

GitLab
Introduction
Setting up GitLab SSO enables you to authenticate using your GitLab account, ensuring secure access to Devtron without the need for passwords. This document provides you step-by-step instructions on setting up GitLab SSO in Devtron.
Prerequisites
To configure GitLab SSO in Devtron, you need:
Super Admin permissions
Only a Super Admin in Devtron can configure SSO. You can use the Admin credentials provided during the initial setup, if you’re setting up Devtron for the first time.
A GitLab account to create and manage OAuth credentials. If you do not have a GitLab account, you must create it first on GitLab.
Host URL configured on the Host URL screen (Global Configurations → Host URL).
Get the redirectURI from Devtron
Getting the redirectURI from Devtron is a crucial component of the authentication process. It acts as an endpoint to which you are redirected after successful authentication. Follow the below instructions to get the redirectURI:
Navigate to Global Configurations → Authorization → SSO Login Services. The SSO Login Service page is displayed.
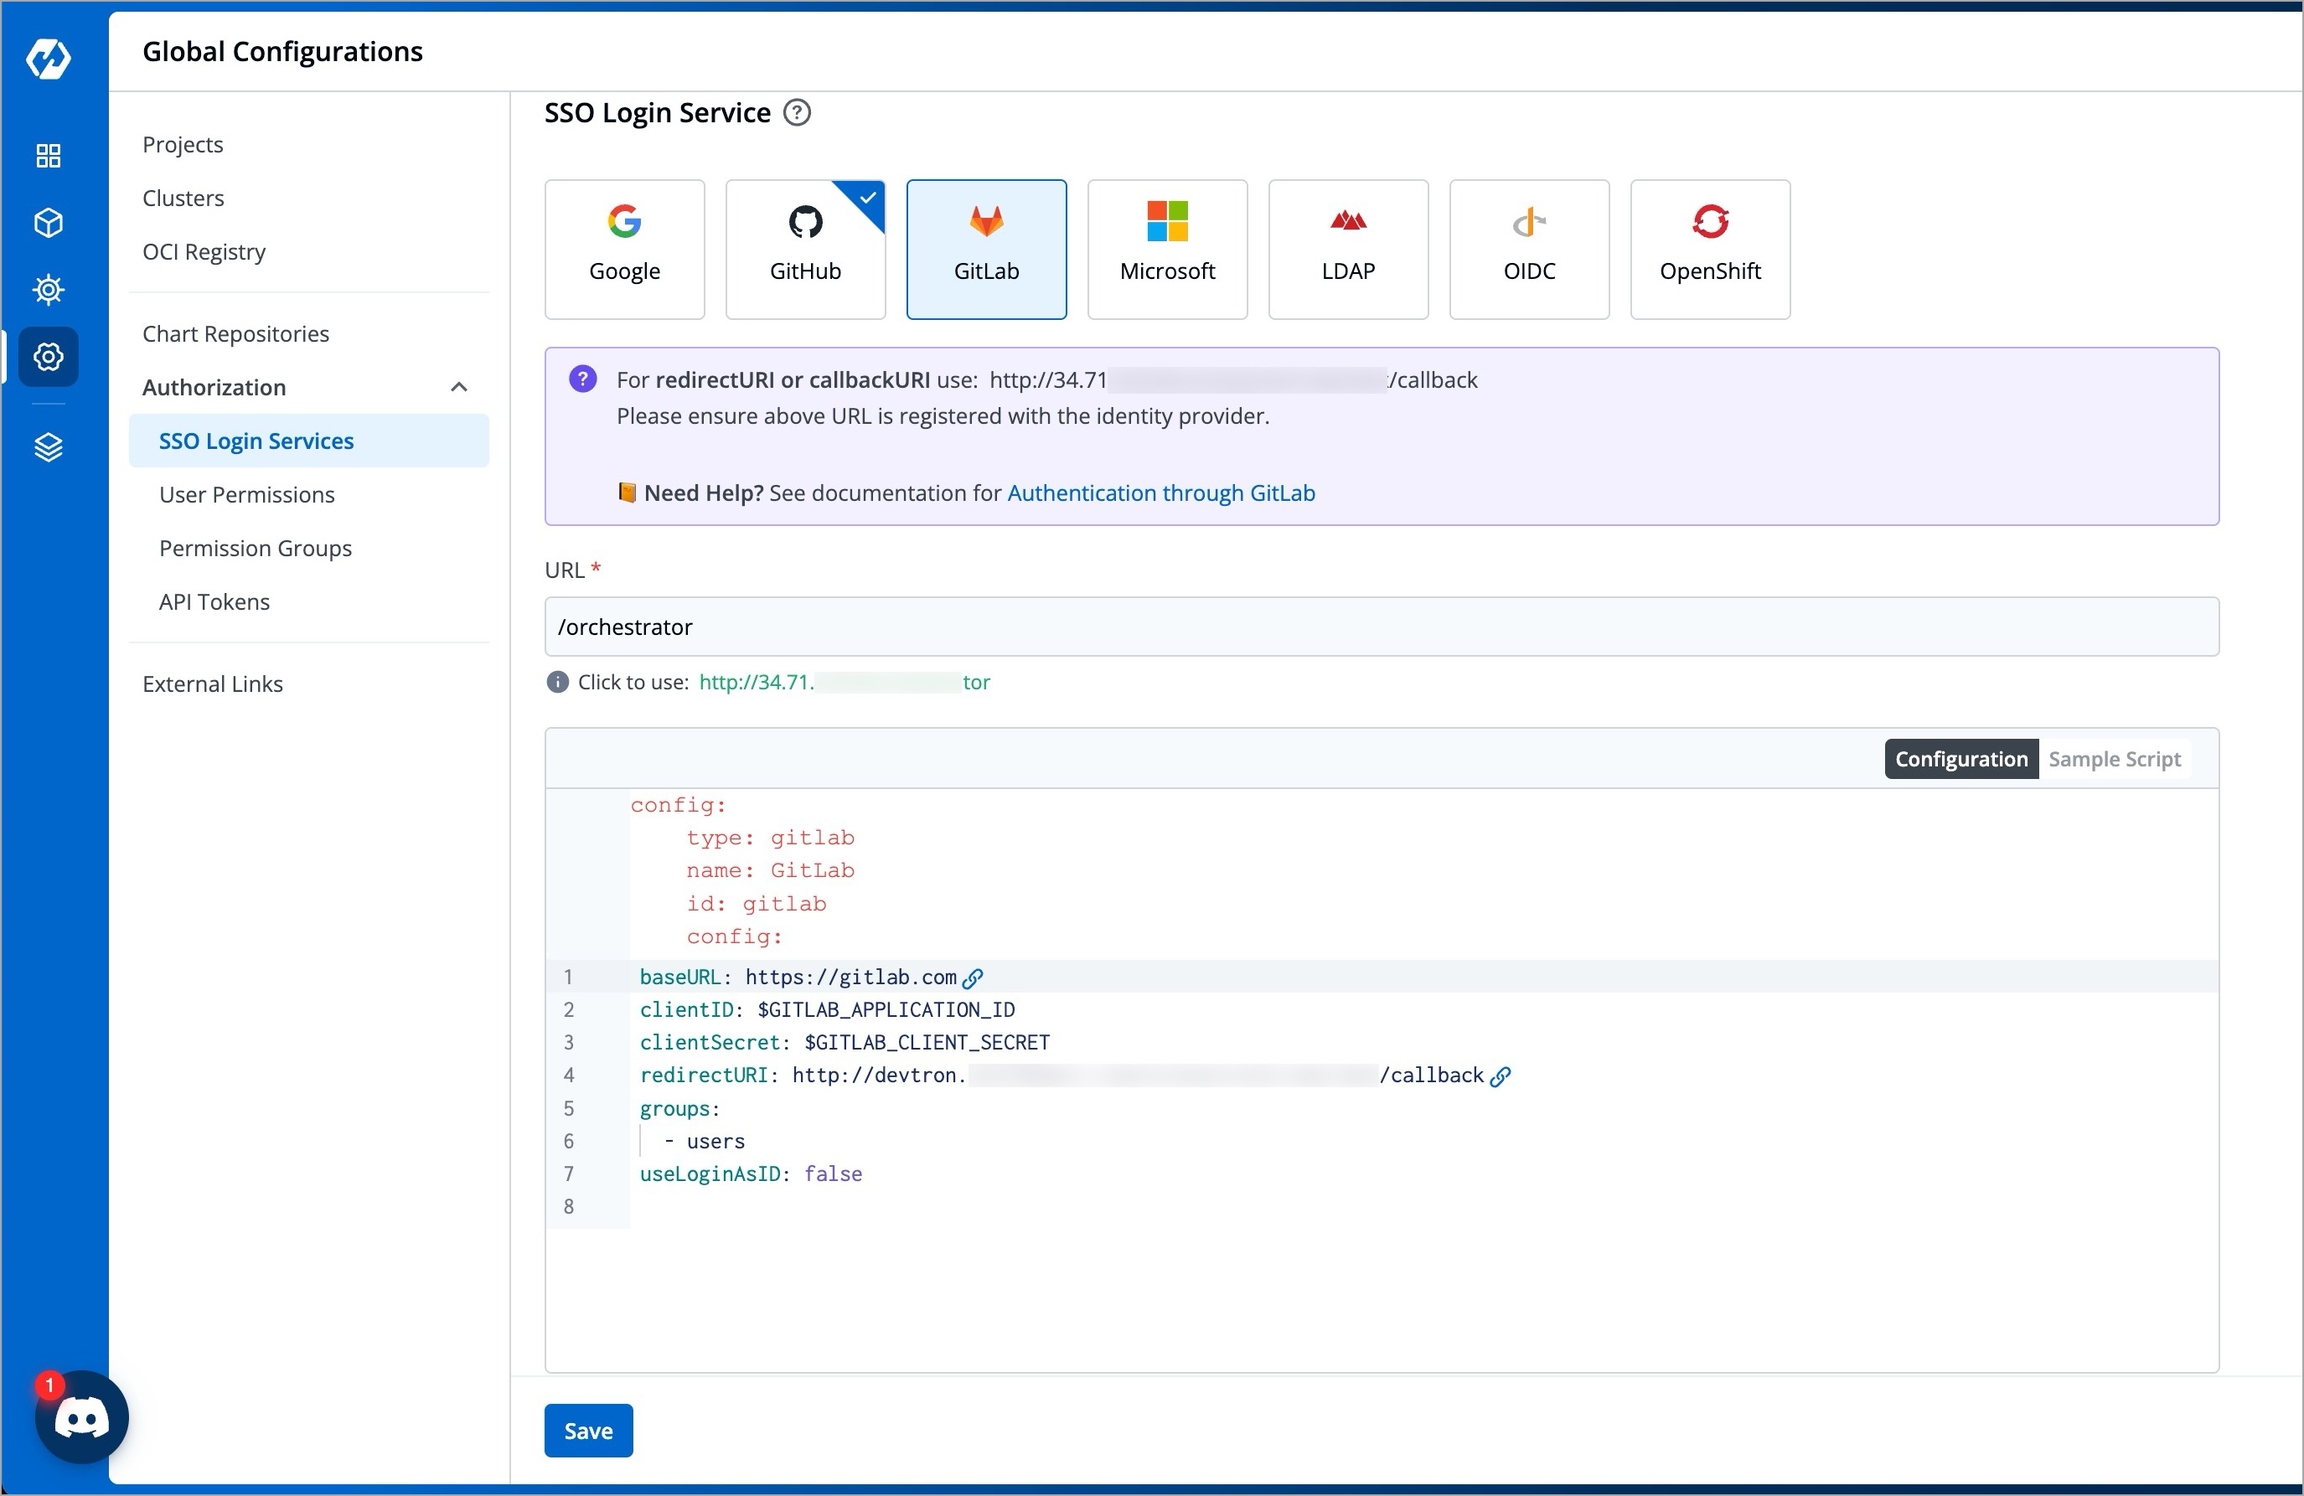
Figure 1: Global Configurations Select GitLab from the list of available SSO login services.
Click the URL suggested in green color next to the Click to use label to update the URL field. Update the URL field only if the host URL displayed in the URL field is incorrect.
Click the Save button.
When you populate the Host URL in the URL text box, the redirectURI (or callbackURI) is updated automatically in the purple block at the top of the SSO Login Service screen. This redirectURI is essential, as it is required while setting up the OAuth credentials in GitLab.
Configuring OAuth in GitLab
Open Authentication (OAuth) allows you to authorize one application to sign in to another without the need for passwords. Configuring OAuth credentials in GitLab involves creating a GitLab OAuth Client ID and Client Secret, which will then be used in Devtron for authentication.
Navigate to GitLab → Profile → Edit Profile → Applications → Add new application.
If you do not already have an OAuth application created on GitLab, refer to Creating an OAuth app. If you already have an OAuth application on GitLab, follow the instructions below:
Select your preferred OAuth app and click Edit.
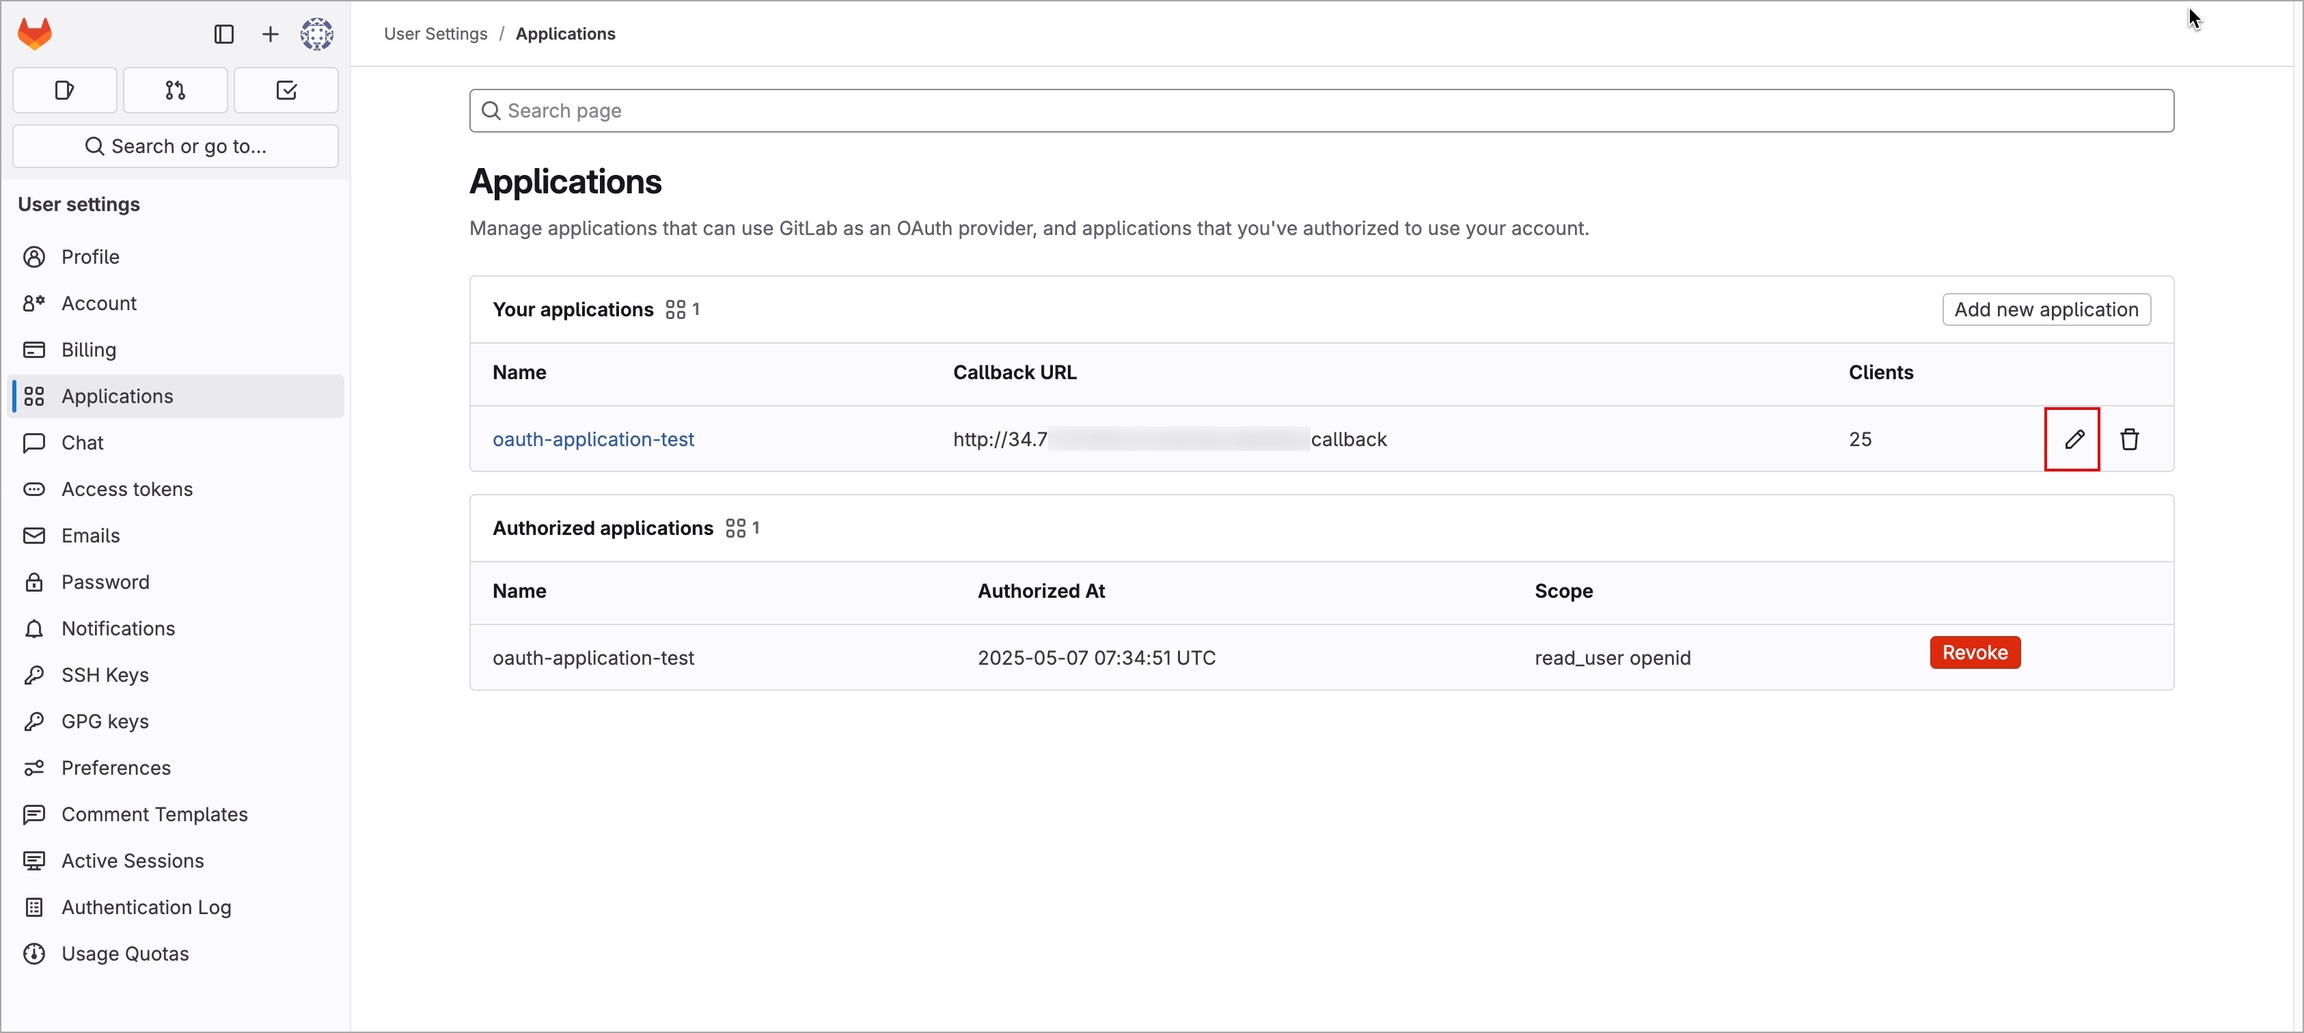
Figure 2: GitLab OAuth Applications List Update the Redirect URI field with the redirectURI created in Devtron.
Enable the required scopes in the Scopes section as per the requirements. To know more, refer to Required scopes.
Click the Save Application button. The following page is displayed.
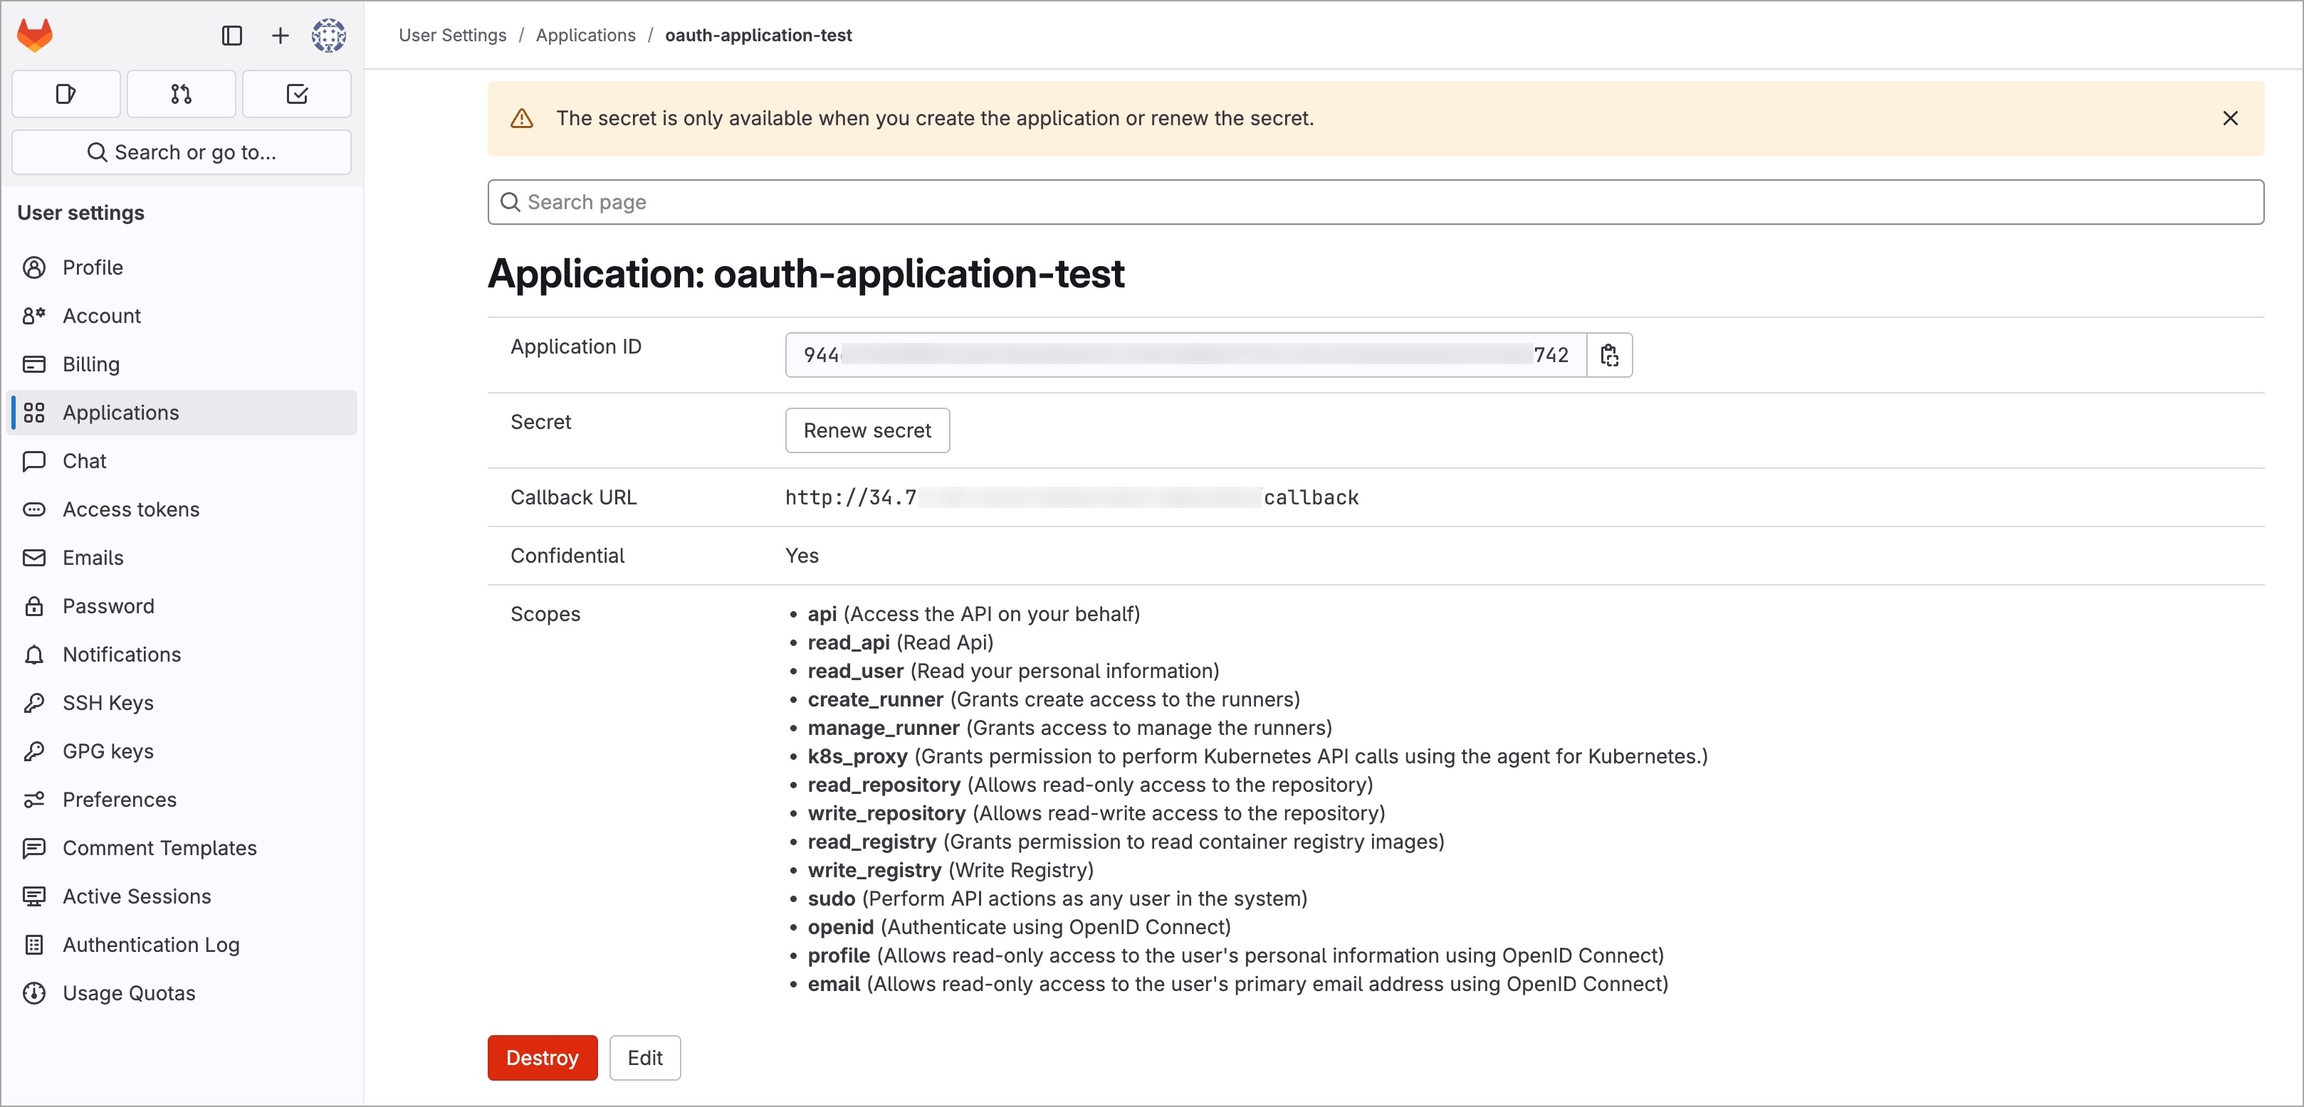
Figure 3: GitLab OAuth Application The client ID is displayed in the Application ID field.
Click the Renew secret button against the Secret field. The Client Secret is then displayed in the Secret field.
Configuring GitLab SSO in Devtron
To configure the GitLab SSO in Devtron, follow the below steps of instructions:
Navigate back to the SSO Login Services screen in Devtron.
Select the Configuration section available next to the URL field.
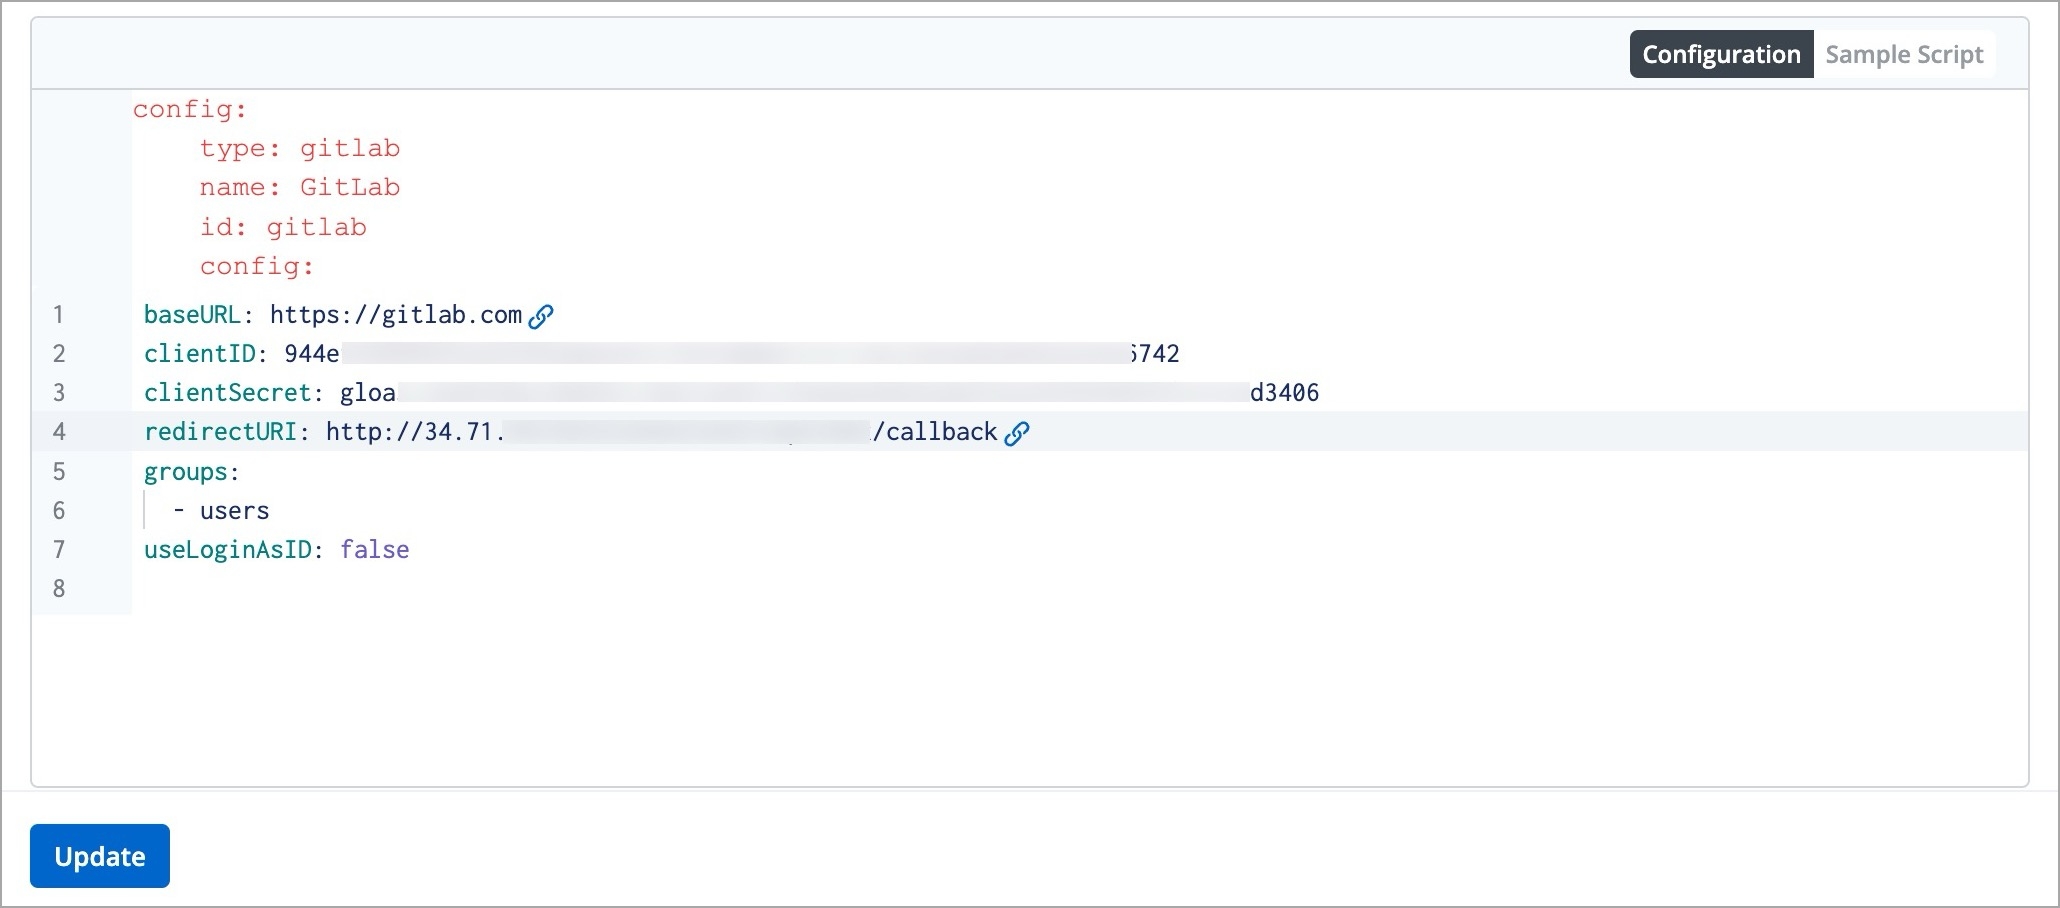
Figure 4: GitLab SSO Configuraion Update the
clientIDattribute with the Client ID generated in the OAuth application on GitLab.Update the
clientSecretattribute with the Client Secret generated in the OAuth application on GitLab.Update the
redirectURIattribute with the redirectURI configured earlier.Click Update button to save the configuration. GitLab SSO is now successfully configured.
Important Note
Although GitLab SSO is now configured, you will not be able to sign in with GitLab unless you add yourself as a user with the necessary permissions and manage other user permissions as well in Devtron. It is highly recommended to create User Permissions.
References
Last updated
Was this helpful?