

Application Groups
Introduction
Application groups in Devtron streamline the deployment of microservices by enabling you to build and deploy multiple applications simultaneously. This feature is particularly beneficial when your microservices are interdependent, as a change in one service often triggers the need to redeploy others.
Accessing Application Groups
From the left sidebar, go to Application Groups
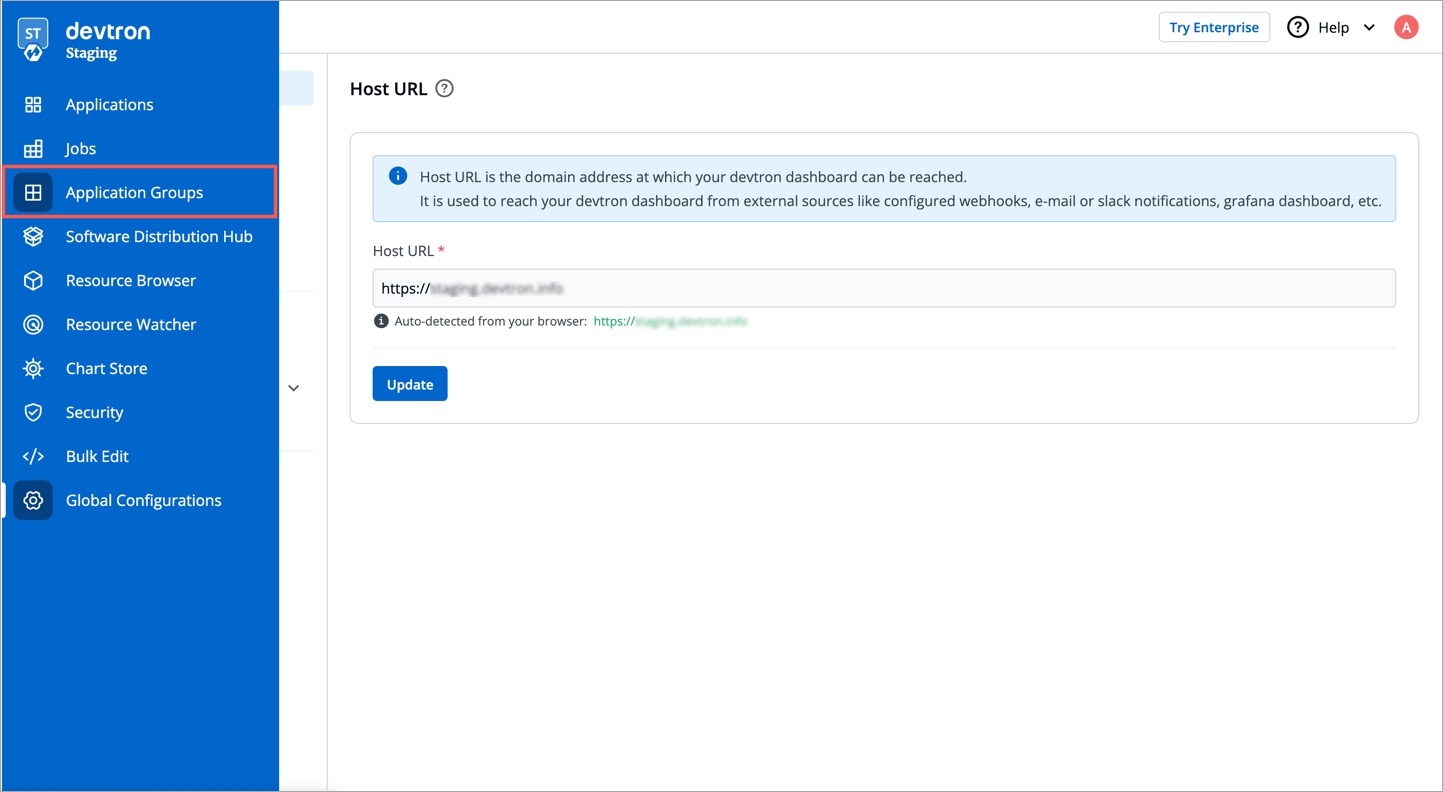
Figure 1: Application Group (Beta) You will see a list of environments. Select the environment to view the application group.
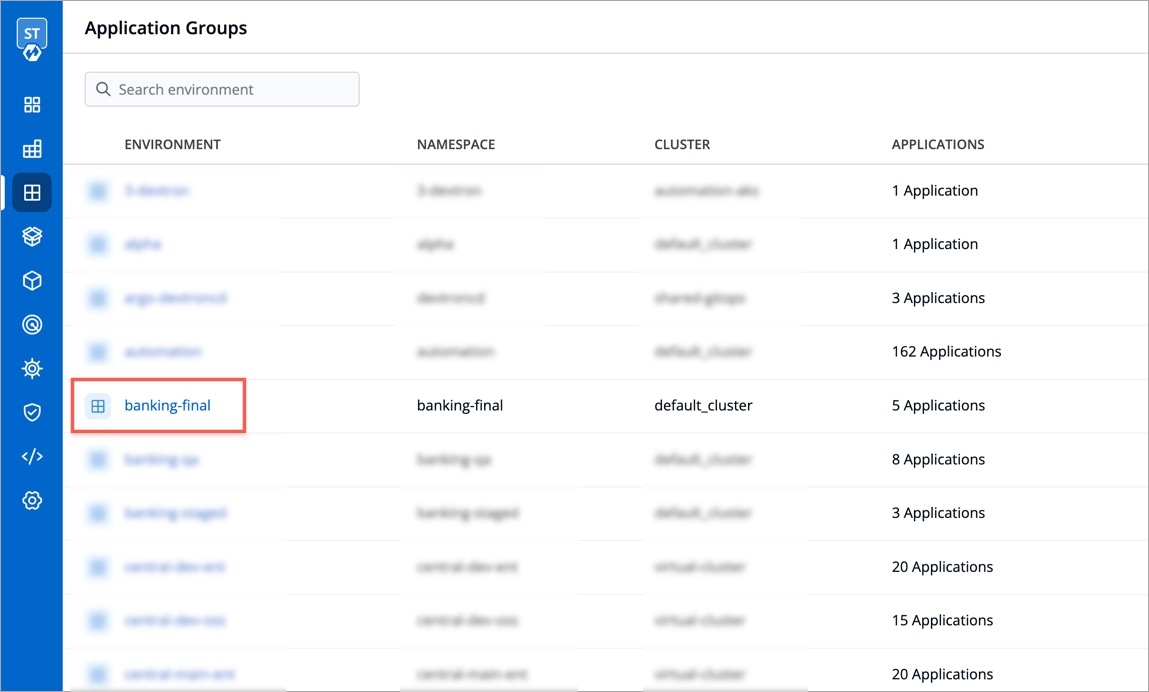
Figure 2: List of Environments The application group would contain the applications meant for deployment in the chosen environment.
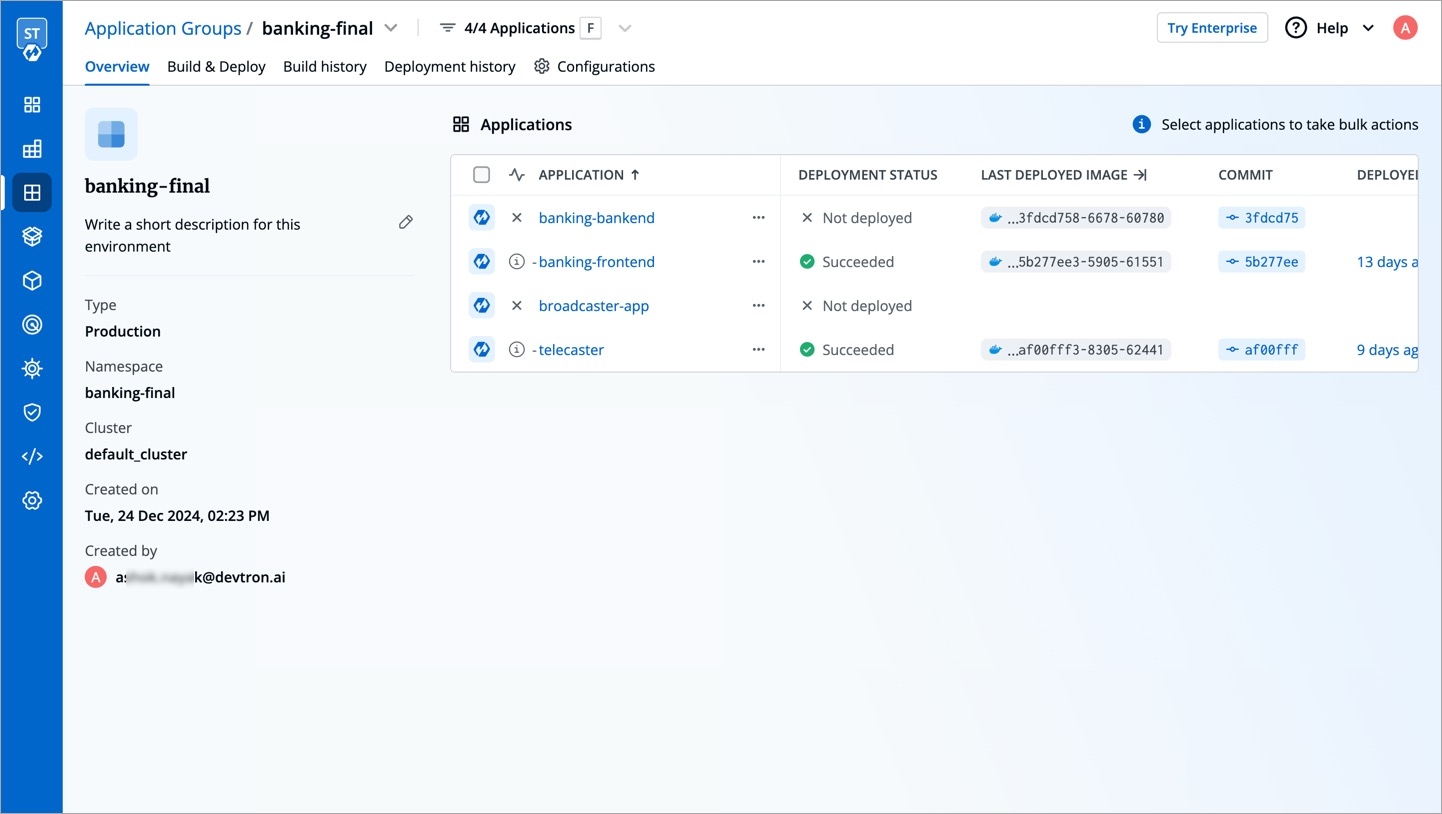
Figure 3: Sample Application Group
As you can see, it has similar options as available under Applications:
Overview
Build & Deploy
Build history
Deployment history
Configurations
First, we will walk you through the key features of Application Groups, followed by additional features that will help you perform bulk actions.
Key Features
Building Application Images
The Build & Deploy tab of your application group enables you to trigger the CI builds of one or more applications in bulk.
Select the applications using the checkboxes and click the Build Image button present at the bottom.
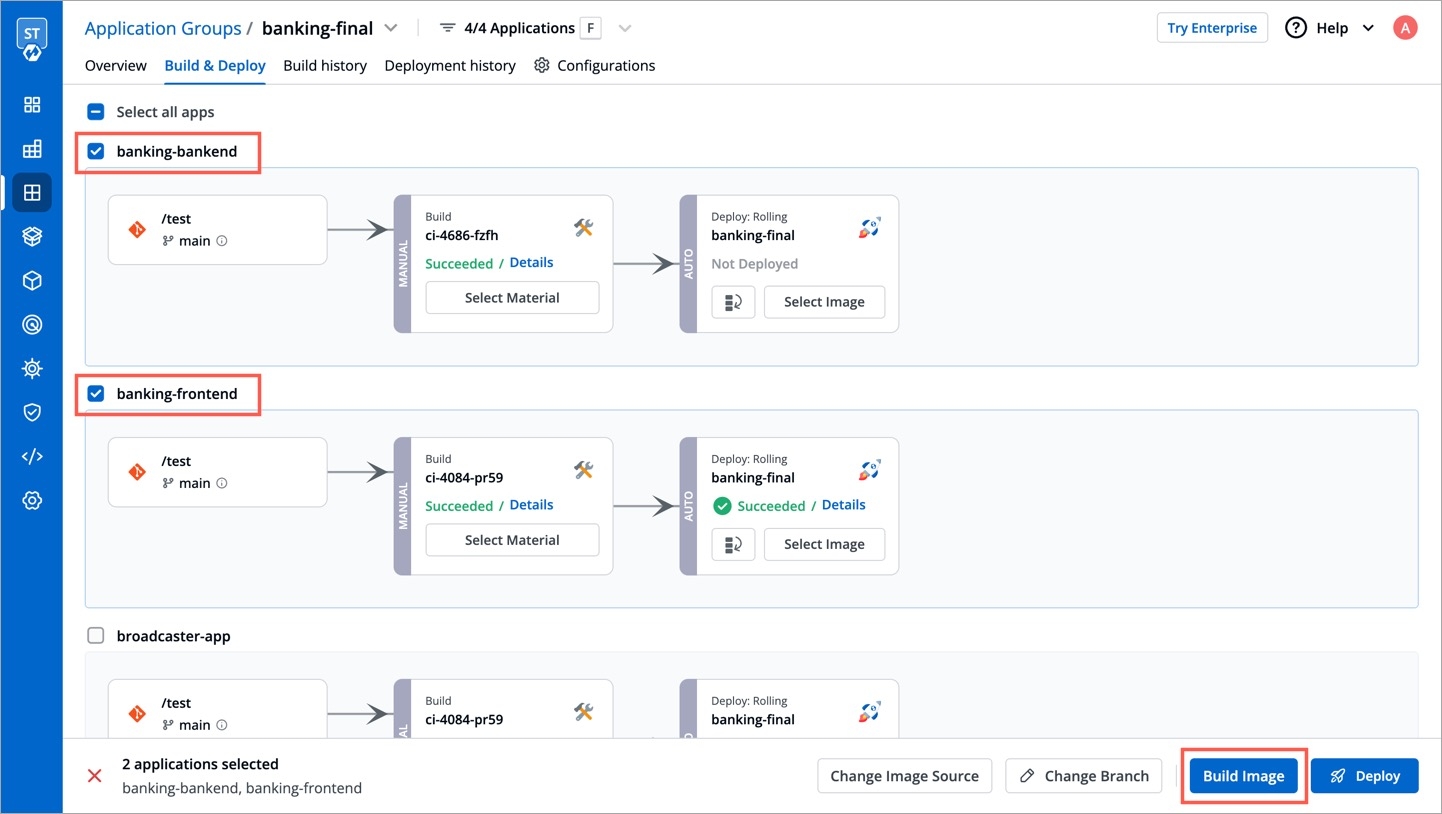
Figure 4: Build Option The
Build imagescreen opens. Select the application and the commit for which you want to trigger the CI build.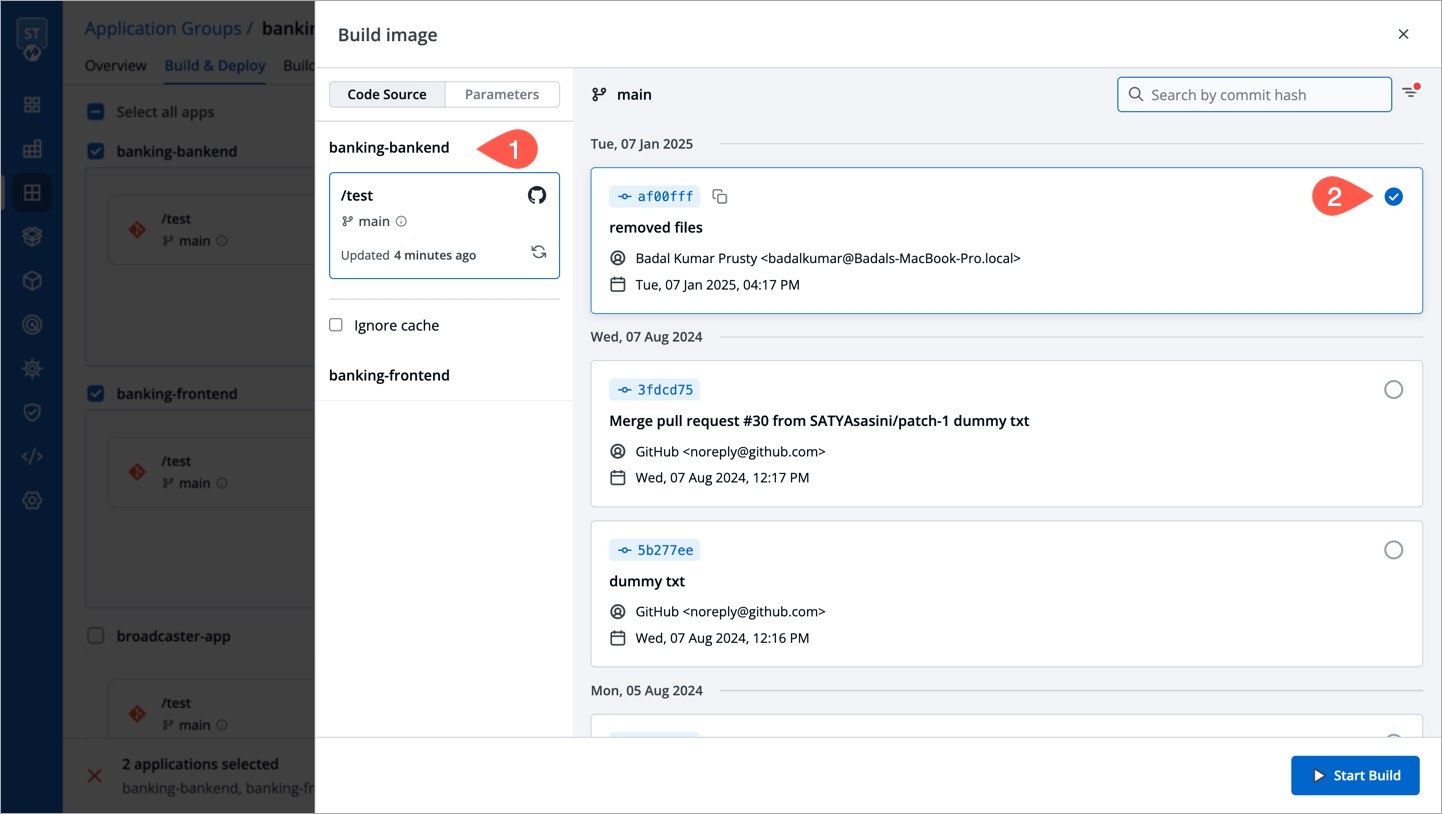
Figure 5: Selecting Commit
Tip
Adding image labels can help you quickly locate the container image from the list of images shown in Application Groups.
Similar to application, you can also pass build parameters in application groups before triggering the build.
Passing build parameters feature is only available in 
Go to the Parameters tab.
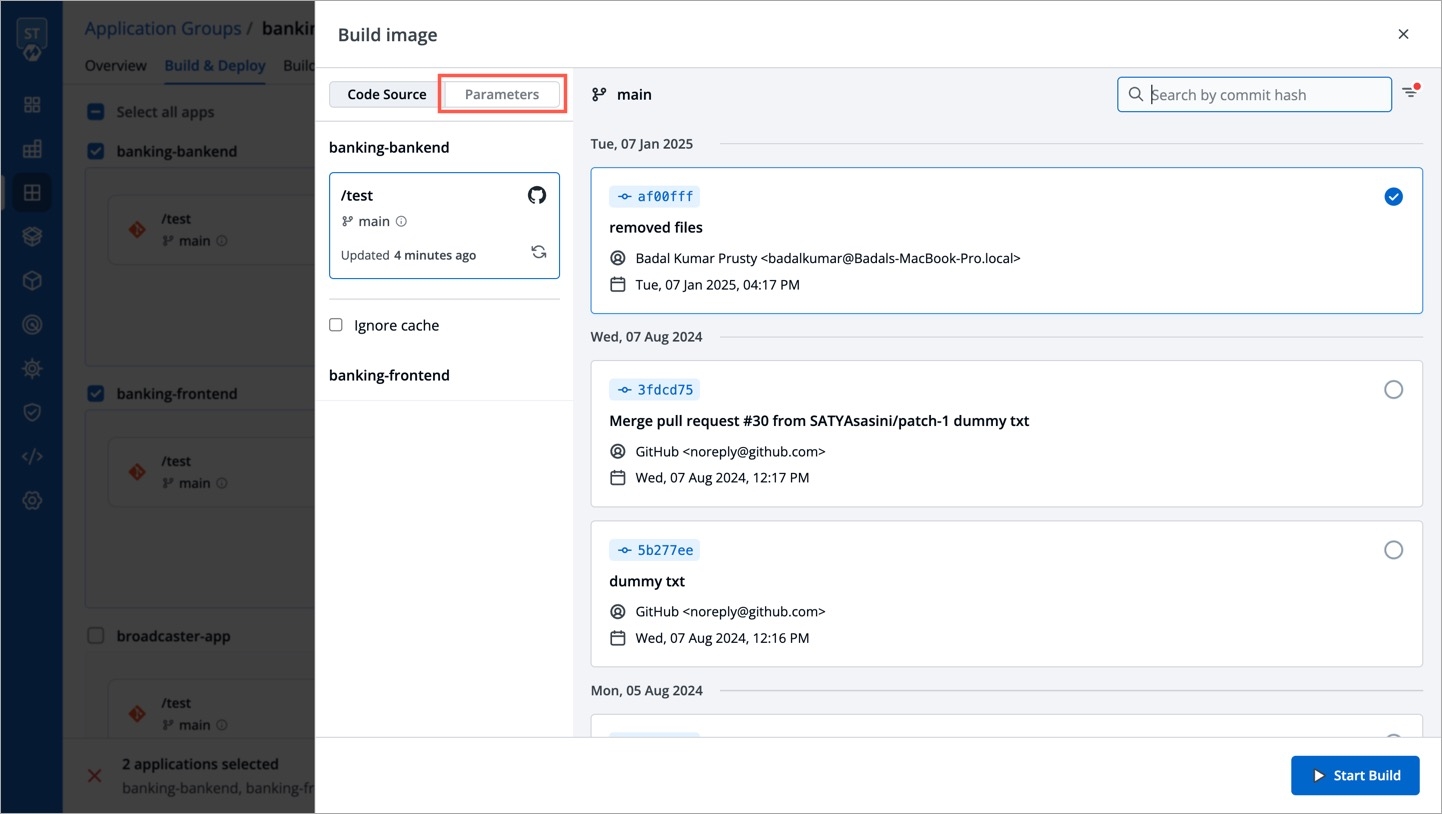
Figure 6: Parameters Tab Click + Add parameter.
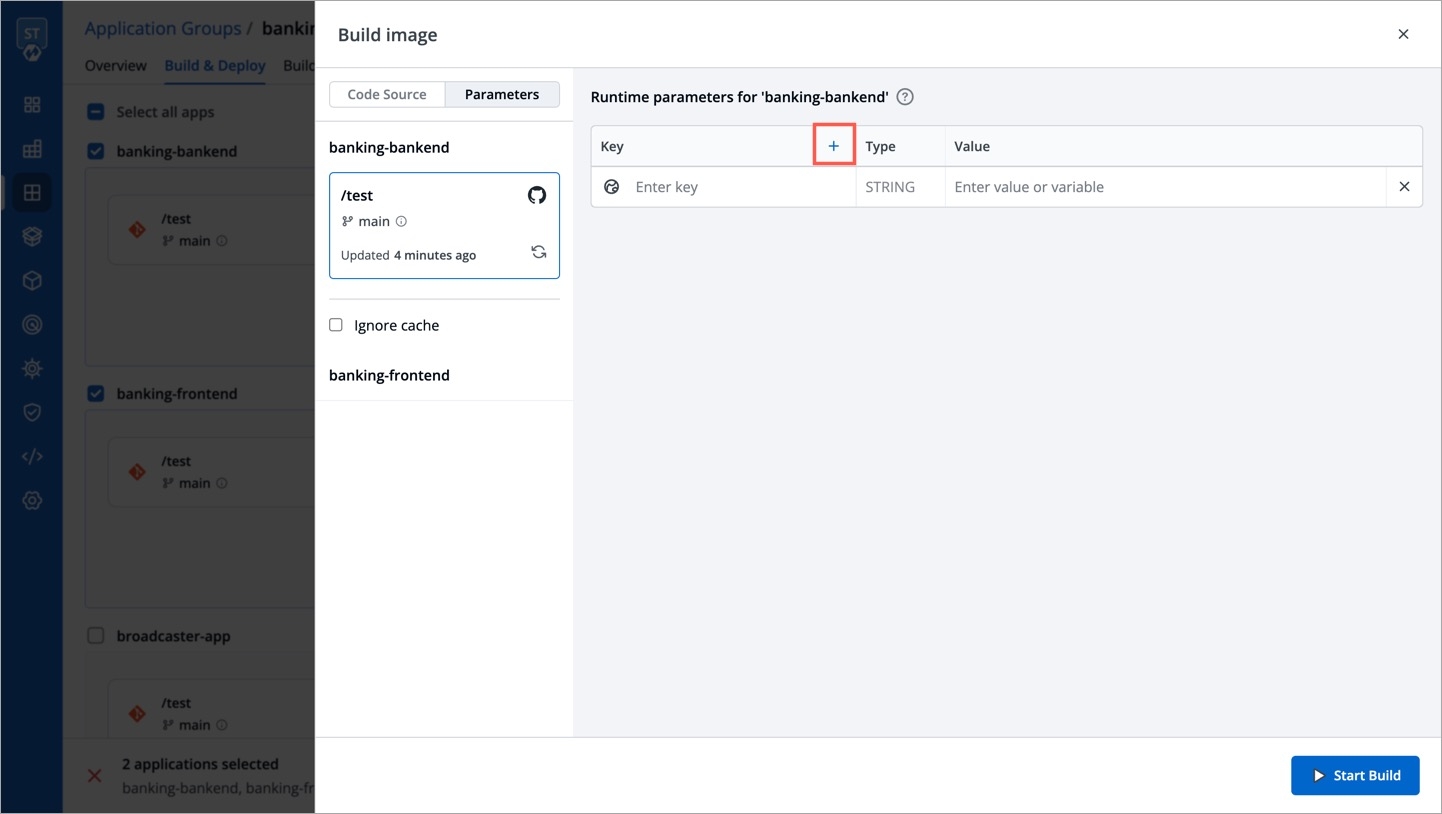
Figure 7: Adding a Parameter Enter your key-value pair as shown below.

Figure 8: Entering Key-Value Pair You may follow the above steps for other applications too, and then click Start Build.
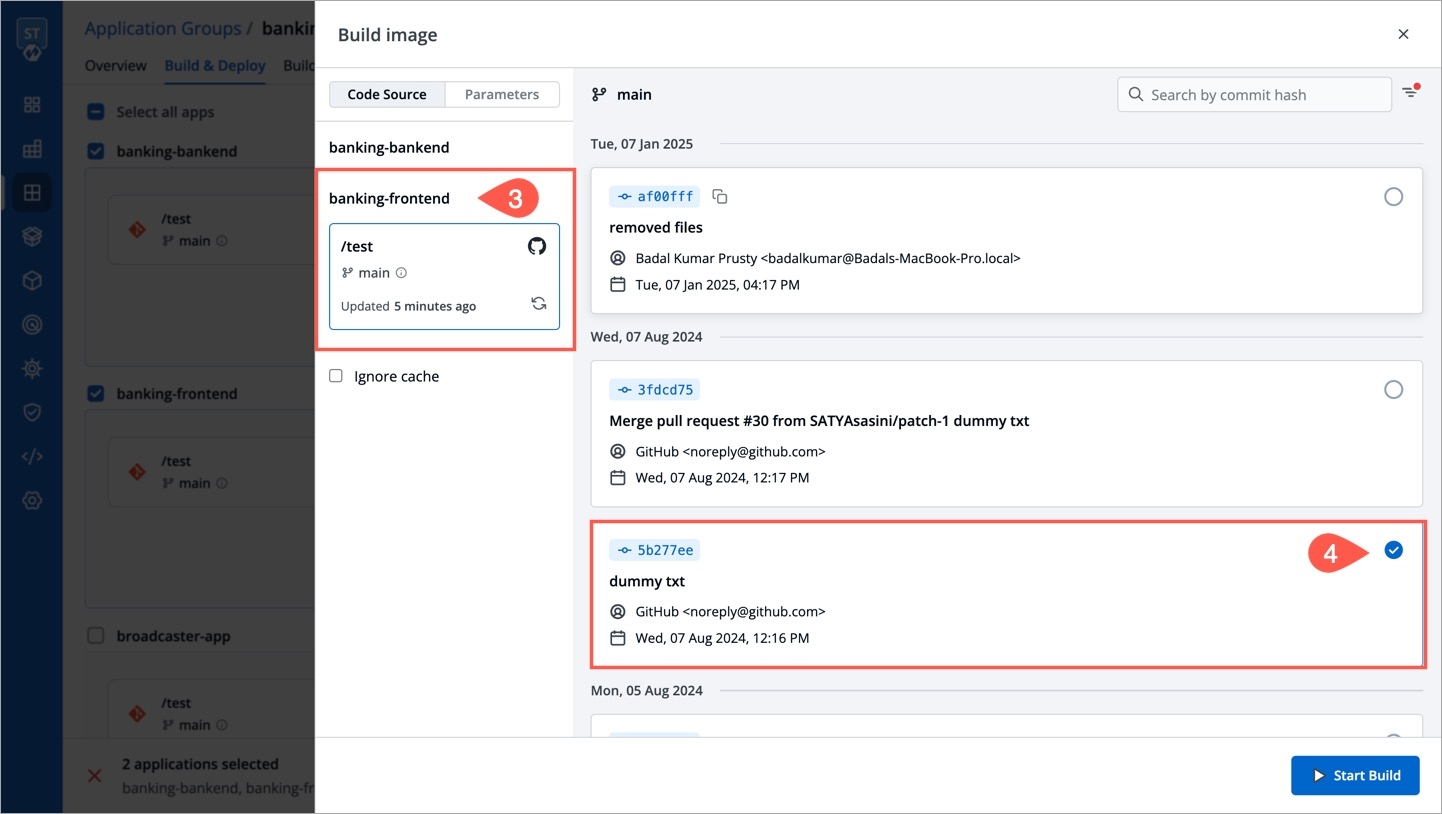
Figure 9: Choosing Commit for Other Application 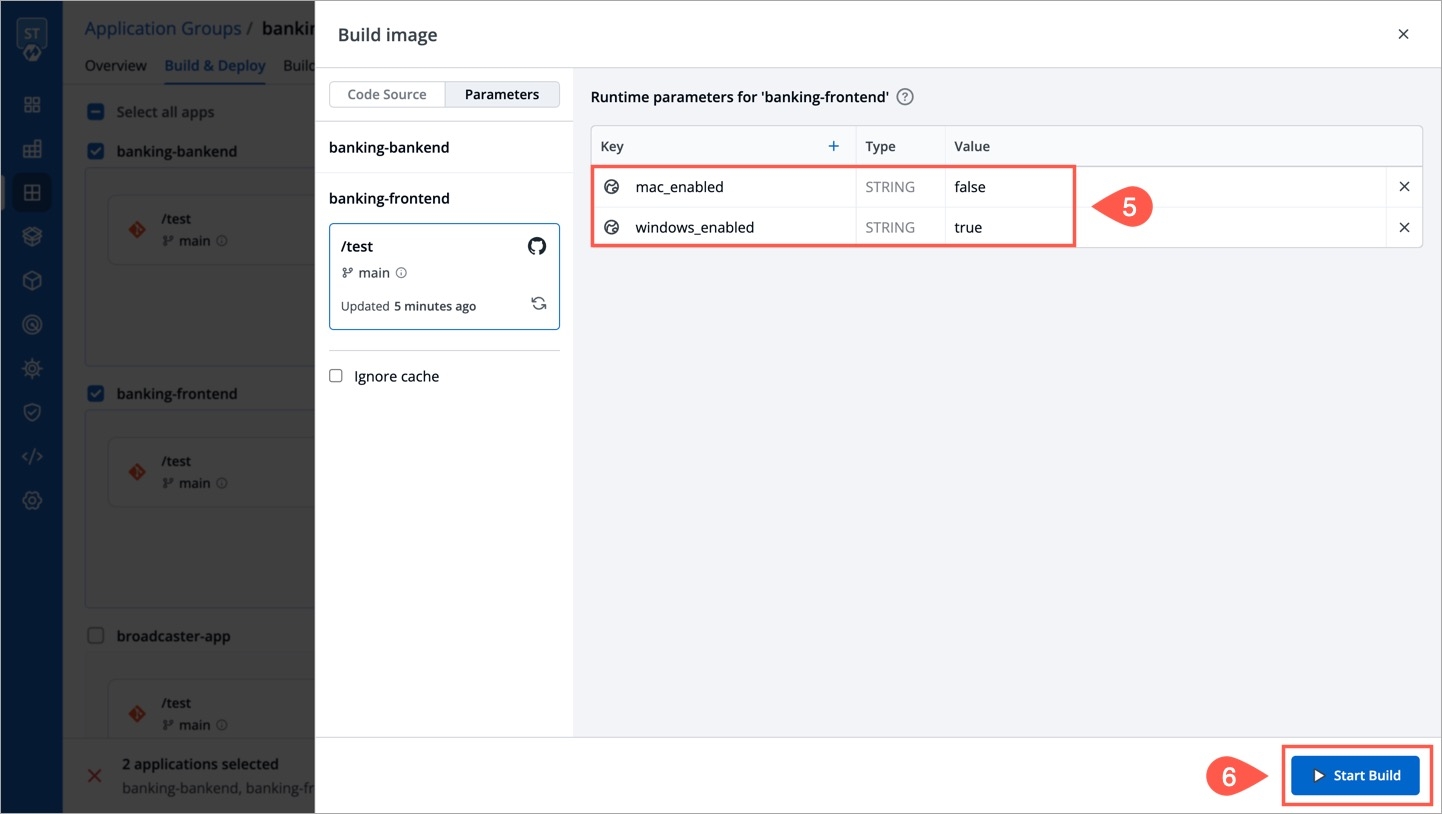
Figure 10: Passing Build Parameters and Triggering Build
The builds will initiate, following which, you can close the
Build imagescreen.
Figure 11: Triggered Deployment
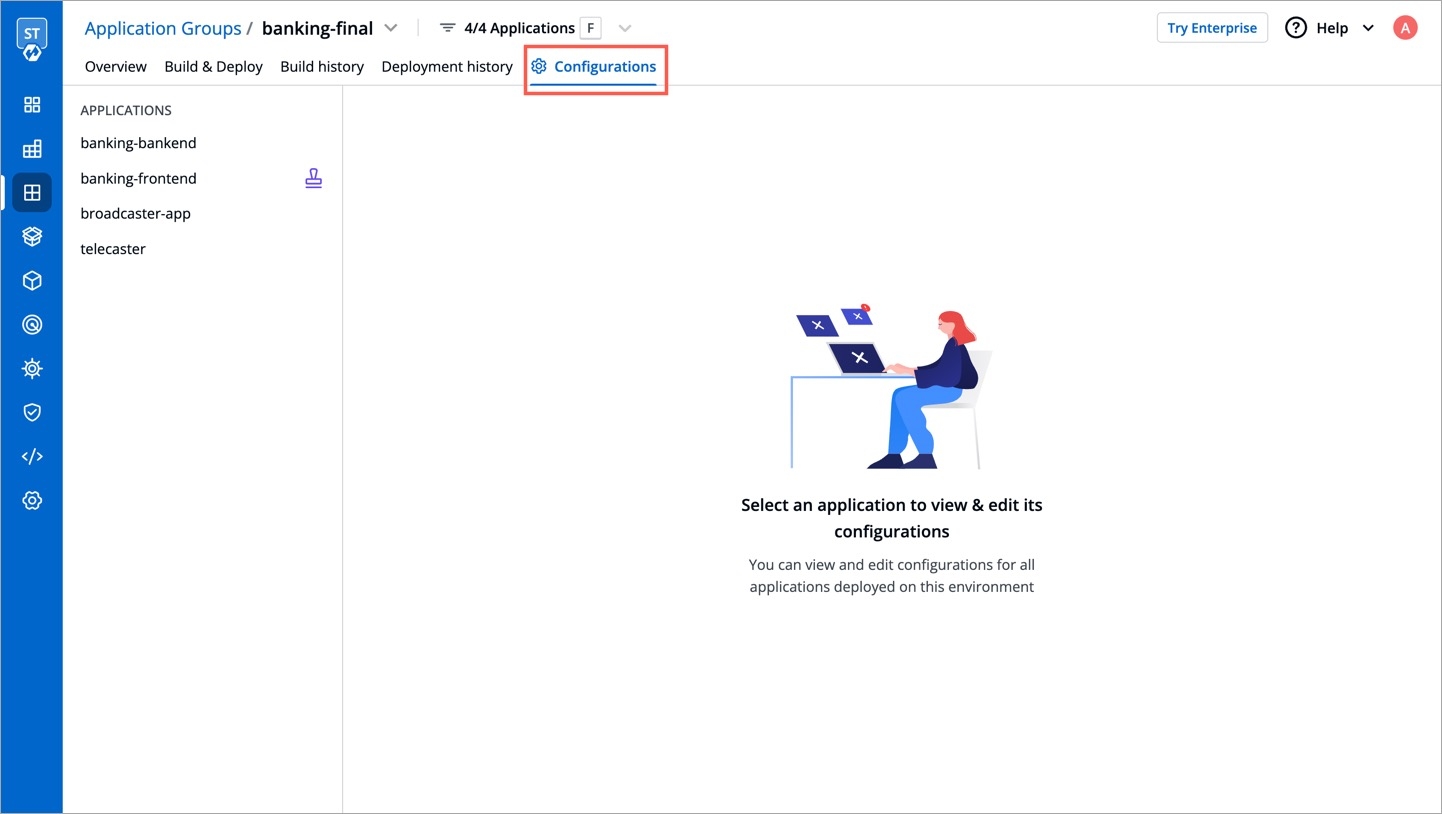
Changing Configurations
The Configurations tab of your application group allows you to configure the following:
As shown below, you can handle the configurations of more than one application from a single screen.
Deploying Applications
The Build & Deploy tab of your application group helps you deploy one or more applications in bulk.
Select the applications using the checkboxes and click the Deploy button present at the bottom.
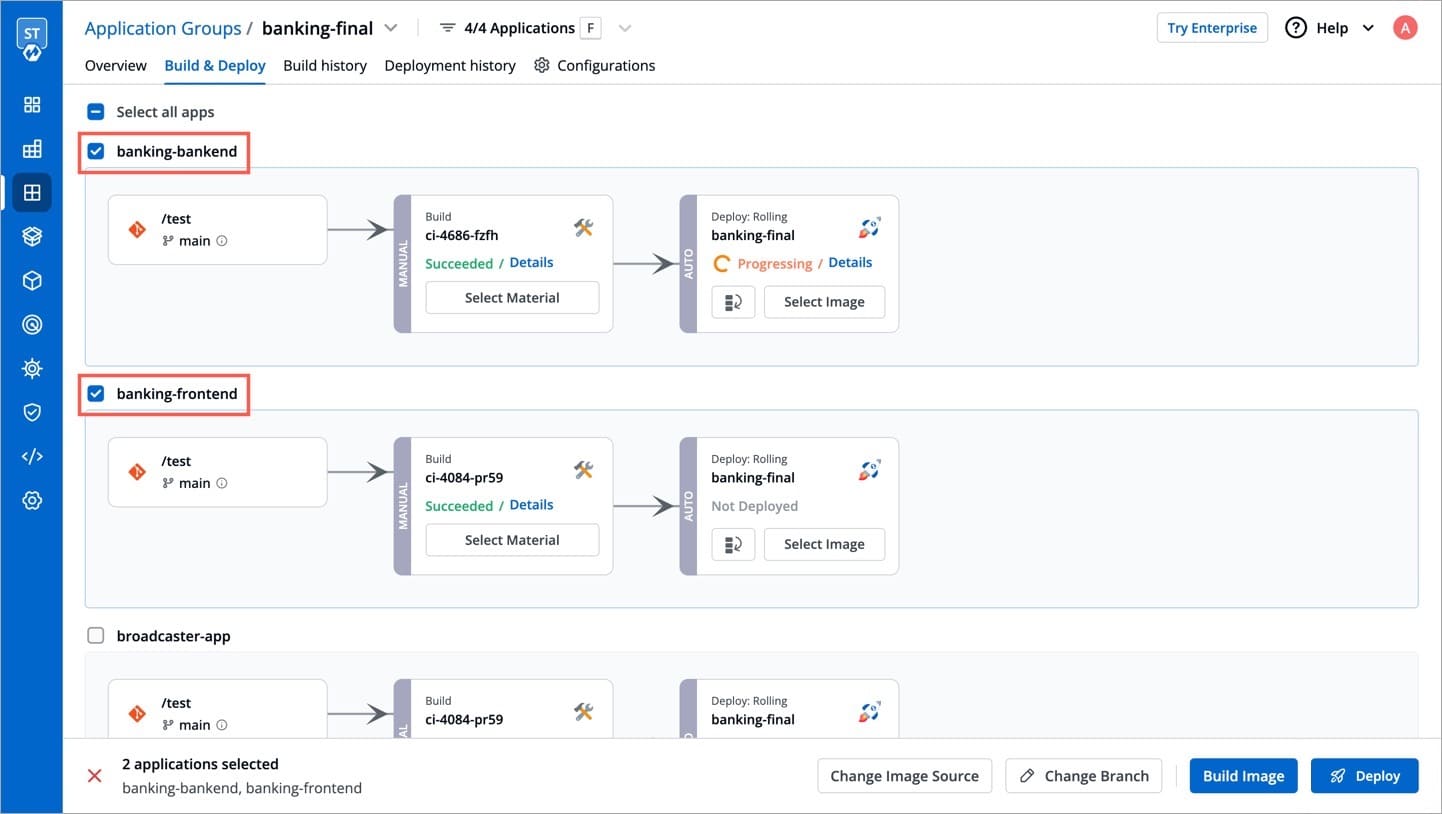
Figure 13: Deploy Option Select the desired container image that you want to deploy for respective application.
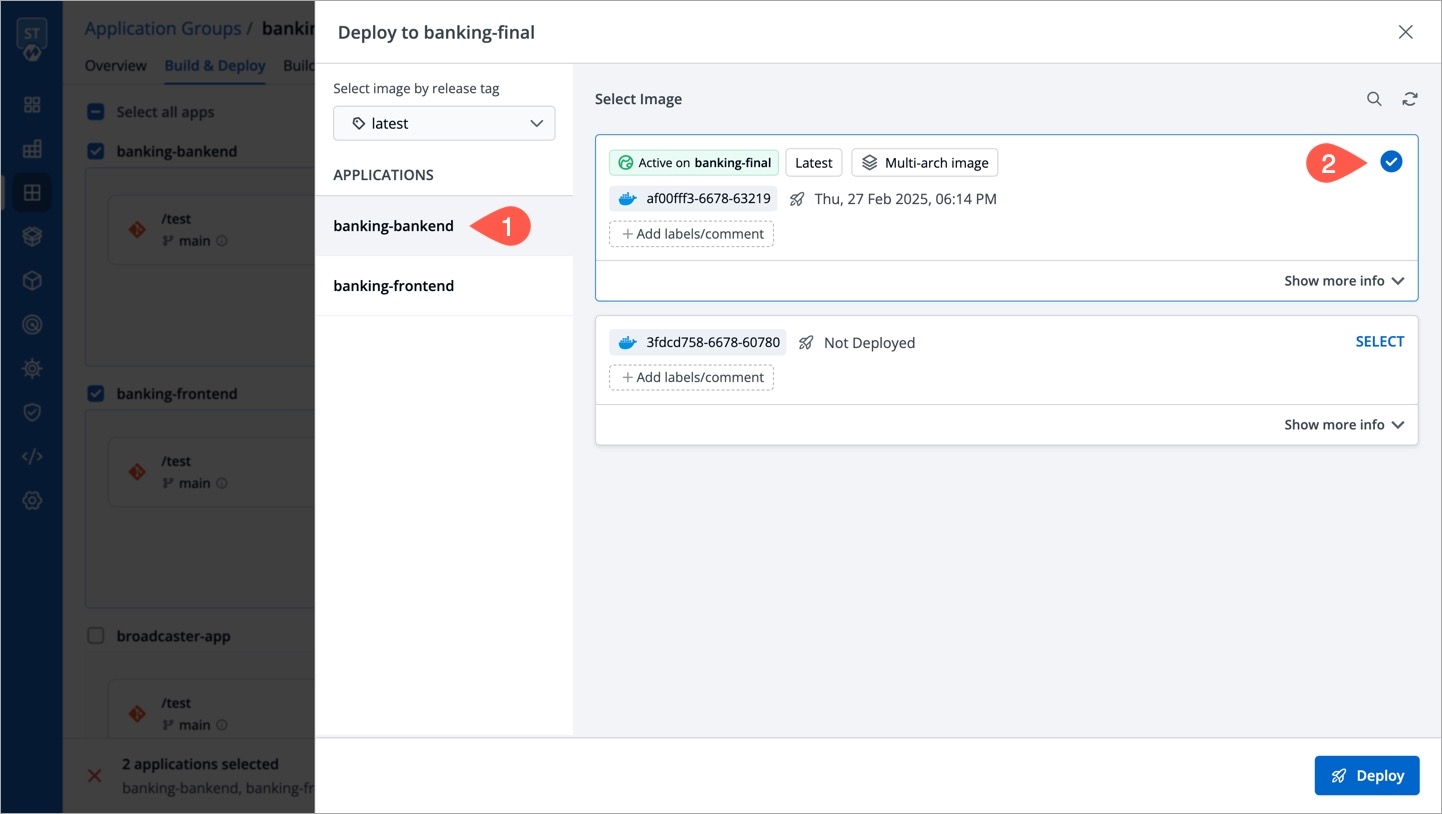
Figure 14: Selecting Image Repeat the step for other applications too.

Figure 15: Deploying Apps If you wish, you can deploy all applications in an Application Group using a single deployment strategy; select the preferred deployment strategy for all the applications and click Deploy. By default, all applications will be deployed using their respective default strategies.
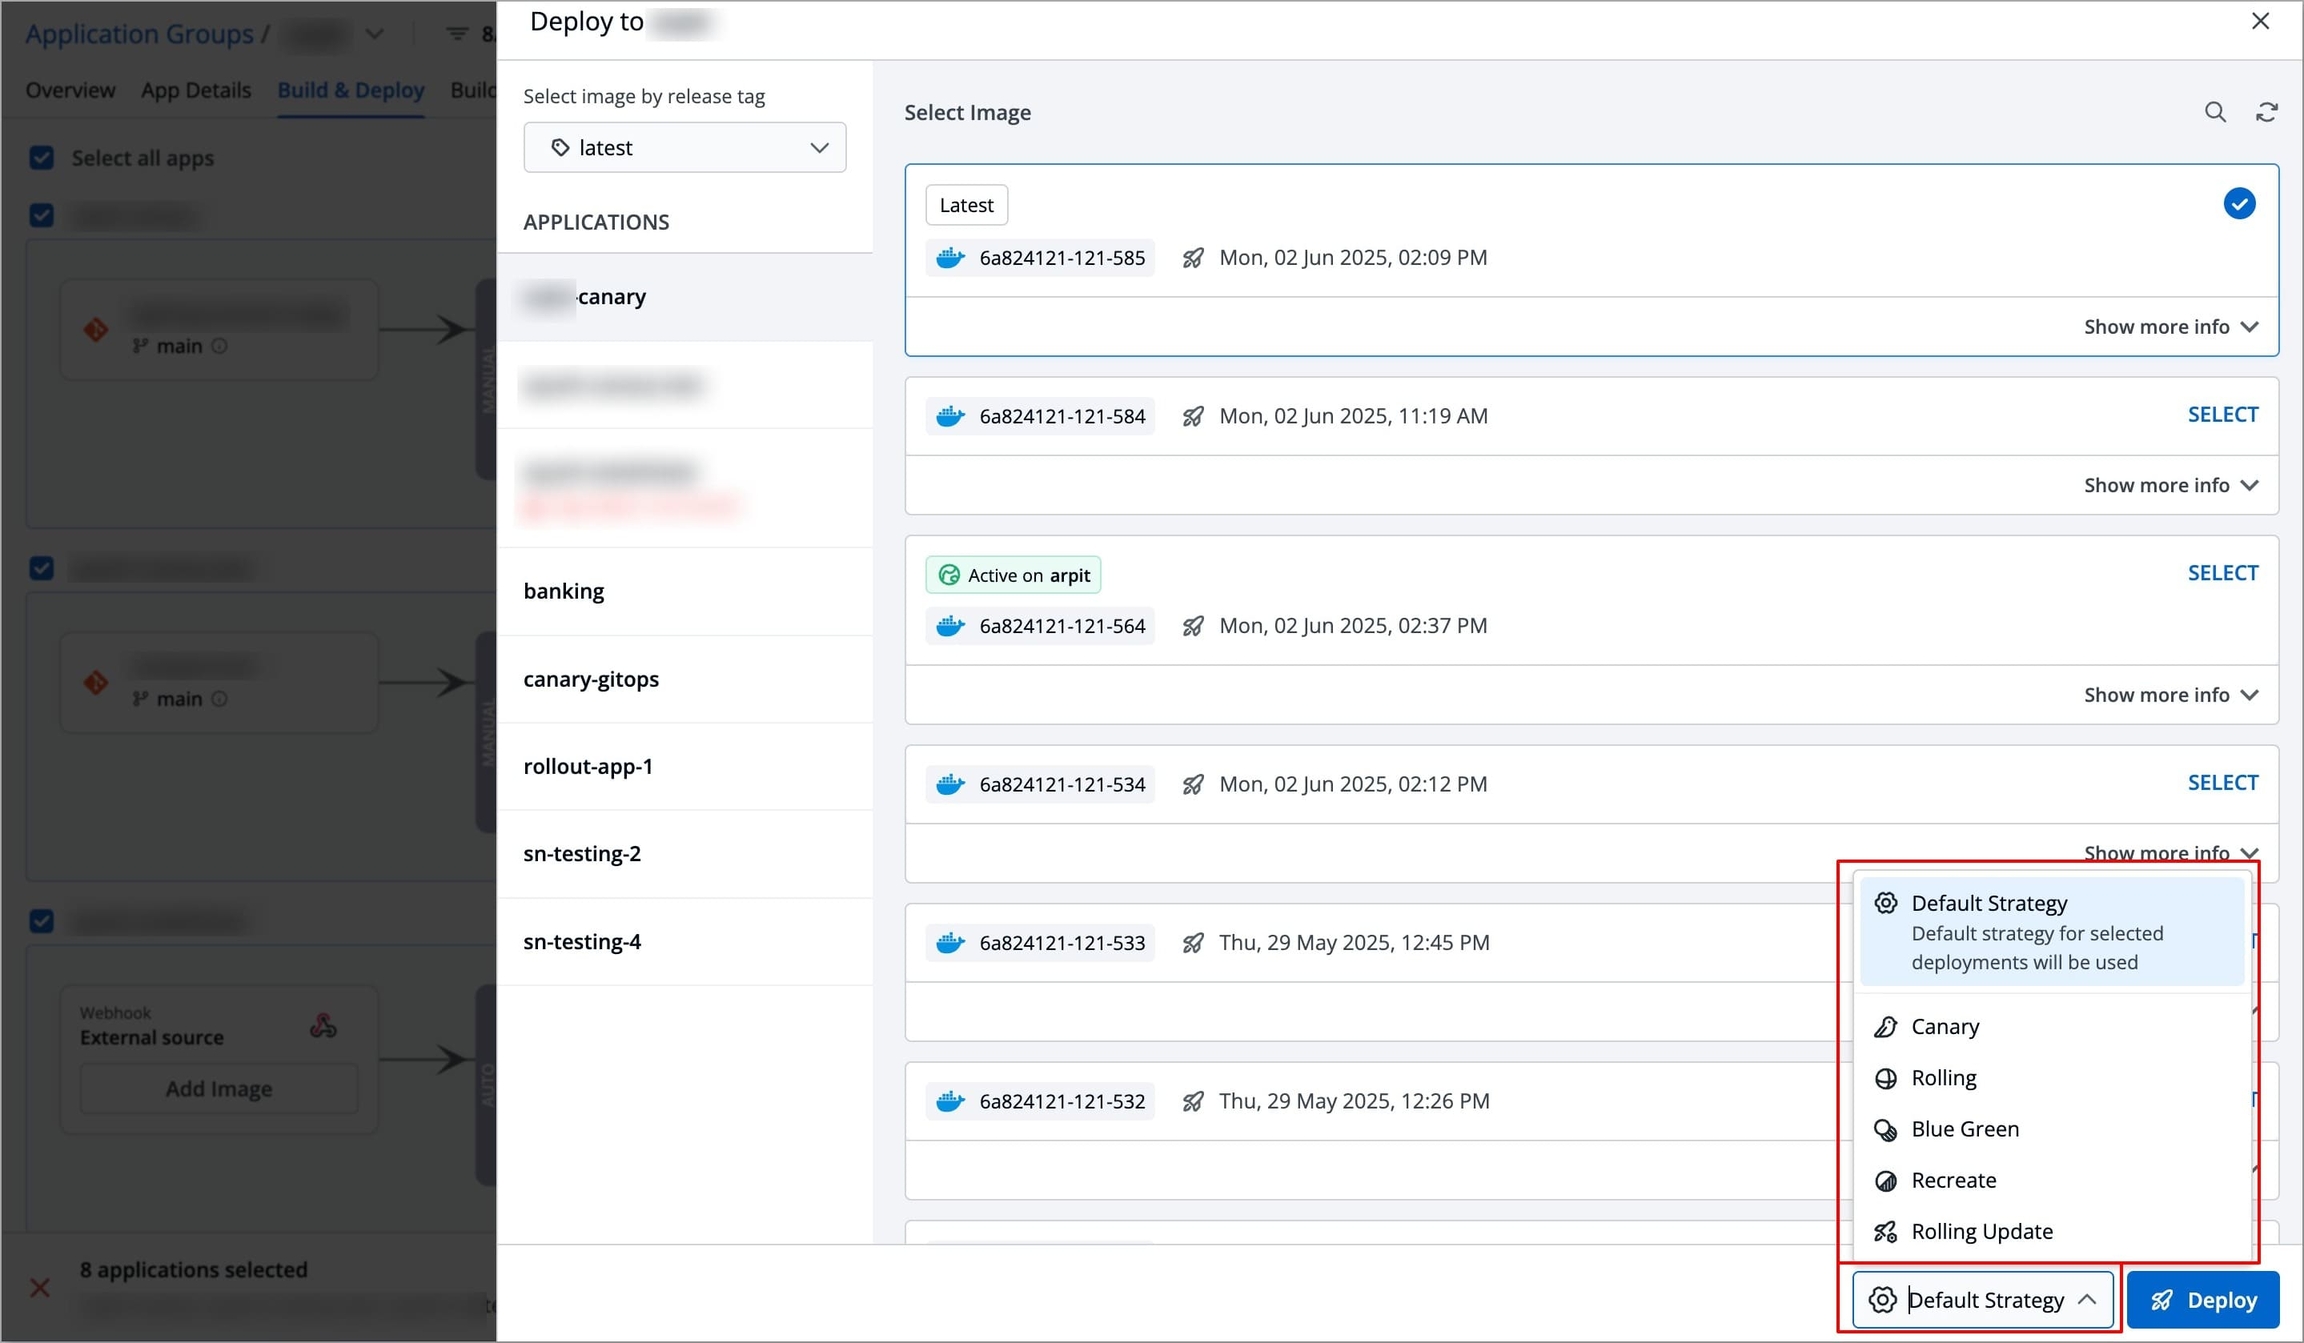
Figure 16: Selecting Deployment Strategy
Deployment feasibility page will open; in case for any application, the selected deployment strategy is not configured, you can select one of the configured strategies for that application. If you do not select a configured deployment strategy, deployment will be skipped for that particular application.
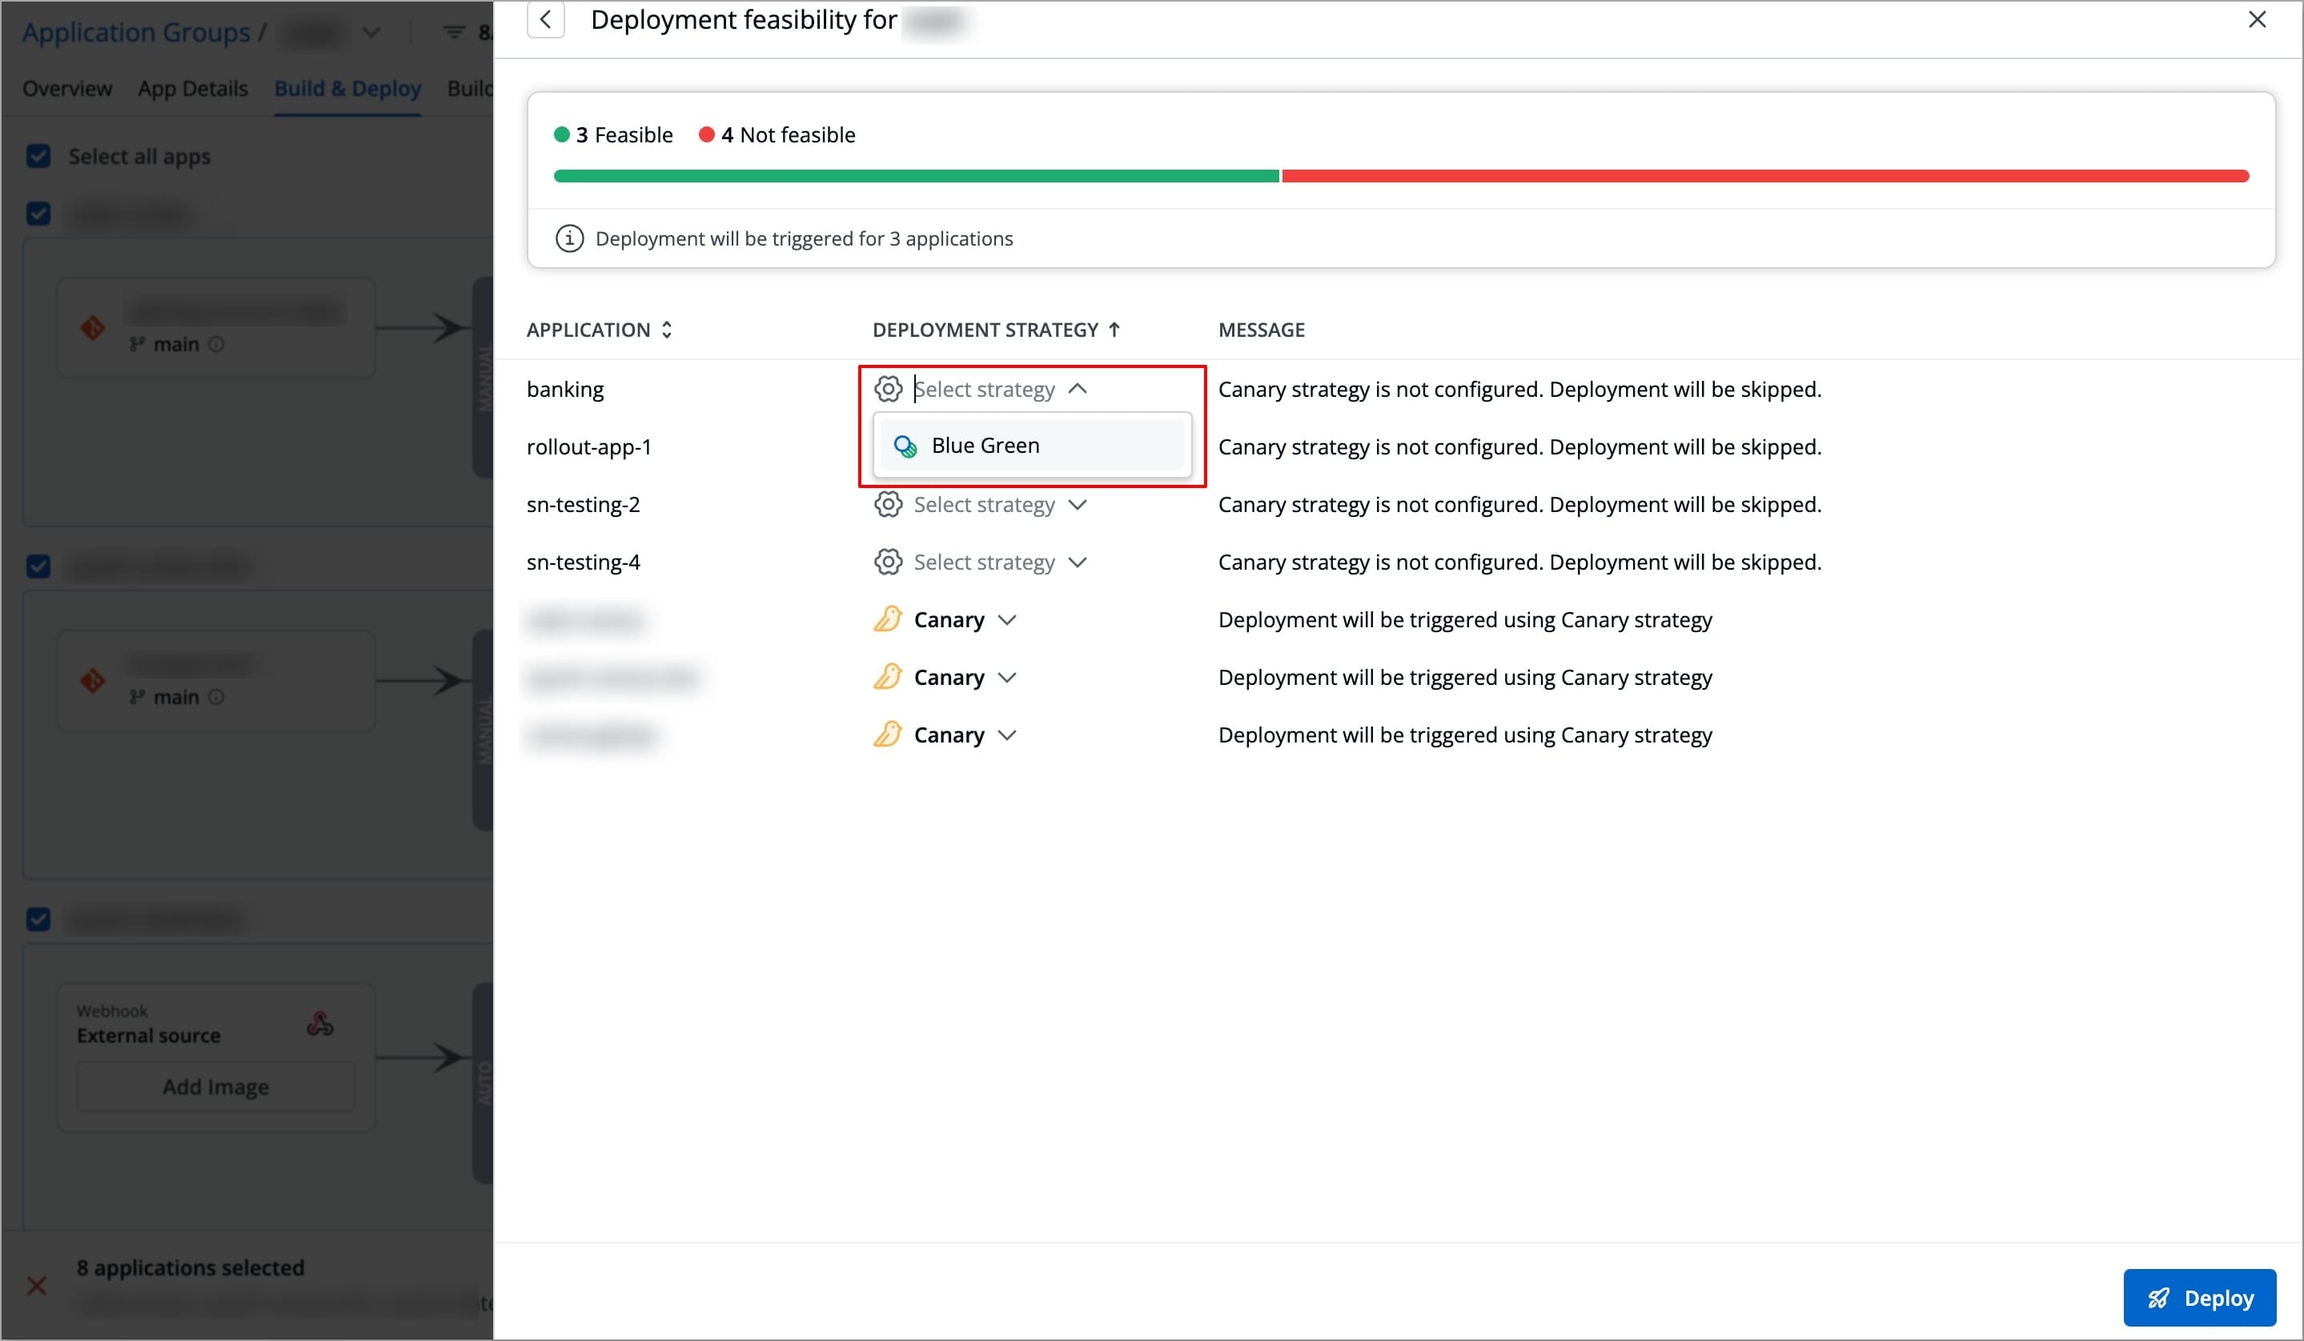
Figure 17: Deployment Feasibility
The deployment will be initiated, following which, you can close the screen as shown below.
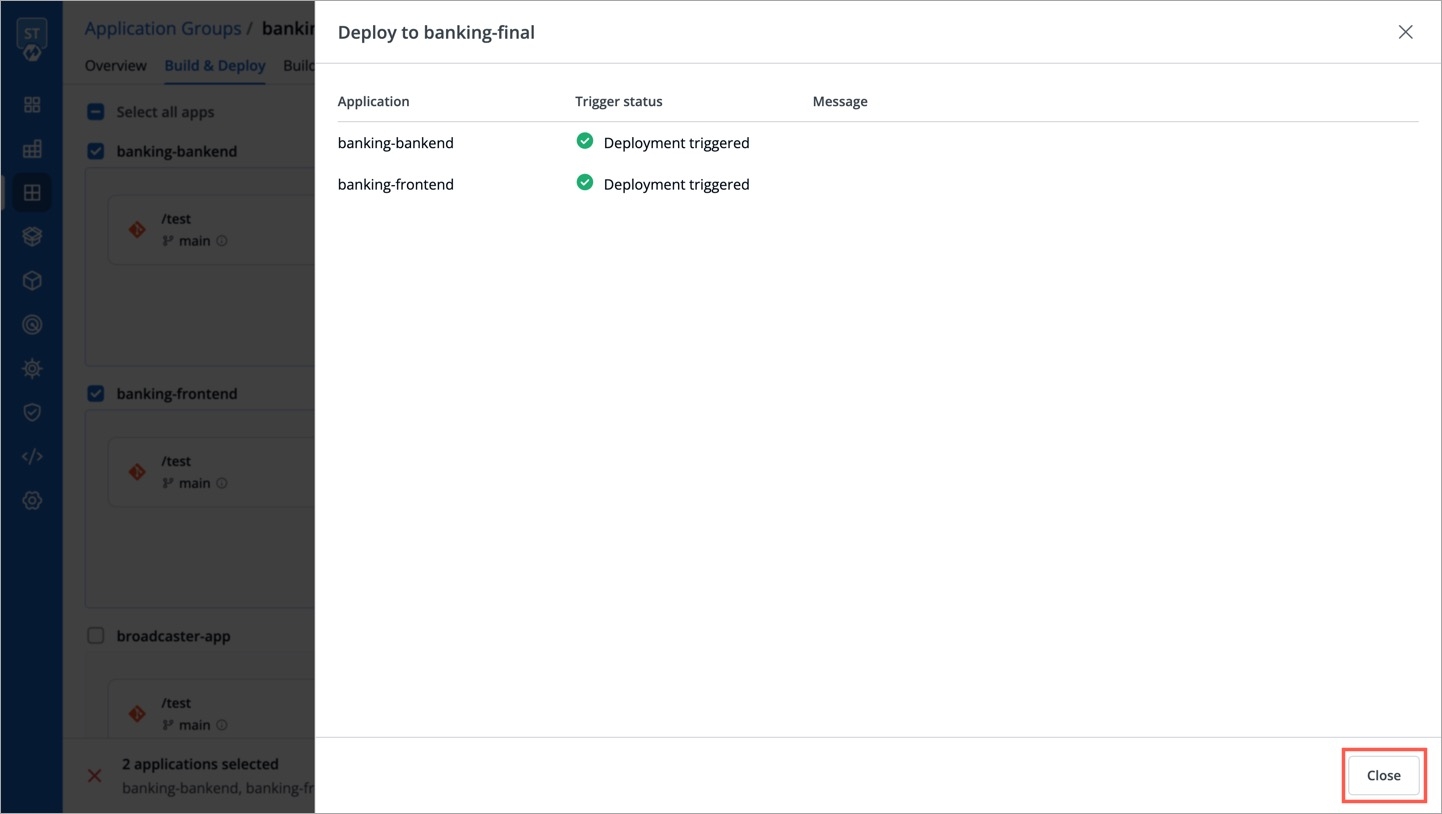
Figure 18: Triggered Deployment
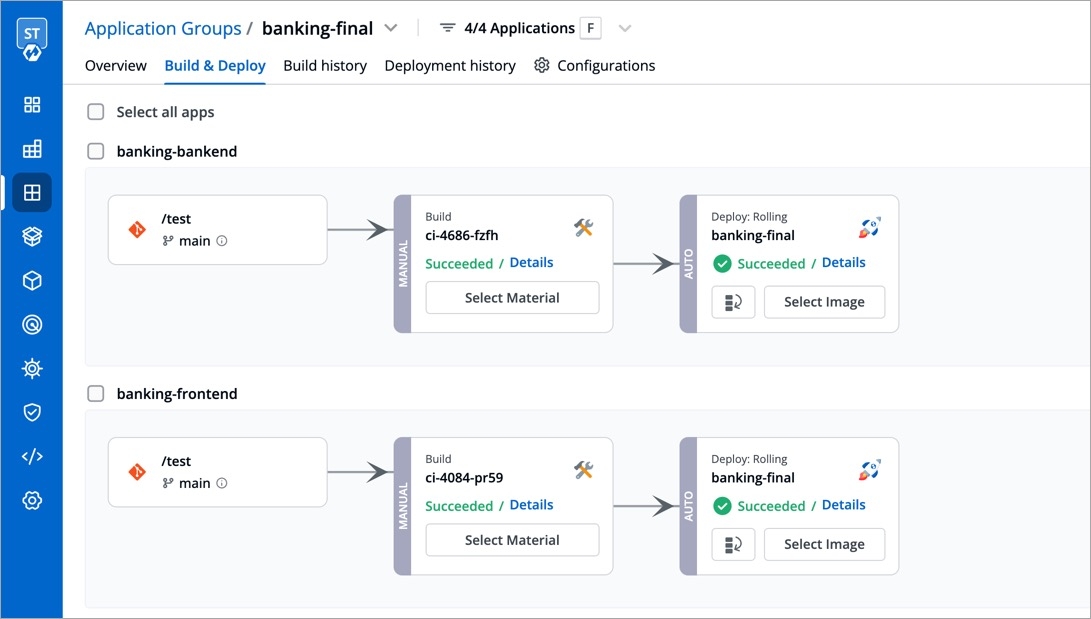
Once the deployment is successful, the pipelines will show Succeeded.
Managing Traffic
While deployment, Devtron allows you to manage your Canary and Blue-Green deployments by providing visibility and easy controls to manage how new versions (releases) are shared with users.
To do so, follow the below steps:
Go to Overview and Click on Manage Traffic.
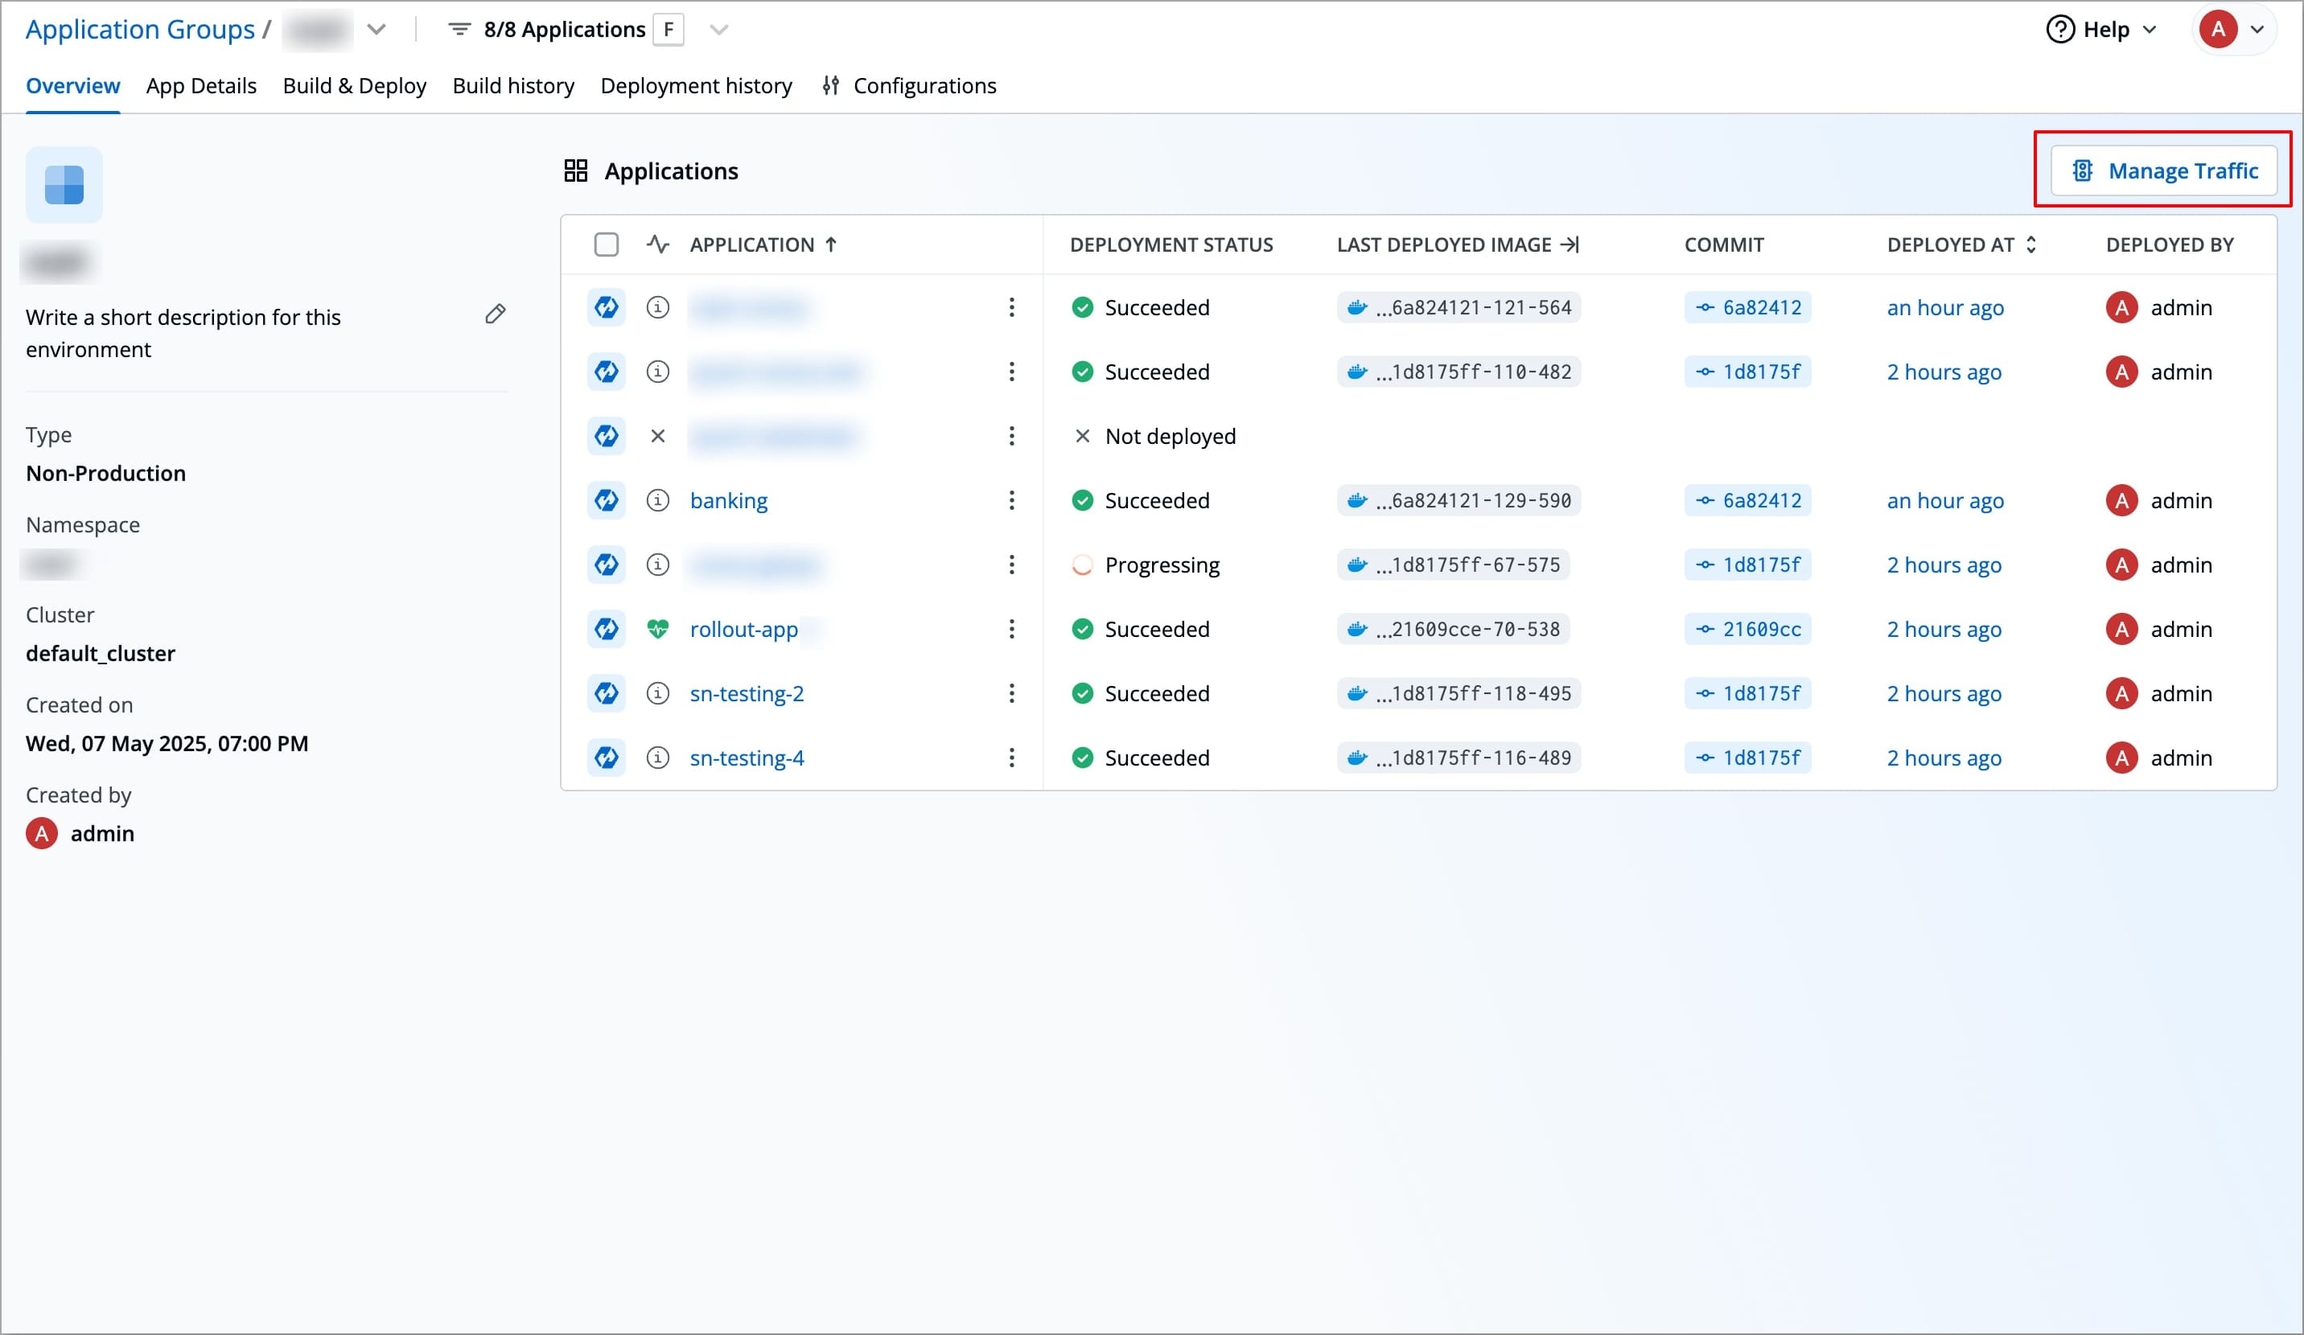
Figure 20: Selecting Managing Traffic Select the required applications, a side window will appear displaying all the eligible rollouts.
You can take the following actions based on the deployment strategy of the application
For Canary Deployments, you can either choose to initiate the next step or to initiate the full rollout.
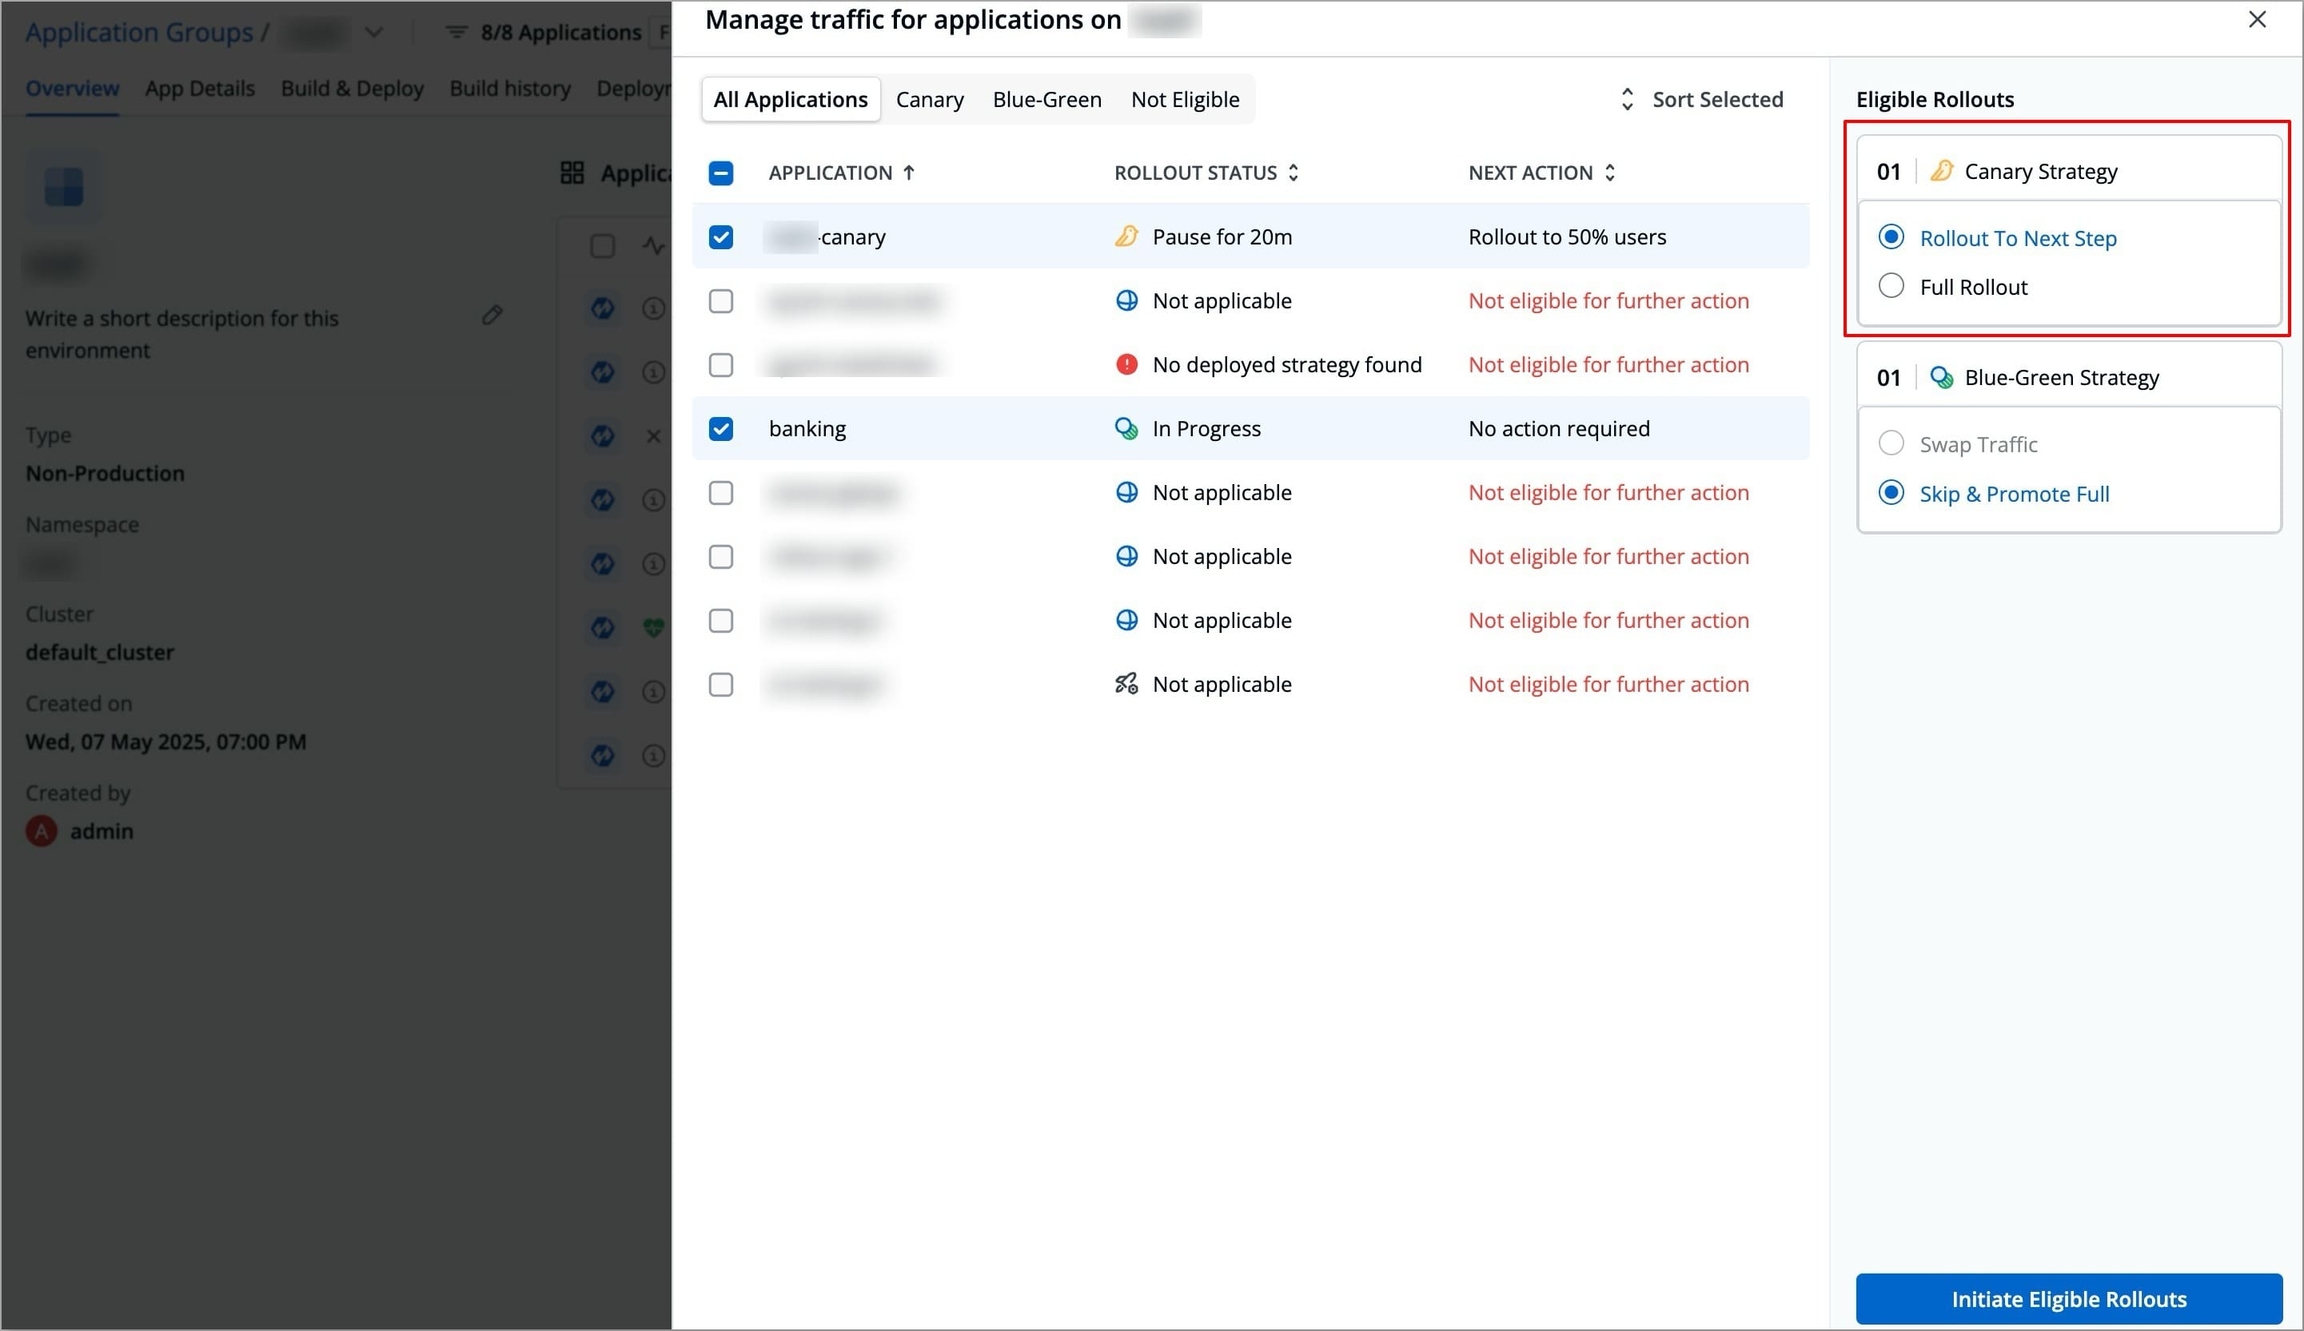
Figure 21: Selecting Action for Canary Deployments For Blue Green deployments, you can either choose to Swap Traffic, or you can choose Skip & Promote Full.
Swap Traffic: This will swap the traffic from the current deployment to the application latest deployment.
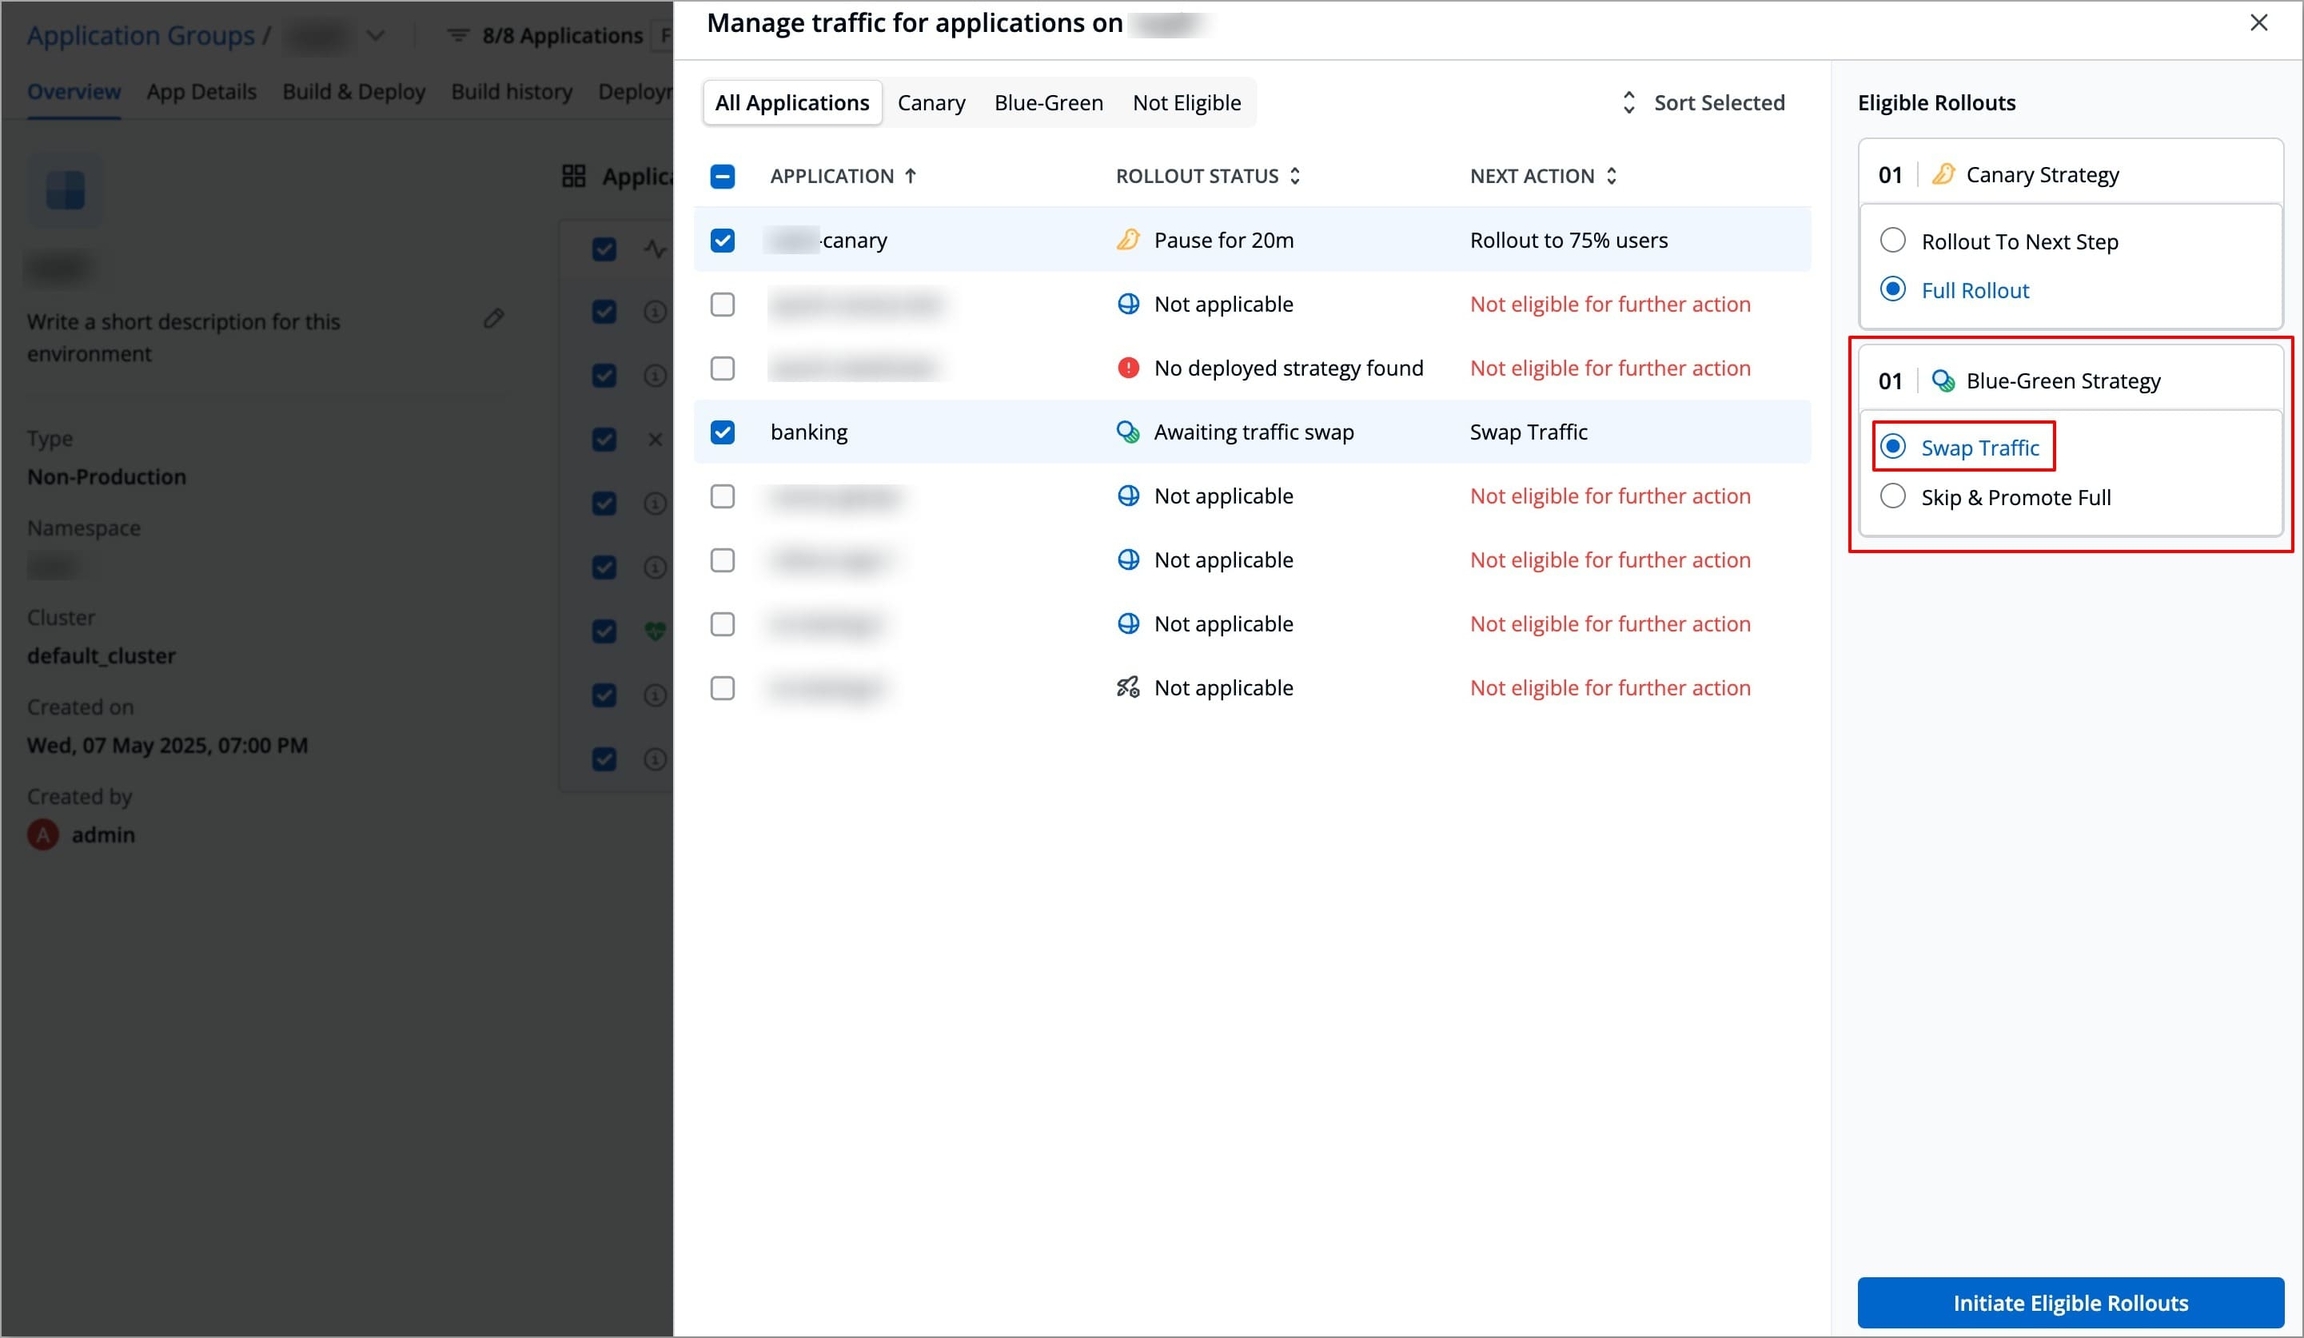
Figure 22: Selecting 'Swap Traffic' Skip & Promote Full: While deploying, this will directly deploy the whole traffic to application latest deployment.
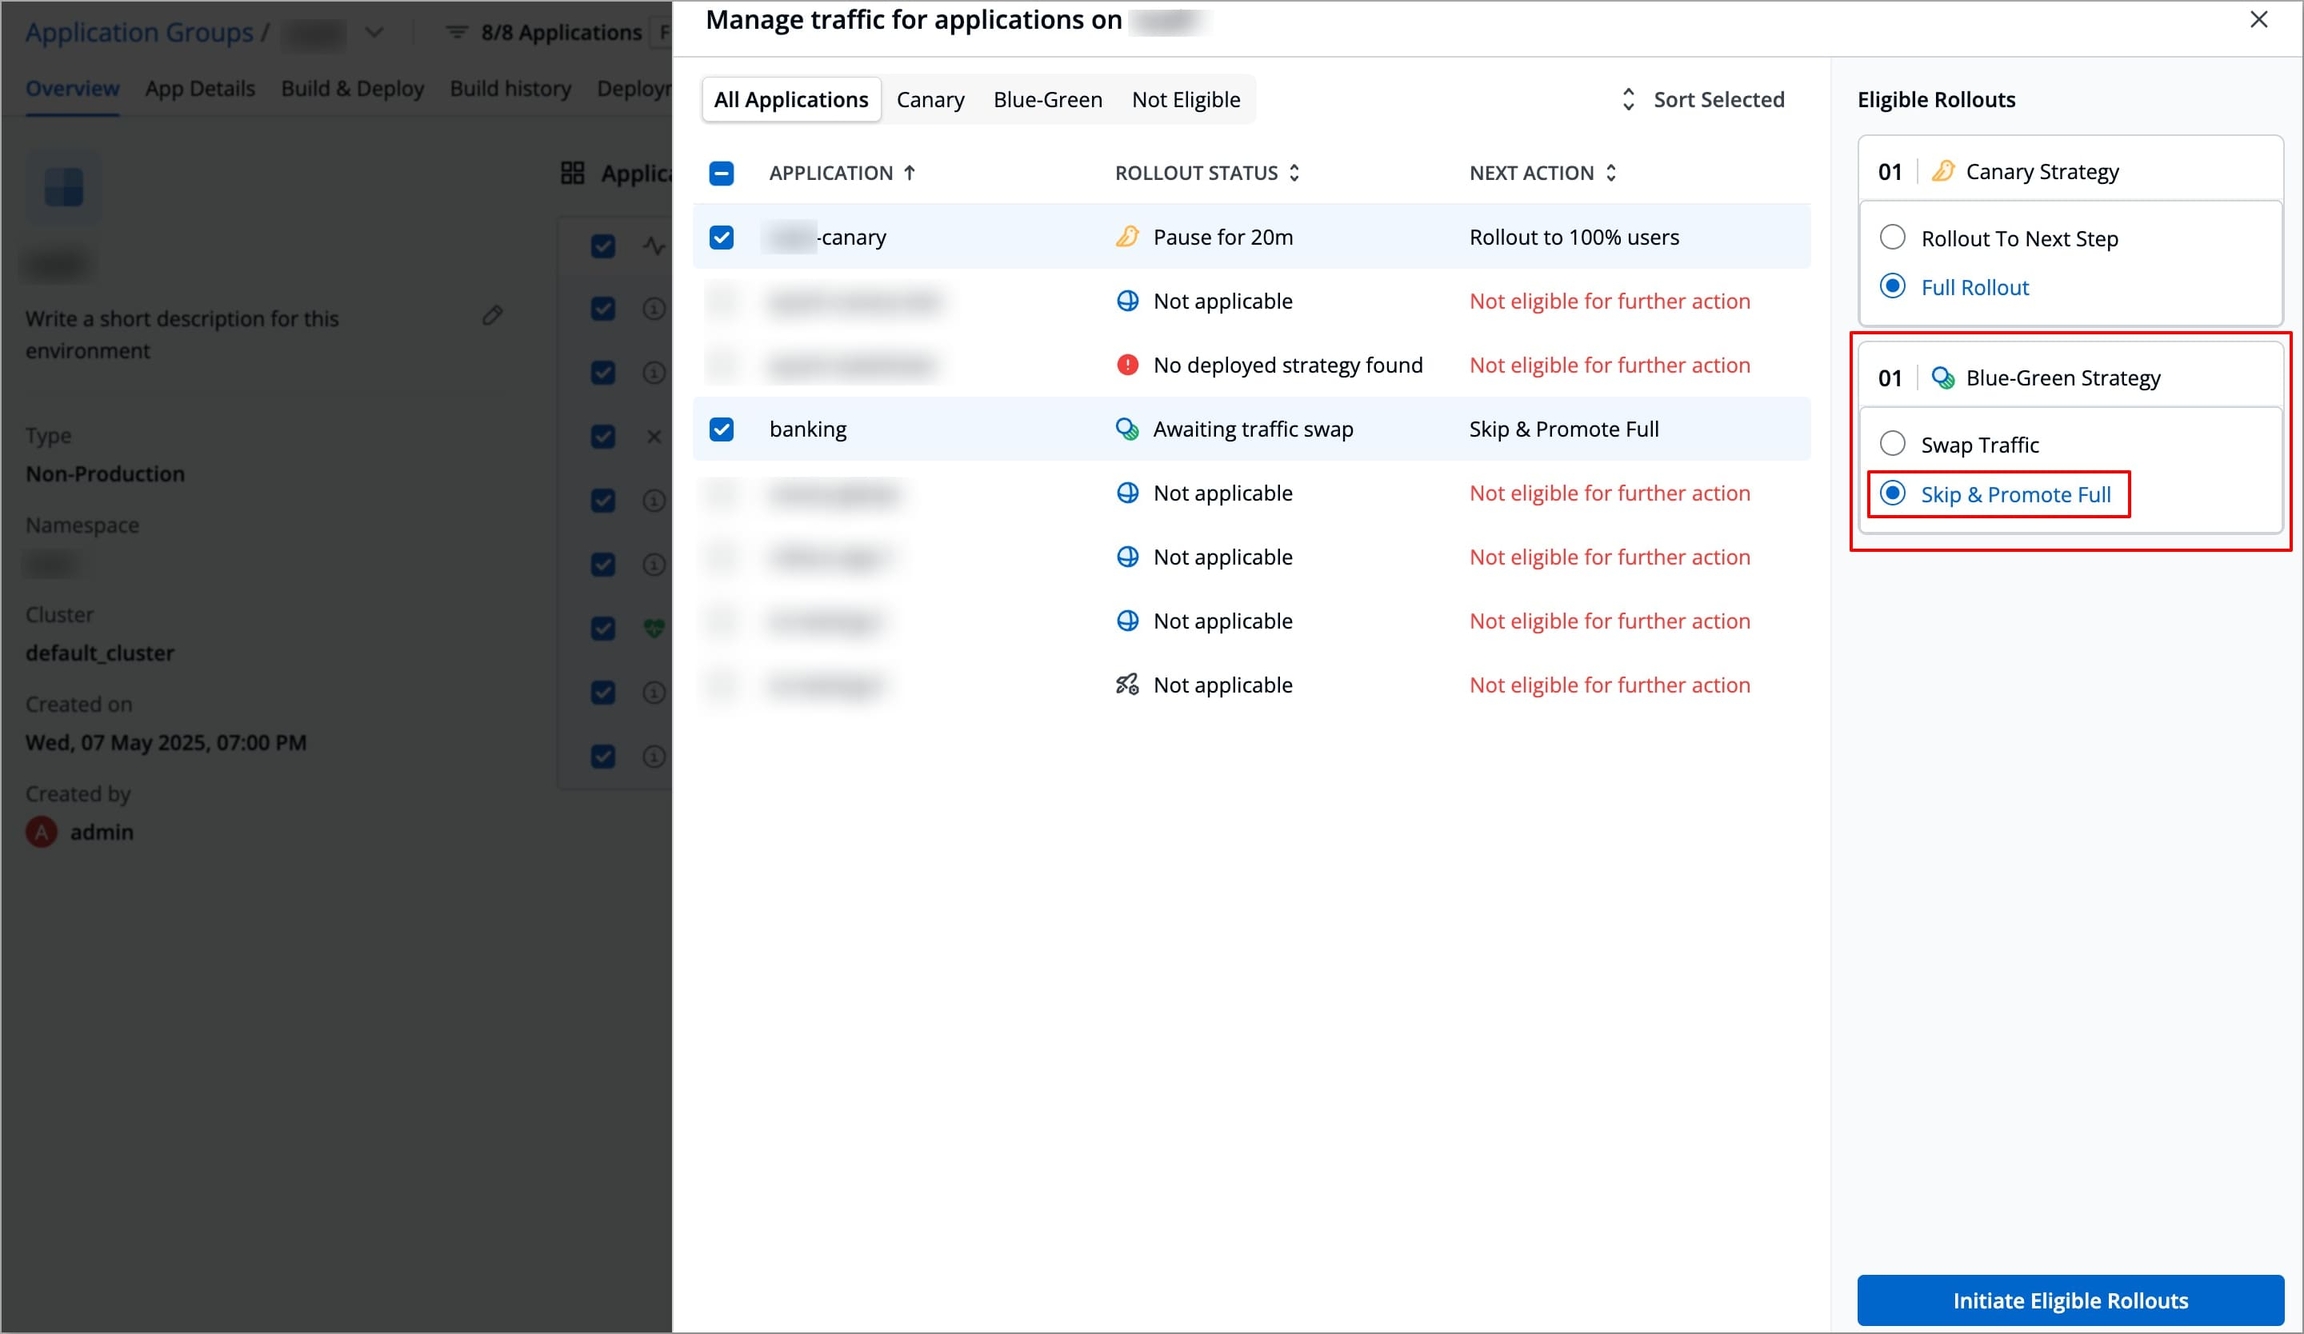
Figure 23: Selecting 'Skip & Promote Full'
Click Initiate Eligible Rollouts to implement the actions.
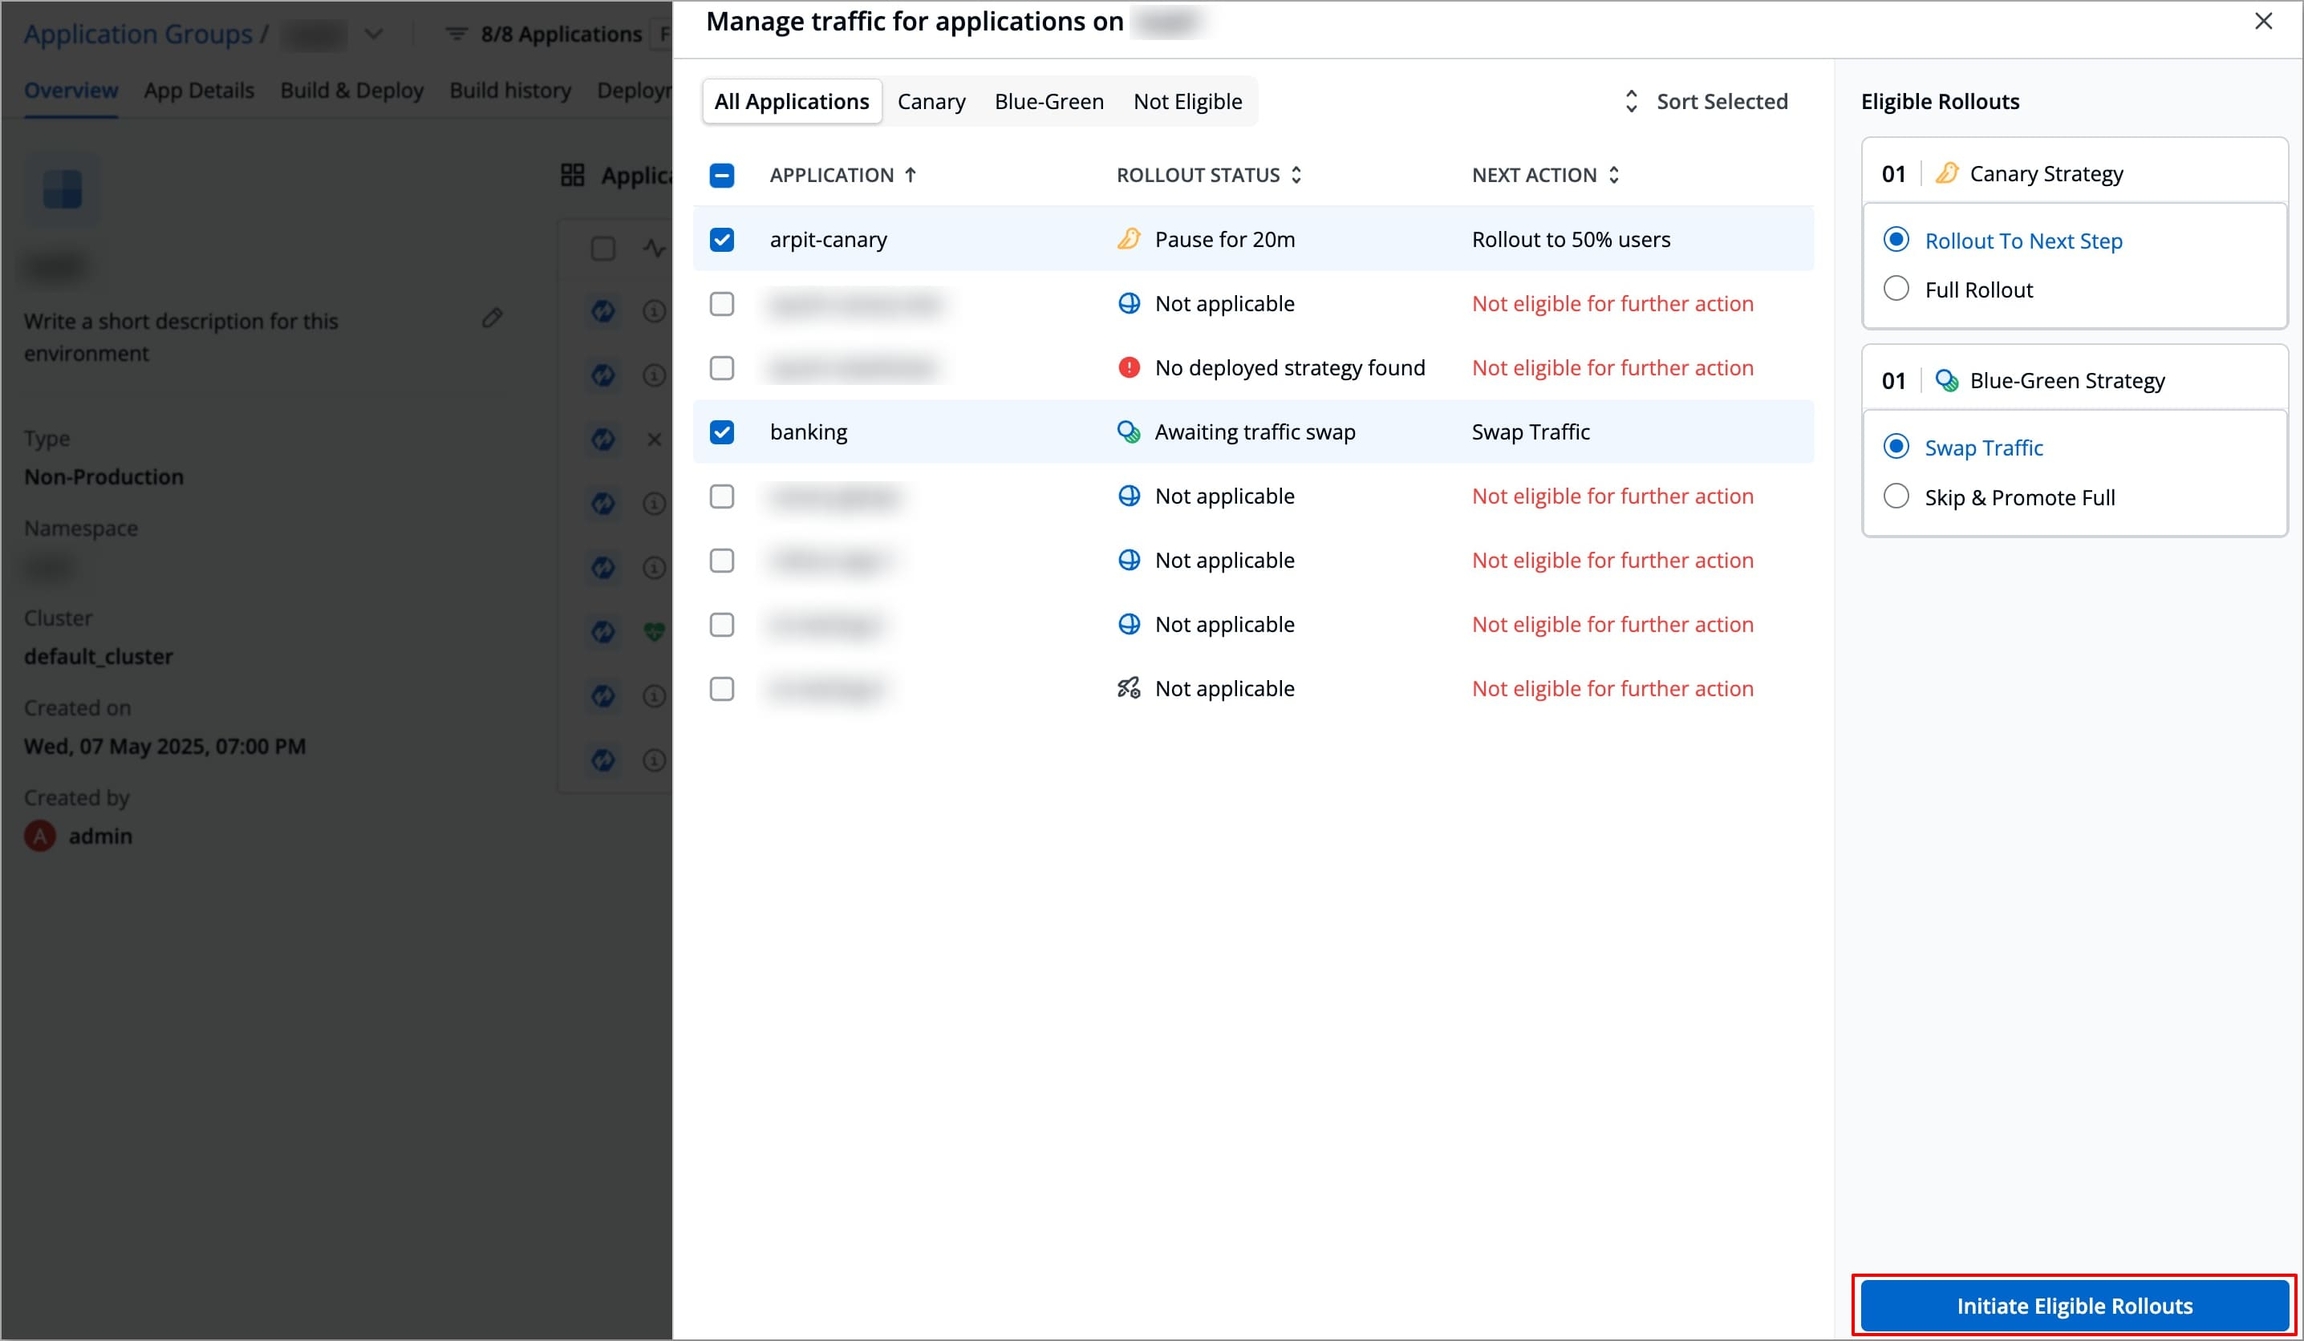
Figure 24: Clicking 'Initiate Eligible Rollouts' 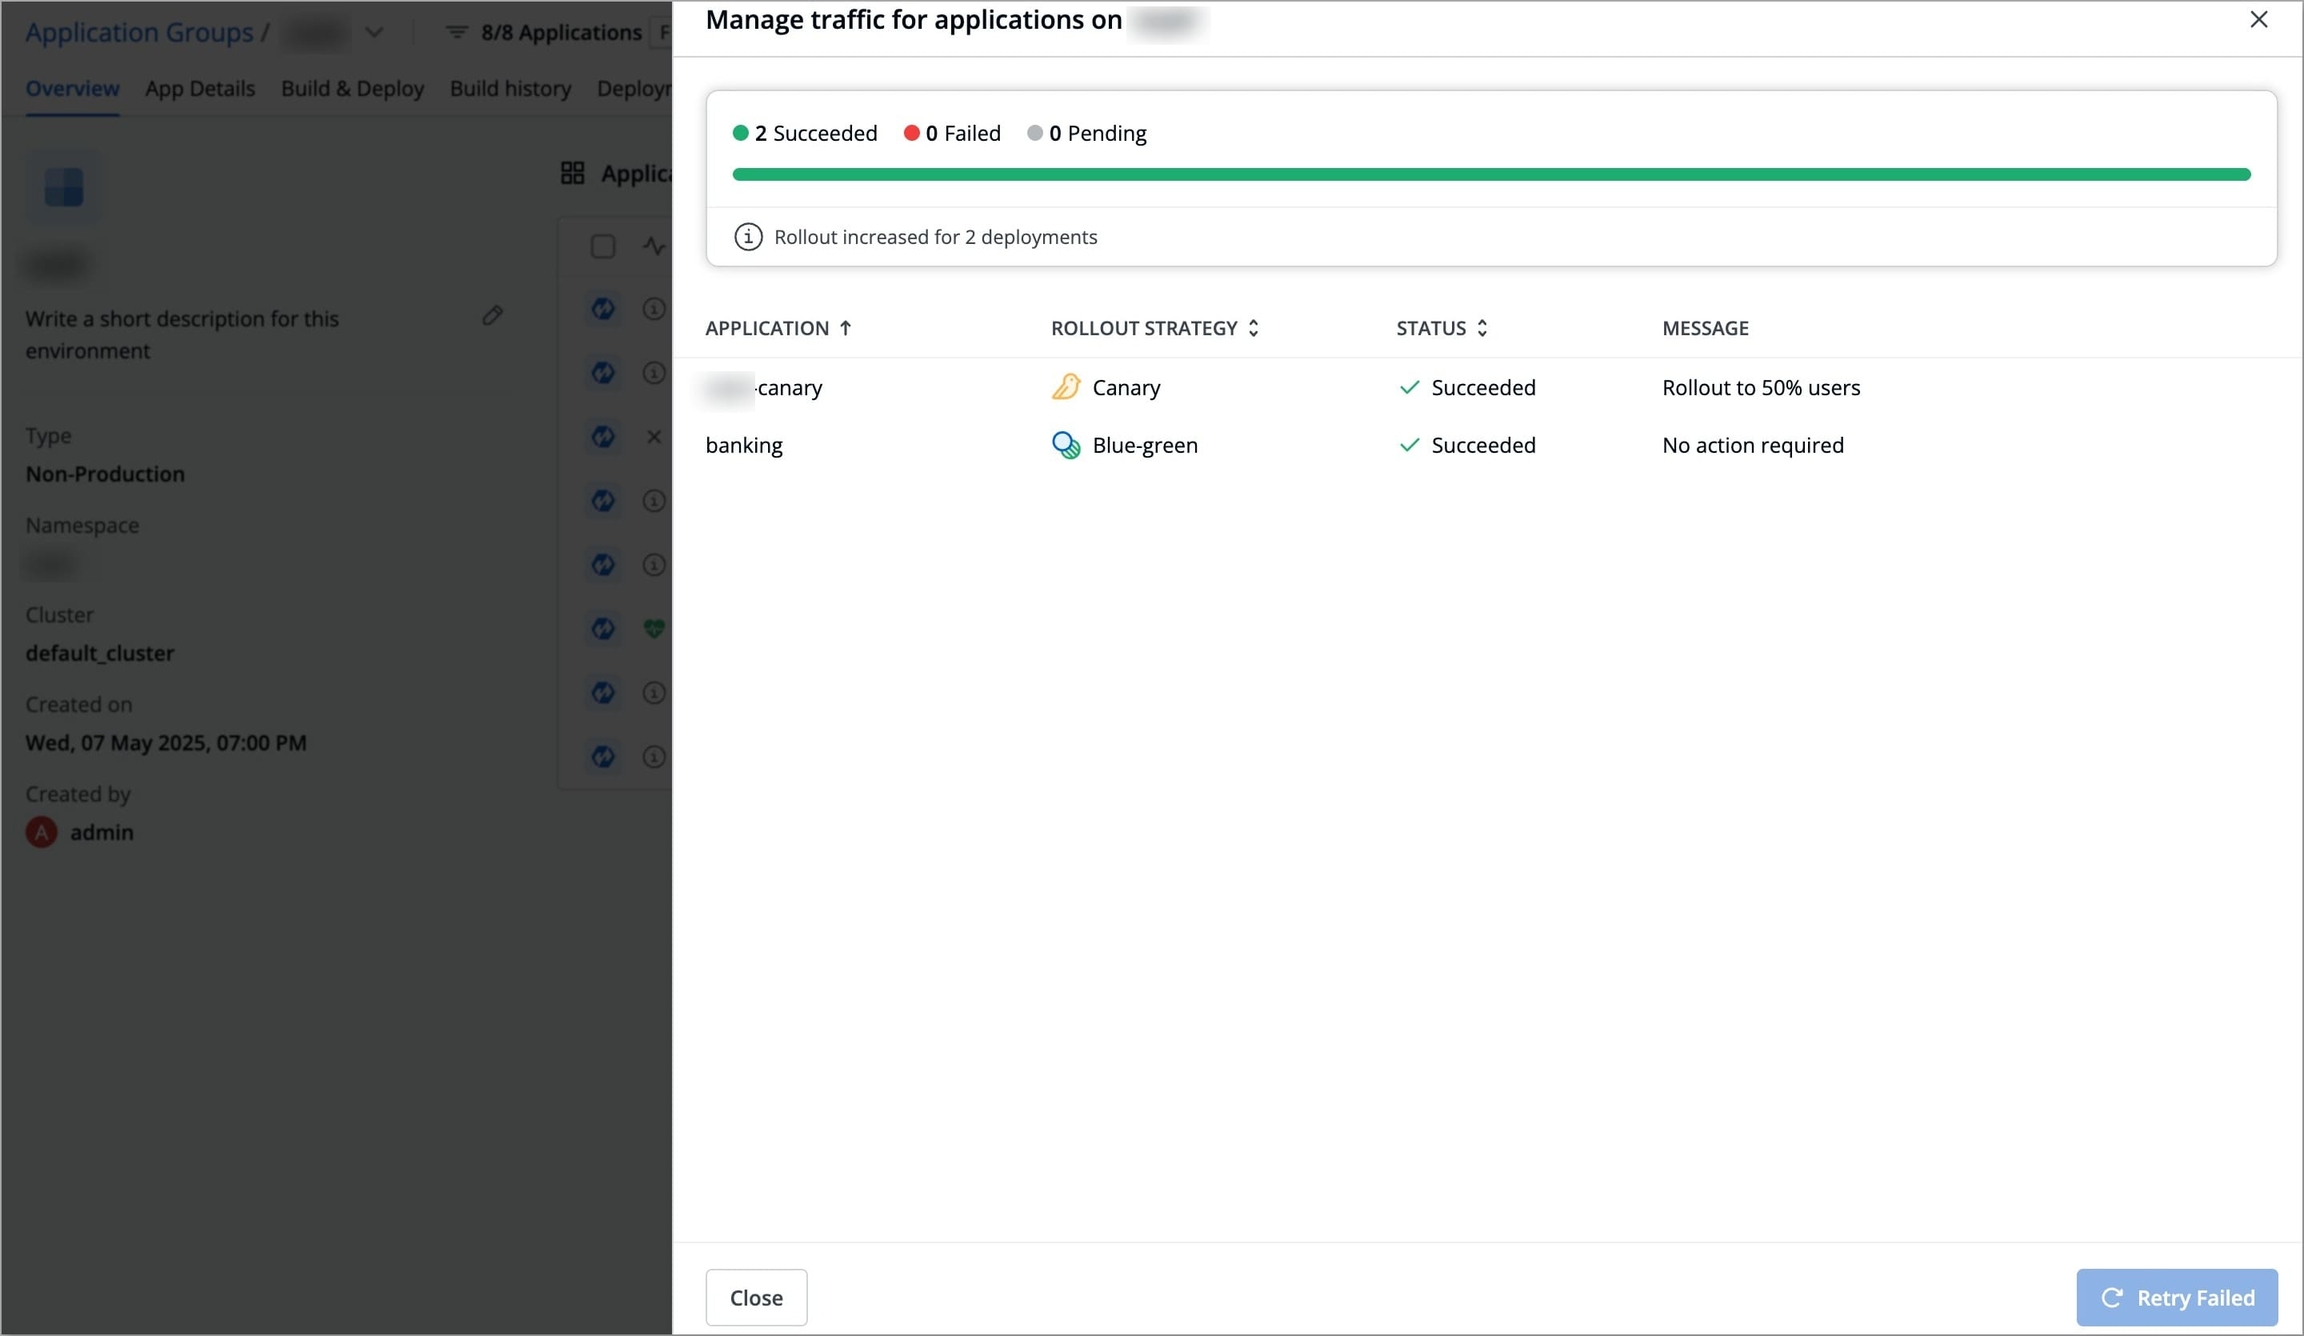
Figure 25: Rollout Status
Additional Features
Clone Pipelines
This feature aims at helping the user clone existing CI/CD pipelines for new target environments in multiple applications. The configurations present in the given CI/CD pipeline also get copied to the cloned pipelines (refer the below table).
Clones the source’s workflow CI as it is
Cloned, including Pre-CD and Post-CD scripts/plugins
Cloned, including Deployment Template (DT), ConfigMap (CM), and Secret
Not cloned
Cloned if at pipeline level; ignored if global
Not cloned (handled globally)
Cloned (handled at pipeline level)
Cloned
Not cloned
Mandatory Plugin
Not cloned
Cloned at pipeline level; ignored if global
Not cloned
Not cloned
Not cloned
Not cloned
Use Case: Let's say you have 'n' number of apps deployed to a development environment named dev-env. Later, a few testers joined your team, thus necessitating the addition of a testing environment (test-env) with those same apps deployed. Manually creating the pipelines and configuring them for test-env environment in each app might be impractical. Therefore, we recommend you to use the cloning feature.
Methods of Cloning
This feature gives you two methods of cloning:
New Workflow: Creates a new workflow and clones the source CI and CD pipeline. Gives you the flexibility to tweak the cloned CI (e.g., changing code branch for build) too.
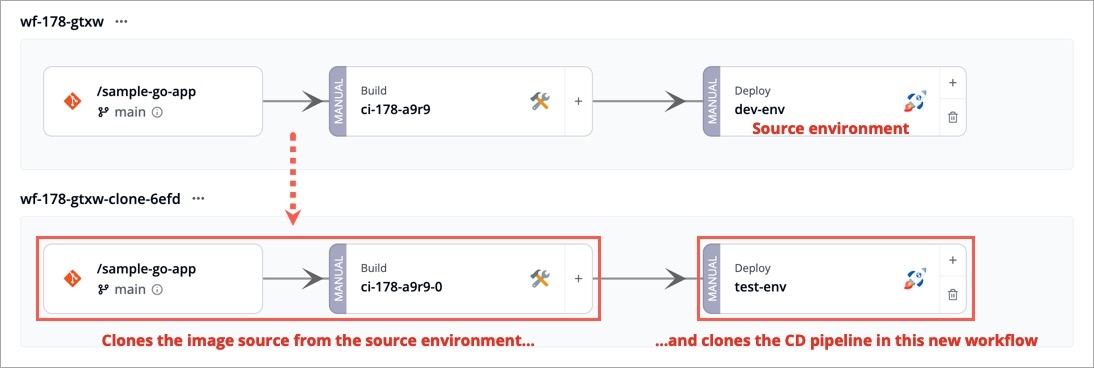
Figure 26: New Workflow Source Workflow: Uses the same workflow and clones only the source CD pipeline, thus keeping the original CI pipeline unchanged.
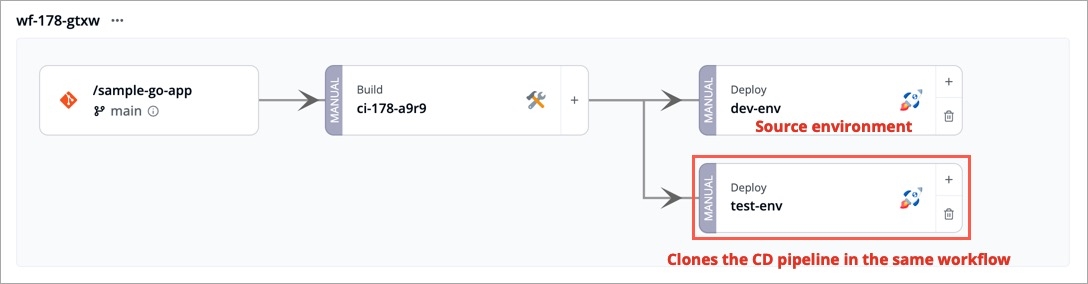
Figure 27: Source Workflow
Steps to Clone Pipelines
Go to Application Groups and click the source environment from the list.
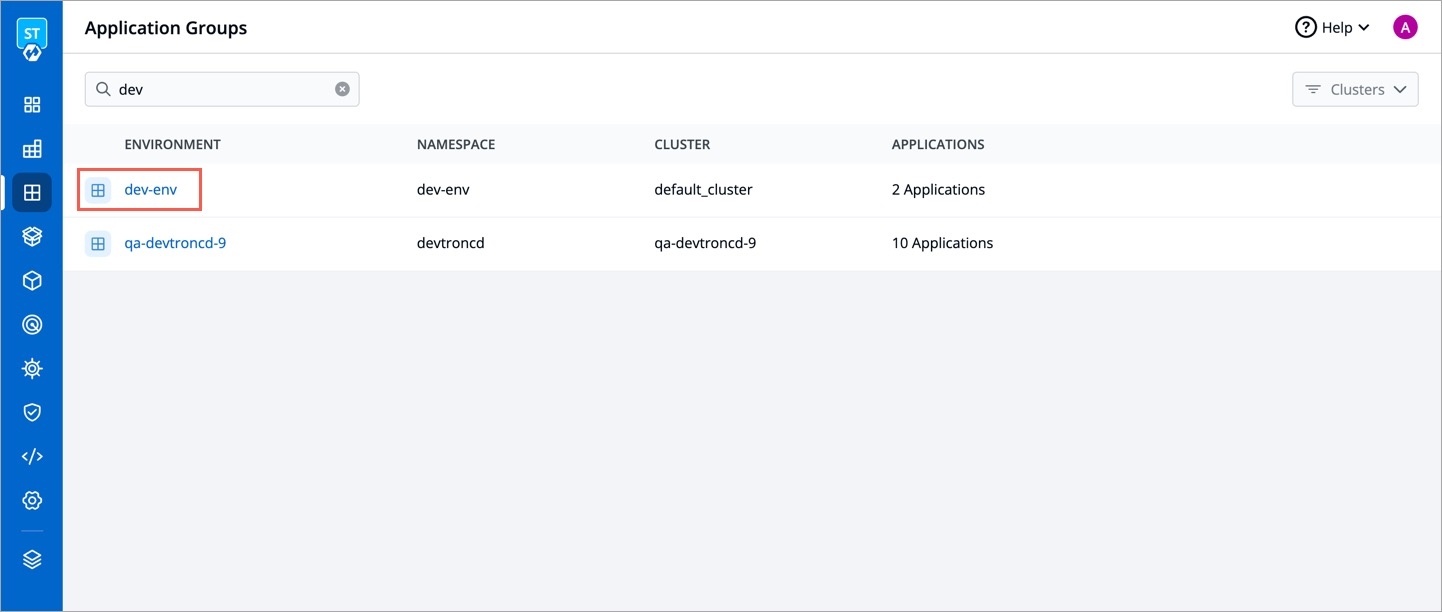
Figure 28: Source Environment Selection Select the applications whose pipelines you wish to clone and click Clone Pipeline Config.
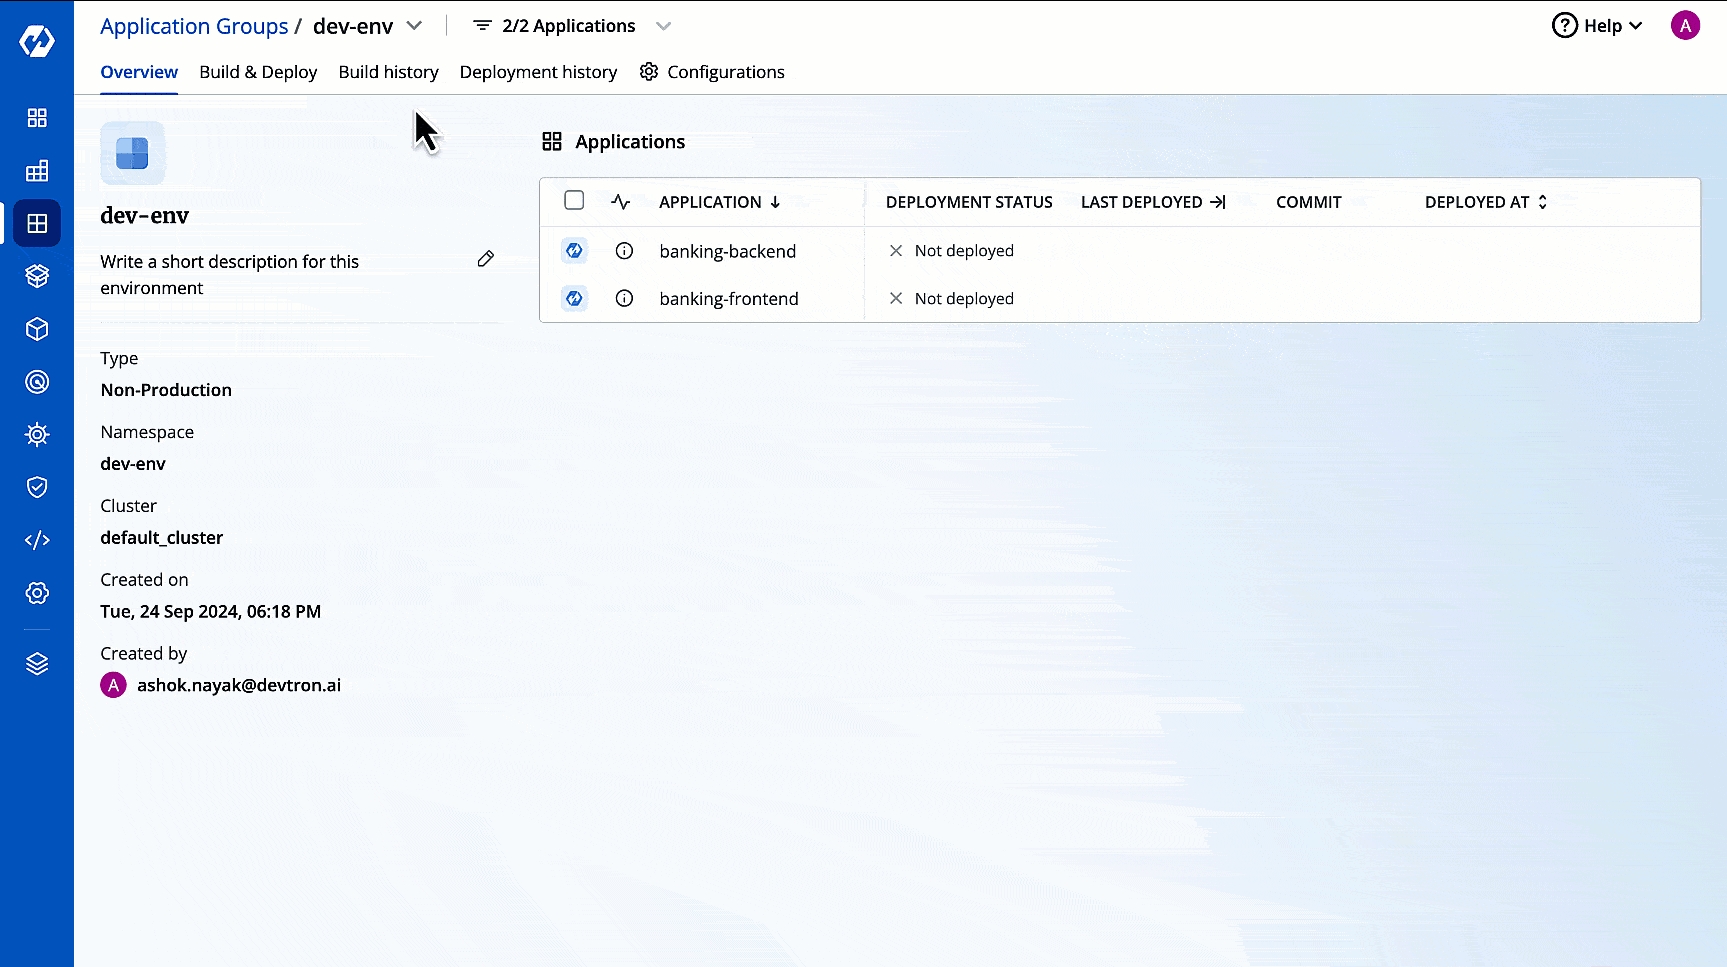
Figure 29: Choosing Applications From the dropdown, select the target environment for which pipelines should be created for selected applications.
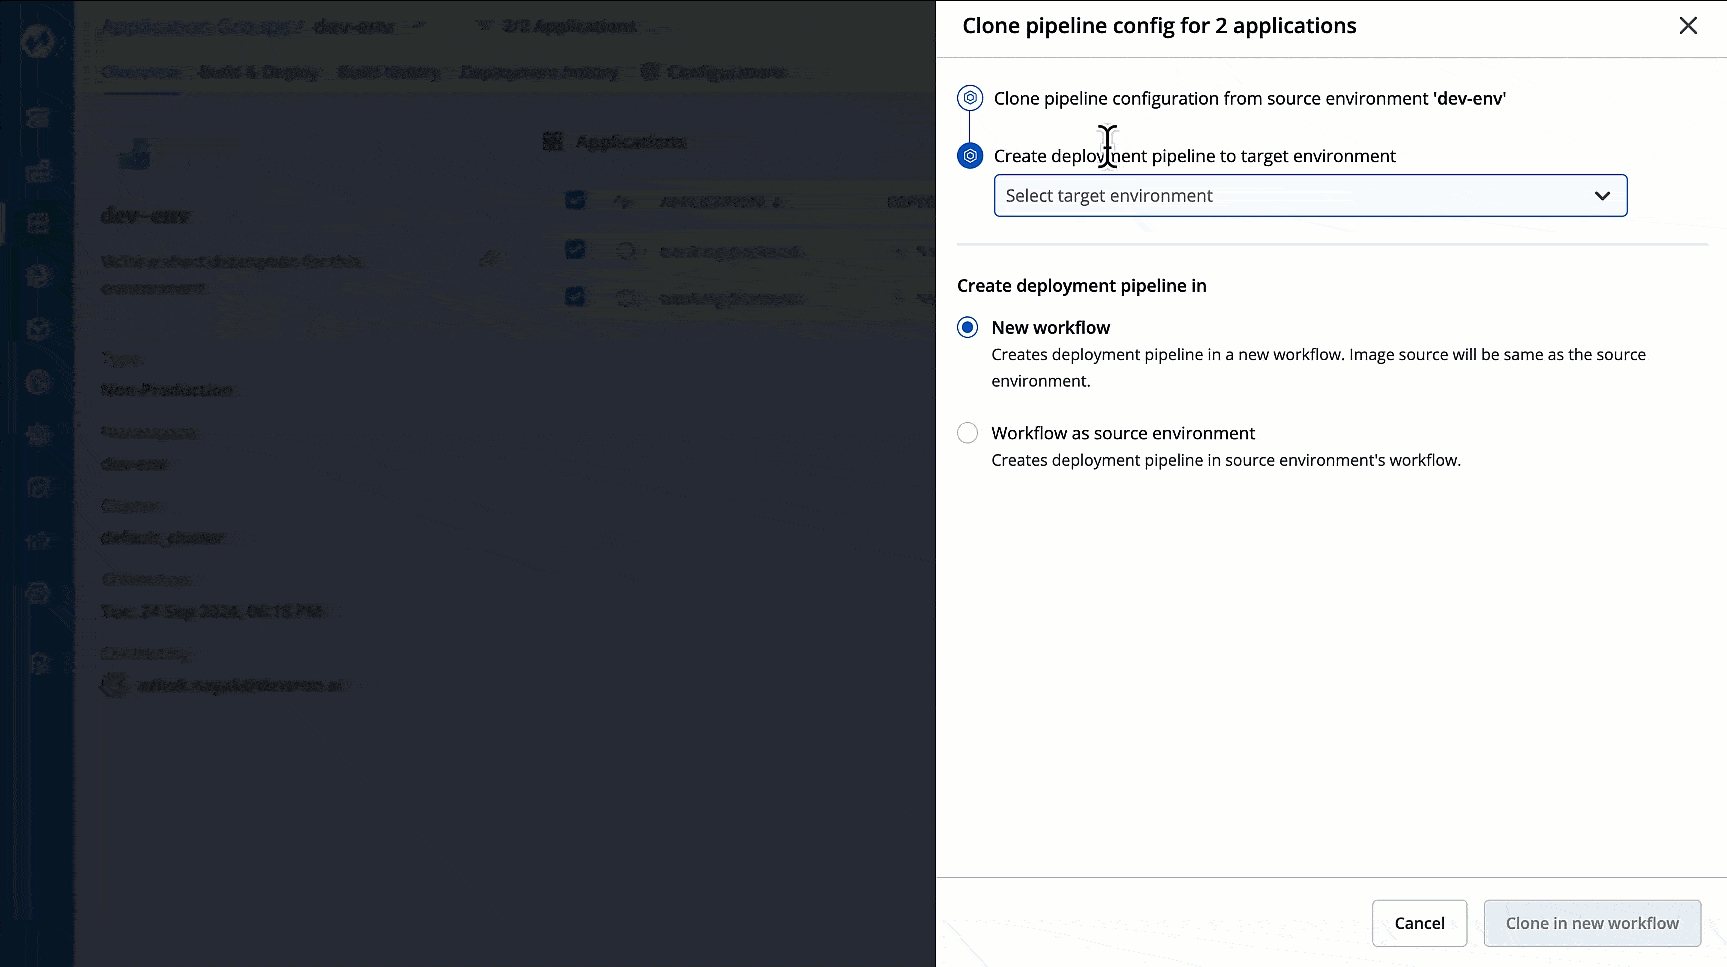
Figure 30: Selecting Target Environment Select the workflow where you wish to create deployment pipeline: New Workflow or Workflow as source environment. Refer Methods of Cloning to know which option will fulfill your requirement.
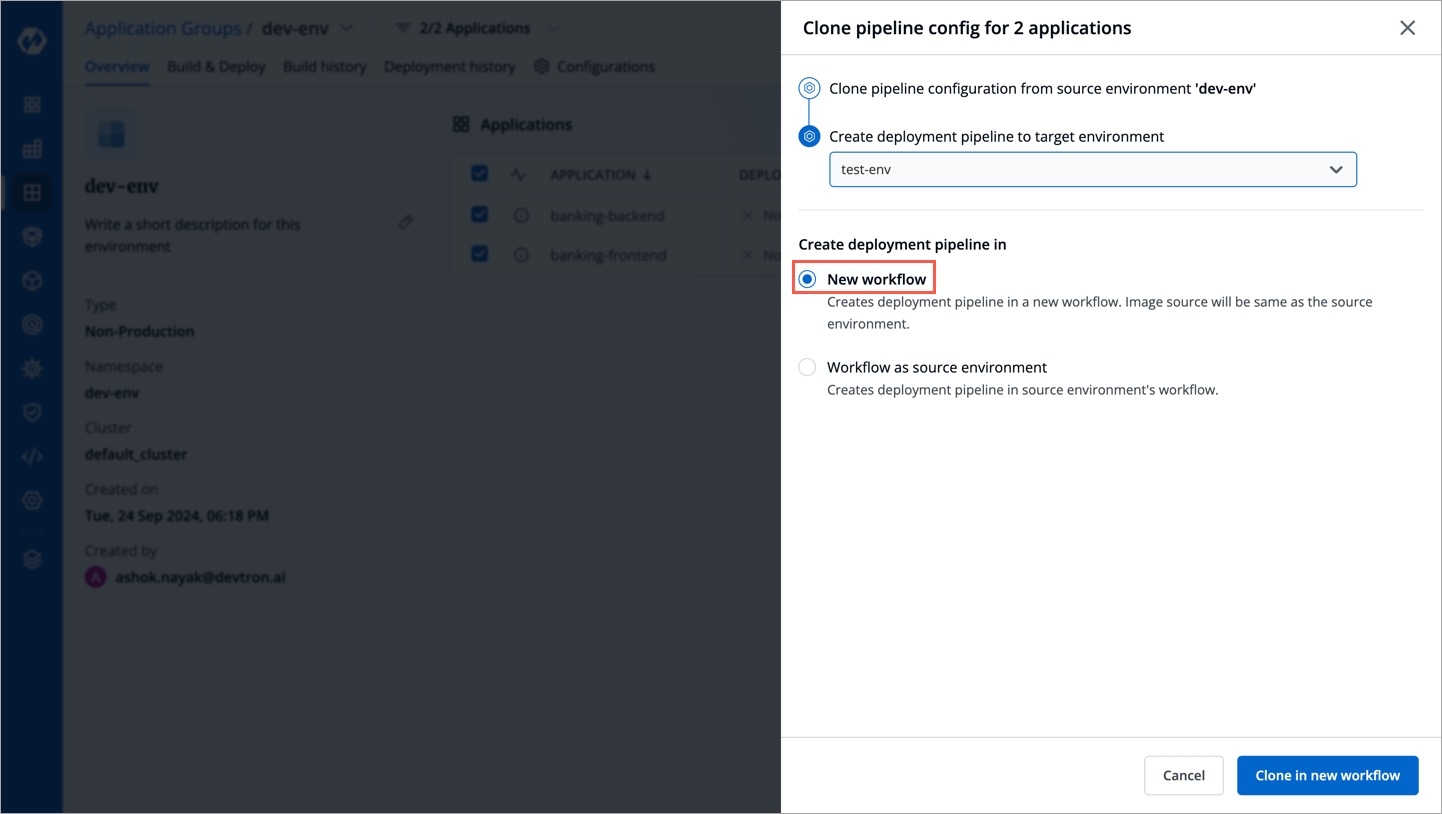
Figure 31: Creating CD Pipeline in Workflow Click Clone in new workflow or Clone in source workflow (depending on the option you selected in the previous step).
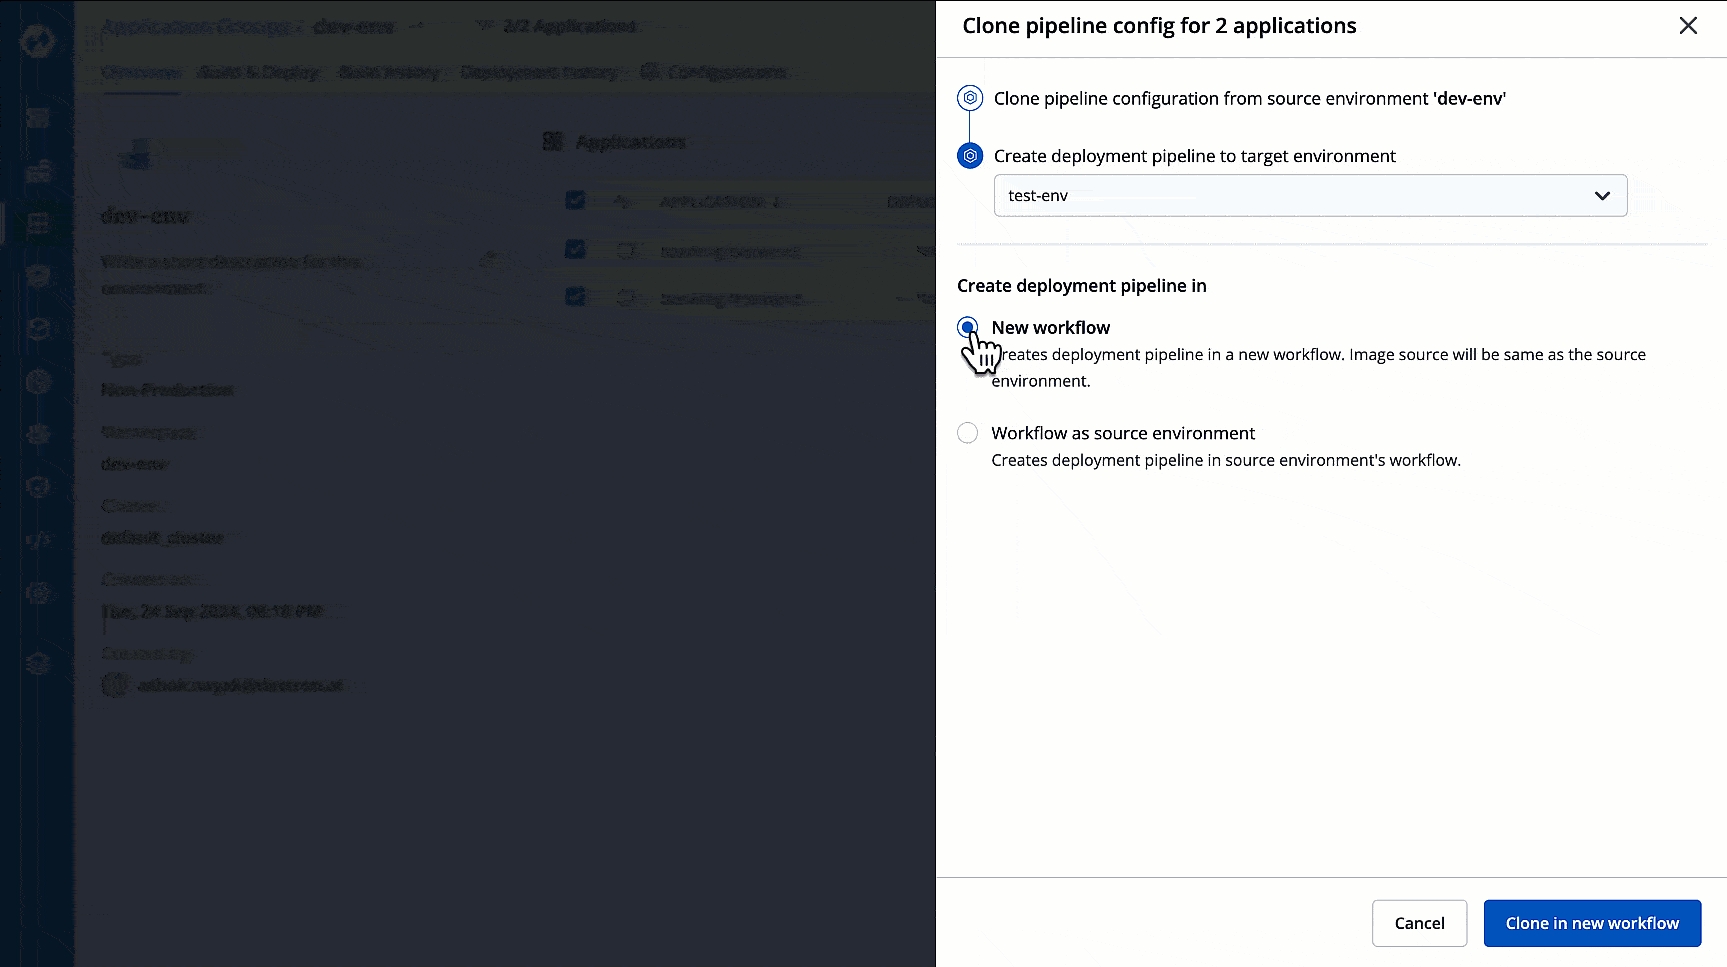
Figure 32: Initiating Clone
Note
The cloning process will skip if a CD pipeline (for the target environment) already exists in the chosen application's workflow. You can view this in the clone status generated after the above process.
Hibernating and Unhibernating Apps
Who Can Perform This Action?
Users need to have Build & deploy permission or above (along with access to the environment and application) to hibernate or unhibernate applications.
Since every application comes with an option to hibernate, the same is true for application groups. Using application group, you can hibernate one or more applications belonging to the same environment if you do not want them to consume resources (replica count will be set to 0).
In other words, you can hibernate running applications or unhibernate hibernated applications as per your requirement.
Hibernation Process
In the
Overviewpage of your application group, use the checkboxes to choose the applications you wish to hibernate, and click the Hibernate button.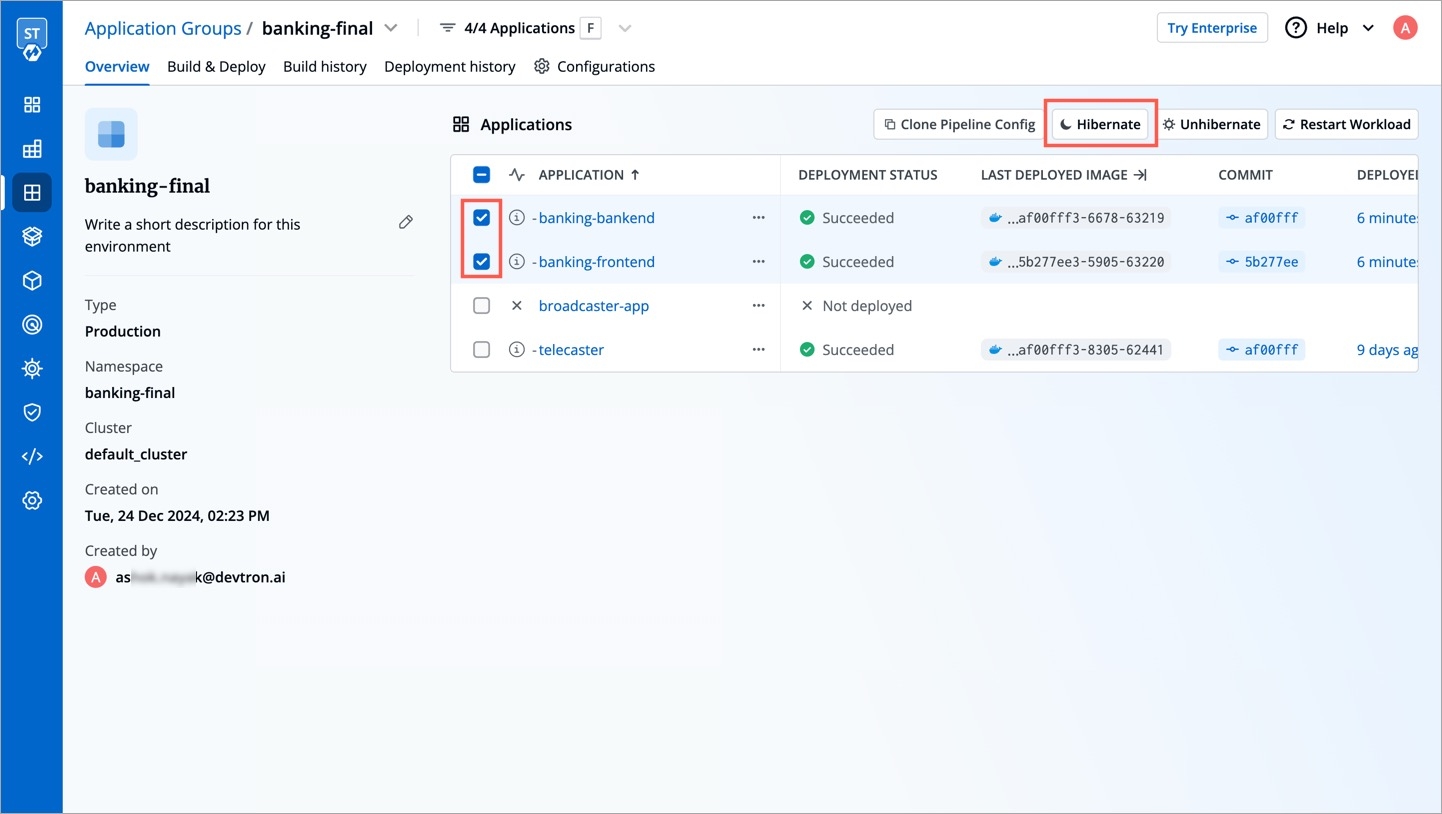
Figure 33: Selecting Apps to Hibernate Confirm the hibernation.
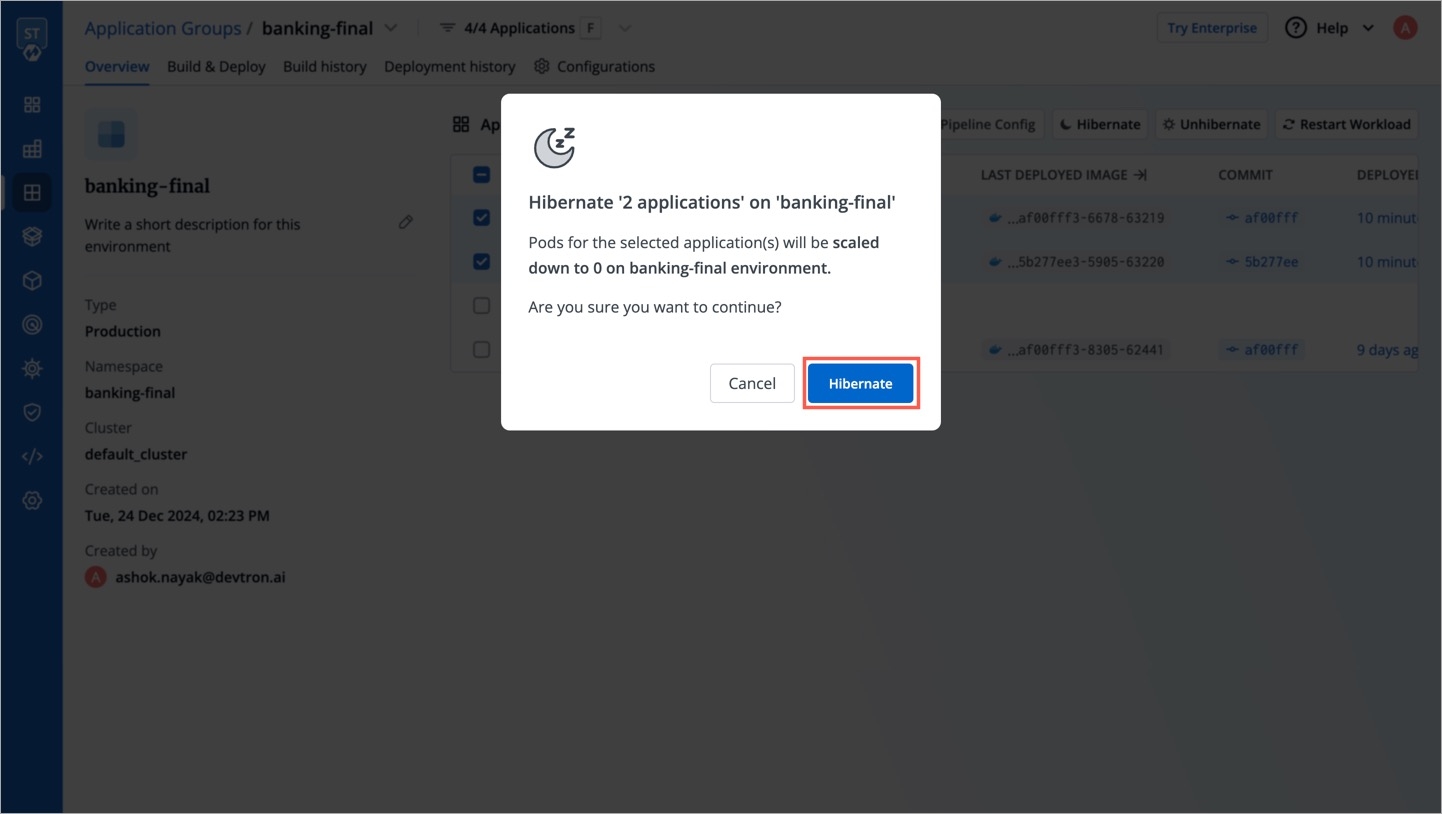
Figure 34: Confirming Hibernation Hibernation will initiate as shown below. You may close the window.
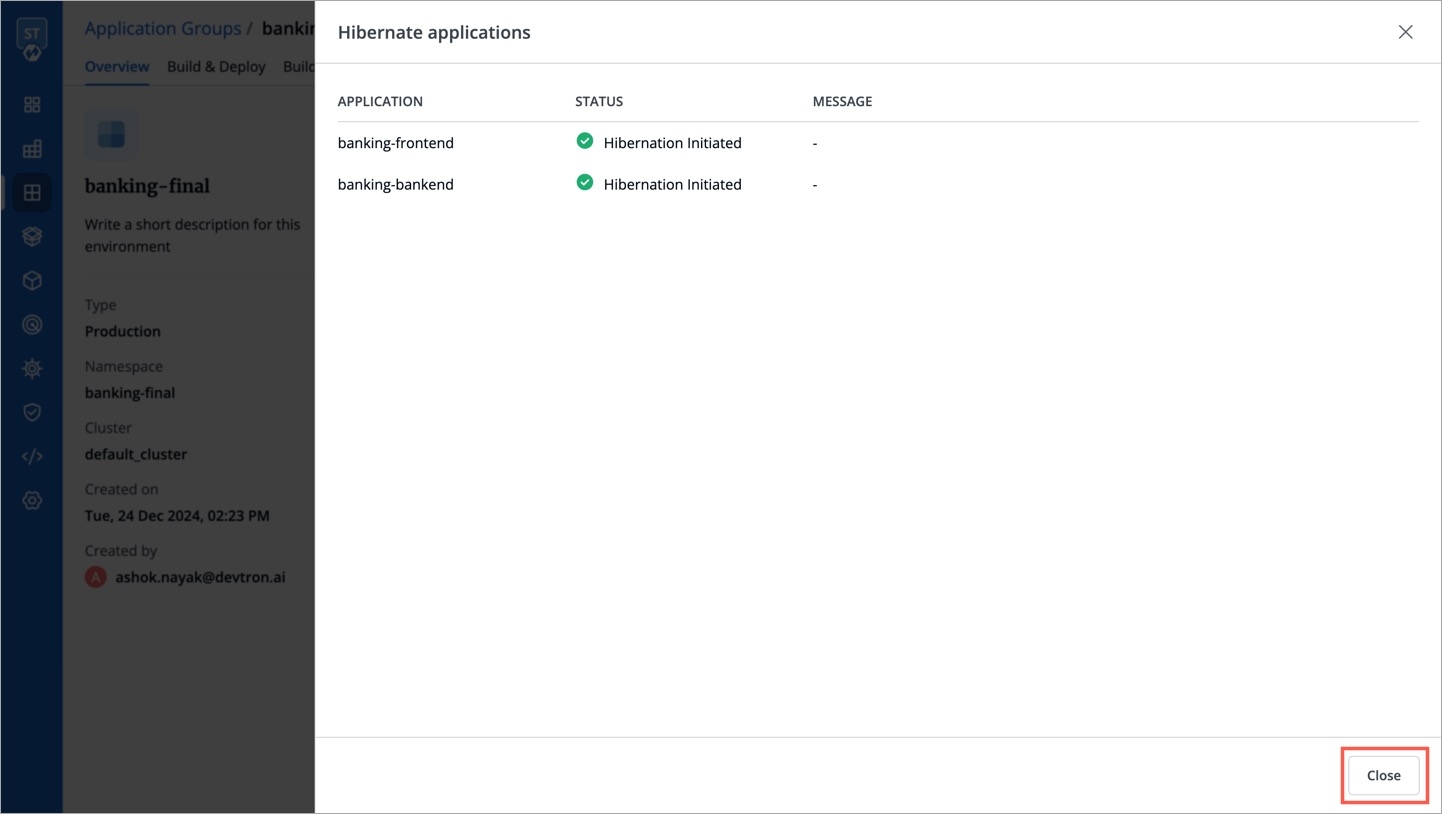
Figure 35: Initiation Status of Hibernation
Your applications pods would be scaled down and would stop incurring costs.
Unhibernation Process
In the same
Overviewpage, you can use the checkboxes to choose the hibernated applications you wish to unhibernate, and click the Unhibernate button.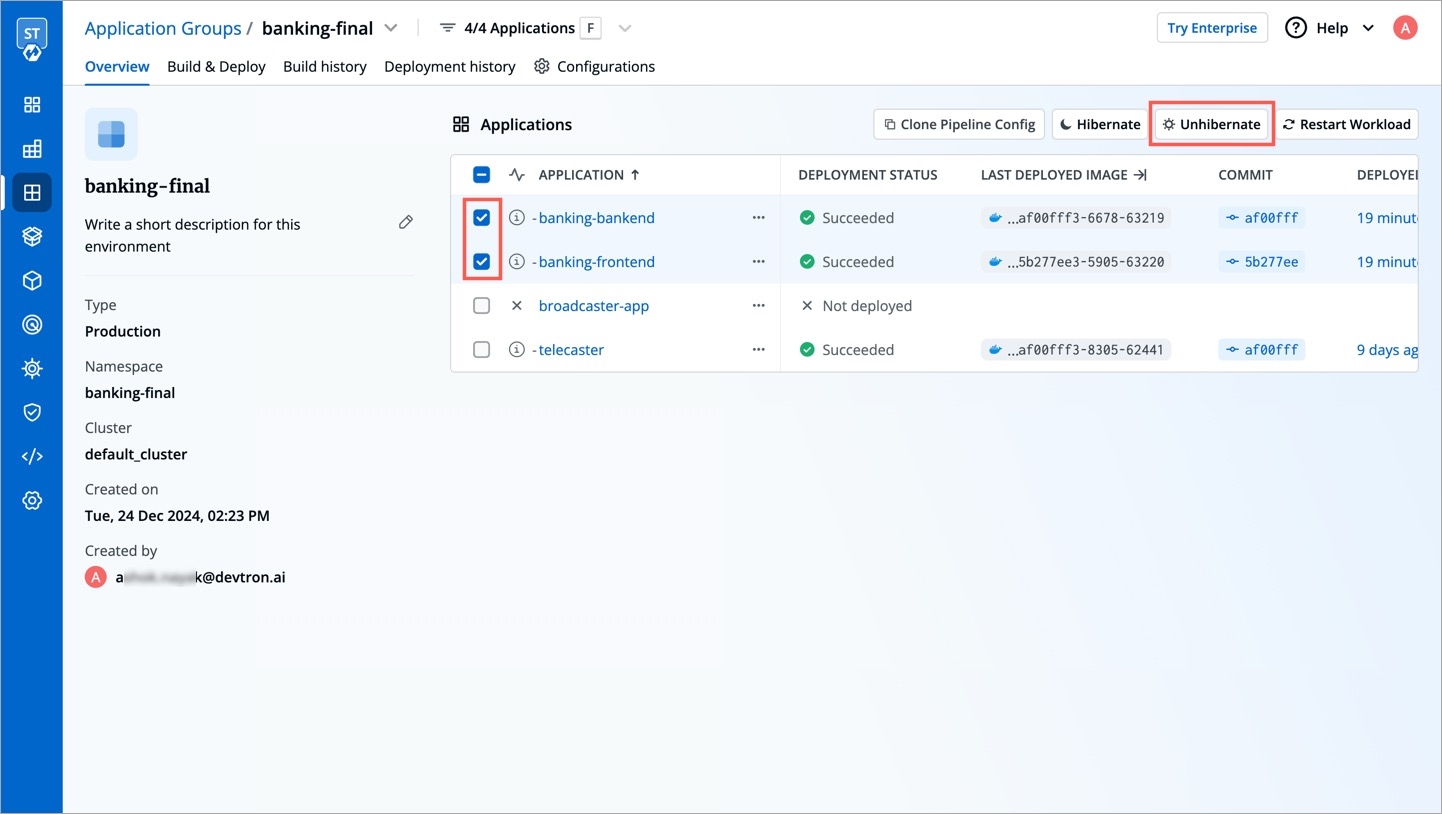
Figure 36: Selecting Hibernated Apps to Unhibernate Confirm the unhibernation.
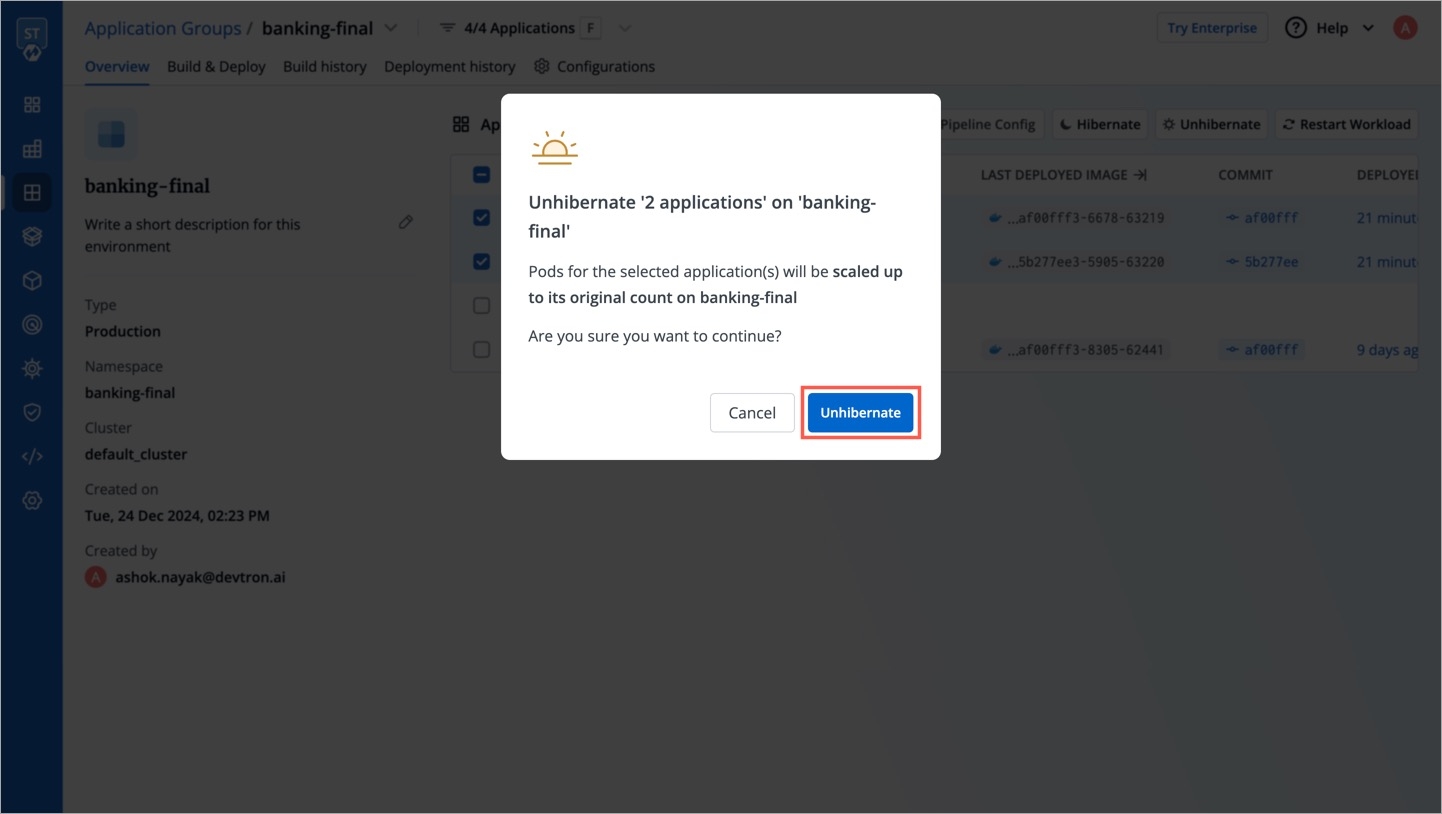
Figure 37: Confirming Unhibernation Unhibernation will initiate as shown below. You may close the window.
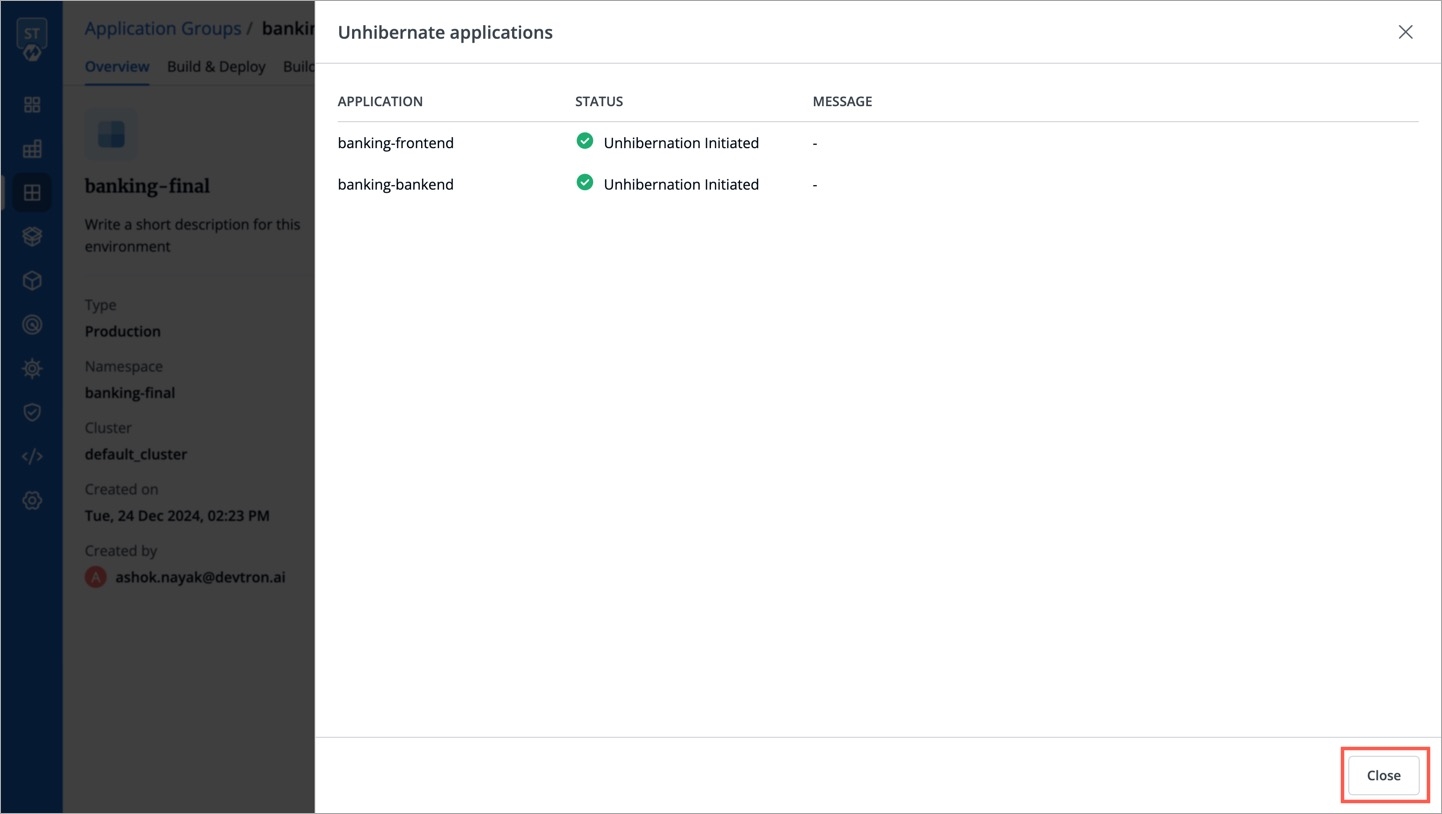
Figure 38: Initiation Status of Unhibernation
Your applications would be up and running in some time.
Restart Workloads
Who Can Perform This Action?
Users need to have Build & deploy permission or above (along with access to the environment and application) to restart workloads in bulk.
Restarting workloads might be necessary if you want your new code or configuration to come into effect, or you are experiencing issues like crashing of pods.
Using application group, you can select the workloads (i.e., Pod, Deployment, ReplicaSet, etc.) of specific applications and restart them.
Use the checkboxes to choose the applications whose workloads you wish to restart, and click the Restart Workload button.
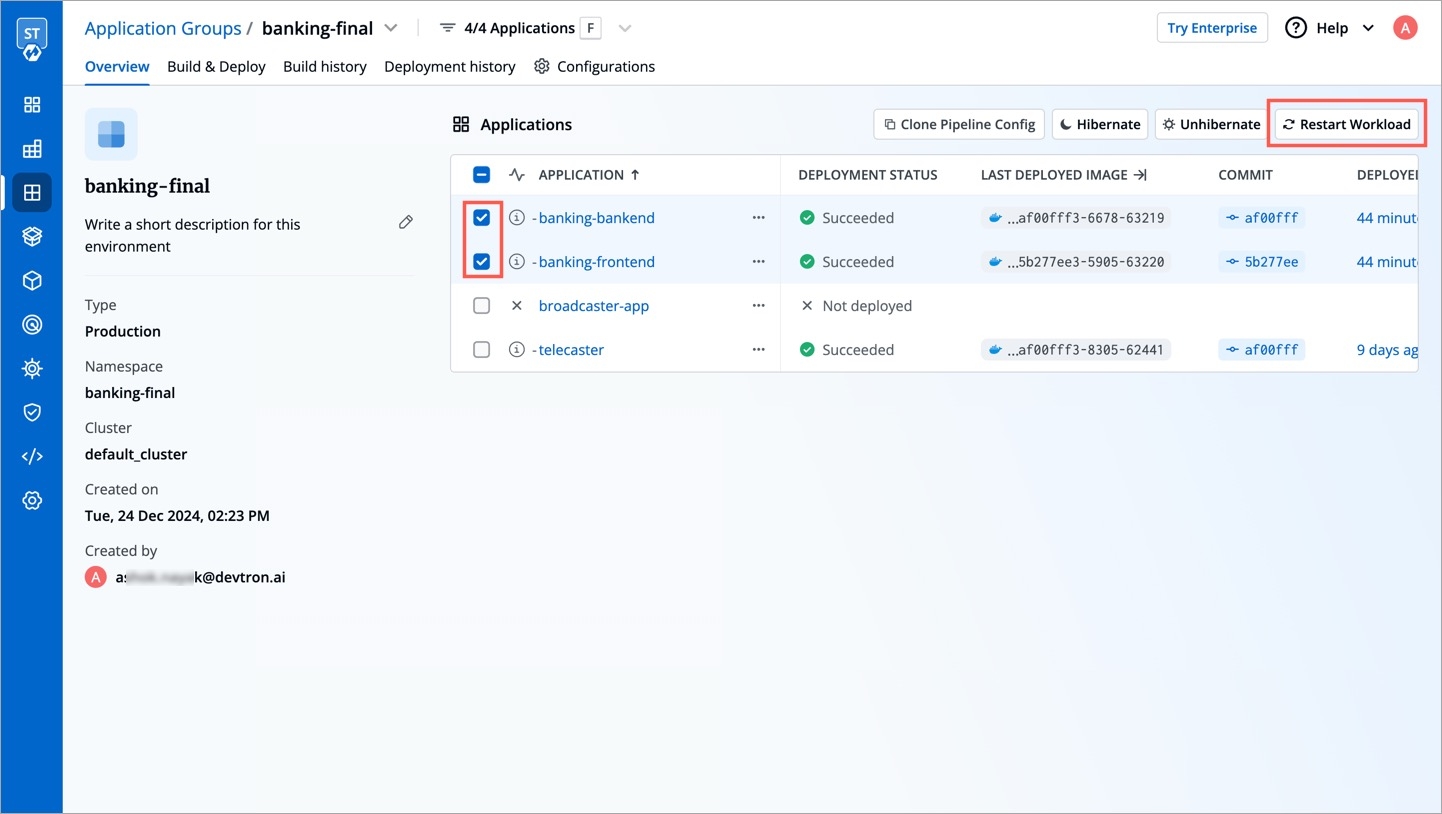
Figure 39: Selecting Apps to Restart Next to the application, click the workload dropdown to view all the individual workloads of an application. Choose only the ones you wish to restart.
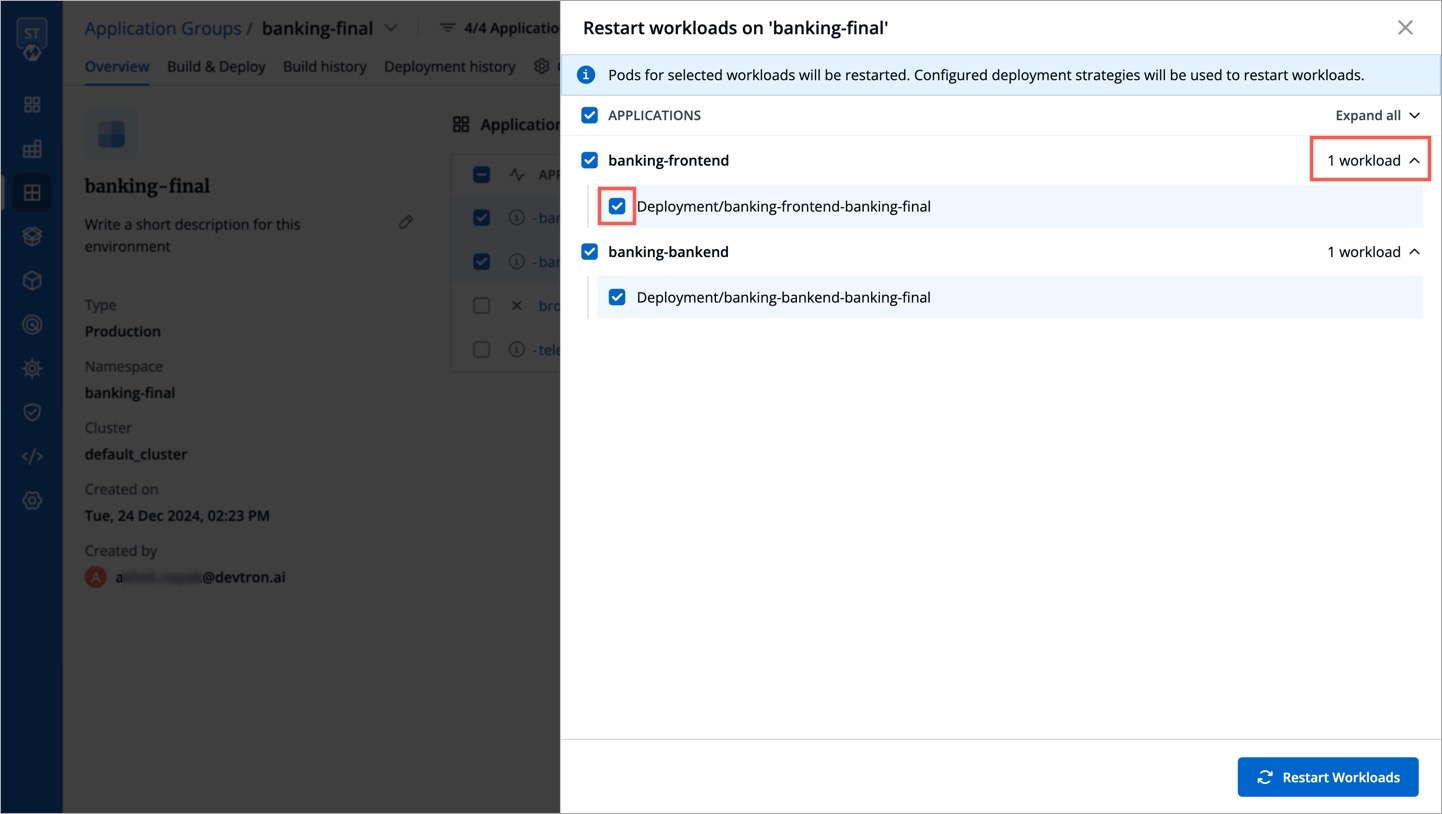
Figure 40: Choosing Workloads Moreover, you can easily select, deselect, or choose multiple workloads as shown below.
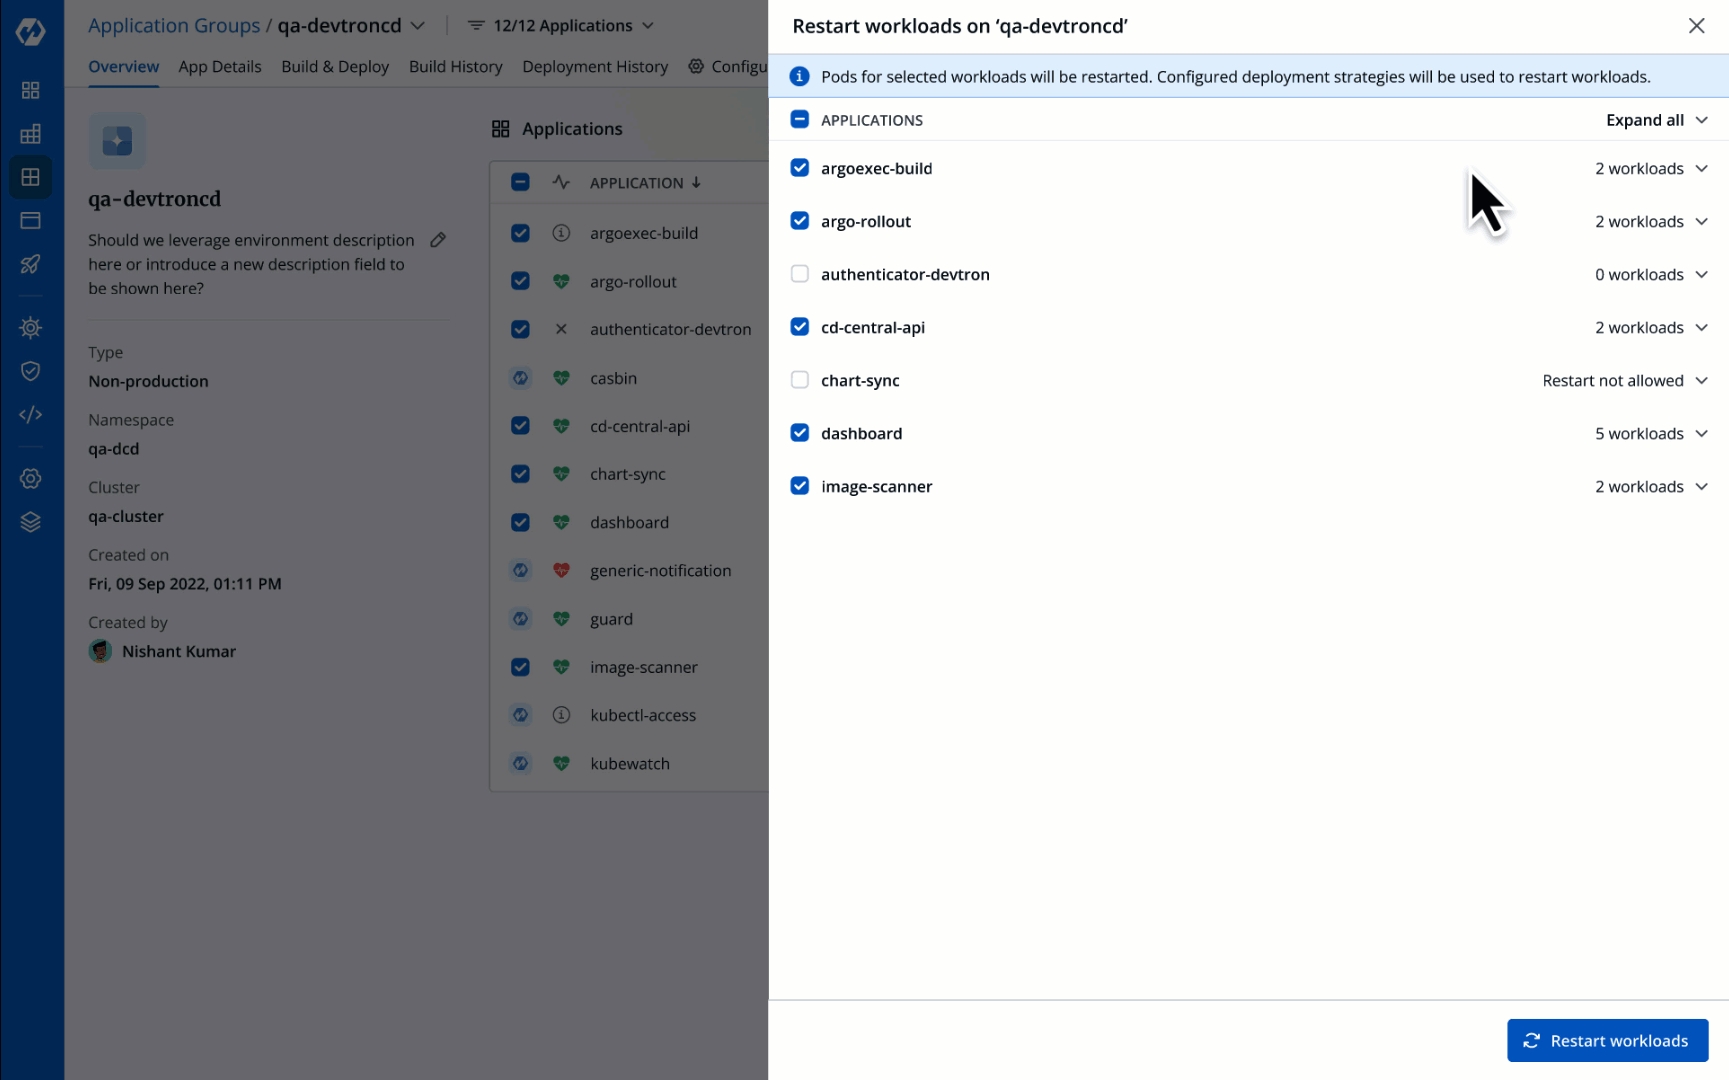
Figure 41: Selecting and Unselecting Workloads Click Restart Workloads.
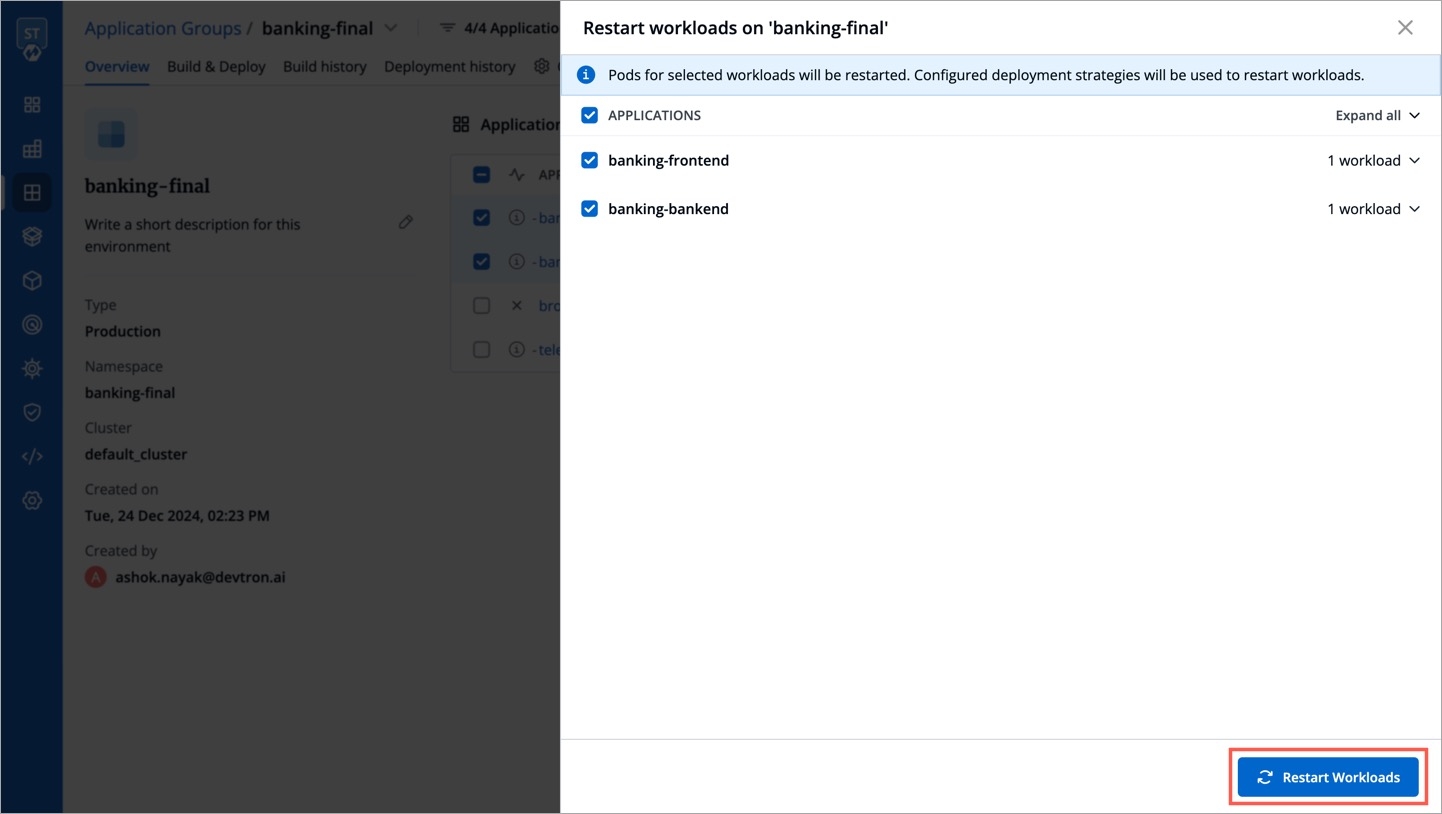
Figure 42: Restarting Workloads
Restarting workloads might take time depending on the number of applications.
Filtering Applications
Assume you have multiple applications (maybe 10, 50, 100, or more) showing up in an application group. If you want to limit your operations (build/deploy/other) to a specific set of applications, the filter feature will help you narrow down the list. Thus, you will see only those applications you select from the filter (be it on the Overview page, Build & Deploy page, and so on.)
Click the filter next to the application group as shown below.
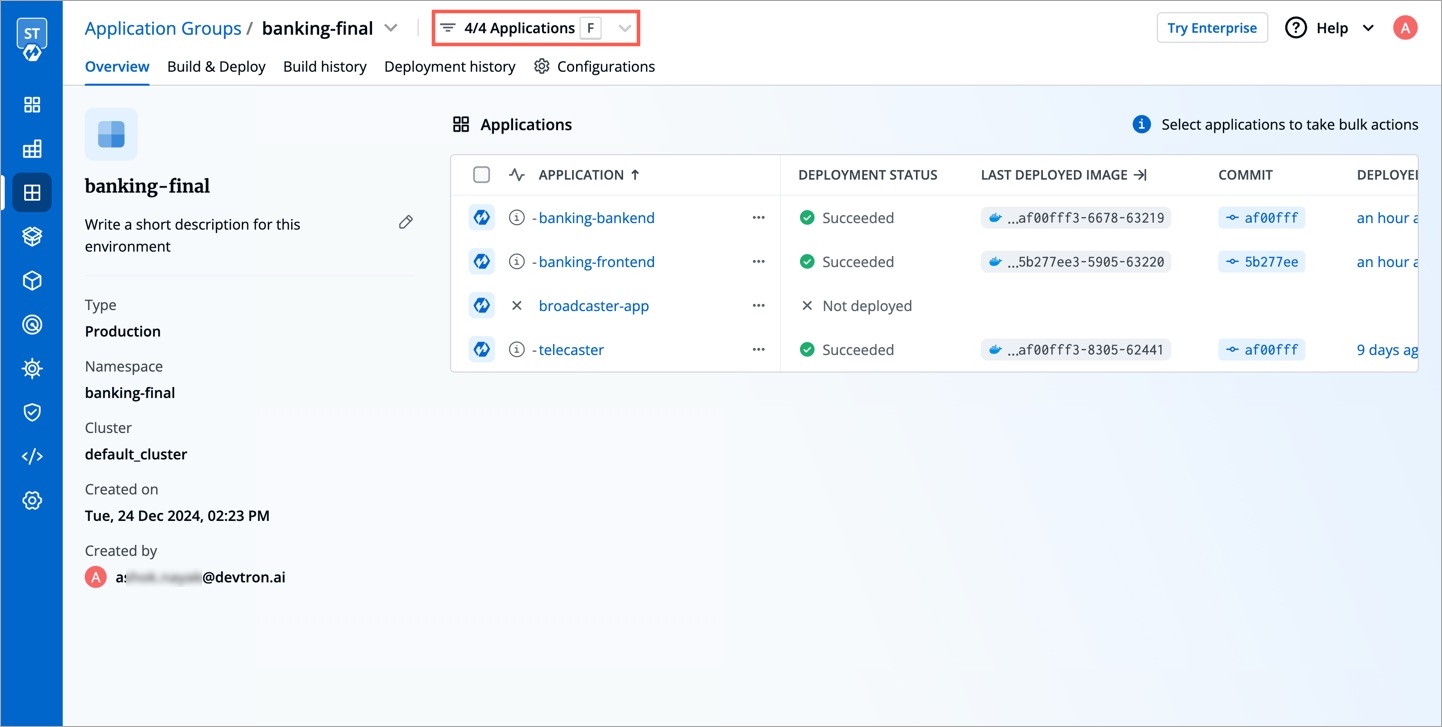
Figure 43: Filter Option The filter will show all the applications present in the group. Click to select the relevant ones.

Figure 44: All Apps The filter narrows down the list of applications as shown below.
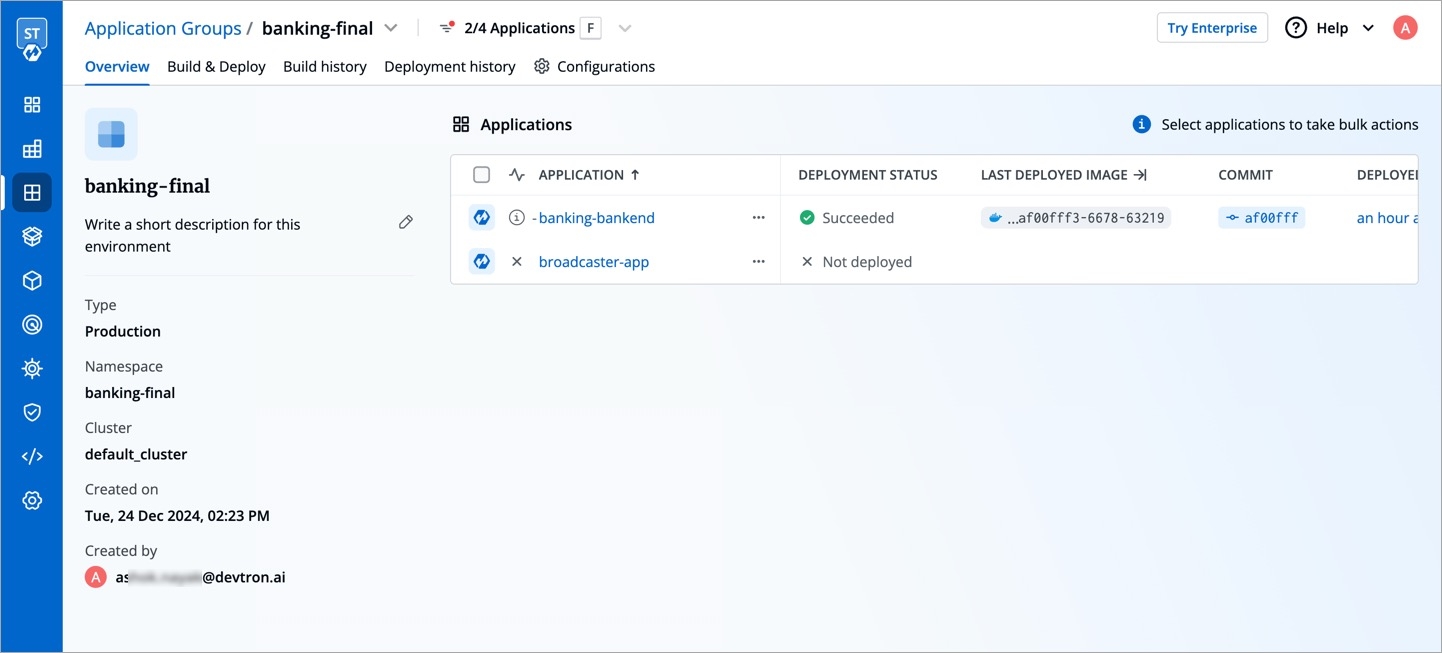
Figure 45: Filtered Apps (Optional) If required, you can save the filter for future use by clicking Save selection as filter.
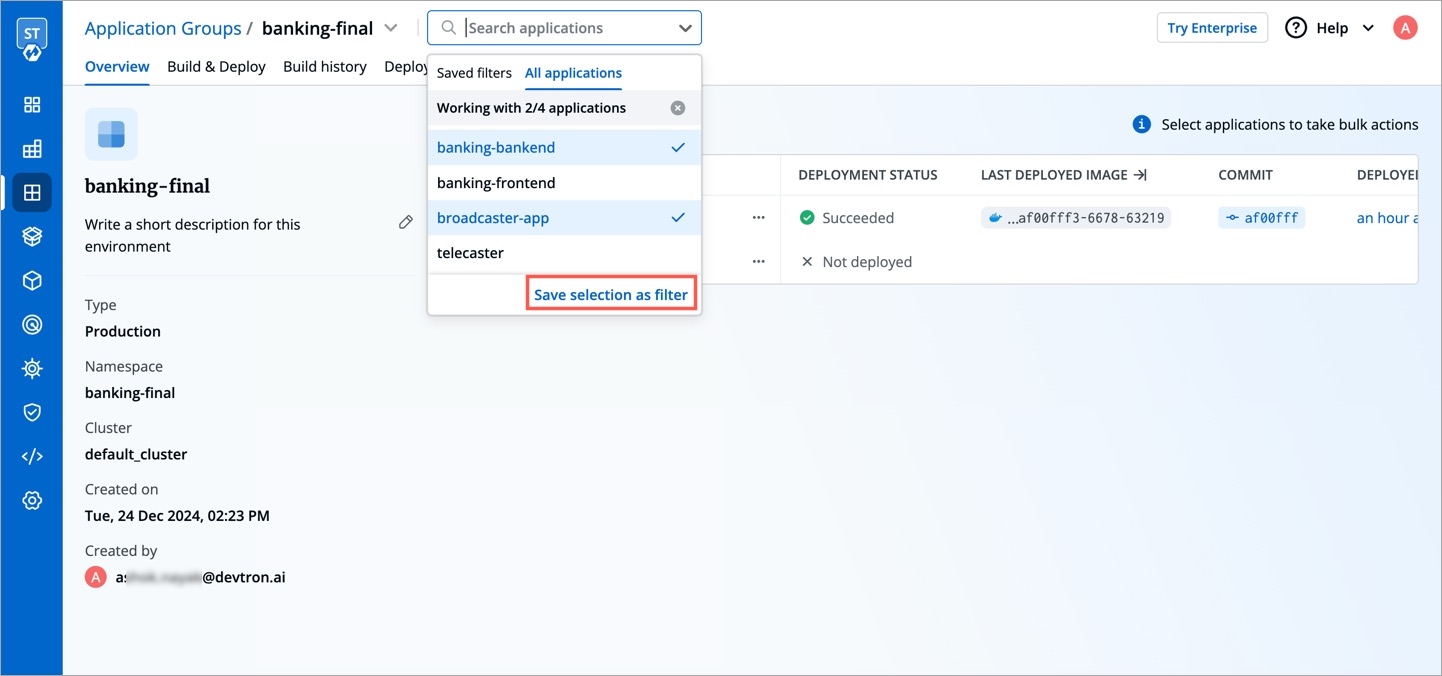
Figure 46: Saving a Filter Add a name and description to the filter to help you know its purpose, and click Save.
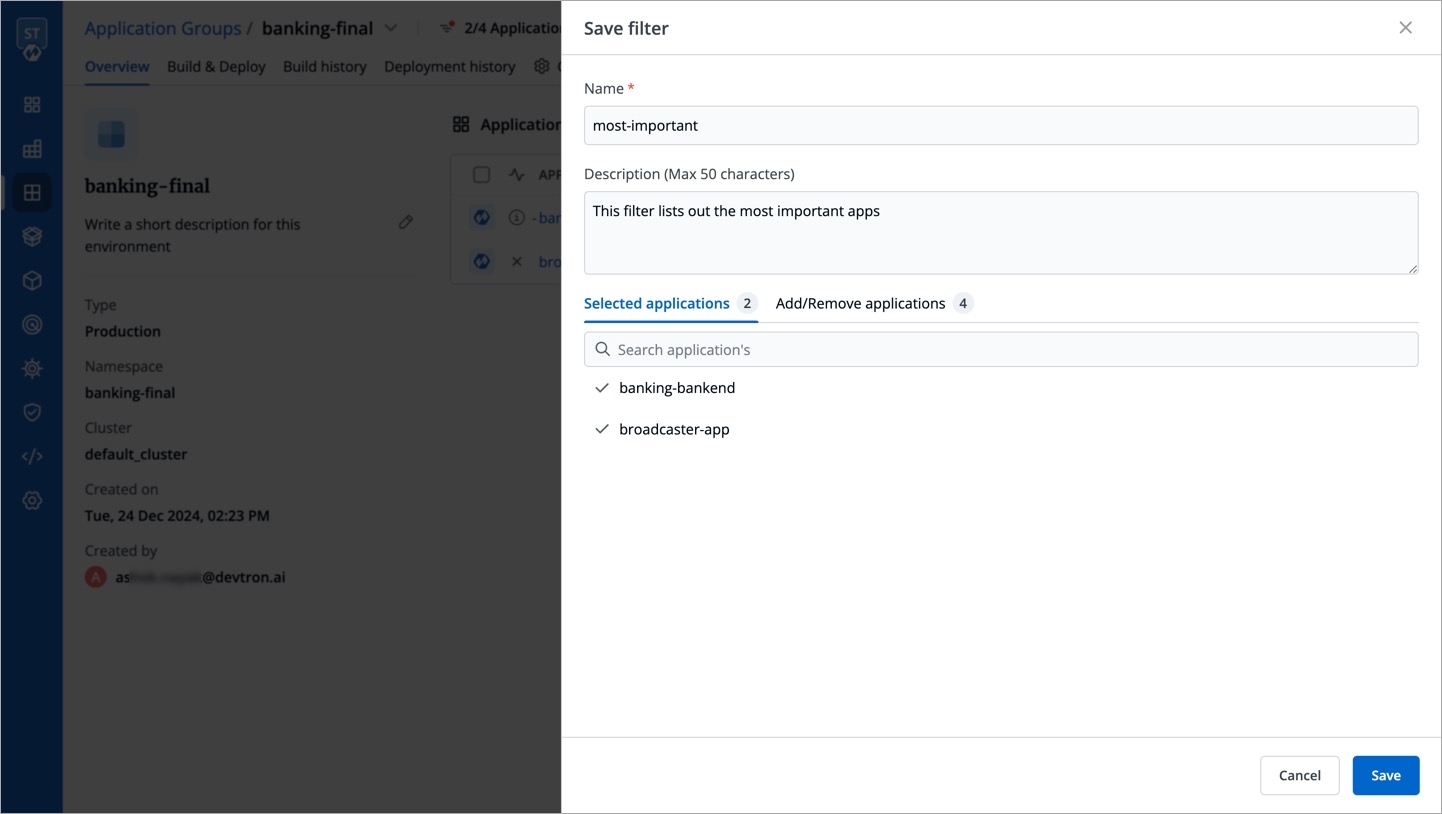
Figure 47: Naming a Filter
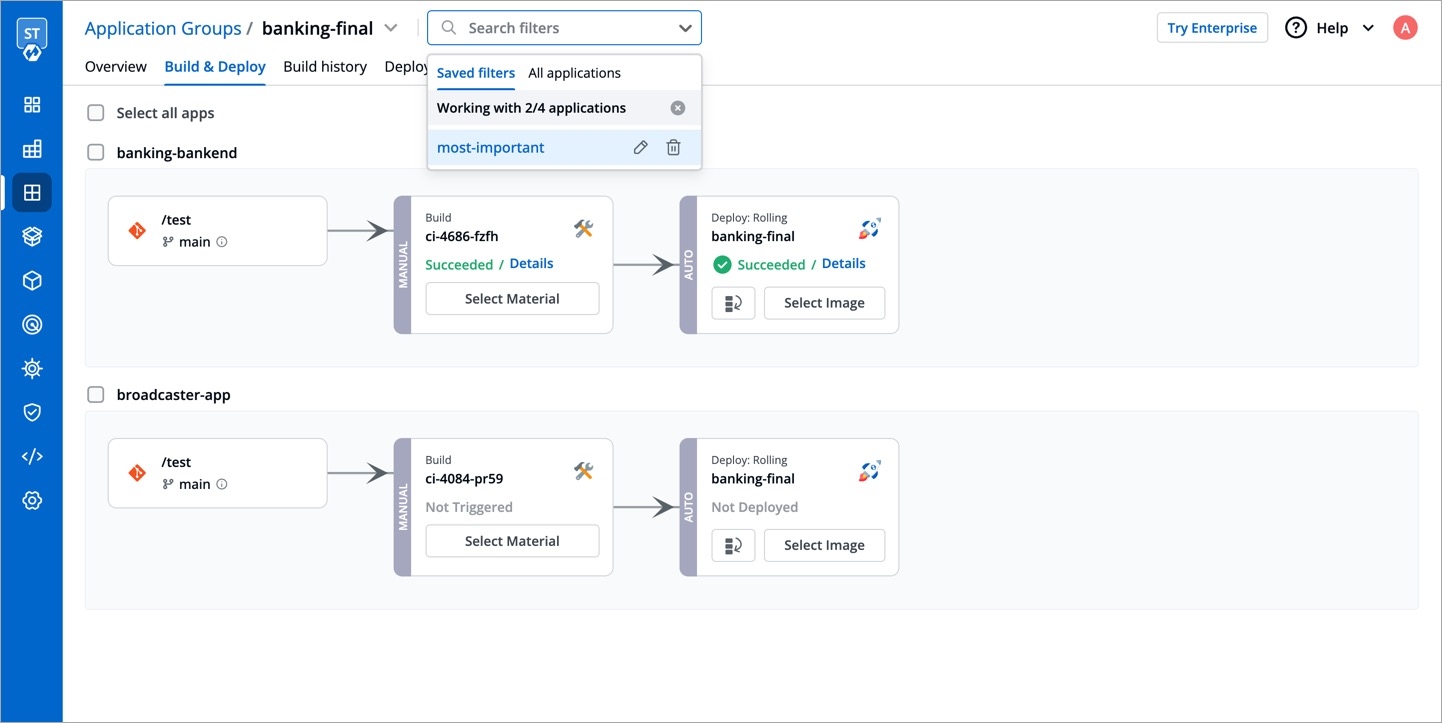
Now when you access the application group, your saved filter will be visible on top.
Permissions
1. Creating a filter
Users can create a filter if they have Admin/Manager access on all selected applications.
Case 1: User has Admin/Manager access on all selected applications
User will be able to create a filter with all selected applications.
Case 2: User does not have Admin/Manager access on all selected applications
User will not be able to create a filter.
Case 3: User selected 4 applications but has Admin/Manager access for only 2 of them
User should be able to create filter with these 2 applications.
2. Editing a saved filter
Users can edit a saved filter if they have Admin/Manager access on all applications in the saved filter.
3. Deleting a saved filter
Users can delete a saved filter if they have Admin/Manager access on all applications in the saved filter.
Changing Branch
Who Can Perform This Action?
Users need to have Admin role or above (along with access to the environment and applications) to update their branch.
Assume you have a few applications whose build pipelines fetch from the main branch of your code repository. However, you decided to maintain a master branch, and you want all the upcoming CI builds to consider the master branch as the source. Devtron provides you the option to change the branch at both levels—individual application as well as application group.
In the Build & Deploy tab of your application group, select the intended applications and click the Change Branch button present at the bottom.
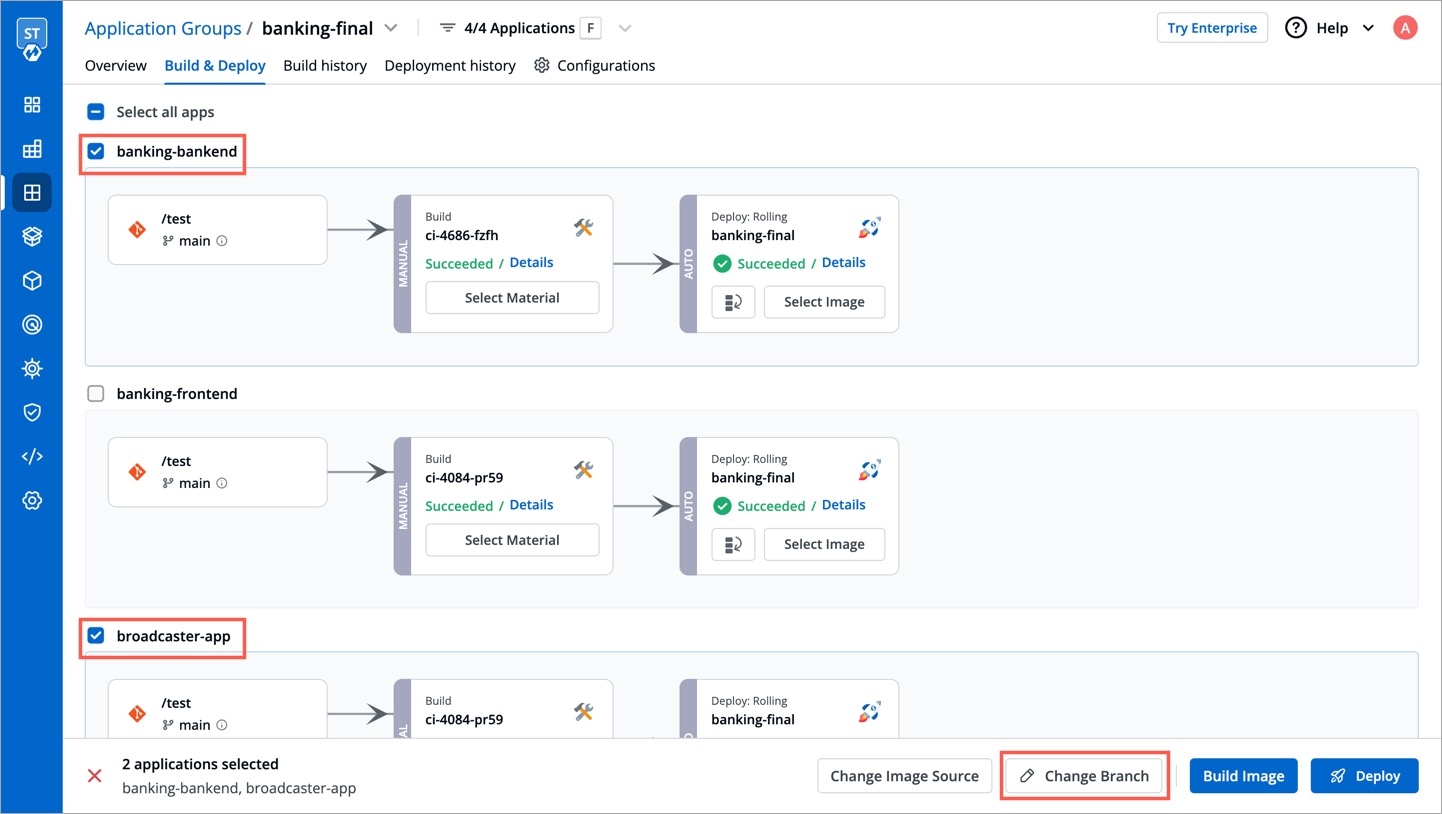
Figure 49: Changing Branch Enter the new branch name. If your build pipeline has
Branch Regexas the Source Type, you must ensure your new branch name matches the regex (regular expression) provided in that build pipeline. Once done, click Update Branch.
Figure 50: Updating Branch Name
Last updated
Was this helpful?