

GitOps Configuration
The 'GitOps Configuration' page appears only if the super-admin has enabled 'Allow changing git repository for application' in Global Configurations → GitOps.
Introduction
This configuration is an extension of the GitOps settings present in Global Configurations of Devtron. Therefore, make sure you read it before making any changes to your app configuration.
The application-level GitOps configuration offers the flexibility to add a custom Git repo (as opposed to Devtron auto-creating a repo for your application).
Adding Custom Git Repo for GitOps
Who Can Perform This Action?
Users need to have Admin permission or above (along with access to the environment and application) to configure user-defined Git repo.
For Devtron Apps
Go to Applications → Devtron Apps (tab) → (choose your app) → App Configuration (tab) → GitOps Configuration.
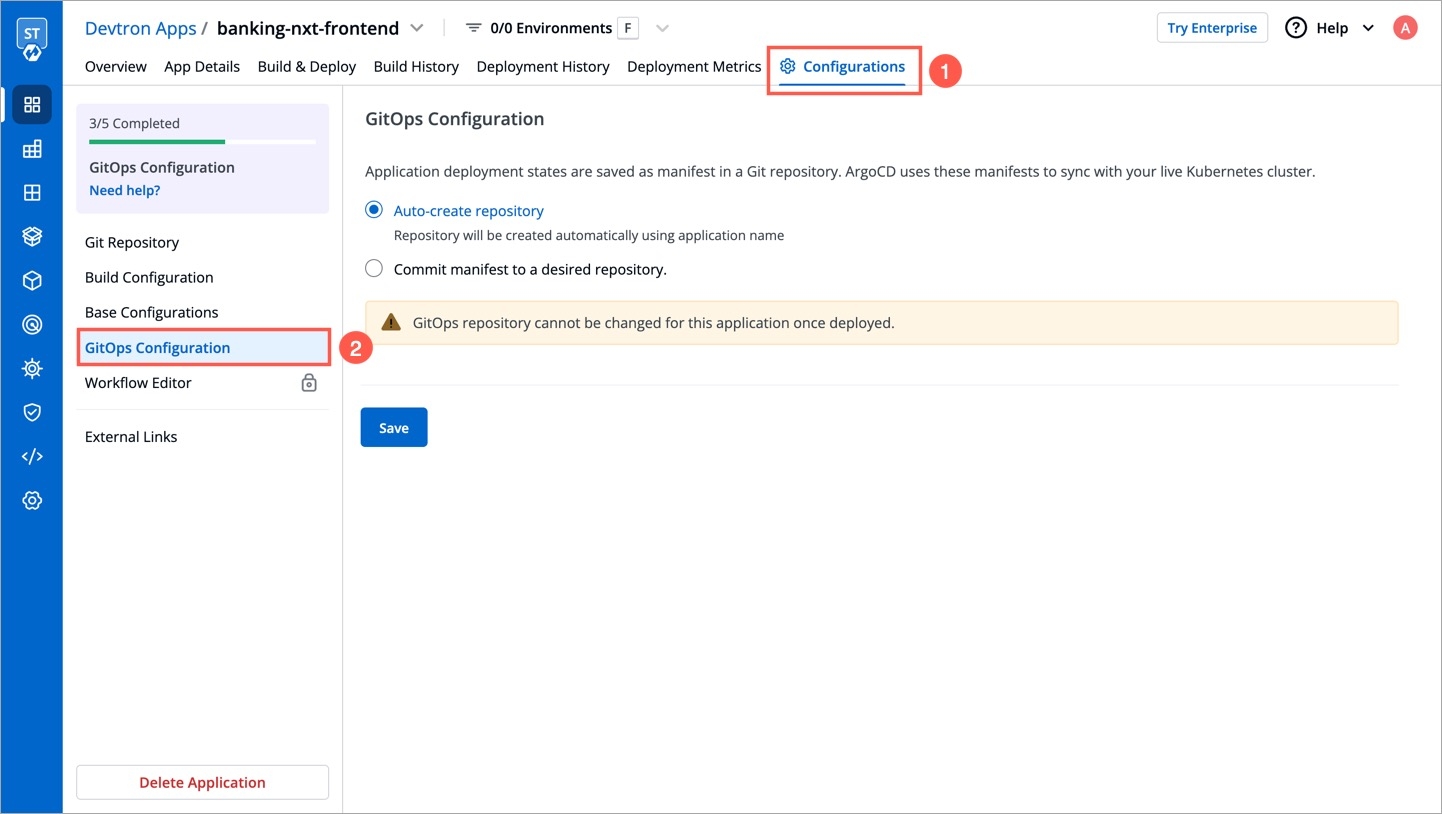
Figure 1: App-level GitOps Config Assuming a GitOps repo was not added to your application earlier, you get 2 options:
Auto-create repository - Select this option if you wish to proceed with the default behavior. It will create a repository automatically, named after your application with a prefix. Thus saving you the trouble of creating one manually.
Commit manifests to a desired repository - Select this option if you wish to add a custom repo that is already created with your Git provider. Enter its link in the
Git Repo URLfield.
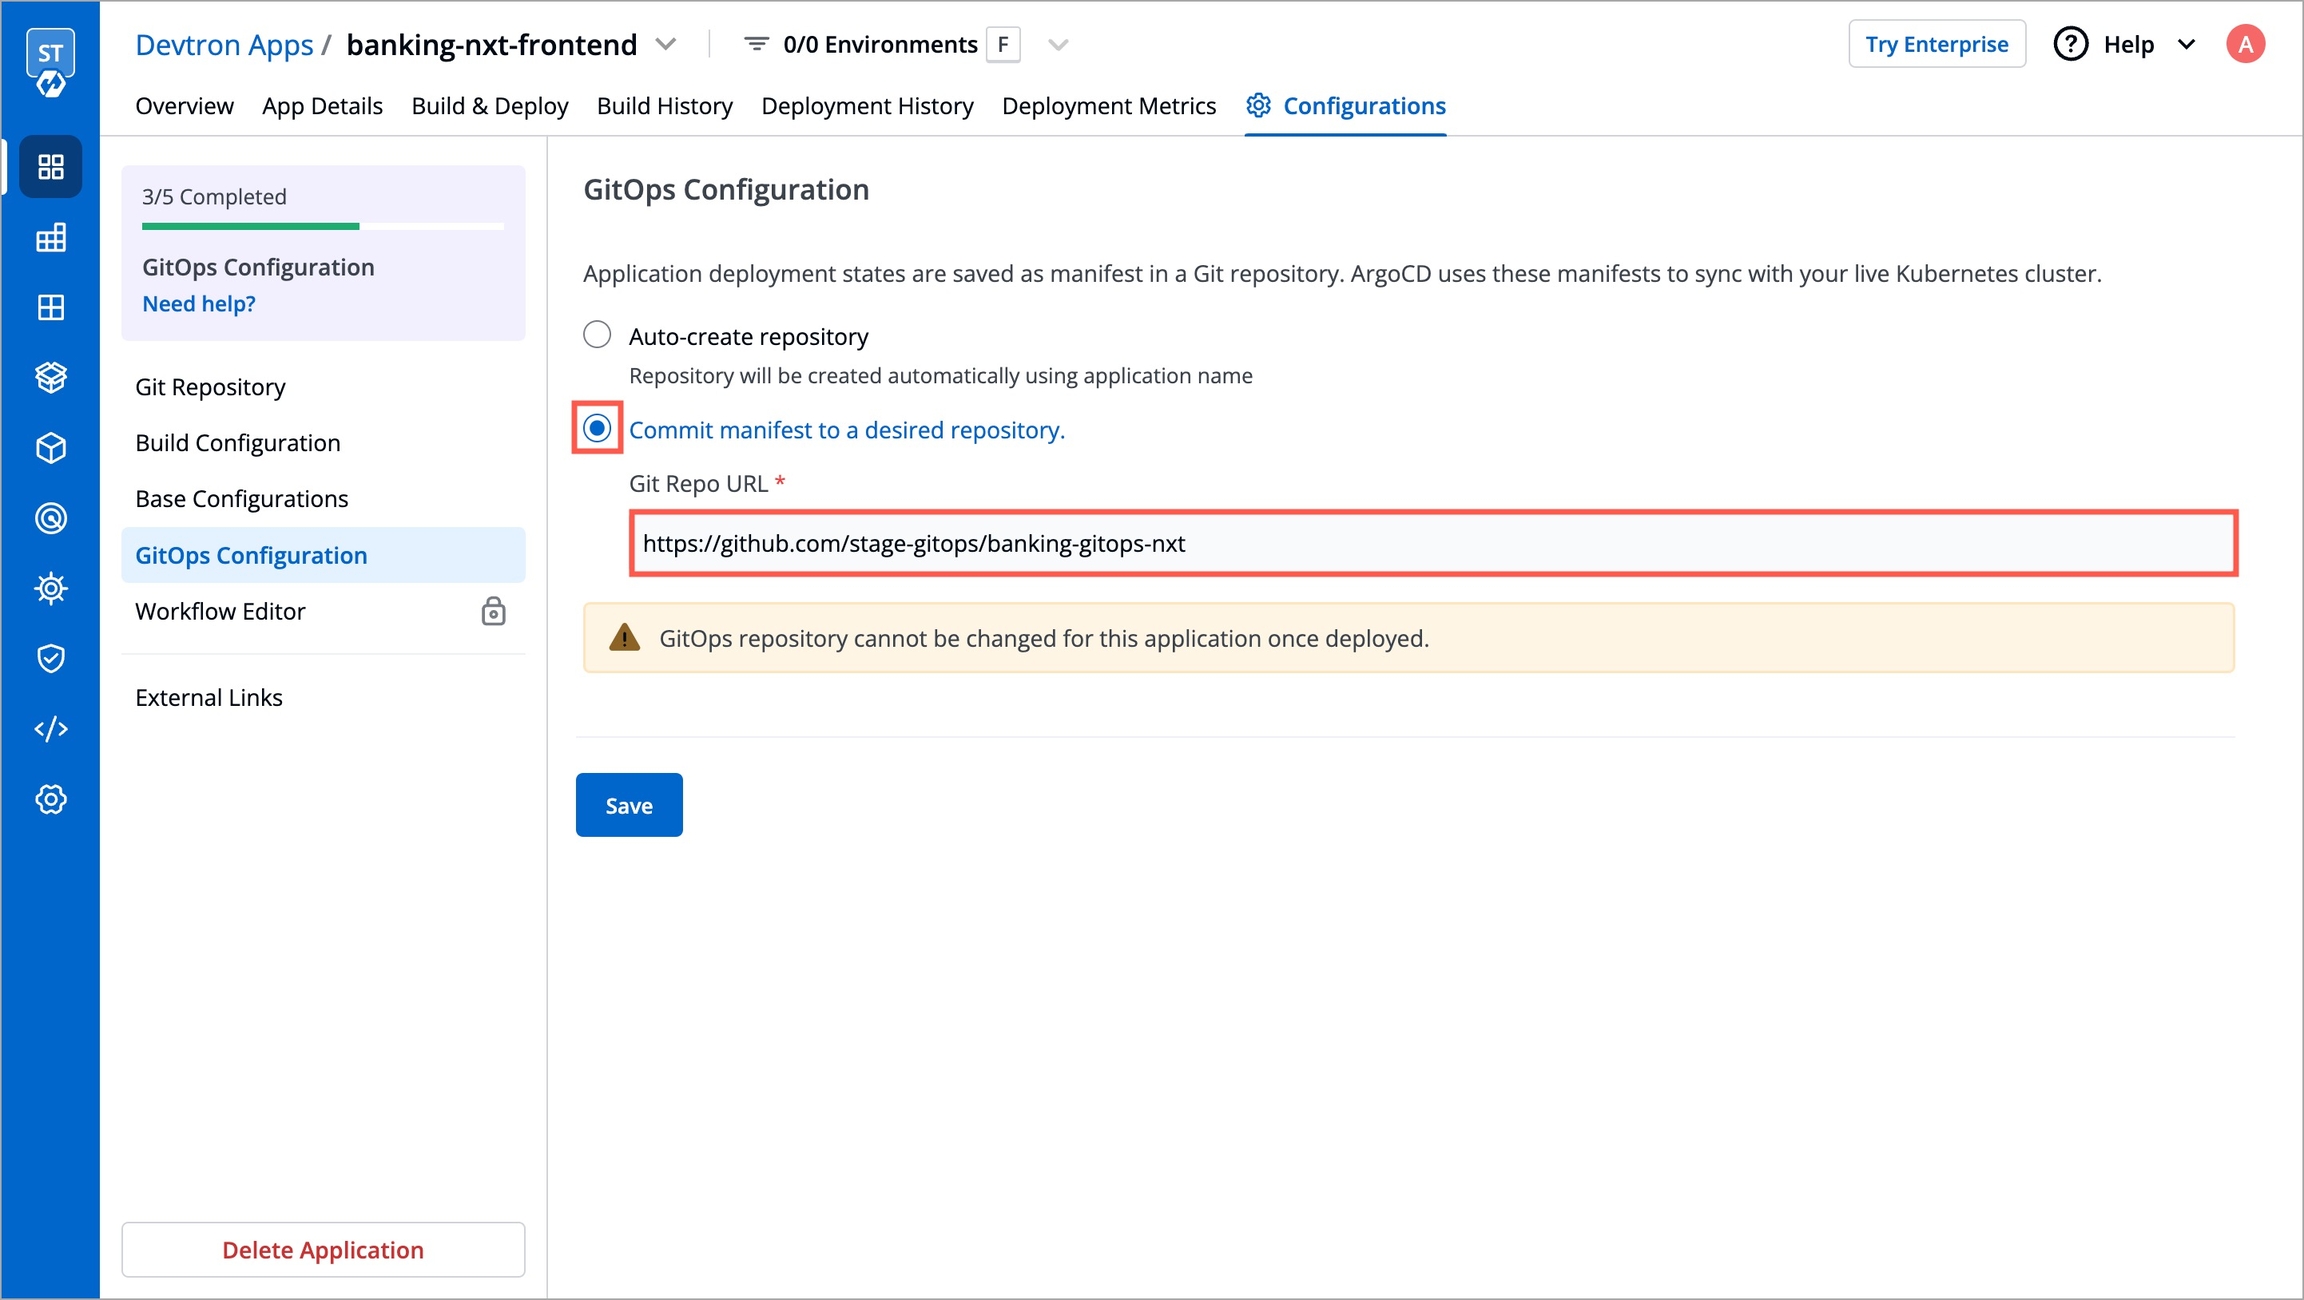
Figure 2: Repo Creation
GitOps repositories, whether auto-created by Devtron or added manually, are immutable. This means they cannot be modified after creation. The same is true if you have an existing CD pipeline that uses/used GitOps for deployment.
Click Save.
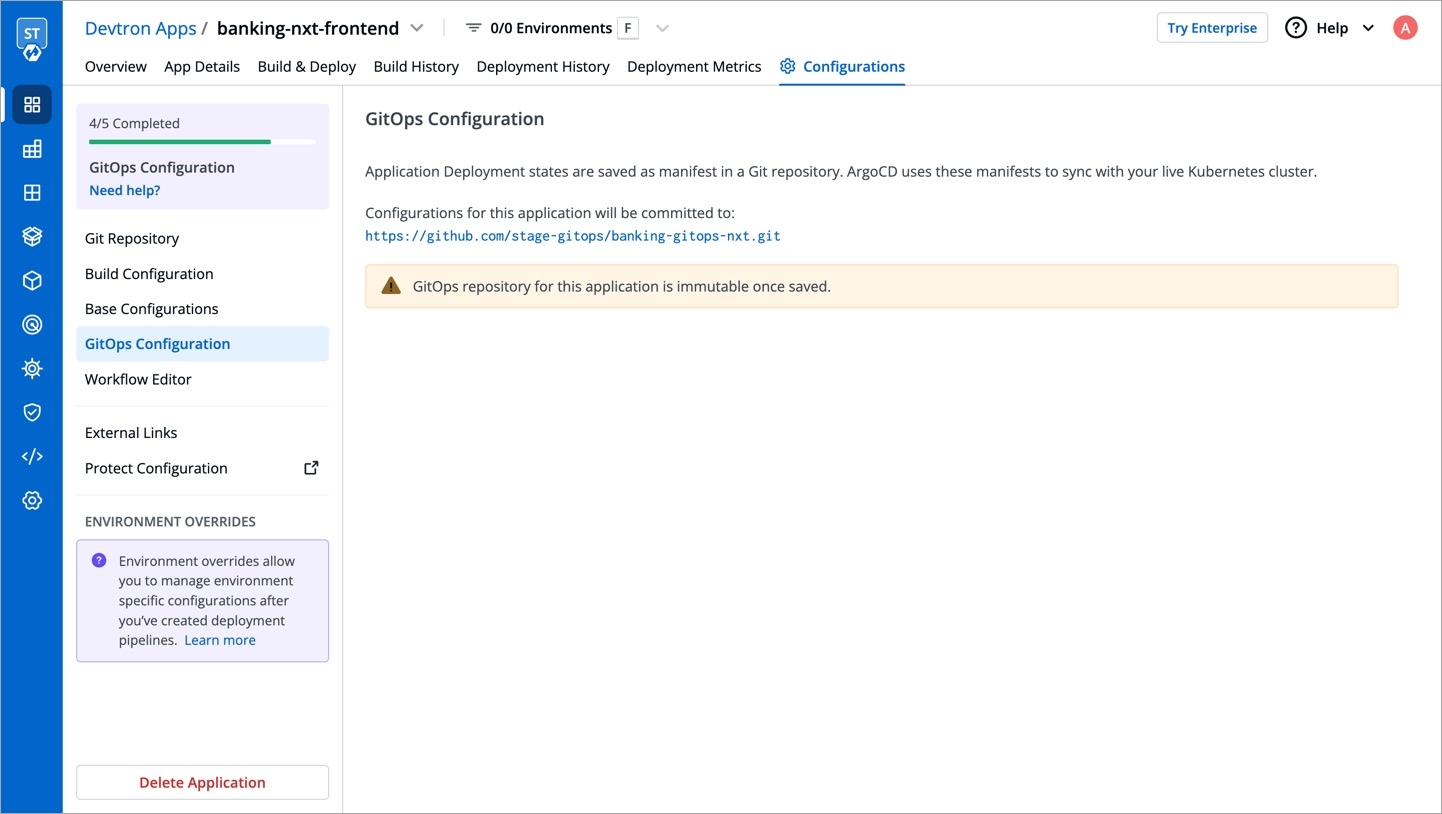
Figure 3: Saved GitOps Config
Note: In case you skipped the GitOps configuration for your application and proceeded towards the creation of a new CD pipeline (that uses GitOps), you will be prompted to configure GitOps as shown below:

For Helm Apps
You can deploy a helm chart using either Helm or GitOps. Let's assume you wish to deploy airflow chart.
Select the helm chart from the Chart Store.
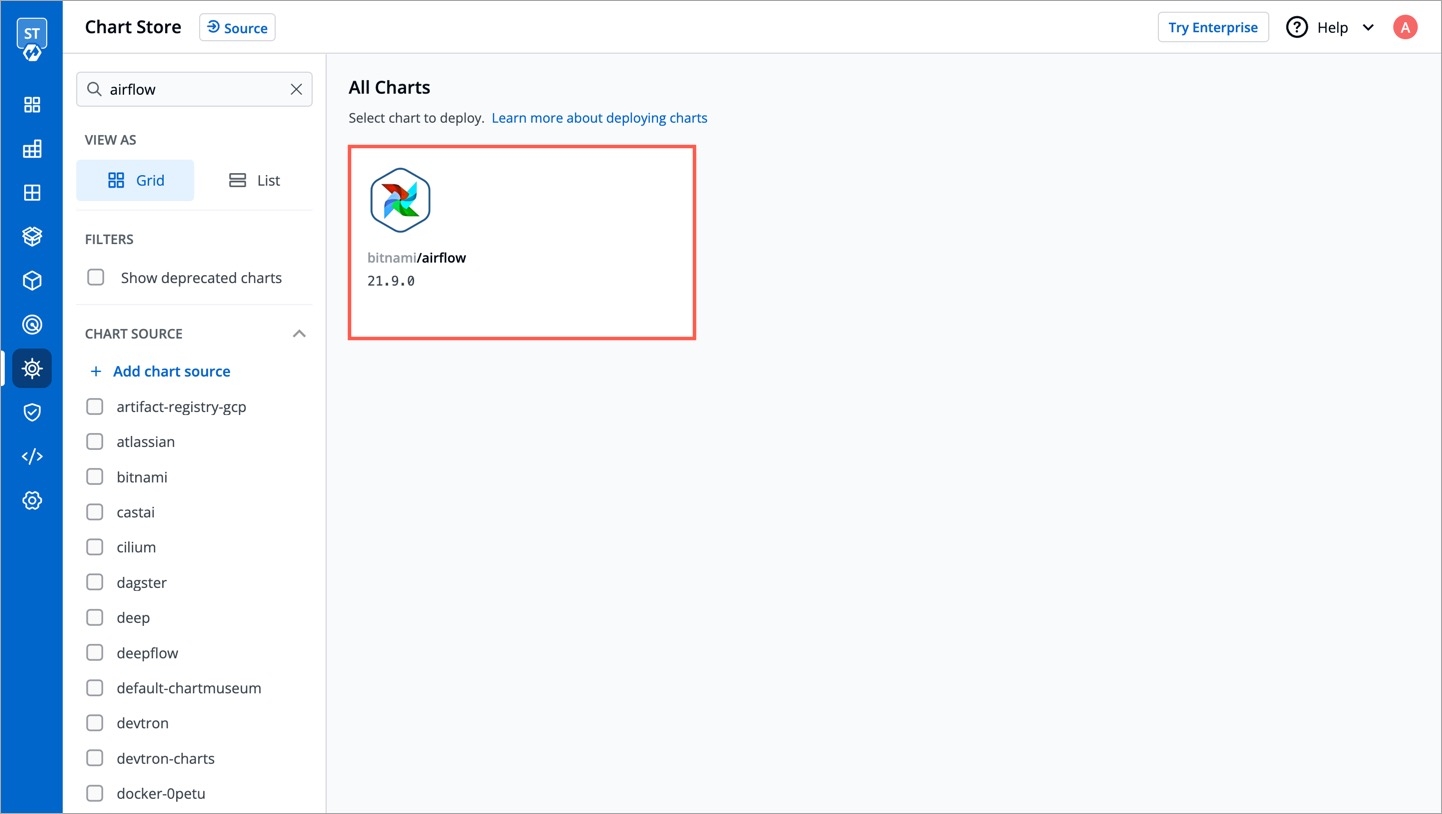
Figure 5: Choosing a Helm Chart Click Configure & Deploy.
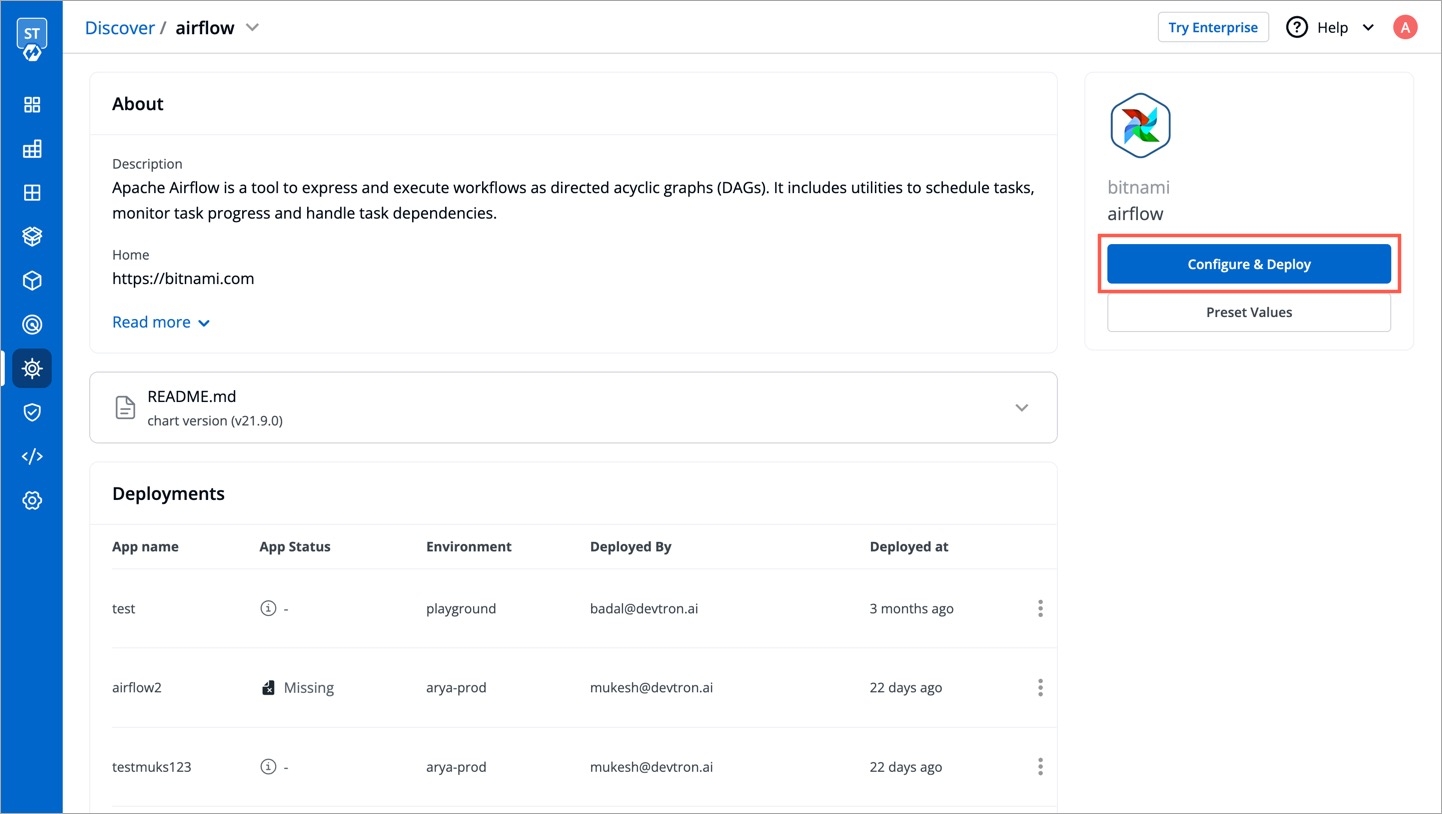
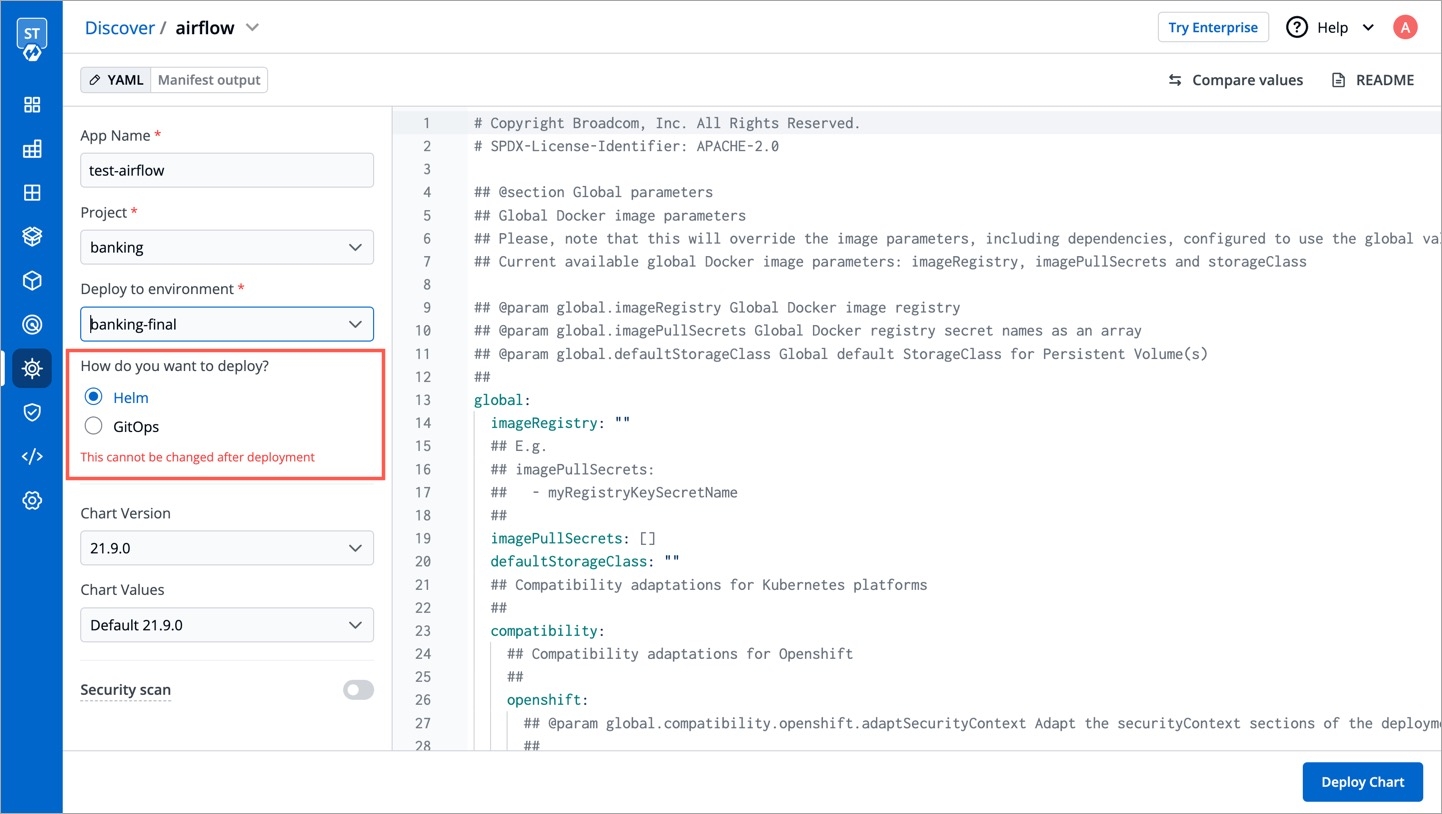
Figure 6: Configure & Deploy Button After you enter the
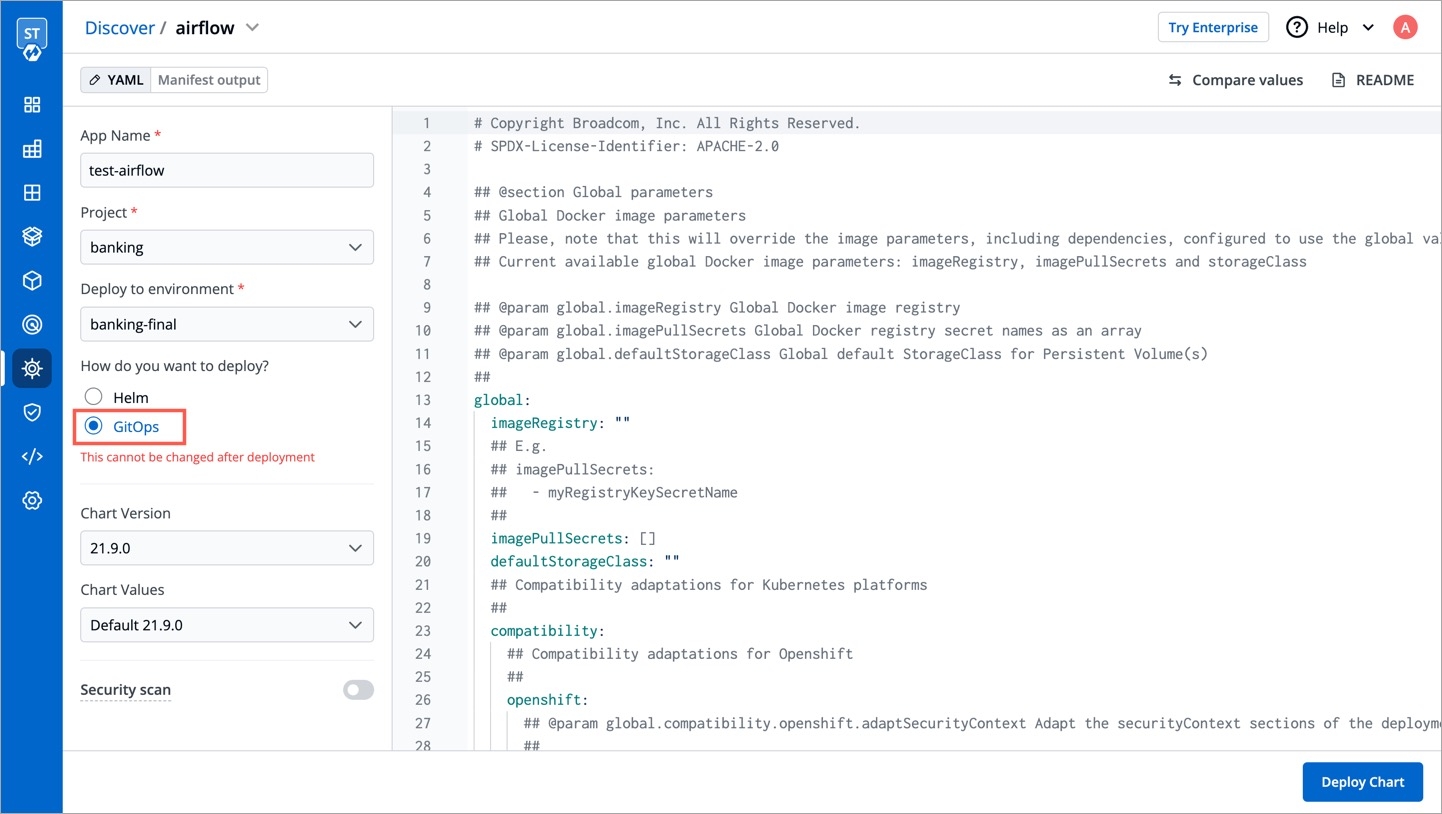
App Name,Project, andEnvironment; an option to choose the deployment approach (i.e., Helm or GitOps) would appear. Select GitOps.
The option to choose between 'Helm' or 'GitOps' is only available in 
A modal window will appear for you to enter a Git repository. Just like Devtron Apps (step 2), you get two options:
Auto-create repository
Commit manifests to a desired repository
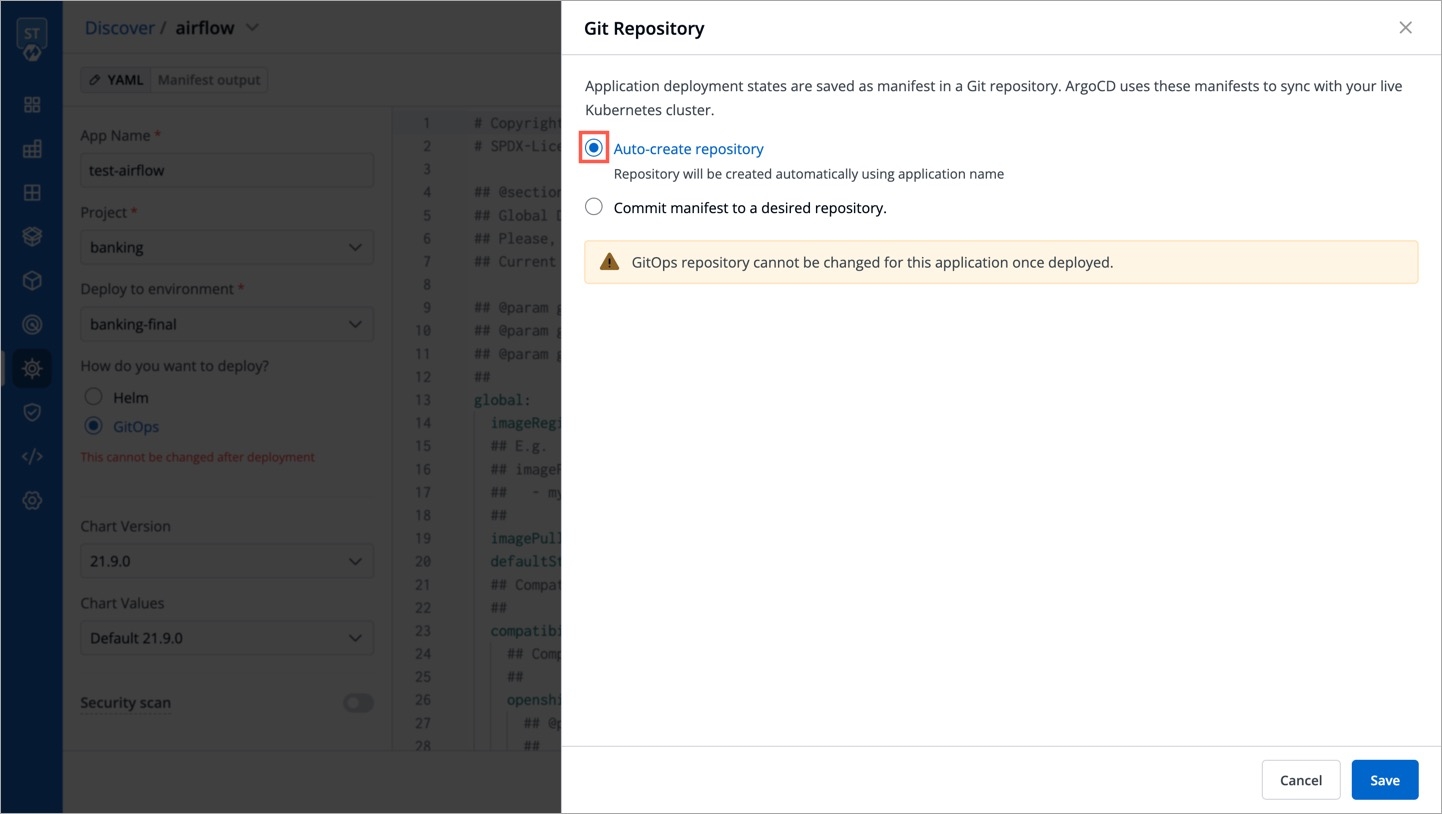
Figure 8: Adding a Repo Enter your custom Git Repo URL, and click Save.
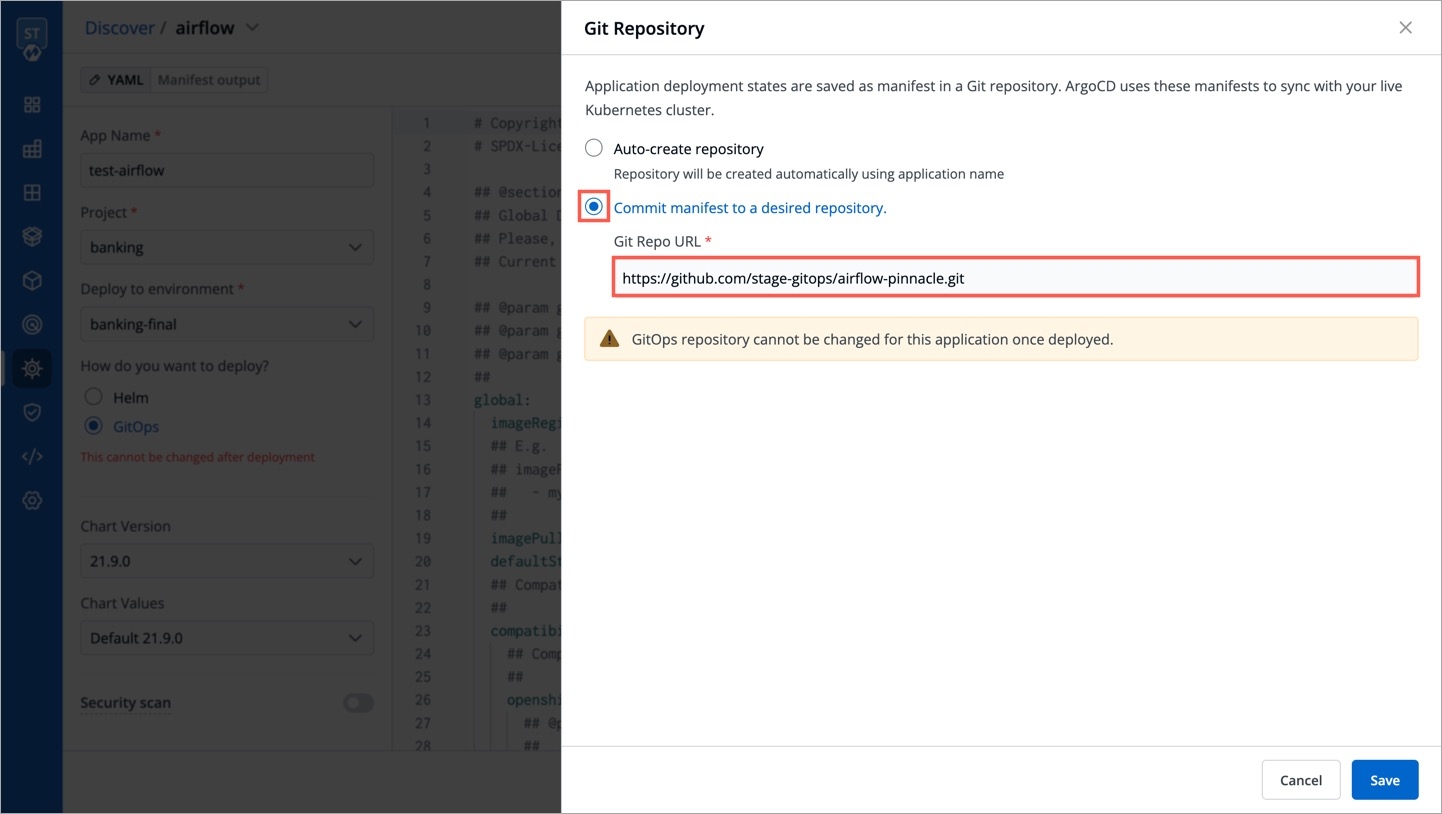
Figure 9: Saved GitOps Config for Helm App
Next, you may proceed to deploy the chart.
Once you deploy a helm app with GitOps, you cannot change its GitOps repo.
Last updated
Was this helpful?