

Resource Recommender
Introduction 
Resource Recommender is a Devtron feature that analyzes the history of resource usage (such as CPU and memory) for Kubernetes workloads in a specific cluster and generates data-backed recommendations for optimal resource allocation.
These recommendations are generated by a background job that runs daily at a specific time by default, using resource usage metrics collected from Prometheus. Job frequency can be customized by modifying the configuration in the ConfigMap. Refer to Modify Resource Recommender Job Schedule to learn more.
It helps users eliminate manual guesswork, reduce over-provisioning, and prevent performance issues caused by under-provisioned workloads.
Prerequisites
Prometheus endpoint must be configured. Refer to the Cluster and Environments
Who Can Perform This Action?
To view recommendations, users need to have view permissions for the specific cluster.
To apply recommendations, users need to have admin permissions for the specific cluster.
Inspect Recommendations
To inspect the resource recommendations, follow the steps below:
Navigate to Resource Browser.
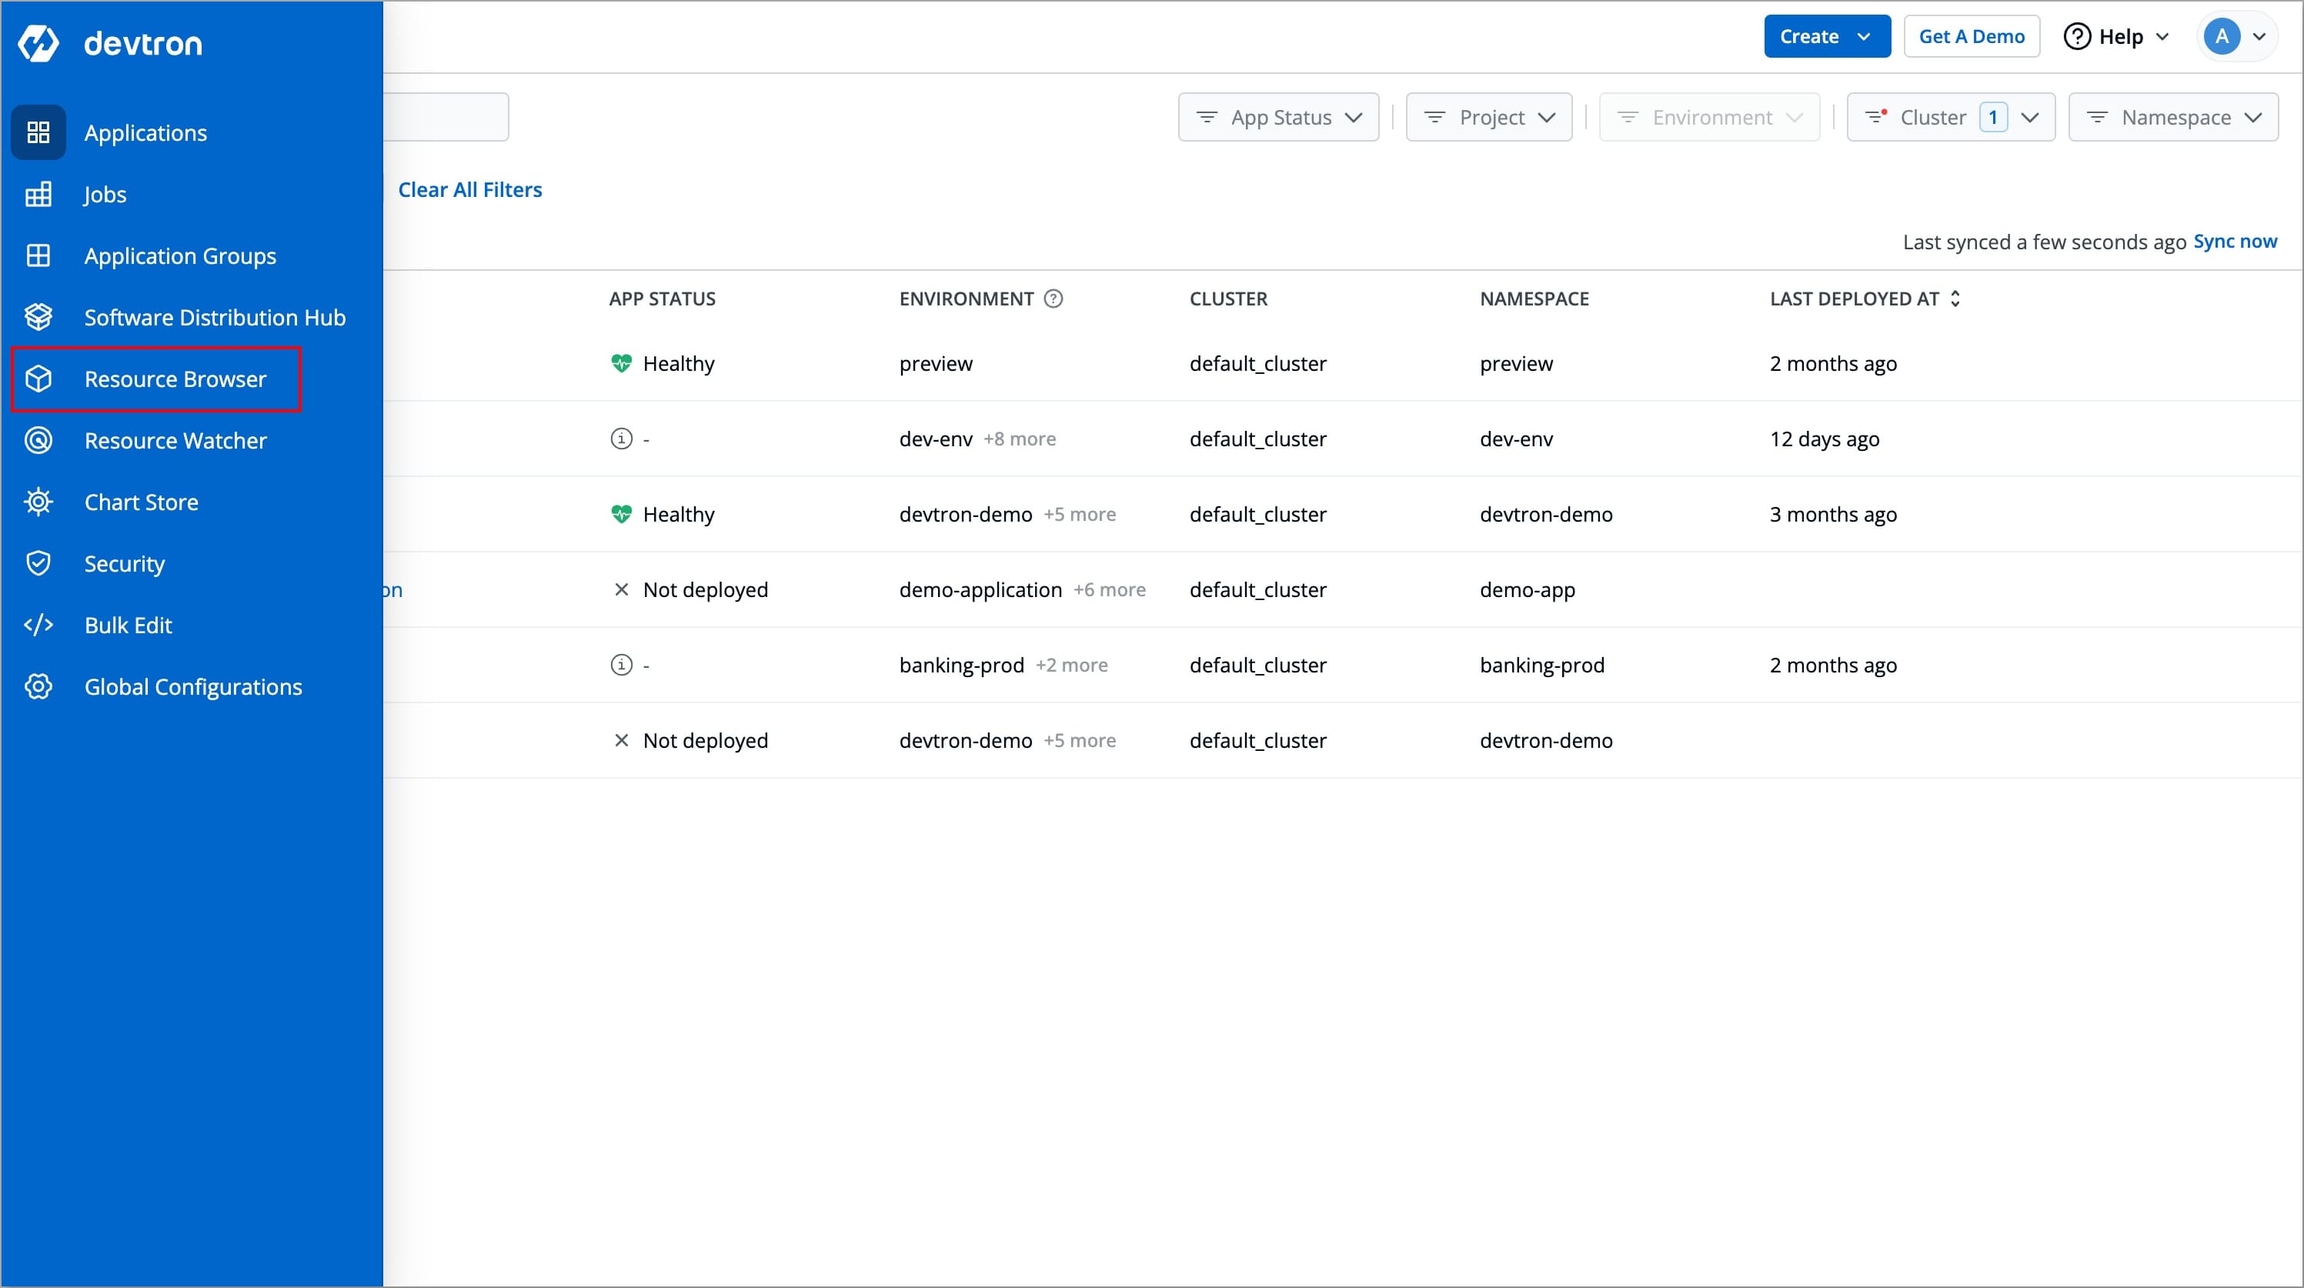
Figure 1: Navigating to Resource Browser Select the specific cluster for which you want to inspect the resource recommendations.
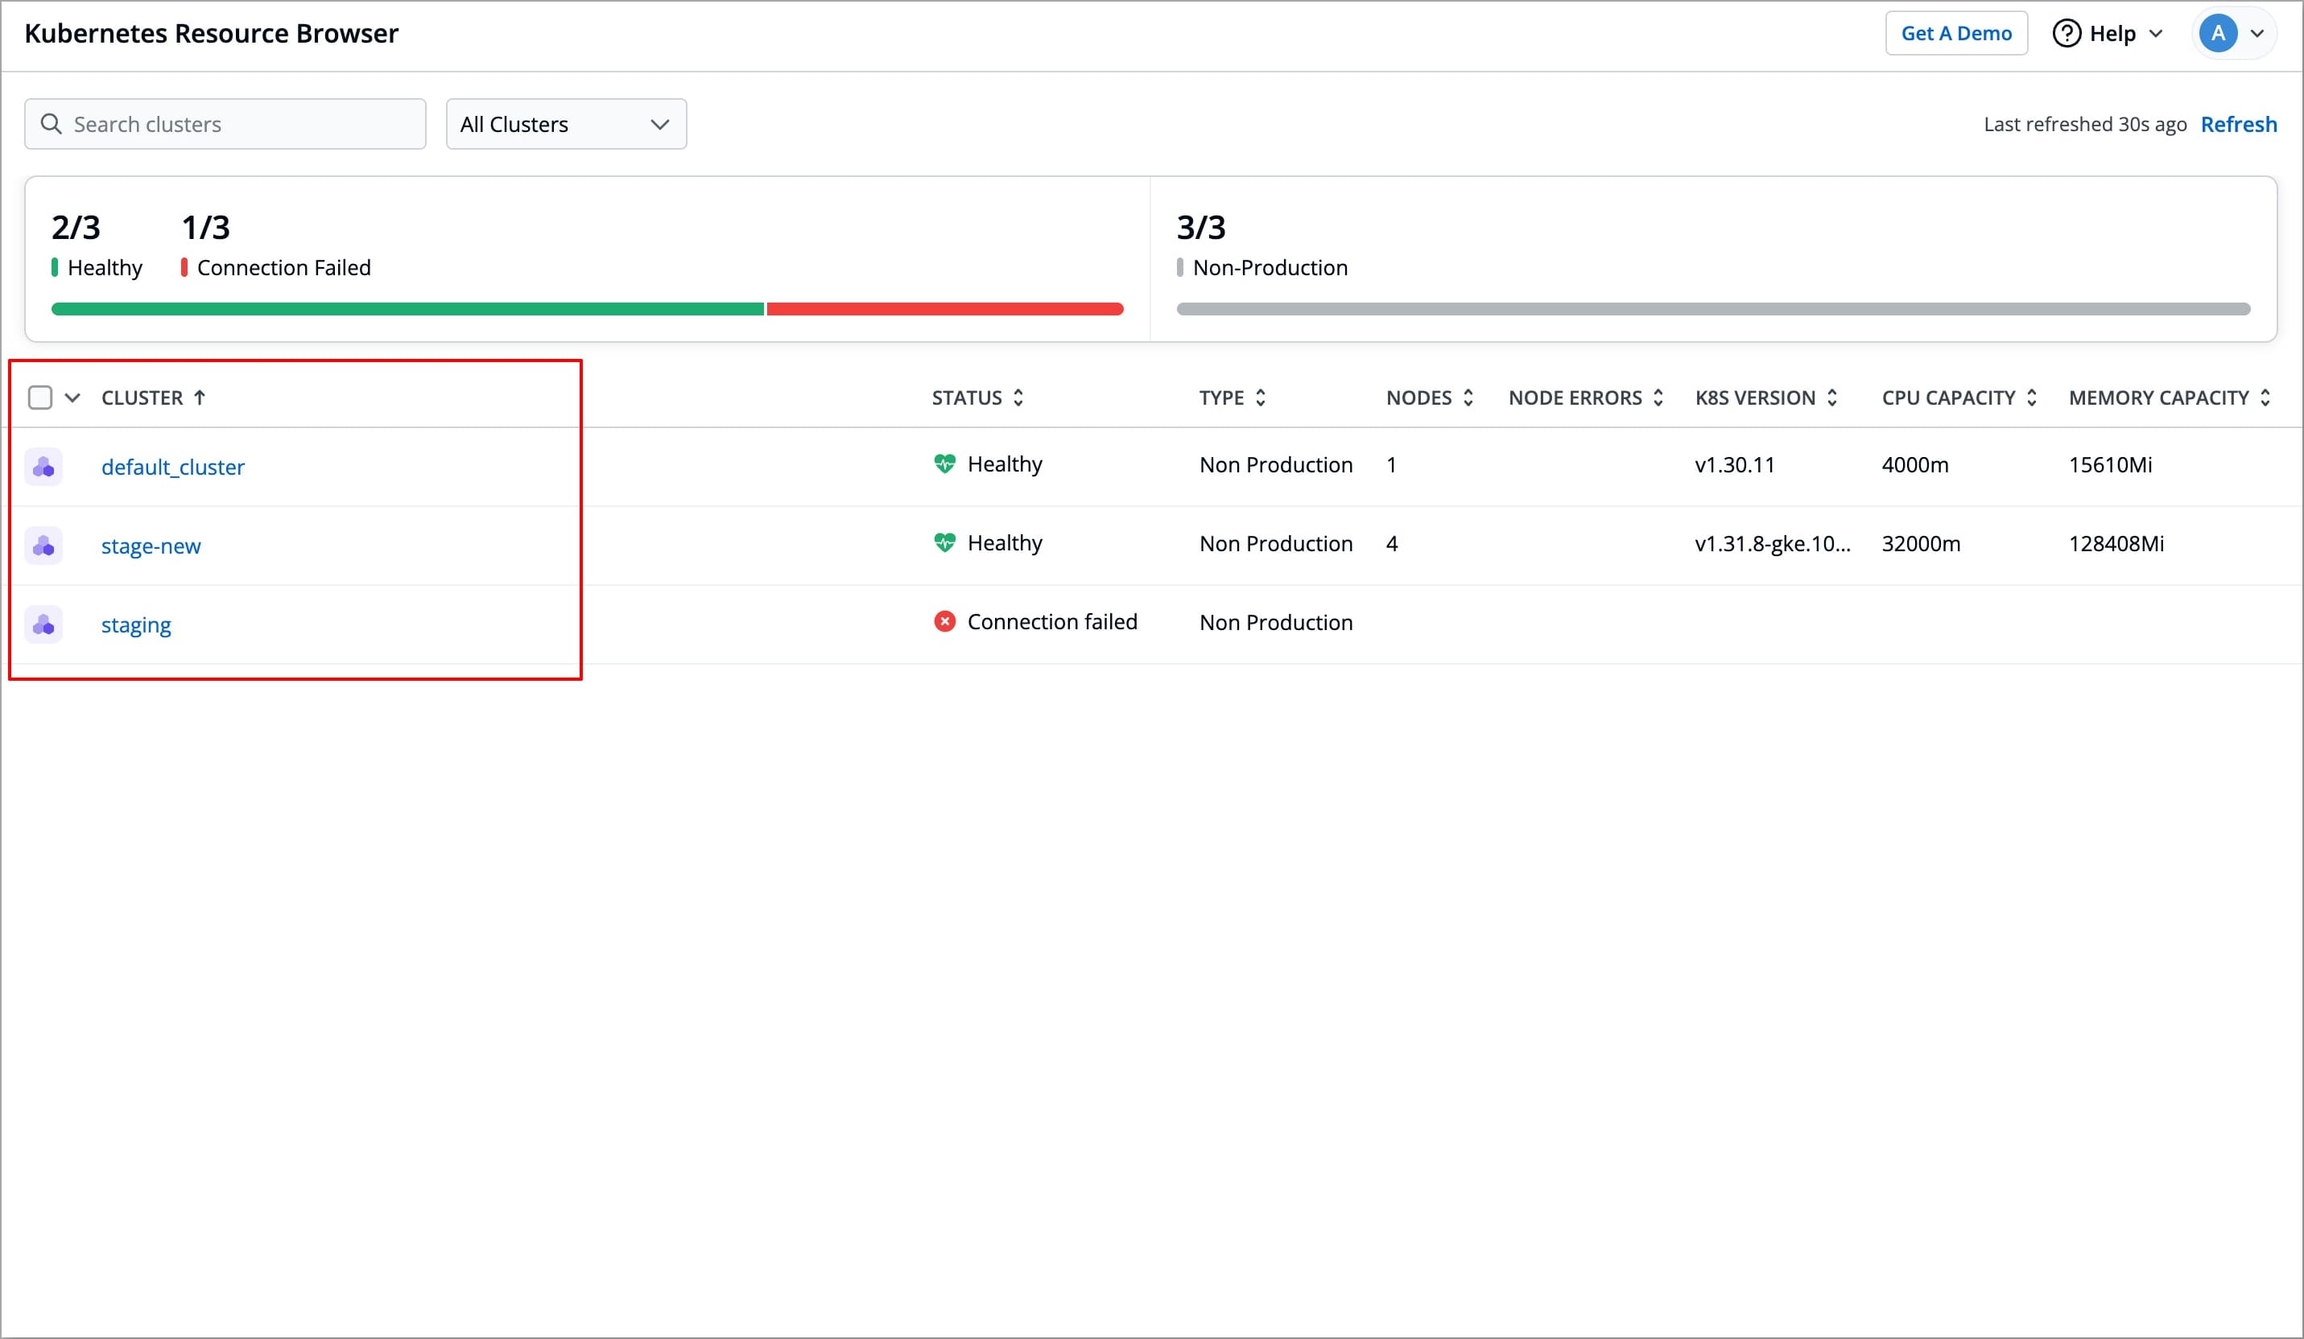
Figure 2: Selecting Cluster Select the Resource Recommender tab to inspect the recommendations.
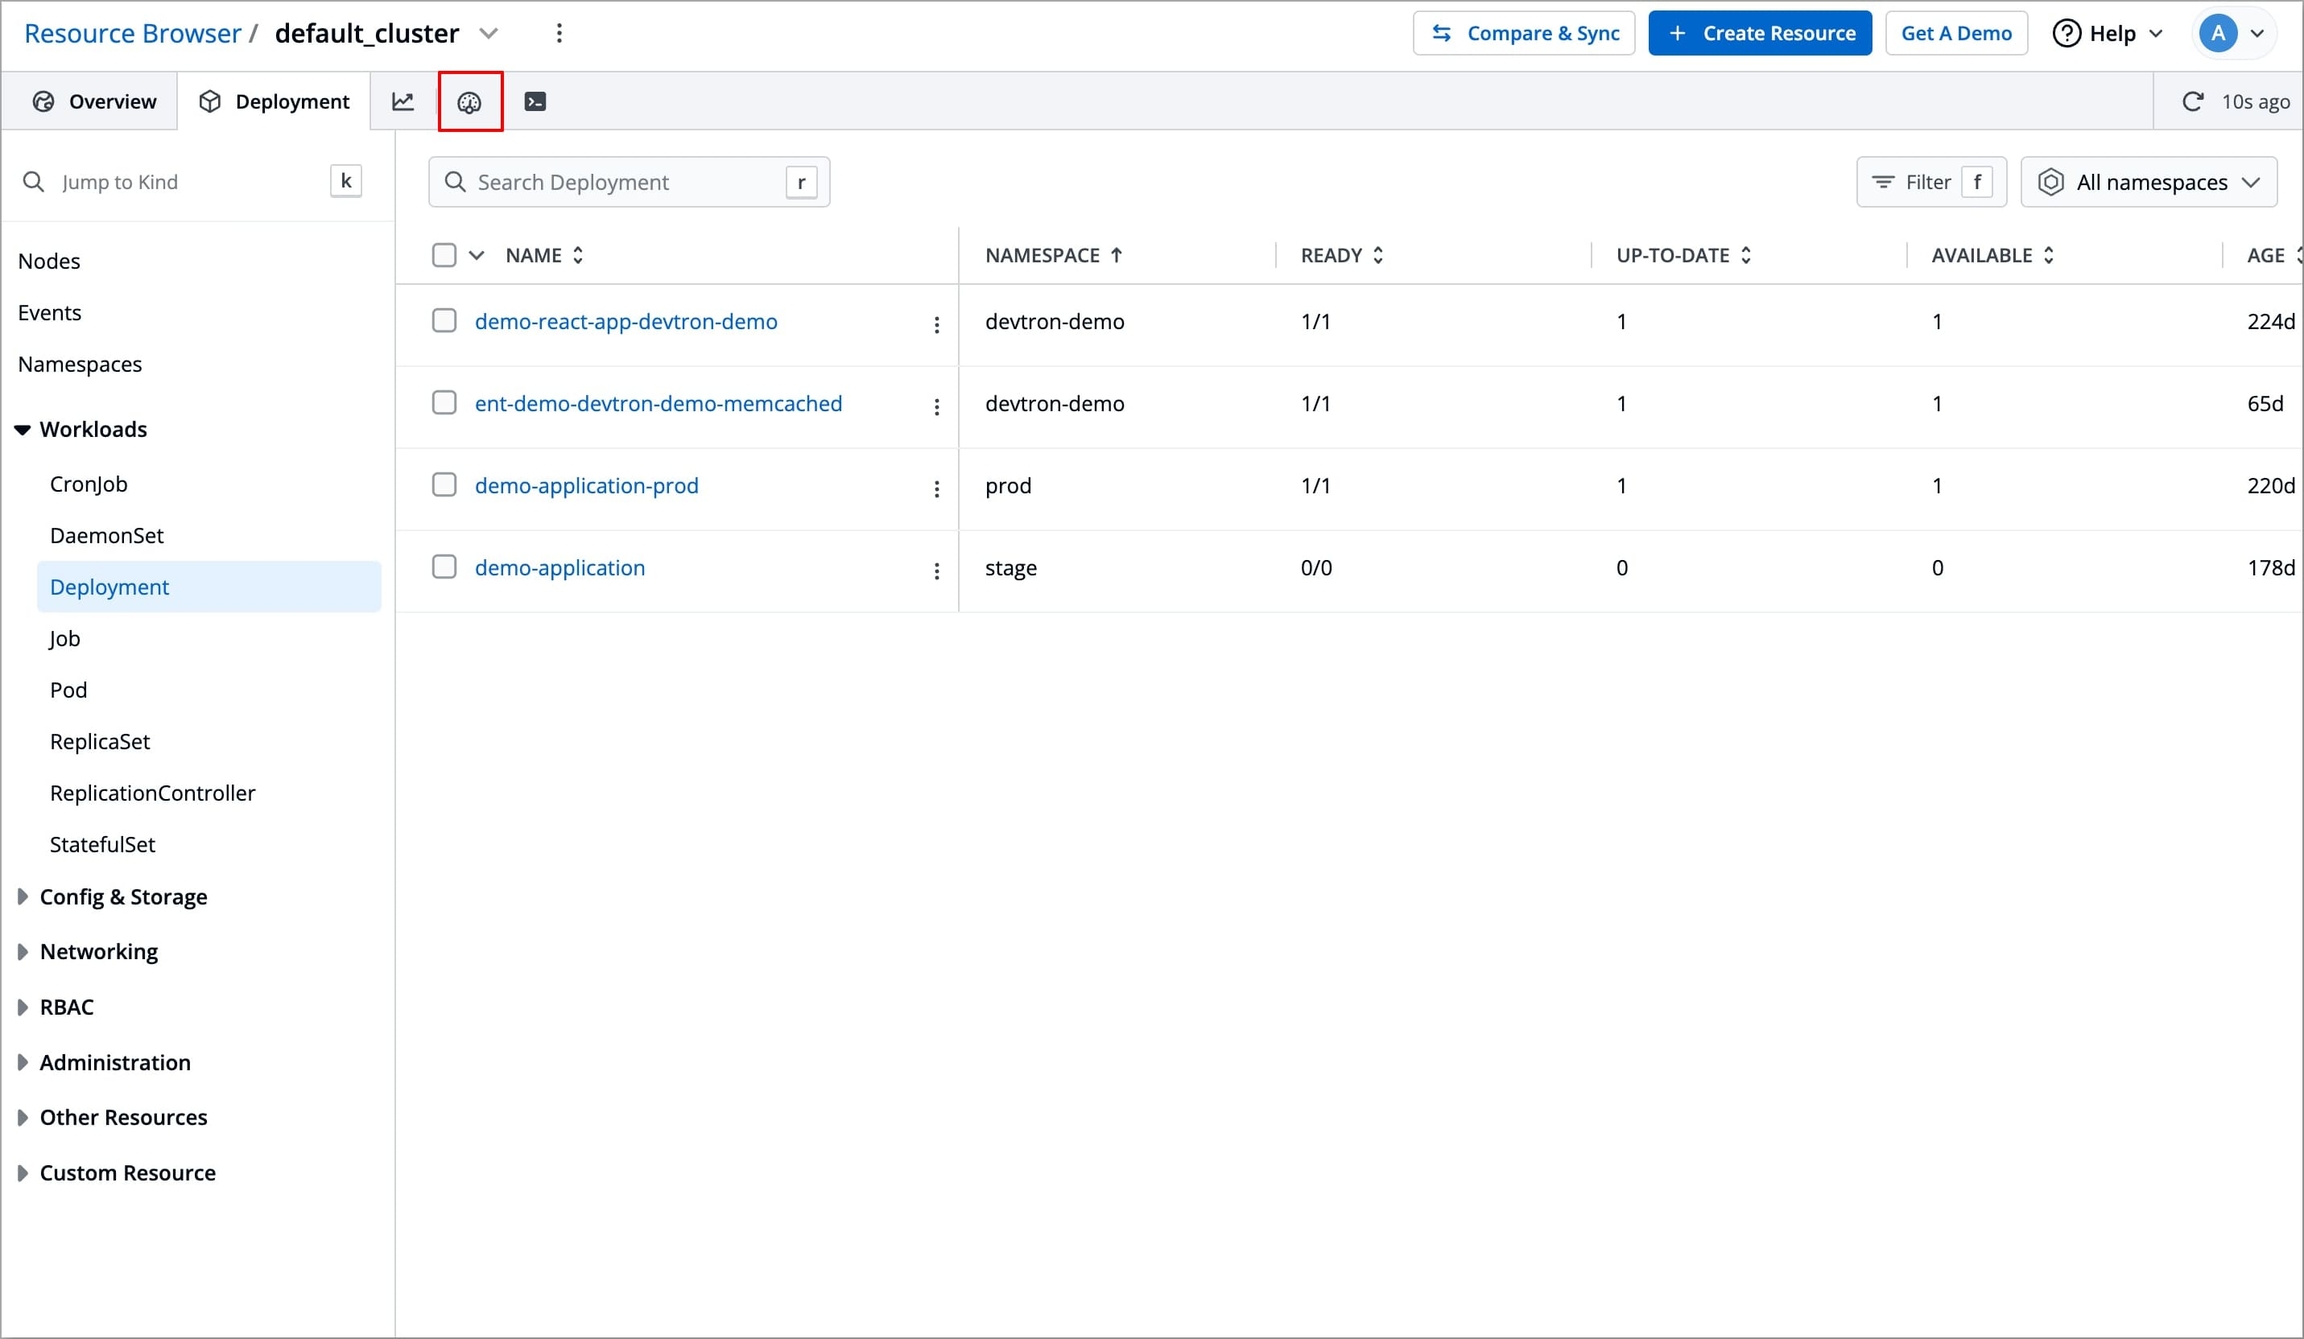
Figure 3: Selecting Resource Recommender Each row displays workloads in that cluster, along with recommendations for CPU and memory.
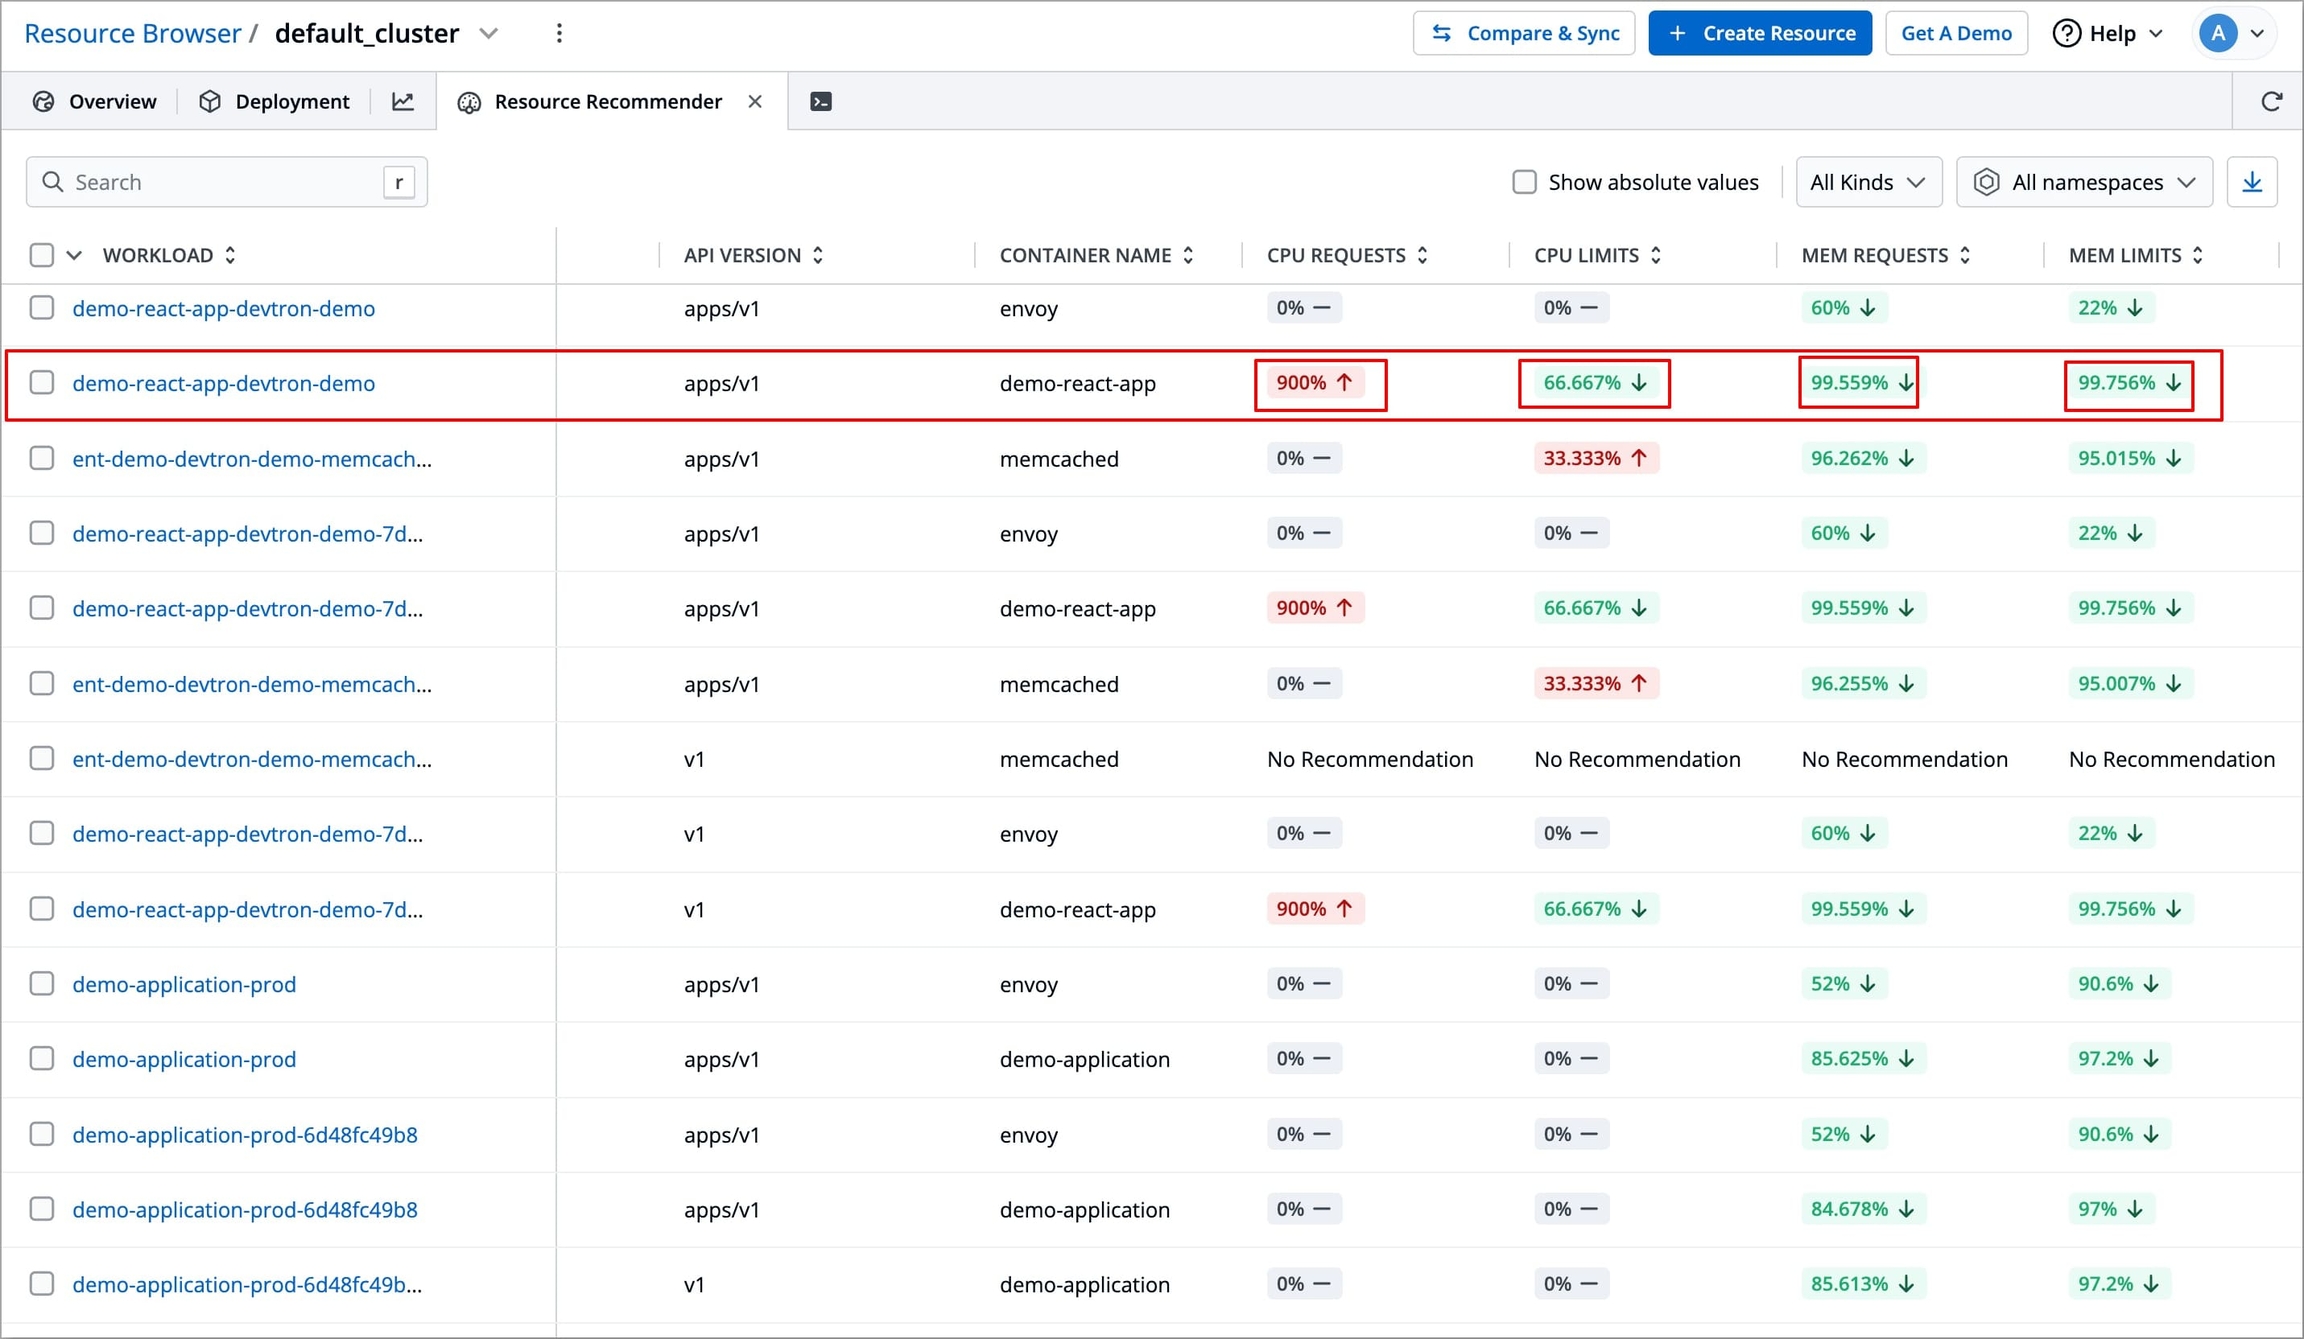
Figure 4: Displaying Workloads along with Recommendations Recommendations are shown as percentage changes by default. You can use the Show absolute values checkbox to see current v/s recommended values in actual units (e.g., 128Mi → 4900Ki).
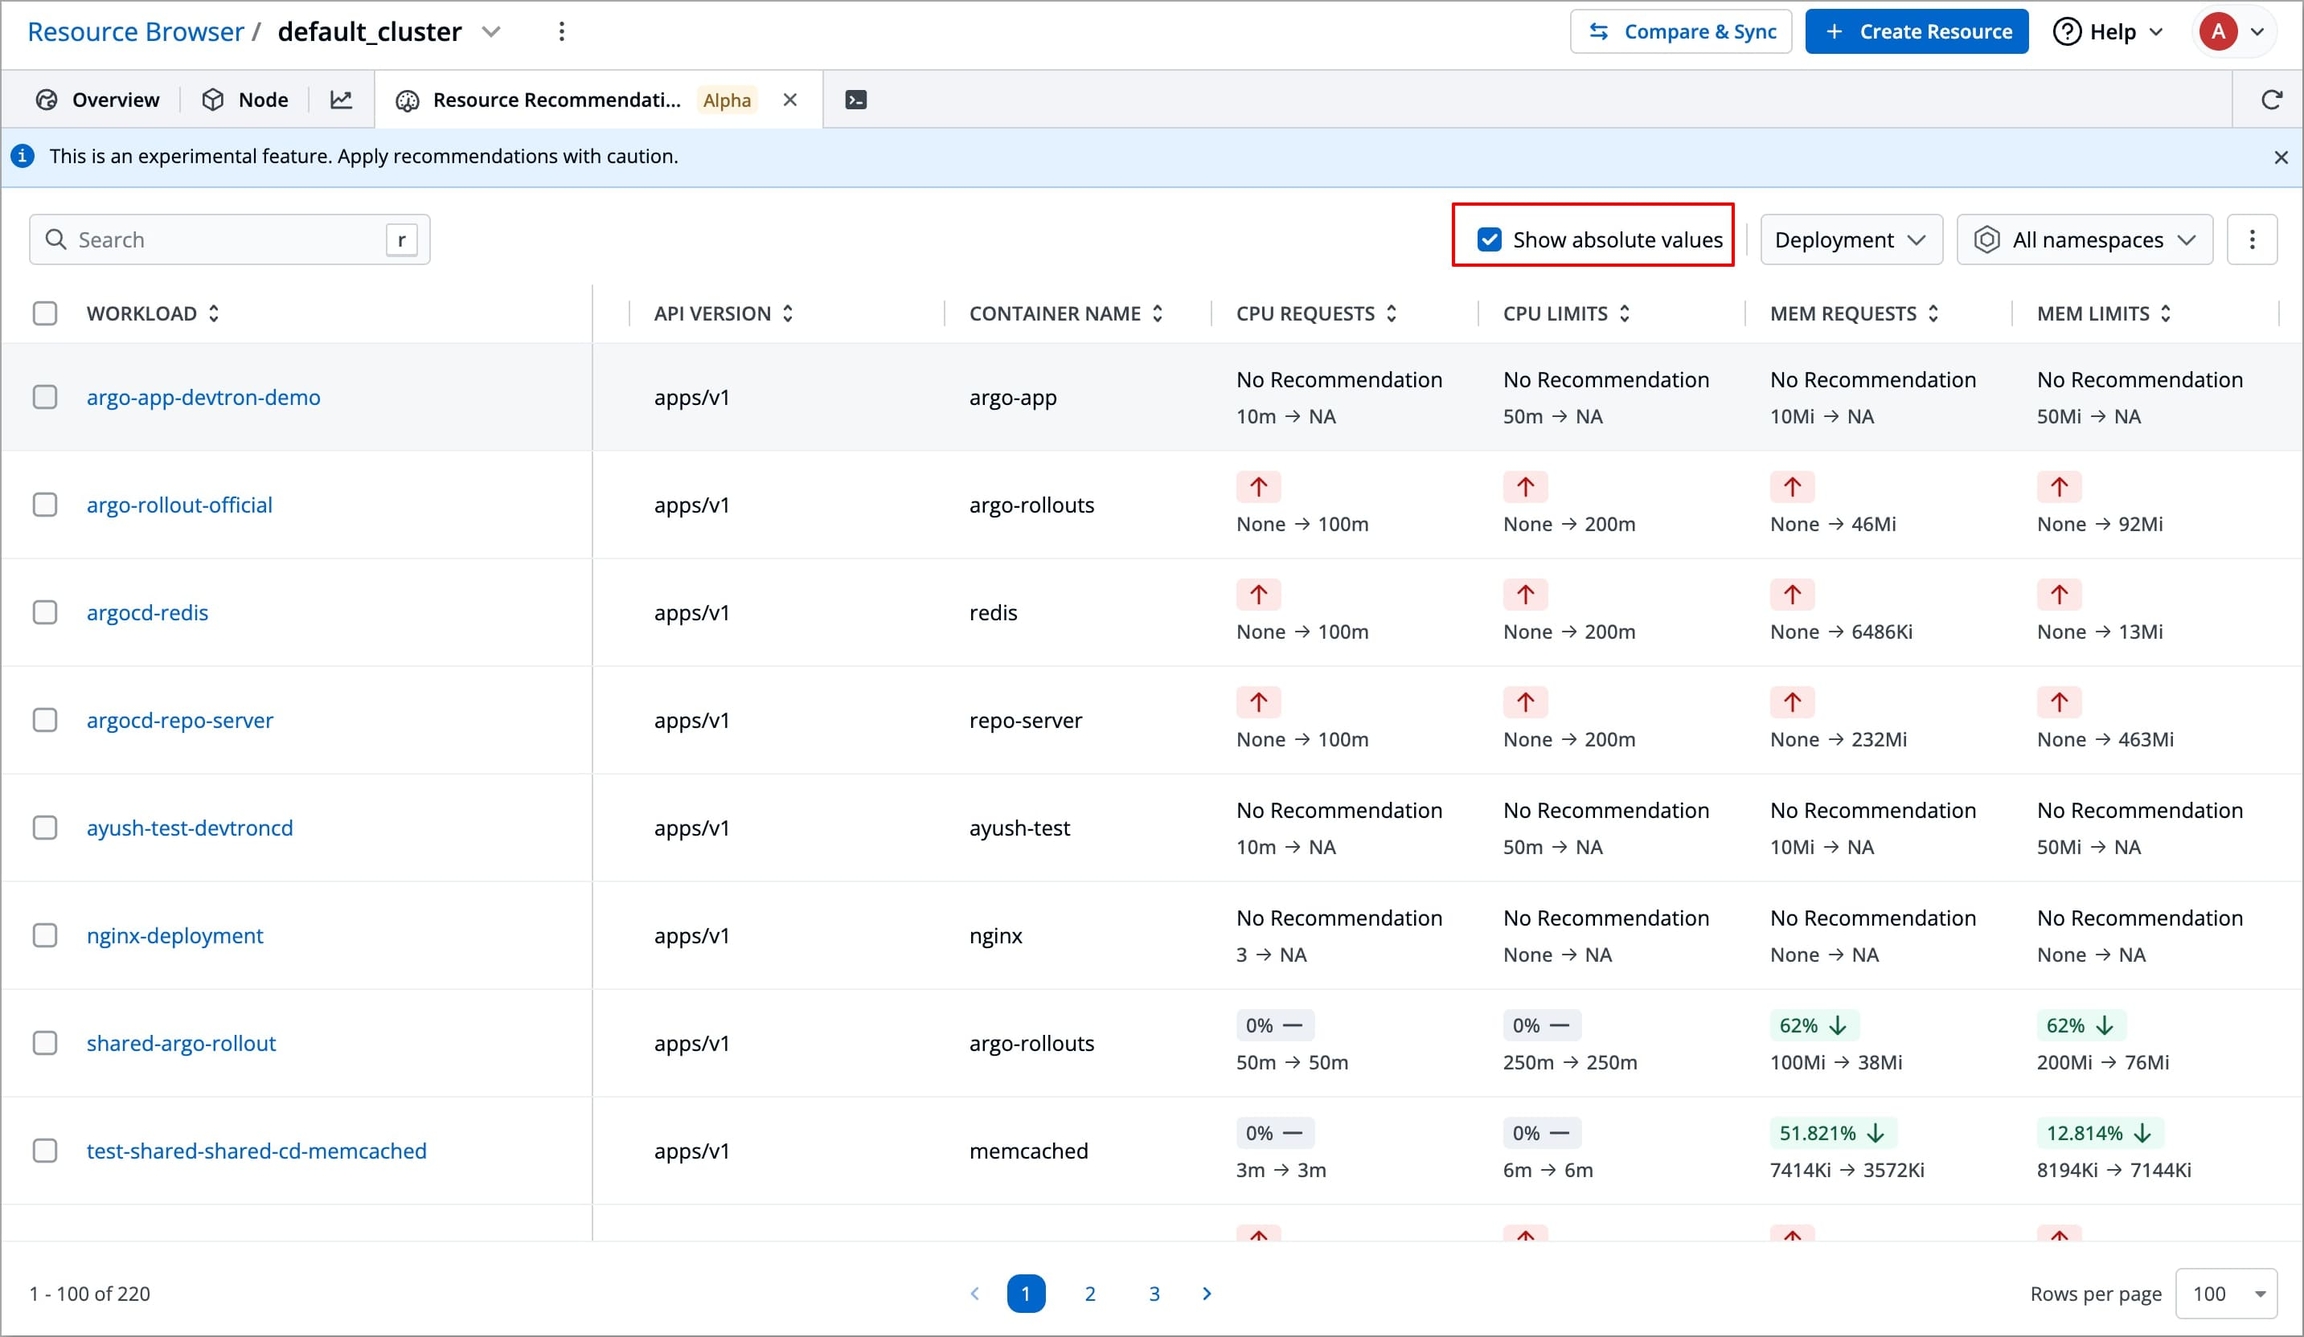
Figure 5: Toggling 'Show Absolute Values'
No Recommendations
In case you have just configured the Prometheus endpoint, you might face the No recommendations yet screen after selecting Resource Recommender.
Click Check for Recommendations to initiate the scan, and recommendations will be available in a few minutes.
You can inspect the resource recommendations for each workload within the cluster.
If you wish, you can filter the workloads based on their
KindandNamespace.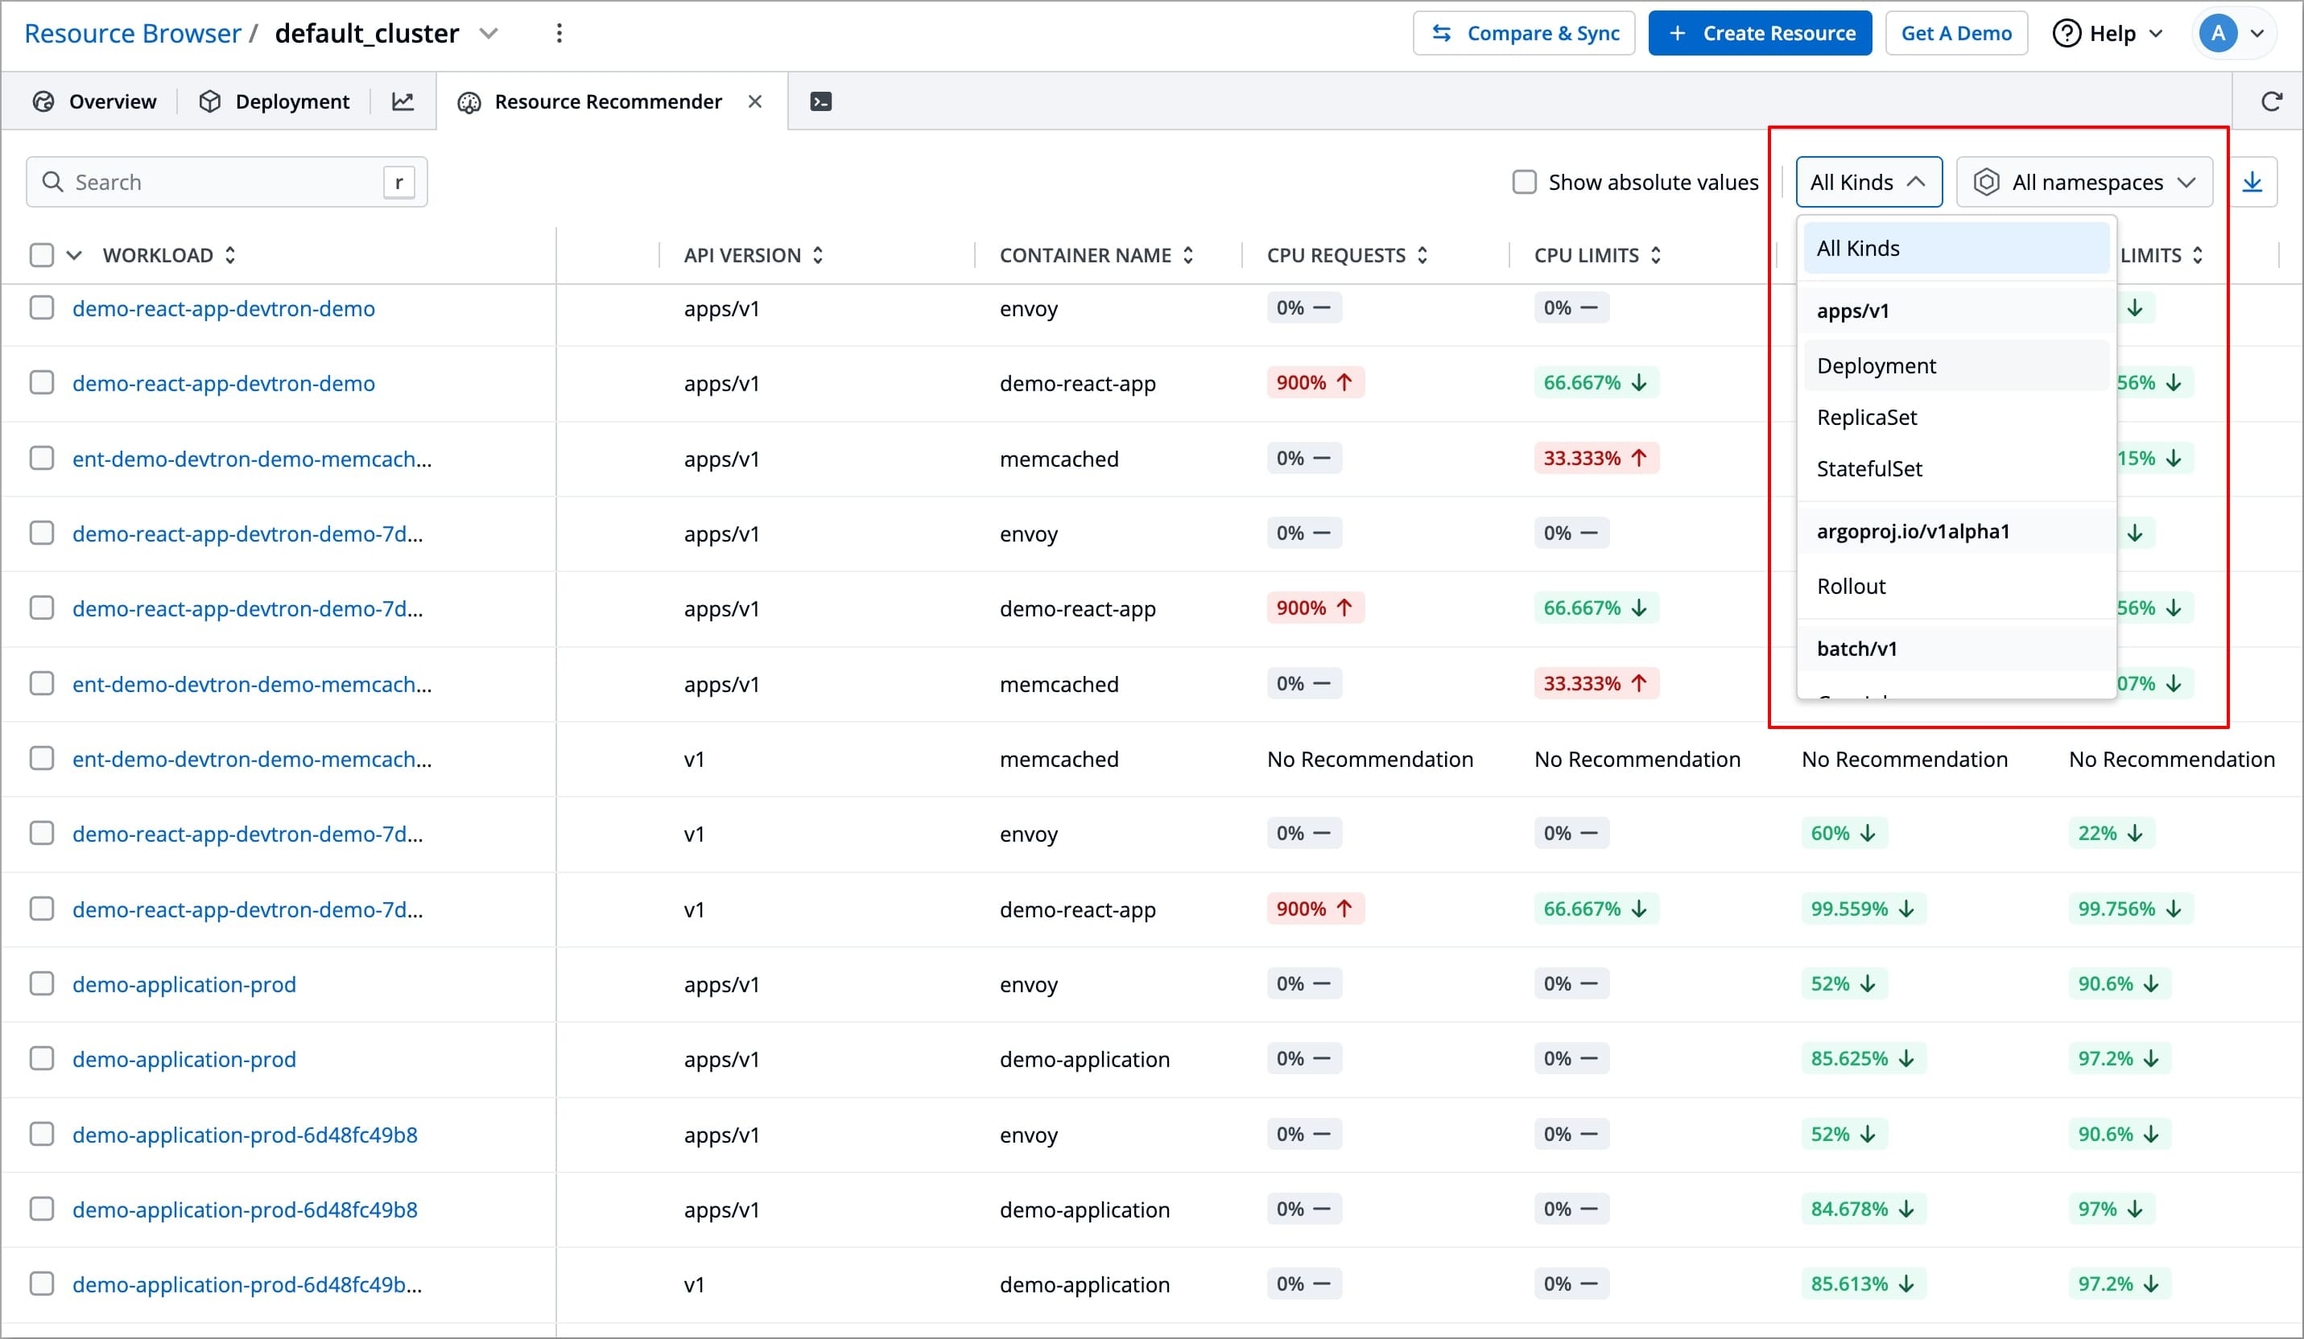
Figure 6a: Filtering via 'Kind' 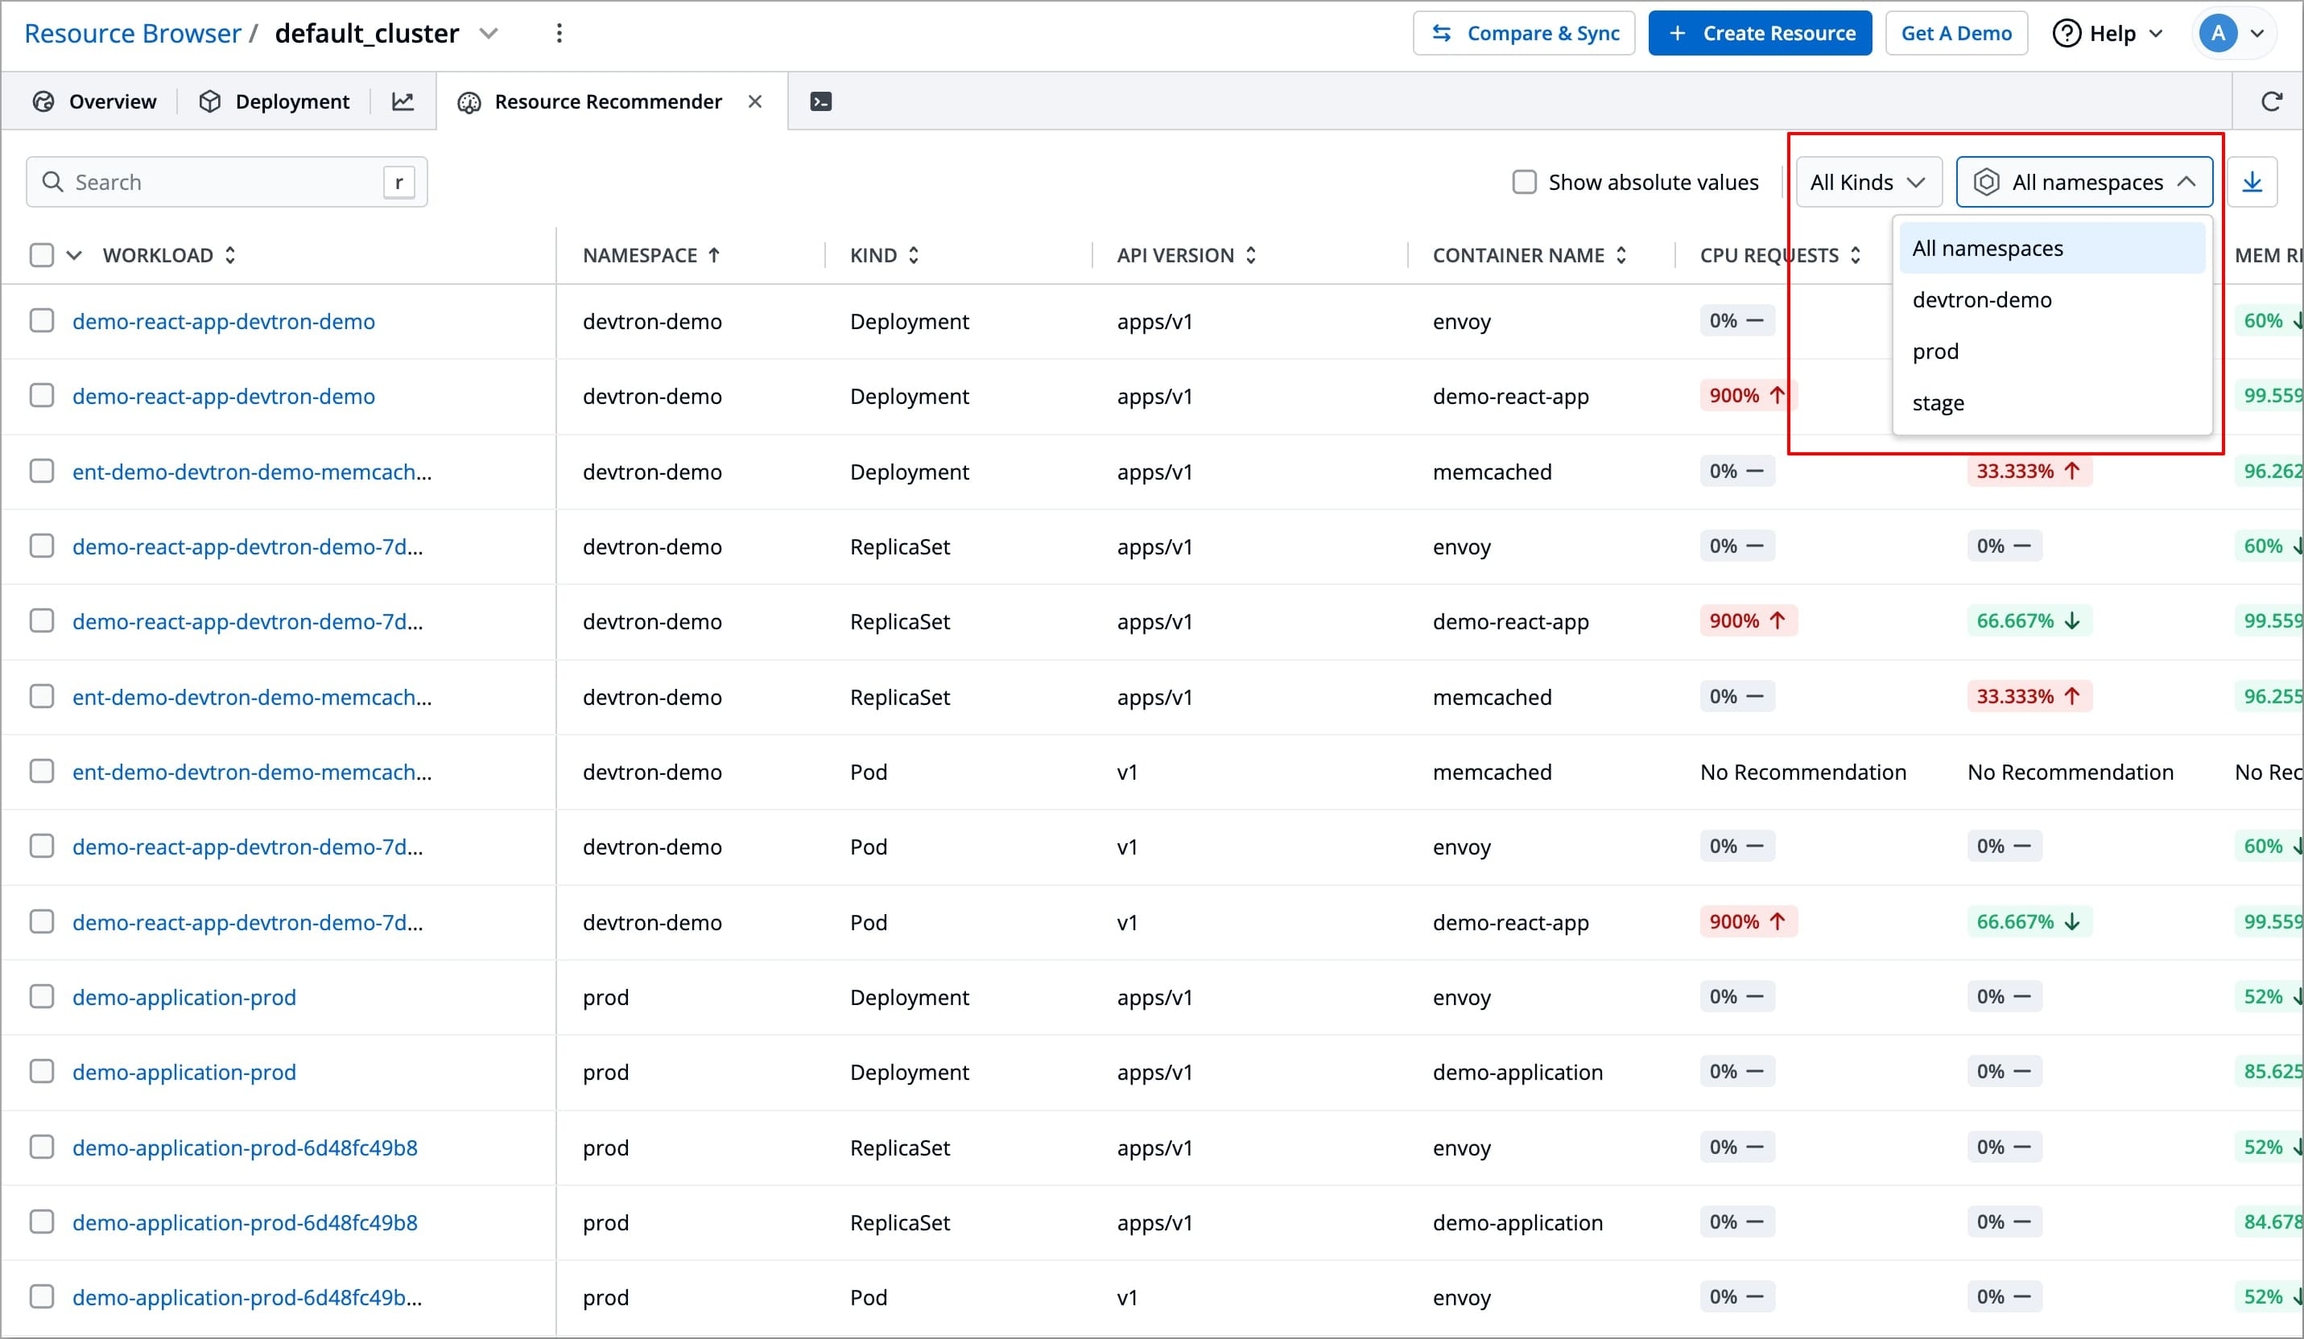
Figure 6b: Filtering via 'Namespace' You can also search for a specific workload via the search bar based on
WORKLOAD,NAMESPACE,KIND,API VERSION, andCONTAINER NAME.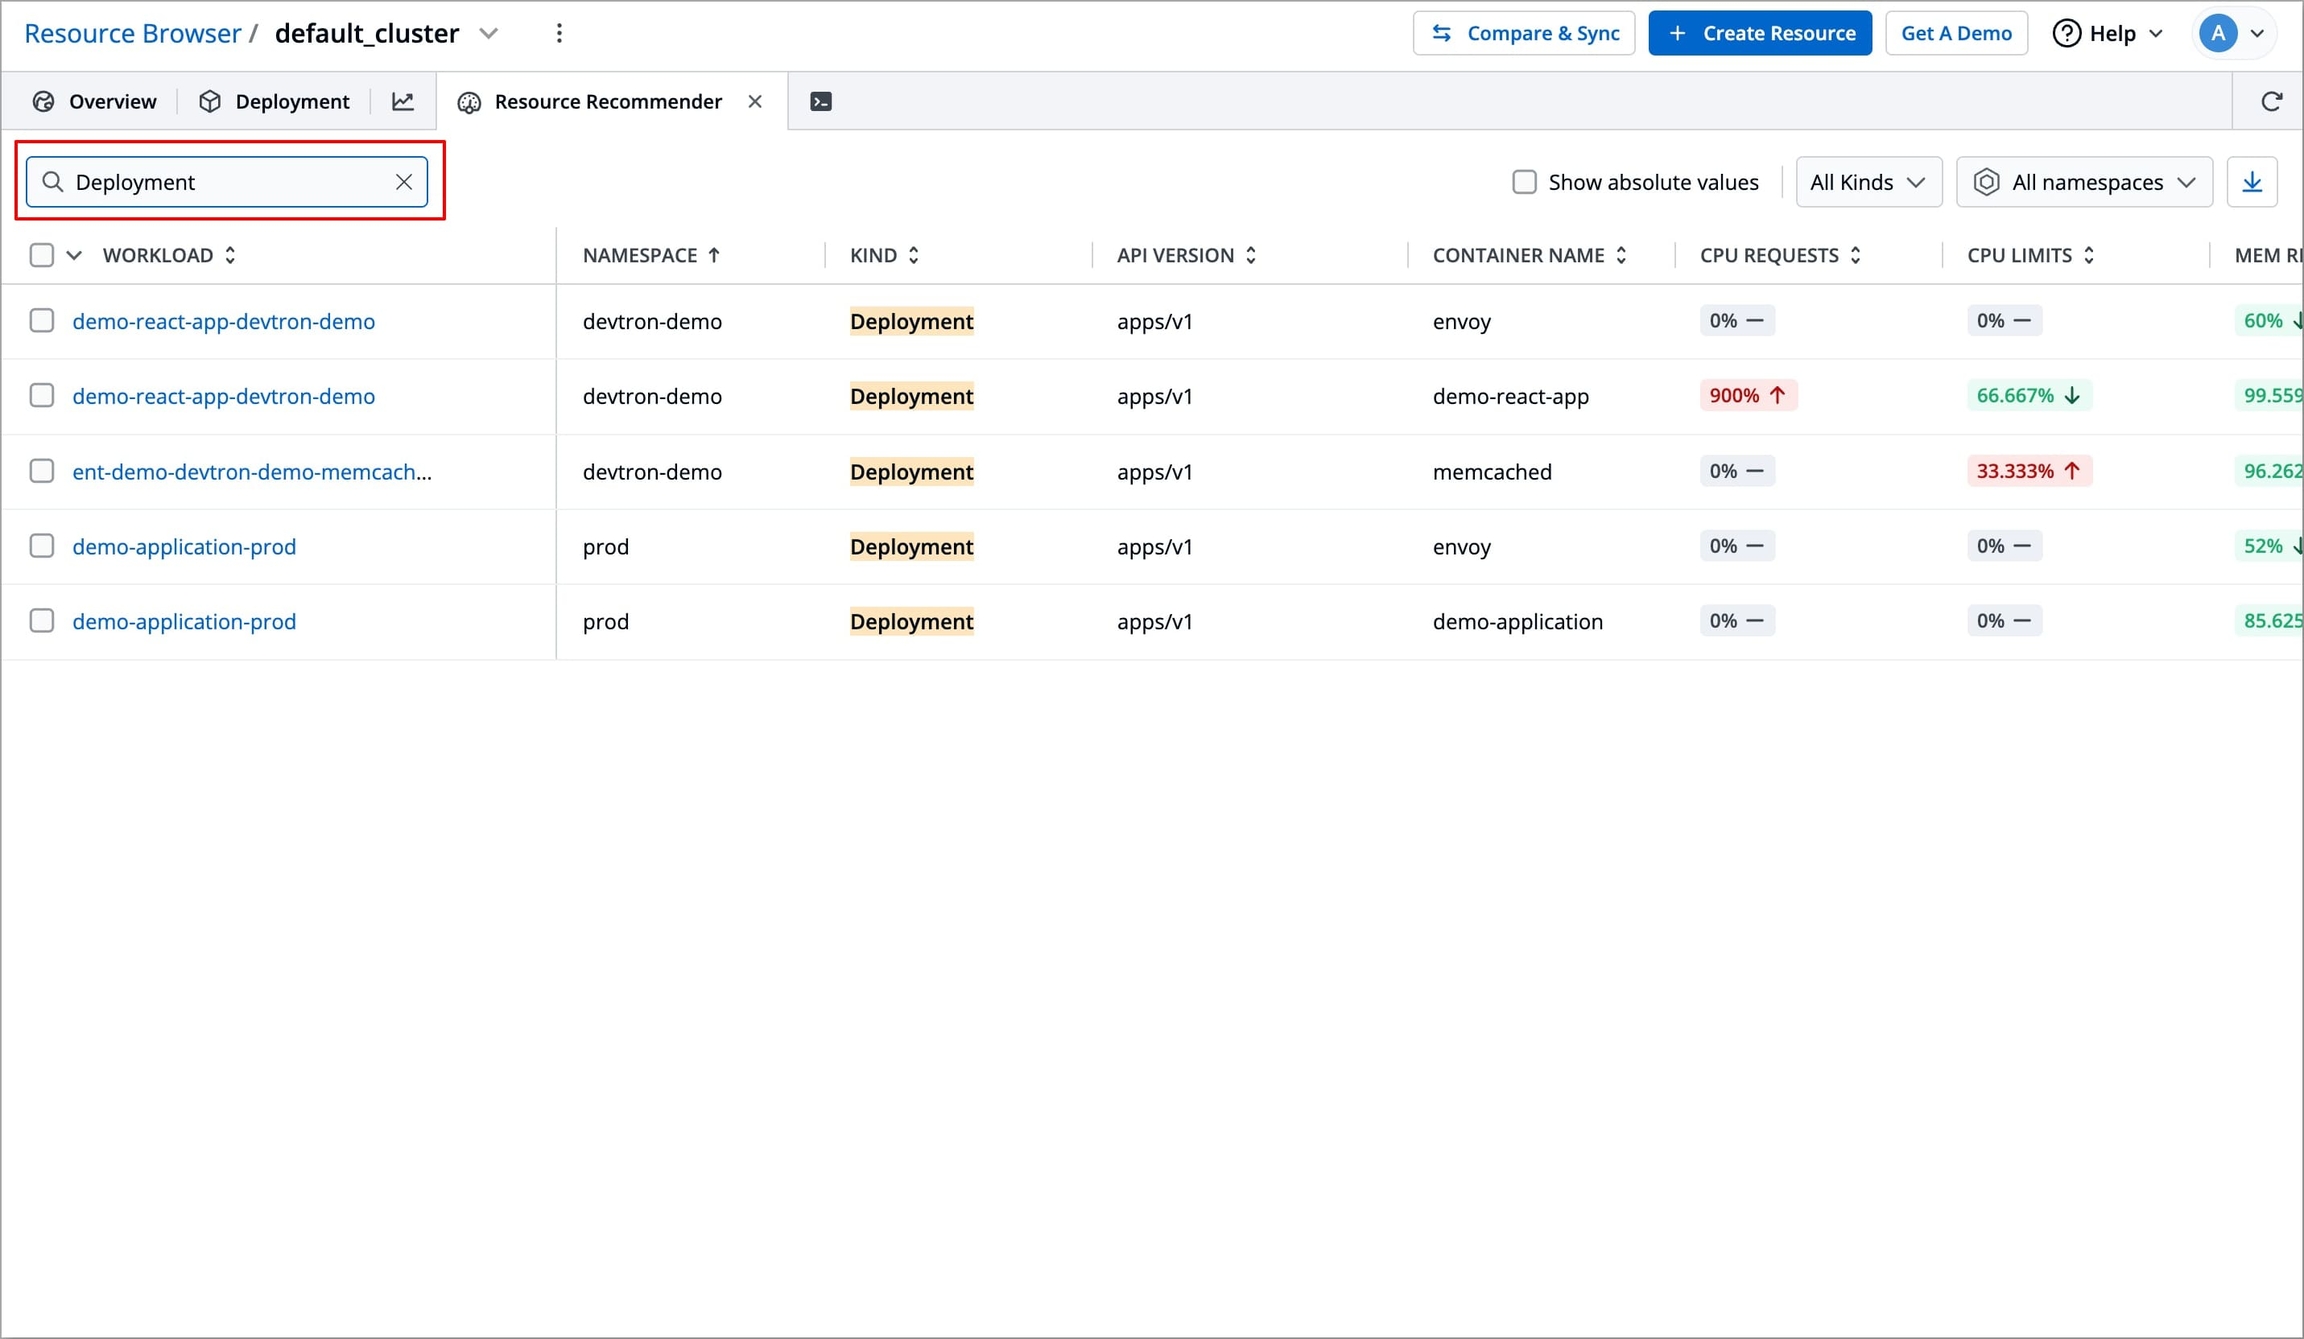
Figure 7: Filtering via Search Bar
For each workload, recommendations can be of the following types:
Types of Recommendation
↑
Red upward arrow
Indicates that the current resource allocation is below the recommended threshold, and more resources should be provisioned to ensure successful builds.
↓
Green downward arrow
Indicates that the current resource allocation is above the recommended requirement, and resources can be safely reduced to optimize cost and efficiency.
0% -
Gray dash (-)
Indicates that the current allocation matches the recommended value, and no changes are needed.
No Recommendation
No Recommendation
No recommendation available
Supported Resources
CPU REQUESTS
CPU guaranteed to the workload
CPU LIMITS
Maximum CPU allocatable to the workload, if available
MEM REQUESTS
Memory (RAM) guaranteed to the workload
MEM LIMITS
Maximum Memory (RAM) allocatable to the workload, if available
Hover the cursor over the specific resource of the particular workload to view the recommendation.
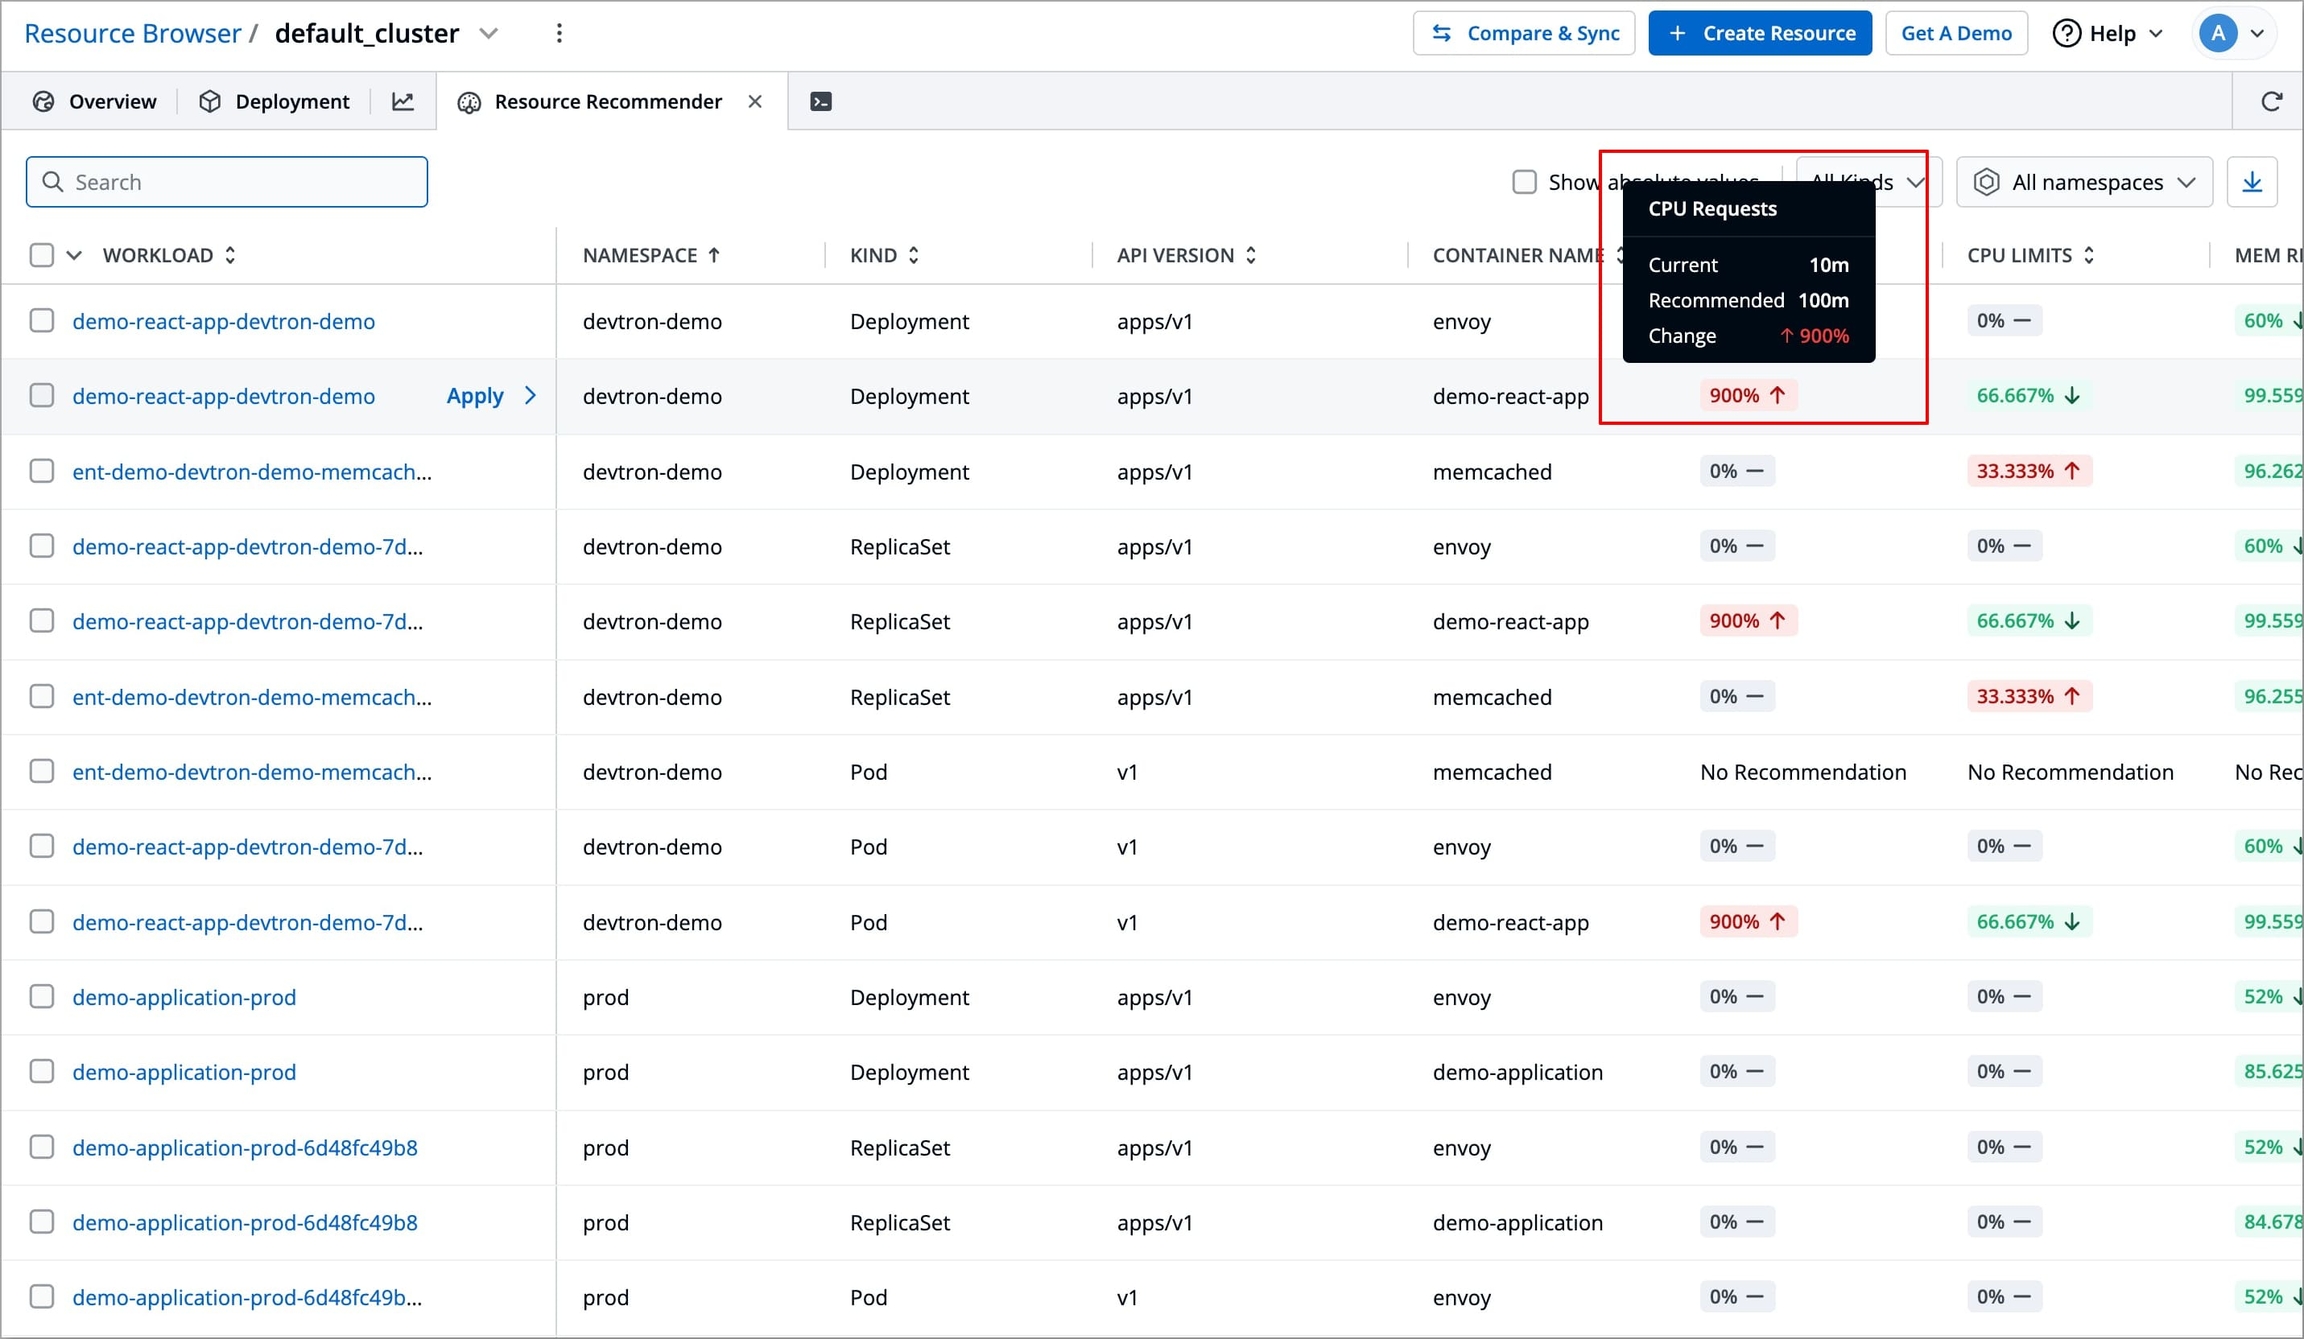
Figure 8a: Recommending for Increasing Resources 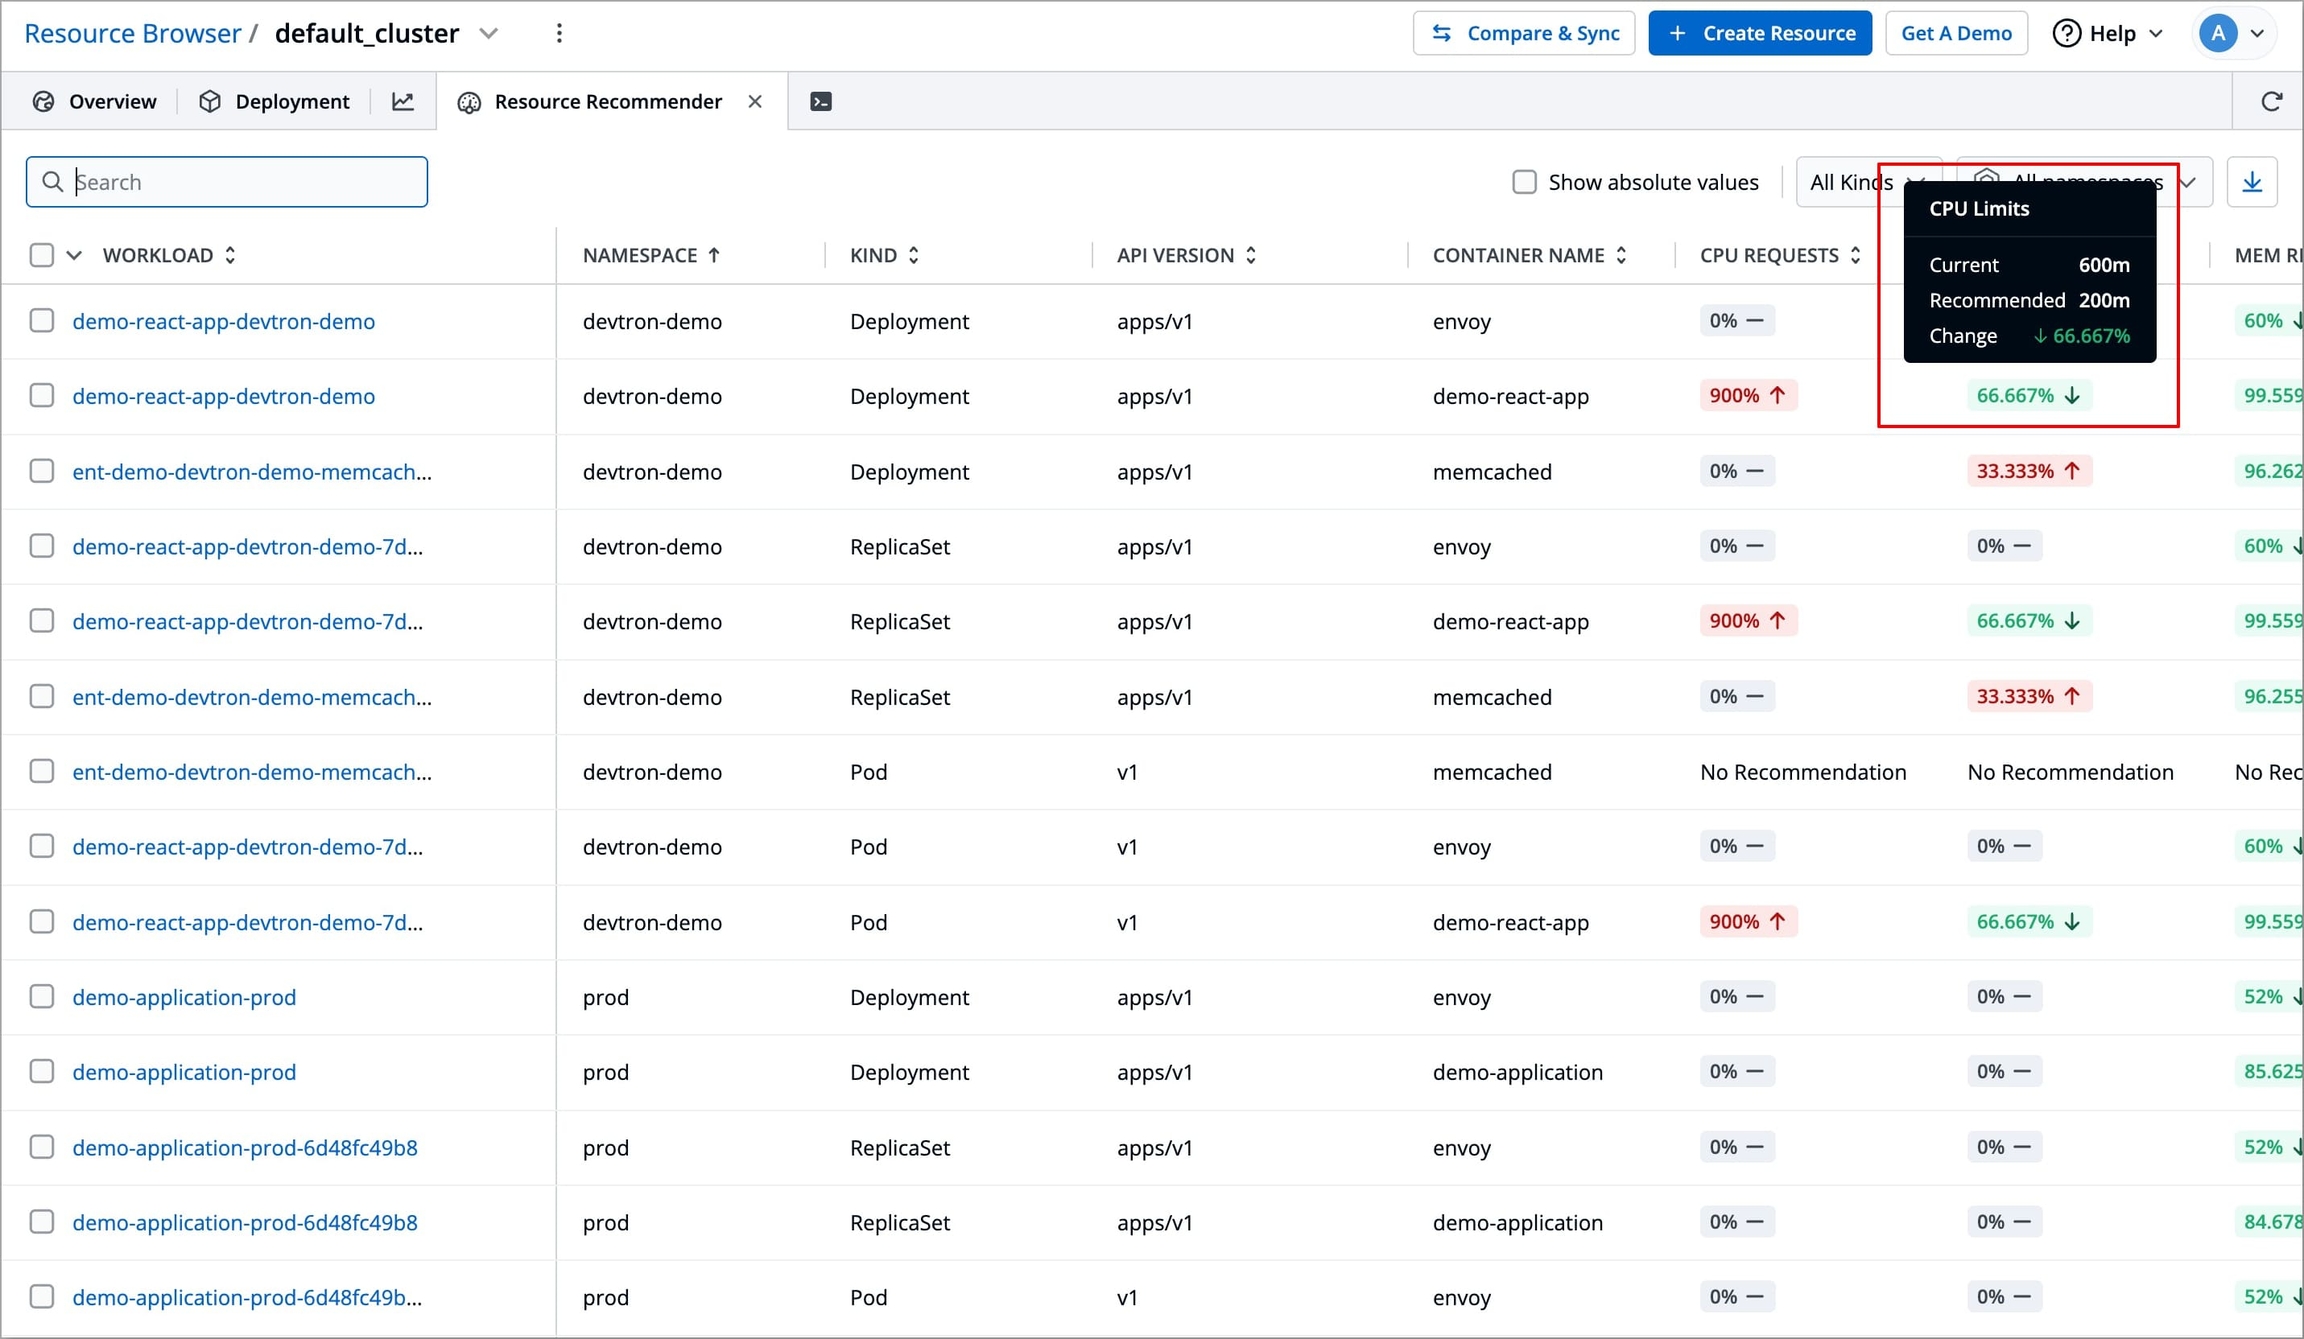
Figure 8b: Recommending for Decreasing Resources 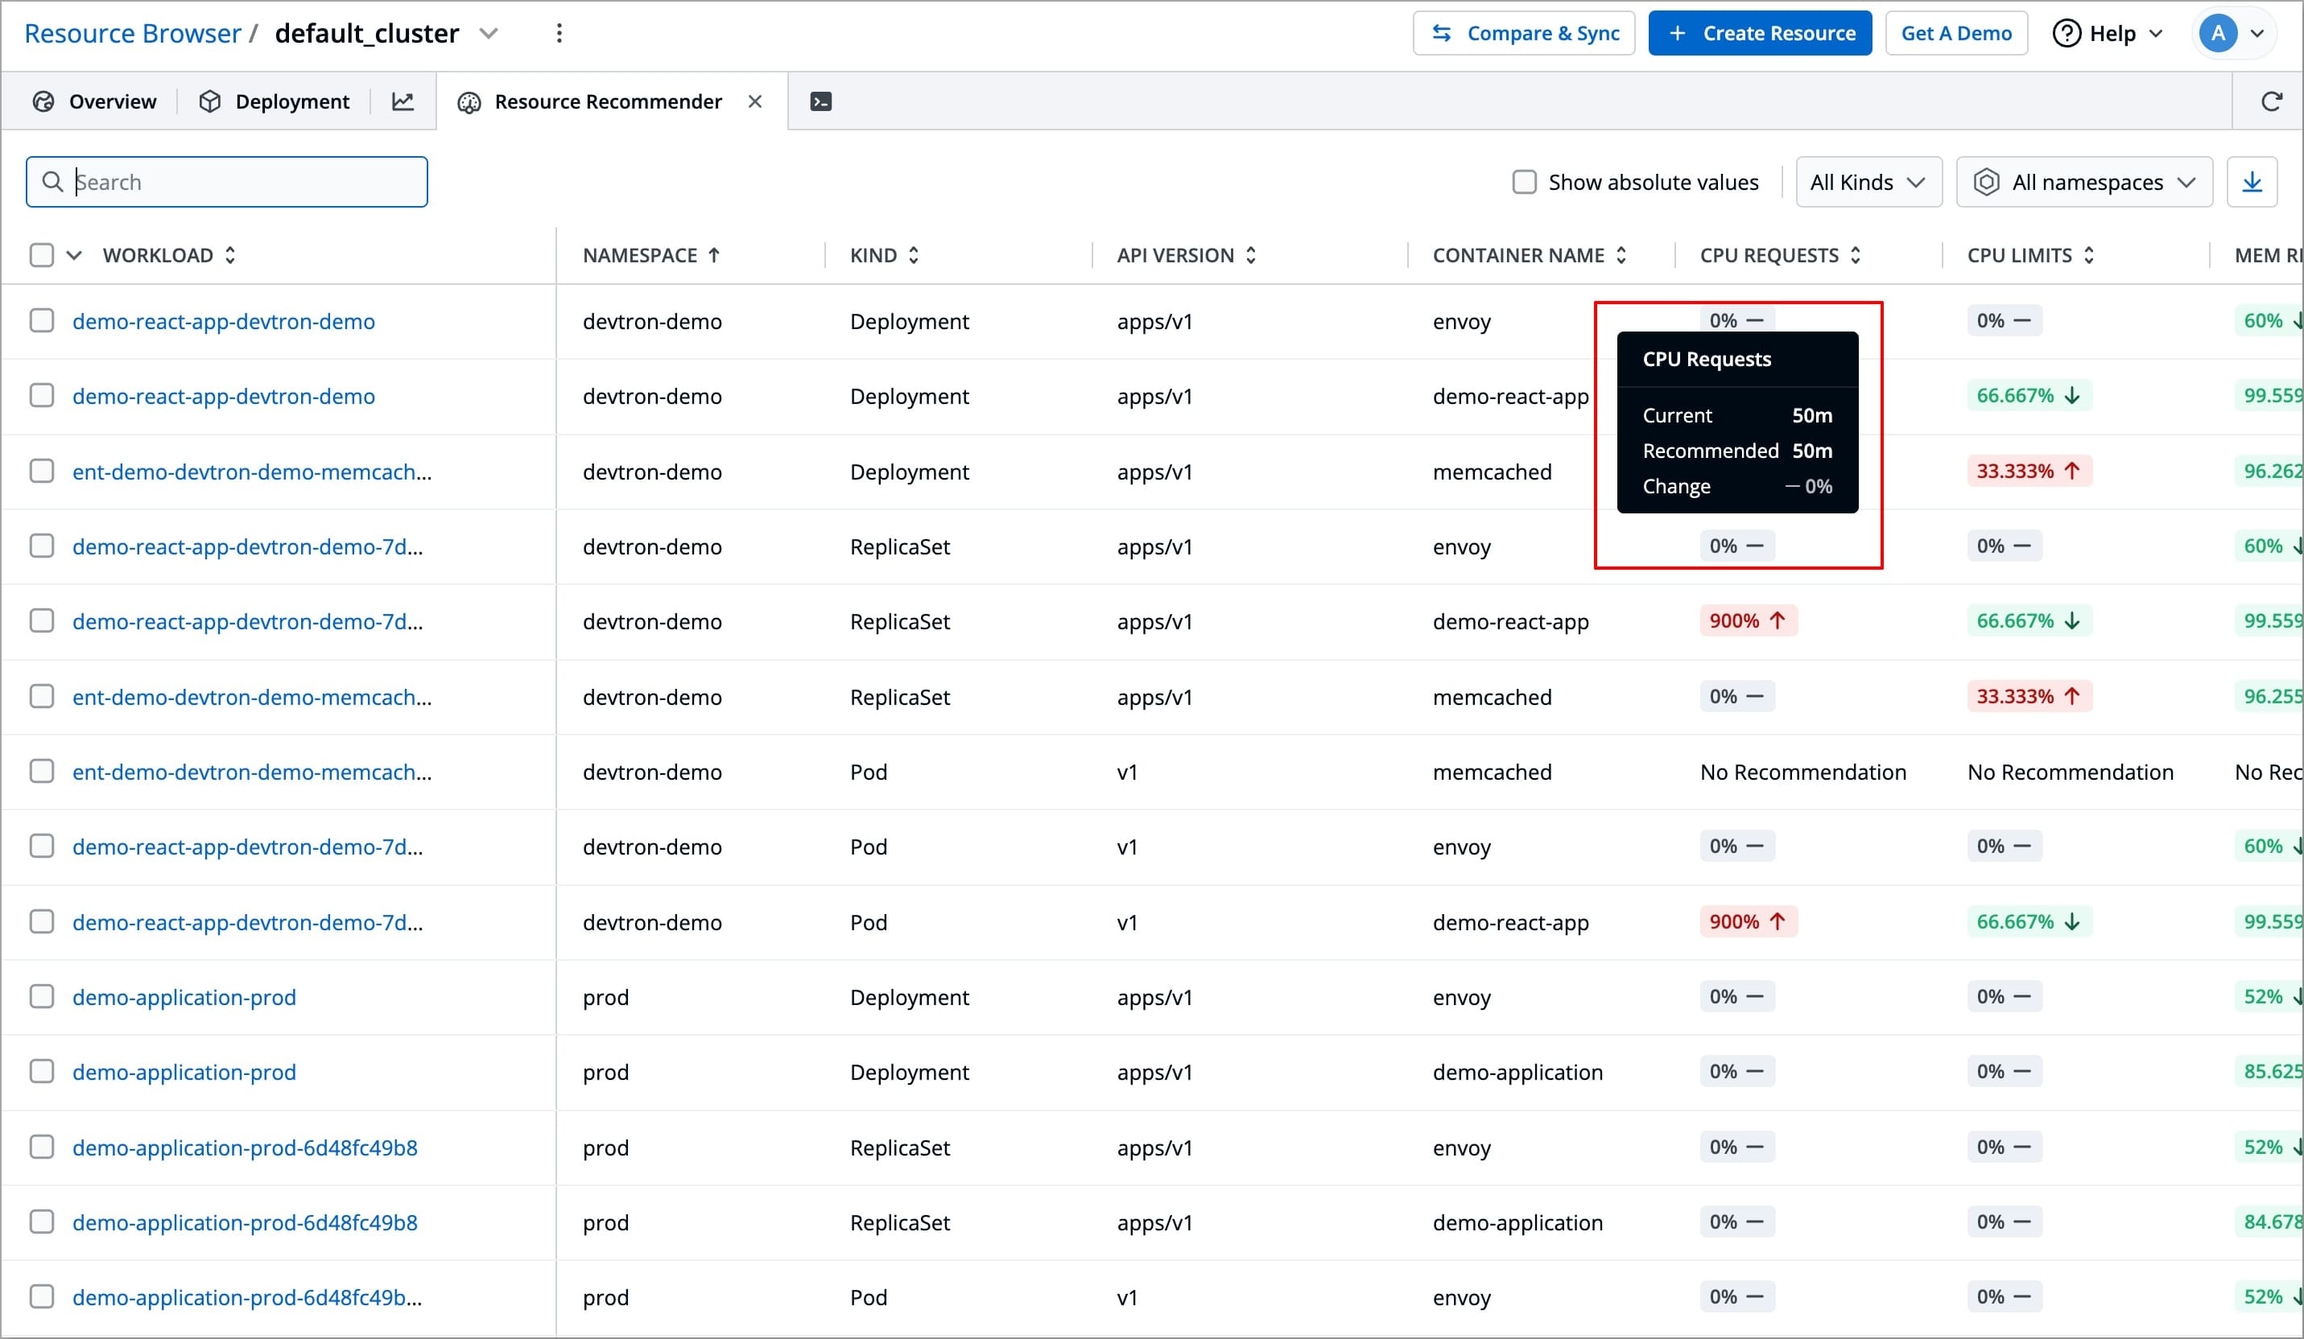
Figure 8c: Recommending to not take any action 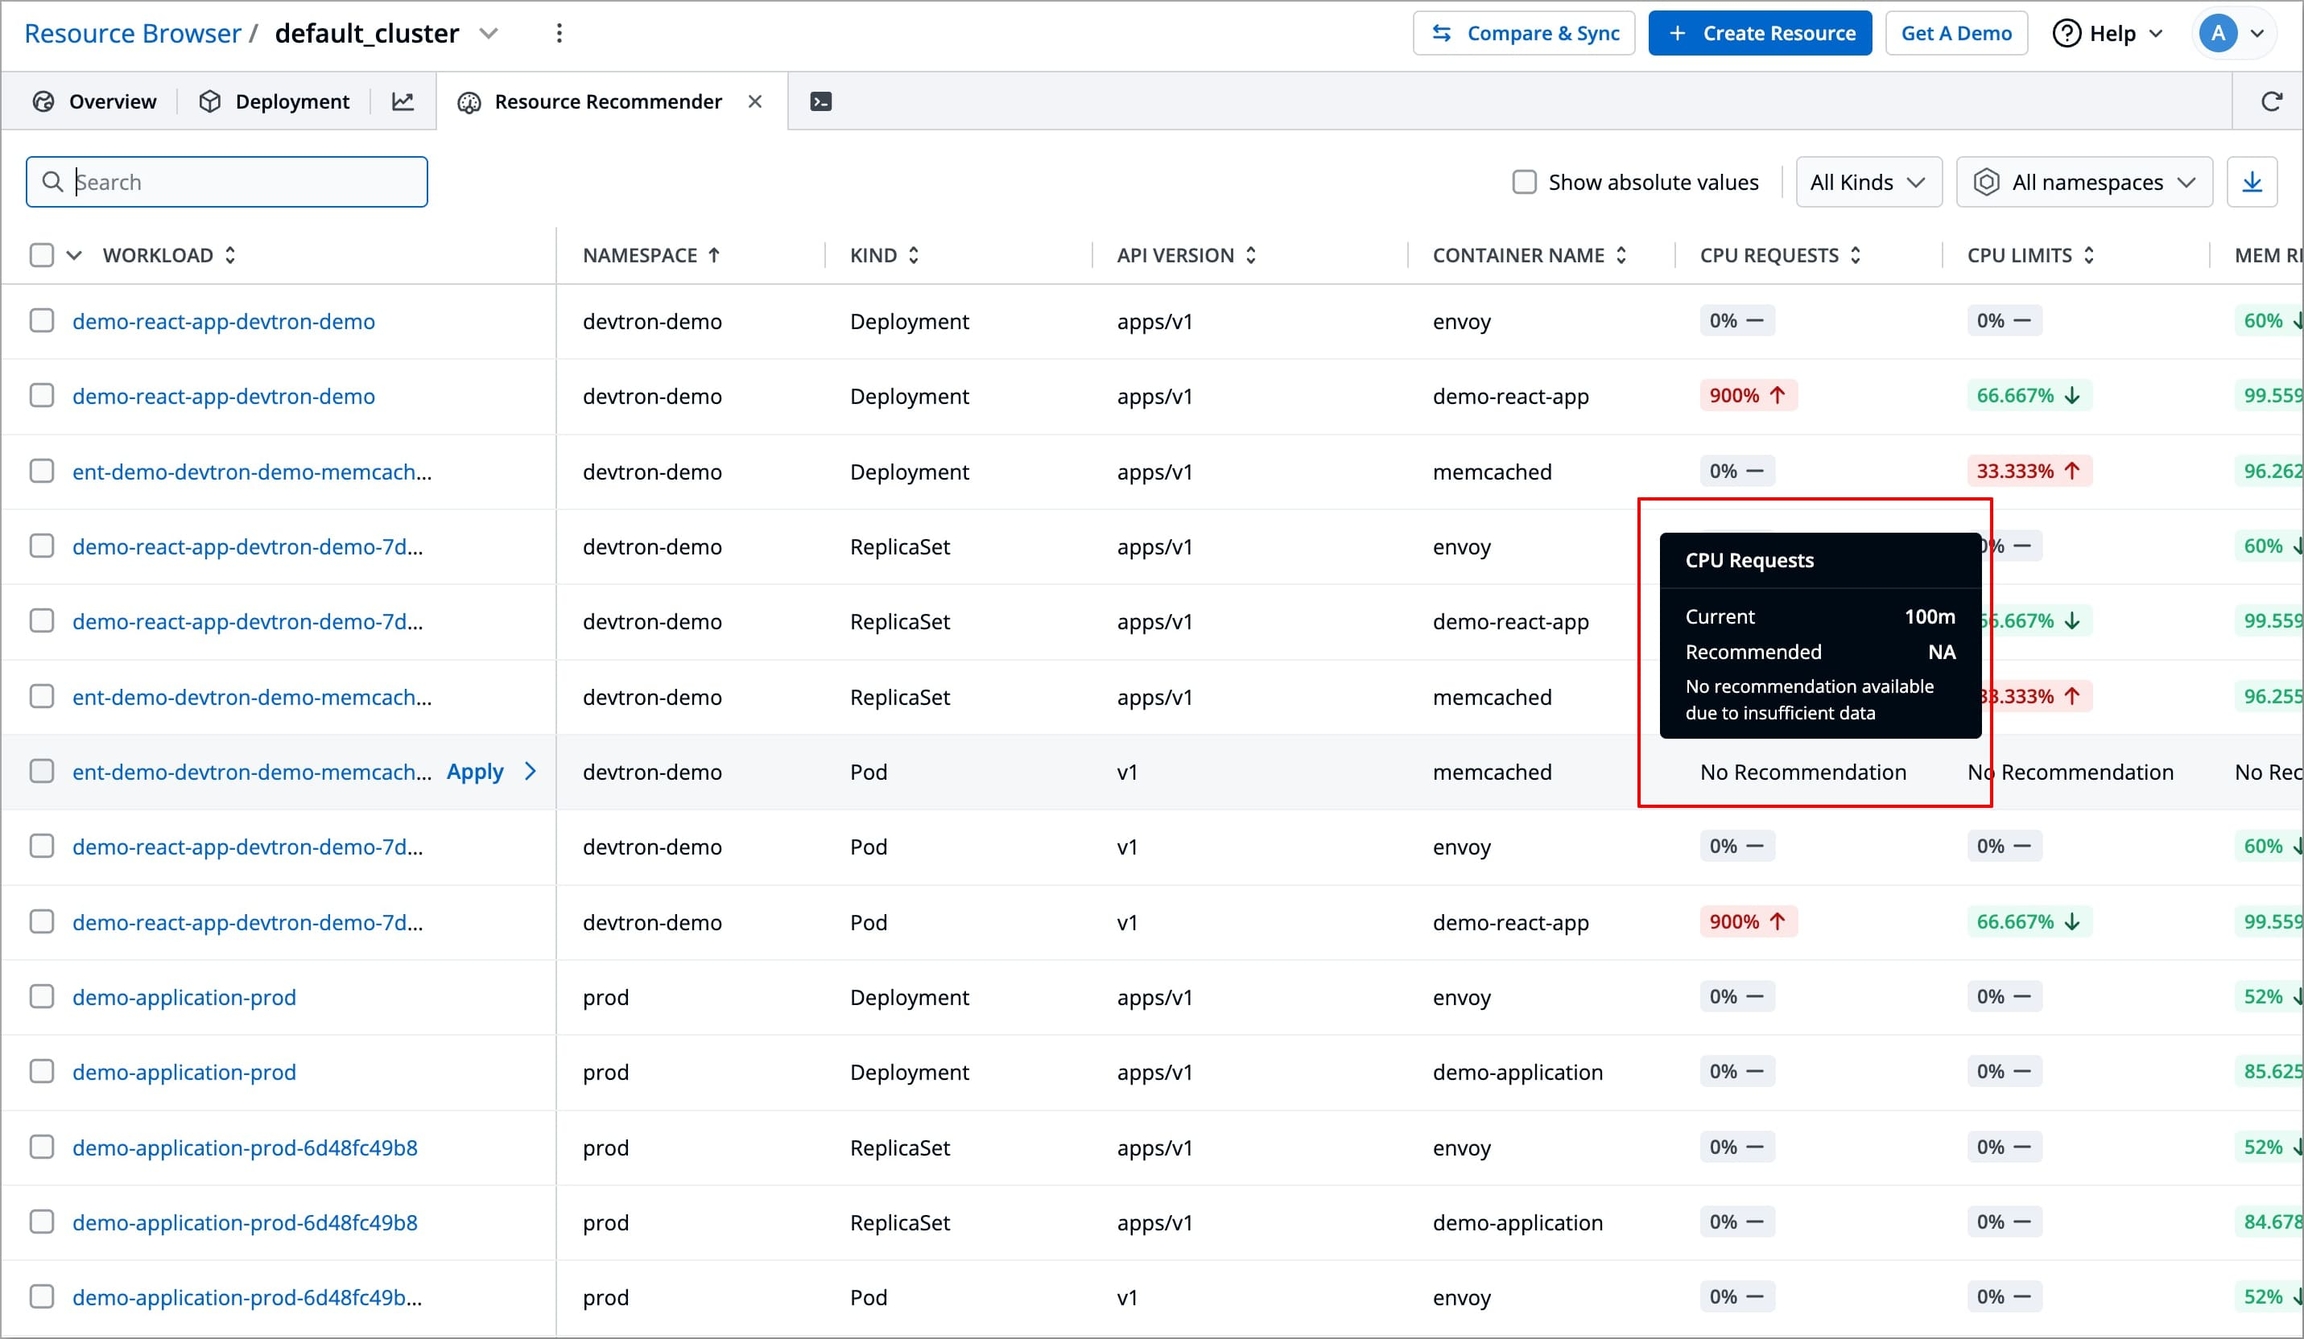
Figure 8d: No Recommendation
Rescan for Recommendations
If you want to rescan for recommendations, use this option to fetch the most recent data for your cluster. To do so, follow the steps below:
Select the kebab menu (⋮) from the right side.
Click Rescan for recommendations.
Rescanning will start, and recommendations will be updated in few minutes.
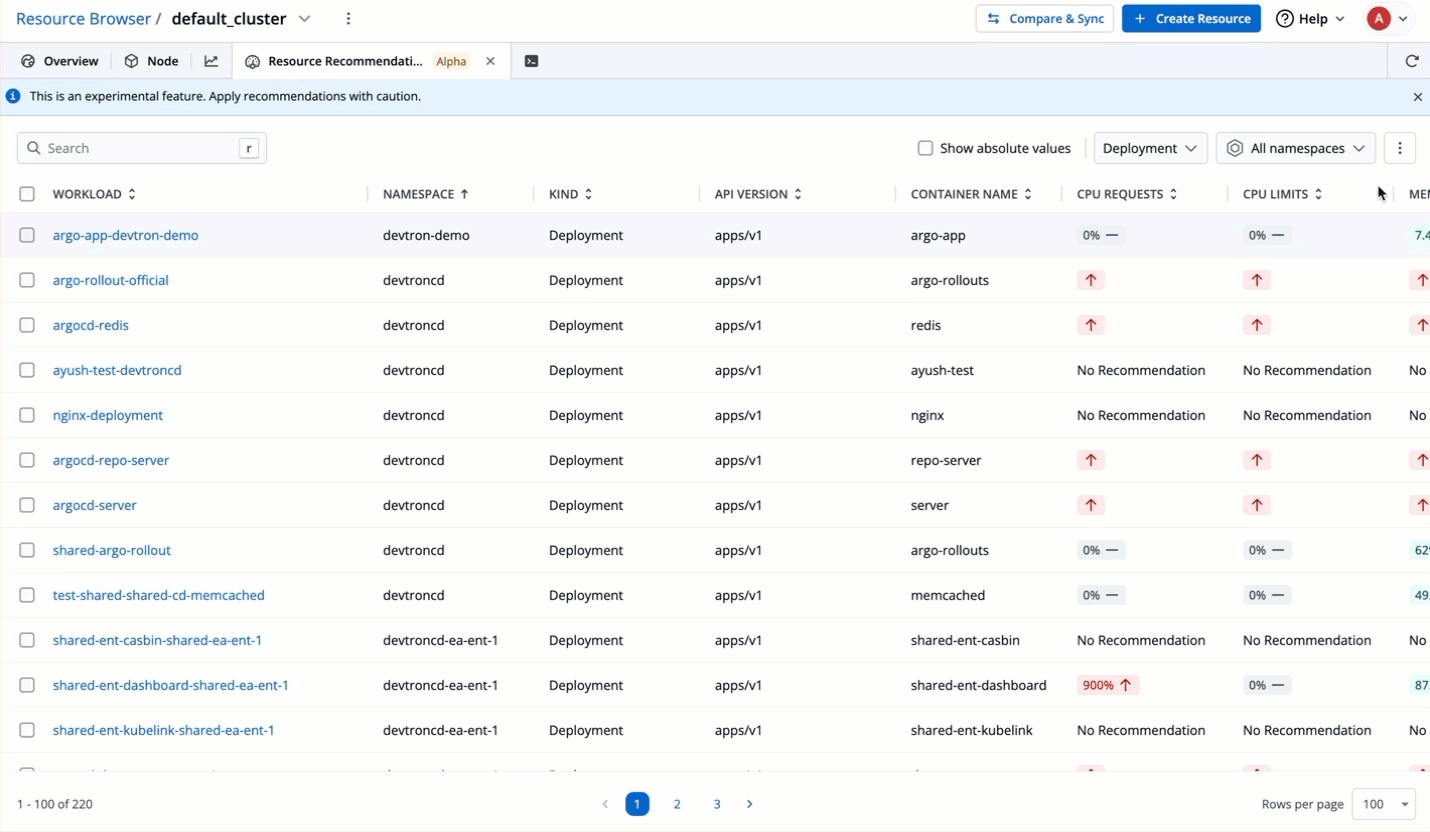
Figure 9: Rescanning for Recommendations
Apply Recommendations
After inspecting the recommendations, you can directly apply them to your workloads in the following ways:
Apply Per Workload
To apply recommended resources to a specific workload, follow the steps below:
Hover over the specific workload row and click the Apply button that appears on hover.
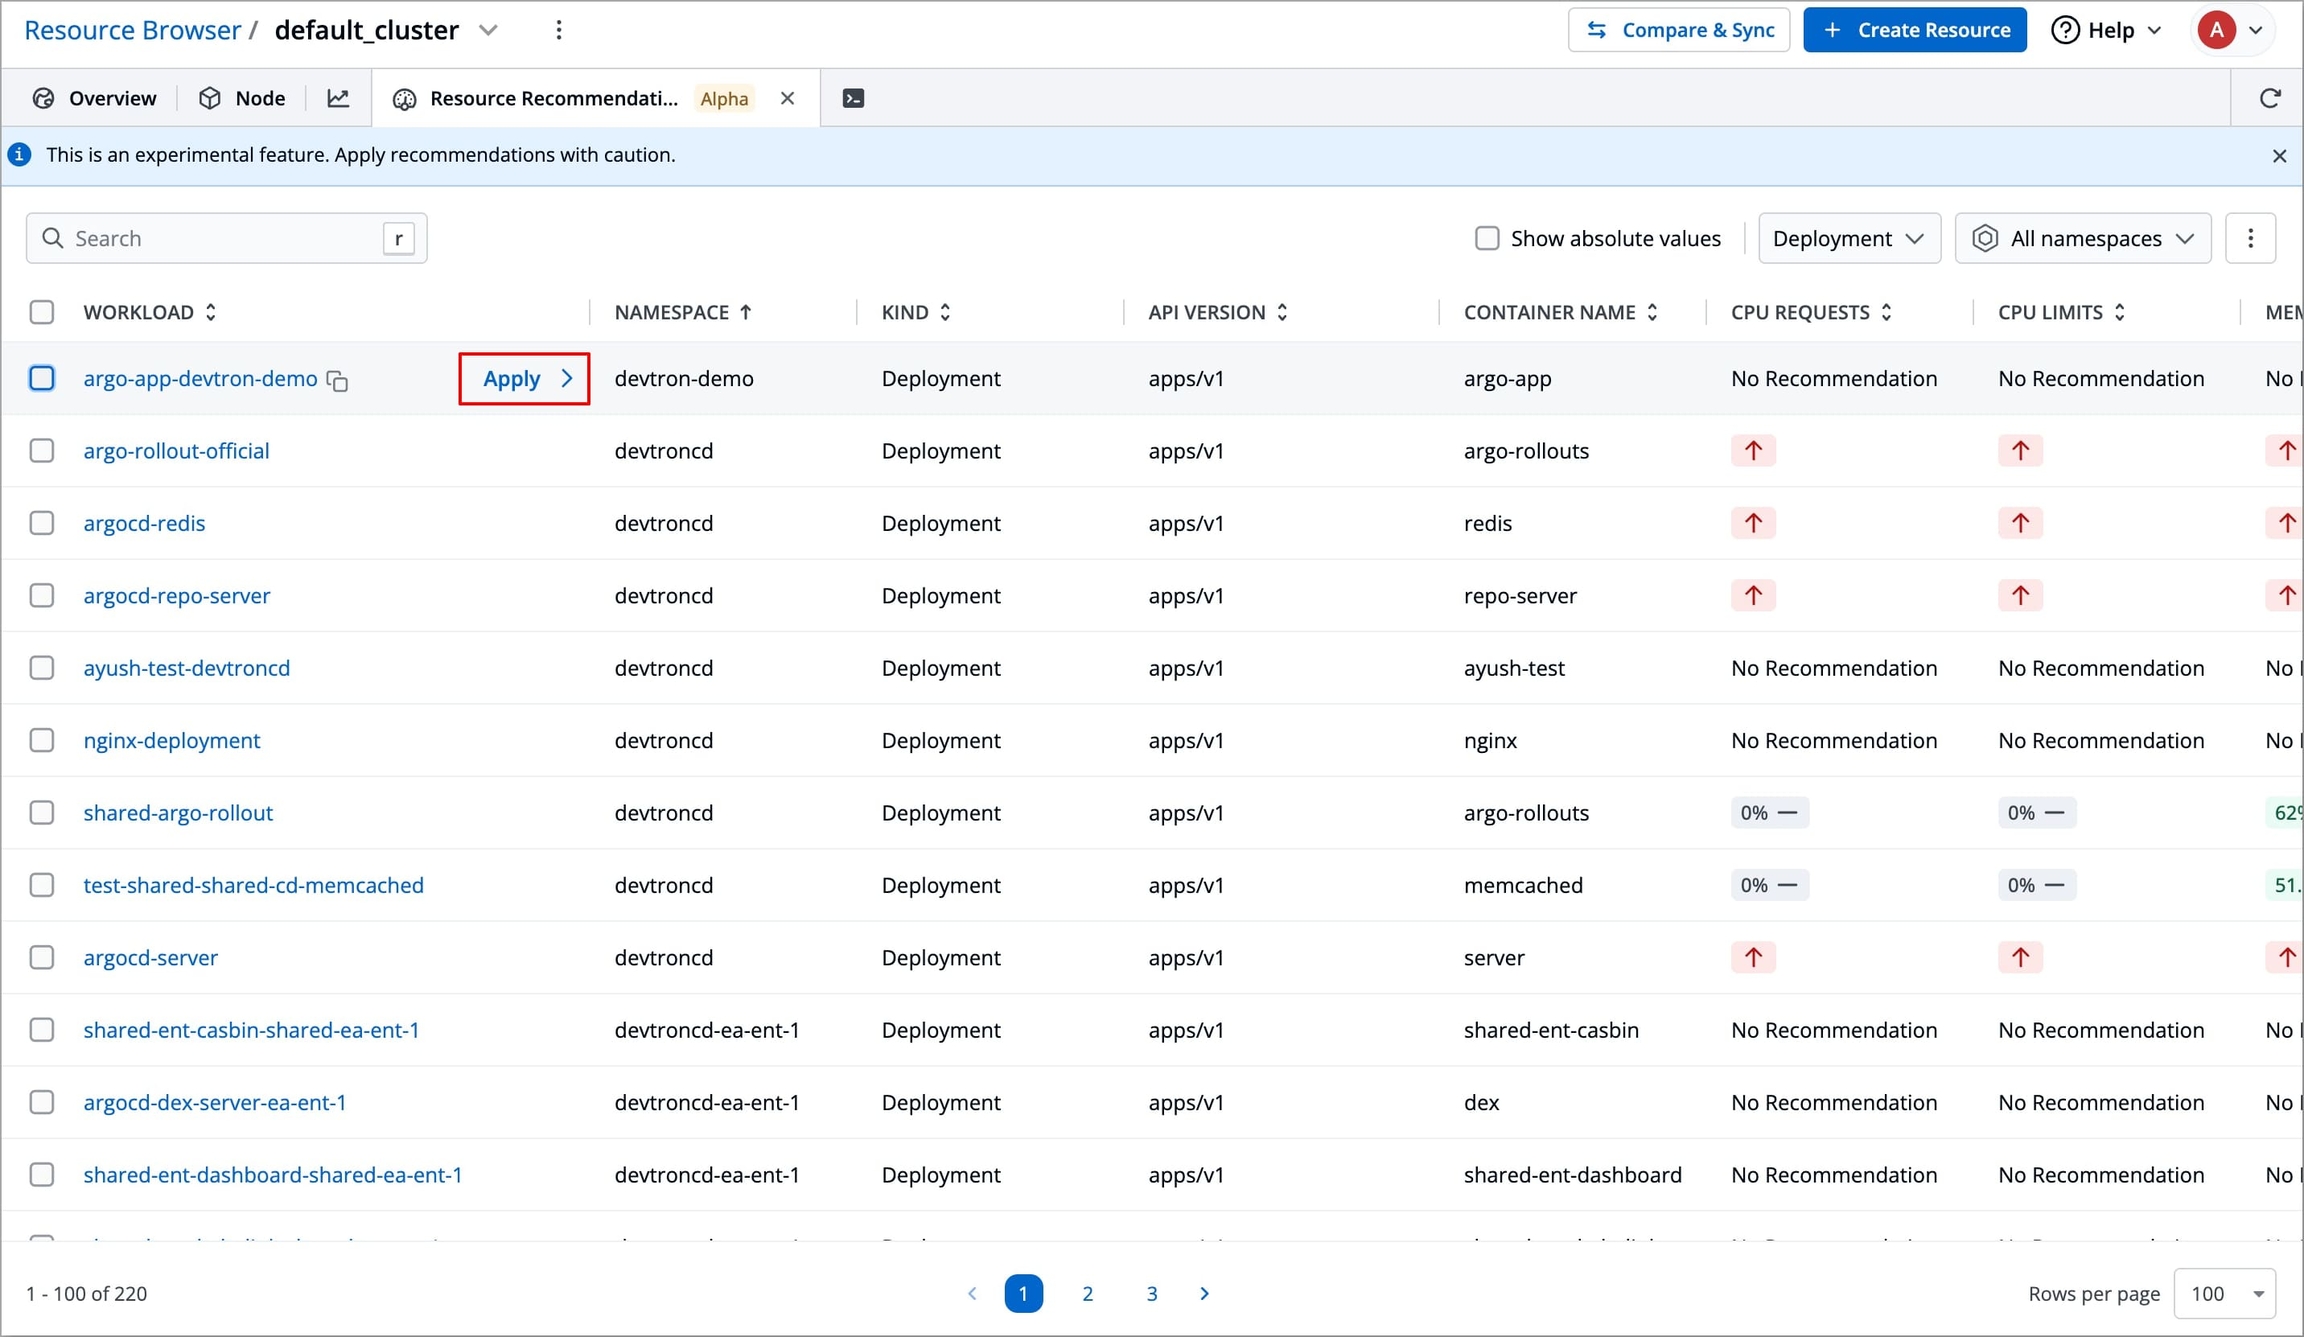
Figure 10: Selecting Workload A modal window will open, displaying the comparison between the current and recommended resource values for that specific workload; review the recommended changes carefully.
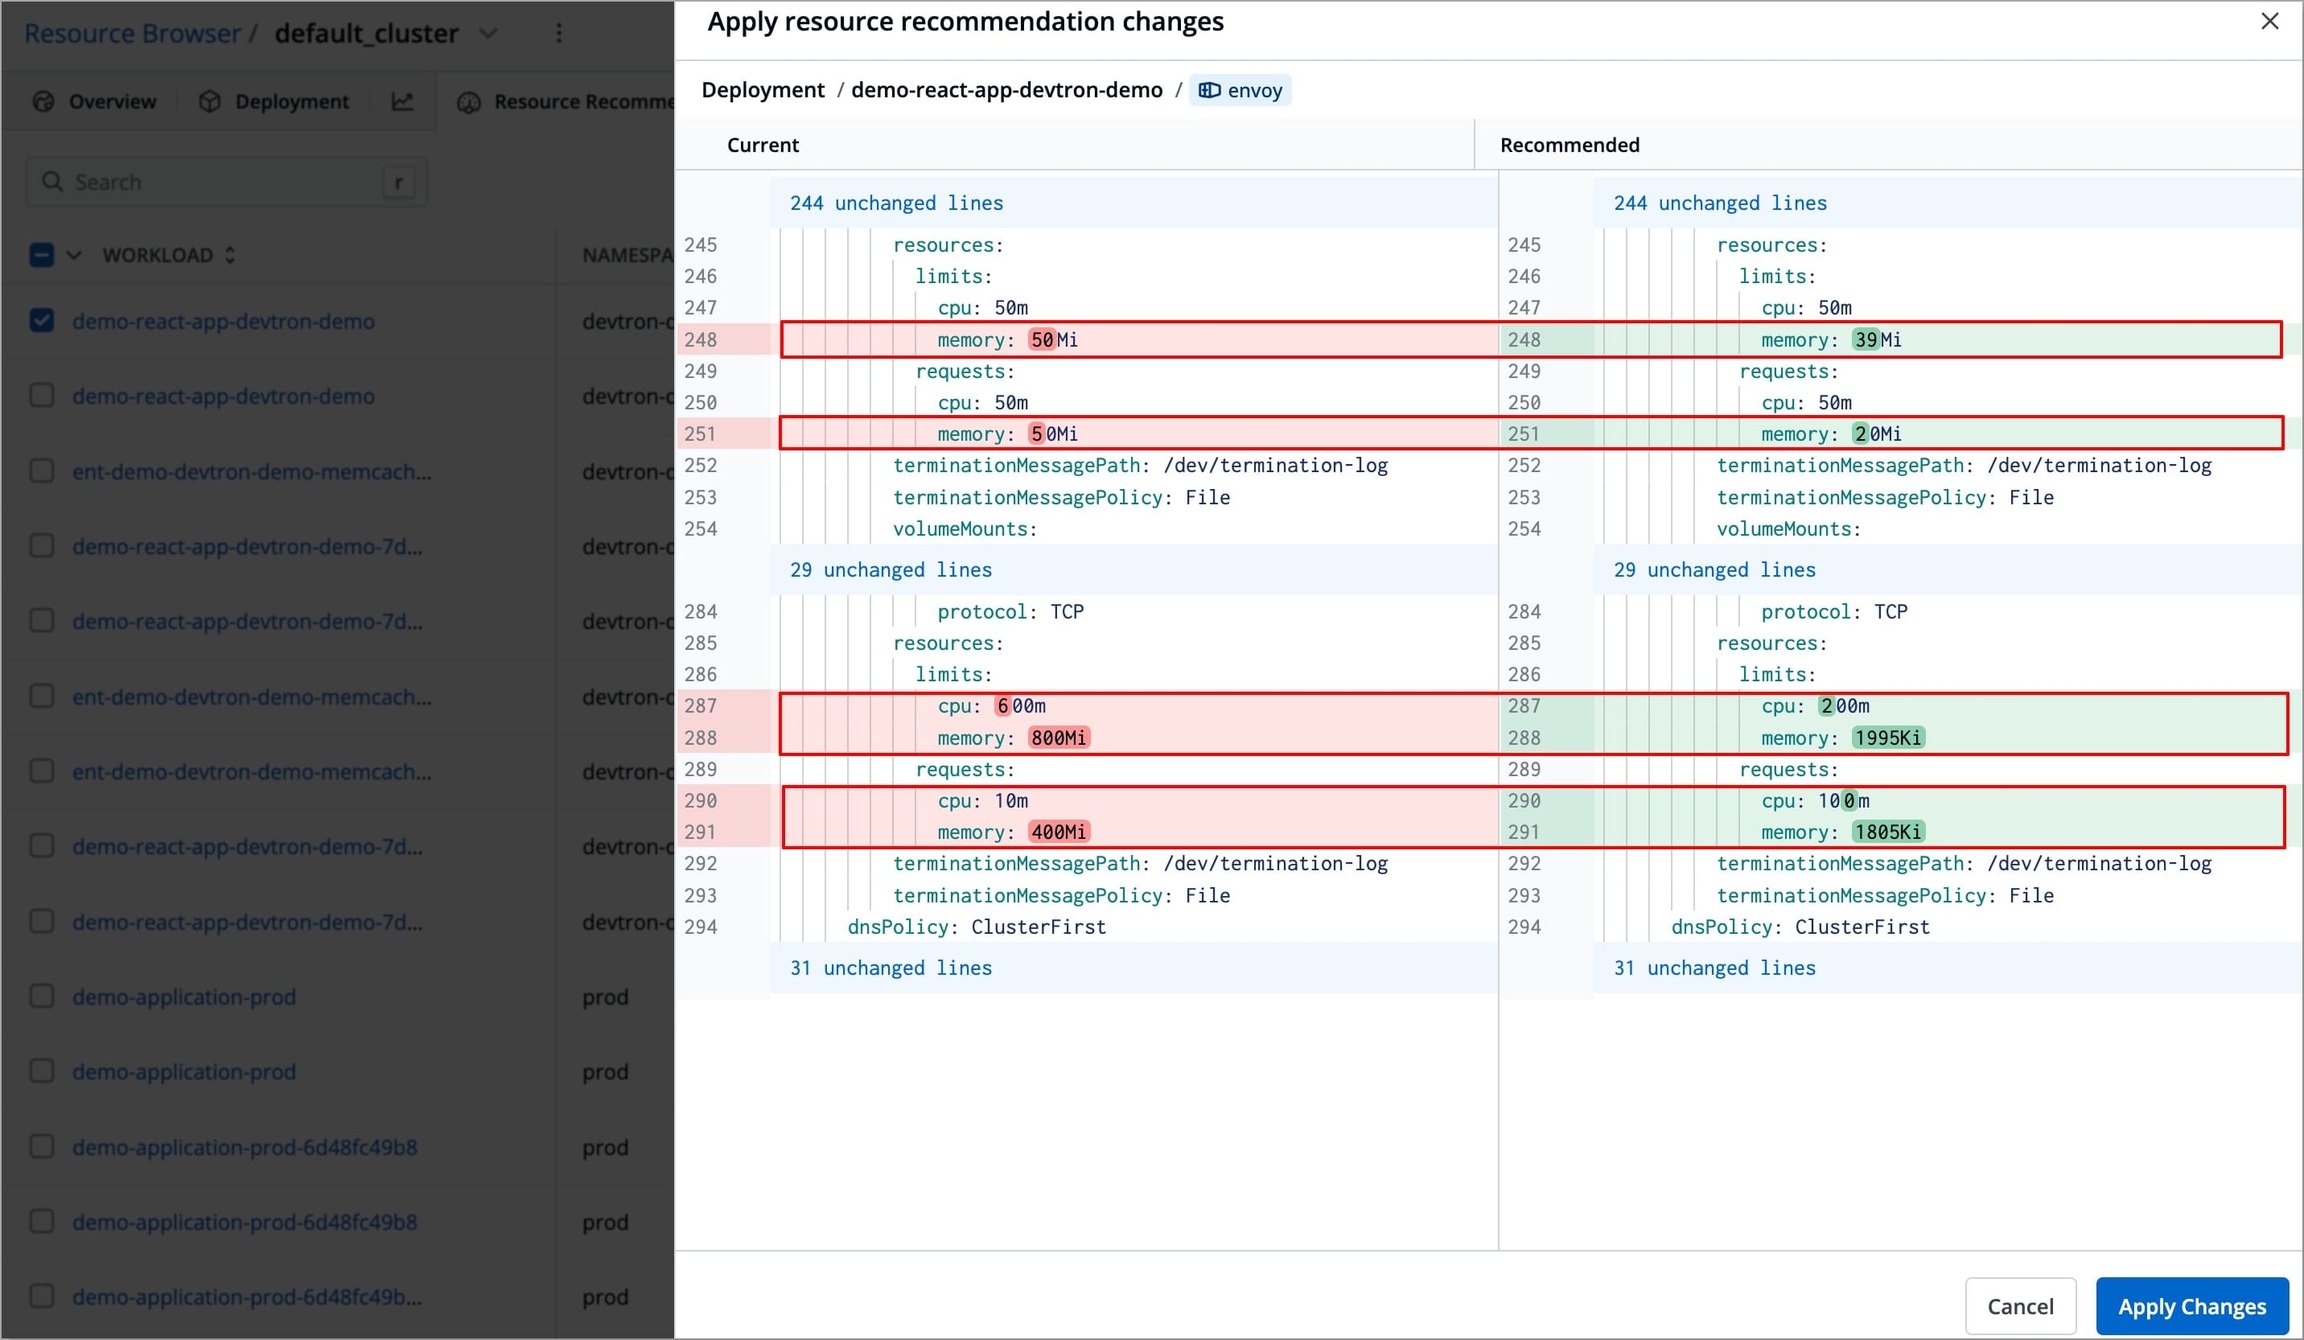
Figure 11: Comparing Configurations Click Apply Changes to update the resource configuration.
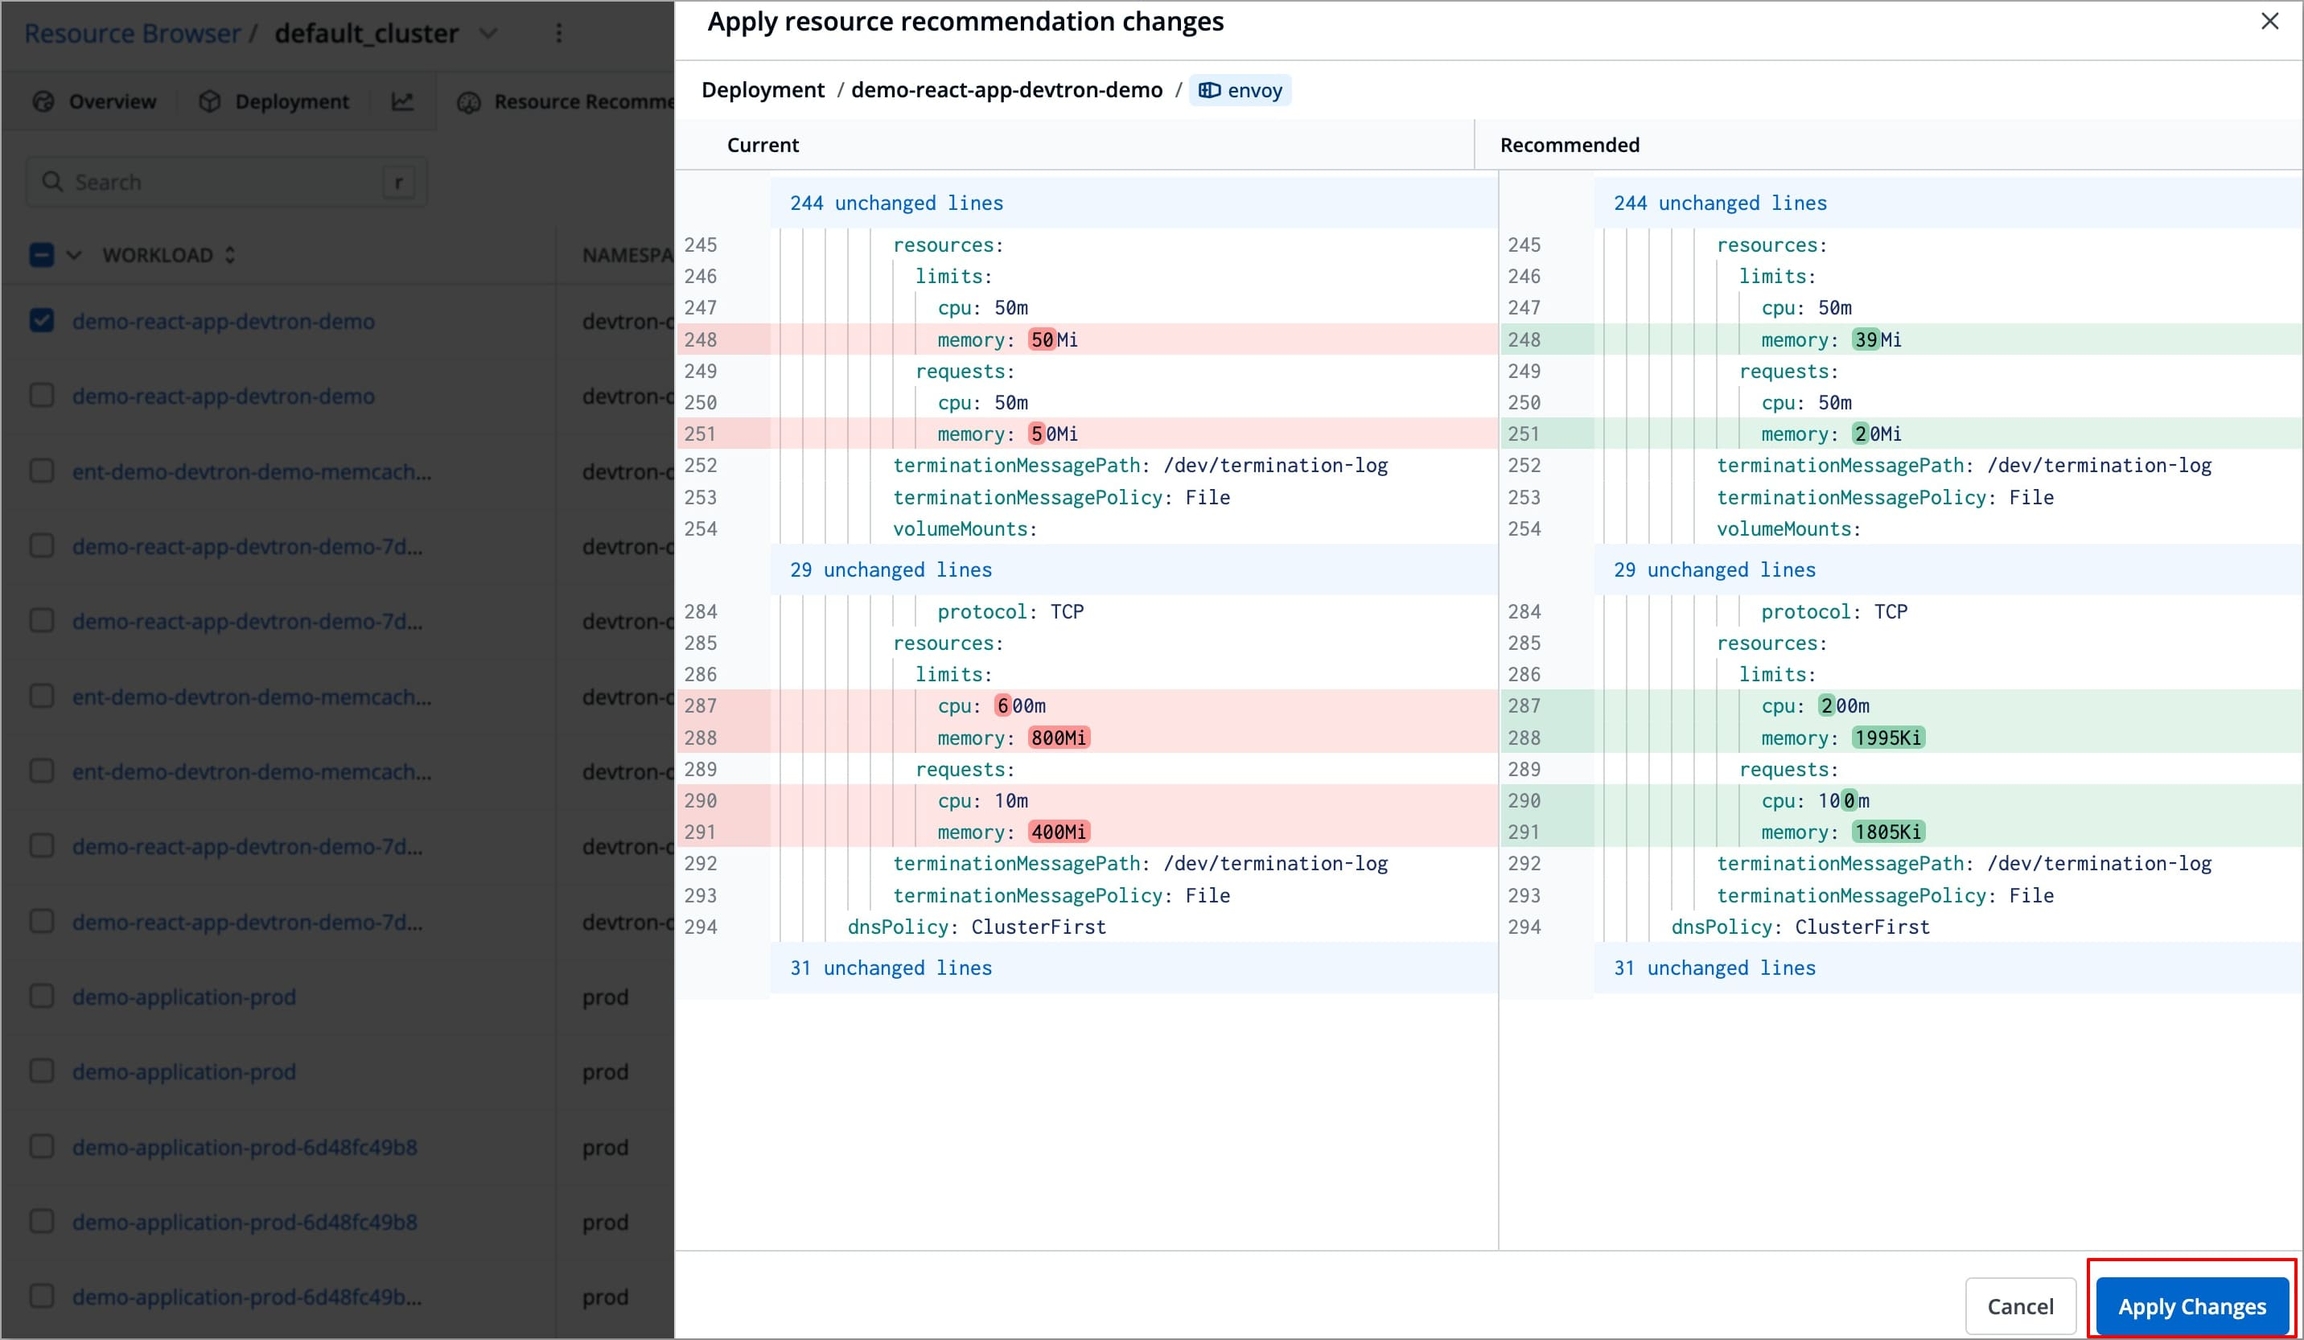
Figure 12: Applying Changes
Bulk Apply
If you wish, you can apply recommended resource configurations to multiple or all workloads at once. To do so, follow the steps below:
Select the workloads for which you want to apply recommended resource configurations and click Apply Changes.
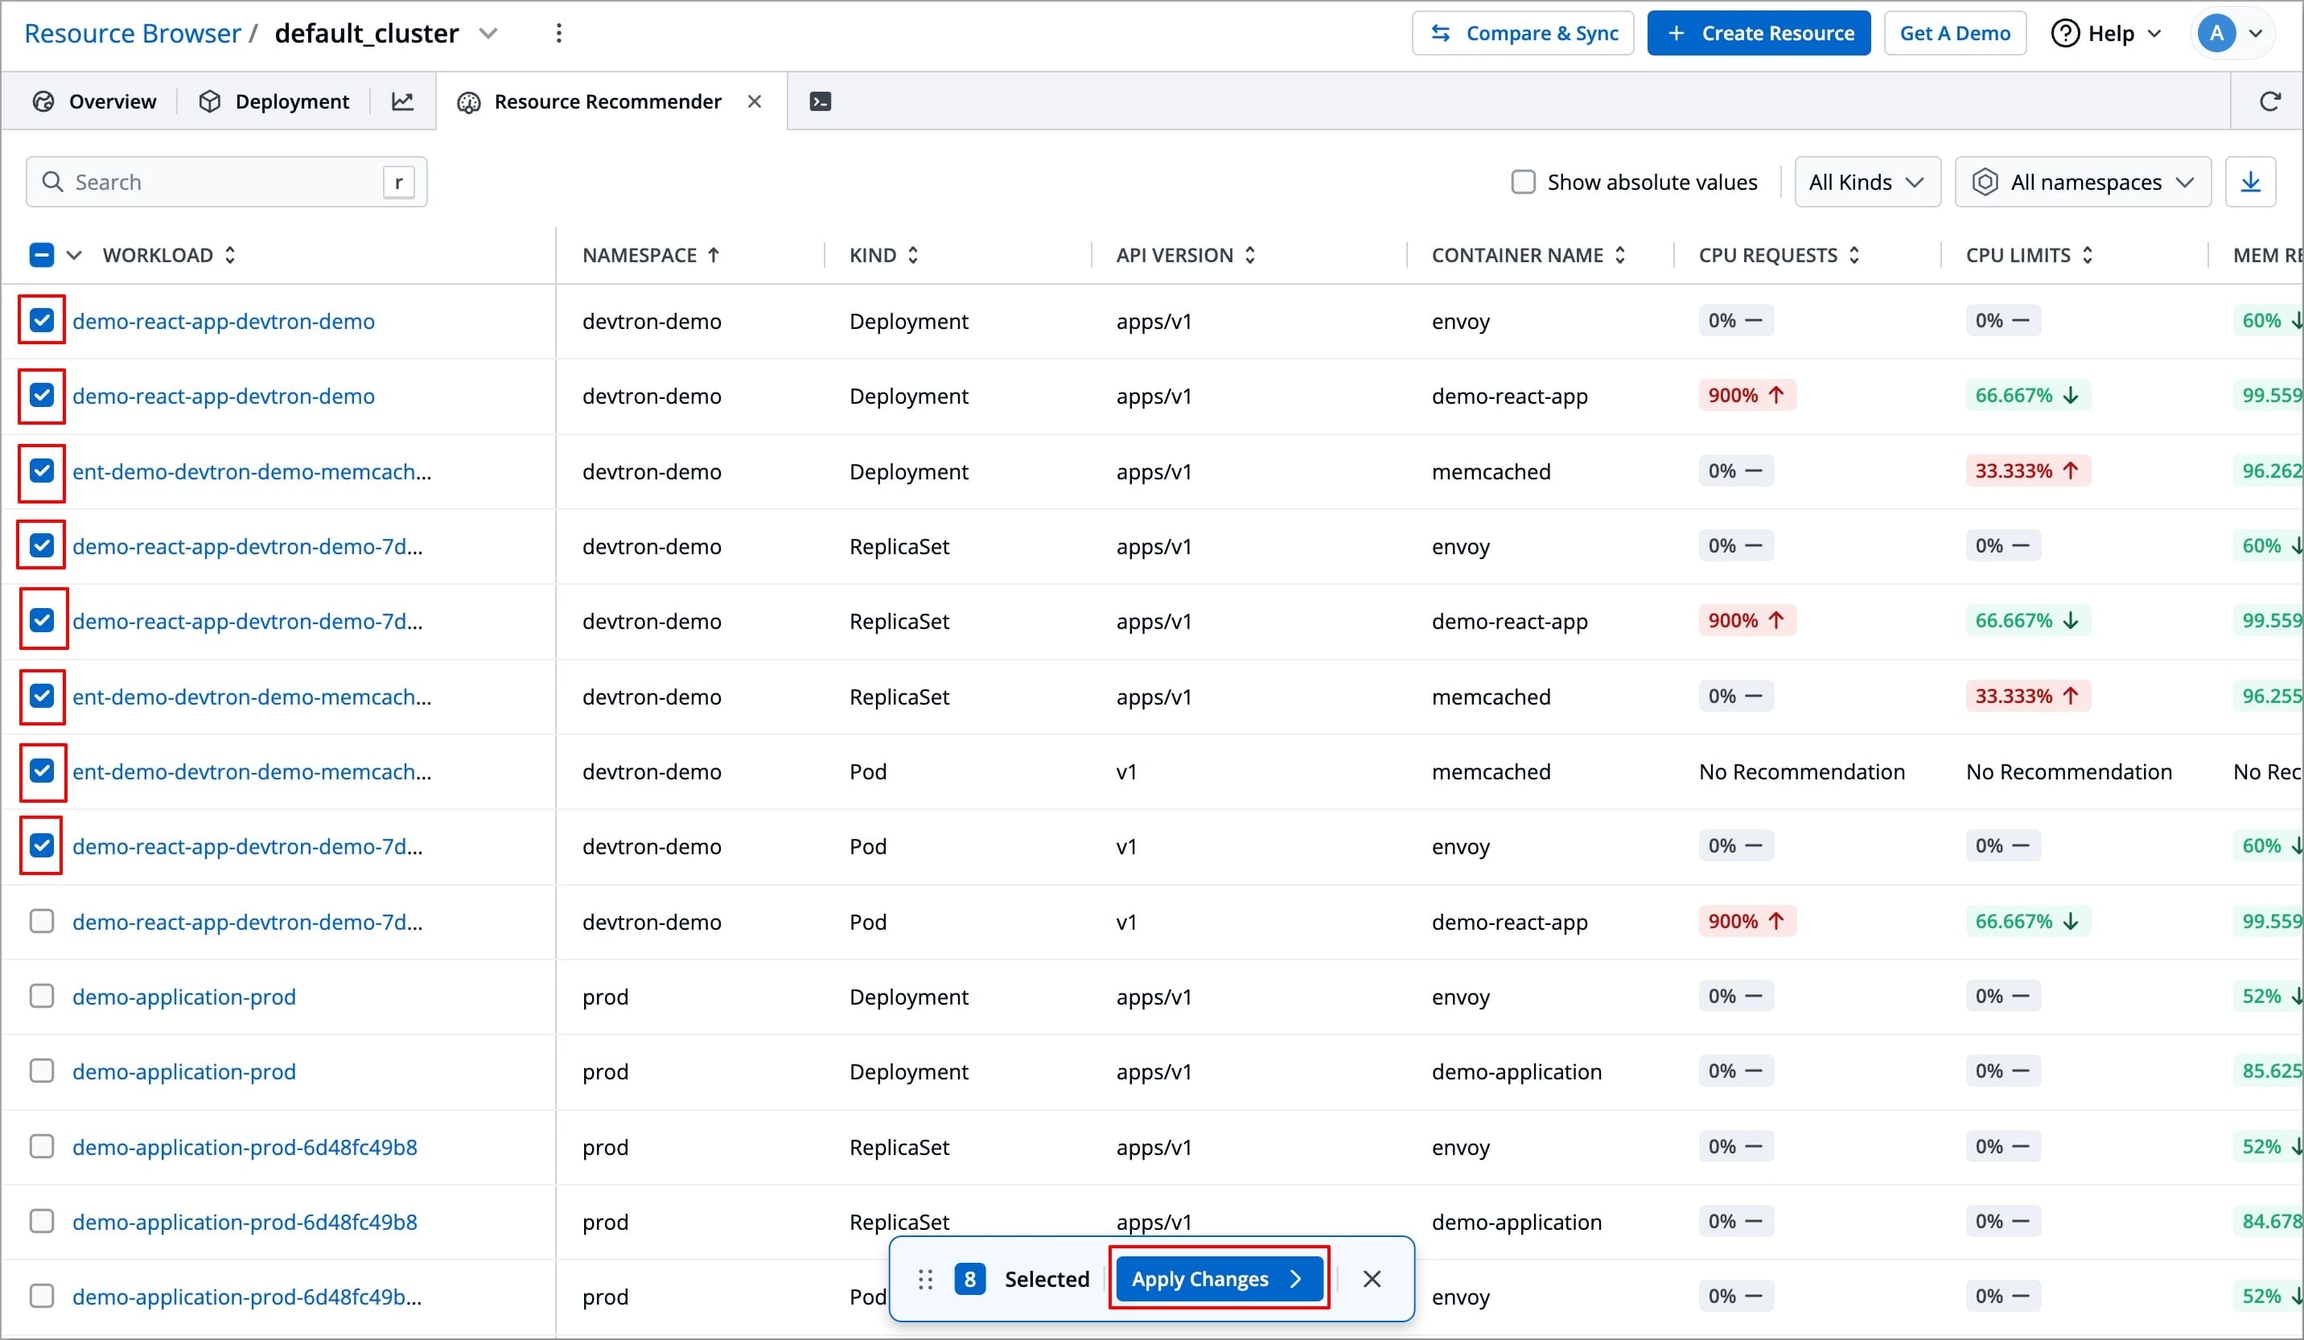
Figure 13: Selecting Workloads A modal window will open, displaying the comparison between the current and recommended resource values for each workload; review the recommended changes for each workload carefully.
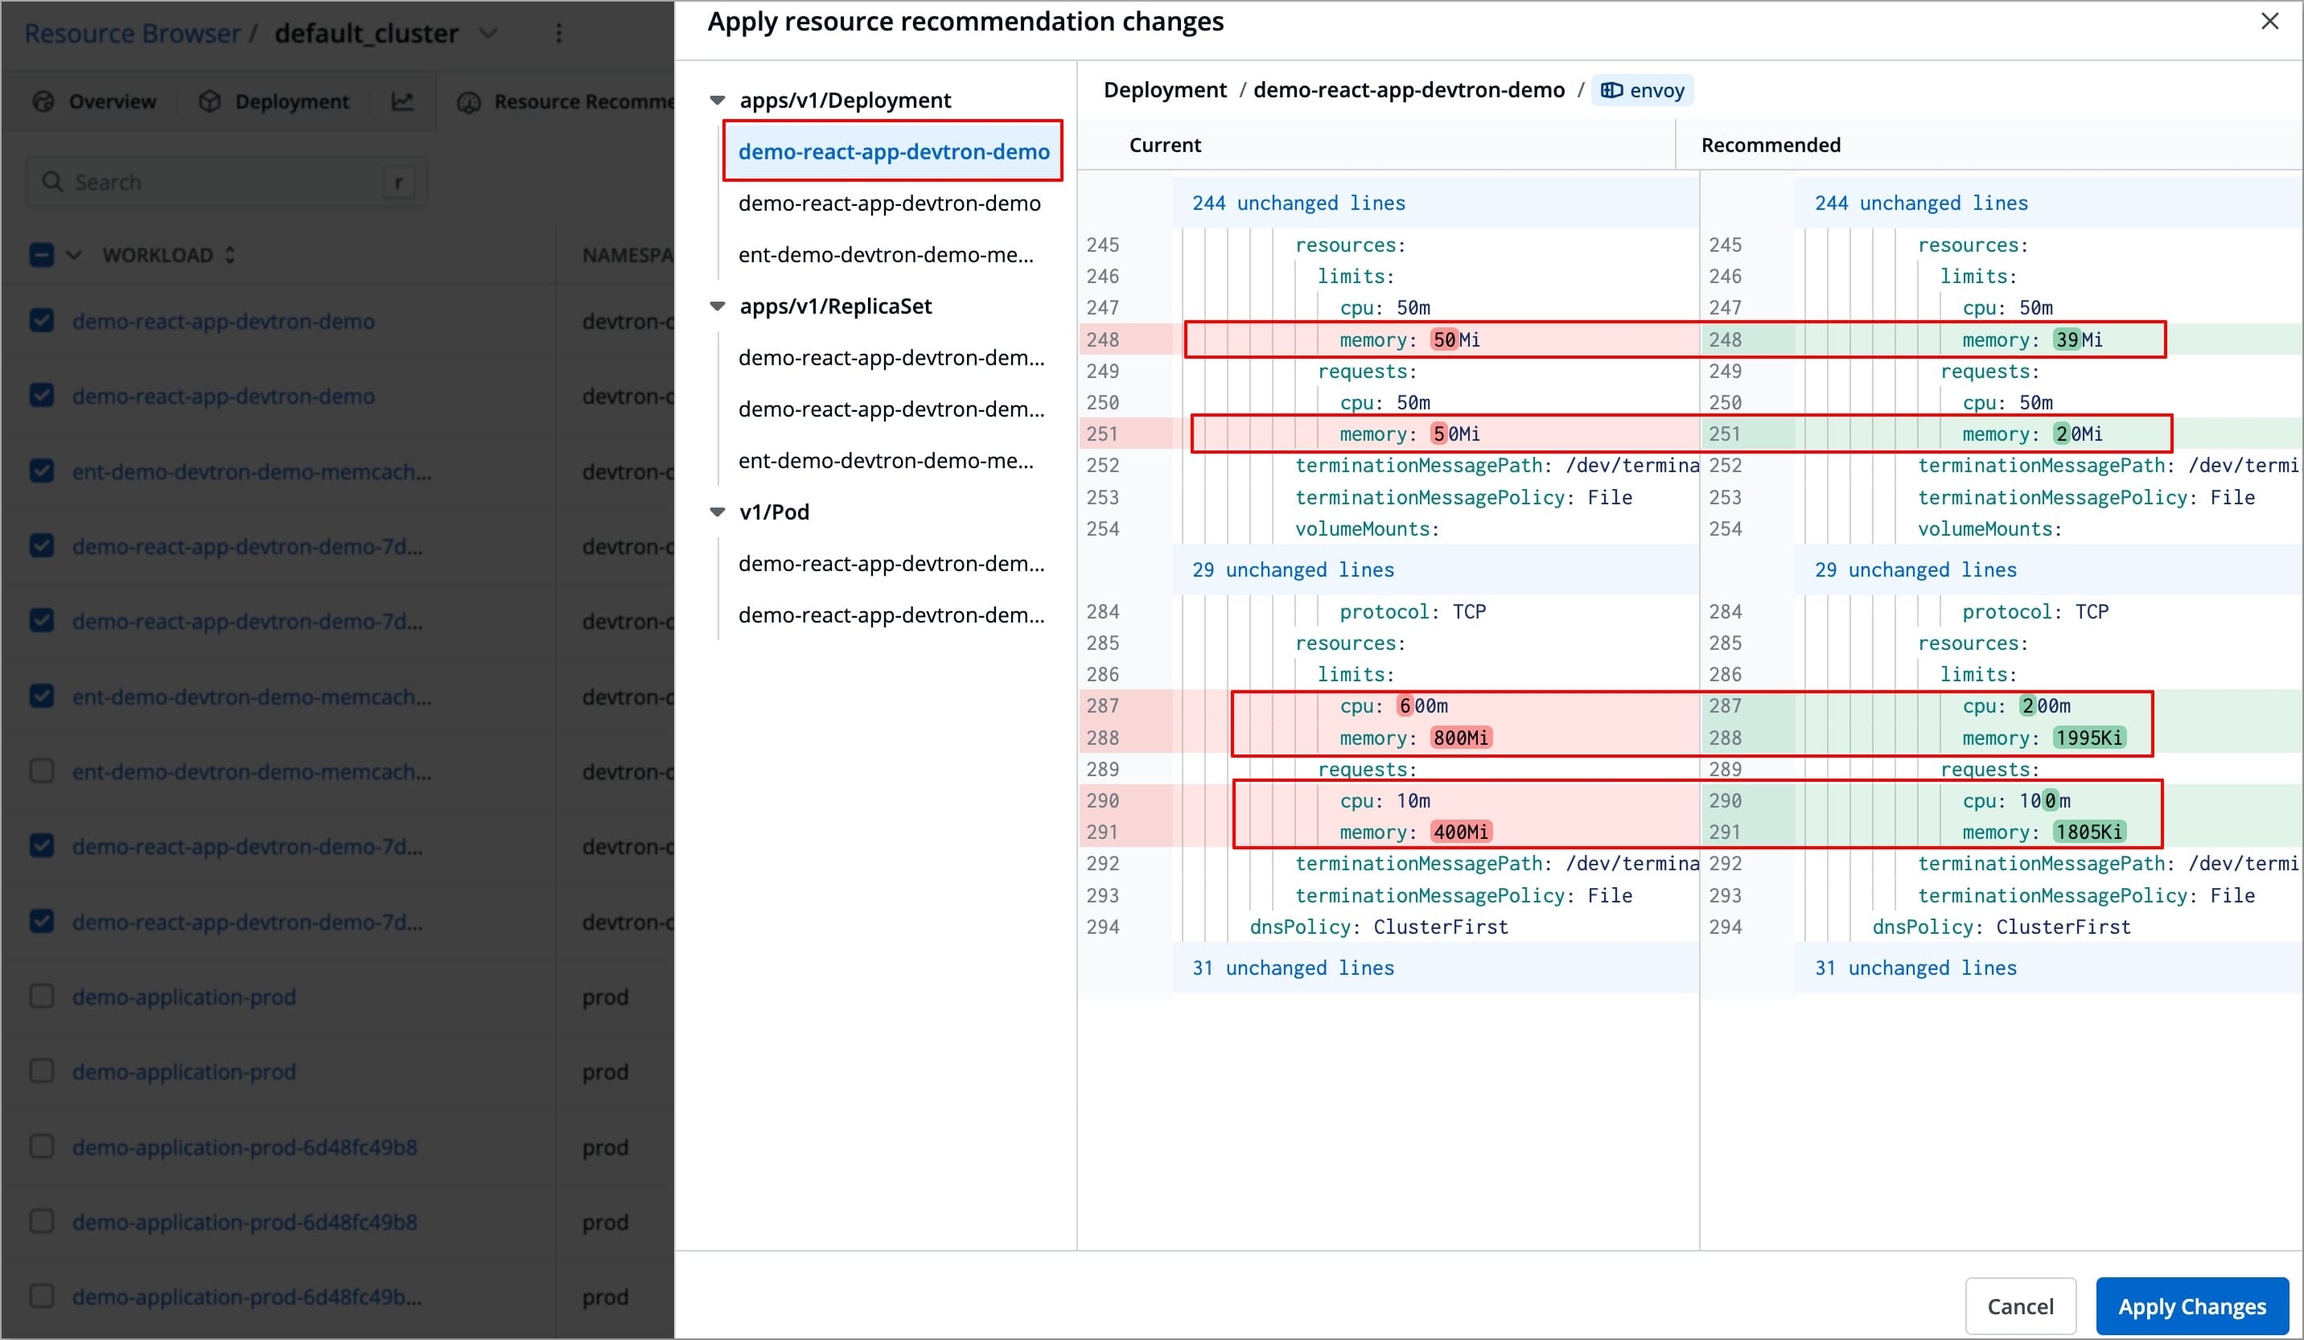
Figure 14: Comparing Configurations for each workload Click Apply Changes to update the resource configuration.
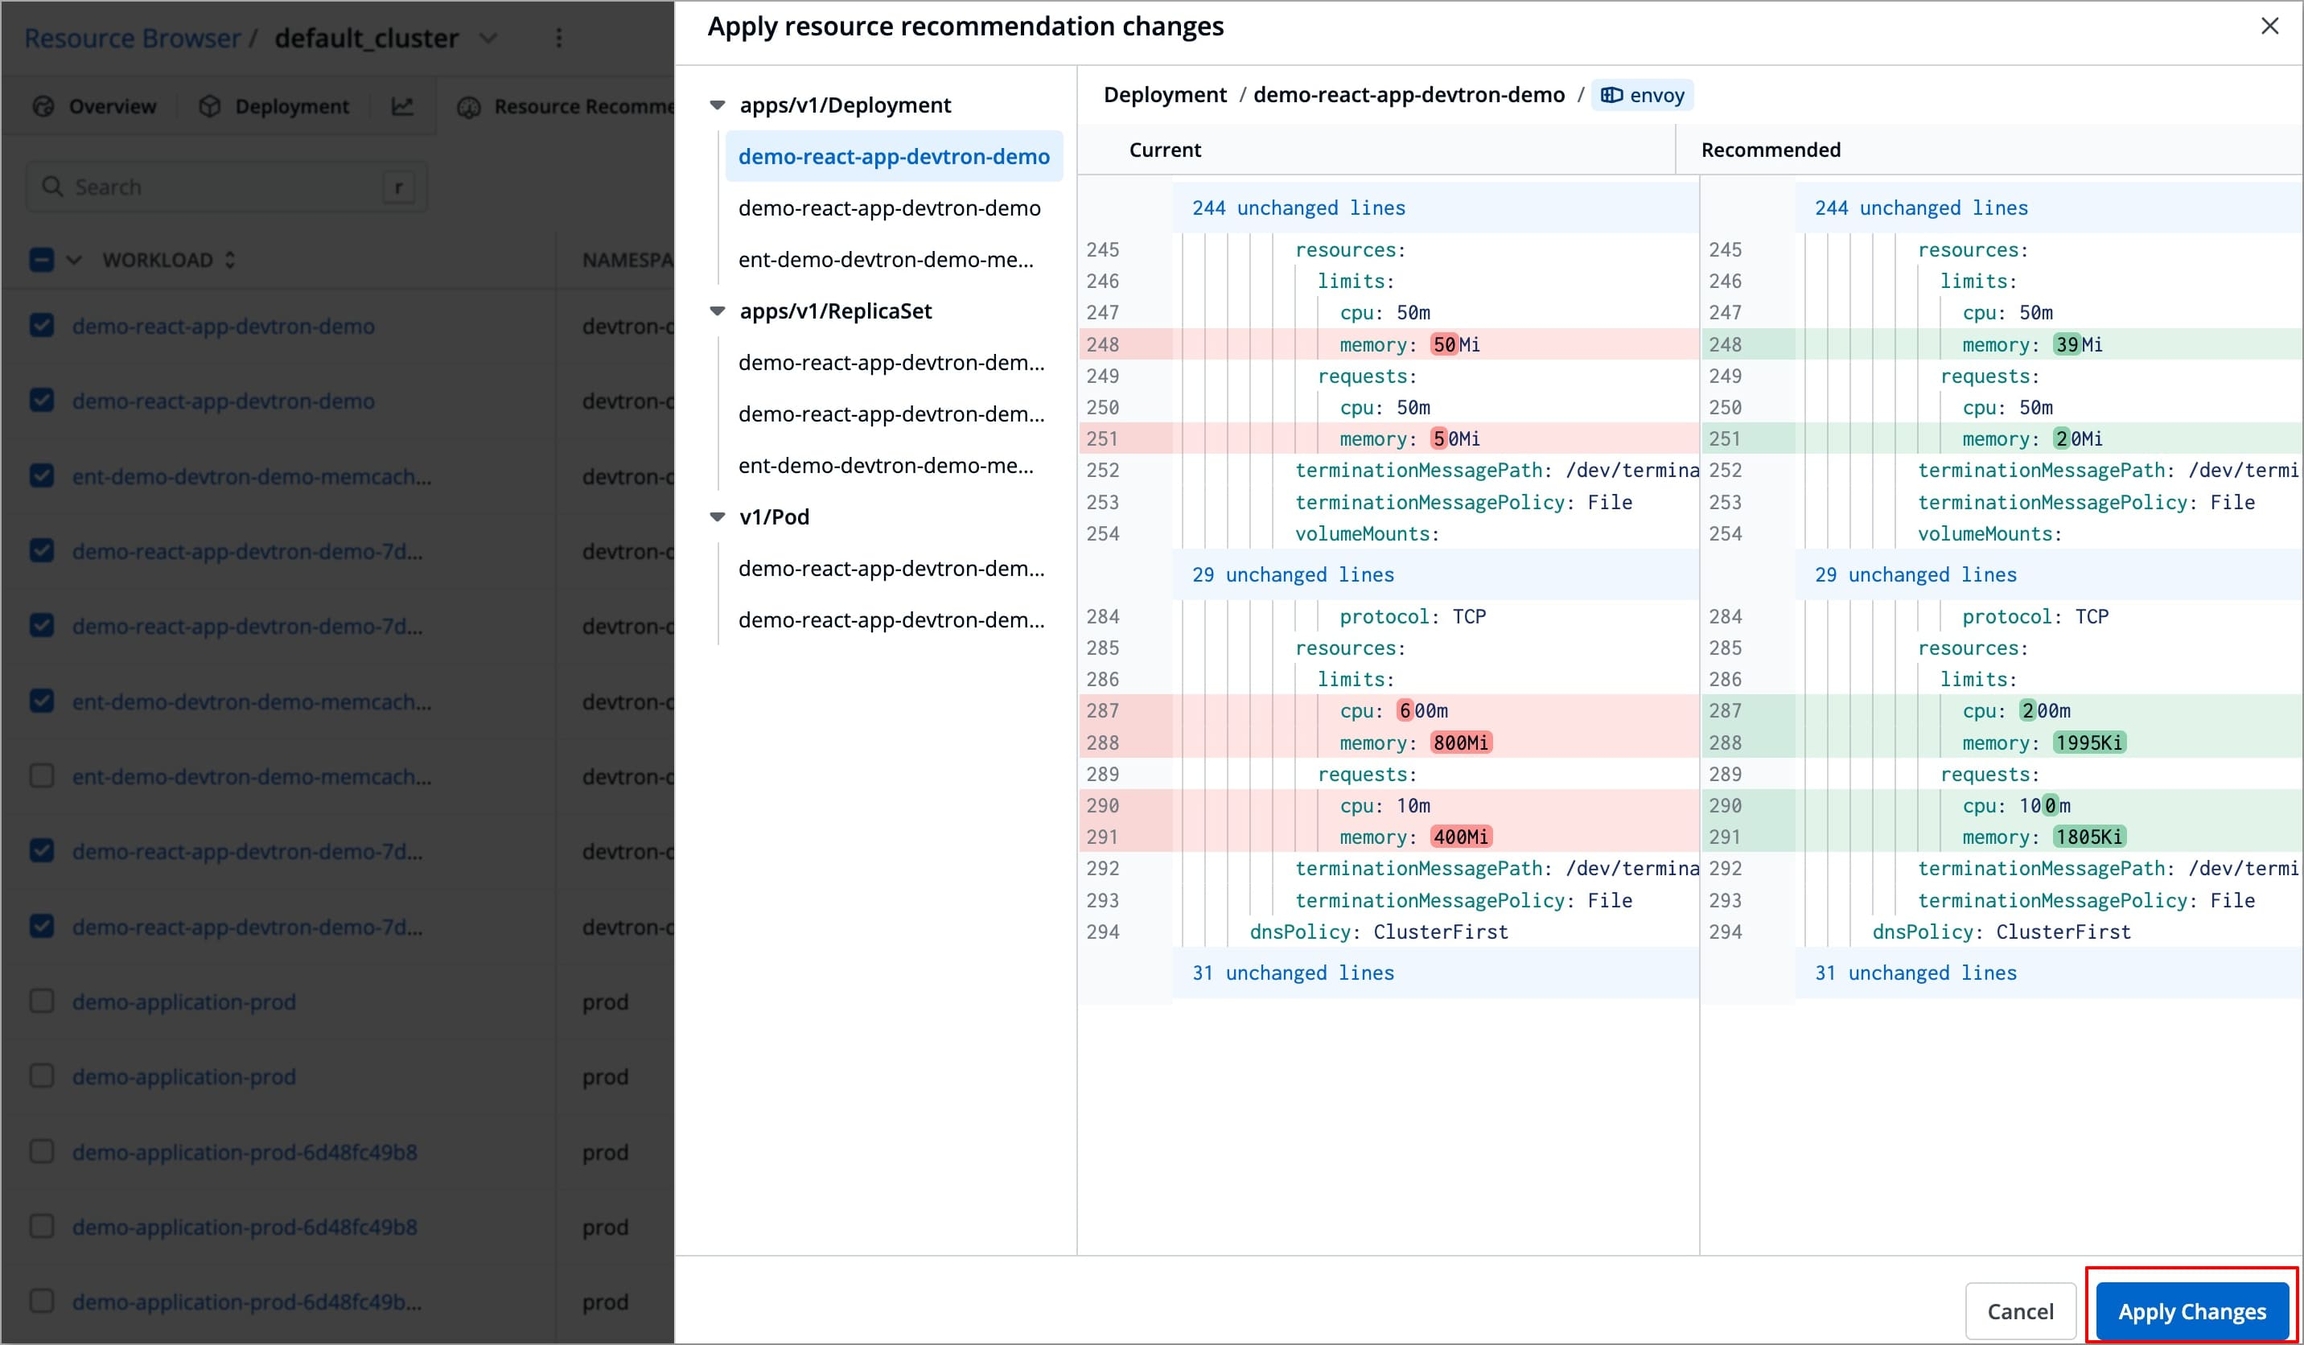
Figure 15: Applying Changes
Export Recommendations in CSV File
You can also export resource recommendations to a CSV file. To do so, follow the steps below:
Filter the workloads for which you want to export resource recommendations, based on their
KindandNamespace. By default, it will export resource recommendations for all workloads.Click the Download button; a dialog box will appear displaying that your export is ready. By default, the file will be downloaded automatically to your system. If you wish you can select Click Here To Download Manually to download the file manually.
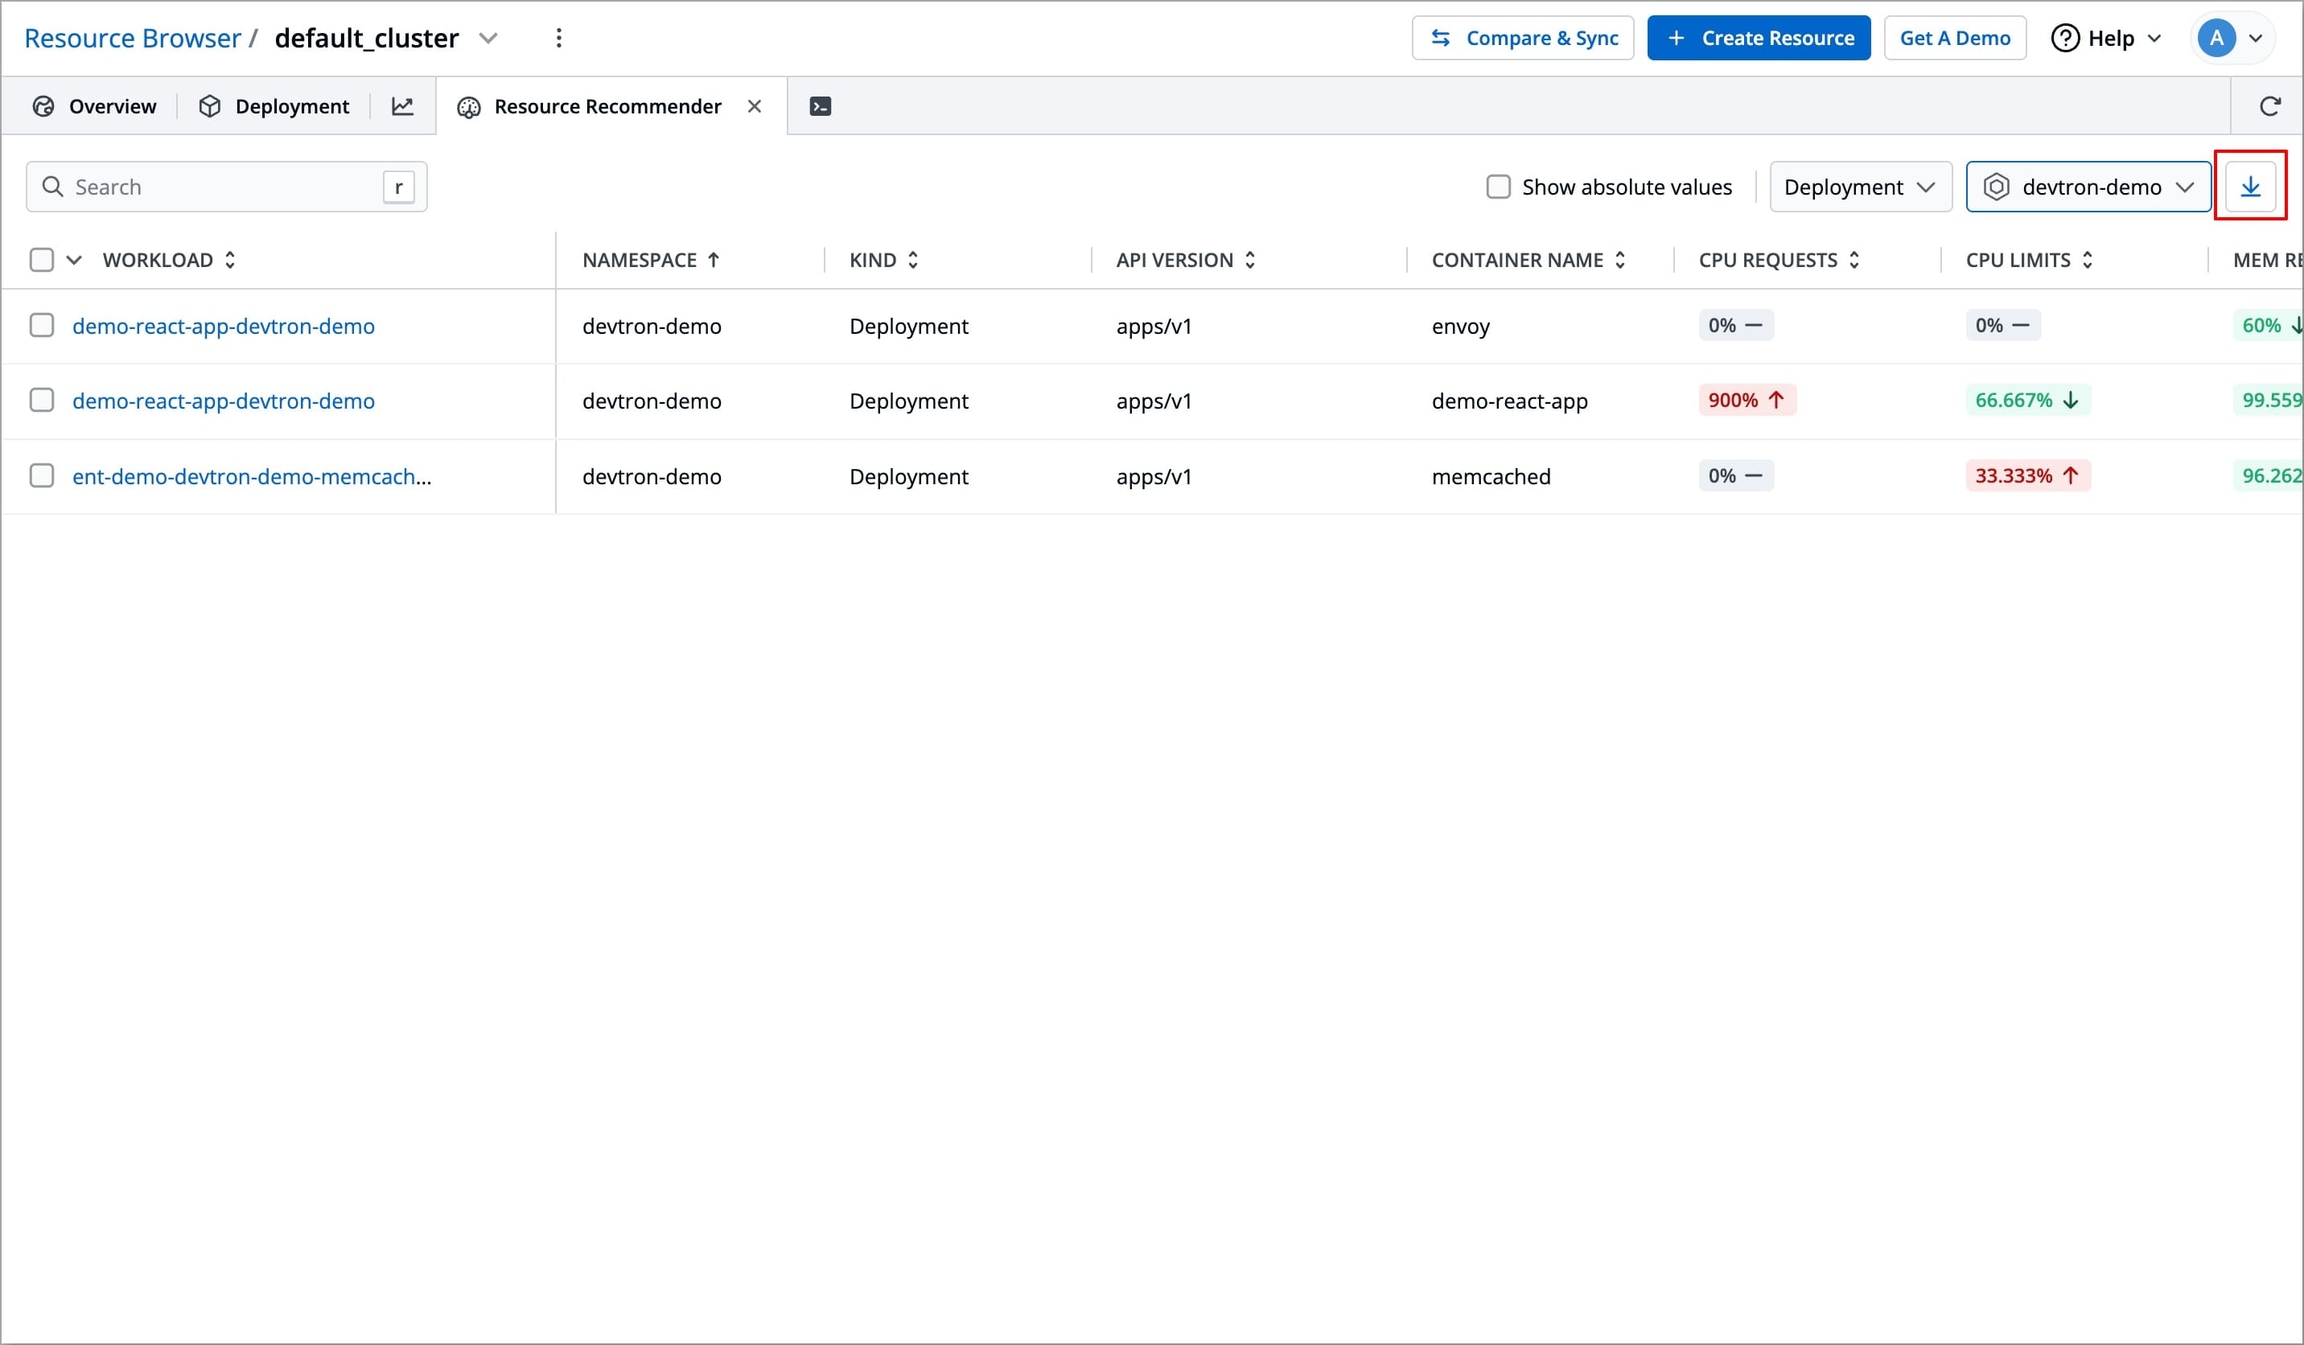
Figure 16a: Clicking Download Button 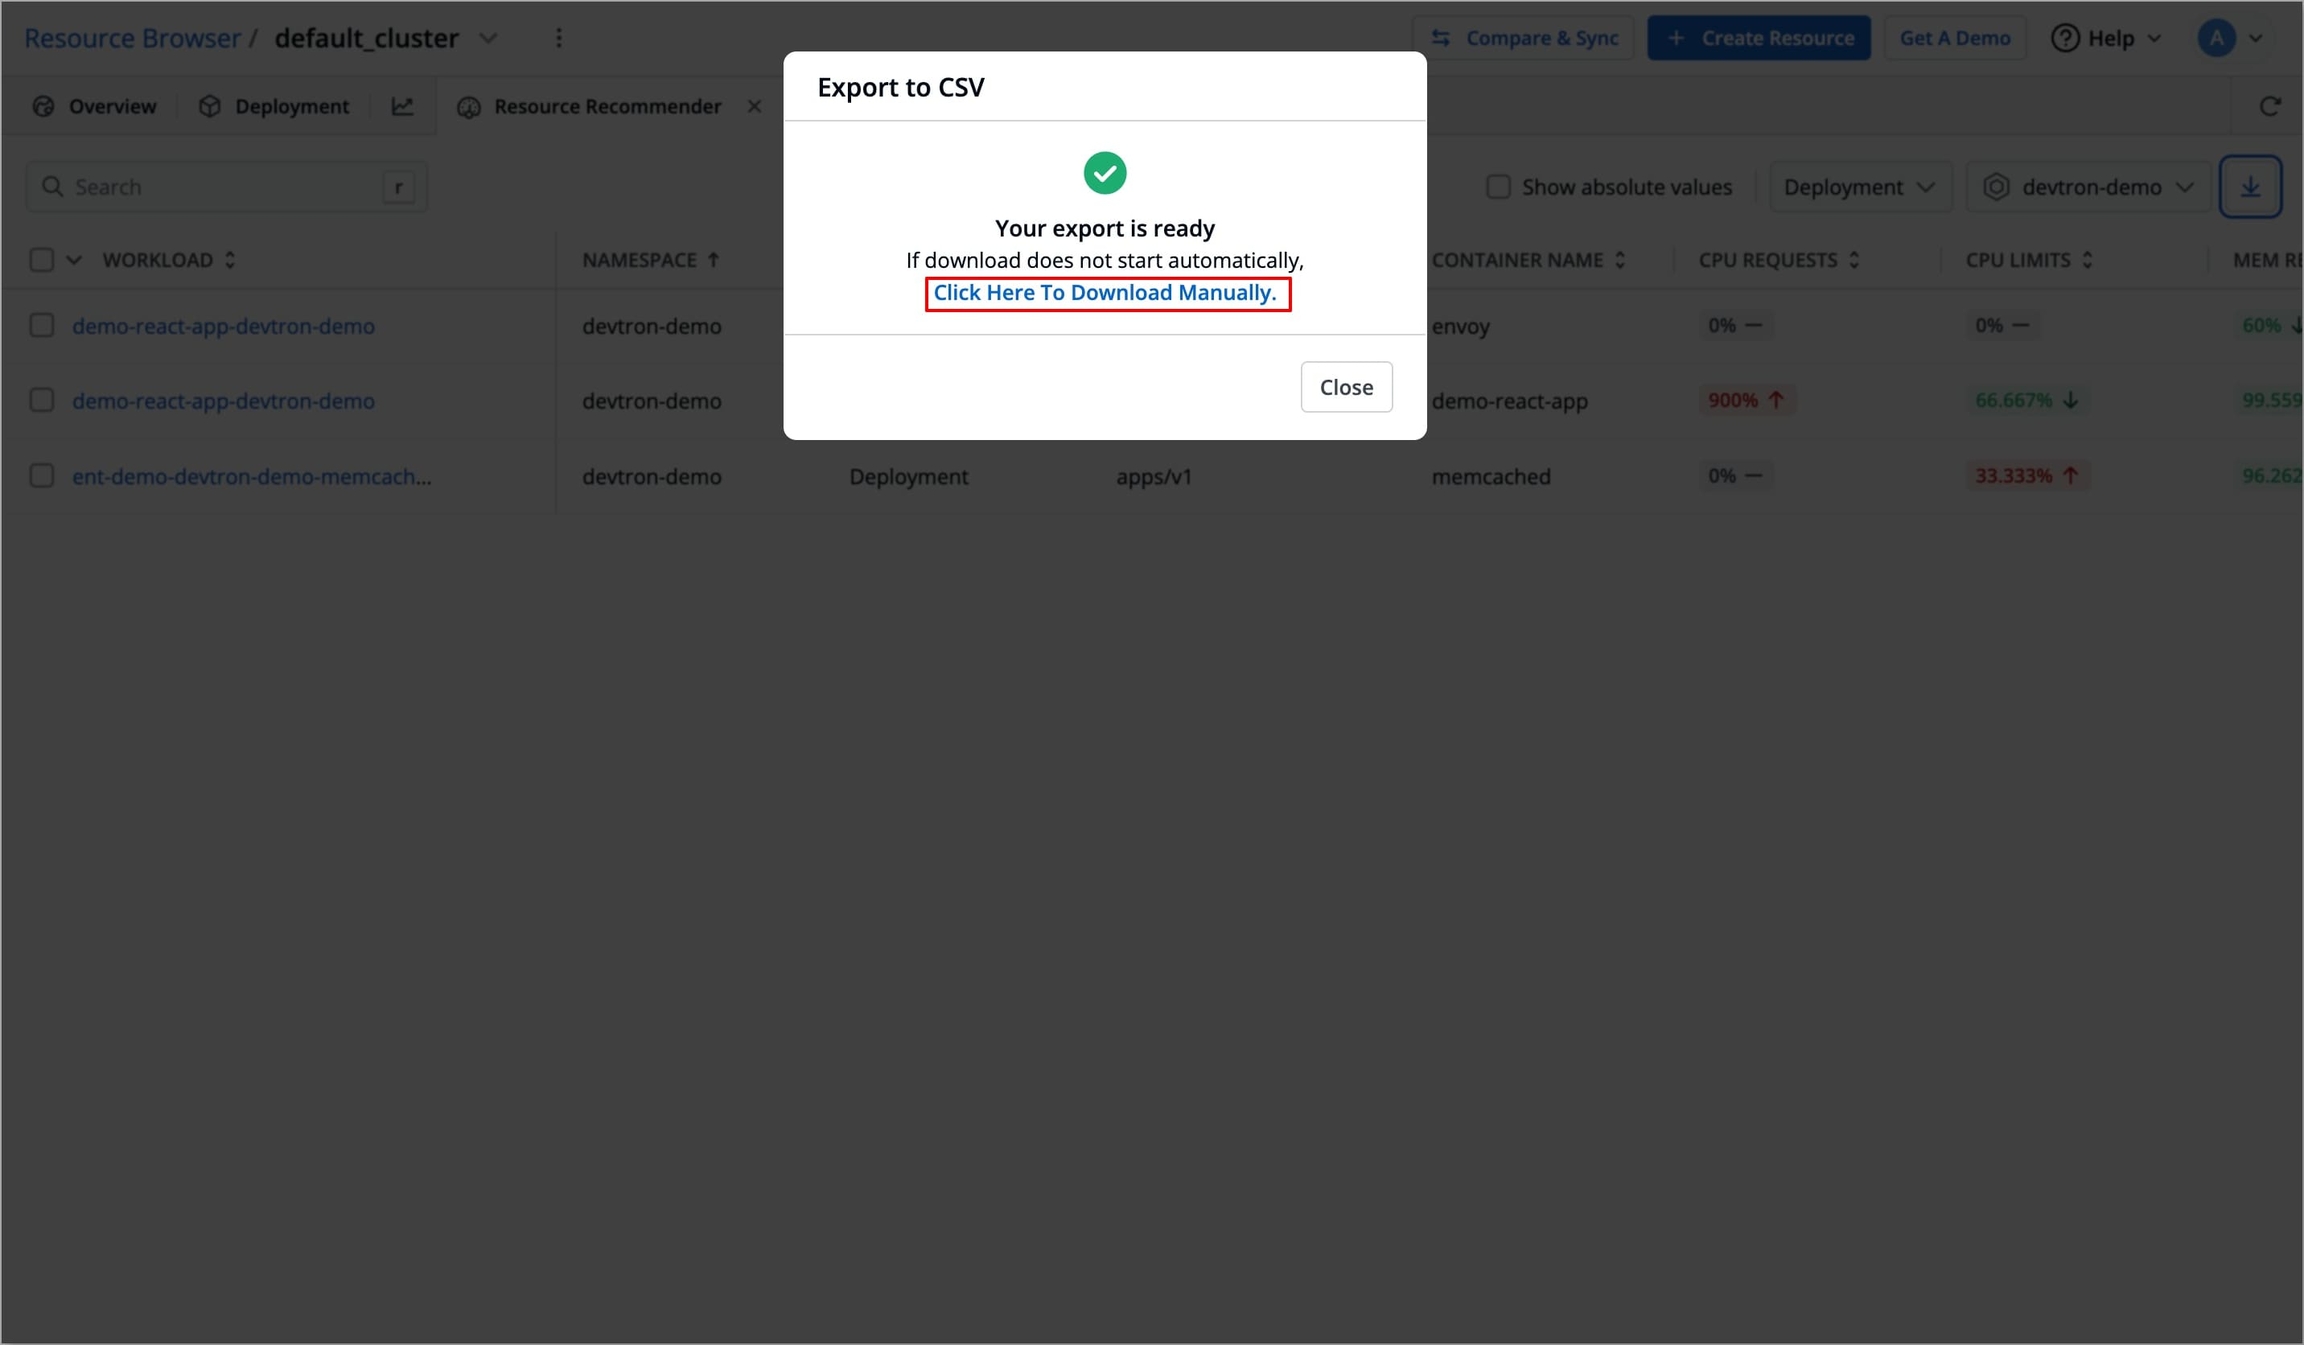
Figure 16b: Export Ready
Modify Resource Recommender Job Schedule
To modify the schedule of the Resource Recommender background job, follow the steps below:
In a new tab, go to Resource Browser → (Select the Cluster for which you want to modify the resource recommender job schedule) → Config & Storage → ConfigMap
Select the Orchestrator/Devtron ConfigMap
If Devtron is managing your setup, contact Devtron support to perform these changes.
If you installed Devtron via Helm, select
devtron-cmand click Edit Live Manifest.
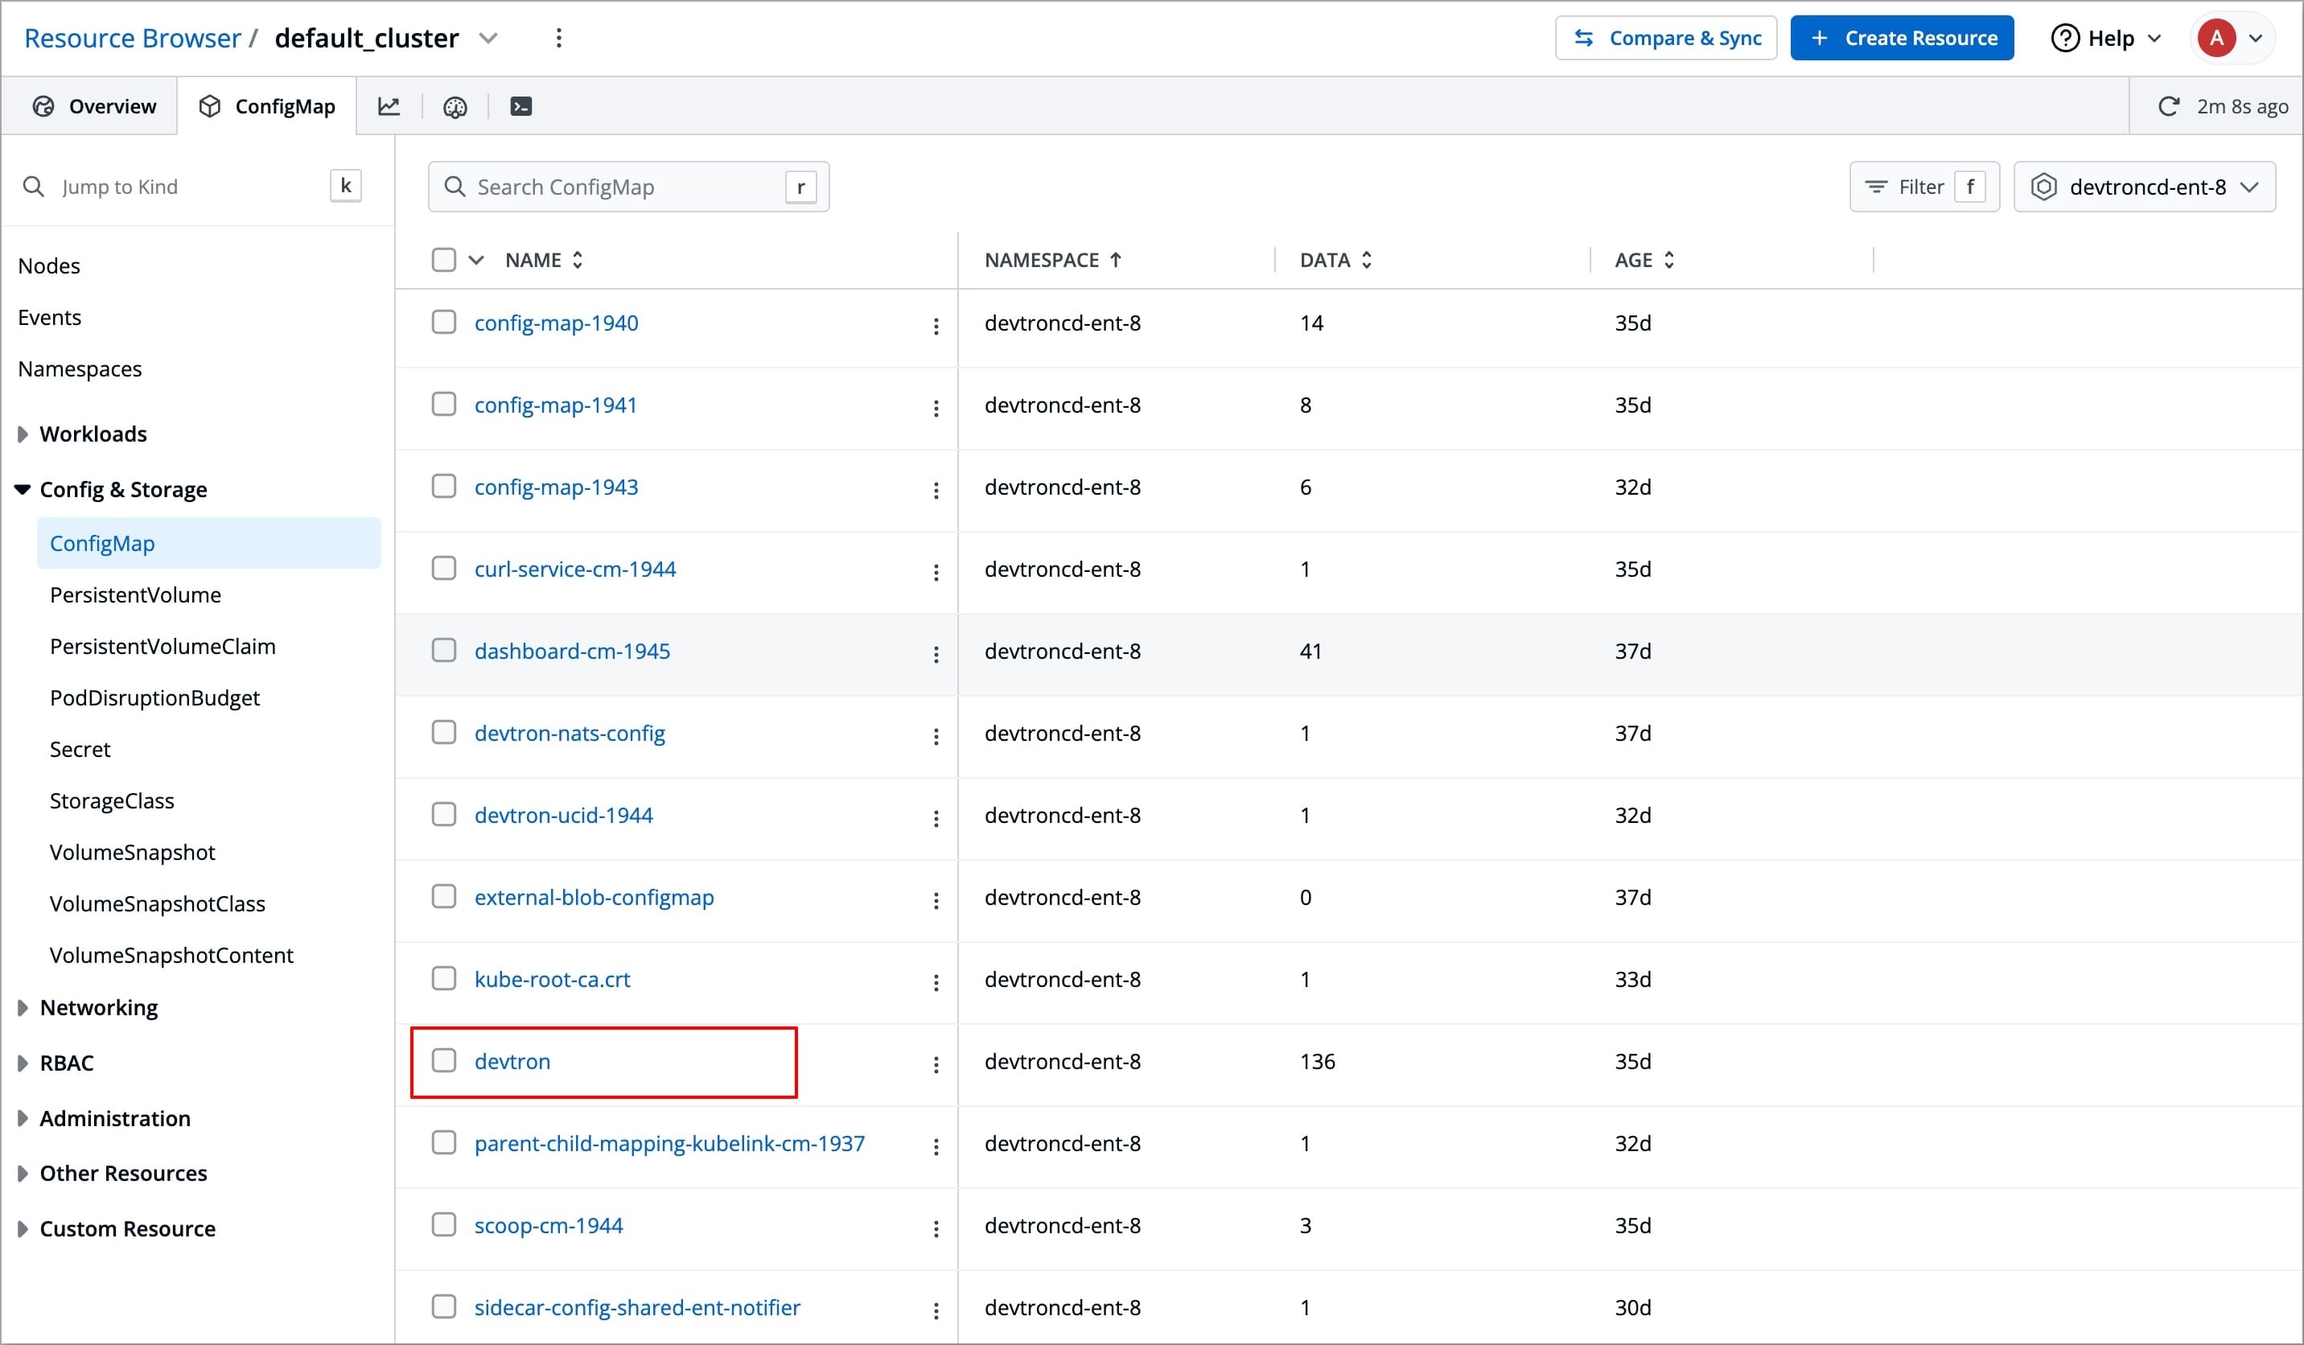
Figure 17a: Selecting Devtron CM 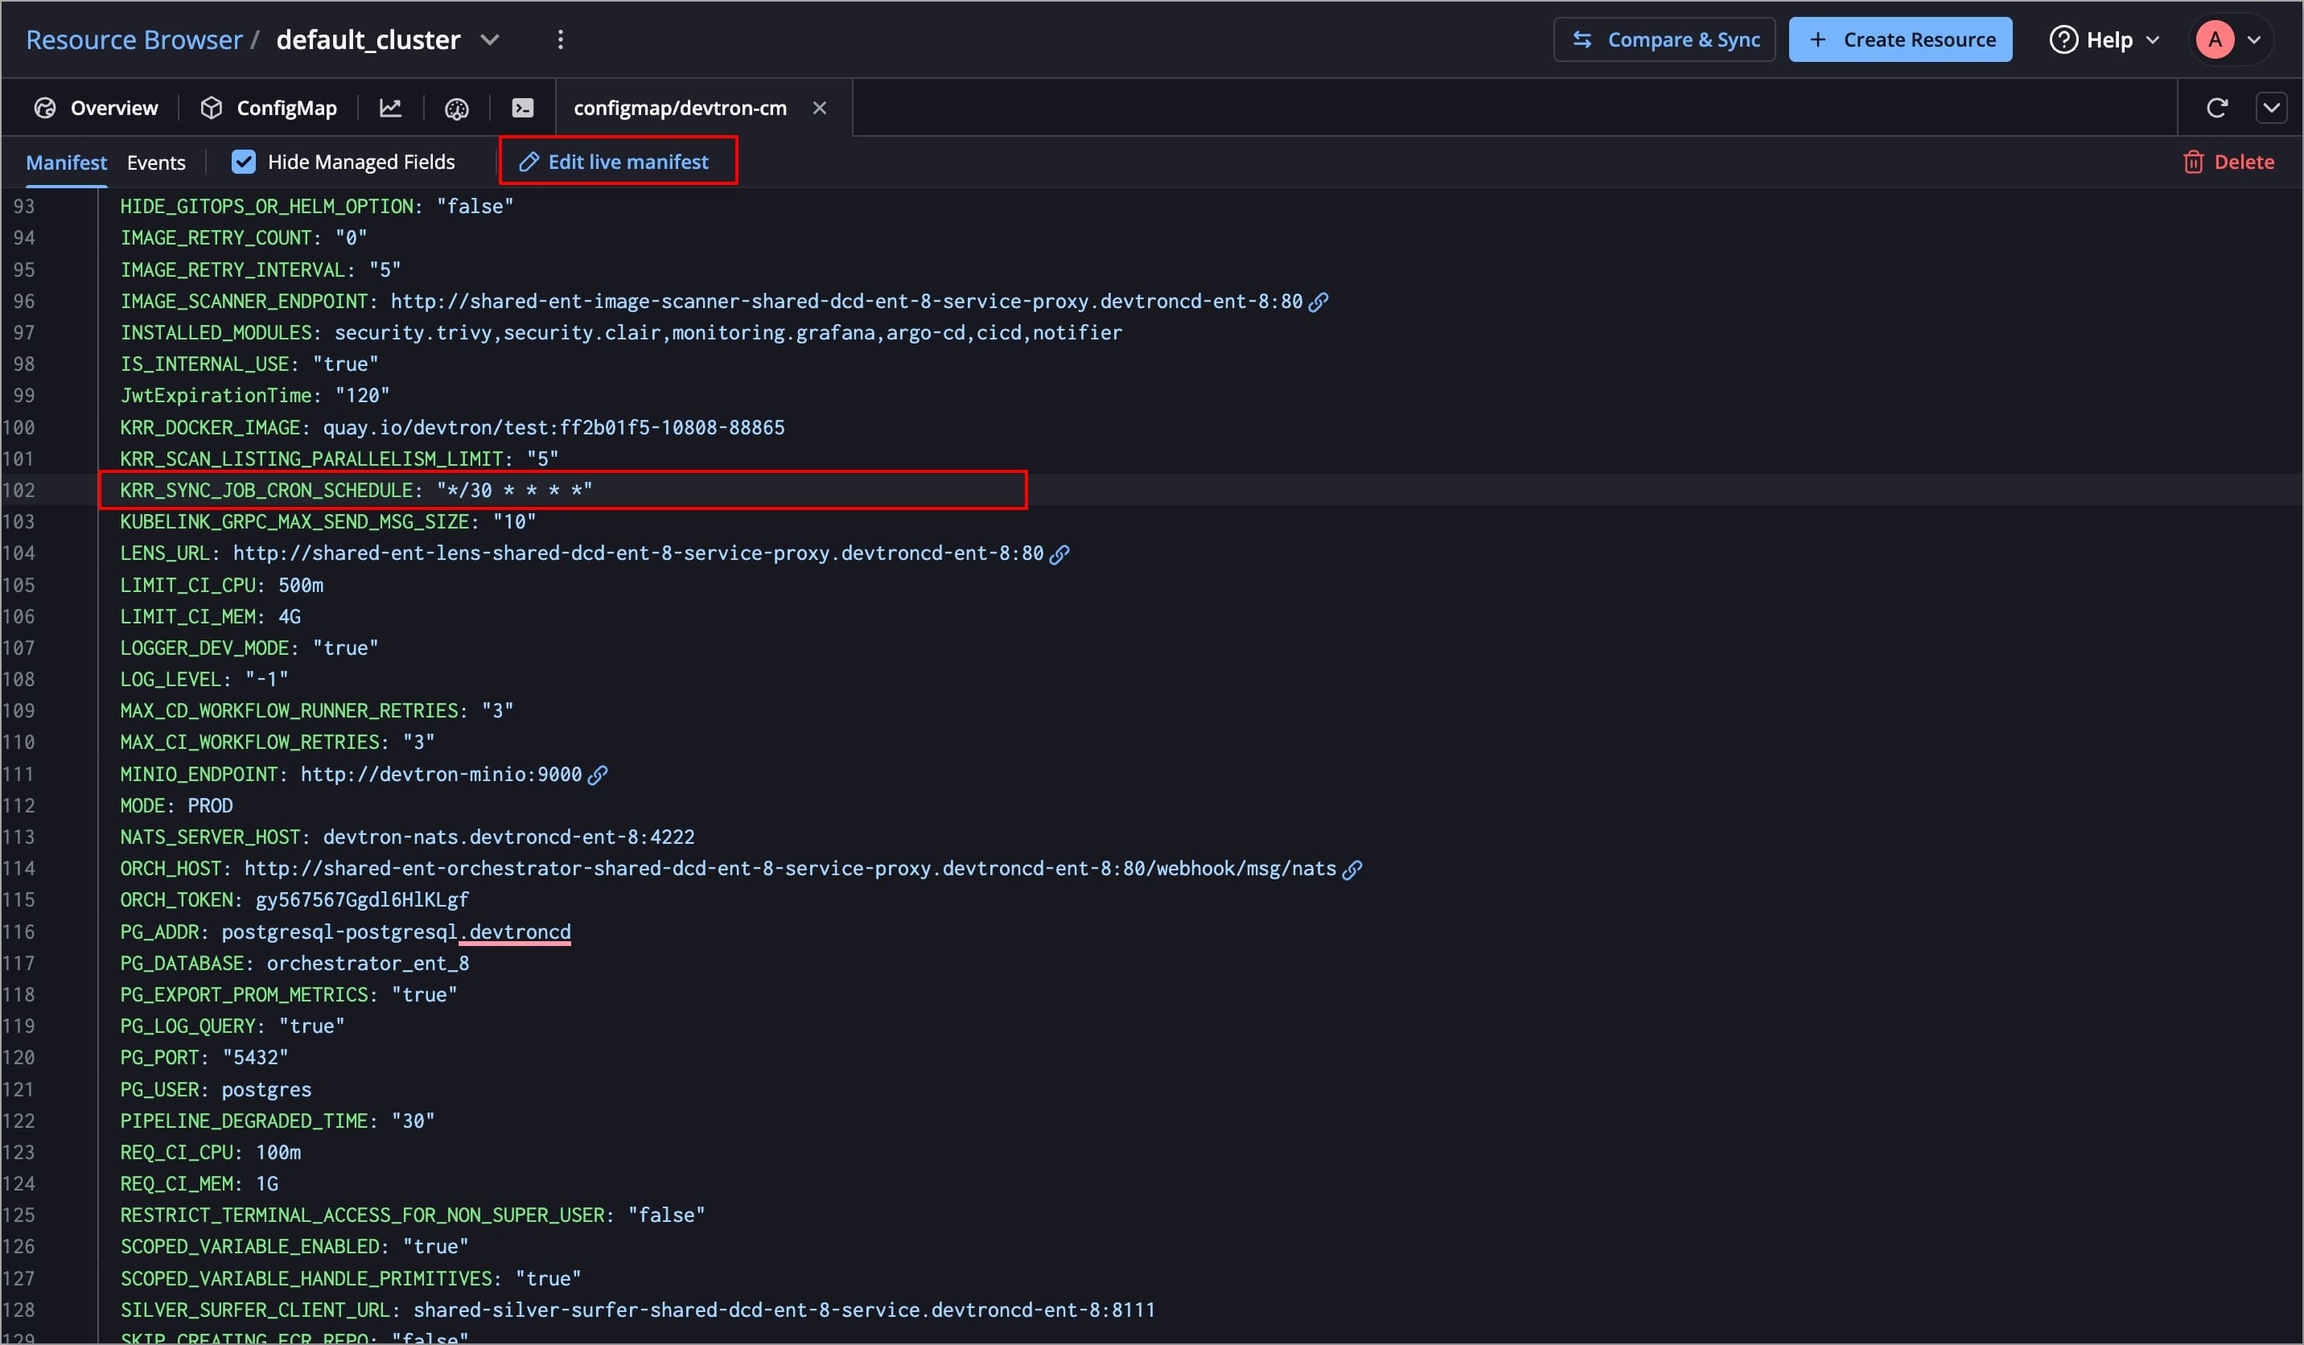
Figure 17b: Clicking 'Edit Live Manifest' Edit the
KRR_SYNC_JOB_CRON_SCHEDULEkey and set the schedule according to your use case using a cron expression.Click Apply Changes and manifest will be updated.
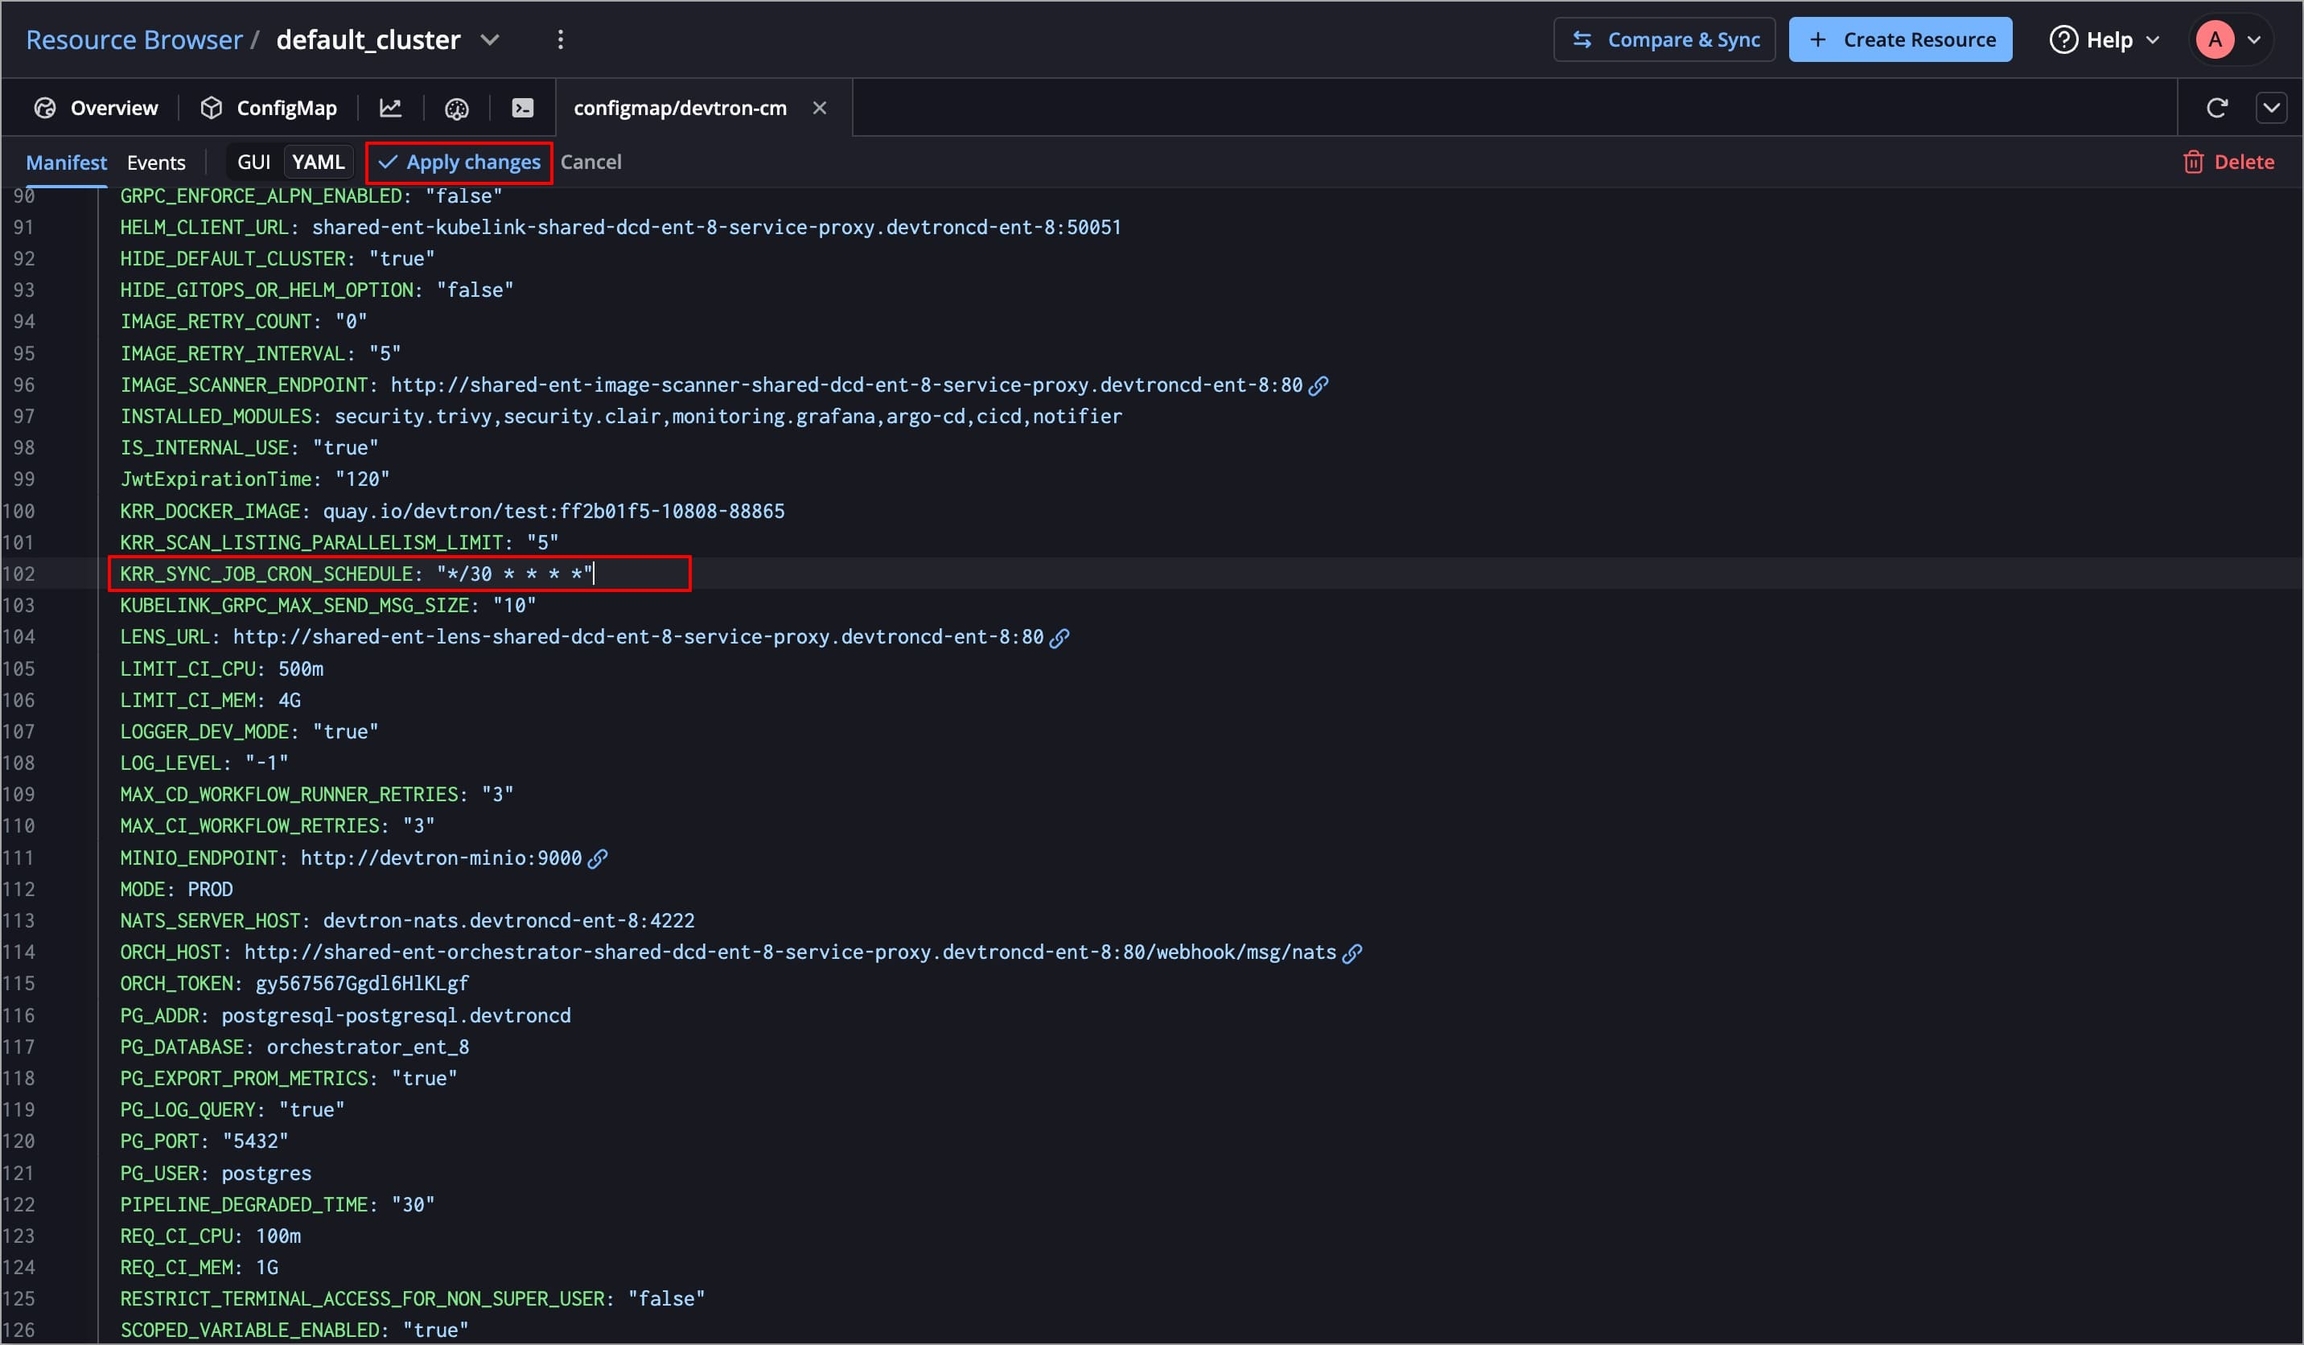
Figure 18: Applying Changes Restart the
orchestratorordevtronpod to implement the changes.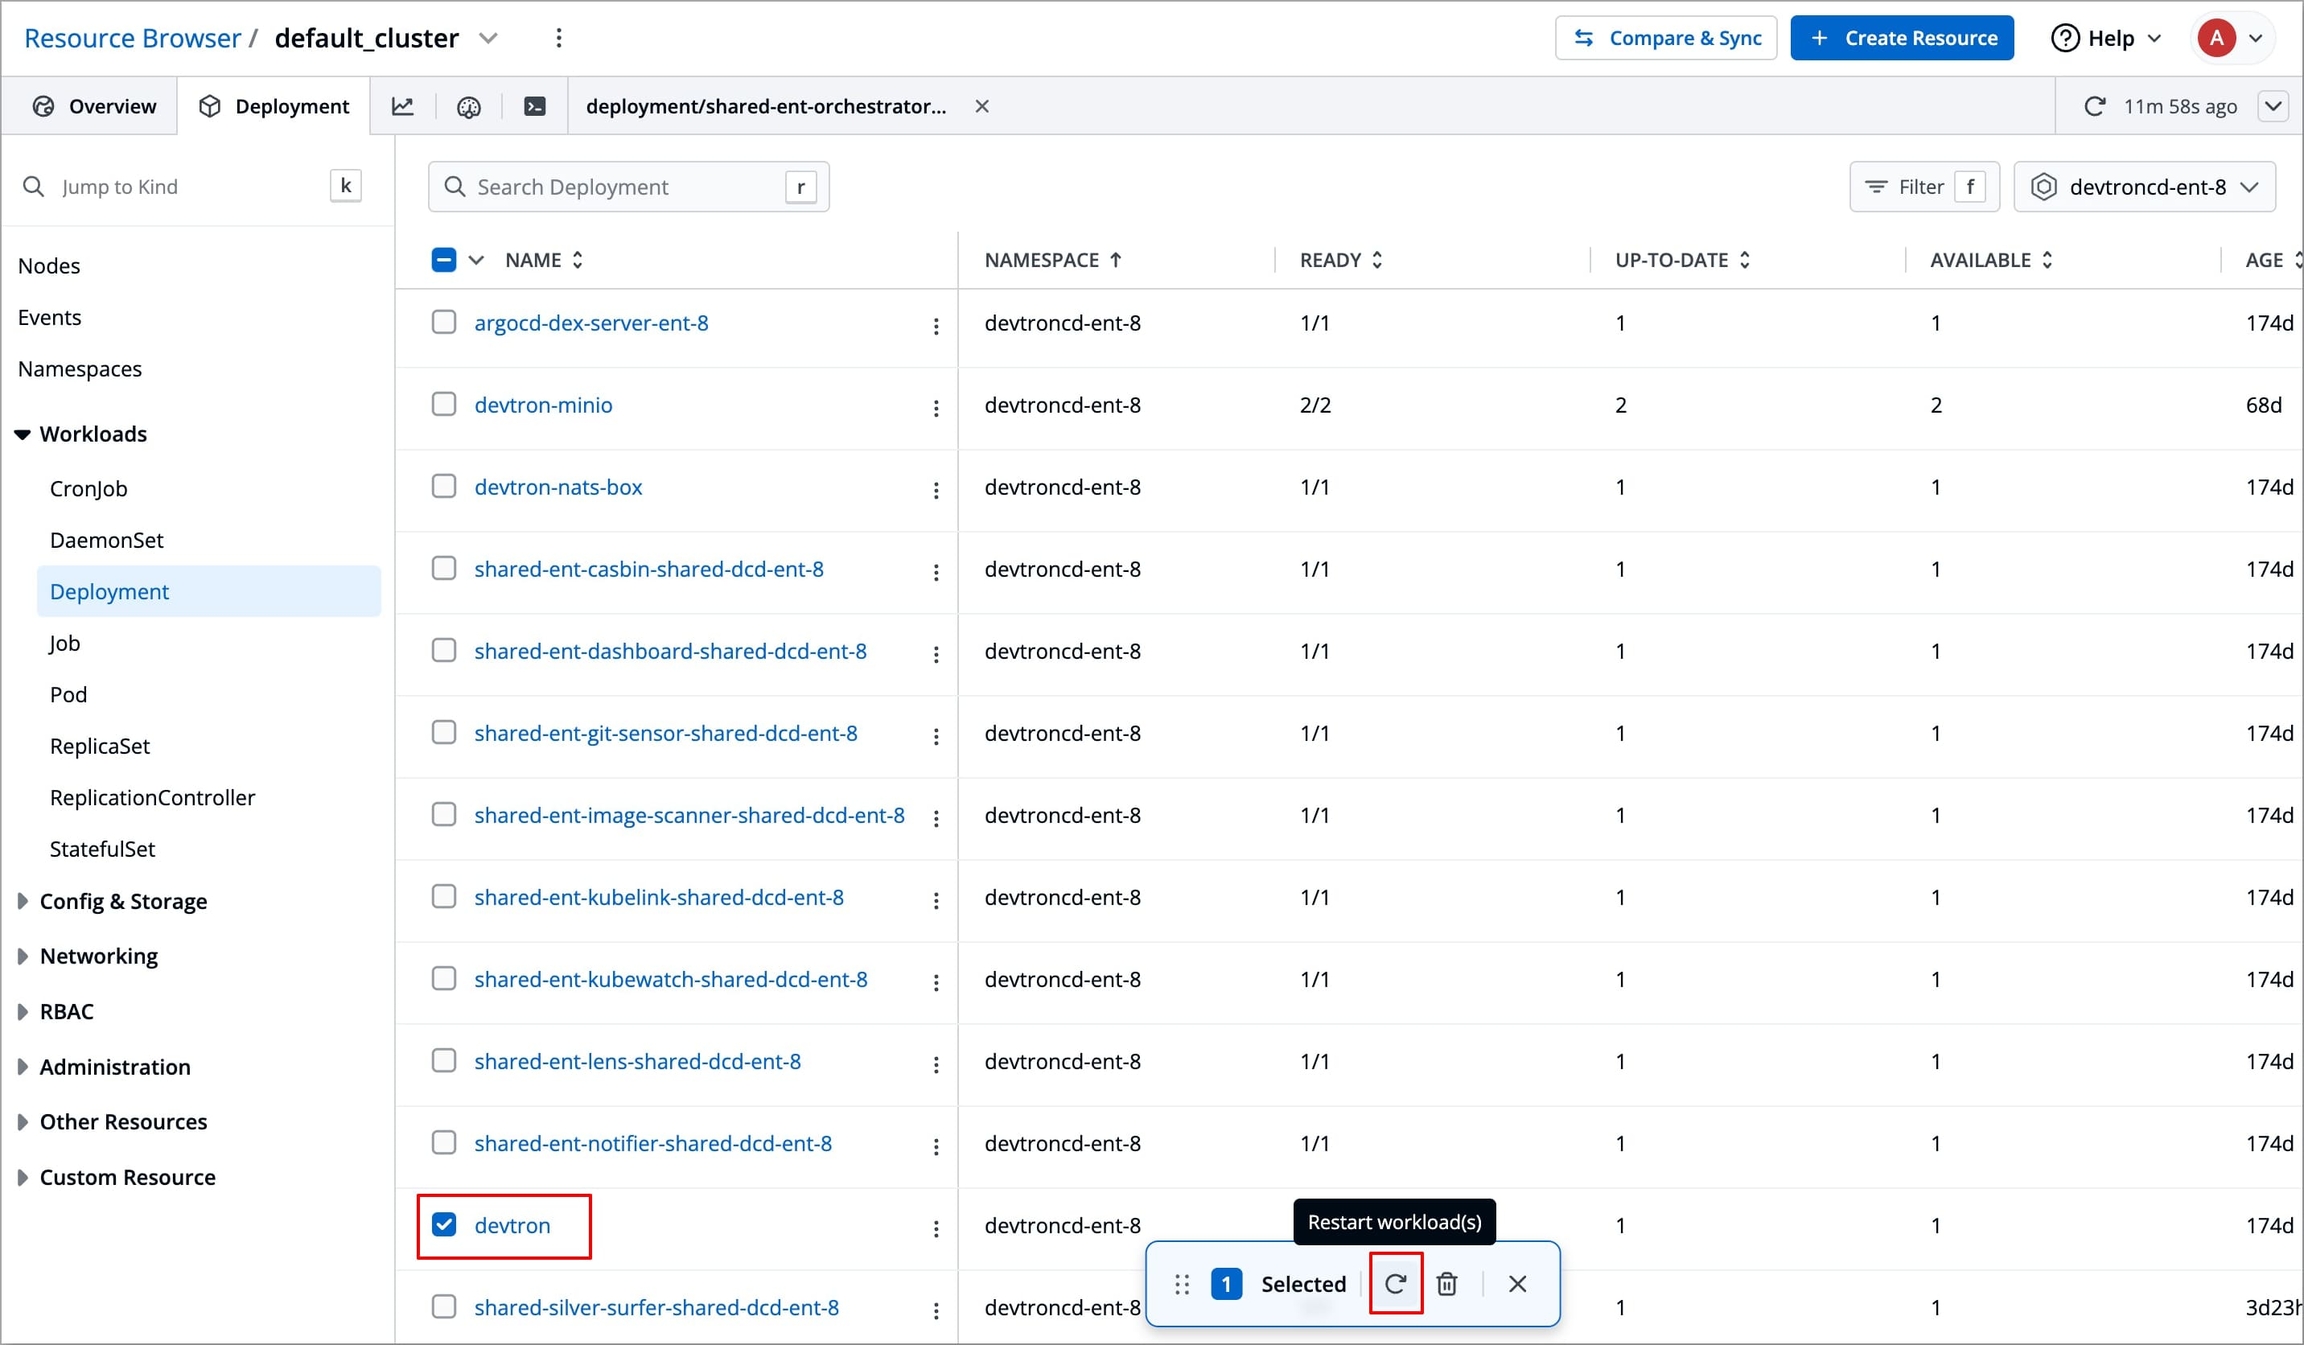
Figure 19: Restarting Pods
Last updated
Was this helpful?