

Create Your Plugin
Introduction
Devtron lets you create plugins to run specific tasks at different stages of your CI/CD pipelines. You can create any of the following:
CI plugin (in pre-build/post-build stage)
CD plugin (in pre-deployment/post-deployment stage) ...or both.
You can achieve this by converting a fully functional custom task into a plugin. Creating a plugin makes it reusable with other CI or CD pipelines.
Plugin Creation
There are two parts to creating a plugin:
Part 1: Create a Custom Task
In the following example, we are creating a plugin named 'Secret Management Validator'.
Go to Applications and select your app from the Devtron Apps tab.
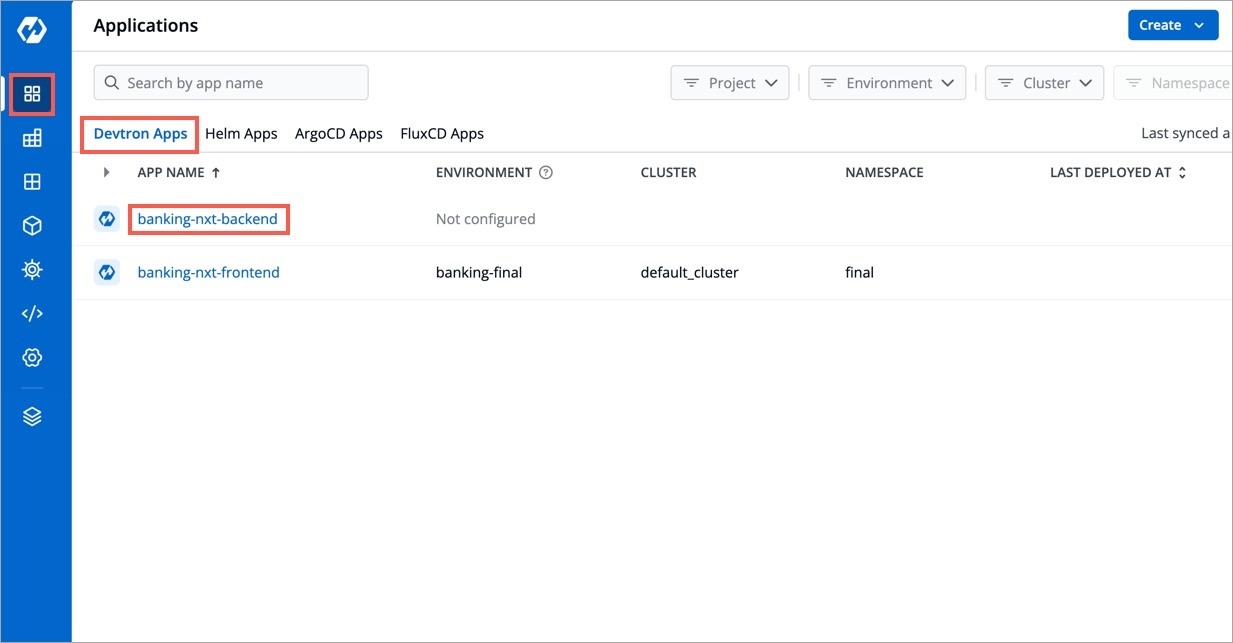
Figure 1: Choosing your App From the Configurations tab, go to Workflow Editor.
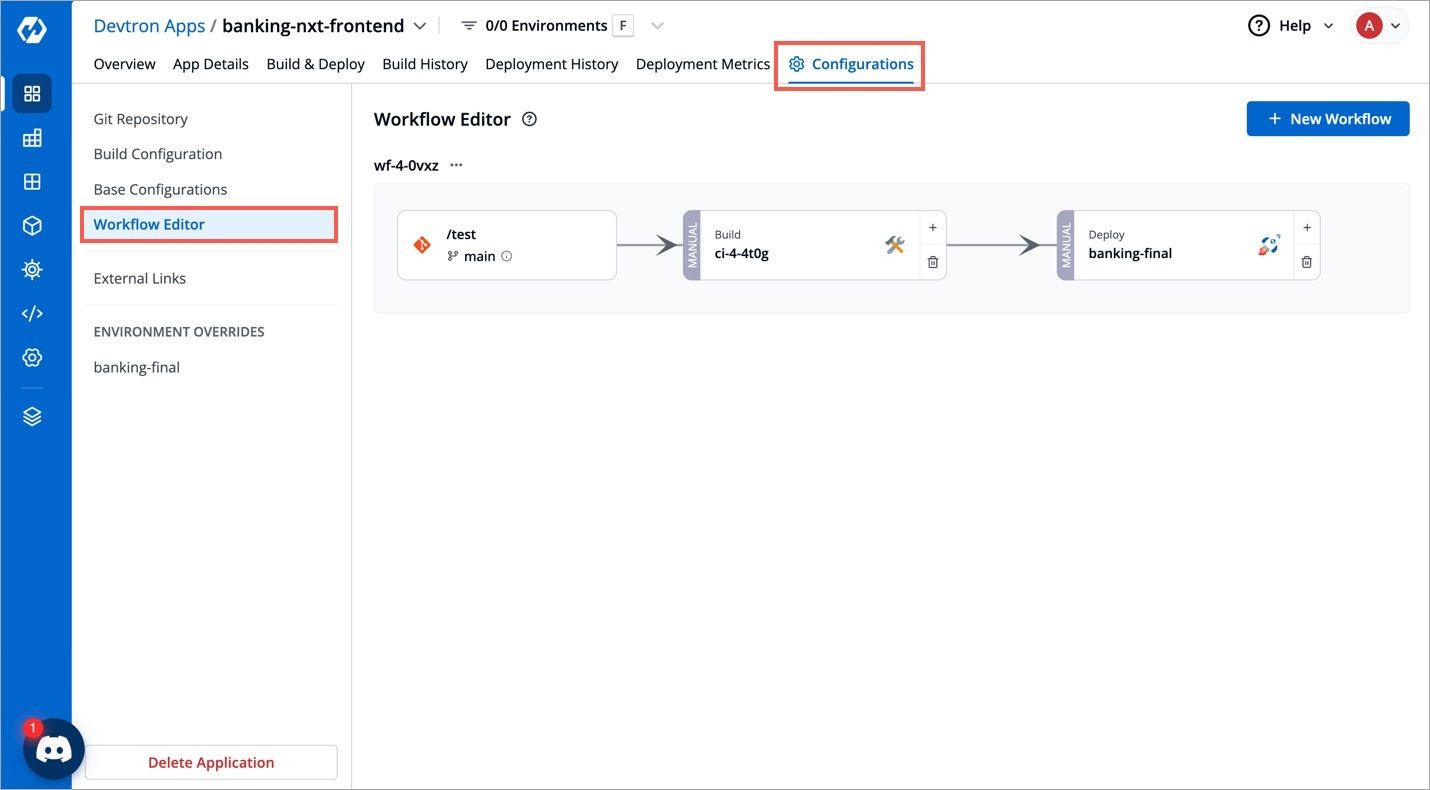
Figure 2: Workflow Editor Click any pipeline (build/deployment pipeline).
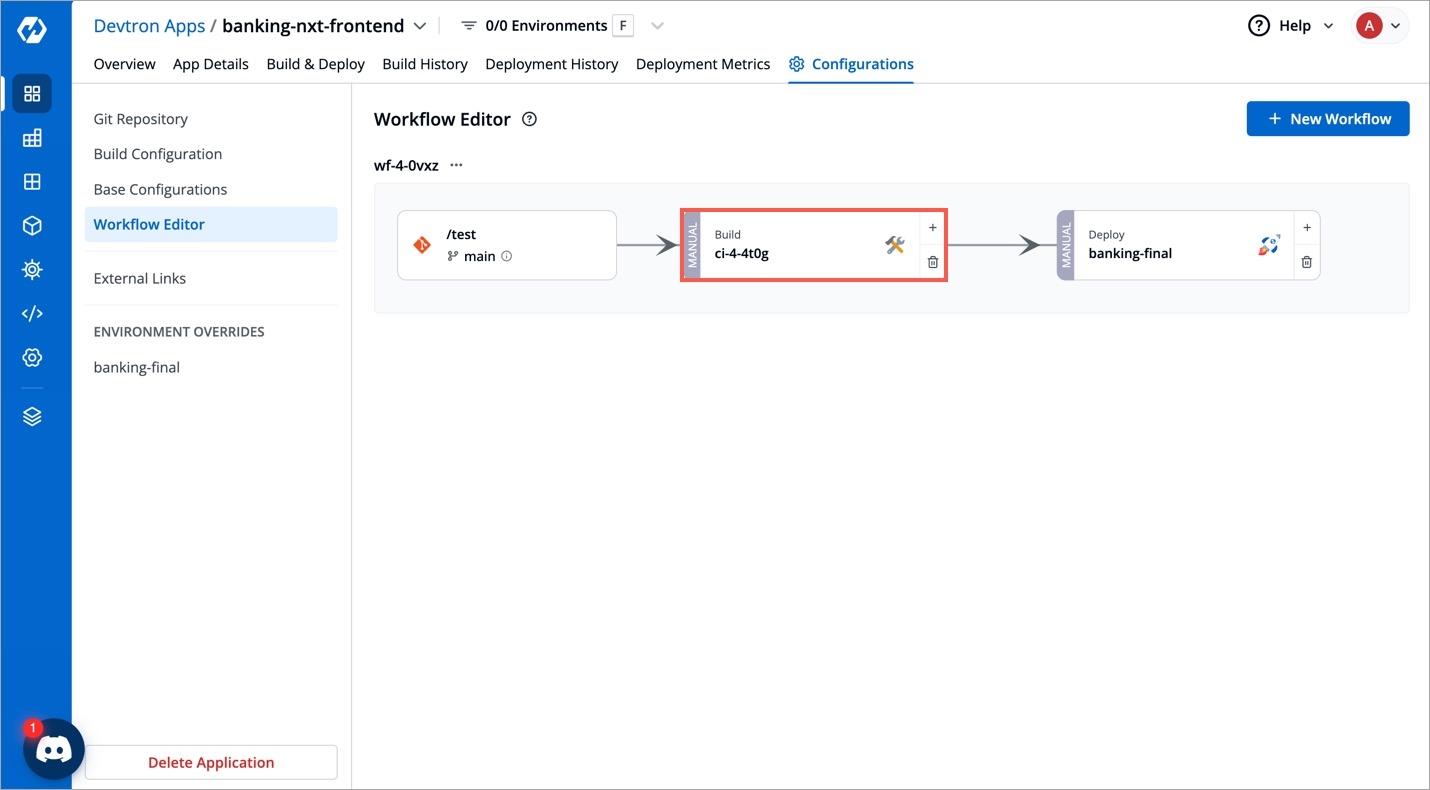
Figure 3: Selecting Pipeline Go to the Pre or Post stage of your pipeline, e.g.,
Pre-build stage.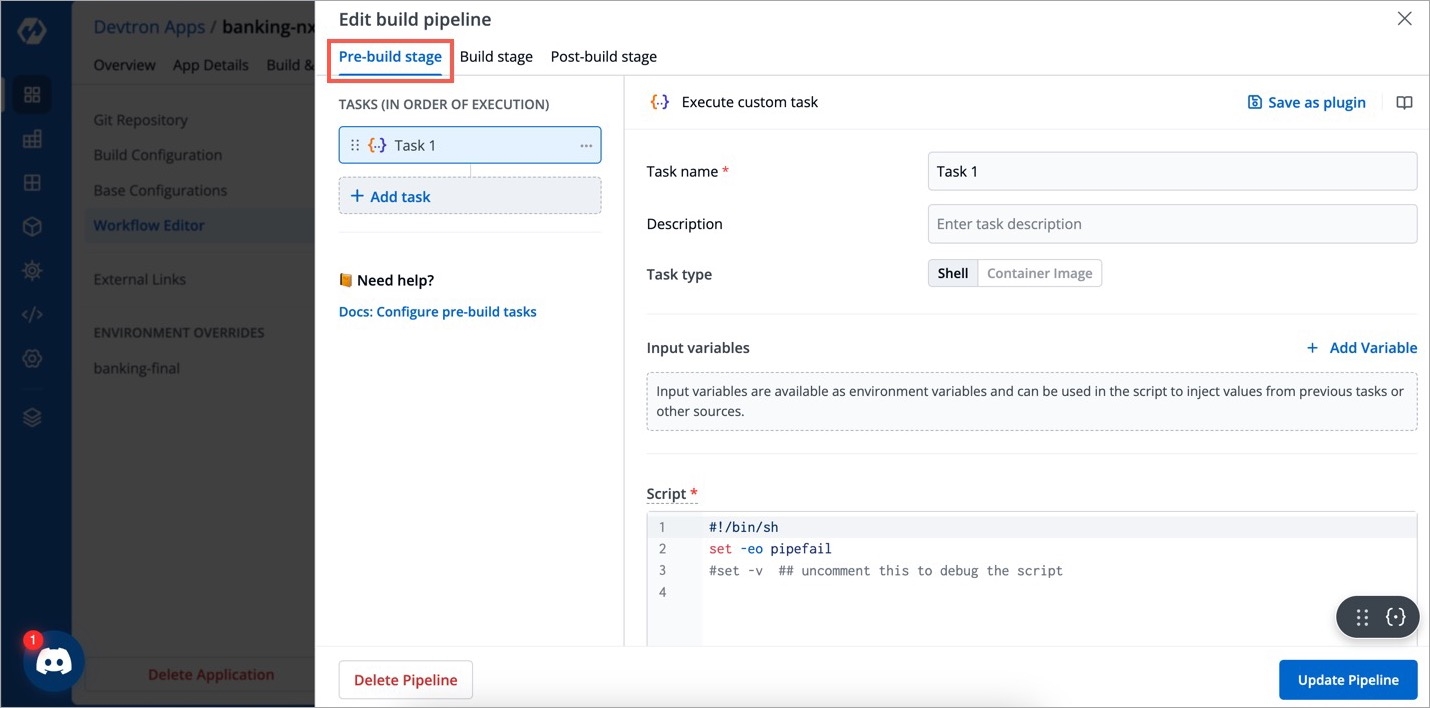
Figure 4: Selecting Stage Click + Add Task to create a plugin from scratch or click an existing task.
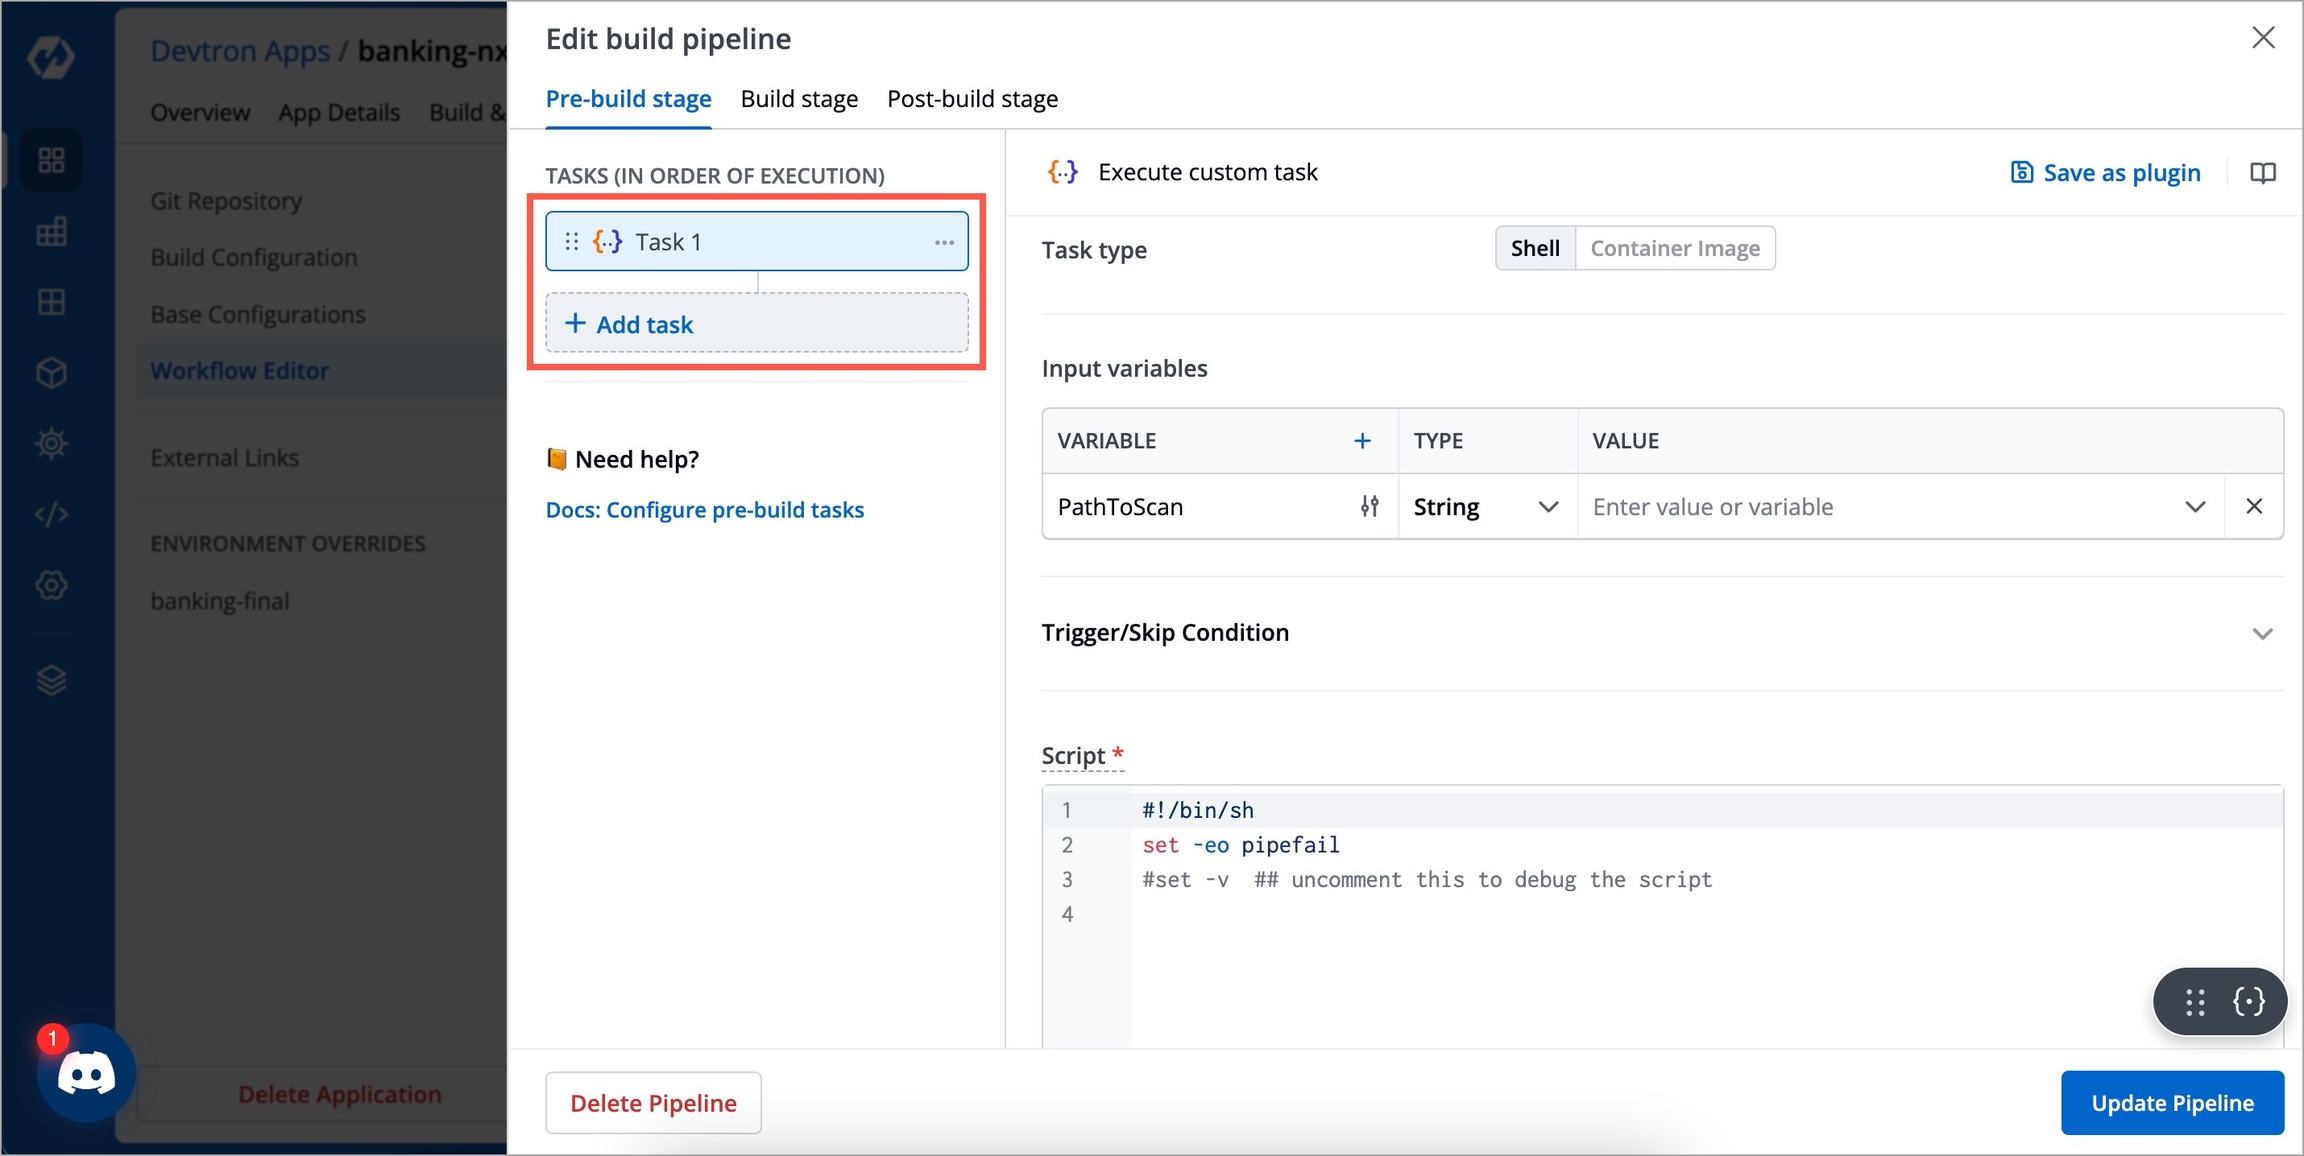
Figure 5: Adding a Task On the Execute Custom Task page, fill the following details:
Task Name - Give a name to the task, e.g.,
Secret Management Validator Task.Description - Write the purpose of the task in brief.
Task Type - Choose
Shellif the task consists of shell commands or chooseContainer Imagein case of complex operations that require a specific container environment (refer 'Container Image' task).Input Variables - Add one or more input variables to accept values from the user. Give a name to your input variable along with a description and input type (String/Number/Boolean/Date).
Trigger Skip Condition - Here you can set conditions to execute or skip the task. You can select Set trigger conditions to execute the task, or Set skip conditions to skip the task.
Script - Enter the script to be executed.
Output directory path - Enter the directory where your script will write/produce output files (e.g., test report, zip files).
Output Variables - Similar to input variables, you can create variables whose values will be generated as output after task execution.
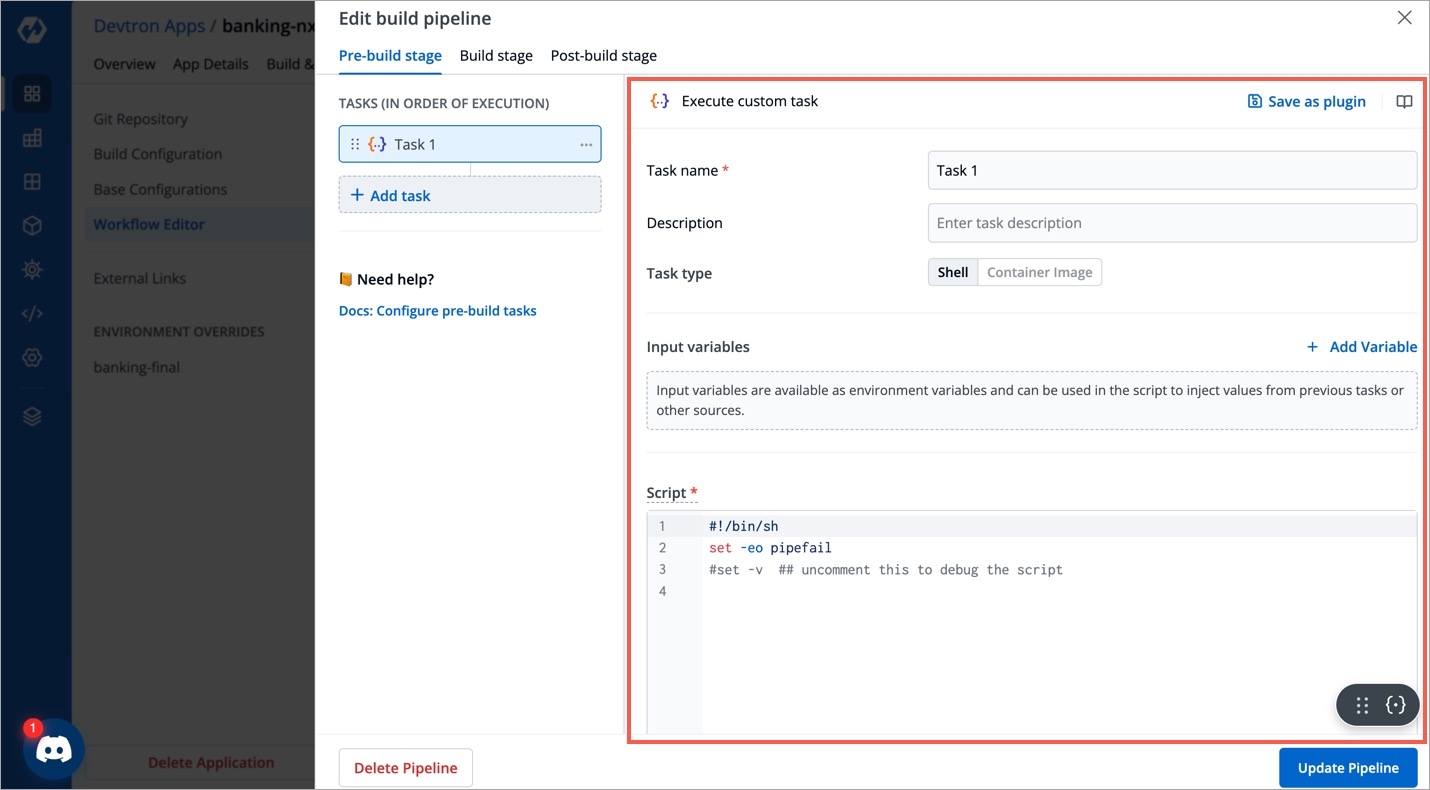
Figure 6: 'Execute Custom Task' Page Click Update Pipeline.
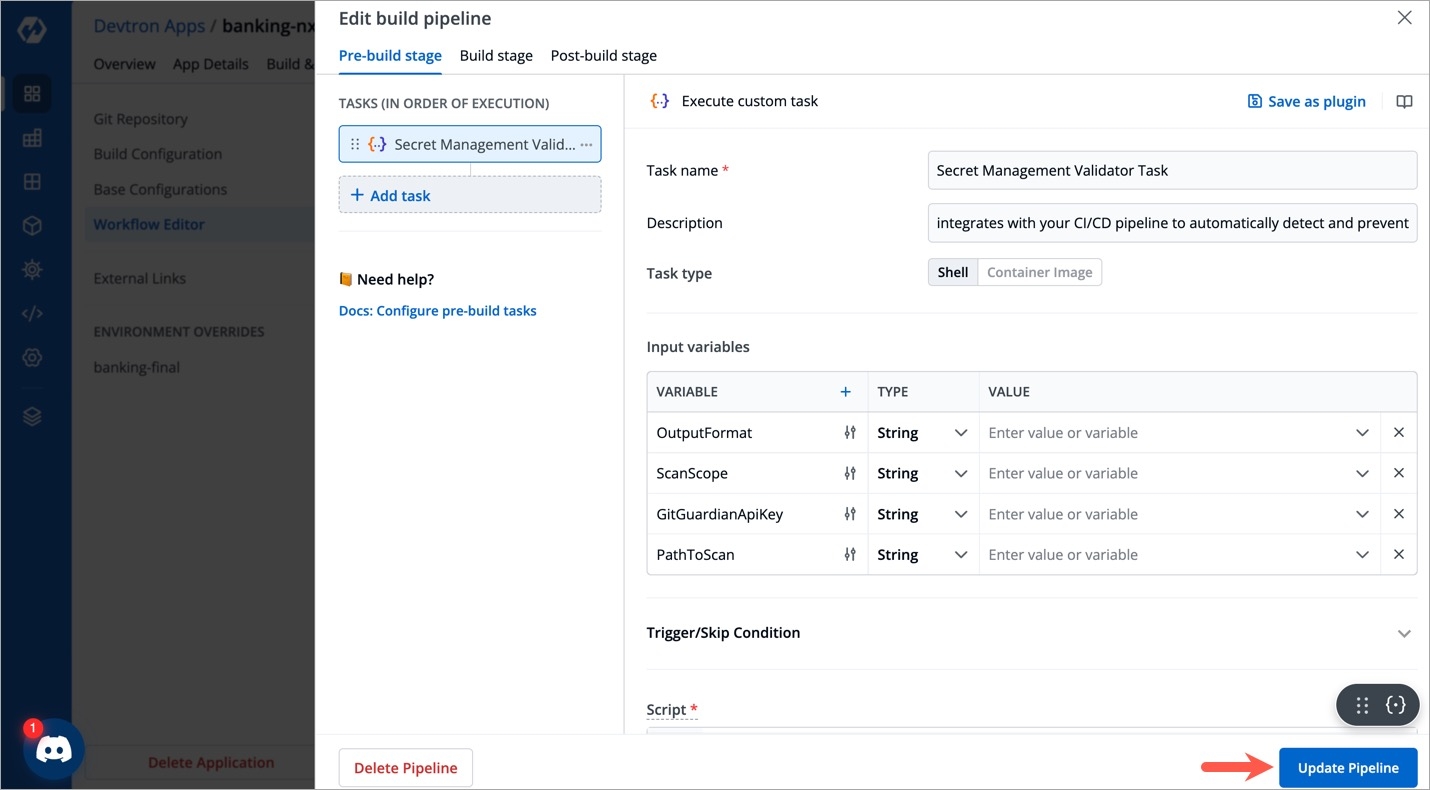
Figure 7: 'Update Pipeline' Button
Next Steps
Go to the Build & Deploy tab of your application and run the pipeline having your custom task. If the custom task executes correctly and the script performs as expected, you may proceed to save your custom task as a plugin.
Part 2: Convert Custom Task to a Plugin
Go to your custom task that you have tried and tested, and click Save as Plugin.
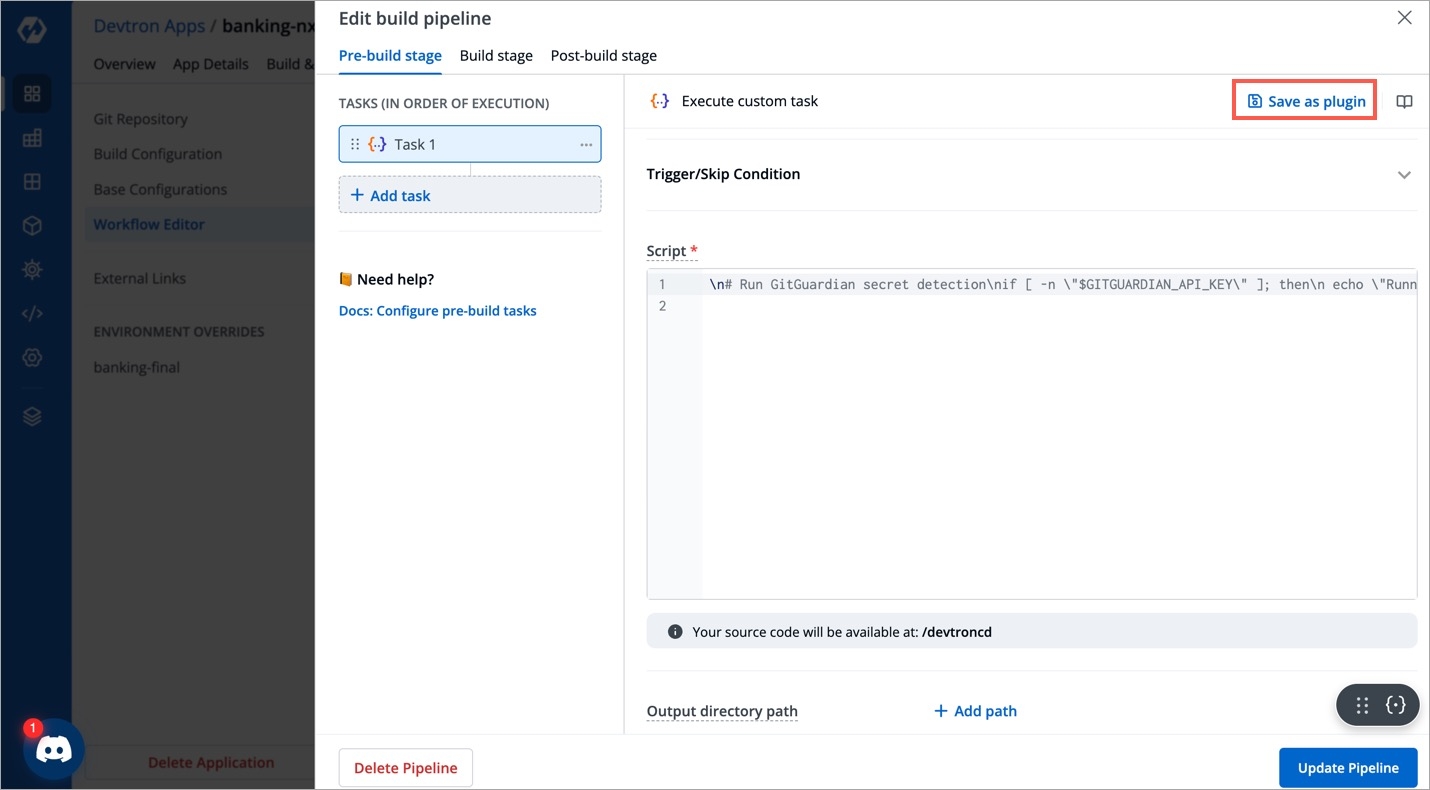
Figure 8: 'Save as Plugin' Option In the New plugin tab, fill the following details:
FieldsDescriptionPlugin Icon
Enter the online URL of your plugin icon (jpg/png supported). This image will be shown alongside your plugin name in the list of plugins.
Plugin display name
Enter the name of your plugin, e.g.,
Secret Management ValidatorPlugin ID
Enter a unique identifier for your plugin, e.g.,
sec-mgmt-valPlugin version
Enter the version of your plugin. We recommend using semantic versioning, e.g.,
1.0.0Documentation link
Give the user guide link for this plugin, e.g.,
https://docs.devtron.ai/usage/plugins/plugin-list/jira-validatorDescription
Enter a brief description of your plugin explaining what the plugin does
Tags
Select one or more tags from the list or create your own tag. This tag helps in identifying and classifying the plugin, e.g.,
ComplianceSecretsSecurity.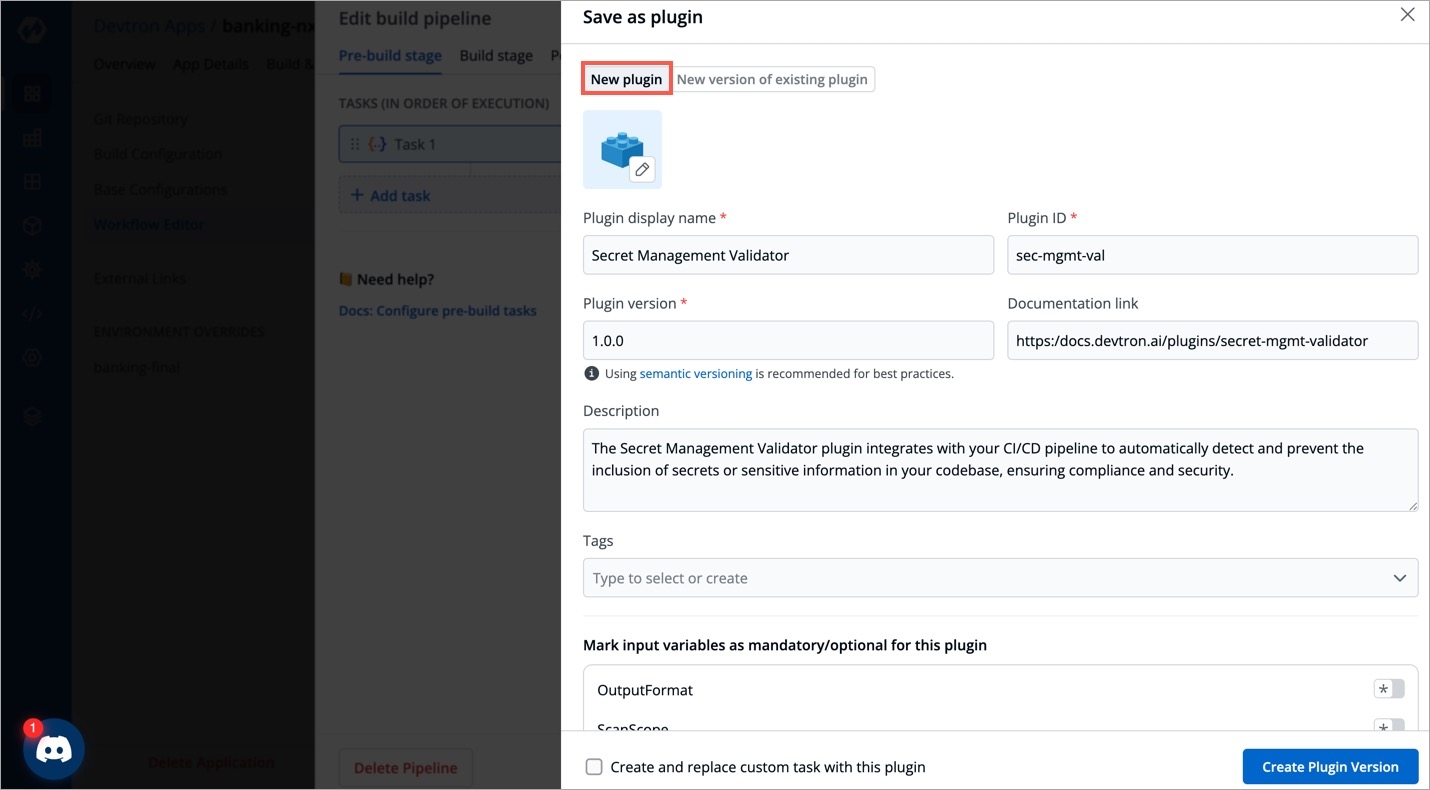
Figure 8: Entering New Plugin Details You have the option of marking the input variables (defined in step 6 earlier) as mandatory/optional. Enabling the toggle will make the input variable mandatory for your users.
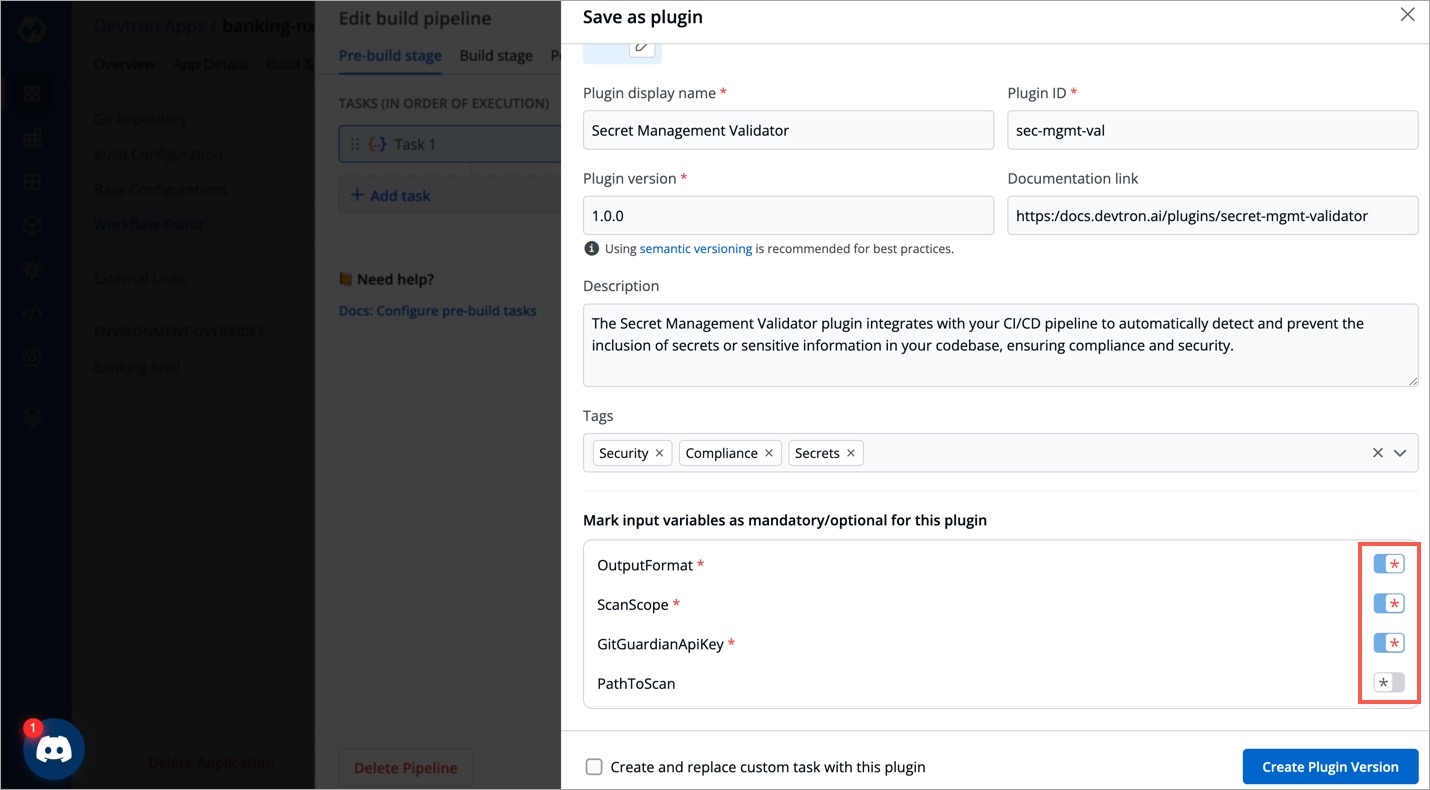
Figure 9: Marking Variables as Mandatory or Optional Since you created the plugin from a custom task, you get an option to replace the original task with your plugin (in the task list).
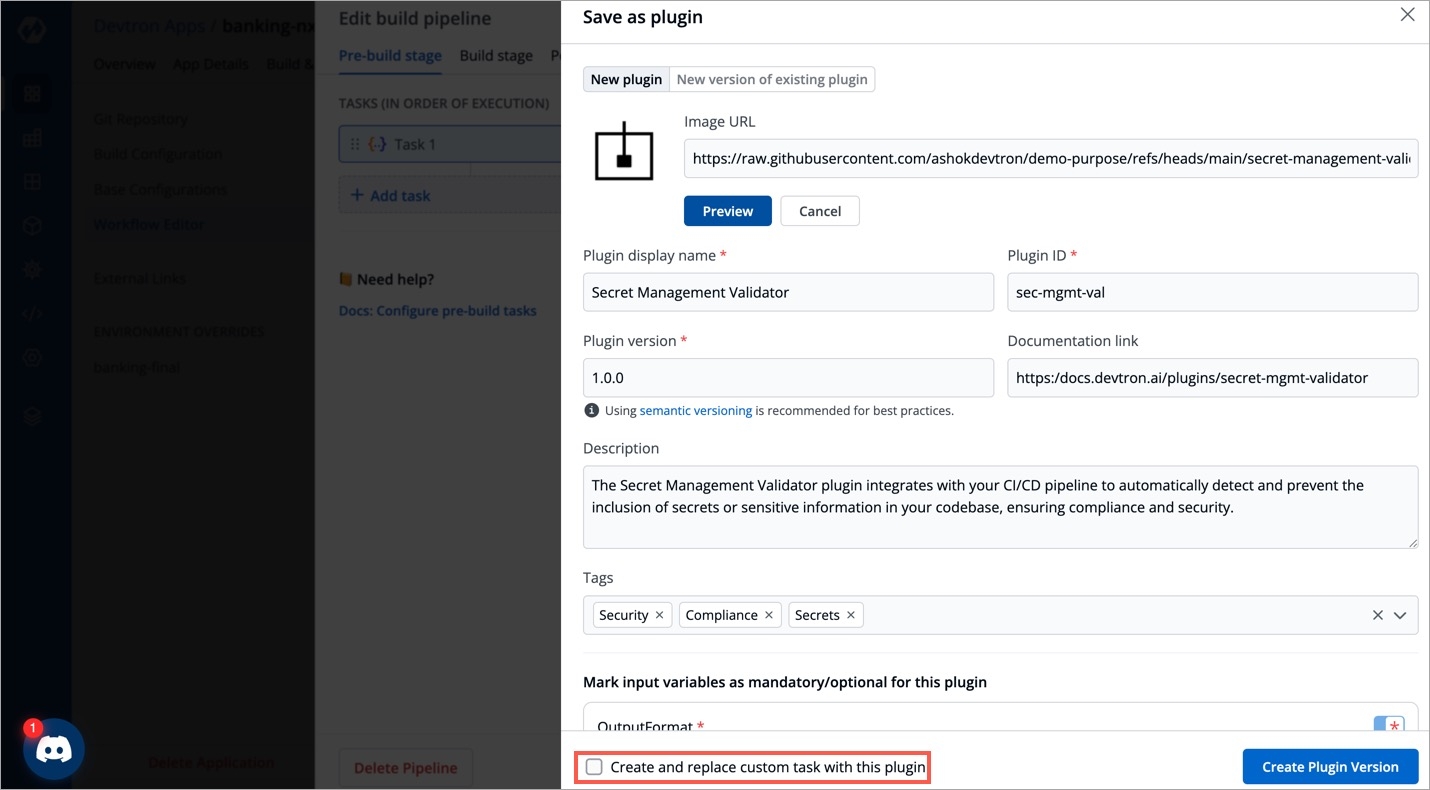
Figure 10: Replace Task with Plugin Click Create Plugin Version.
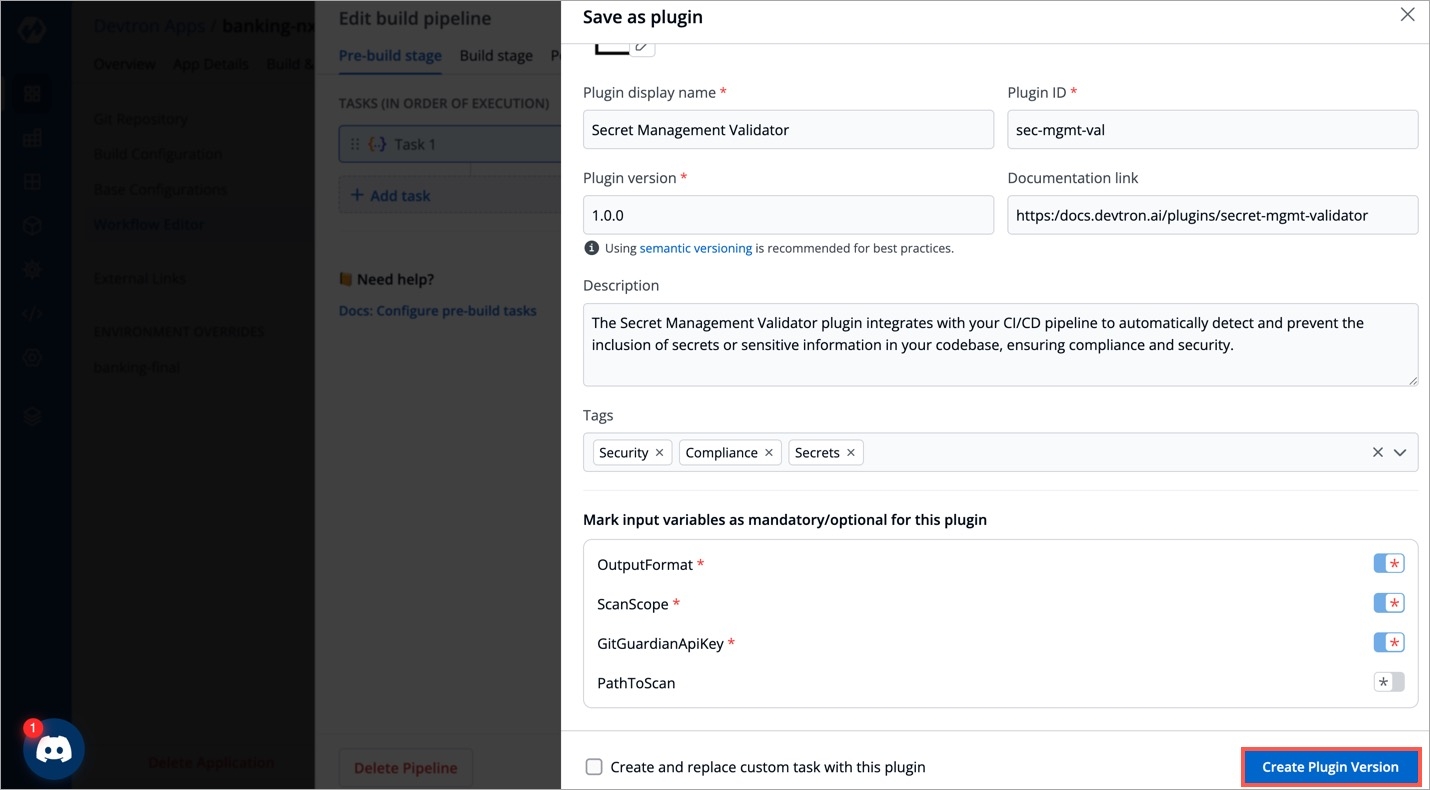
Figure 11: 'Create Plugin Version' Button Your new plugin would appear in the list of plugins.
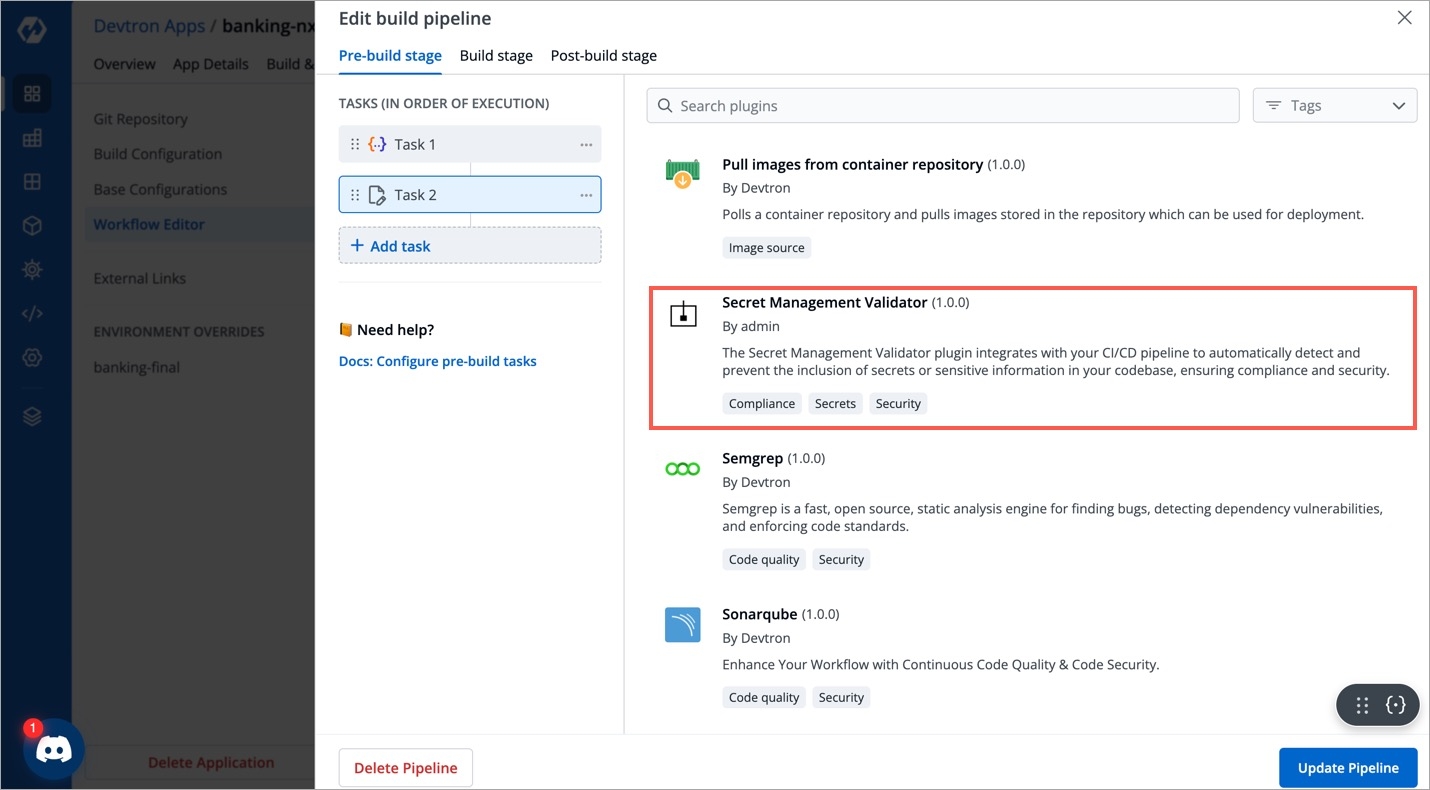
Figure 12: List of Plugins
Create a New Version of Plugin
You may create incremental versions of your plugin (e.g., 1.0.0 → 1.0.1 or 2.0.0). The old version(s) of your plugins will still be available to your users.
Follow steps 1-7 from the Create a New Plugin section of this document.
From the New version of existing plugin tab, select the plugin for which you want to create a new version from the Existing Plugin dropdown.
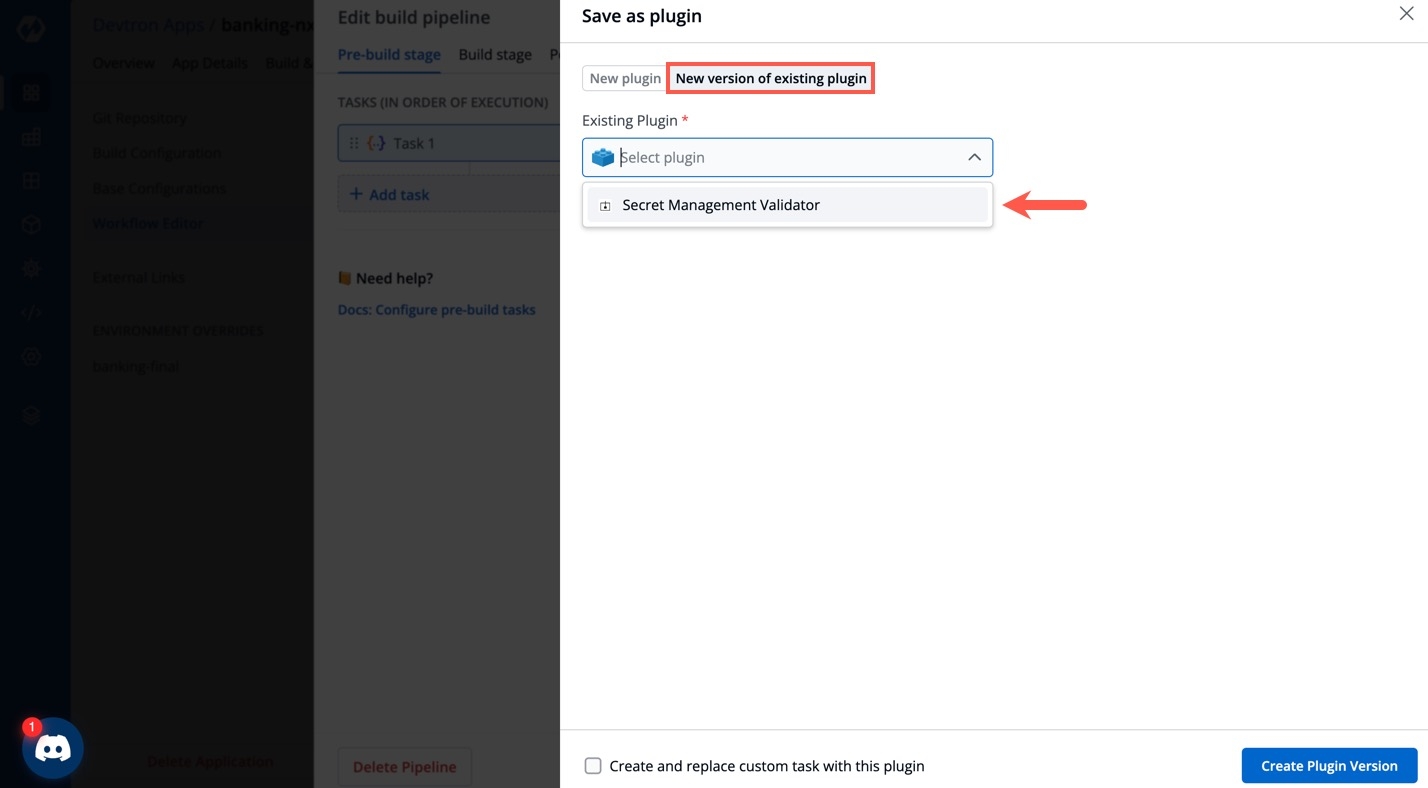
Figure 13: Selecting Existing Plugin for Versioning Specify the new version in the New version field.
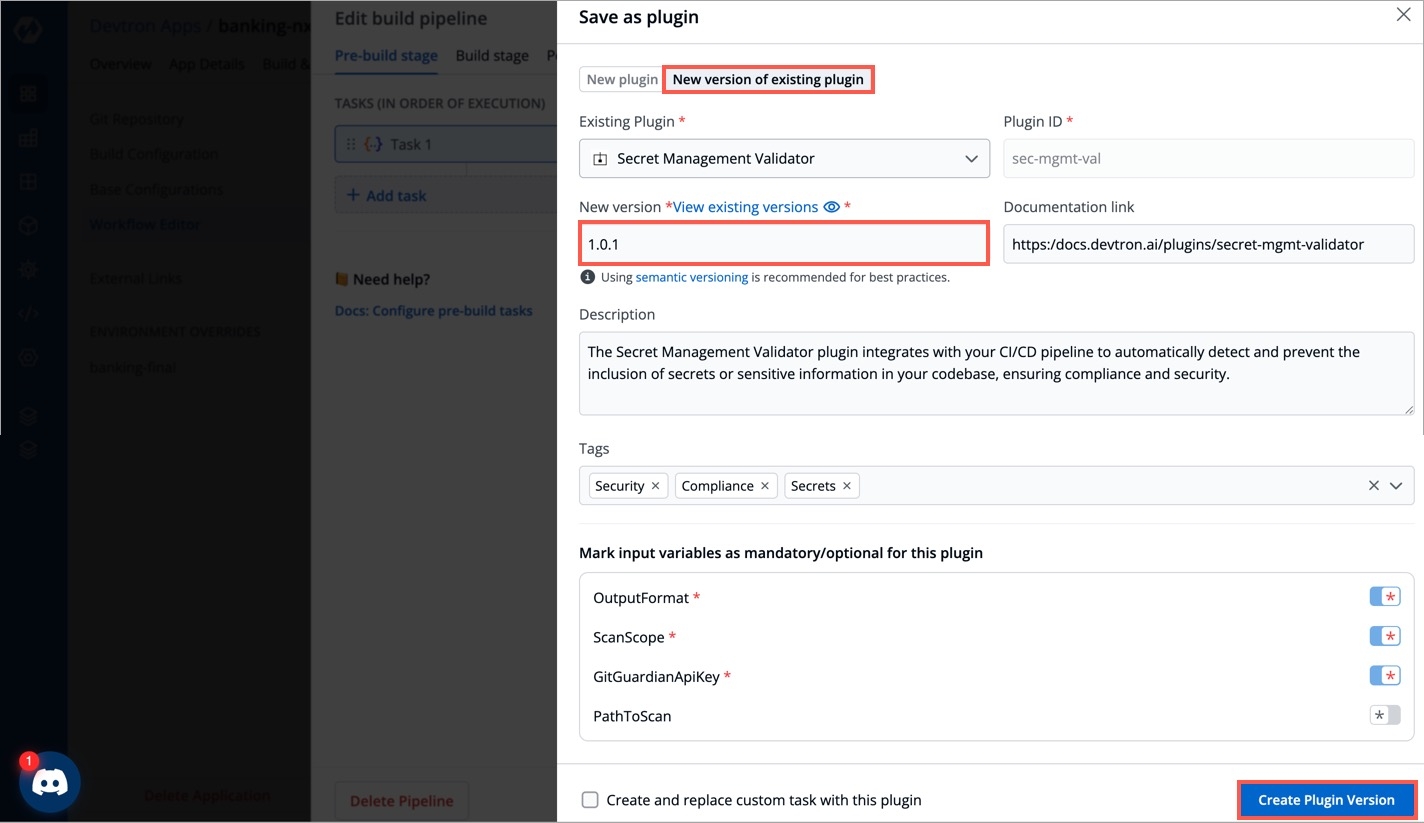
Figure 14: Creating New Version Verify the details in the remaining fields that got auto-populated from your existing plugin and modify if required.
Click Create Plugin Version.
You can view and use the available plugin versions as shown below.
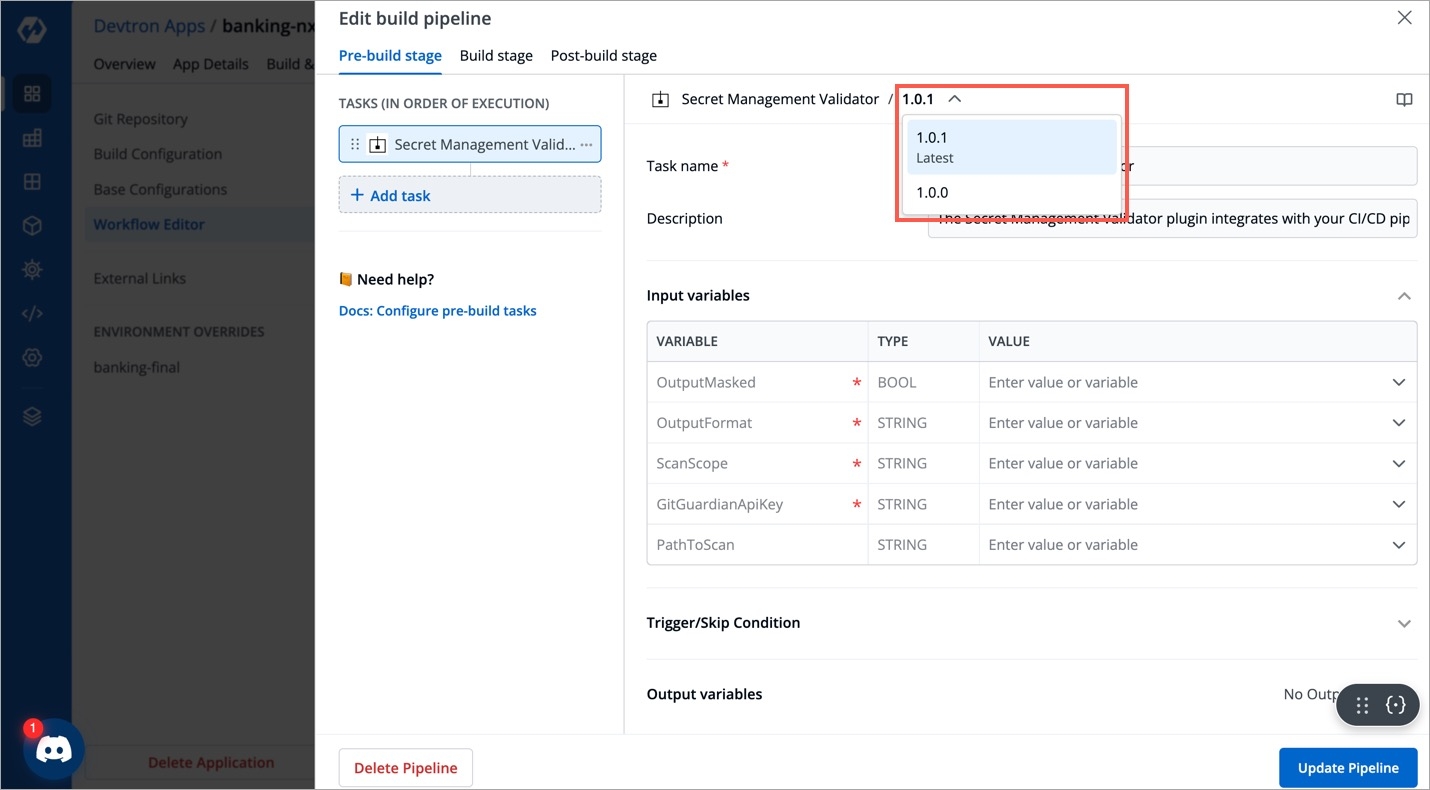
Figure 15: Selecting a Version
-->
Last updated
Was this helpful?