Try Devtron Enterprise!
Start Free Trial
LogoLogo
WebsiteDevtron demoGithub RepoJoin Discord
v0.7
v0.7
  • Introduction
  • Getting Started
  • Install Devtron
    • Install Devtron with CI/CD
    • Install Devtron with CI/CD and GitOps (Argo CD)
    • Install Devtron without Integrations
    • Install Devtron on Minikube, Microk8s, K3s, Kind, Cloud VMs
    • Install Devtron on Airgapped Environment
    • Demo on Popular Cloud Providers
    • Backup for Disaster Recovery
    • Uninstall Devtron
    • FAQs
  • Install Devtron Enterprise Trial
  • Devtron Kubernetes Client
  • Configurations
    • Installation Configurations
    • Override Configurations
    • Ingress Setup
  • Global Configurations
    • Host URL
    • GitOps
    • Projects
    • Clusters & Environments
    • Git Accounts
    • Container/OCI Registry
    • Chart Repositories
    • Deployment Charts
    • Authorization
      • SSO Login Services
        • Google
        • GitHub
        • GitLab
        • Microsoft
        • LDAP
        • OIDC
          • Keycloak
          • Okta
        • OpenShift
      • User Permissions
      • Permission Groups
      • API Tokens
    • Notifications
    • Deployment Window
    • Approval Policy
    • External Links
    • Catalog Framework
    • Scoped Variables
    • Plugin Policy
    • Pull Image Digest
    • Tags Policy
    • Filter Condition
    • Lock Deployment Configuration
    • Image Promotion Policy
    • Build Infra
  • Devtron Upgrade
    • Update Devtron from Devtron UI
    • Upgrade to 1.5.0
    • 0.6.x-0.7.x
    • 0.5.x-0.6.x
    • 0.4.x-0.5.x
    • 0.4.x-0.4.x
    • 0.3.x-0.4.x
    • 0.3.x-0.3.x
    • 0.2.x-0.3.x
  • Usage
    • Applications
      • Create a New Application
      • Clone an Existing Application
      • Deploy a Sample Application
      • App Configuration
        • Git Repository
        • Build Configuration
        • Base Deployment Template
          • Deployment
          • Rollout Deployment
          • Job and Cronjob
          • StatefulSets
        • GitOps Configuration
        • Workflow Editor
          • CI Pipeline
            • Pre-Build/Post-Build Stages
            • Override Build Configuration
          • CD Pipeline
        • ConfigMaps
        • Secrets
          • External Secret Operator (ESO)
            • AWS Secrets Manager
            • Google Secrets Manager
            • HashiCorp Vault
        • Environment Overrides
        • Deleting Application
      • Build and Deploy
        • Triggering CI
        • Triggering CD
        • Rollback Deployment
        • Applying Labels to Images
      • App Details
        • Debugging Deployment And Monitoring
        • Using Ephemeral Containers
        • Application Metrics
      • Application Overview
    • Jobs
      • Create a new job
      • Configurations
      • Workflow Editor
      • Trigger Job
      • Overview
    • Application Groups
    • Software Distribution Hub
      • Tenants
      • Release Hub
    • Resource Browser
    • Resource Watcher
    • Charts
      • Charts Overview
      • Deploy & Observe
      • Examples
        • Deploying Mysql Helm Chart
        • Deploying MongoDB Helm Chart
      • Chart Group
    • Security
      • Security Scans
      • Security Policies
    • Bulk Edit
    • Integrations
      • Build and Deploy (CI/CD)
      • GitOps (Argo CD)
      • Vulnerability Scanning (Clair)
      • Notifications
      • Monitoring (Grafana)
    • Pipeline Plugins
      • Create Your Plugin
      • Our Plugins
        • Ansible Runner
        • Bitbucket Runner Trigger
        • Codacy
        • Code-Scan
        • Copacetic
        • Container Image Exporter
        • Copy Container Image
        • Cosign
        • CraneCopy
        • Dependency track - Maven & Gradle
        • Dependency track - NodeJS
        • Dependency track - Python
        • Devtron CD Trigger
        • Devtron CI Trigger
        • Devtron Job Trigger
        • DockerSlim
        • EKS Create Cluster
        • GCS Create Bucket
        • GitHub Pull Request Updater
        • GKE Provisioner
        • GoLang-migrate
        • Jenkins
        • Jira Issue Validator
        • Jira Issue Updater
        • K6 Load Testing
        • Pull images from container repository
        • Semgrep
        • SonarQube
        • SonarQube v1.1.0
        • Terraform CLI
        • Vulnerability Scanning
  • Resources
    • Glossary
    • Troubleshooting
    • Use Cases
      • Devtron Generic Helm Chart To Run CronJob Or One Time Job
      • Connect SpringBoot with Mysql Database
      • Connect Expressjs With Mongodb Database
      • Connect Django With Mysql Database
      • Pull Helm Charts from OCI Registry
    • Telemetry Overview
    • Devtron on Graviton
    • Release Notes
Powered by GitBook
On this page
  • Prerequisites
  • Steps on Keycloak Admin Console
  • Creating a Client
  • Getting Client Secret
  • Creating Users
  • Retrieving Issuer URL
  • Steps on Devtron
  • Configuring OIDC SSO
  • Adding Users

Was this helpful?

Export as PDF
  1. Global Configurations
  2. Authorization
  3. SSO Login Services
  4. OIDC

Keycloak

PreviousOIDCNextOkta

Last updated 9 months ago

Was this helpful?

Prerequisites

  • Install and on your server or cloud environment.

  • Create a new for your application.


Steps on Keycloak Admin Console

Creating a Client

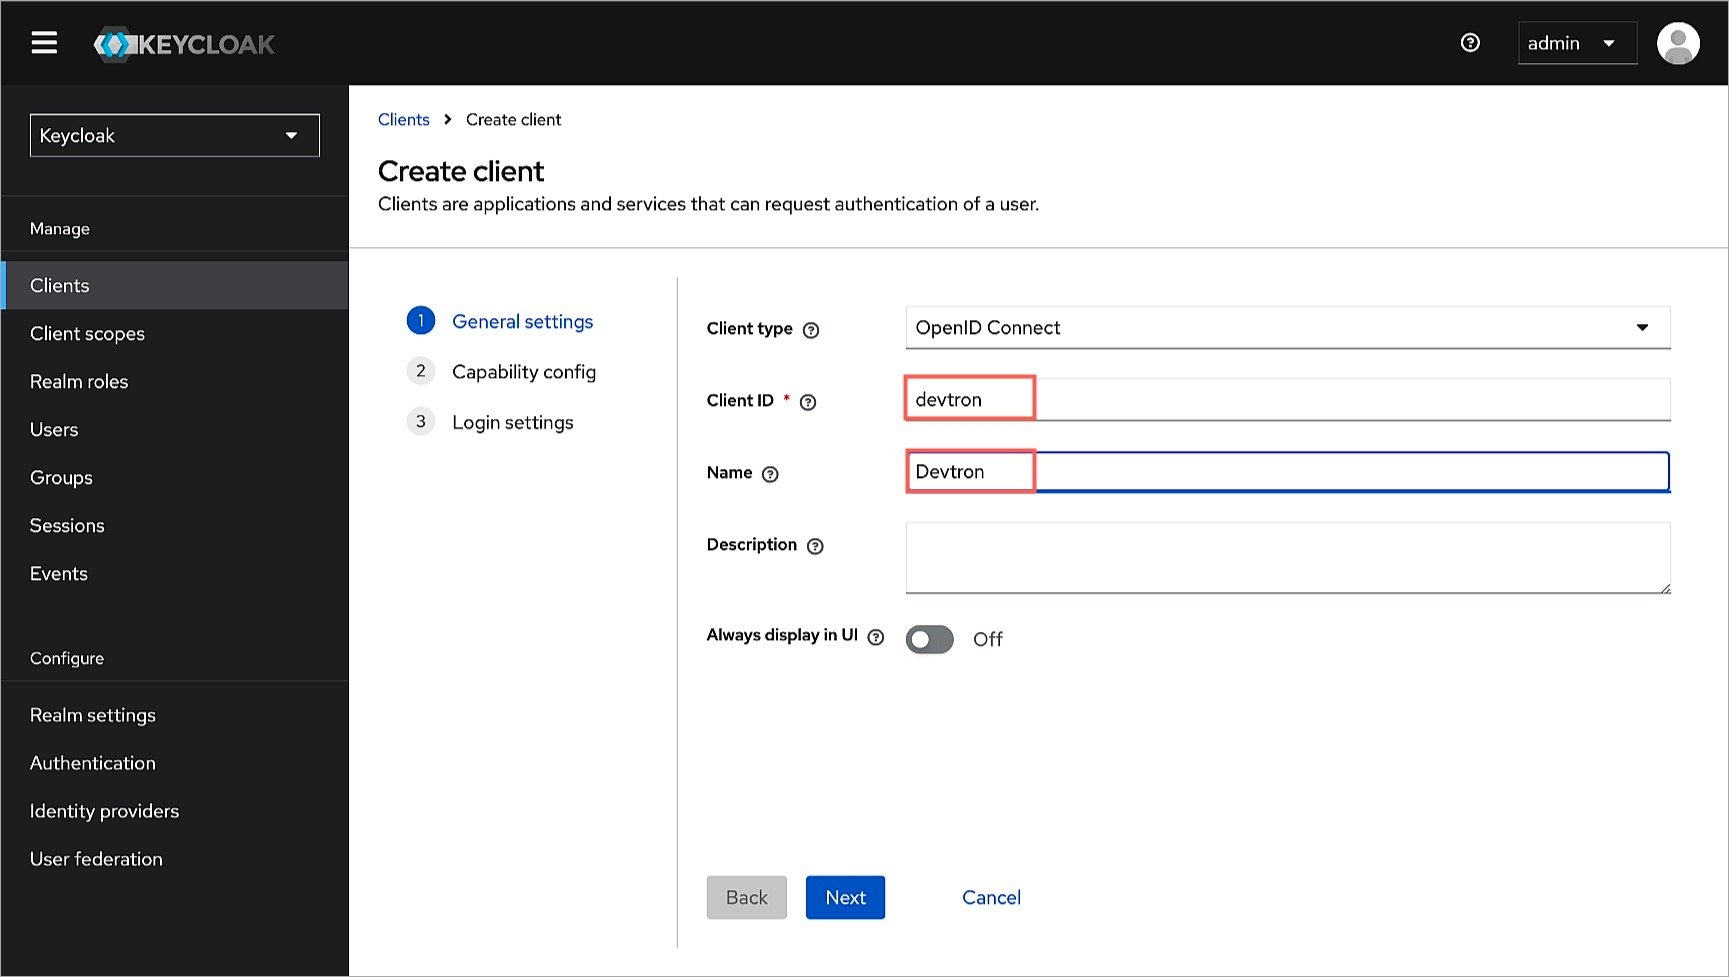
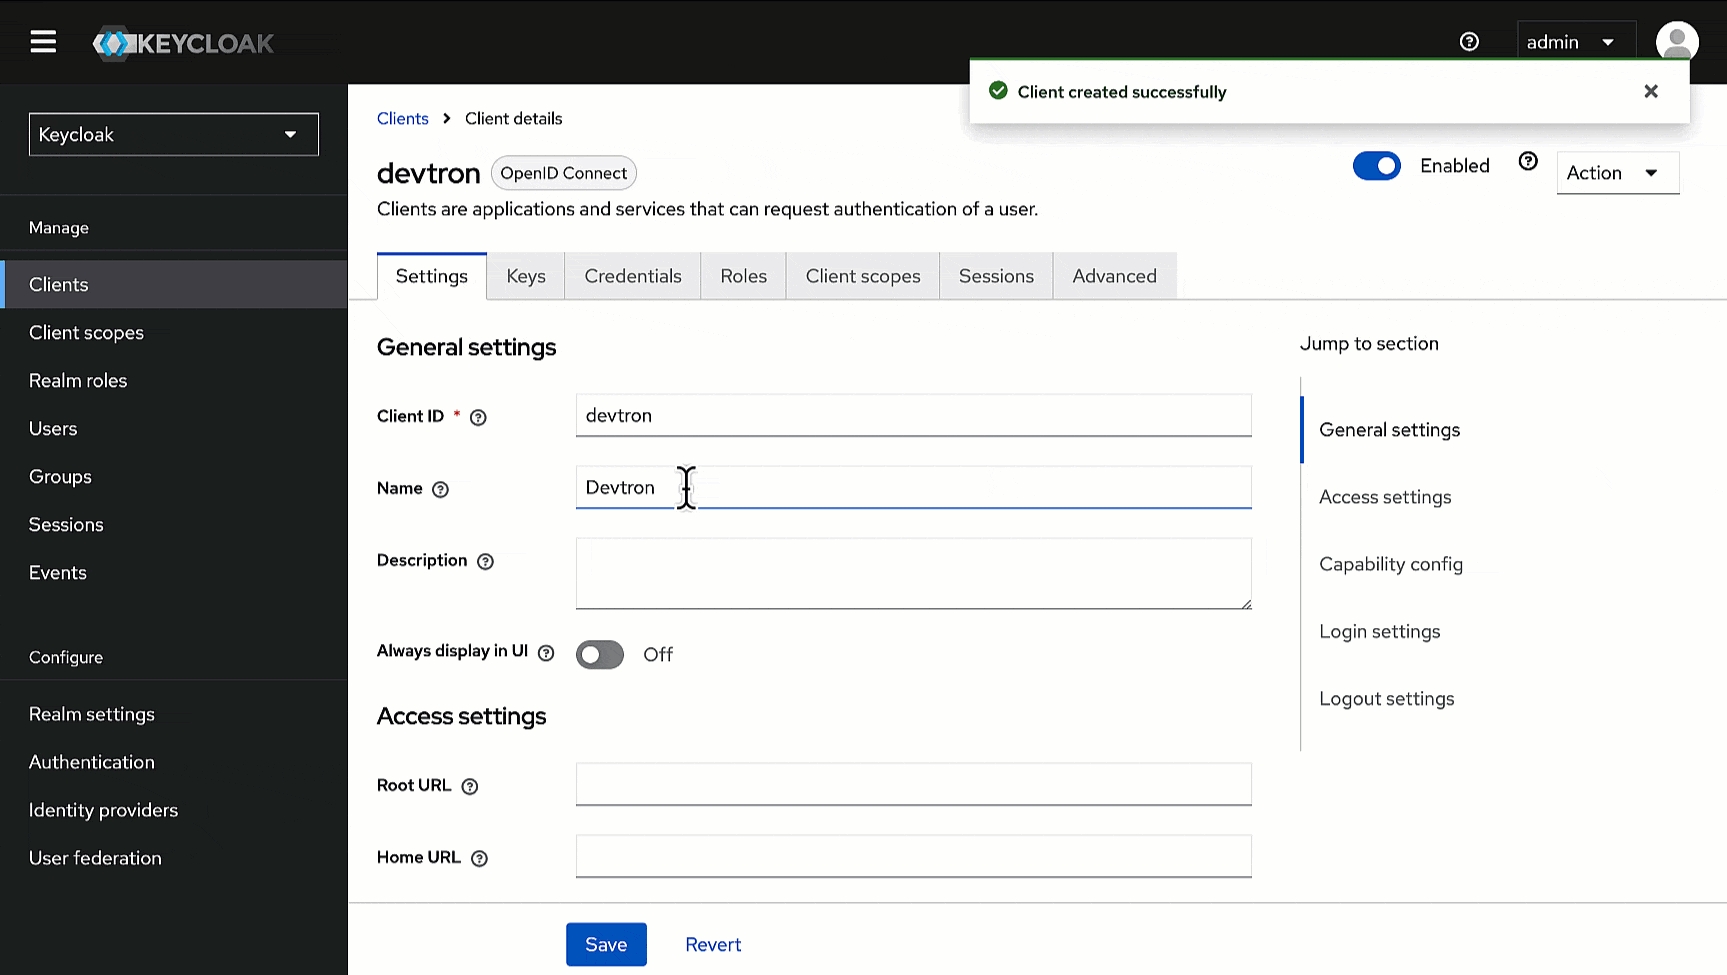
Here, we will add Devtron as a client for using Keycloak SSO.

  1. In the Admin Console, go to Clients and click Create client.
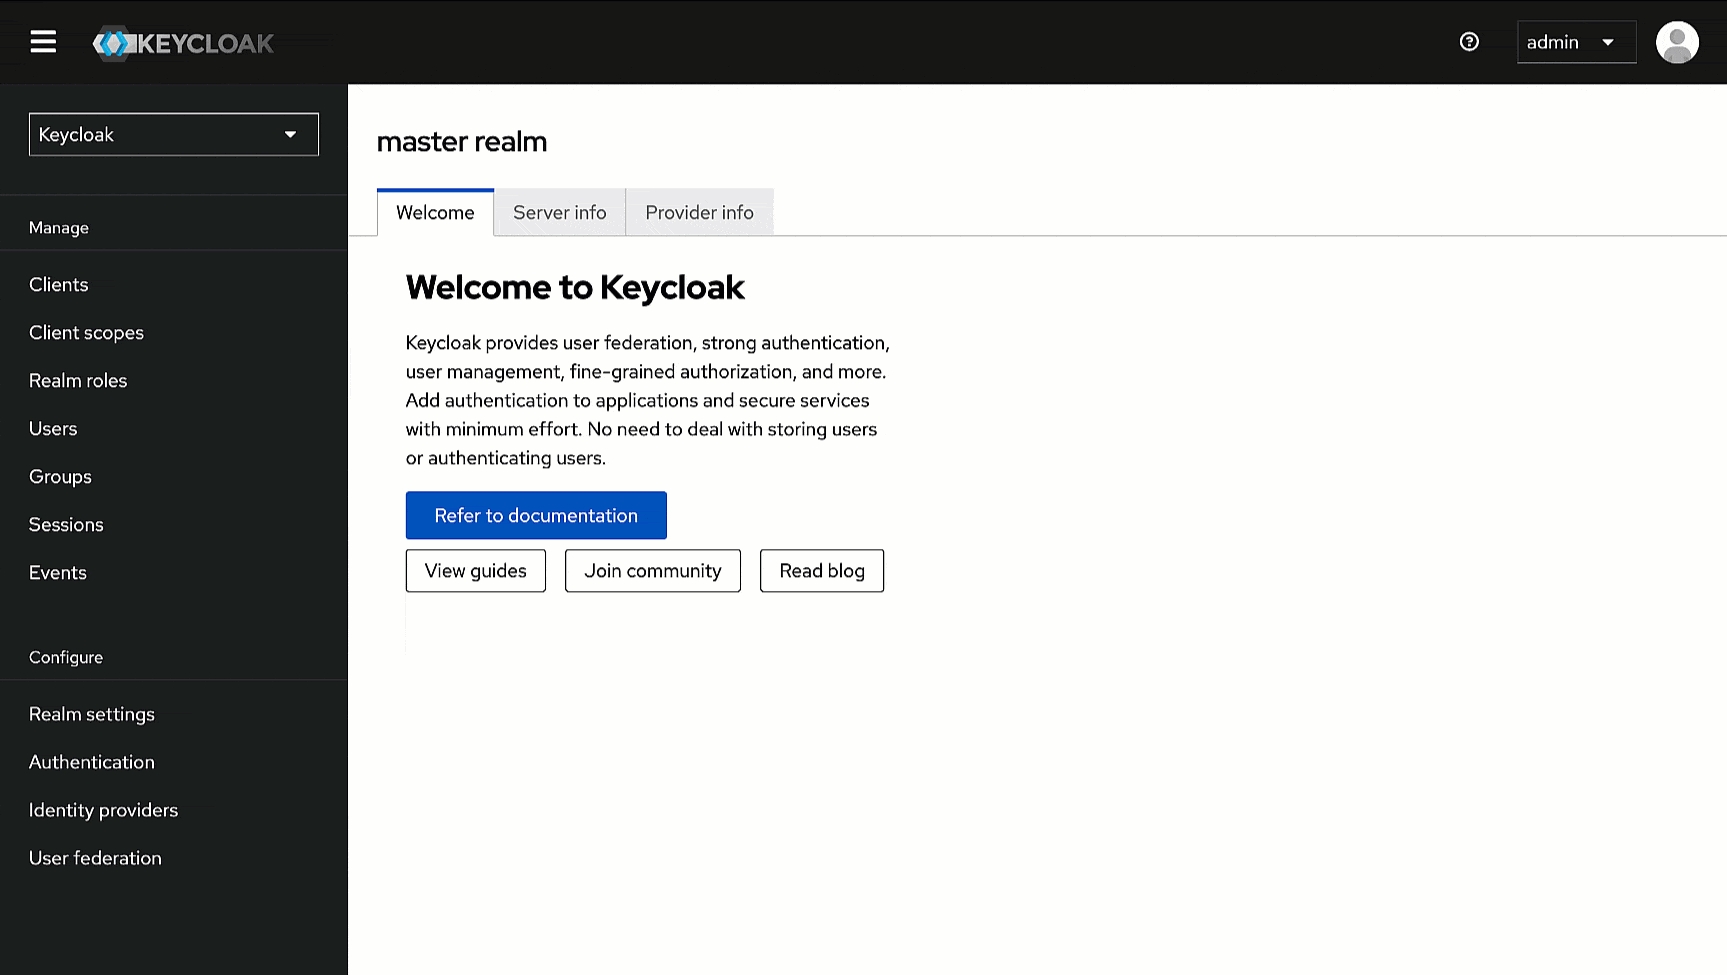
    Figure 1: Creating Client on Keycloak
  2. Within General Settings:

    • Enter devtron in the Client ID field. We will use this ID while configuring SSO later in Devtron.

    • Enter Devtron in the Name field.

    Figure 2: Client ID and Name
  3. Within Capability config, turn on Client Authentication.
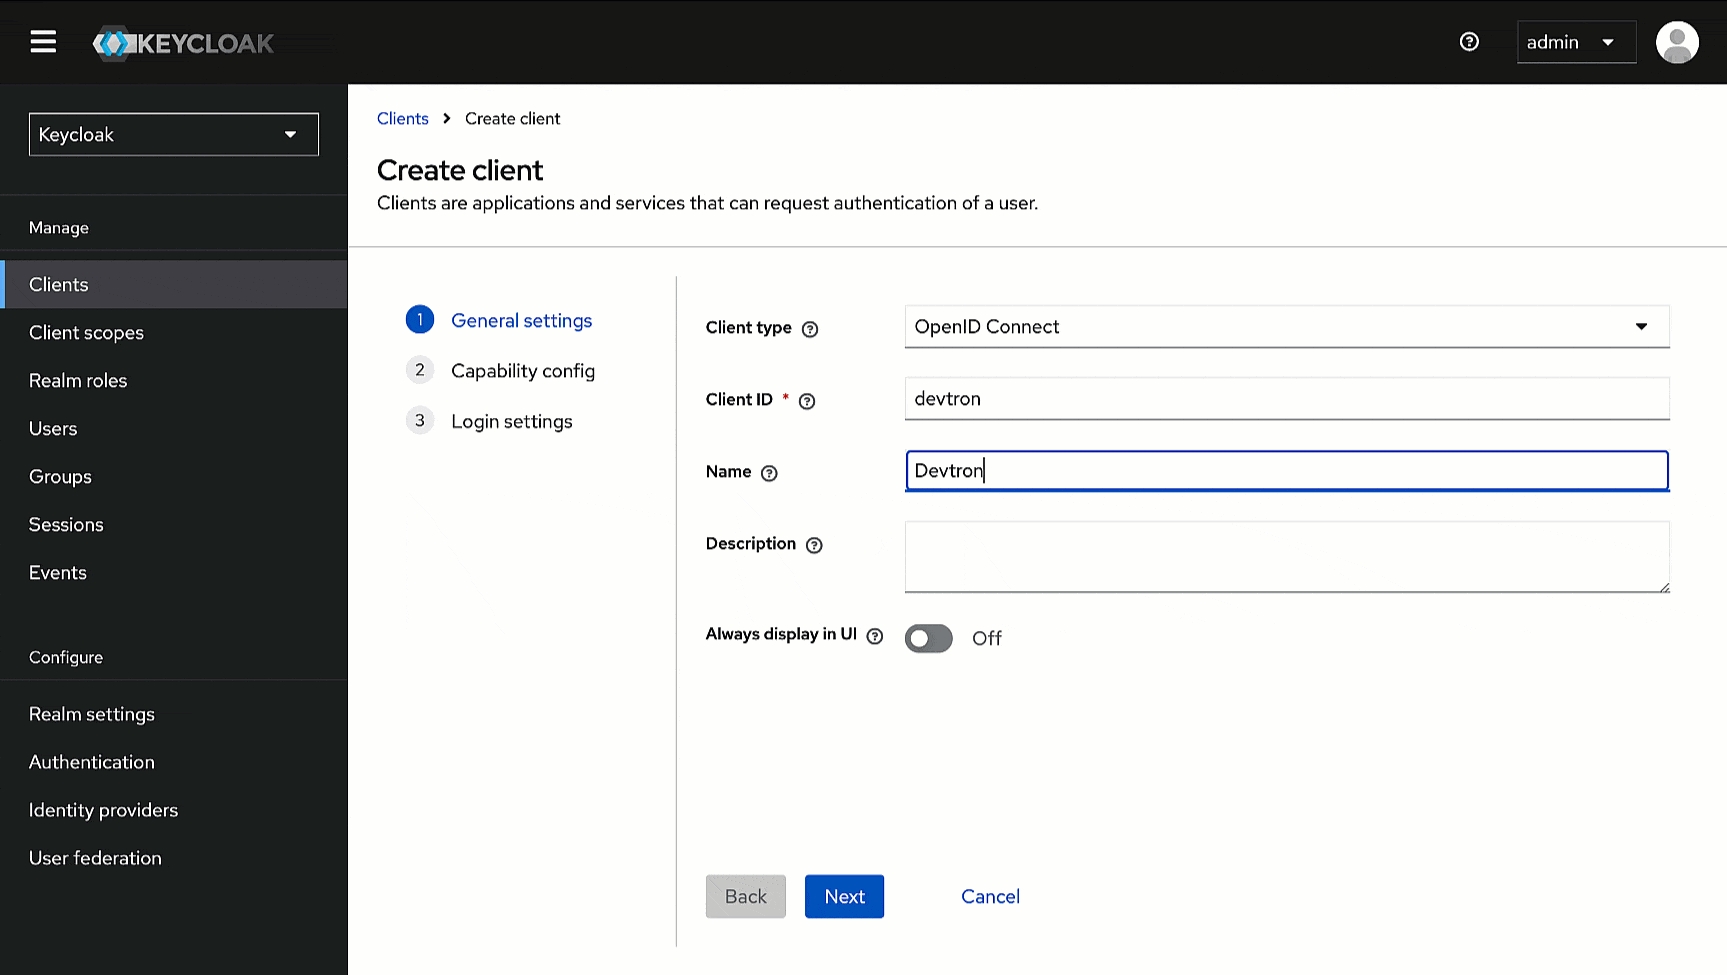
    Figure 3: Enabling Client Authentication Toggle
  4. Within Login settings, enter https://<DEVTRON_BASE_URL>/orchestrator/api/dex/callback in the following fields.

    • Valid redirect URIs

    • Valid post logout redirect URIs

    • Web origins

    to know where to find DEVTRON_BASE_URL.
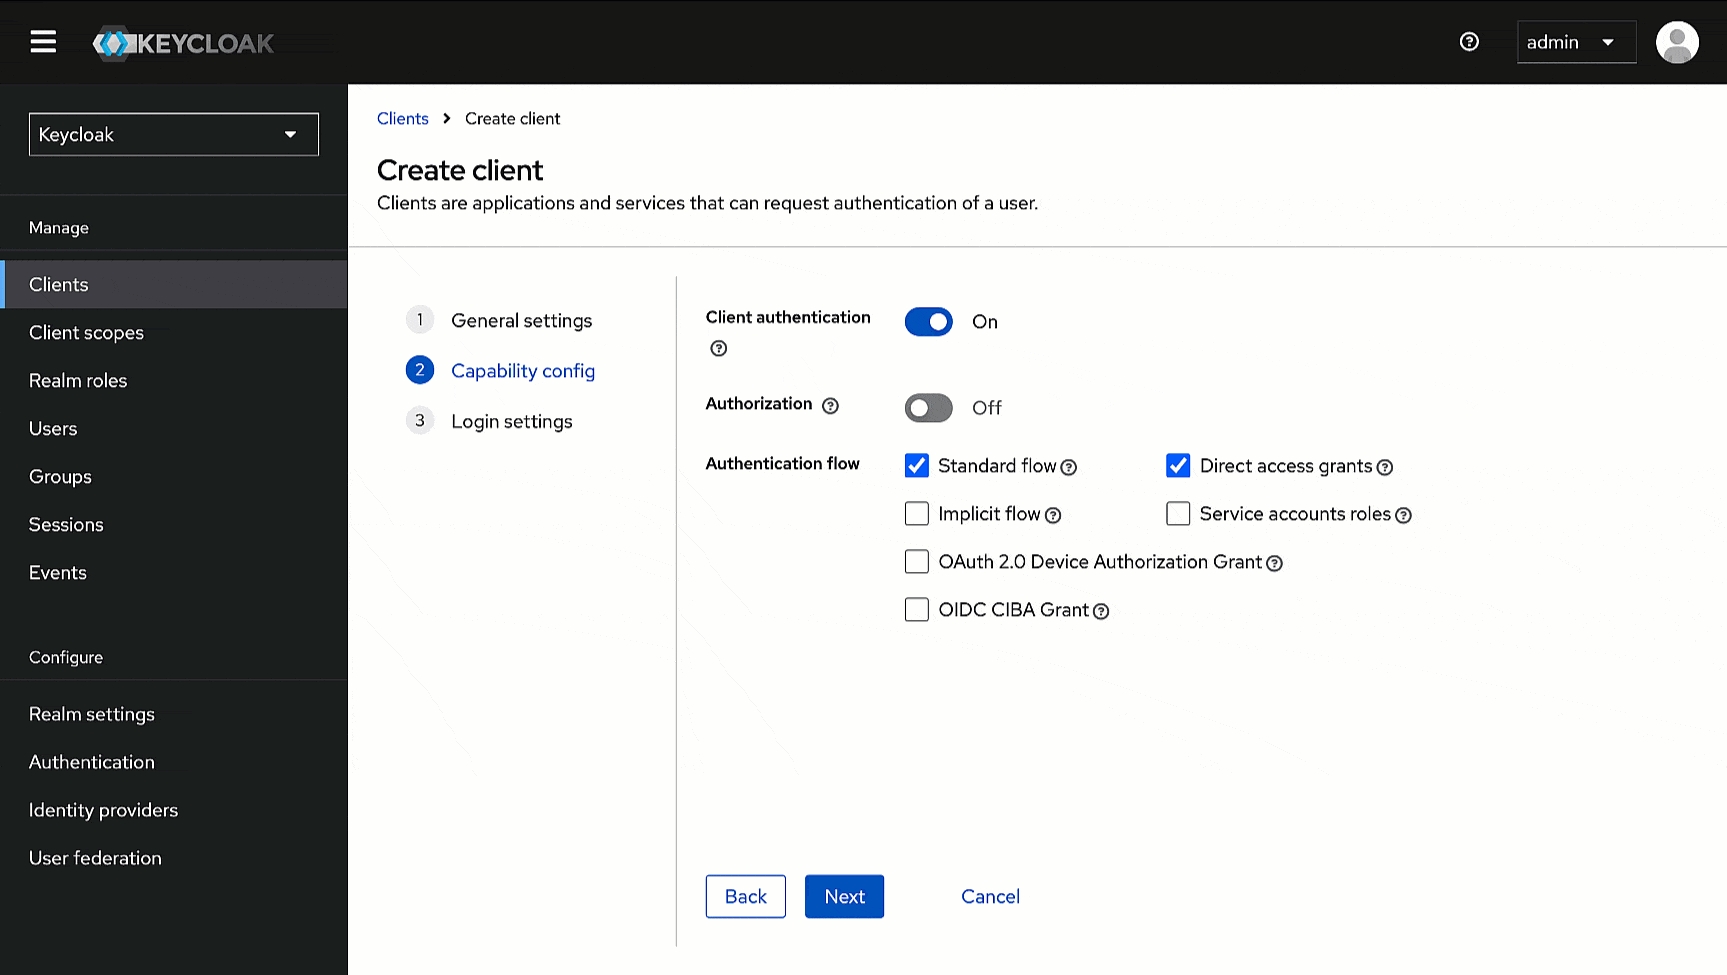
    Figure 4: Entering Callback/Redirect URIs
  5. Click Save.

Getting Client Secret

Here, we will obtain the secret we need while configuring SSO in Devtron.

  1. Go to the Credentials tab of the client you created.
  2. Use the copy button next to the Client Secret field and paste it somewhere for future reference.

Creating Users

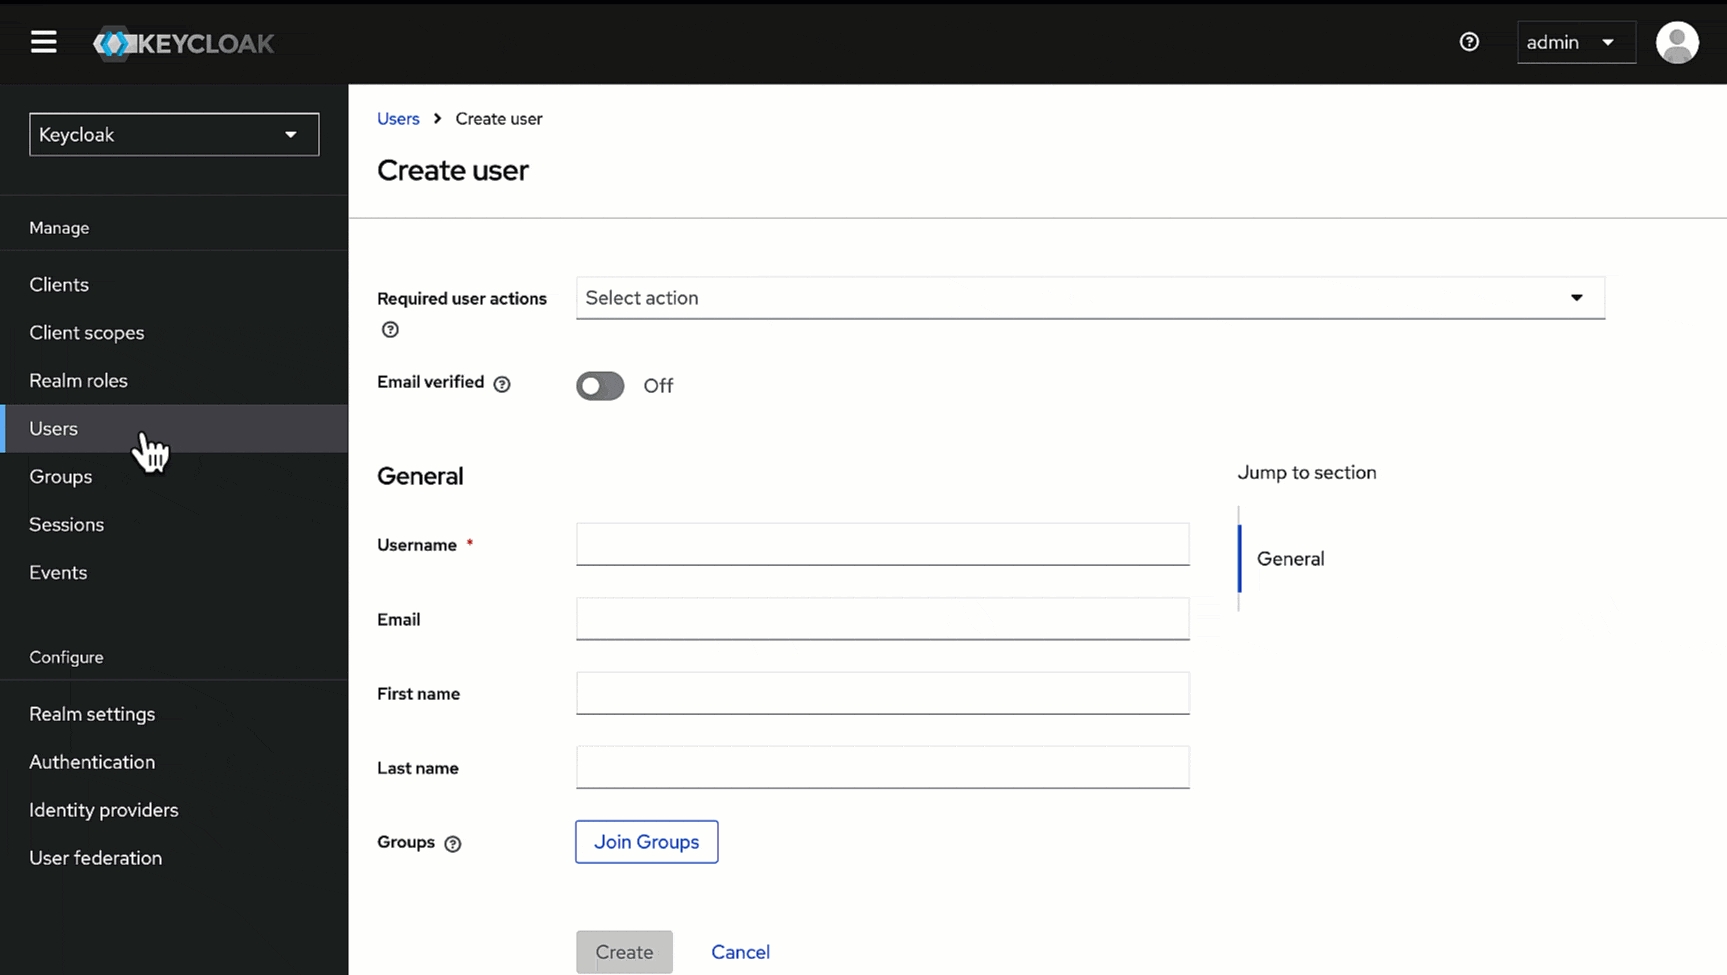
Here, we will create a user that can log in to Devtron via SSO. We will assign a username and password that the user can enter while logging in to Devtron via Keycloak SSO.

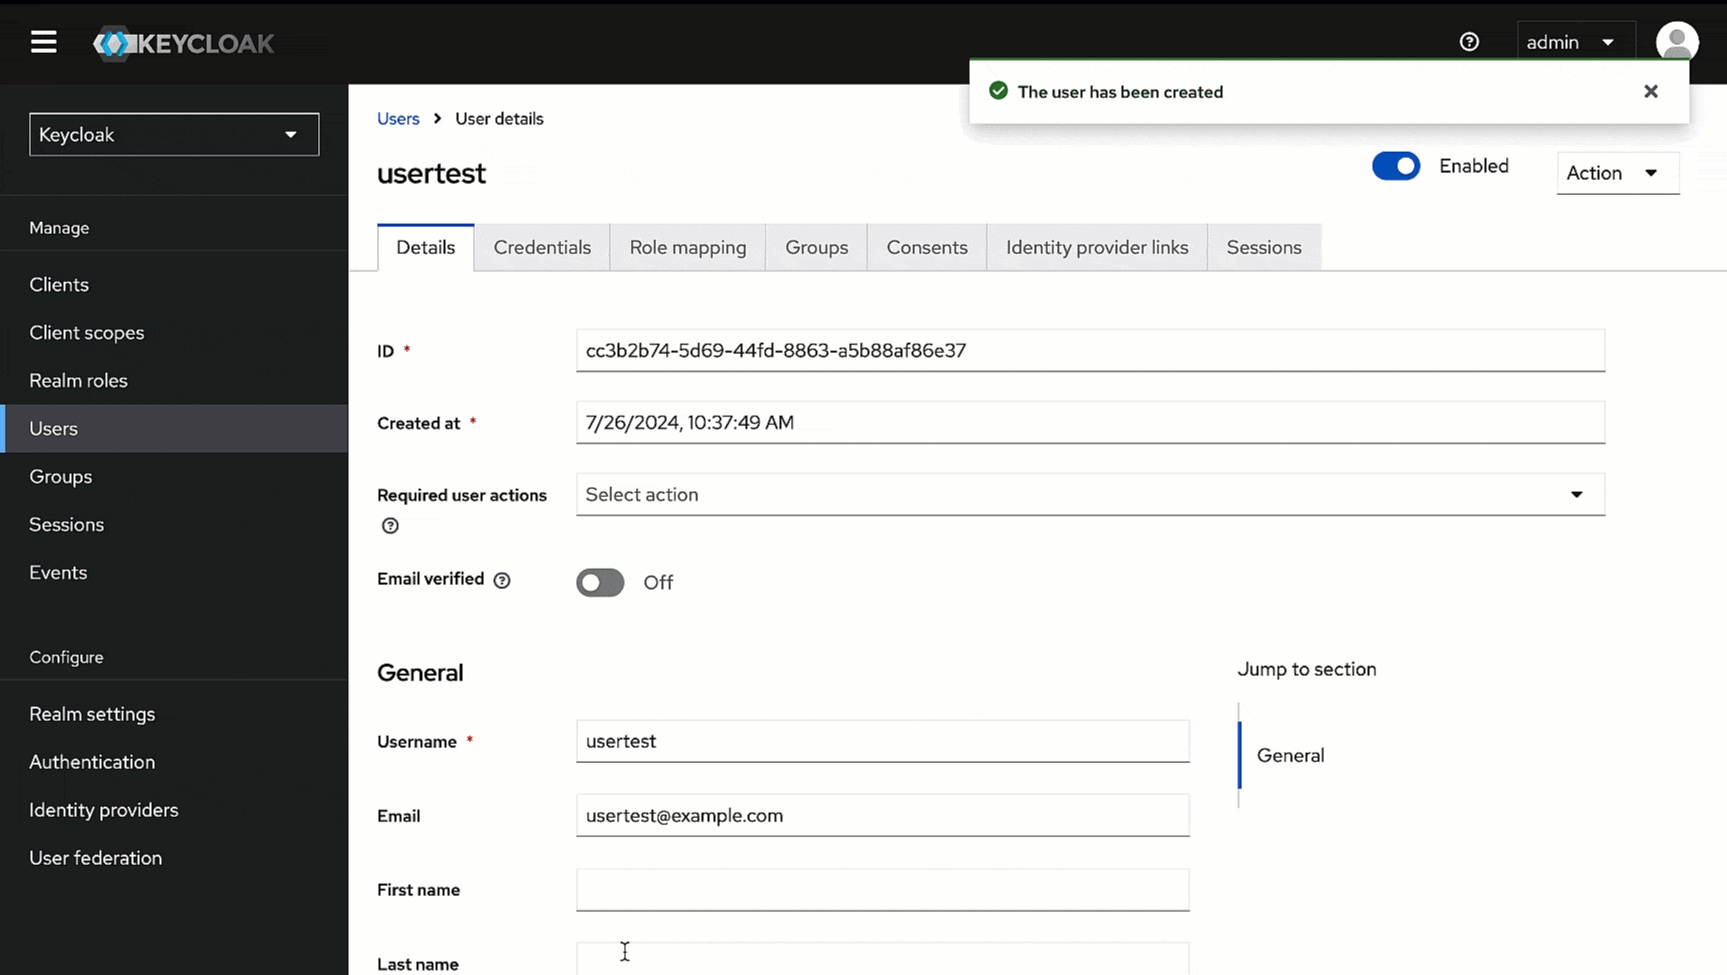
  1. In the Admin Console, go to Users and click Add user.

  2. Give a username (e.g., usertest) in the Username field and enter the user's email address (e.g., usertest@example.com) in the Email field.

  3. Click Create. Your user creation will be successful.

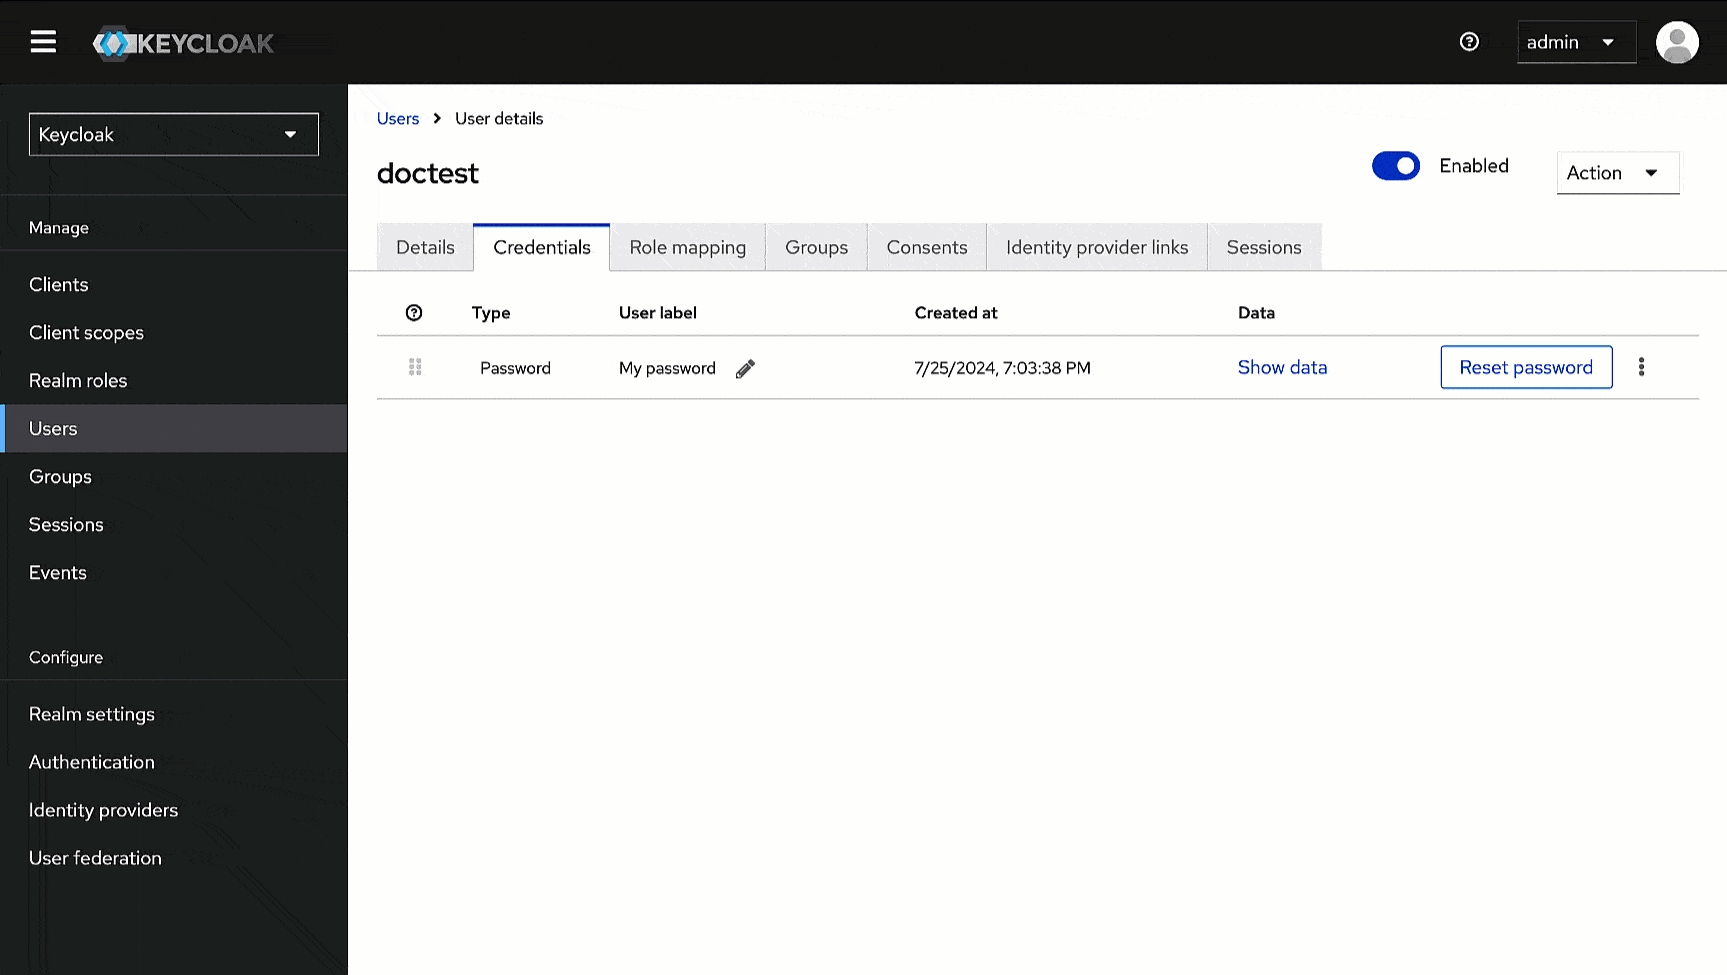
  4. Go to the Credentials tab of the user you created.
  5. Click Set password.

  6. Enter the password and confirm it.

  7. Click Save.

Retrieving Issuer URL

Here, we will obtain the Issuer URL we need while configuring SSO in Devtron.

  1. In the Admin Console, go to Realm settings.

  2. In the General tab, scroll down to the Endpoints field, and click the OpenID Endpoint Configuration link.
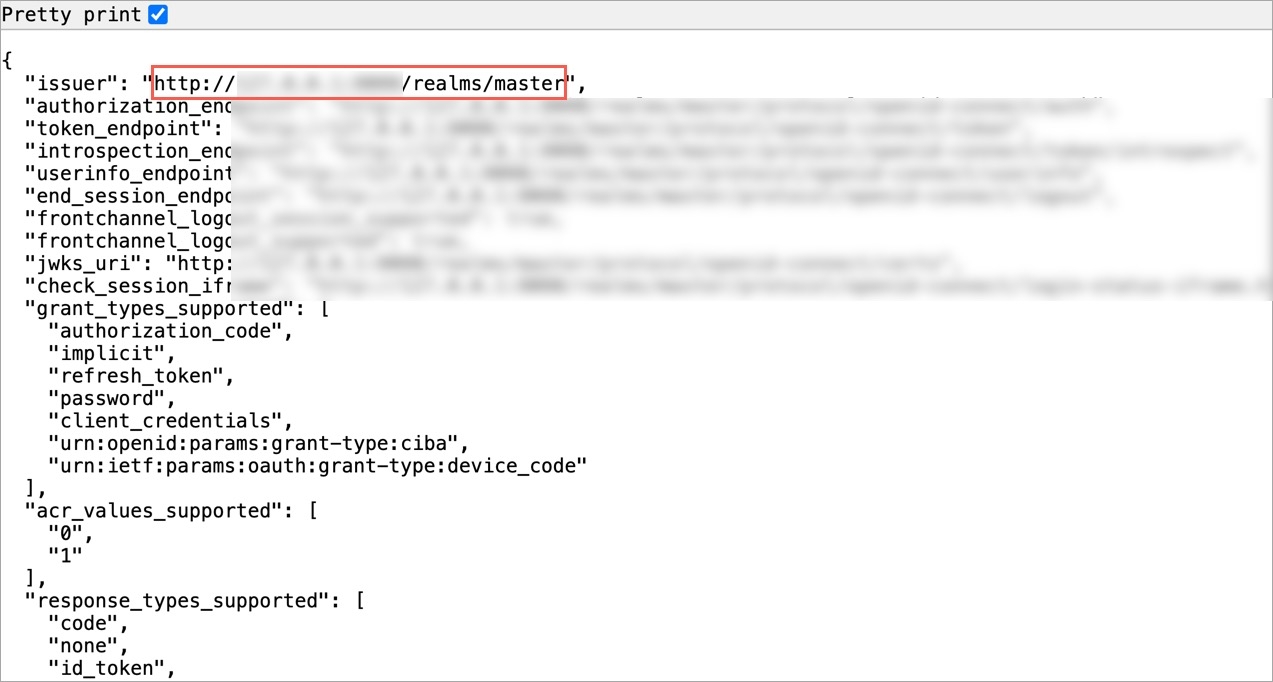
  3. This will open a new page, copy the value of the key named issuer, and paste it somewhere for future reference.

Steps on Devtron

Configuring OIDC SSO

Who Can Perform This Action?

Users need to have super-admin permission to configure SSO.

  1. Go to Global Configurations → SSO Login Services → OIDC.
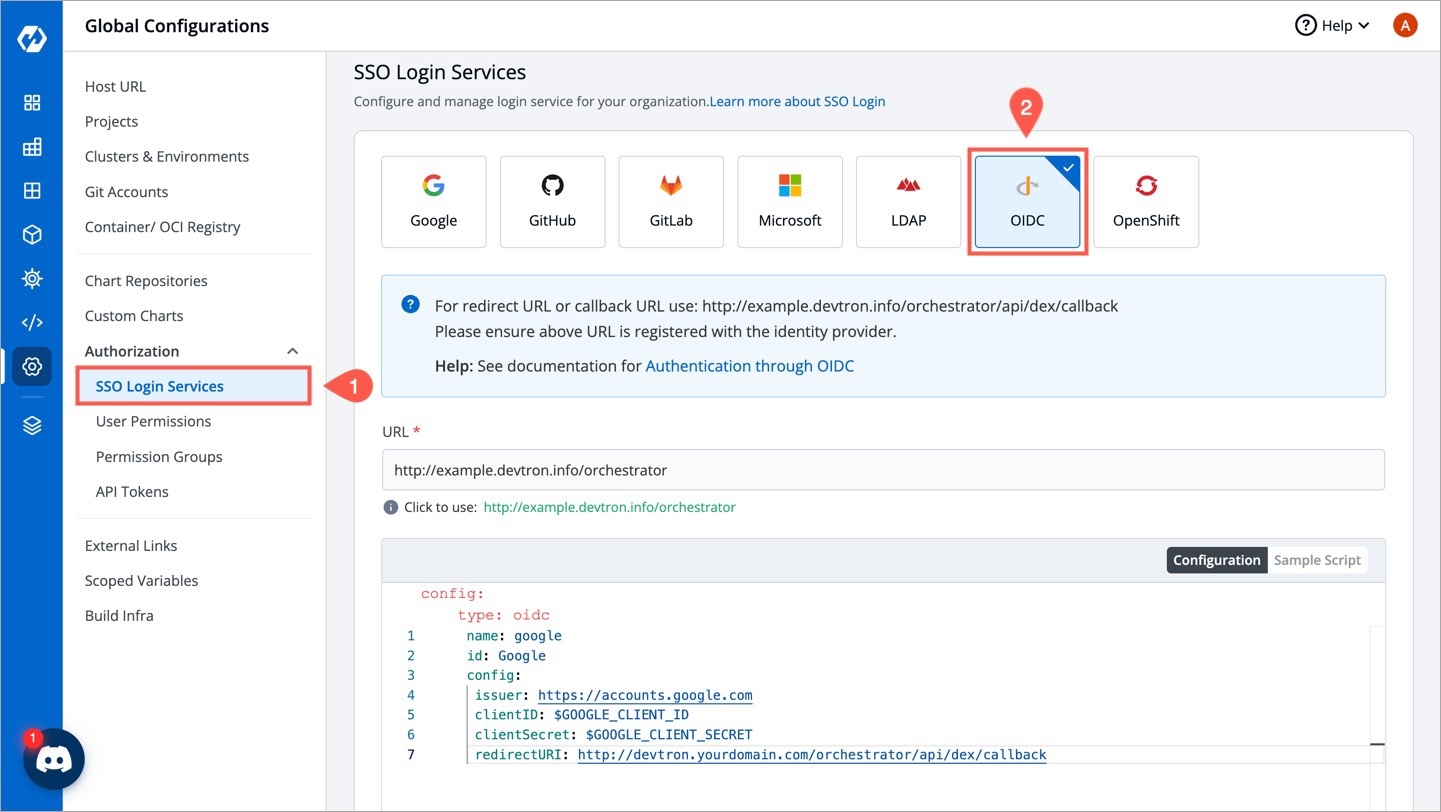
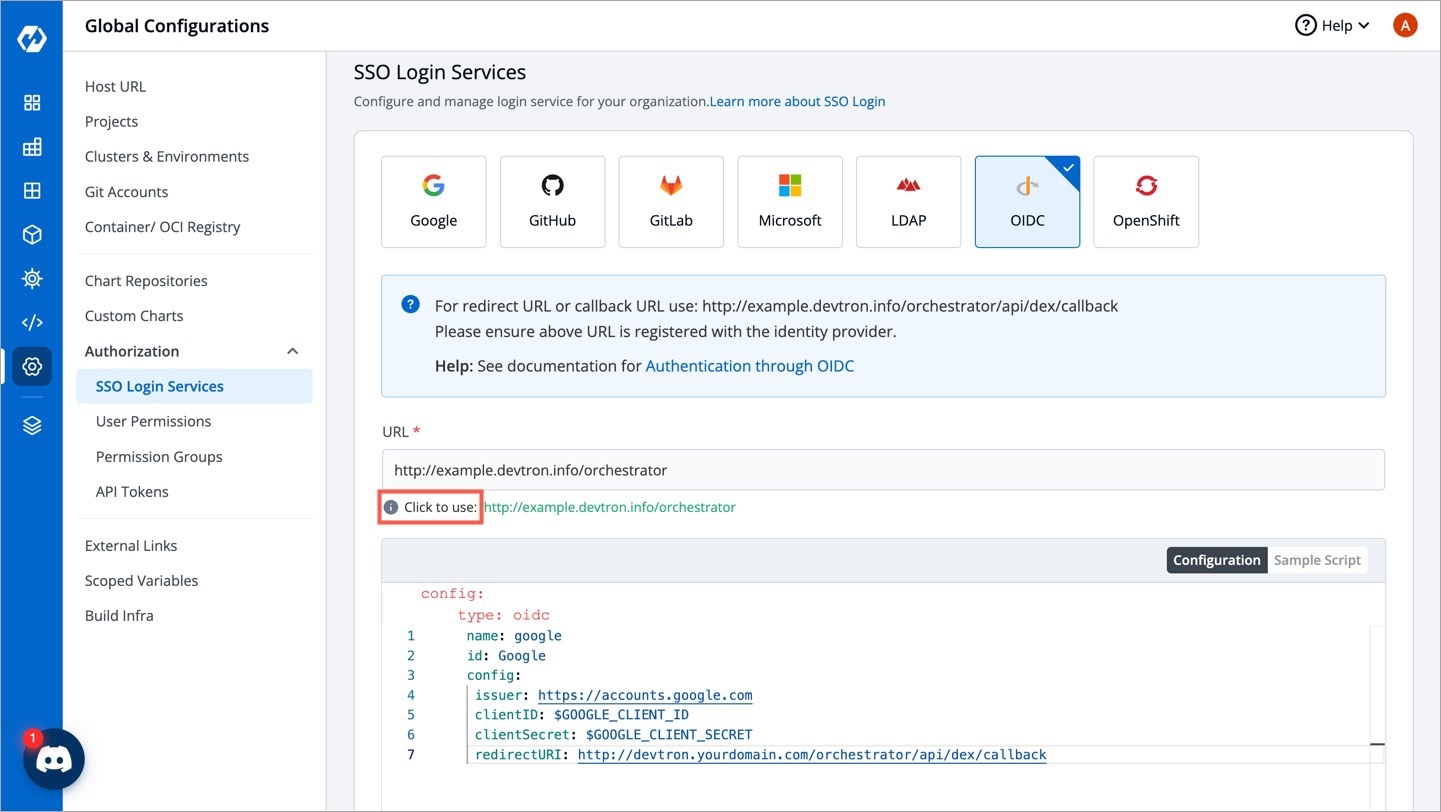
  2. Below the URL field, take the help of the Click to use option to populate the exact URL if the displayed one is incorrect.
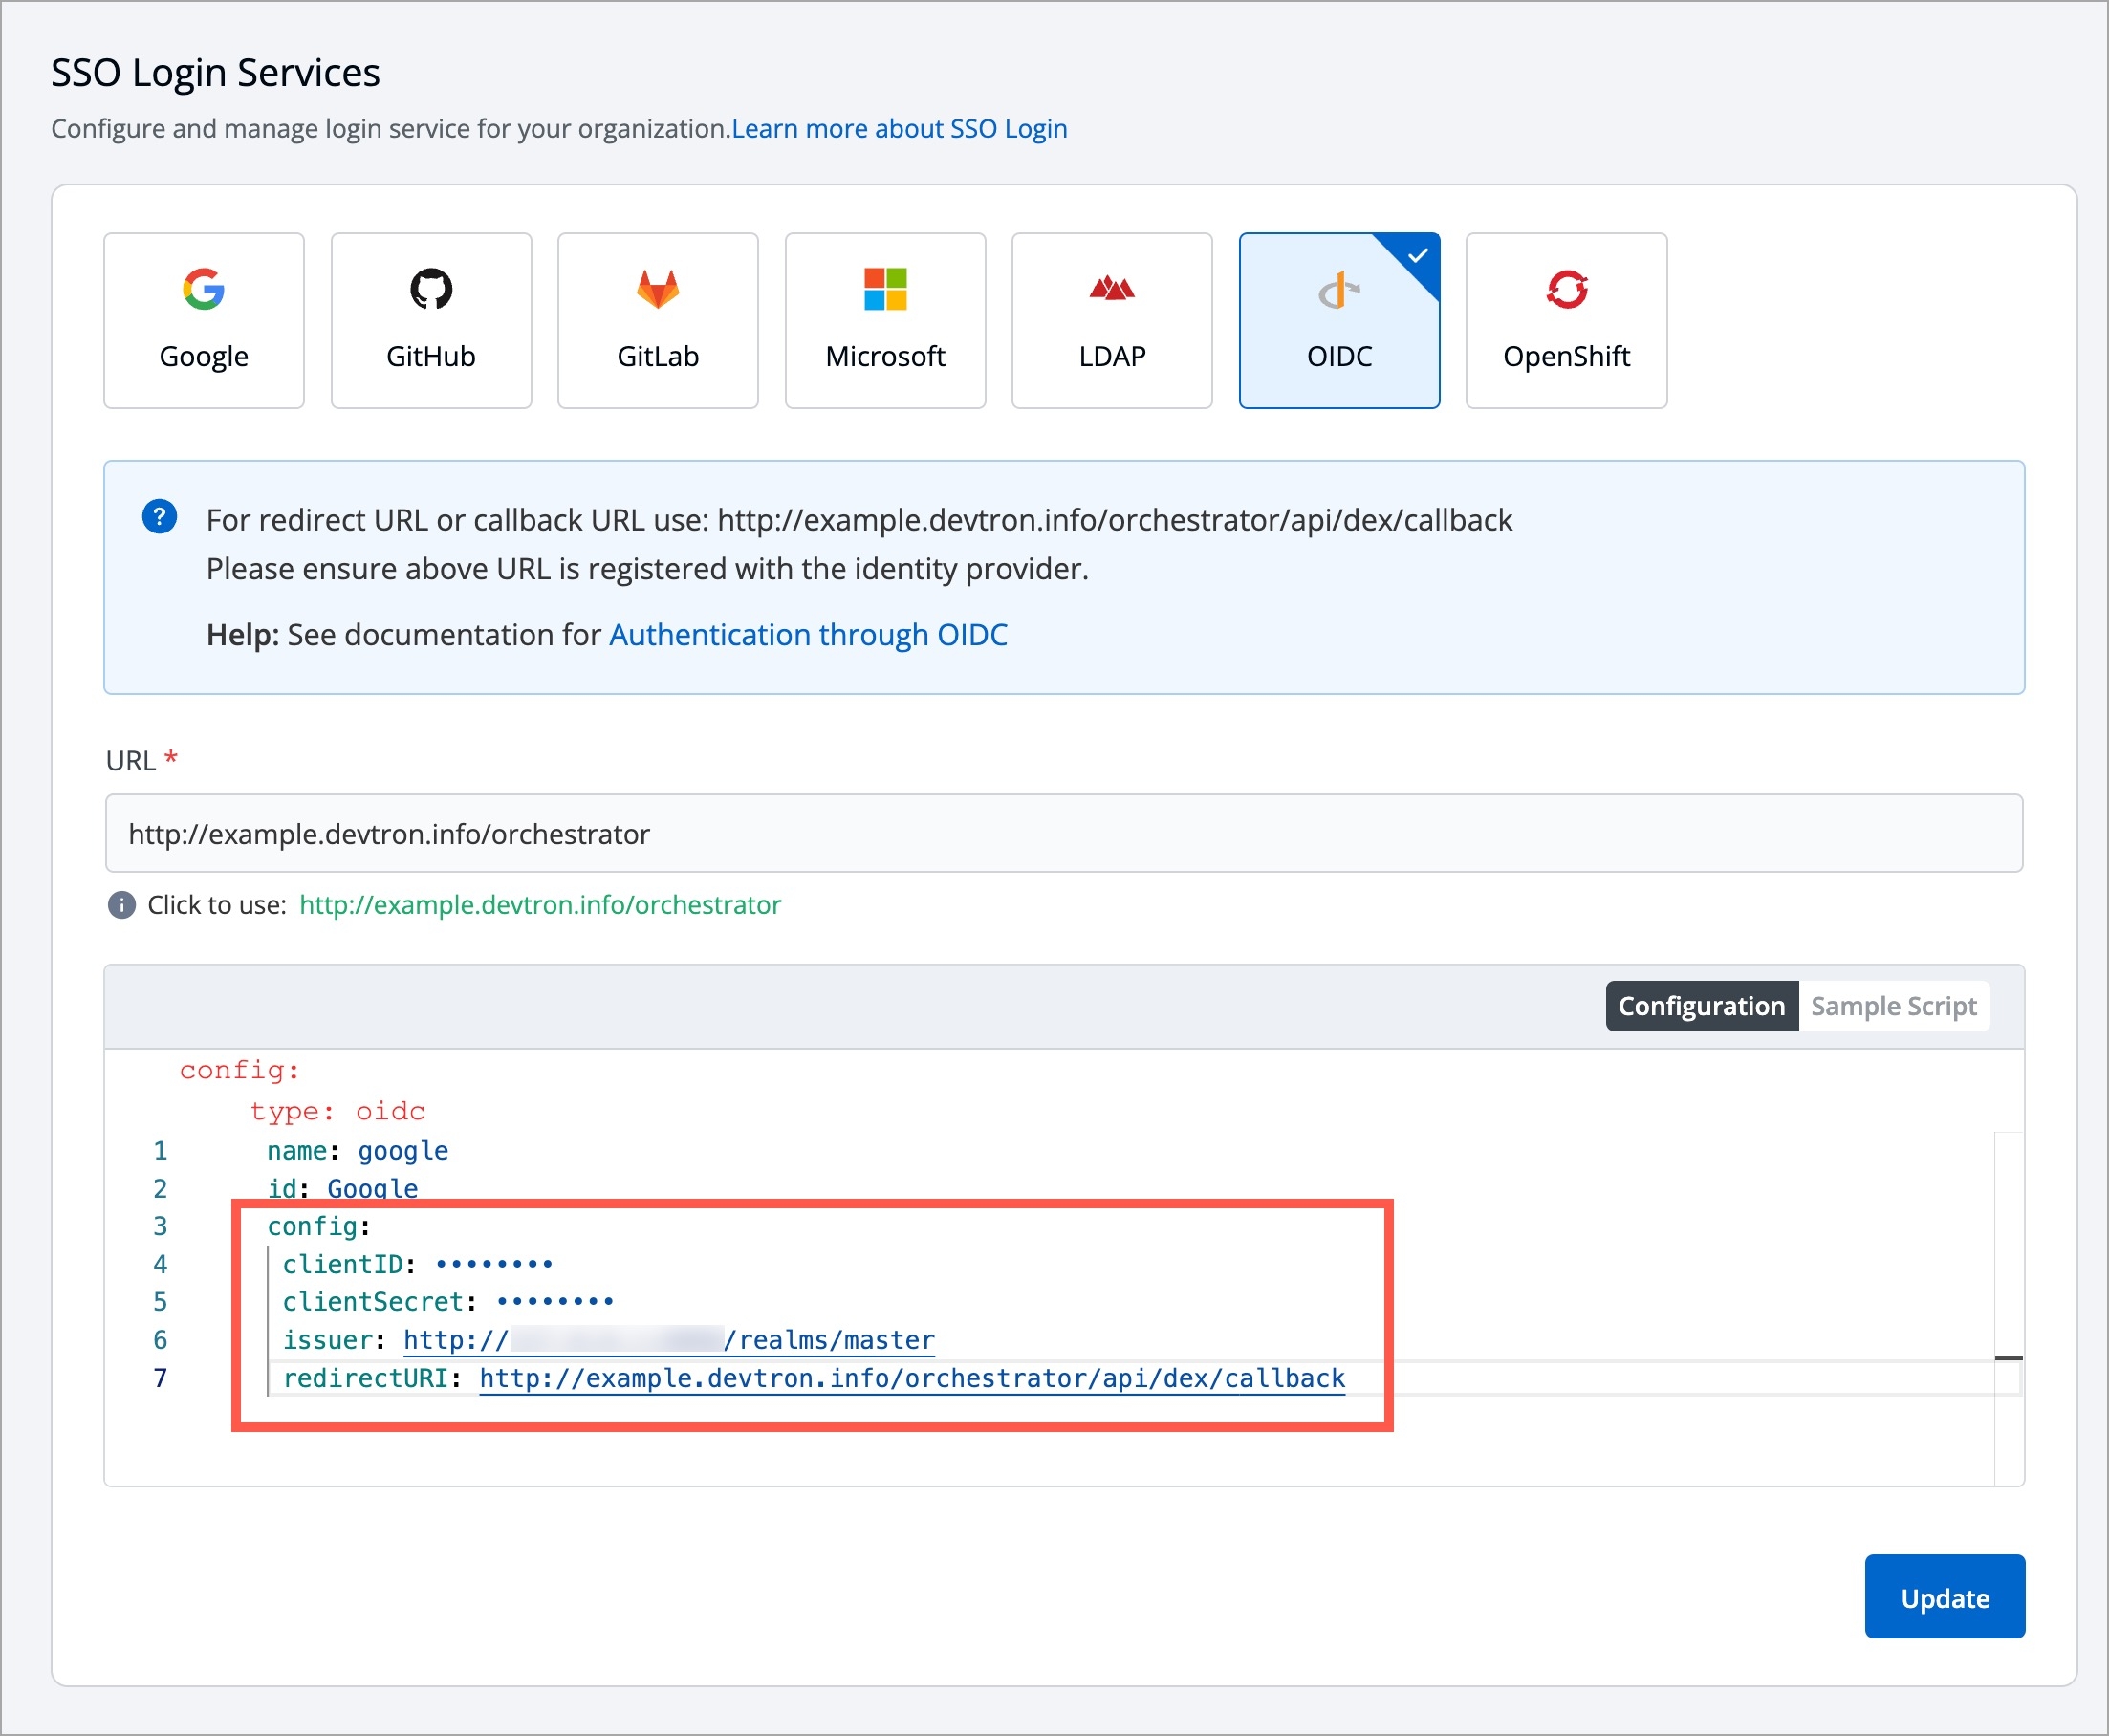
  3. In the Configuration editor, do the following:

  4. Click Save or Update to activate Keycloak SSO login.

Adding Users

Who Can Perform This Action?

Users need to have super-admin permission to add users.

Here, we will add the user we created in the Keycloak Admin Console. If this step is skipped, the user might not be able to log in to Devtron via Keycloak.

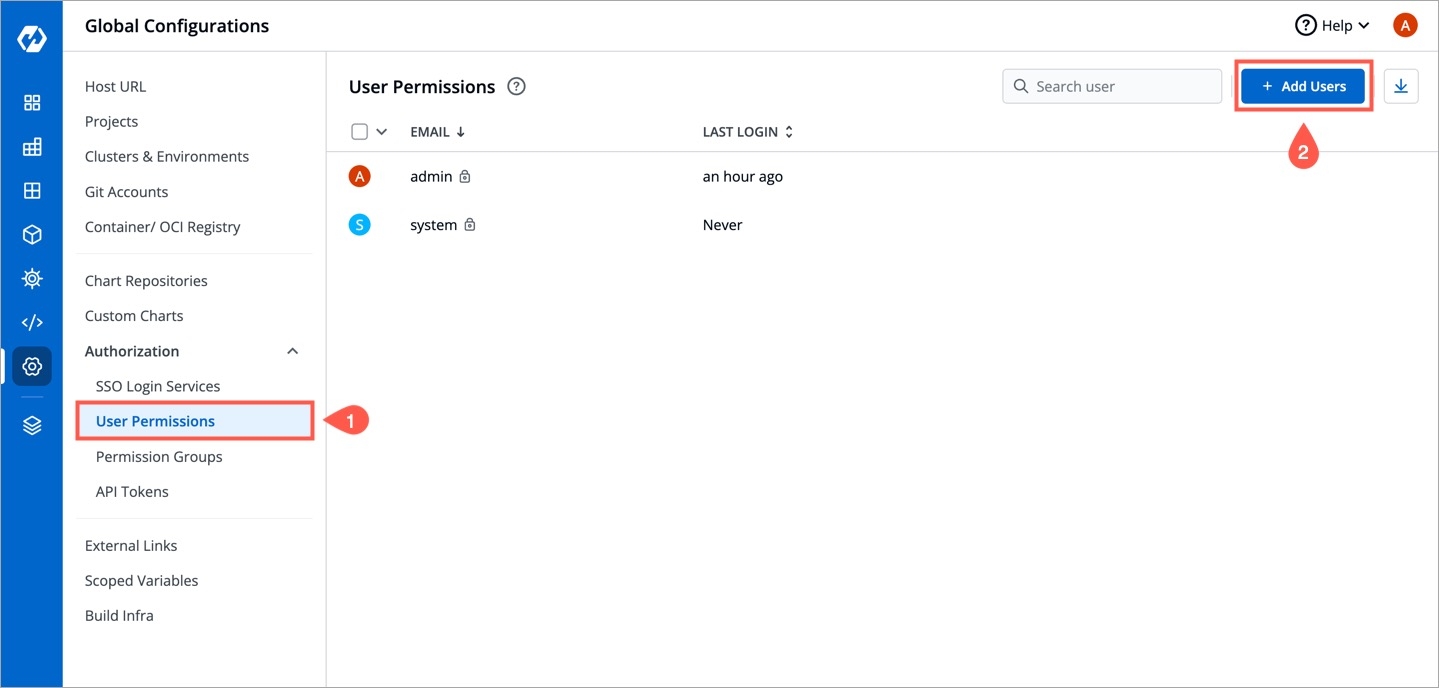
  1. Go to Global Configurations → Authorization → User Permissions.

  2. Click + Add Users.

  3. In the Email addresses field, enter the email address of the user you created in Keycloak.
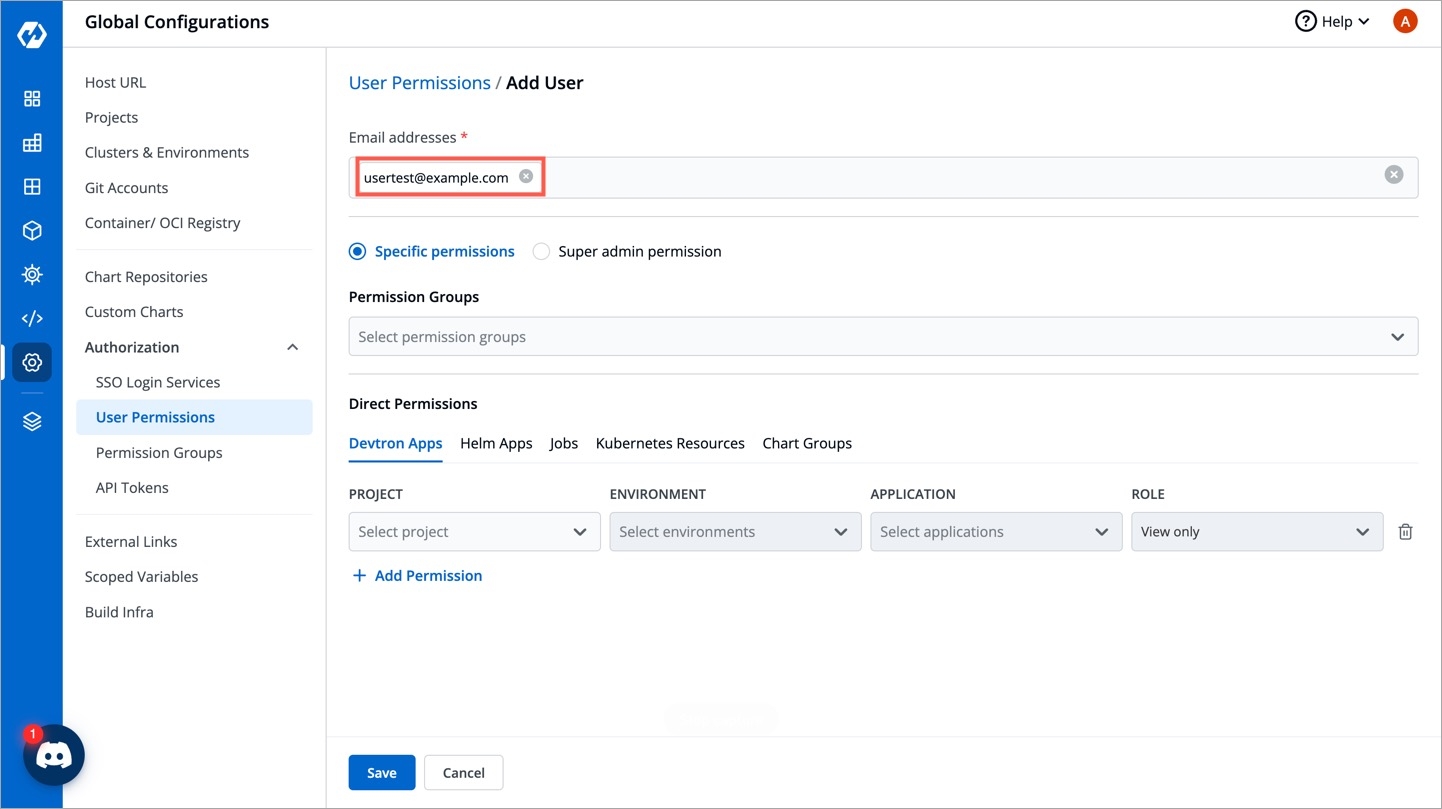
  4. Click Save.

Note

Kindly get in touch with us if you encounter any issues while logging out of Keycloak on Devtron as it might be buggy.

Figure 5: Obtaining Client Secret
Figure 6: Creating User Data
Figure 7: Adding User Password
Figure 8: OpenID Endpoint Configuration Link
Figure 9: Locating Issuer URL

Here, we will set up an OIDC SSO and enter the values we obtained in the .

Figure 10: Choosing OIDC SSO
Figure 11: Populating Correct Orchestrator URL

In the issuer field, paste the URL you got while .

In the clientID field, paste the ID you entered while .

In the clientSecret field, paste the secret you got under .

In the redirectURI field, make sure to enter the same redirect URI you gave in step 4 of .

Figure 12: Sample Keycloak SSO Config
Figure 13: Adding Users to Devtron
Figure 14: Entering User Data and Permissions

Assign necessary permissions to this new user. Refer to know more.

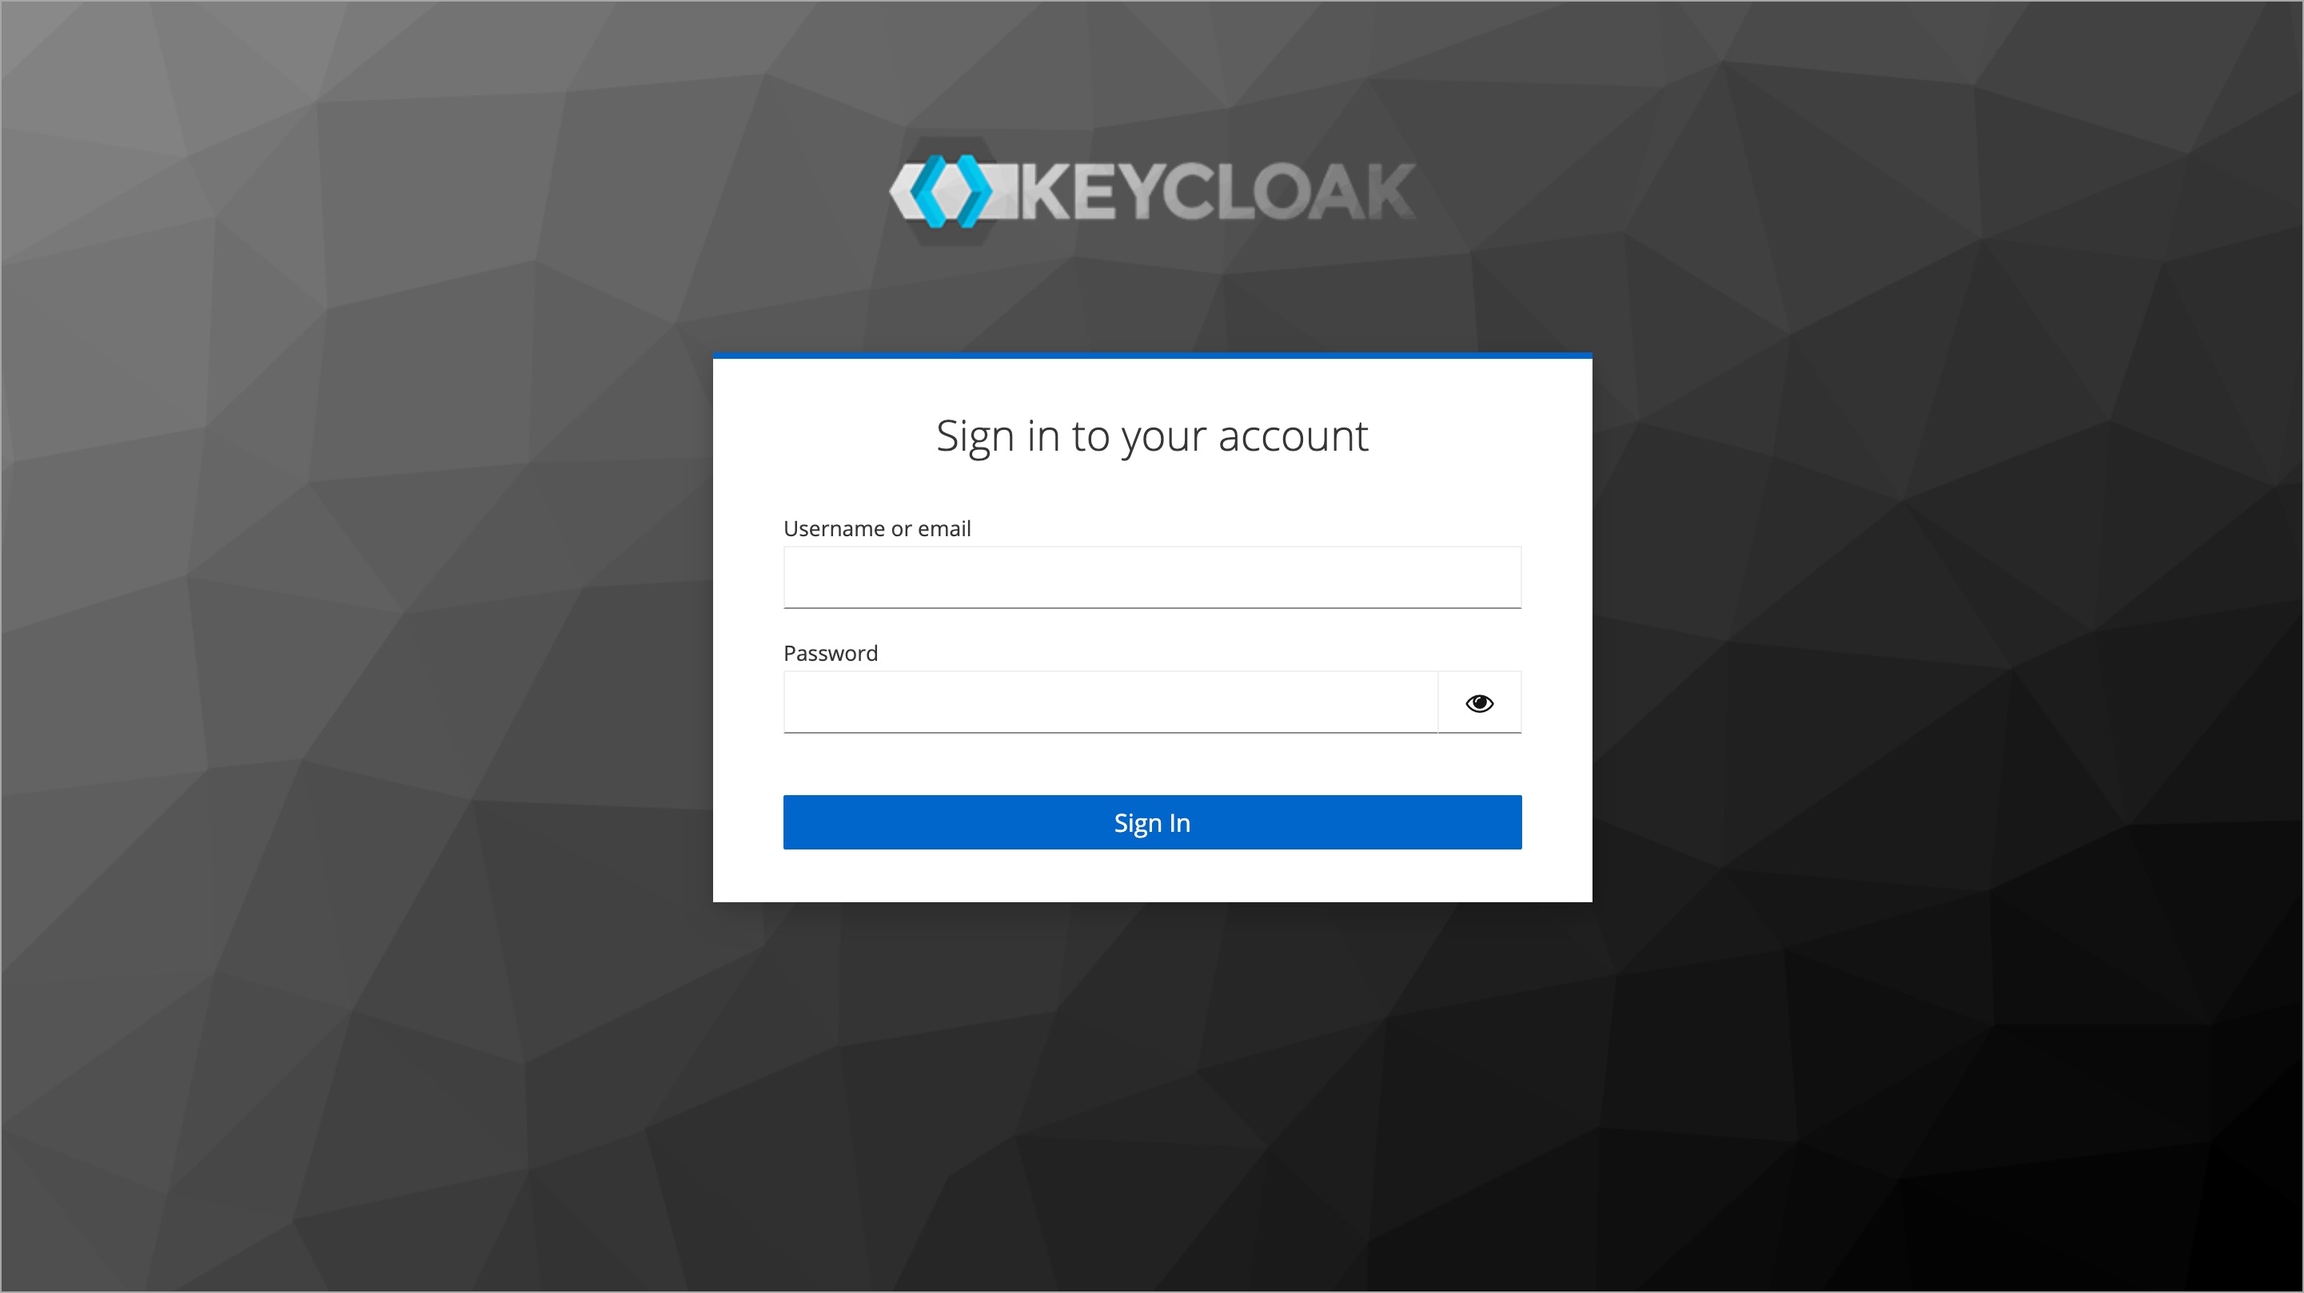
Now, you may log out and test the Keycloak OIDC login method using the . Clicking the Login with Oidc button will land you on Keycloak's login page.
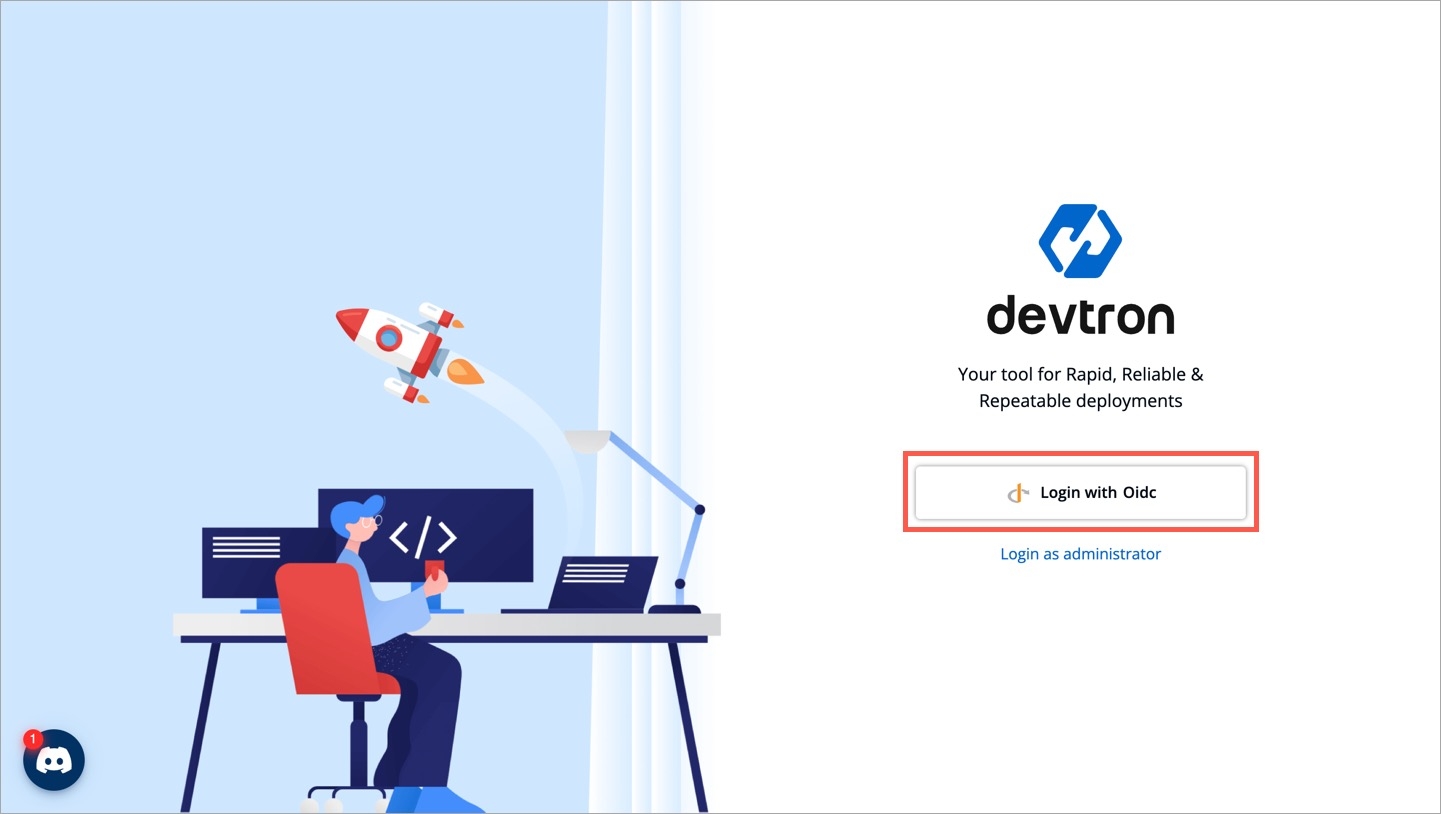
Figure 15a: Login using OIDC method
Figure 15b: Keycloak's Login Page
user permissions
previous section
retrieving issuer URL
creating the client
client credentials tab
client creation
user credentials
configure Keycloak
realm in Keycloak
Click here