Git Repository
Last updated
Last updated
During the CI process, the application source code is pulled from your git repository.
Devtron also supports multiple Git repositories (be it from one Git account or multiple Git accounts) in a single deployment.
Therefore, this doc is divided into 2 sections, read the one that caters to your application:
Follow the below steps if the source code of your application is hosted on a single Git repository.
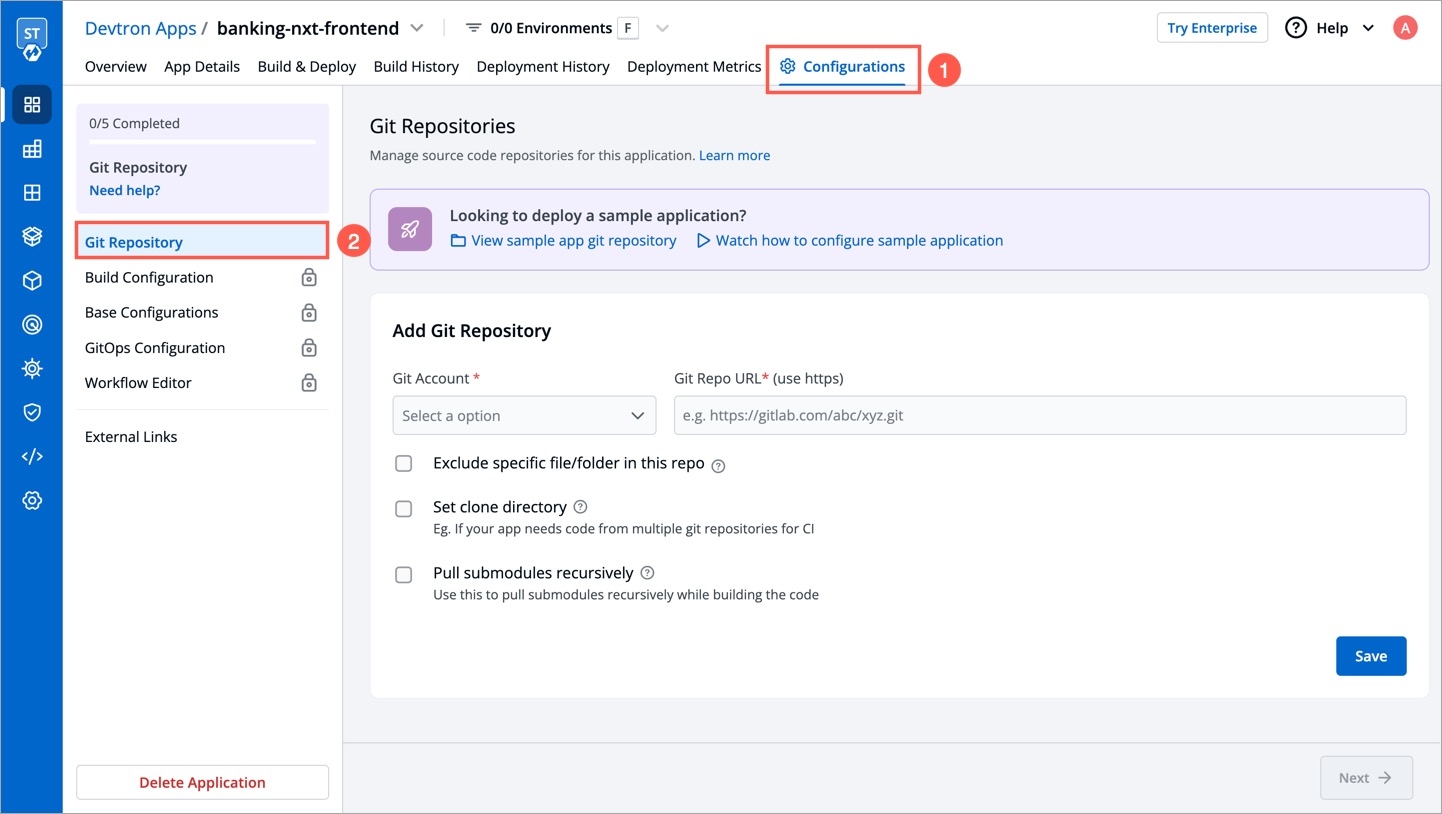
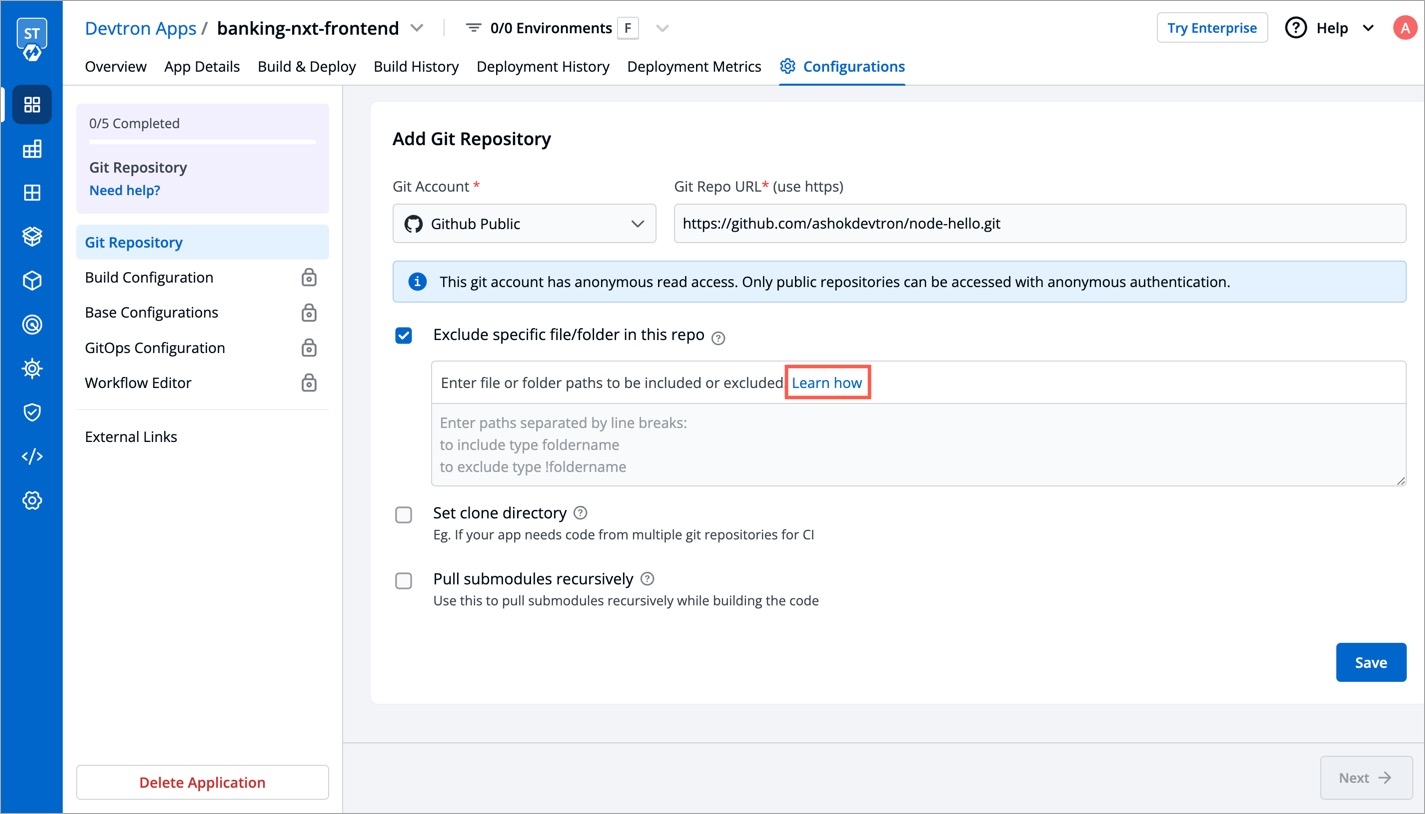
In your application, go to App Configuration → Git Repository. You will get the following fields and options:
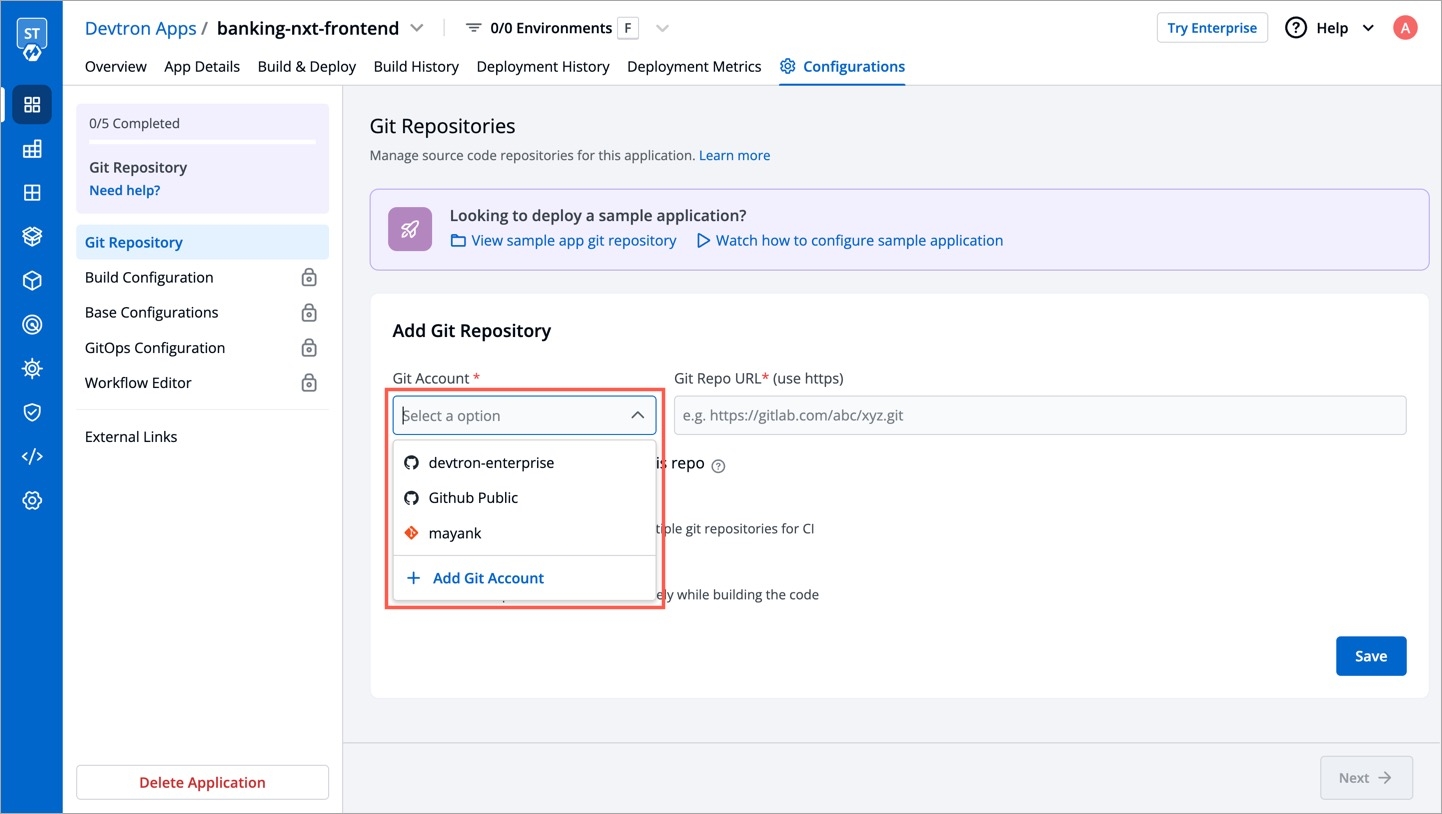
This is a dropdown that shows the list of Git accounts added to your organization on Devtron. If you haven't done already, we recommend you to first add your Git account (especially when the repository is private).
If the authentication type of your Git account is anonymous, only public Git repositories in that account will be accessible. Whereas, adding a user auth or SSH key will make both public and private repositories accessible.
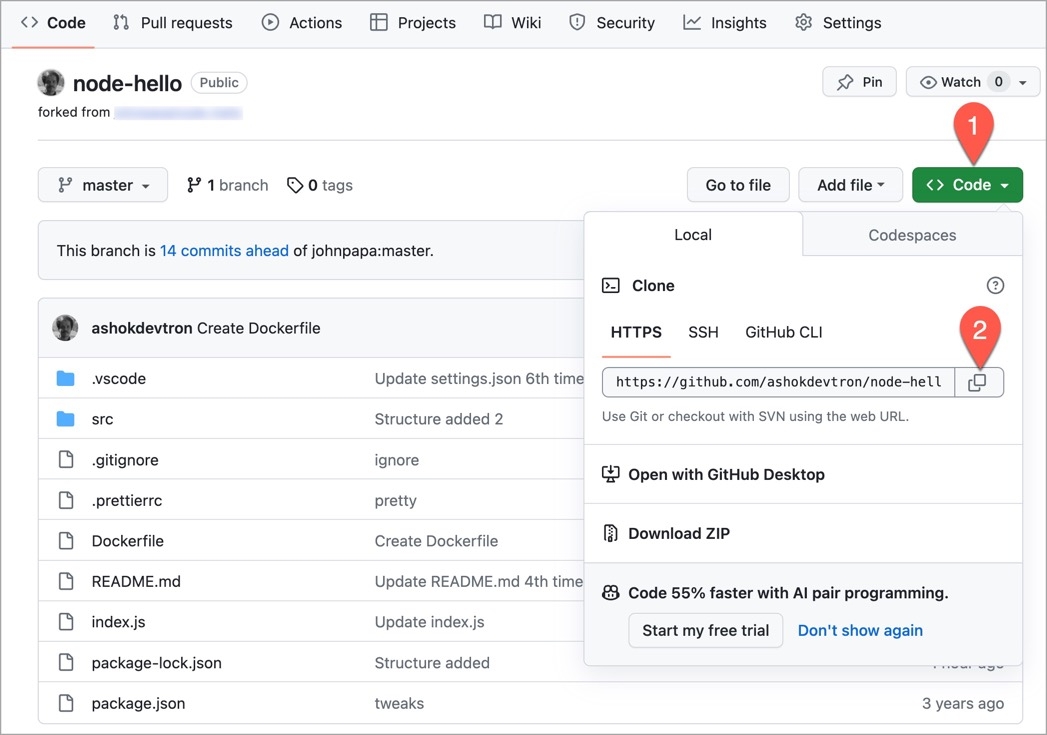
In this field, you have to provide your code repository’s URL, for e.g., https://github.com/devtron-labs/django-repo.
You can find this URL by clicking on the Code button available on your repository page as shown below:
Copy the HTTPS/SSH portion of the URL too
Make sure you've added your Dockerfile in the repo
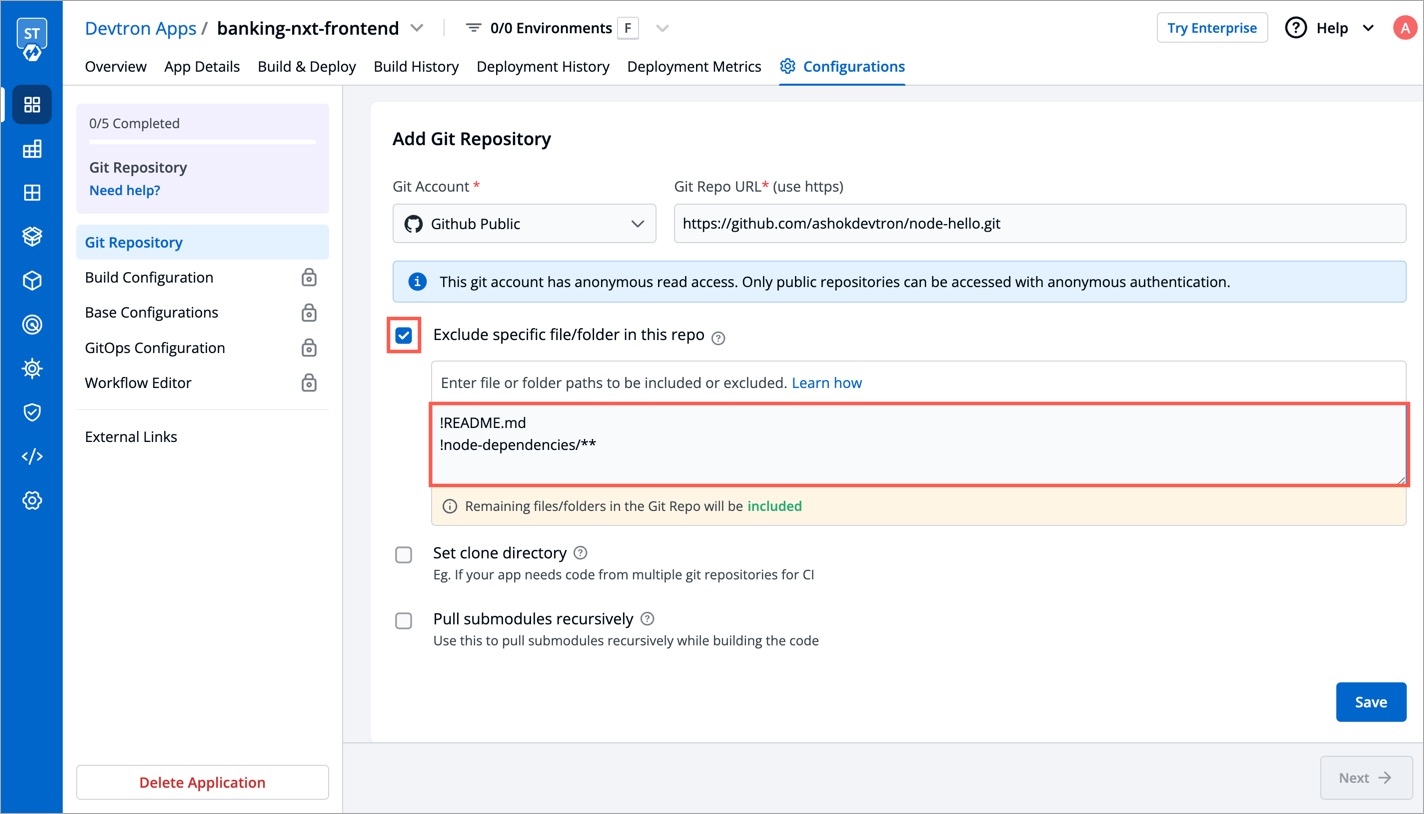
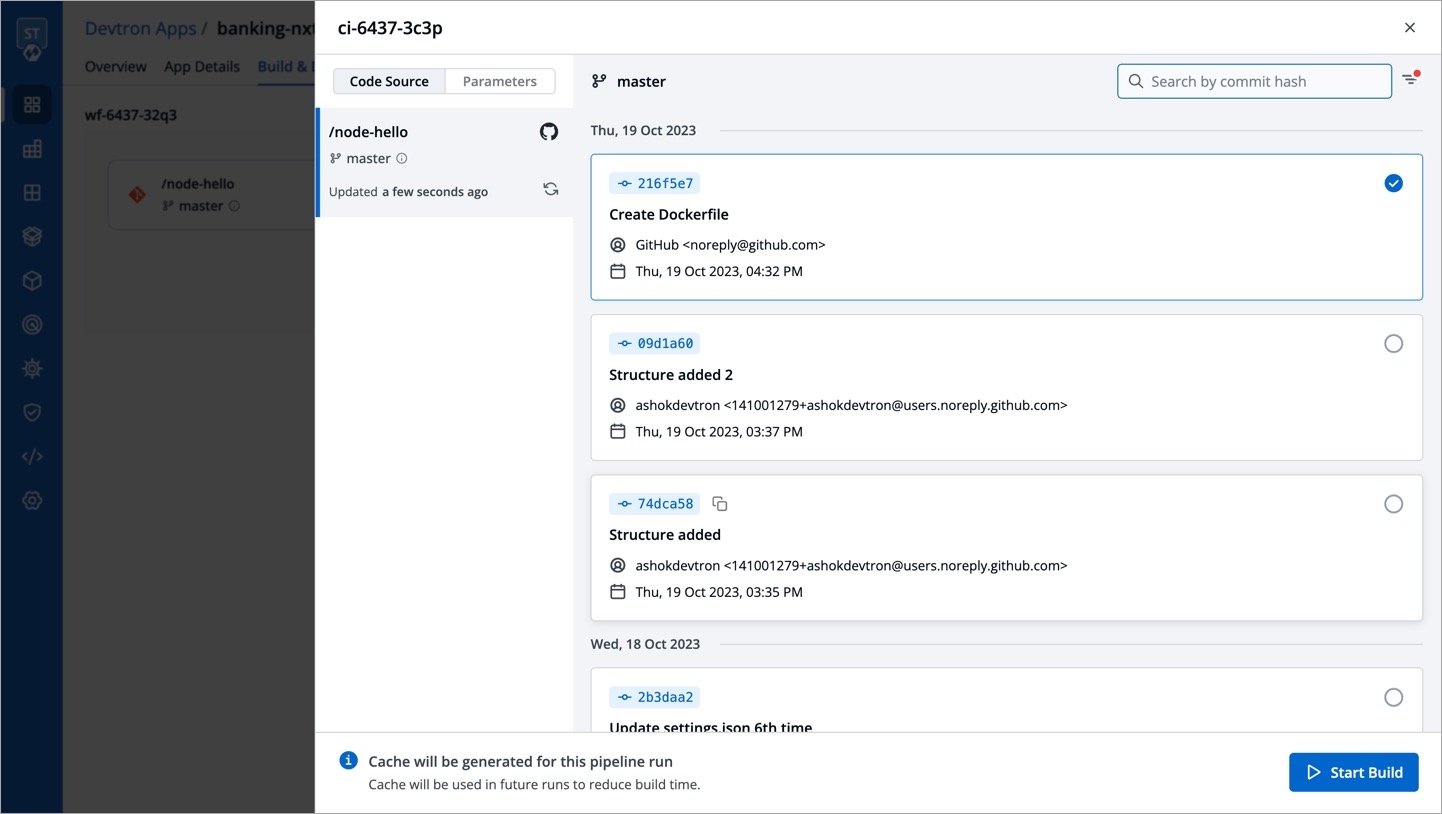
Not all repository changes are worth triggering a new CI build. If you enable this checkbox, you can define the file(s) or folder(s) whose commits you wish to use in the CI build.
In other words, if a given commit contains changes only in file(s) present in your exclusion rule, the commit won't show up while selecting the Git material, which means it will not be eligible for build. However, if a given commit contains changes in other files too (along with the excluded file), the commit won't be excluded and it will definitely show up in the list of commits.
Devtron allows you to create either an exclusion rule, an inclusion rule, or a combination of both. In case of multiple files or folders, you can list them in new lines.
To exclude a path, use ! as the prefix, e.g. !path/to/file
To include a path, don't use any prefix, e.g. path/to/file
!README.md
Exclusion of a single file in root folder: Commits containing changes made only in README.md file will not be shown
!README.md
!index.js
Exclusion of multiple files in root folder: Commits containing changes made only in README.md or/and index.js files will not be shown
README.md
Inclusion of a single file in root folder: Commits containing changes made only in README.md file will be shown. Rest all will be excluded.
!src/extensions/printer/code2.py
Exclusion of a single file in a folder tree: Commits containing changes made specifically to code2.py file will not be shown
!src/*
Exclusion of a single folder and all its files: Commits containing changes made specifically to files within src folder will not be shown
!README.md
index.js
Exclusion and inclusion of files: Commits containing changes made only in README.md will not be shown, but commits made in index.js file will be shown. All other commits apart from the aforementioned files will be excluded.
!README.md
README.md
Exclusion and inclusion of conflicting files: If conflicting paths are defined in the rule, the one defined later will be considered. In this case, commits containing changes made only in README.md will be shown.
You may use the Learn how link (as shown below) to understand the syntax of defining an exclusion or inclusion rule.
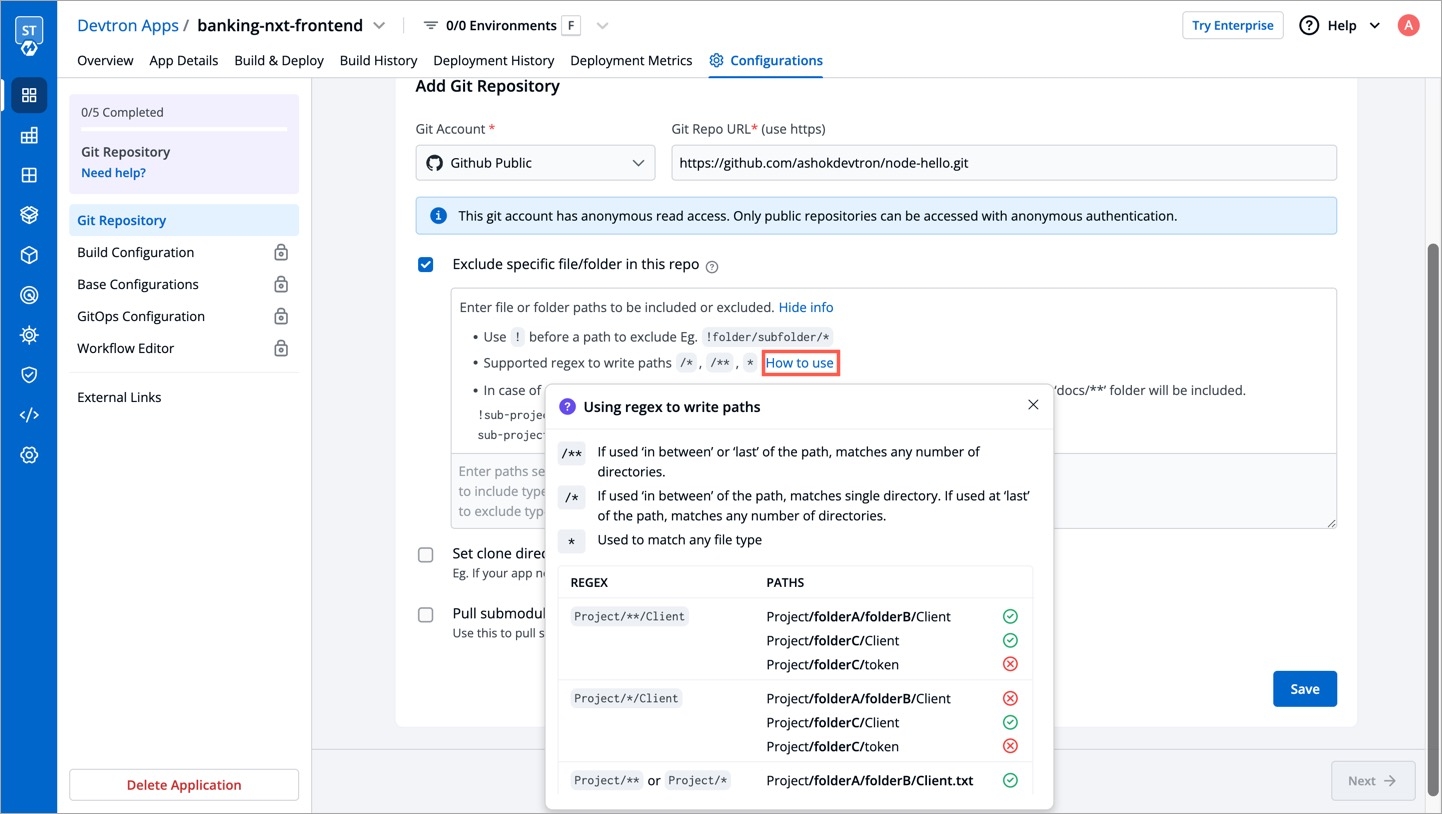
Since file paths can be long, Devtron supports regex too for writing the paths. To understand it better, you may click the How to use link as shown below.
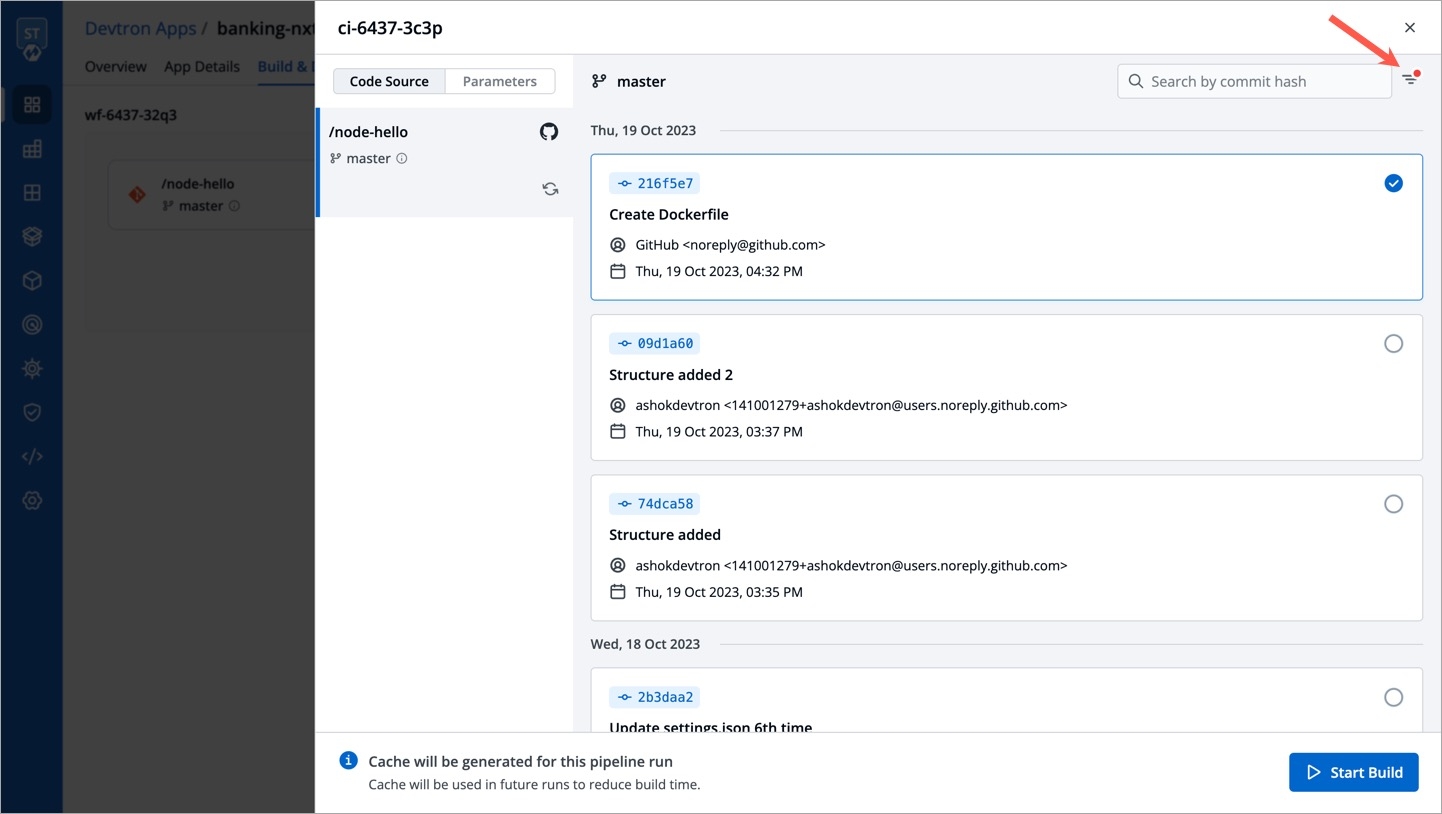
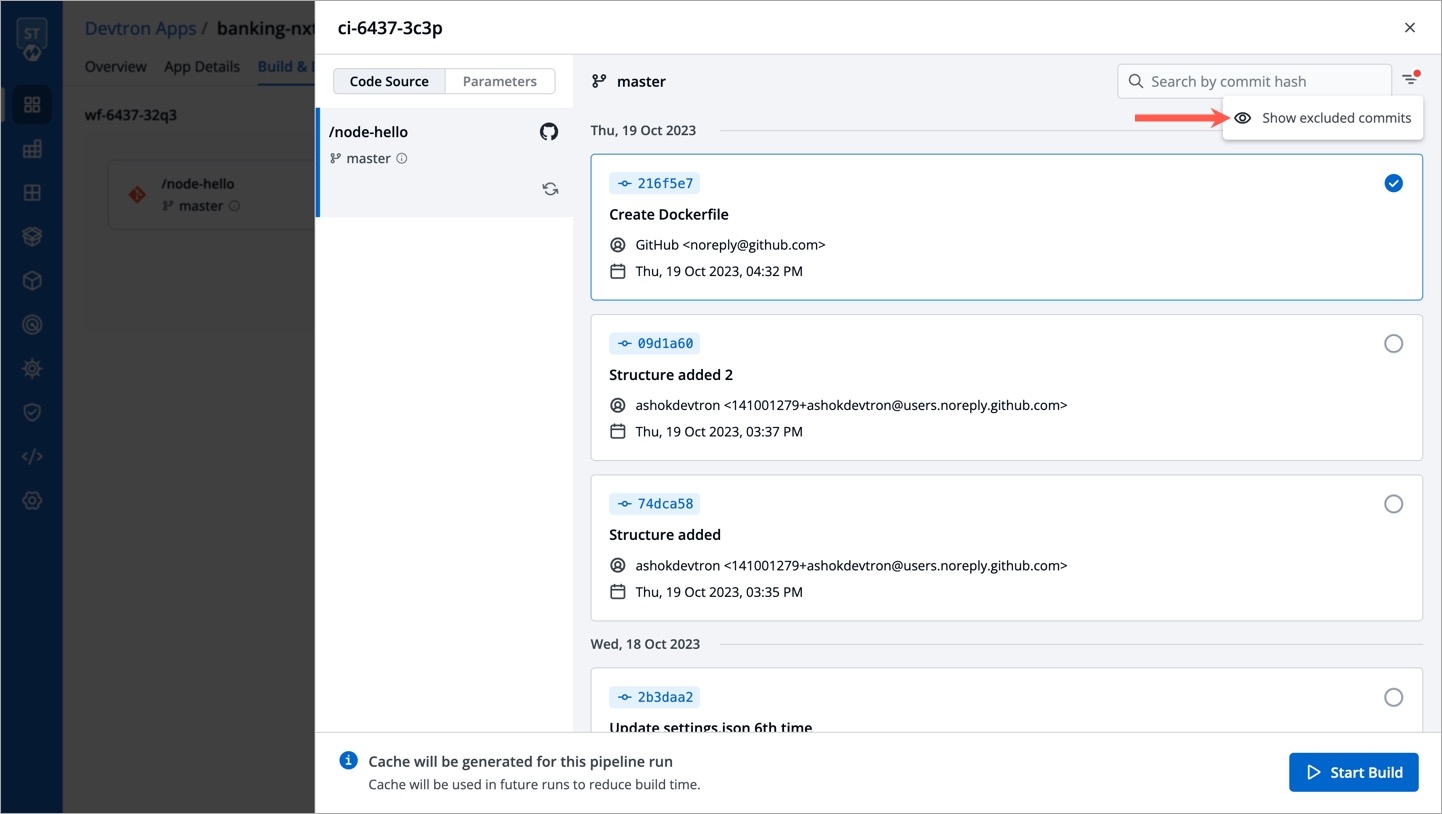
As we saw earlier in fig. 4 and 5, commits containing the changes of only README.md file were not displayed, since the file was in the exclusion list.
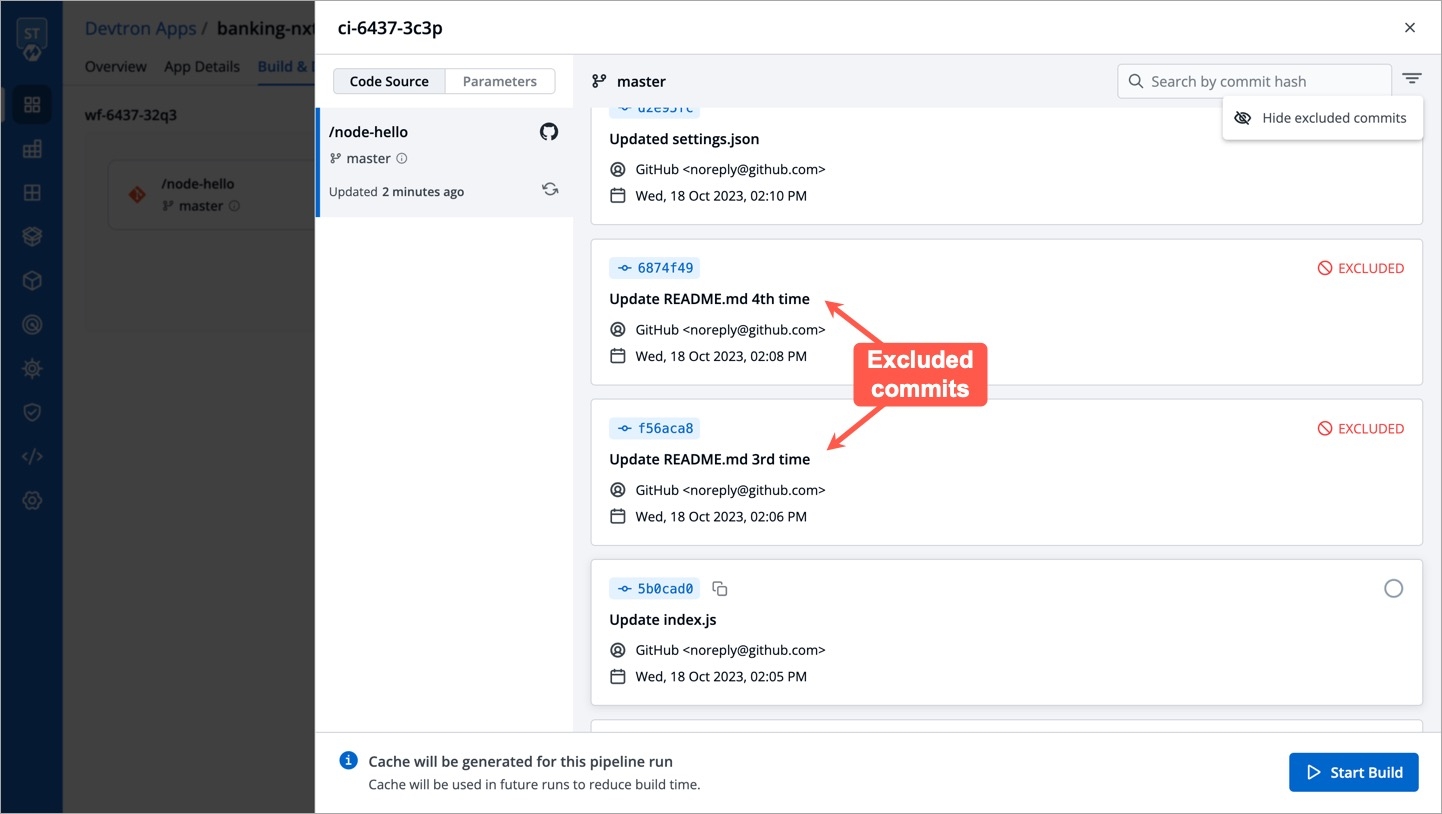
However, Devtron gives you the option to view the excluded commits too. There's a döner menu at the top-right (beside the Search by commit hash search bar).
The EXCLUDED label (in red) indicates that the commits contain changes made only to the excluded file, and hence they are unavailable for build.
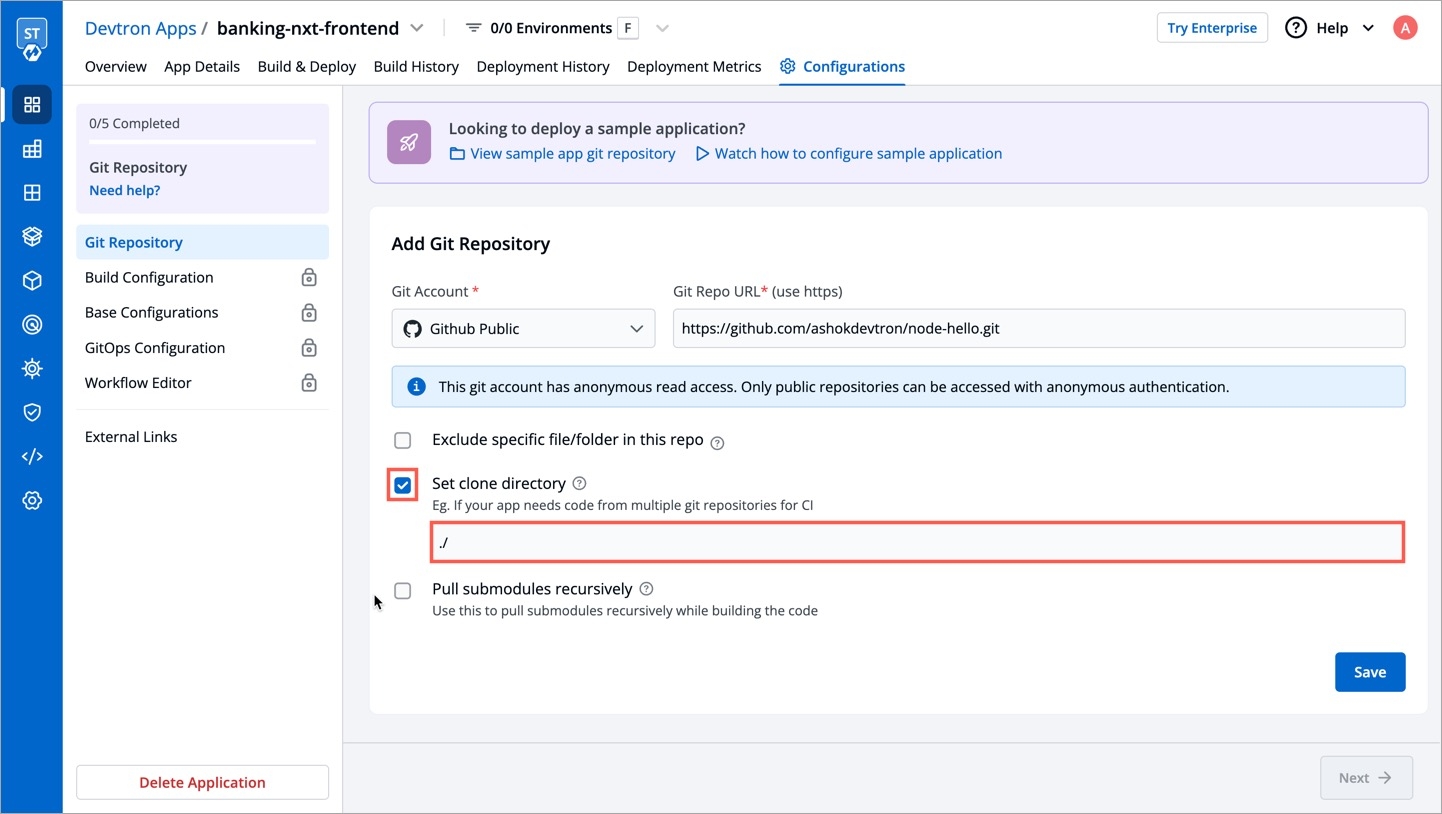
After clicking the checkbox, a field titled clone directory path appears. It is the directory where your code will be cloned for the repository you specified in the previous step.
This field is optional for a single Git repository application and you can leave the path as default. Devtron assigns a directory by itself when the field is left blank. The default value of this field is ./
This checkbox is optional and is used for pulling git submodules present in a repo. The submodules will be pulled recursively, and the auth method used for the parent repo will be used for submodules too.
As discussed earlier, Devtron also supports multiple git repositories in a single application. To add multiple repositories, click Add Git Repository and repeat all the steps as mentioned in Single Repo Application. However, ensure that the clone directory paths are unique for each repo.
Repeat the process for every new git repository you add. The clone directory path is used by Devtron to assign a directory to each of your Git repositories. Devtron will clone your code at those locations and those paths can be referenced in the Docker file to create a Docker image of the application.
Whenever a change is pushed to any of the configured repositories, CI will be triggered and a new Docker image file will be built (based on the latest commits of the configured repositories). Next, the image will be pushed to the container registry you configured in Devtron.
Even if you add multiple repositories, only one image will be created based on the Dockerfile as shown in the docker build config
Let’s look at this with an example:
Due to security reasons, you want to keep sensitive configurations like third-party API keys in separate access-restricted git repositories, and the source code in a Git repository that every developer has access to. To deploy this application, code from both the repositories are required. A Multi-Git support helps you achieve it.
Other examples where you might need Multi-Git support:
To make code modularized, where front-end and back-end code are in different repos
Common library extracted out in a different repo so that other projects can use it
