

Using Devtron Intelligence
What is Devtron Intelligence (AI Agent) 
Devtron Intelligence is an AI assistant that helps you troubleshoot issues faster by analyzing your Kubernetes workloads. It offers smart and easy-to-understand suggestions using large language models (LLM) of your choice.
Check out the Results section to see where Devtron gives you AI-powered explanation for troubleshooting.
Tutorial
Steps to Configure Devtron Intelligence
Who Can Perform This Action?
User must have permissions to:
Deploy Helm Apps (with environment access)
Edit the ConfigMaps of 'default-cluster'
Restart the pods
1. Get API Key from LLM
Devtron Intelligence supports all major large language models (LLM) e.g., OpenAI, Gemini, AWS Bedrock, Anthropic and many more.
You can generate an API key for an LLM of your choice. Here, we will generate an API key from OpenAI.
2. Create Secret in Devtron
There are 2 methods to create a secret in Devtron, follow the one you prefer:
Method A: Using 'Create Resource'
Go to strings.devtron.ai and encode your API key in base64. This base64 encoded key will be used while creating a secret in the next step.
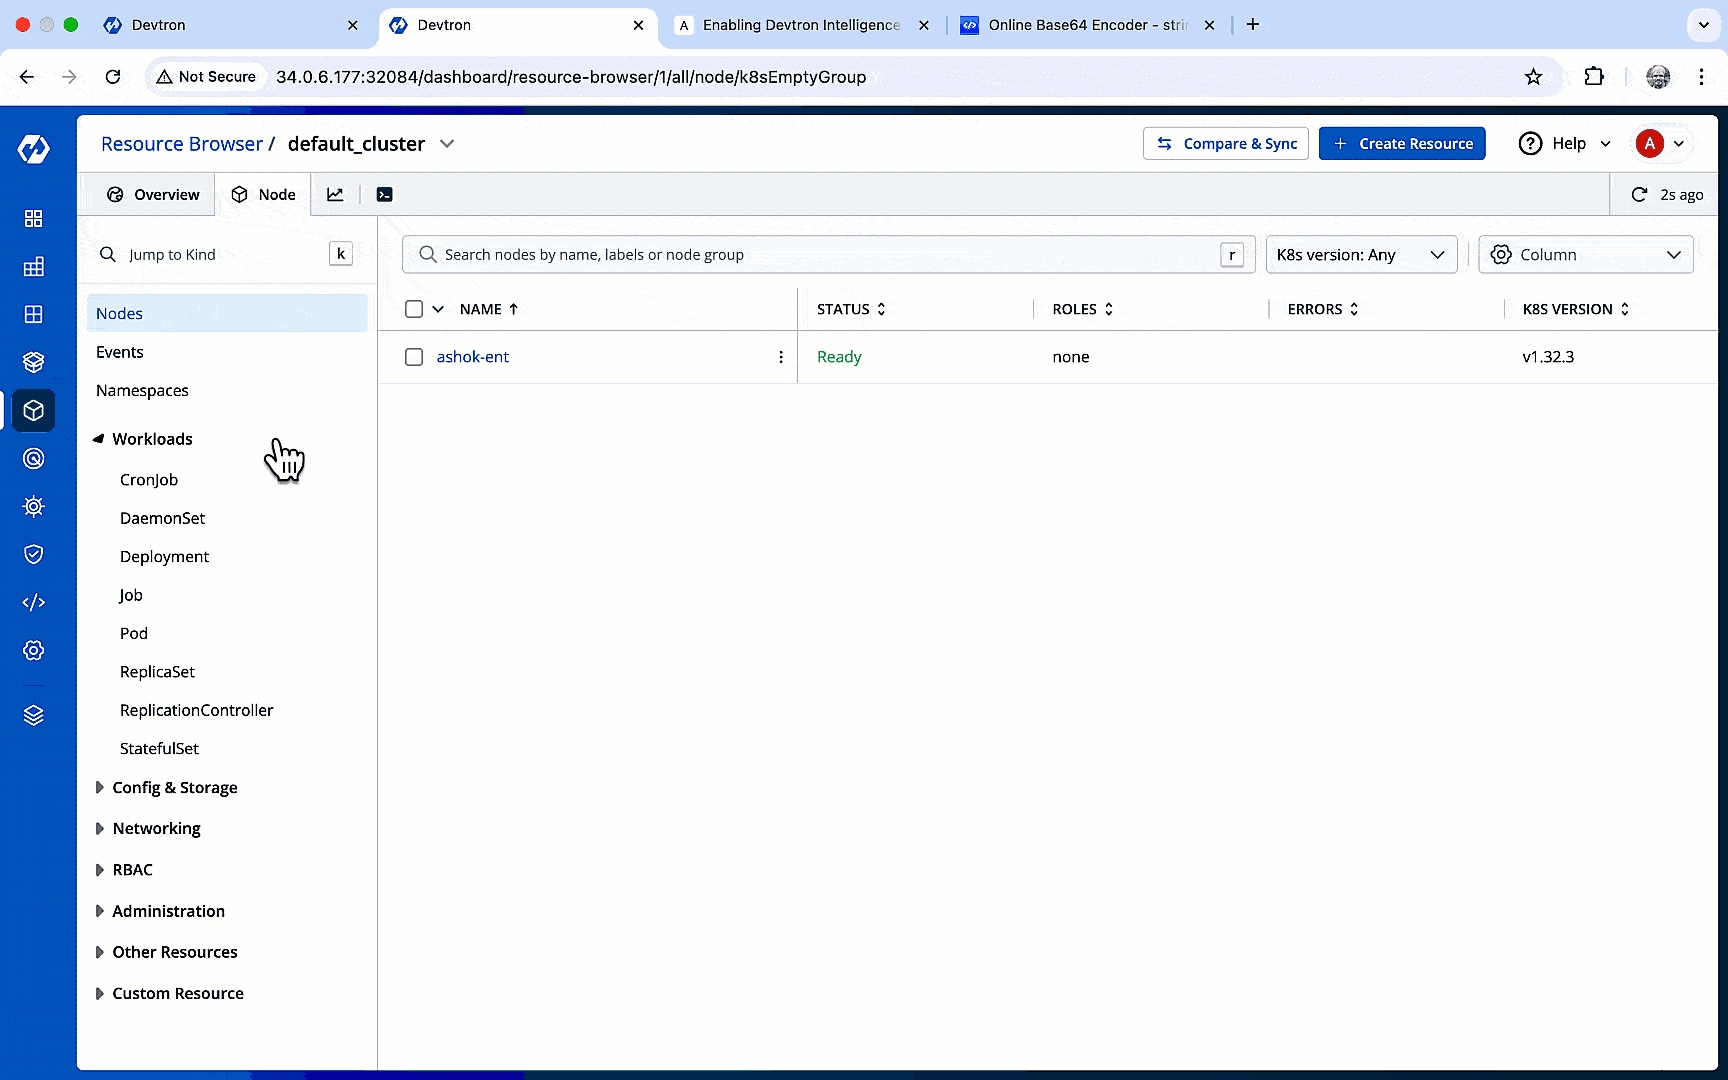
Go to Devtron's Resource Browser → (Select Cluster) → Create Resource
Paste the following YAML and replace the key with your base64-encoded OpenAI key. Also, enter the namespace where the AI Agent chart will be installed:
apiVersion: v1
kind: Secret
metadata:
  name: ai-secret
  namespace: <your-env-namespace>  # Namespace where the AI Agent chart will be installed
type: Opaque
data:
  ## OpenAiKey: <base64-encoded-openai-key>           # For OpenAI
  ## GoogleKey: <base64-encoded-google-key>           # For Gemini
  ## azureOpenAiKey: <base64-encoded-azure-key>       # For Azure OpenAI
  ## awsAccessKeyId: <base64-encoded-aws-access-key>  # For AWS Bedrock
  ## awsSecretAccessKey: <base64-encoded-aws-secret>  # For AWS Bedrock
  ## AnthropicKey: <base64-encoded-anthropic-key>     # For Anthropic
Method B: Using kubectl command
Unlike Method A, this method doesn't require you to encode your LLM Key to Base64 format.
Go to Devtron's Resource Browser and click the terminal icon next to the cluster where you wish to create the secret.
Use the following kubectl command to create a secret.
Replace
my-namespacewith the namespace where the AI Agent chart will be installed.Use the correct LLM key-name and your key-value after
--from-literal
kubectl create secret generic ai-secret \
  --namespace=my-namespace \
  --from-literal=OpenAiKey='openai-key-here' \
#  --from-literal=GoogleKey='google-key-here' \
#  --from-literal=azureOpenAiKey='azure-key-here' \
#  --from-literal=AnthropicKey='anthropic-key-here'
3. Deploy AI Agent Chart
Where should I install the Chart?
Deploy the chart in the cluster whose workloads you wish to troubleshoot. You may install the chart in multiple clusters (1 agent for 1 cluster).
Go to Devtron's Chart Store.
Search the
ai-agentchart and click on it.Click the Configure & Deploy button.
In the left-hand pane:
App Name: Give your app a name, e.g.
ai-agent-appProject: Select your project
Deploy to environment: Choose the target environment (should be associated with the same namespace used while creating secret key in Step 2)
Chart Version: Select the latest chart version.
Chart Values: Choose the default one for the latest version.
In the
values.yamlfile editor, add the appropriateadditionalEnvVarsblock based on your LLM provider. Use the tabs below to find the configuration snippet of some well-known LLM providers.
additionalEnvVars:
  - name: MODEL
    value: gpt-4o-mini       ## Examples: gpt-4o, gpt-4, gpt-3.5-turbo
  - name: OPENAI_API_KEY
    valueFrom:
      secretKeyRef:
        key: OpenAiKey       ## Key of the secret created in Step 2
        name: ai-secret      ## Name of the secret created in Step 2
  - name: CLUSTER_NAME
    value: document-nonprod  ## Name of the target cluster (optional)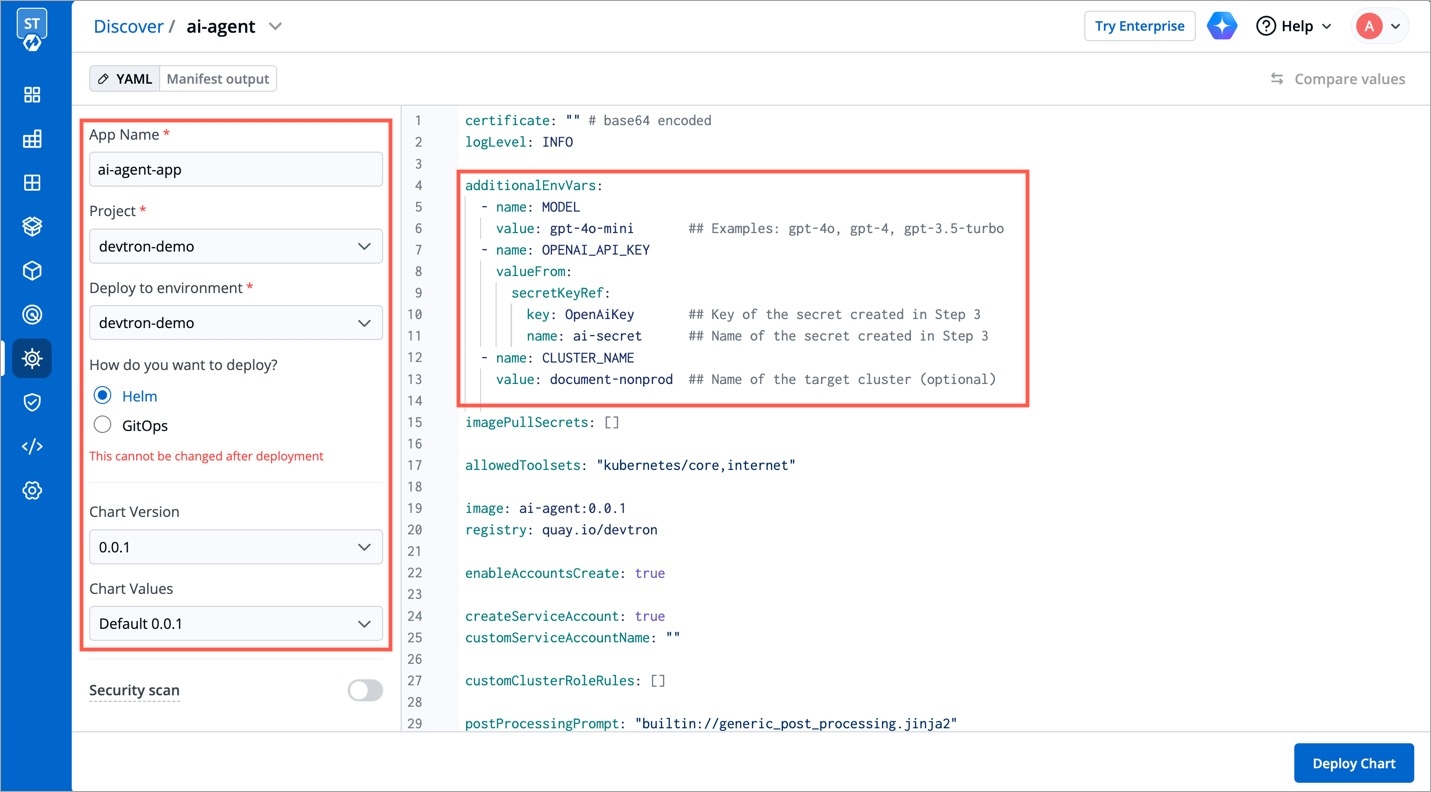
Click the Deploy Chart button.
4. Check Service Endpoint
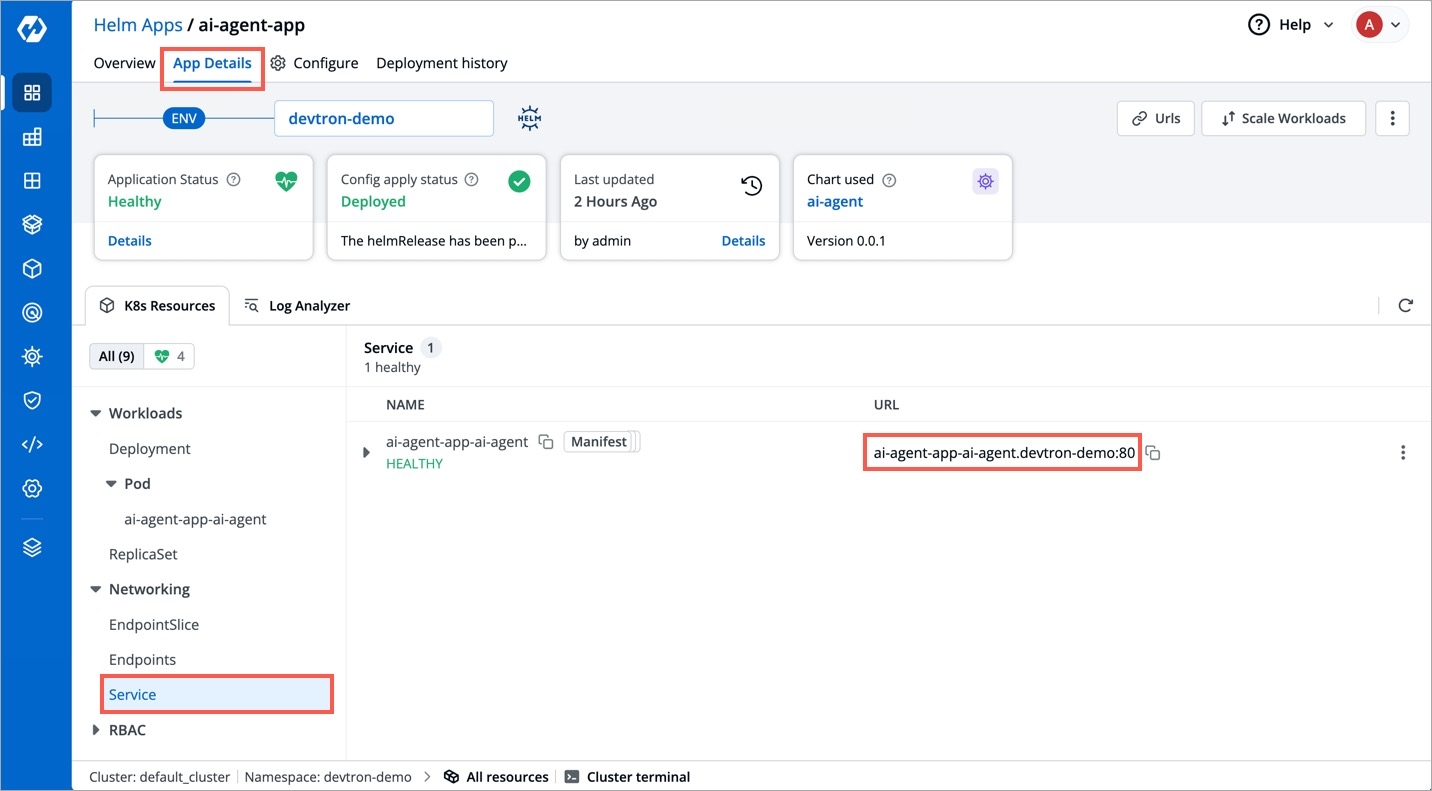
In the App Details page of the deployed chart, expand Networking and click on Service.
Locate the service entry with the URL in the format:
<service-name>.<namespace>:<port>. Note the values ofserviceName,namespace, andportfor the next step.
5. Update ConfigMaps
In a new tab, go to Resource Browser → (Select Cluster) → Config & Storage → ConfigMap
Edit the ConfigMaps:
devtron-cm
Ensure the below entry is present in the ConfigMap (create one if it doesn't exist). Here you can define the target cluster and the endpoint where your Devtron AI service is deployed:
CLUSTER_CHAT_CONFIG: '{"<targetClusterID>": {"serviceName": "", "namespace": "", "port": ""}}'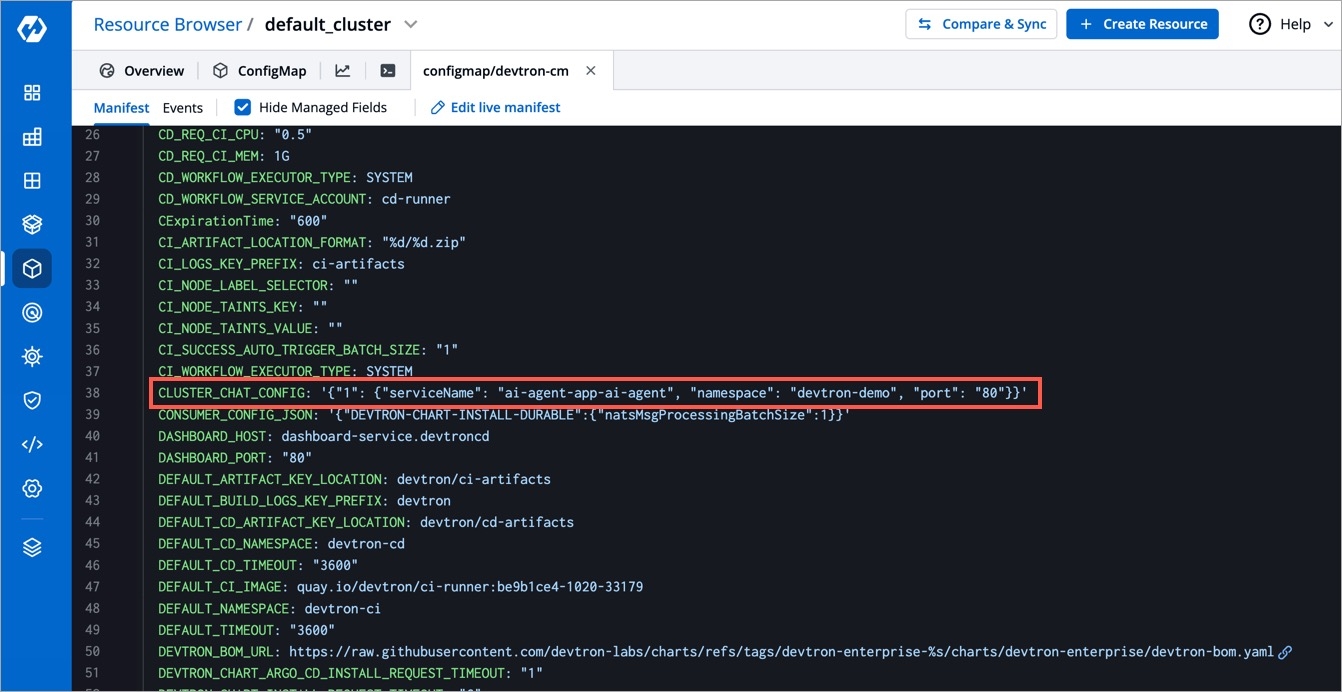
Figure 5: Entry in 'orchestrator-cm' or 'devtron-cm' ConfigMap dashboard-cm
To enable AI integration via feature flag, check if the below entry is present in the ConfigMap (create one if it doesn't exist).
FEATURE_AI_INTEGRATION_ENABLE: "true"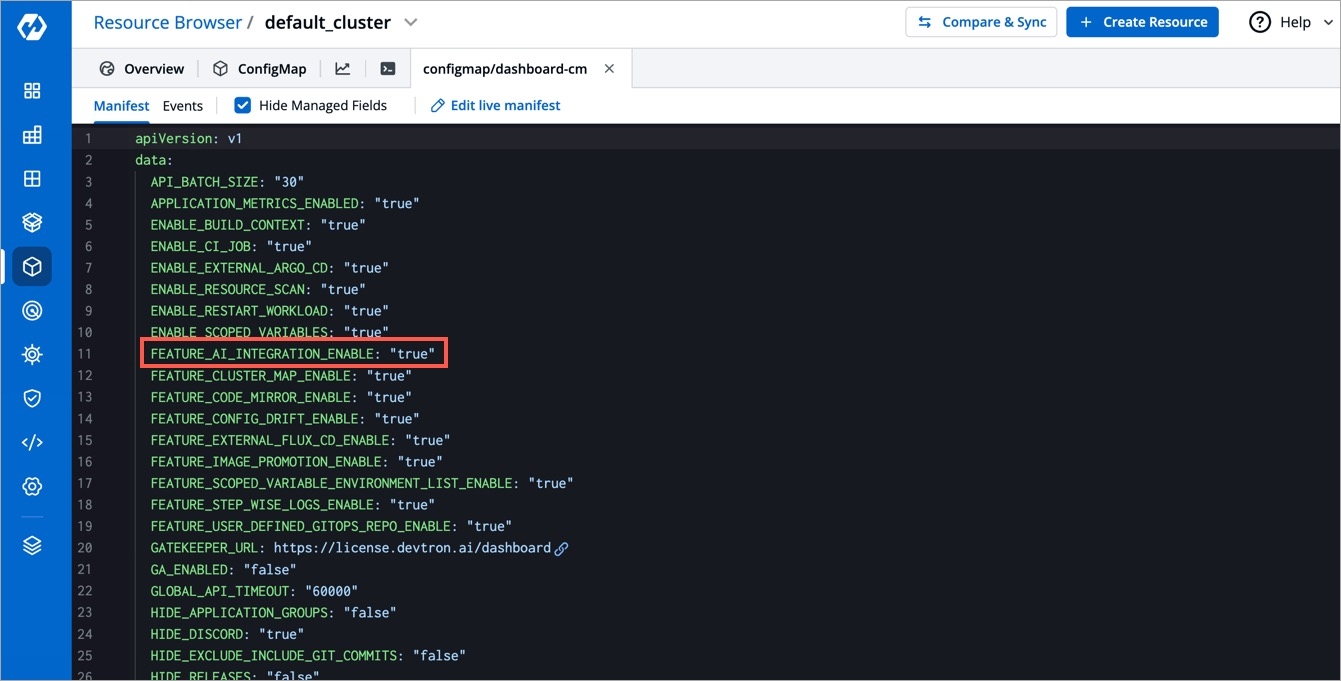
Figure 6: Entry in 'dashboard-cm' ConfigMap
6. Restart Pods
Go to Resource Browser → (Select Cluster) → Workloads → Deployment
Click the checkbox next to the following Deployment workloads and restart them using the
⟳button:devtrondashboard

Figure 7: Restart 'devtron' and 'dashboard' deployment workloads
7. Perform Hard Refresh
Perform a hard refresh of the browser to clear the cache:
Mac: Hold down
CmdandShiftand then pressRWindows/Linux: Hold down
Ctrland then pressF5
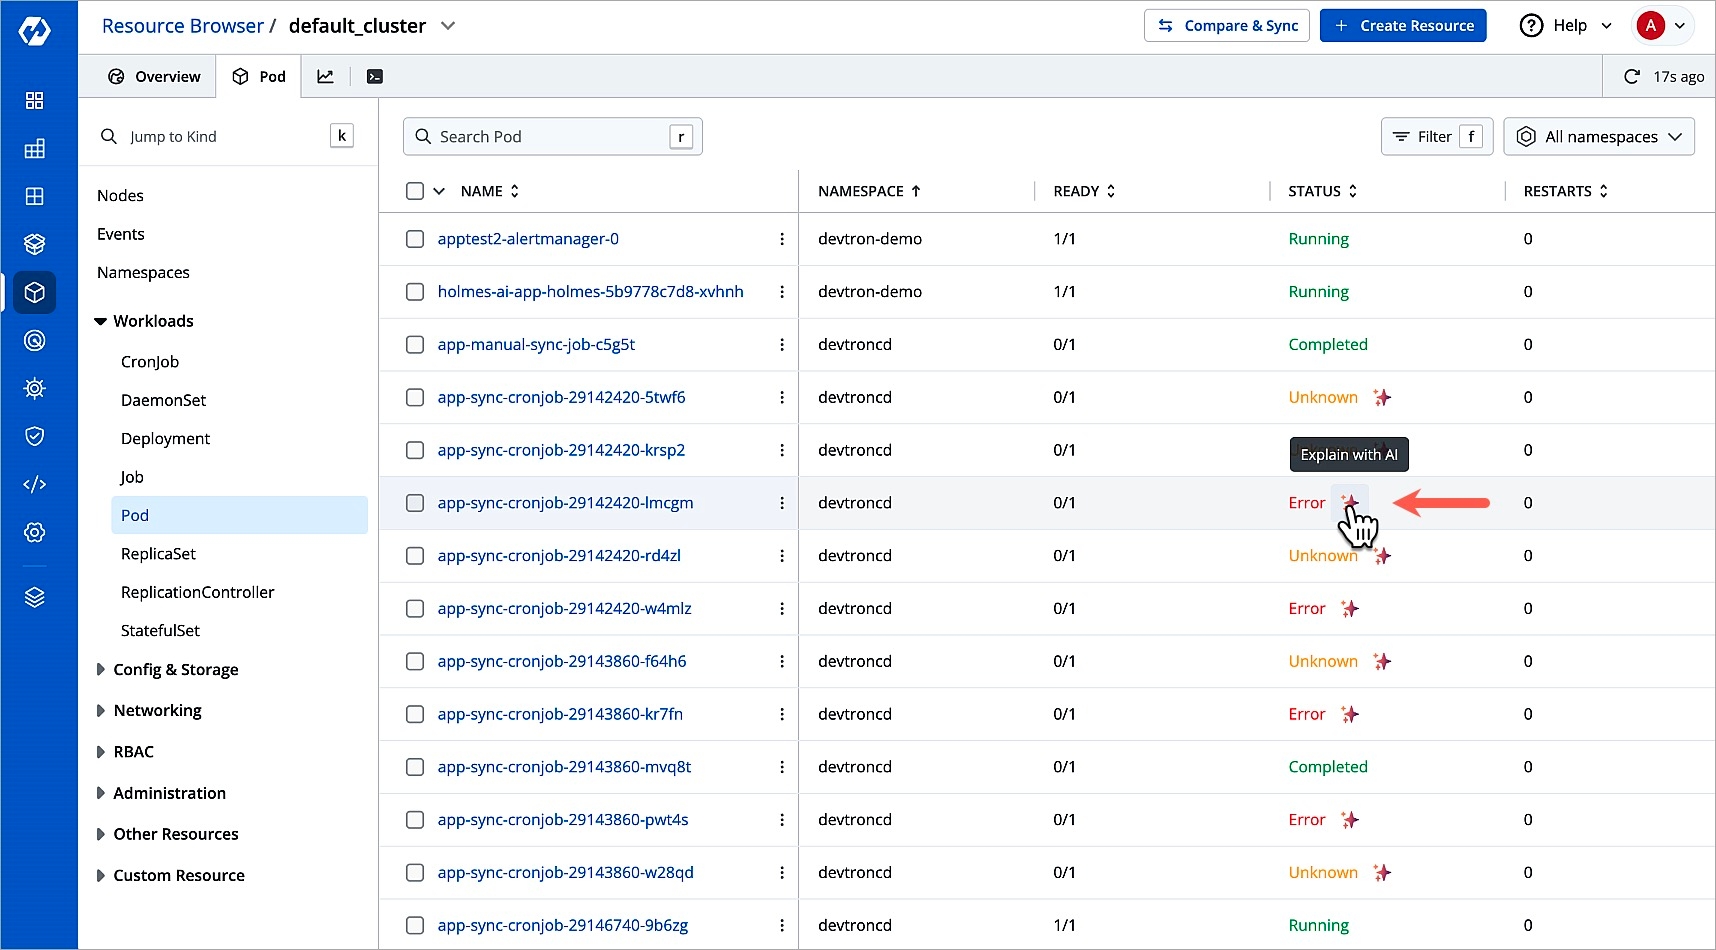
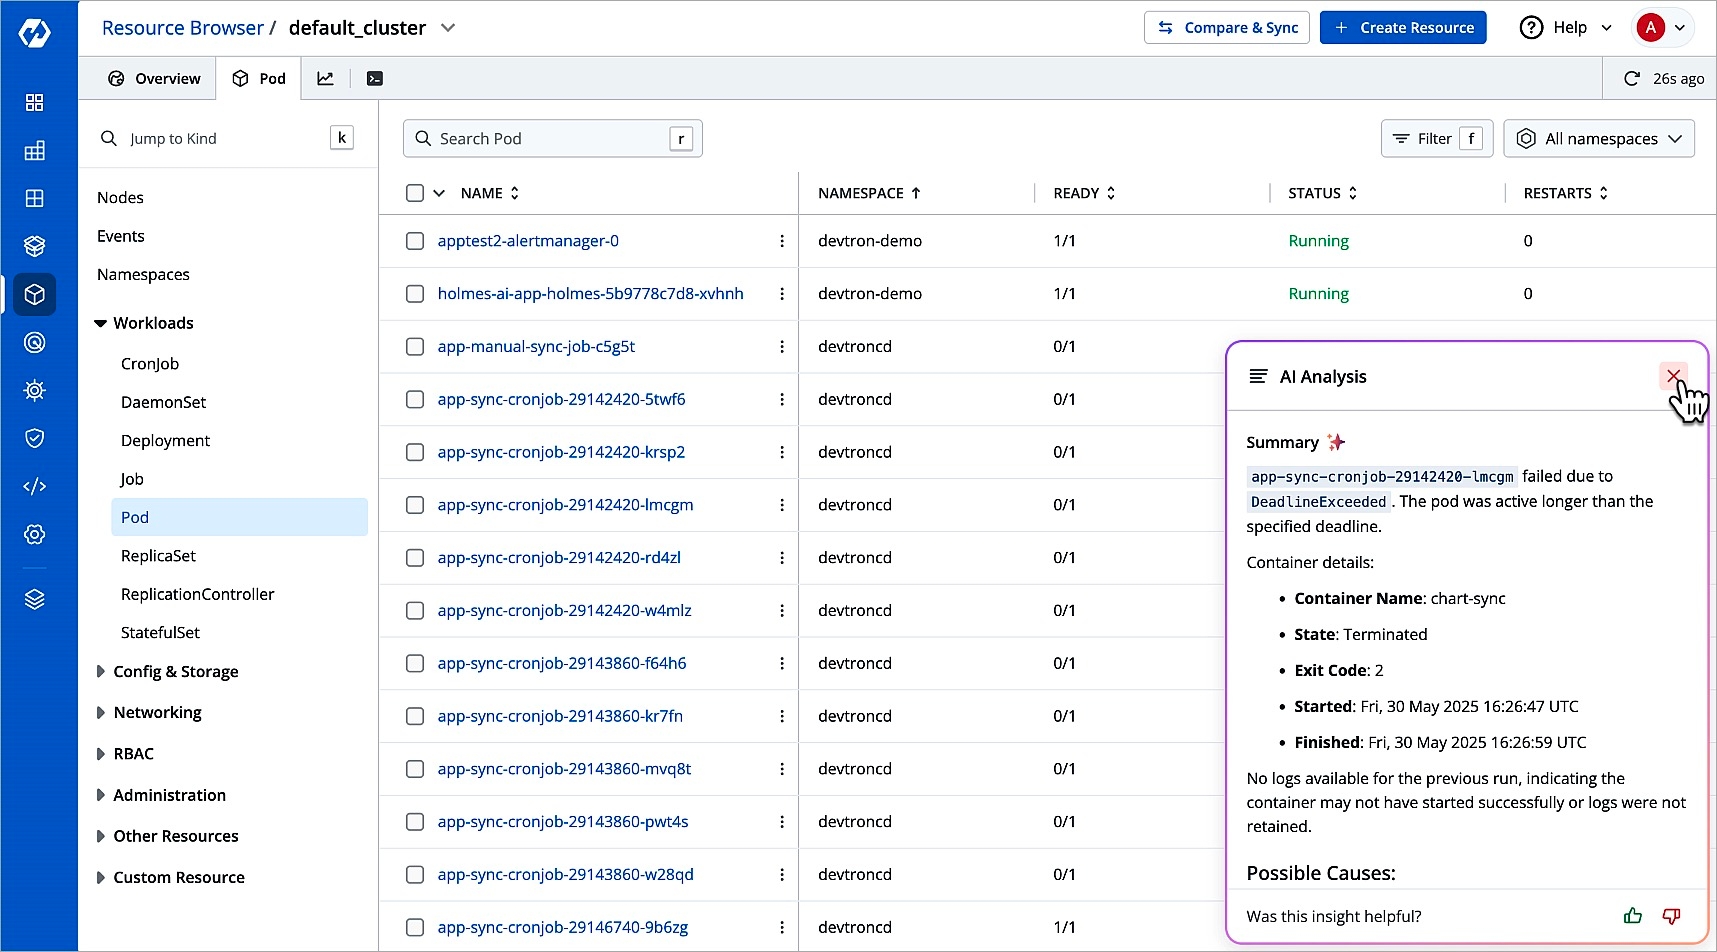
Results
Devtron supports Explain option at the following screens (only for specific scenarios where troubleshooting is possible through AI):
Pod Errors
Path: Resource Browser → (Select Cluster) → Workloads → Pod
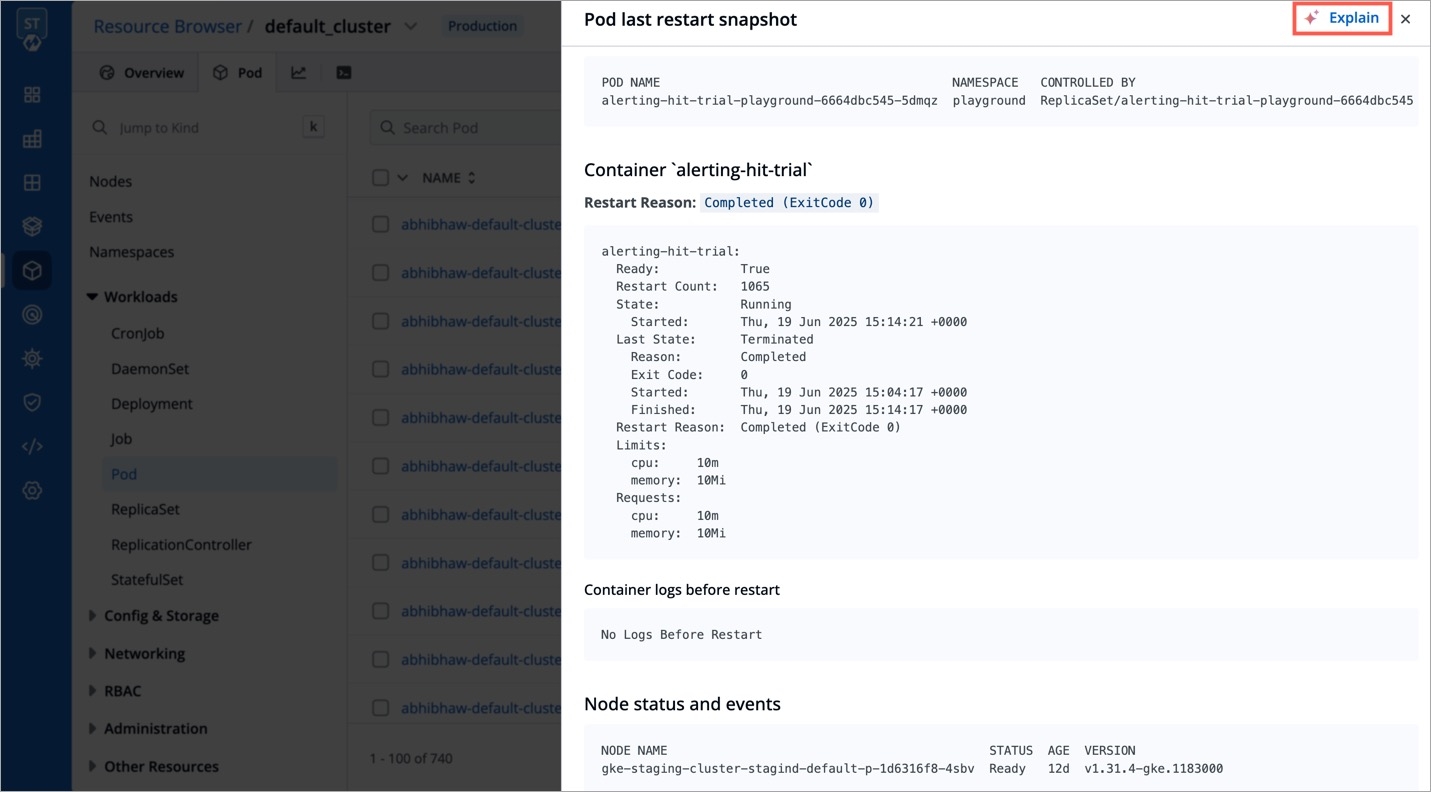
Pod Last Restart Snapshot
Path: Resource Browser → (Select Cluster) → Workloads → Pod → Pod Last Restart Snapshot
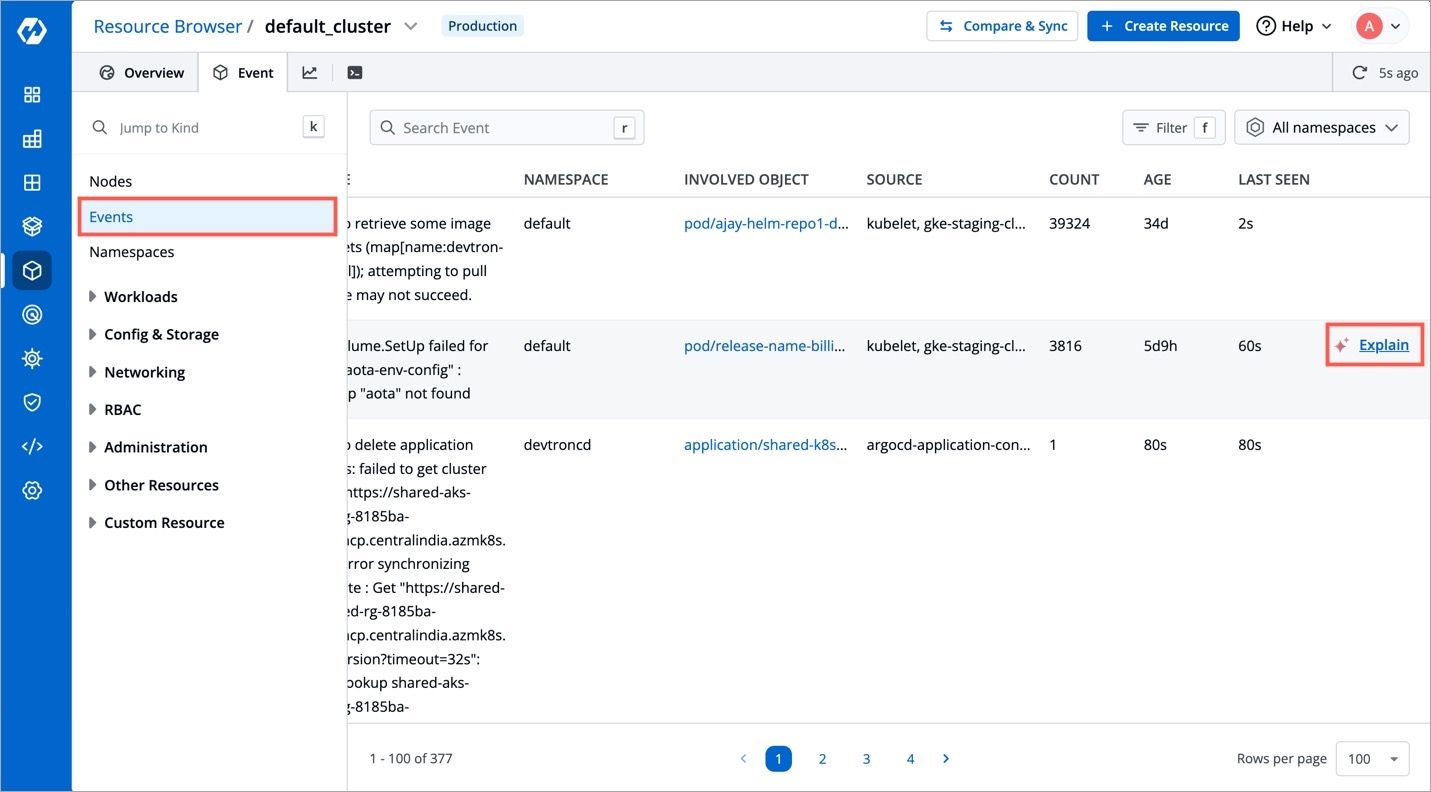
Event Errors
Path: Resource Browser → (Select Cluster) → Events
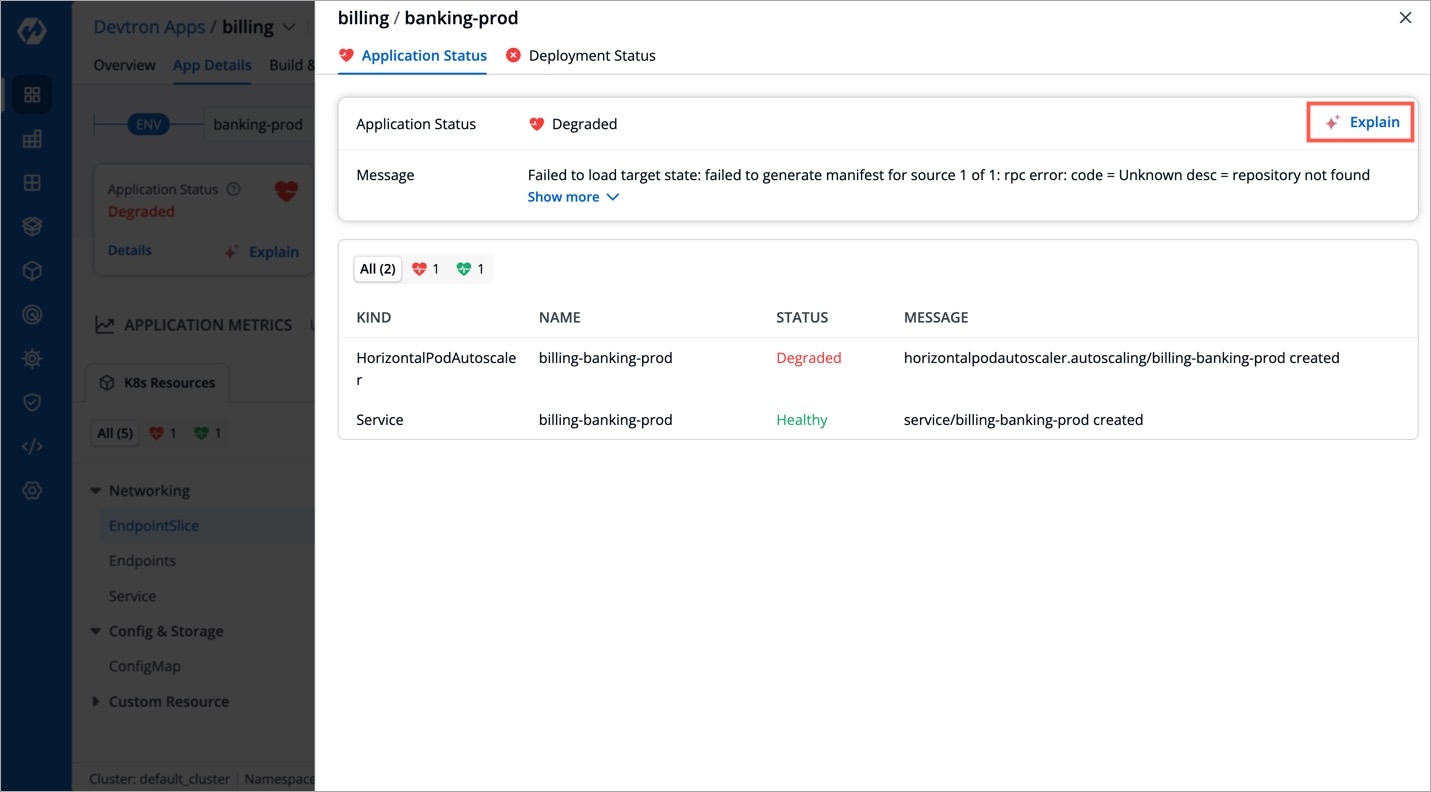
App Details - Application Status
Path: Application → App Details → Application Status Drawer
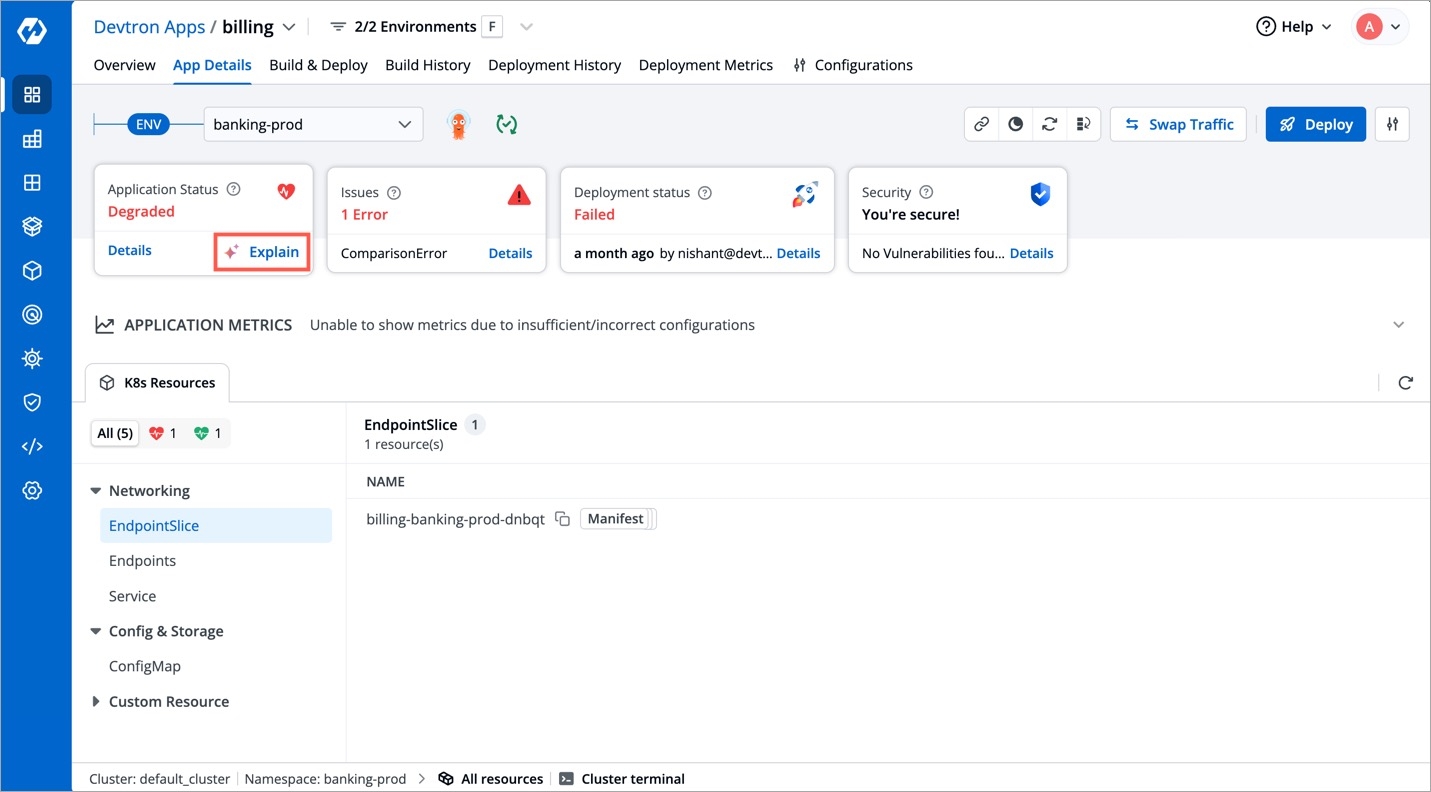
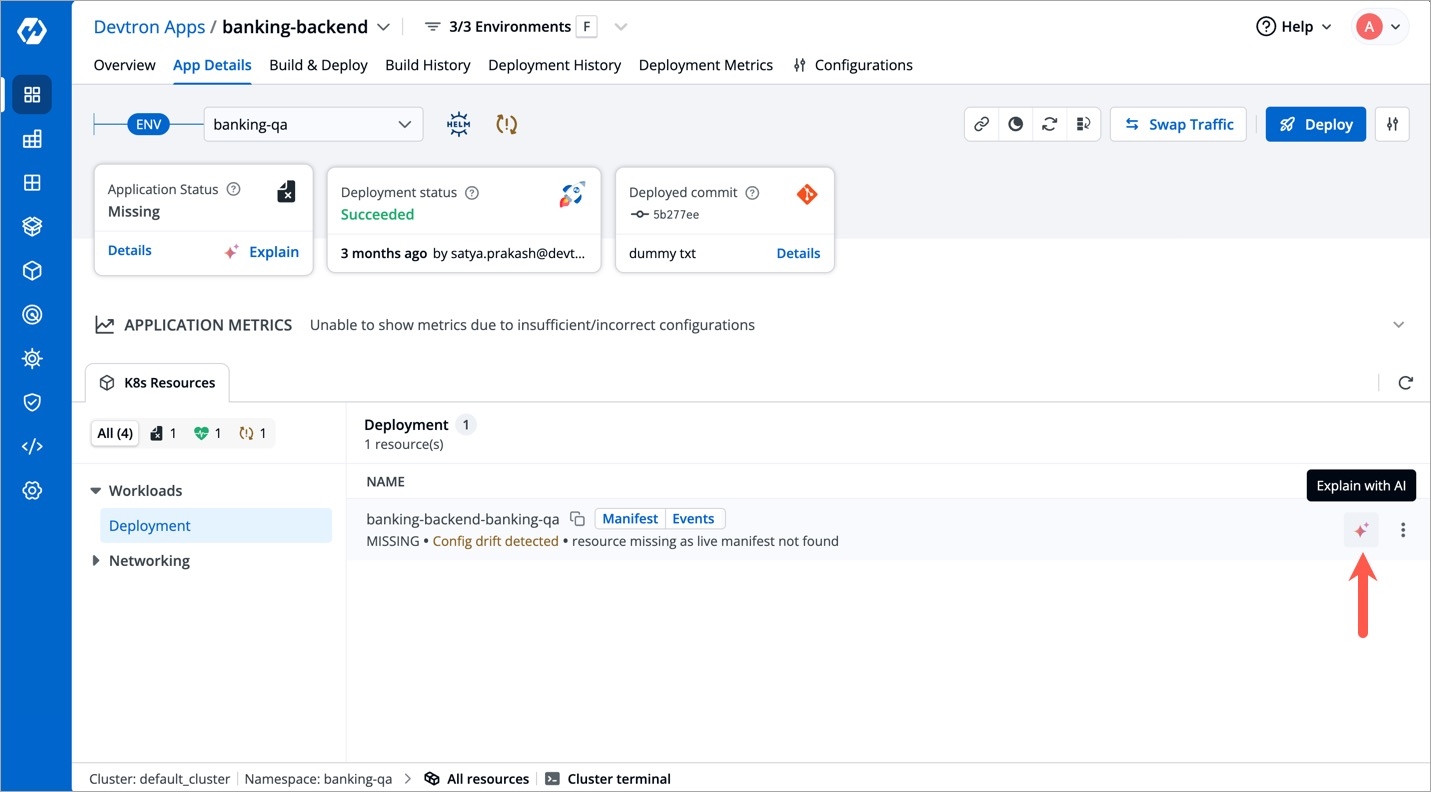
App Details - K8s Resources
Path: Application → App Details → K8s Resources (tab) → Workloads
Last updated
Was this helpful?