Triggering CD
Last updated
Was this helpful?
Last updated
Was this helpful?
After the CI pipeline is complete, you can trigger the CD pipeline.
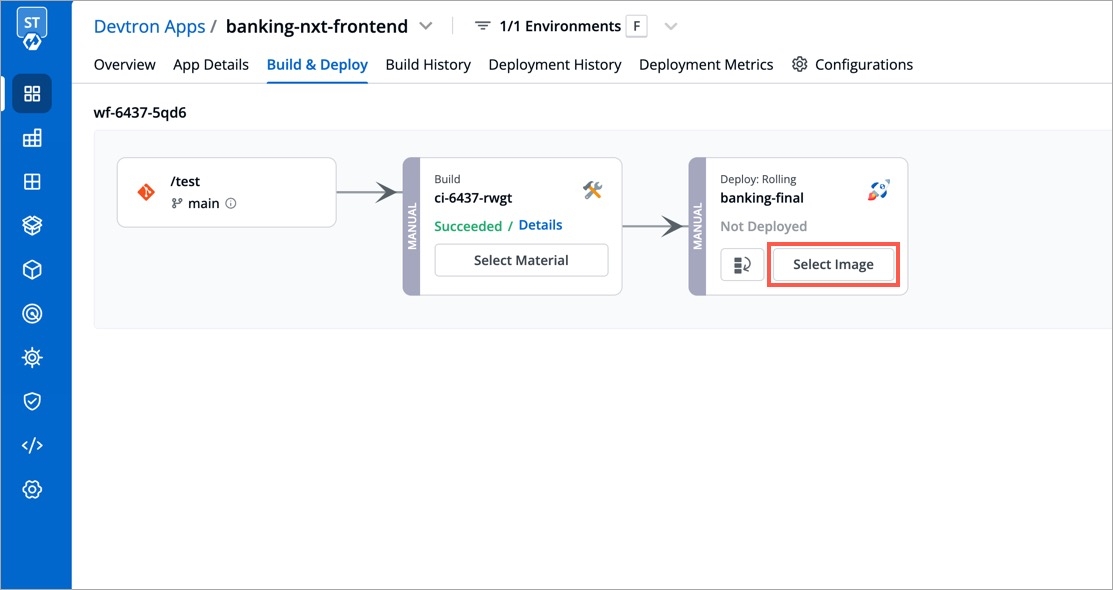
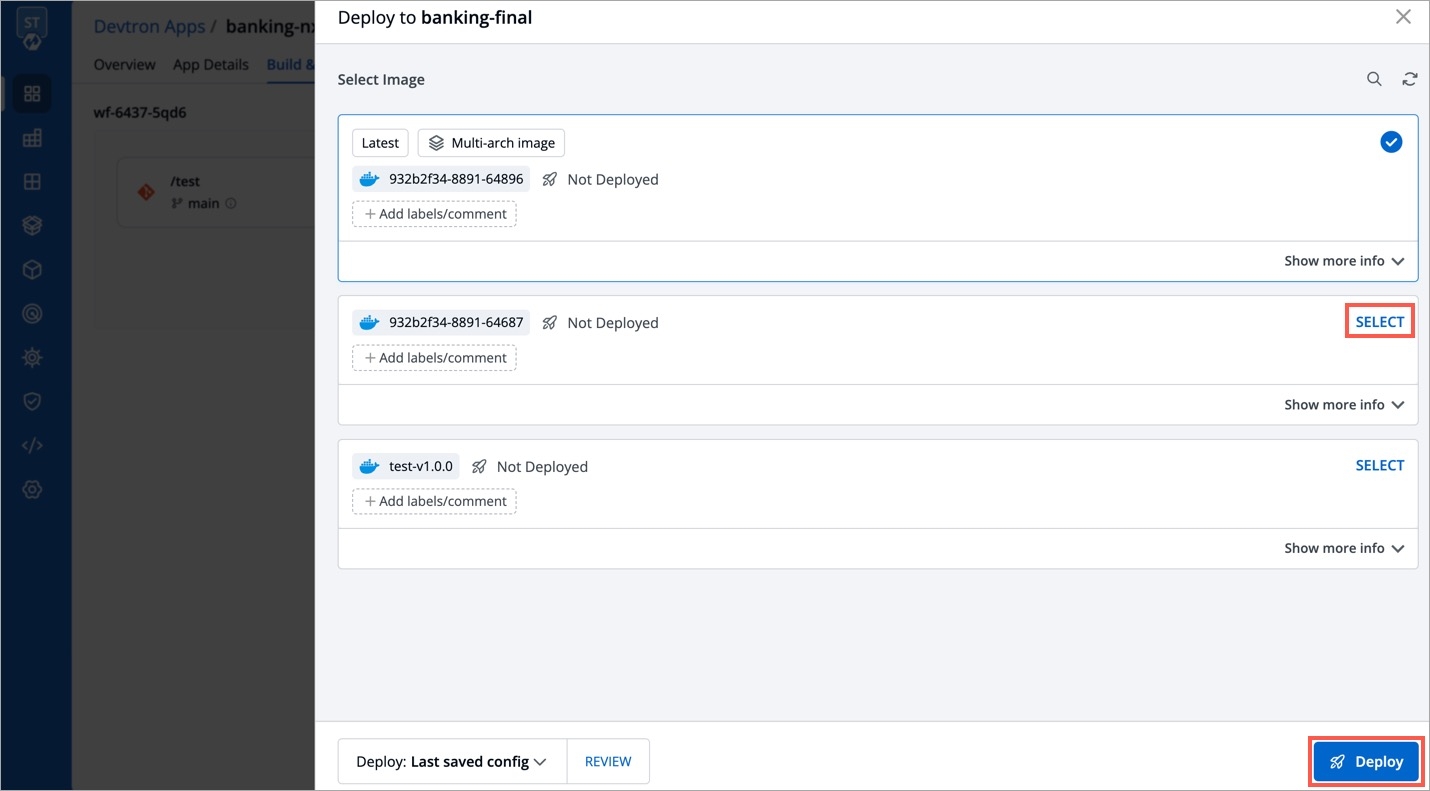
Go to the Build & Deploy tab of your application and click Select Image in the CD pipeline.
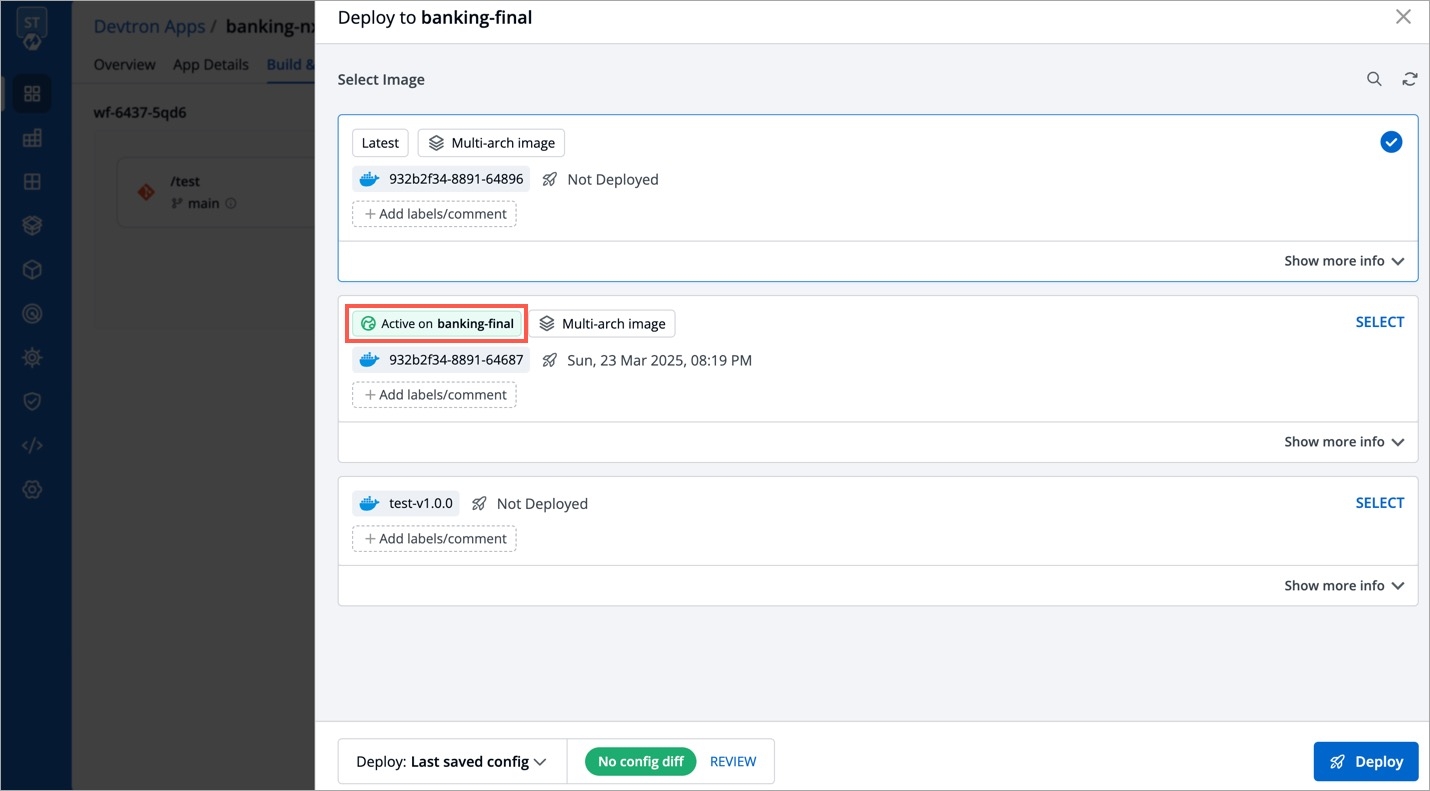
Select an image to deploy and then click Deploy to trigger the CD pipeline.
However, if an image is already deployed, you can identify it by the tag Active on <Environment name>.
When manual approval is enabled for the deployment pipeline configured in the workflow, you are expected to request for an image approval before each deployment. Alternatively, you can deploy images that have already been approved once.
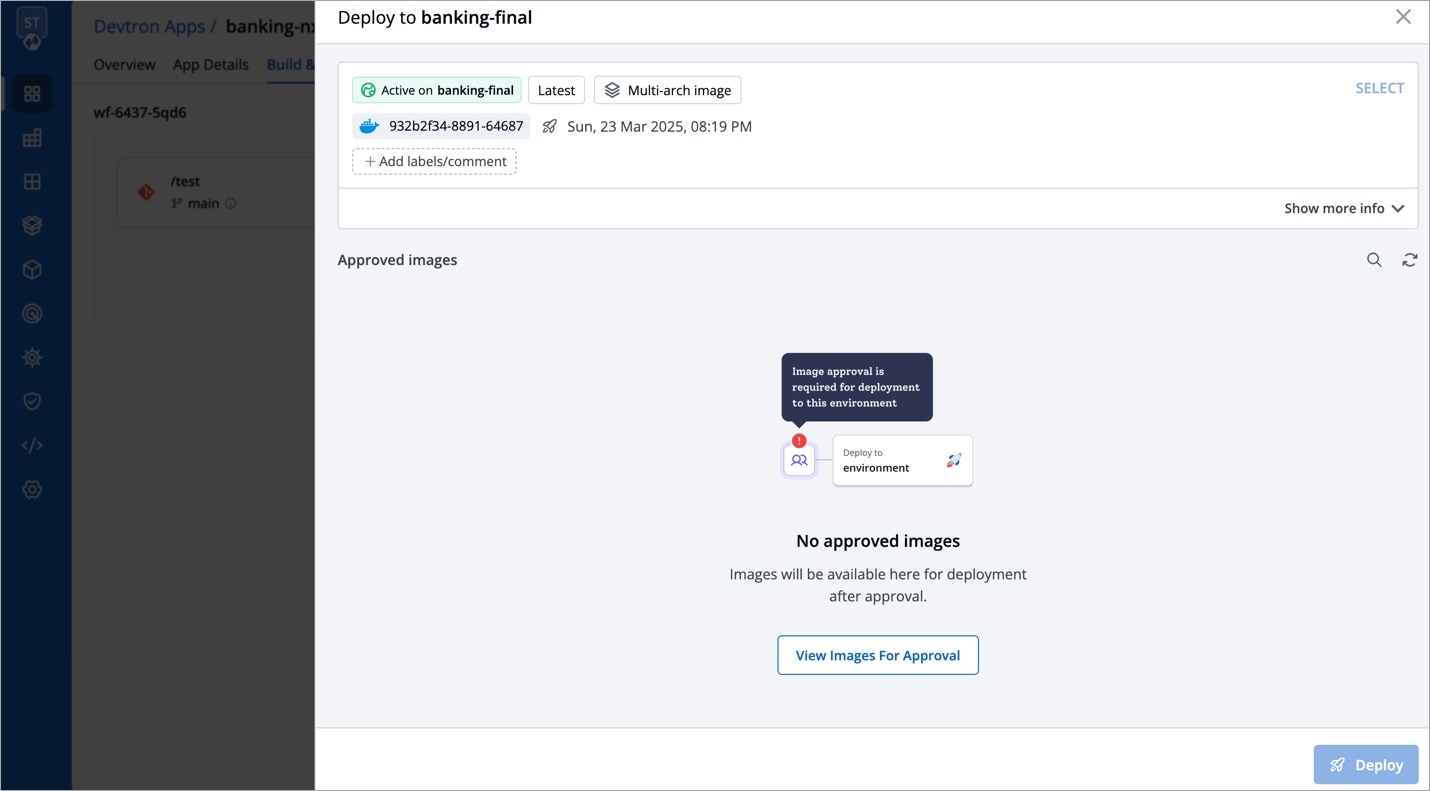
If no approved images are available or the current image is already deployed, you won't see any images for deployment when clicking Select Image.
Users need to have Build & deploy permission or above (along with access to the environment and application) to request for an image approval.
To request an image approval, follow these steps:
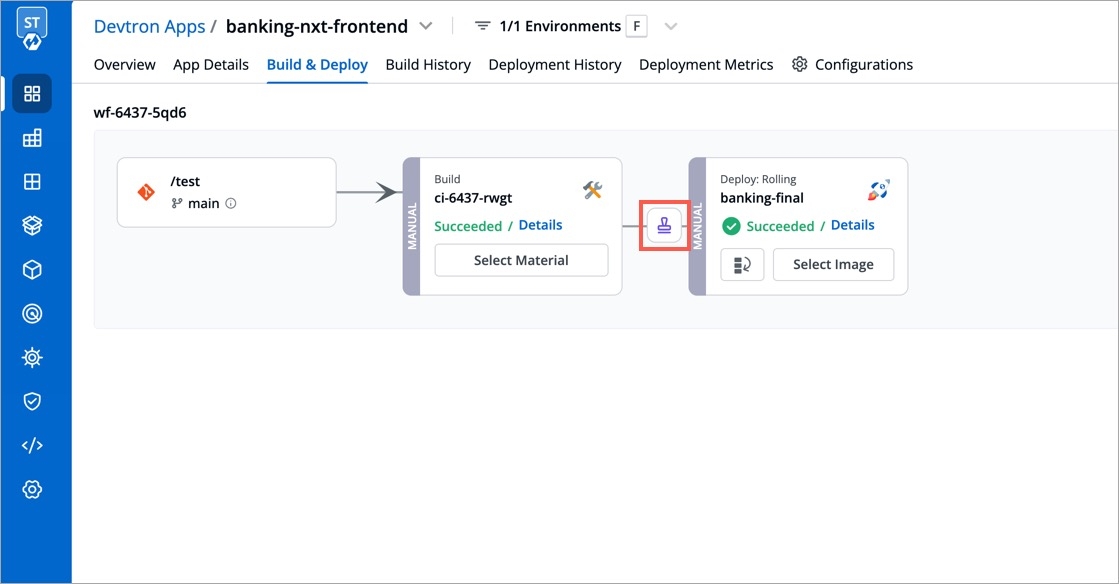
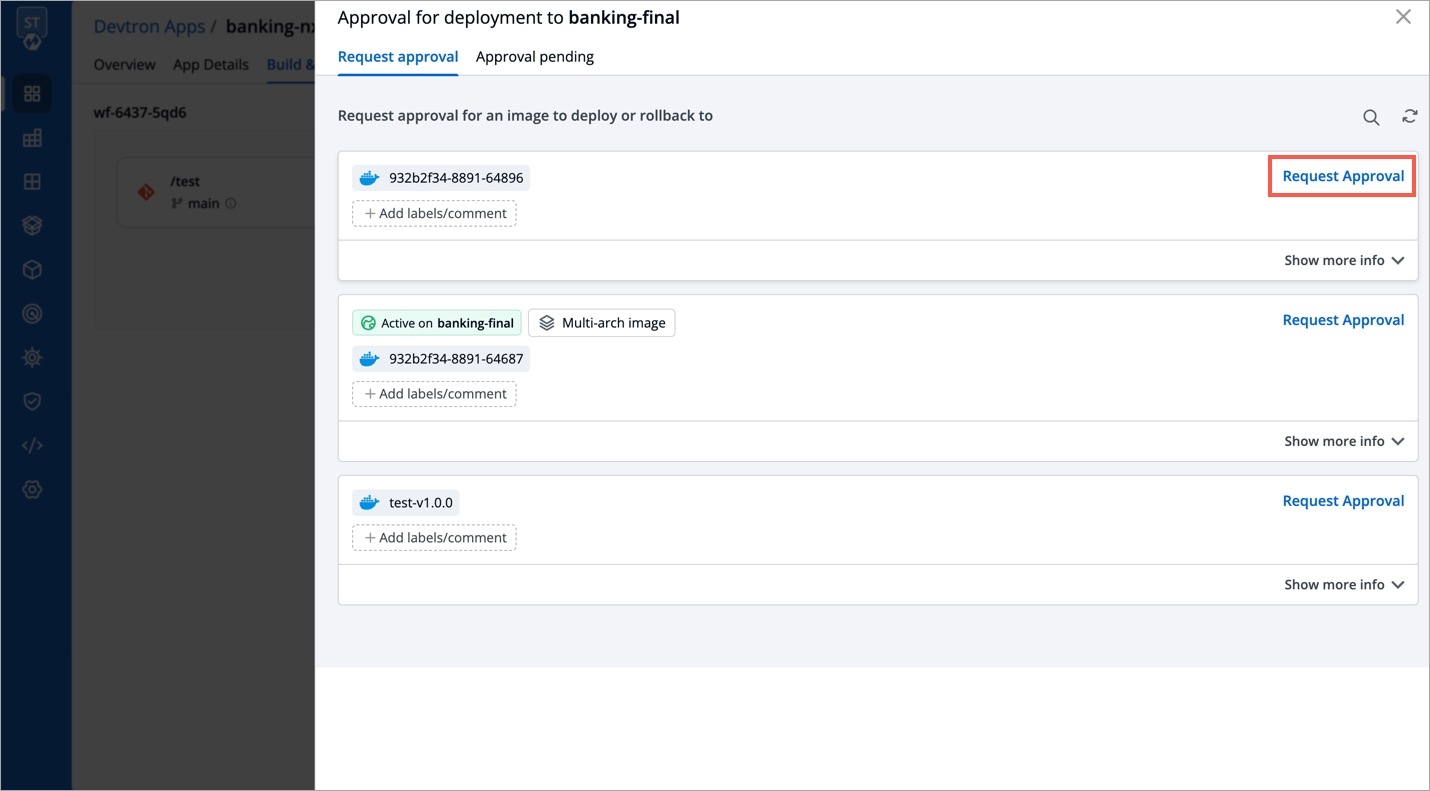
Navigate to the Build & Deploy page, and click the Approval for deployment icon.
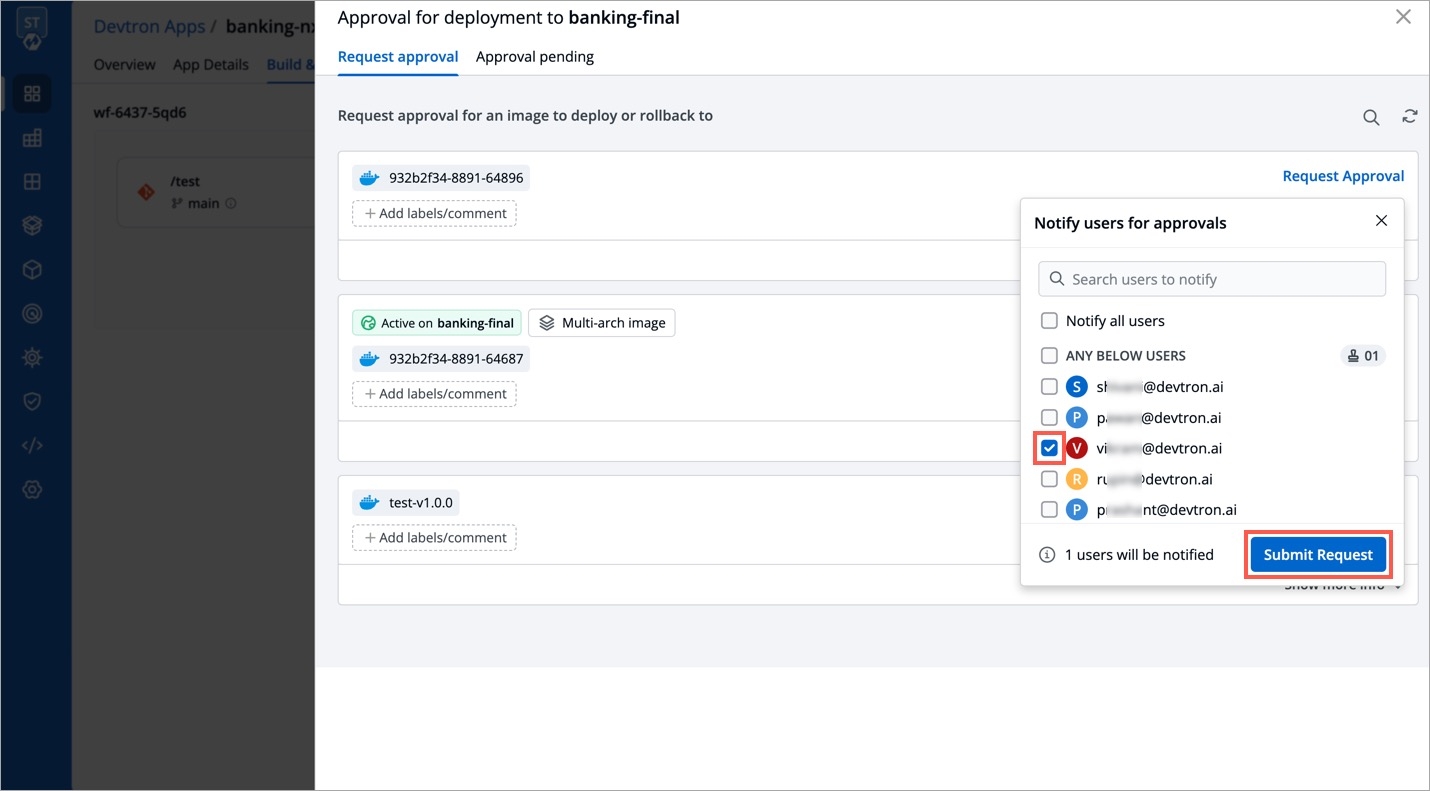
Click the Request Approval button present on the image for which you want to request an approval and click Submit Request.
In case you have configured SES or SMTP on Devtron, you can directly choose the approver(s) from the list of approvers as shown below.
The users you selected will receive an approval request via email. Any user with 'Image approver' permission alongwith access to the given application and given environment would be able to approve the image.
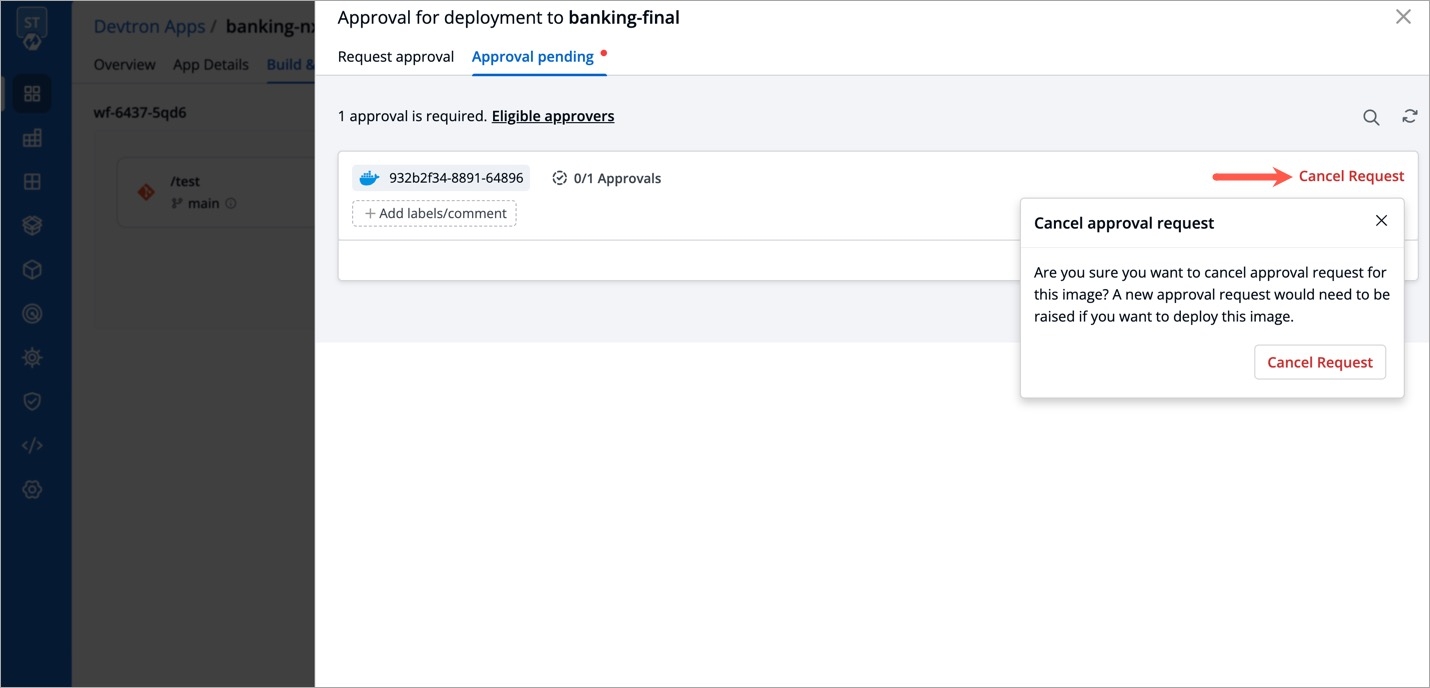
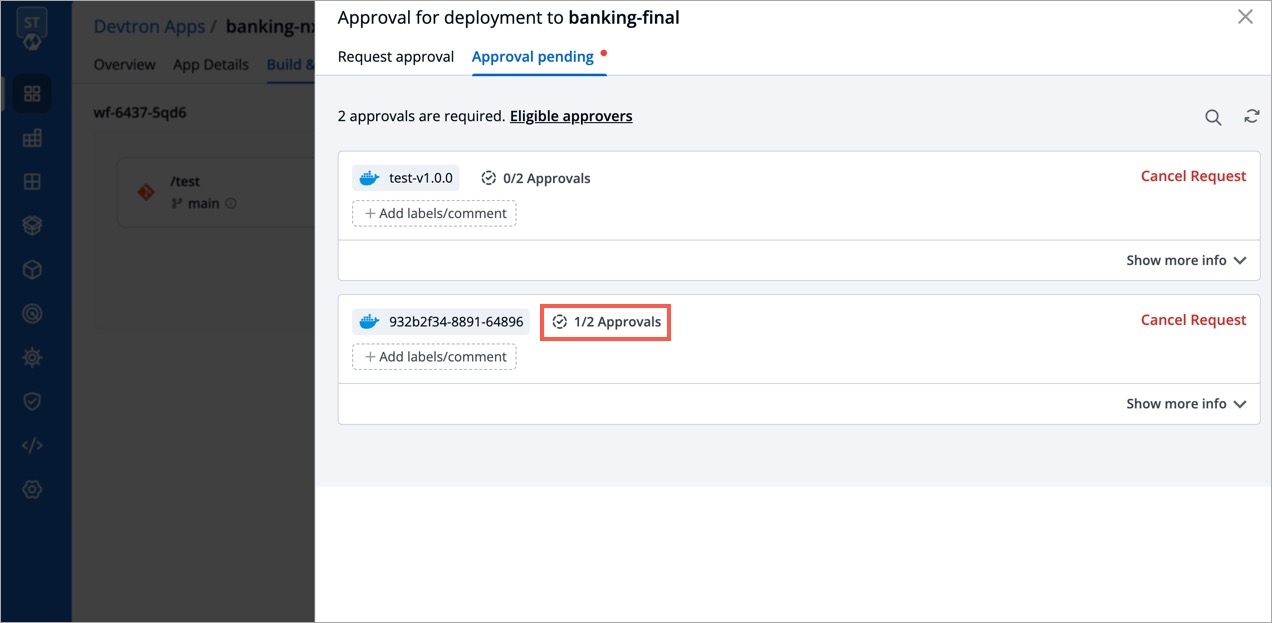
In case you wish to cancel the image approval request, you can do so from the Approval pending tab as shown in the below image.
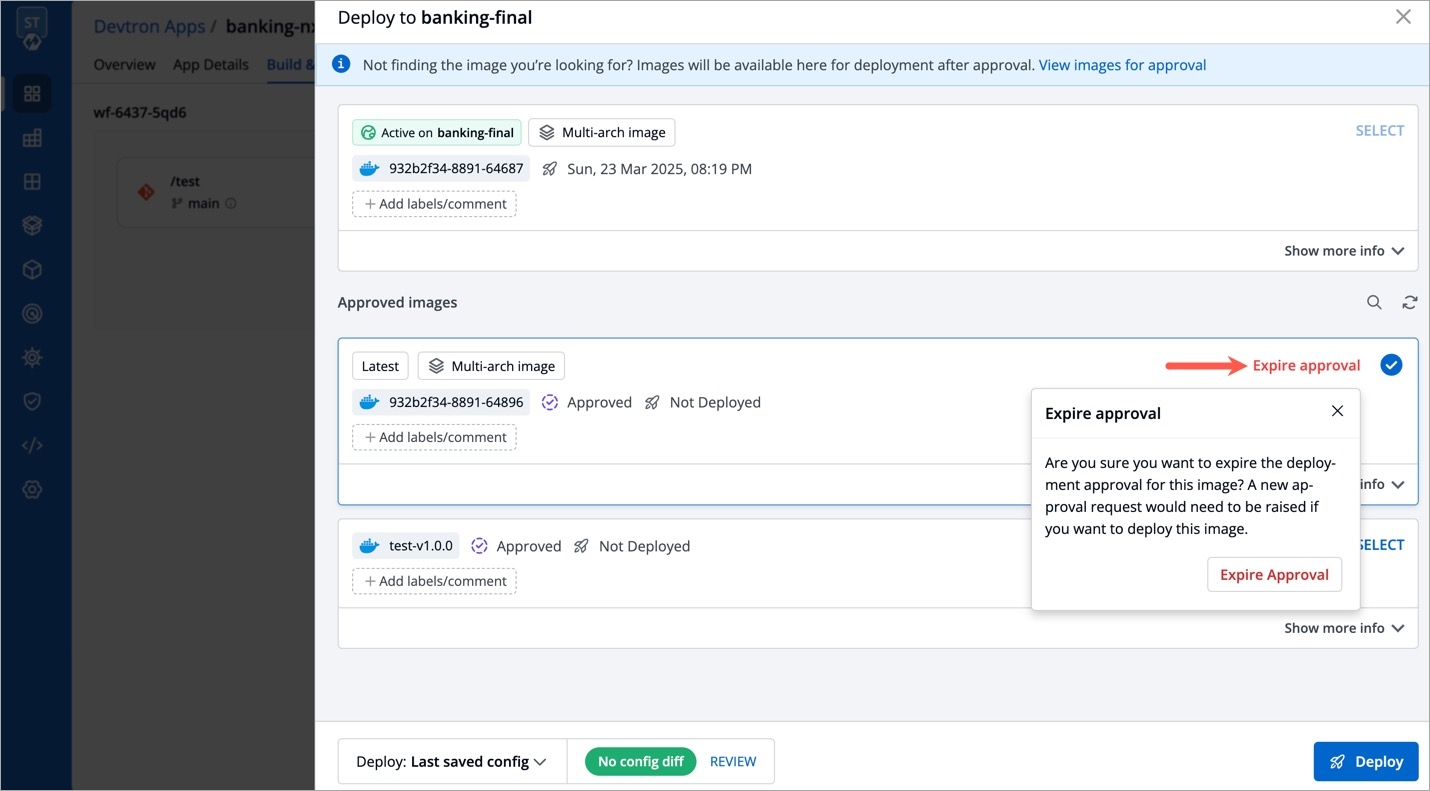
If you've received an approval but no longer want the image to be deployable, you can let the approval expire.
By default, super-admin users are considered as the default approvers. Users who build the image and/or request for its approval, cannot self-approve it even if they have super-admin privileges.
Users with Approver permission (for the specific application and environment) can also approve a deployment. This permission can be granted to users from User Permissions present in Global Configurations.
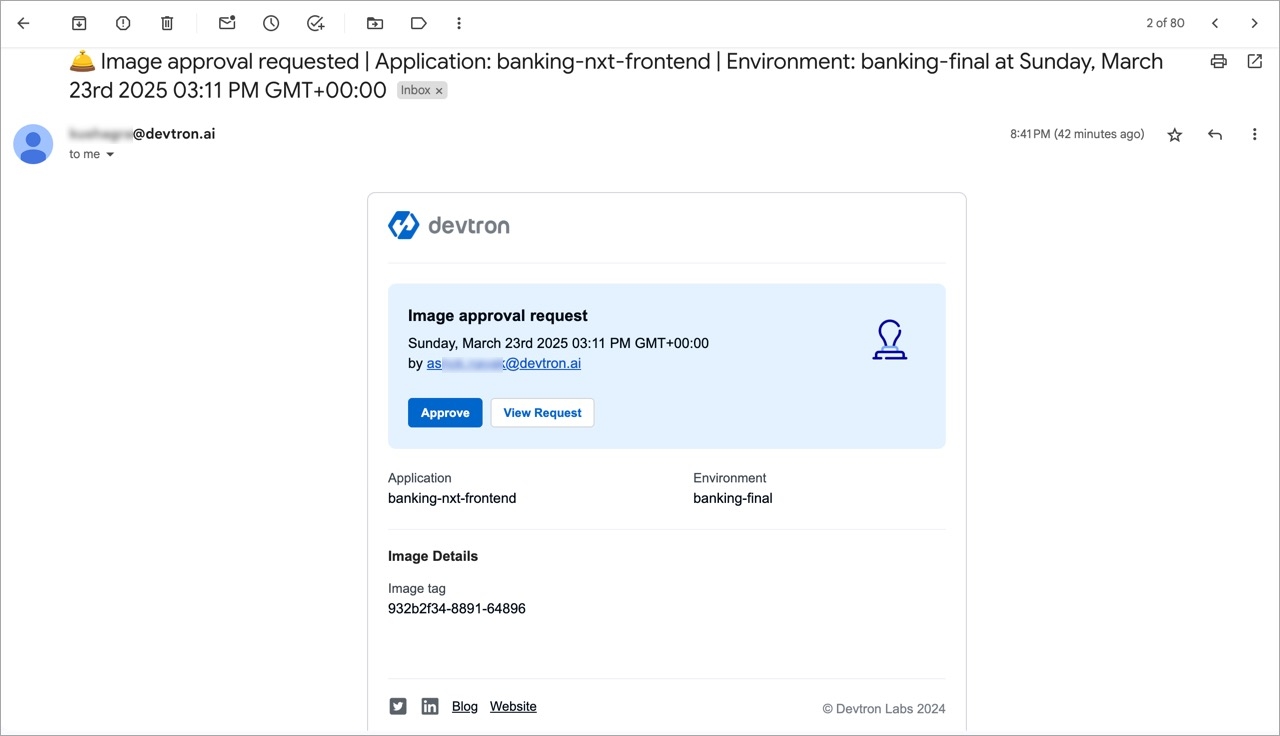
In case SES or SMTP was configured in Devtron, and the user chose the approvers while raising an image approval request, the approvers would receive an email notification as shown below:
To approve an image approval request, follow these steps:
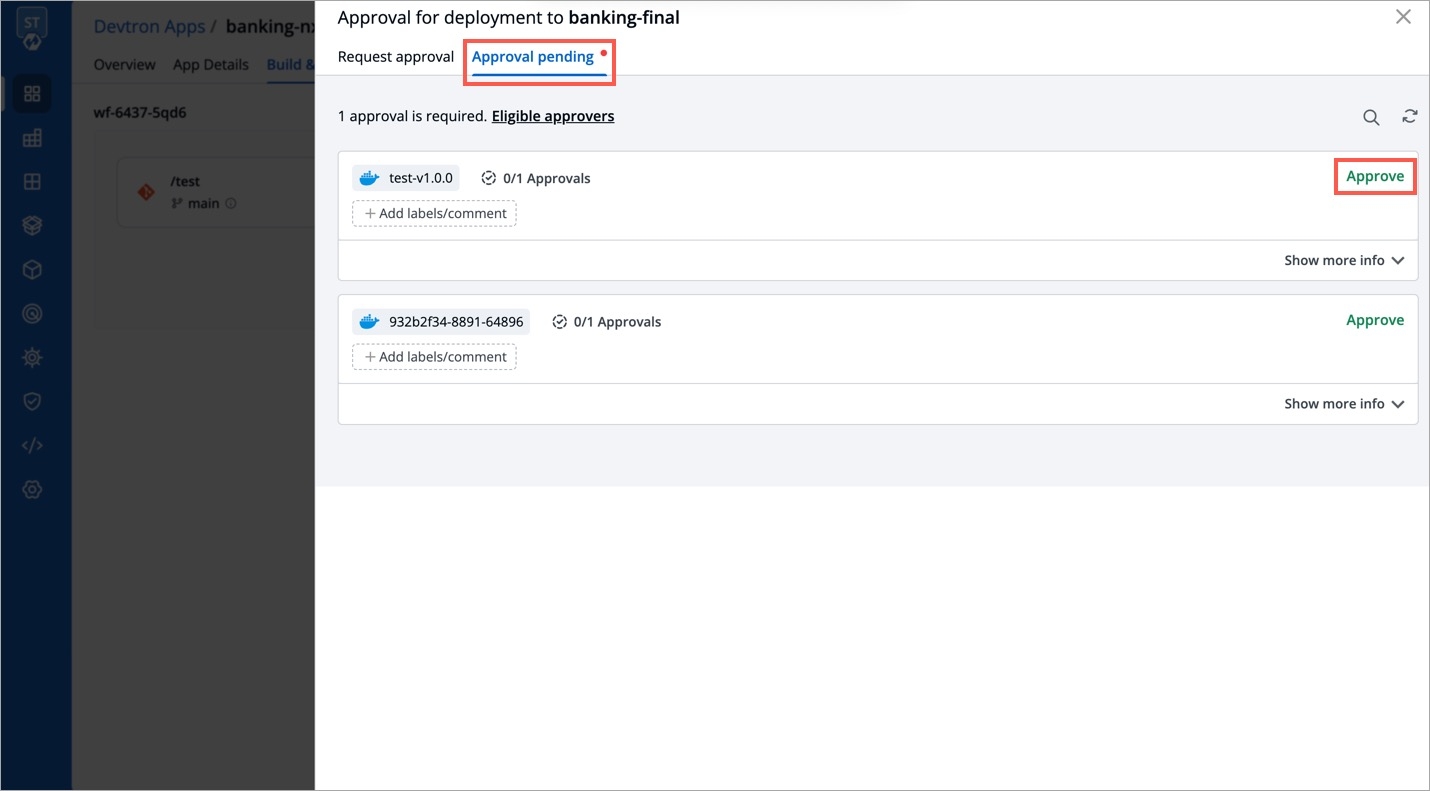
Go to the Build & Deploy page and click the Approval for deployment button.
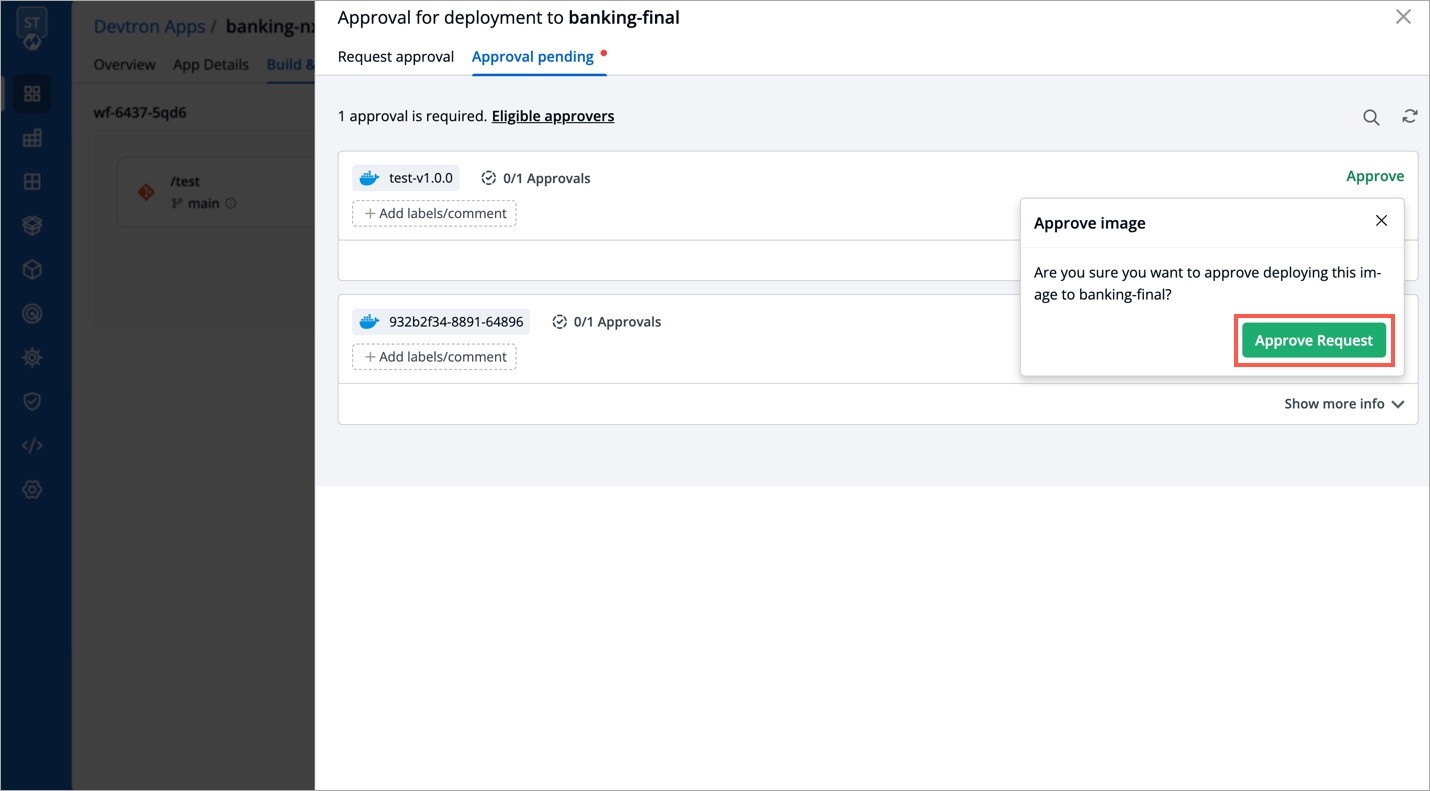
Switch to the Approval pending tab. Here, you will get a list of images that are awaiting approval.
Click Approve followed by Approve Request button.
Users need to have Build & deploy permission or above (along with access to the respective environment and application) to select and deploy an approved image.
In case the super-admin has set the minimum number of approval to more than 1 (in workflow), you must wait for all approvals before deploying the image. In other words, partially approved image will not be eligible for deployment.
To deploy an approved image, follow these steps:
Navigate to the Build & Deploy tab and click Select Image.
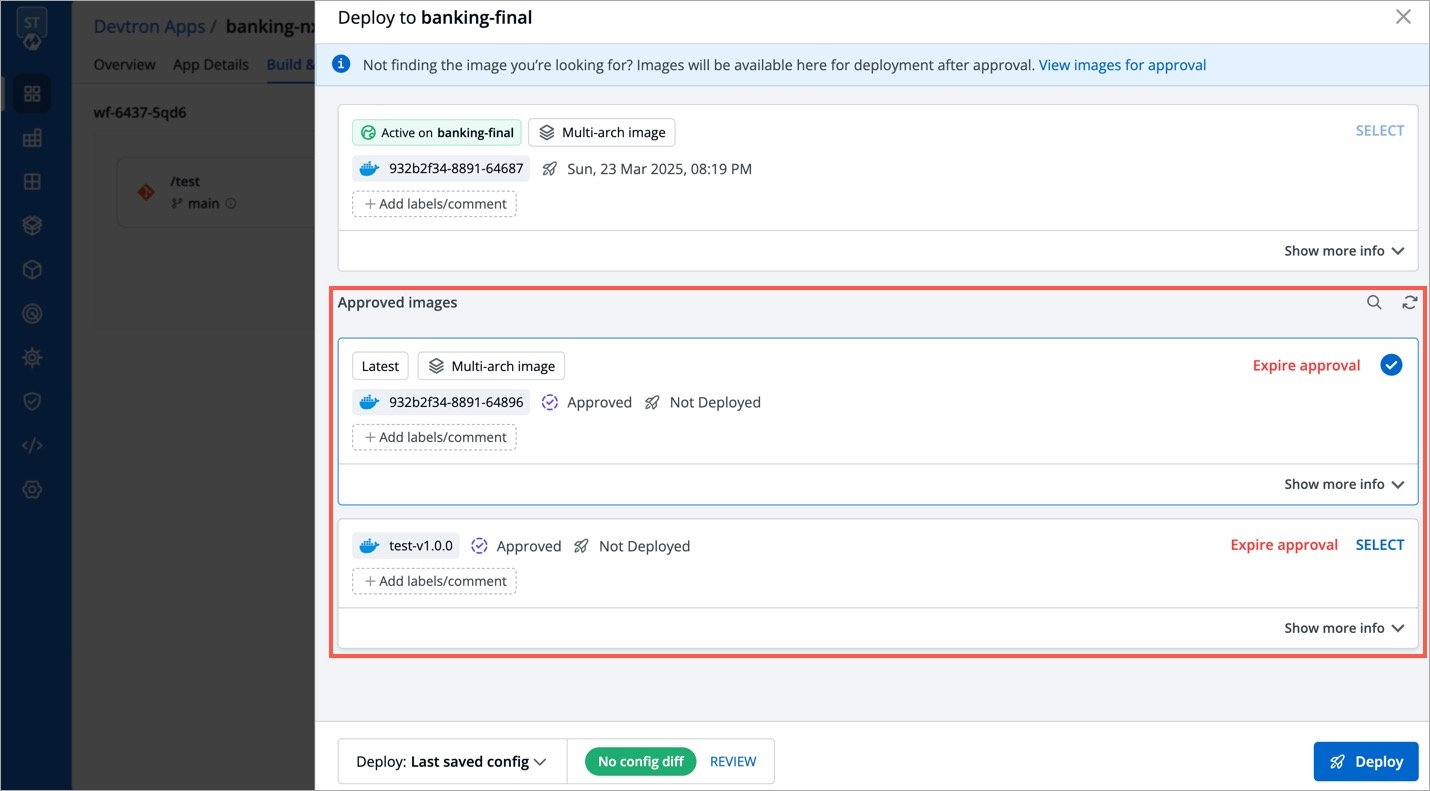
You will find all the approved images listed under the Approved images section. From the list, you can select the desired image and deploy it to your environment.
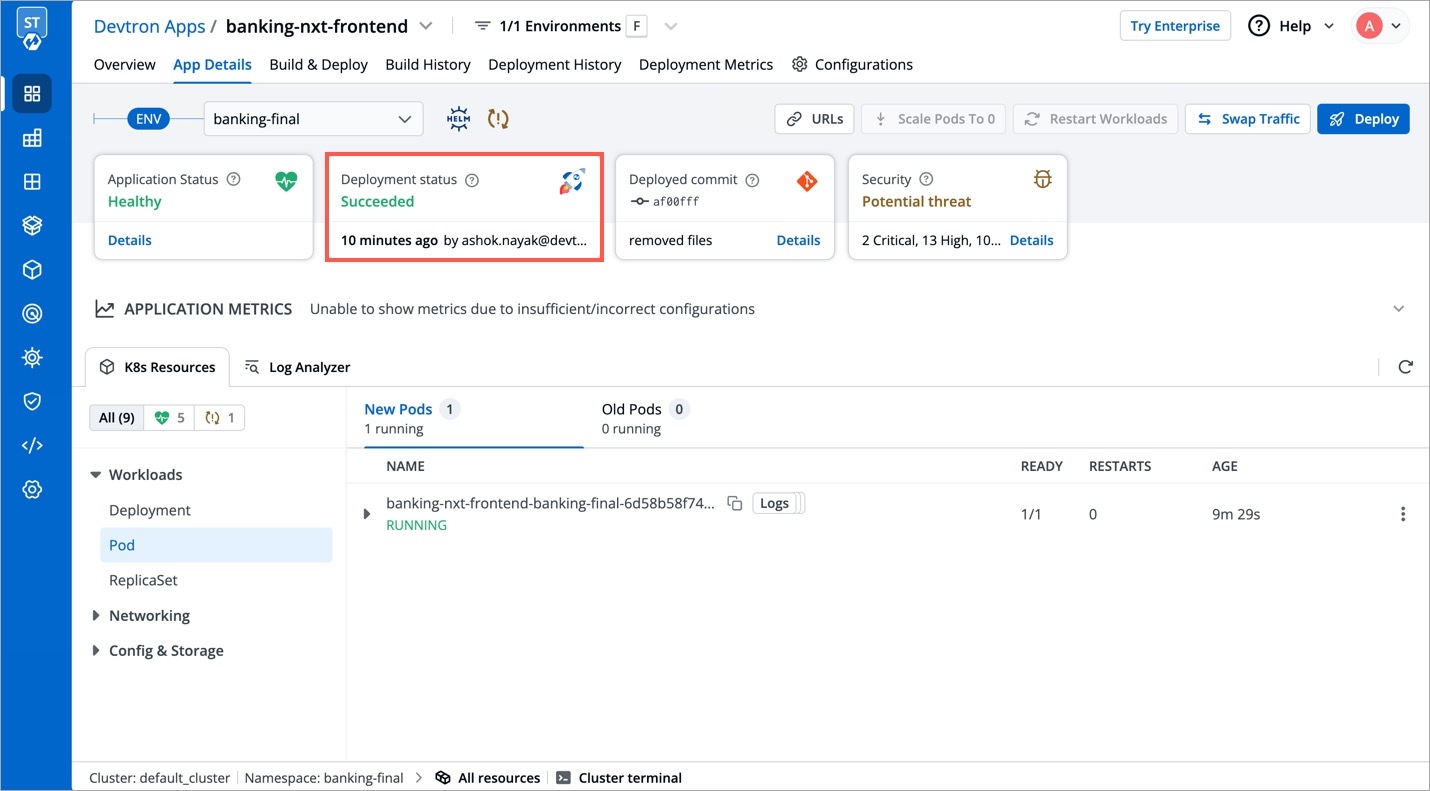
You can view the status of current deployment in the App Details tab.
The status initially appears as Progressing for approximately 1-2 minutes, and then gradually transitions to Healthy state based on the deployment strategy.
Here, our CD pipeline trigger was successful and the deployment is in Healthy state.
To further diagnose the deployments, click here
