

ConfigMaps
A ConfigMap stores key-value pairs that your jobs can use as environment variables or mounted files. Unlike secrets, ConfigMaps are meant for non-sensitive data. Moreover, you can update configurations without modifying or rebuilding your container images, thus making the deployments more efficient.
Add ConfigMap
Who Can Perform This Action?
Users need to have the Admin role or the Super Admin role. Refer the User permissions.
Go to Configurations → ConfigMaps & Secrets.

Figure 1: ConfigMaps & Secrets Click the + button next to ConfigMaps.
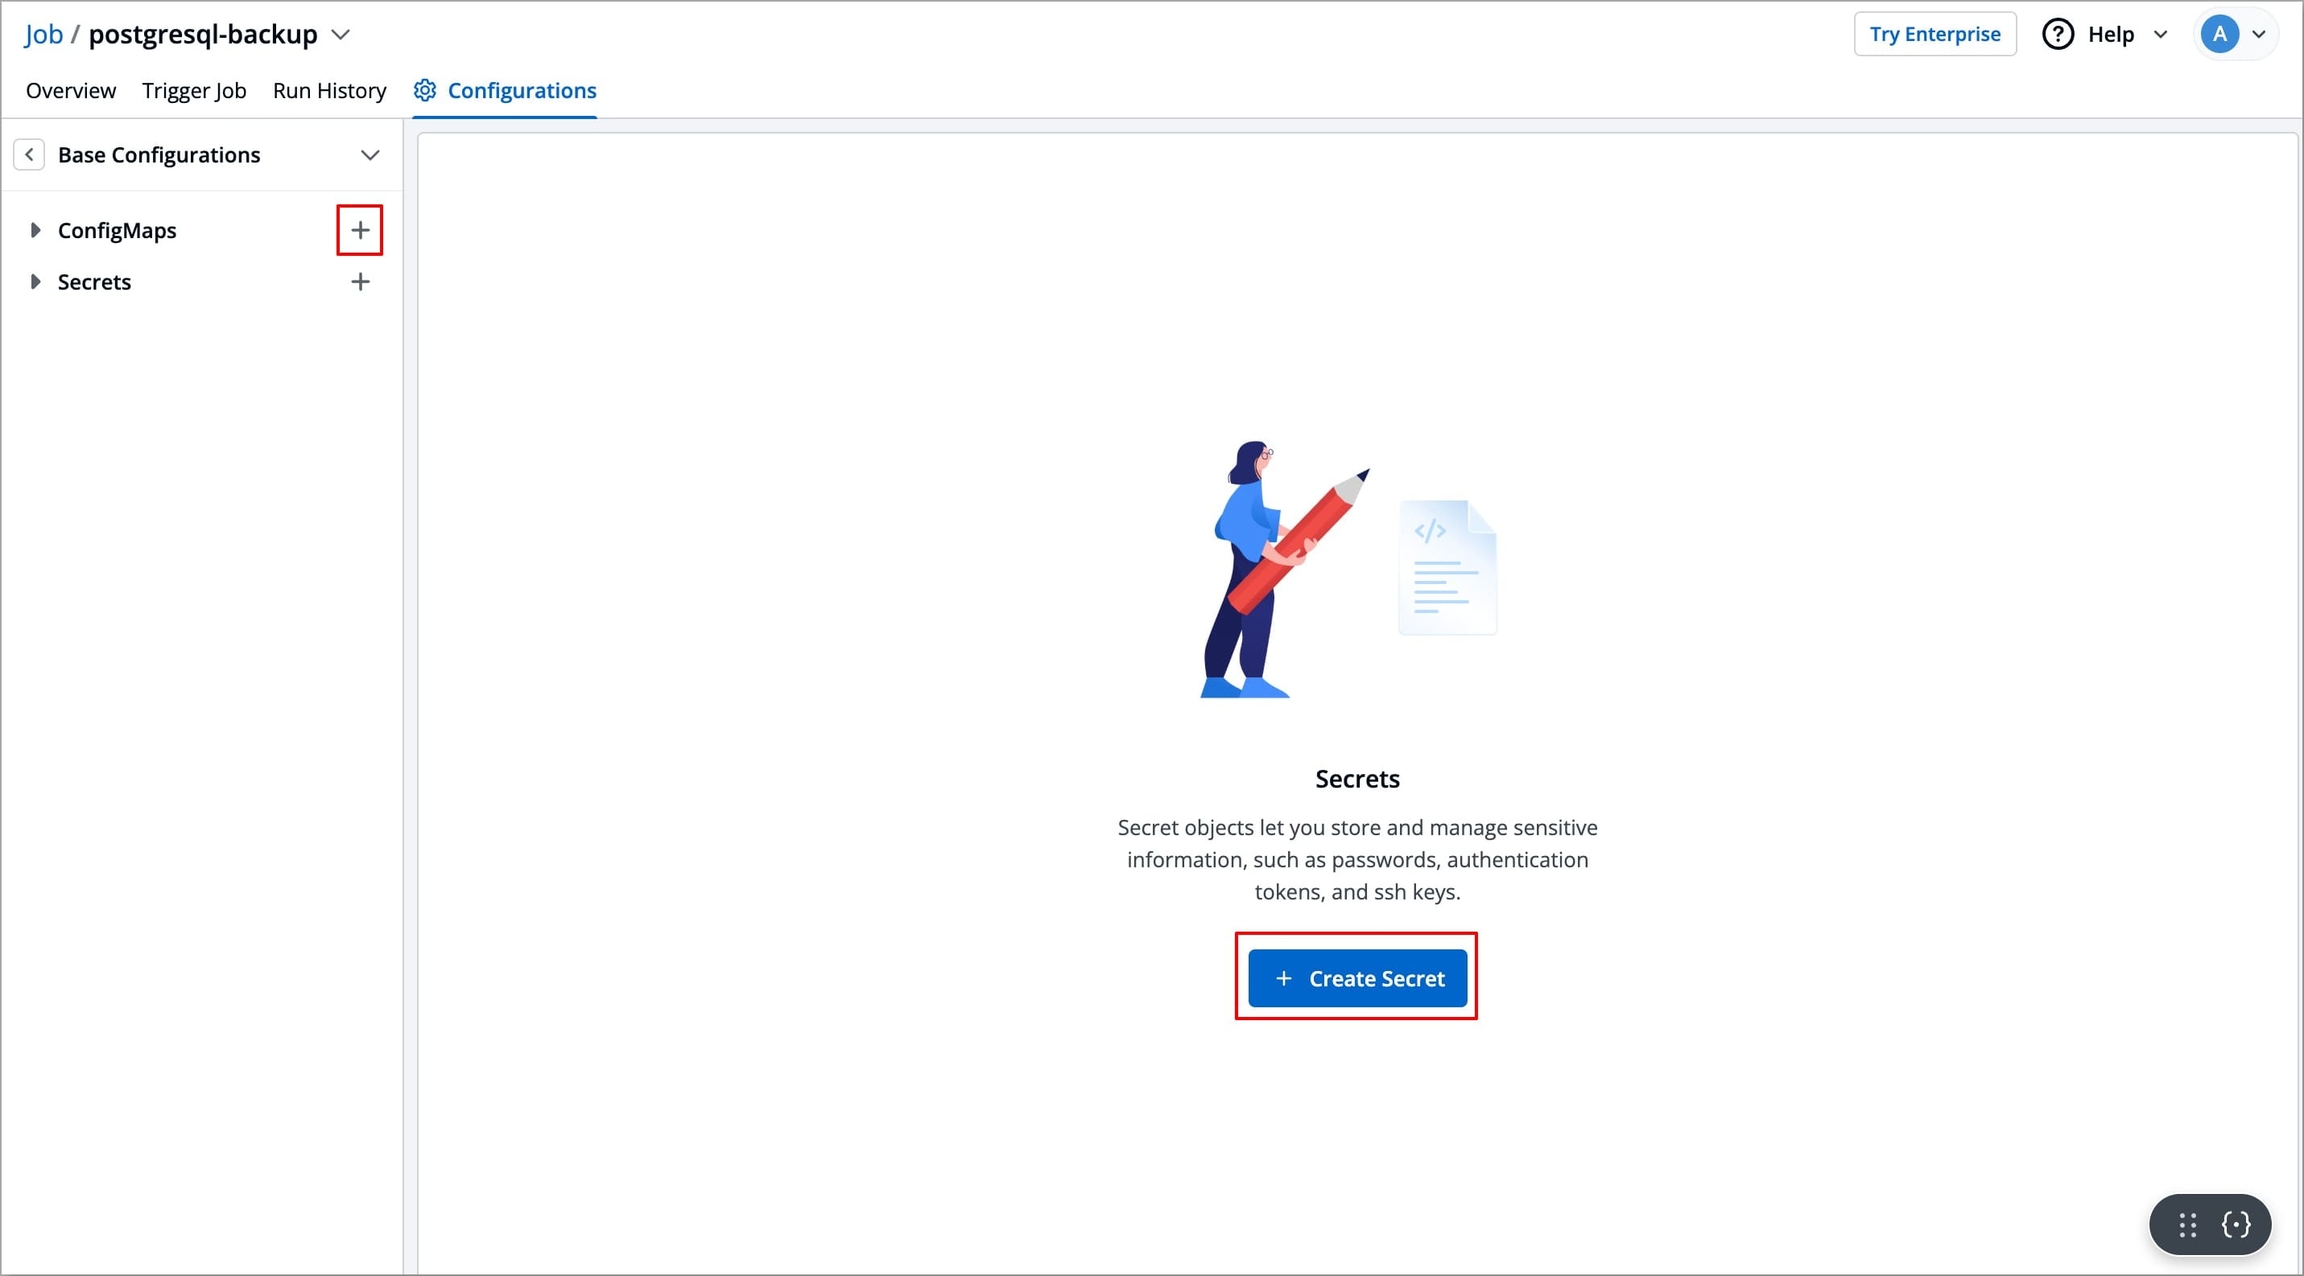
Figure 2: Creating ConfigMap Enter a name for the ConfigMap (Once defined, the name cannot be changed later).
Note: In case you are using an External Kubernetes ConfigMap, the name should be exactly the same as the name given using the
kubectl create configmap <configmap-name> <data source>command.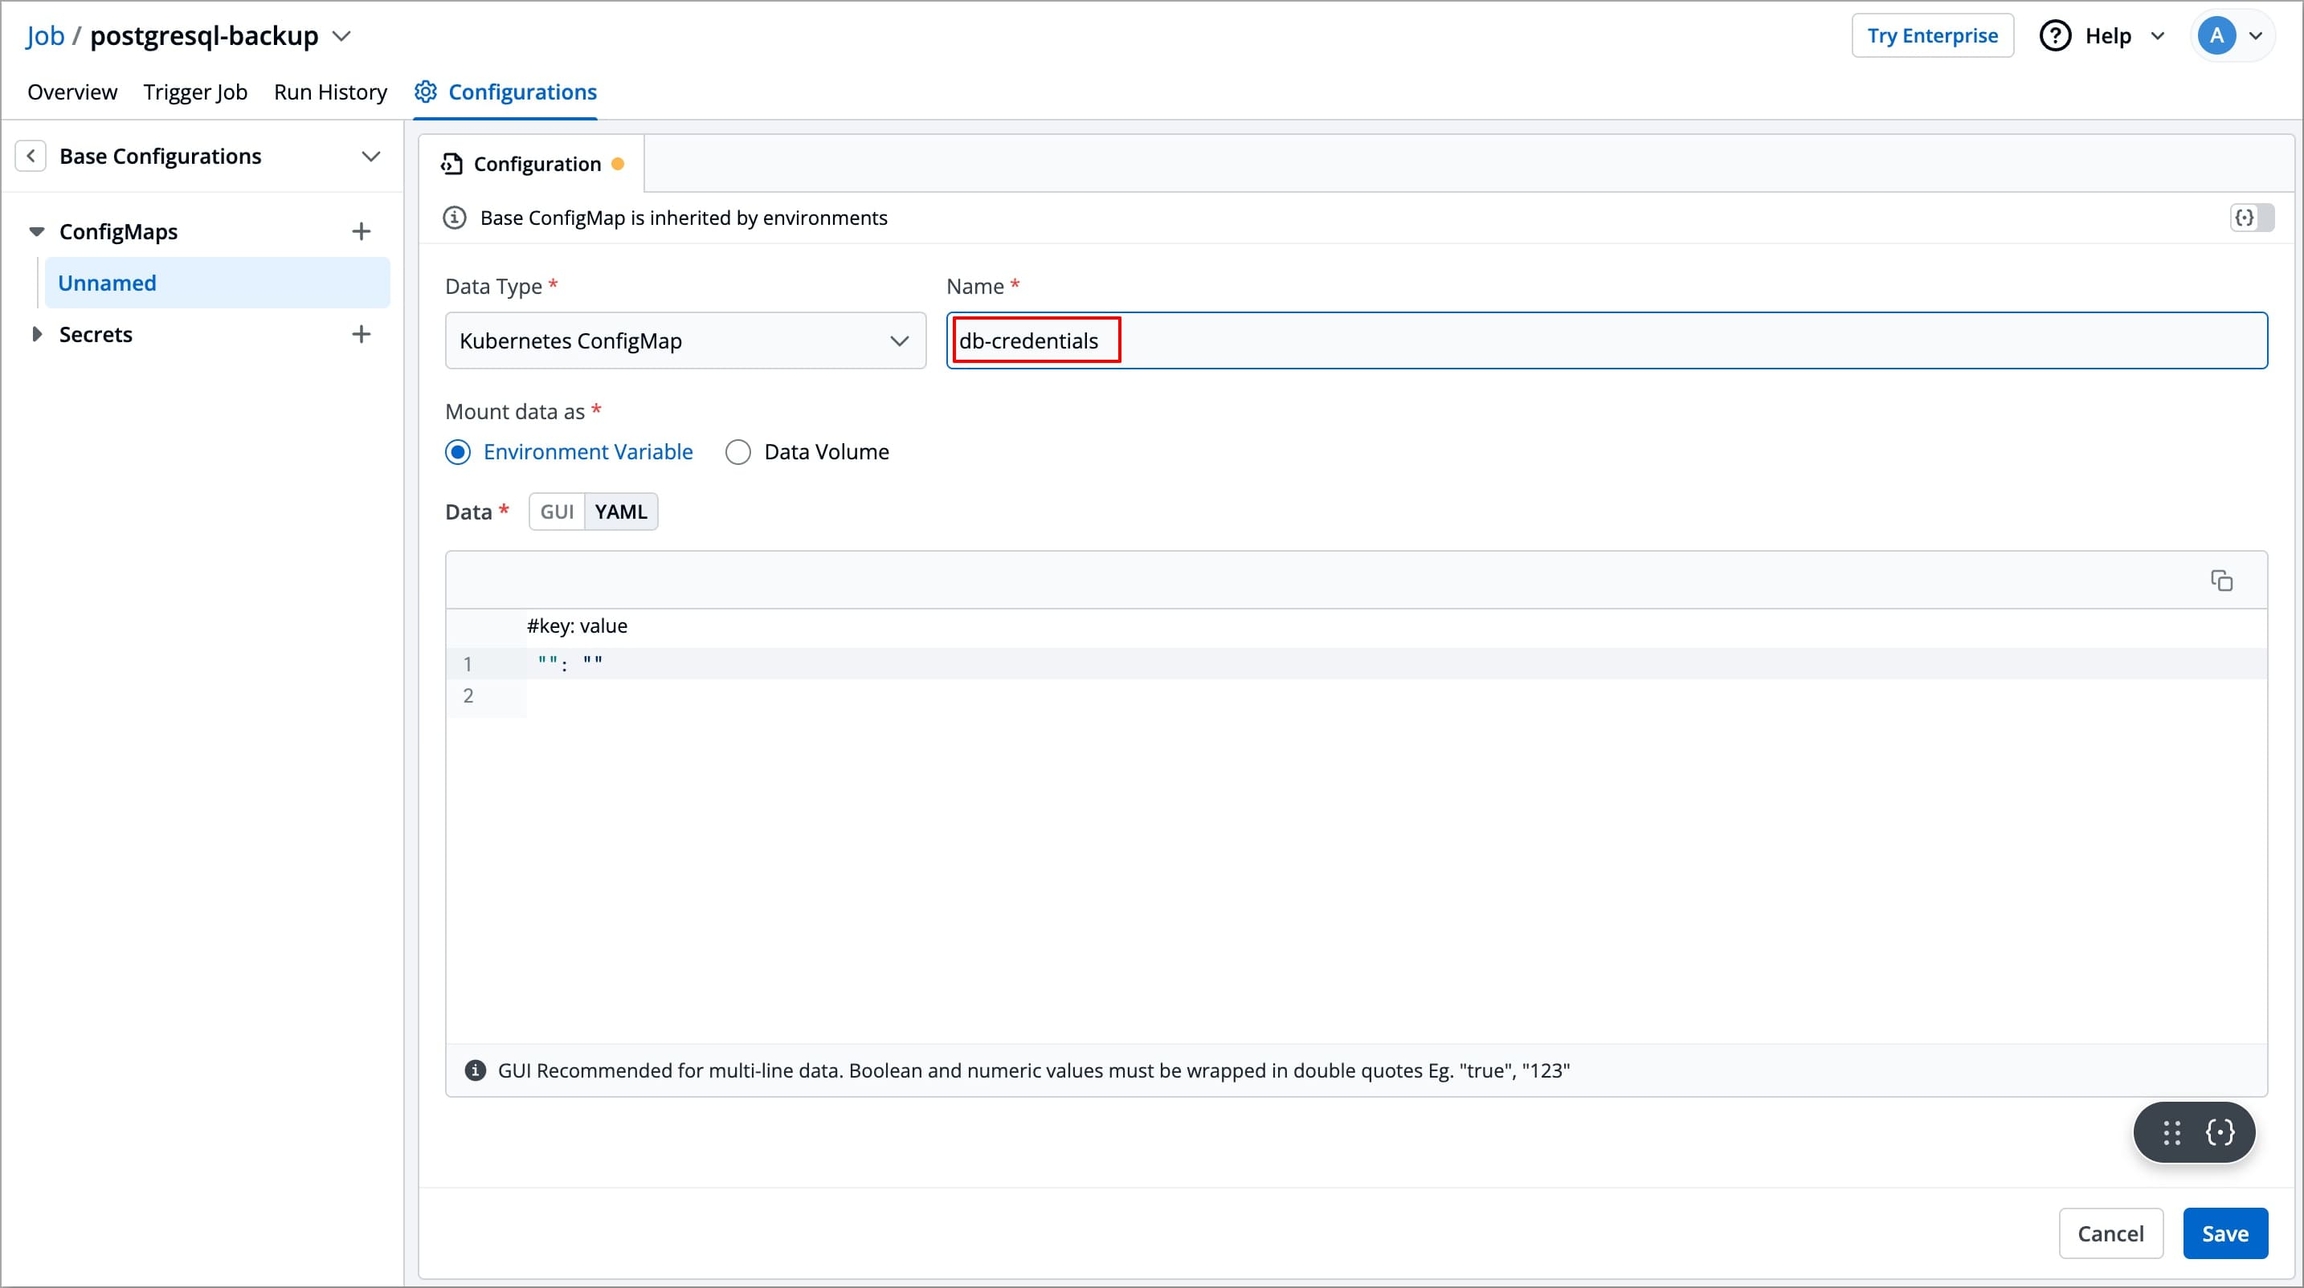
Figure 3: Entering ConfigMap Name Data Type - Choose between the following data types:
Kubernetes ConfigMap: Select the Data Type as Kubernetes ConfigMap, if you wish to create and use the ConfigMap using Devtron.
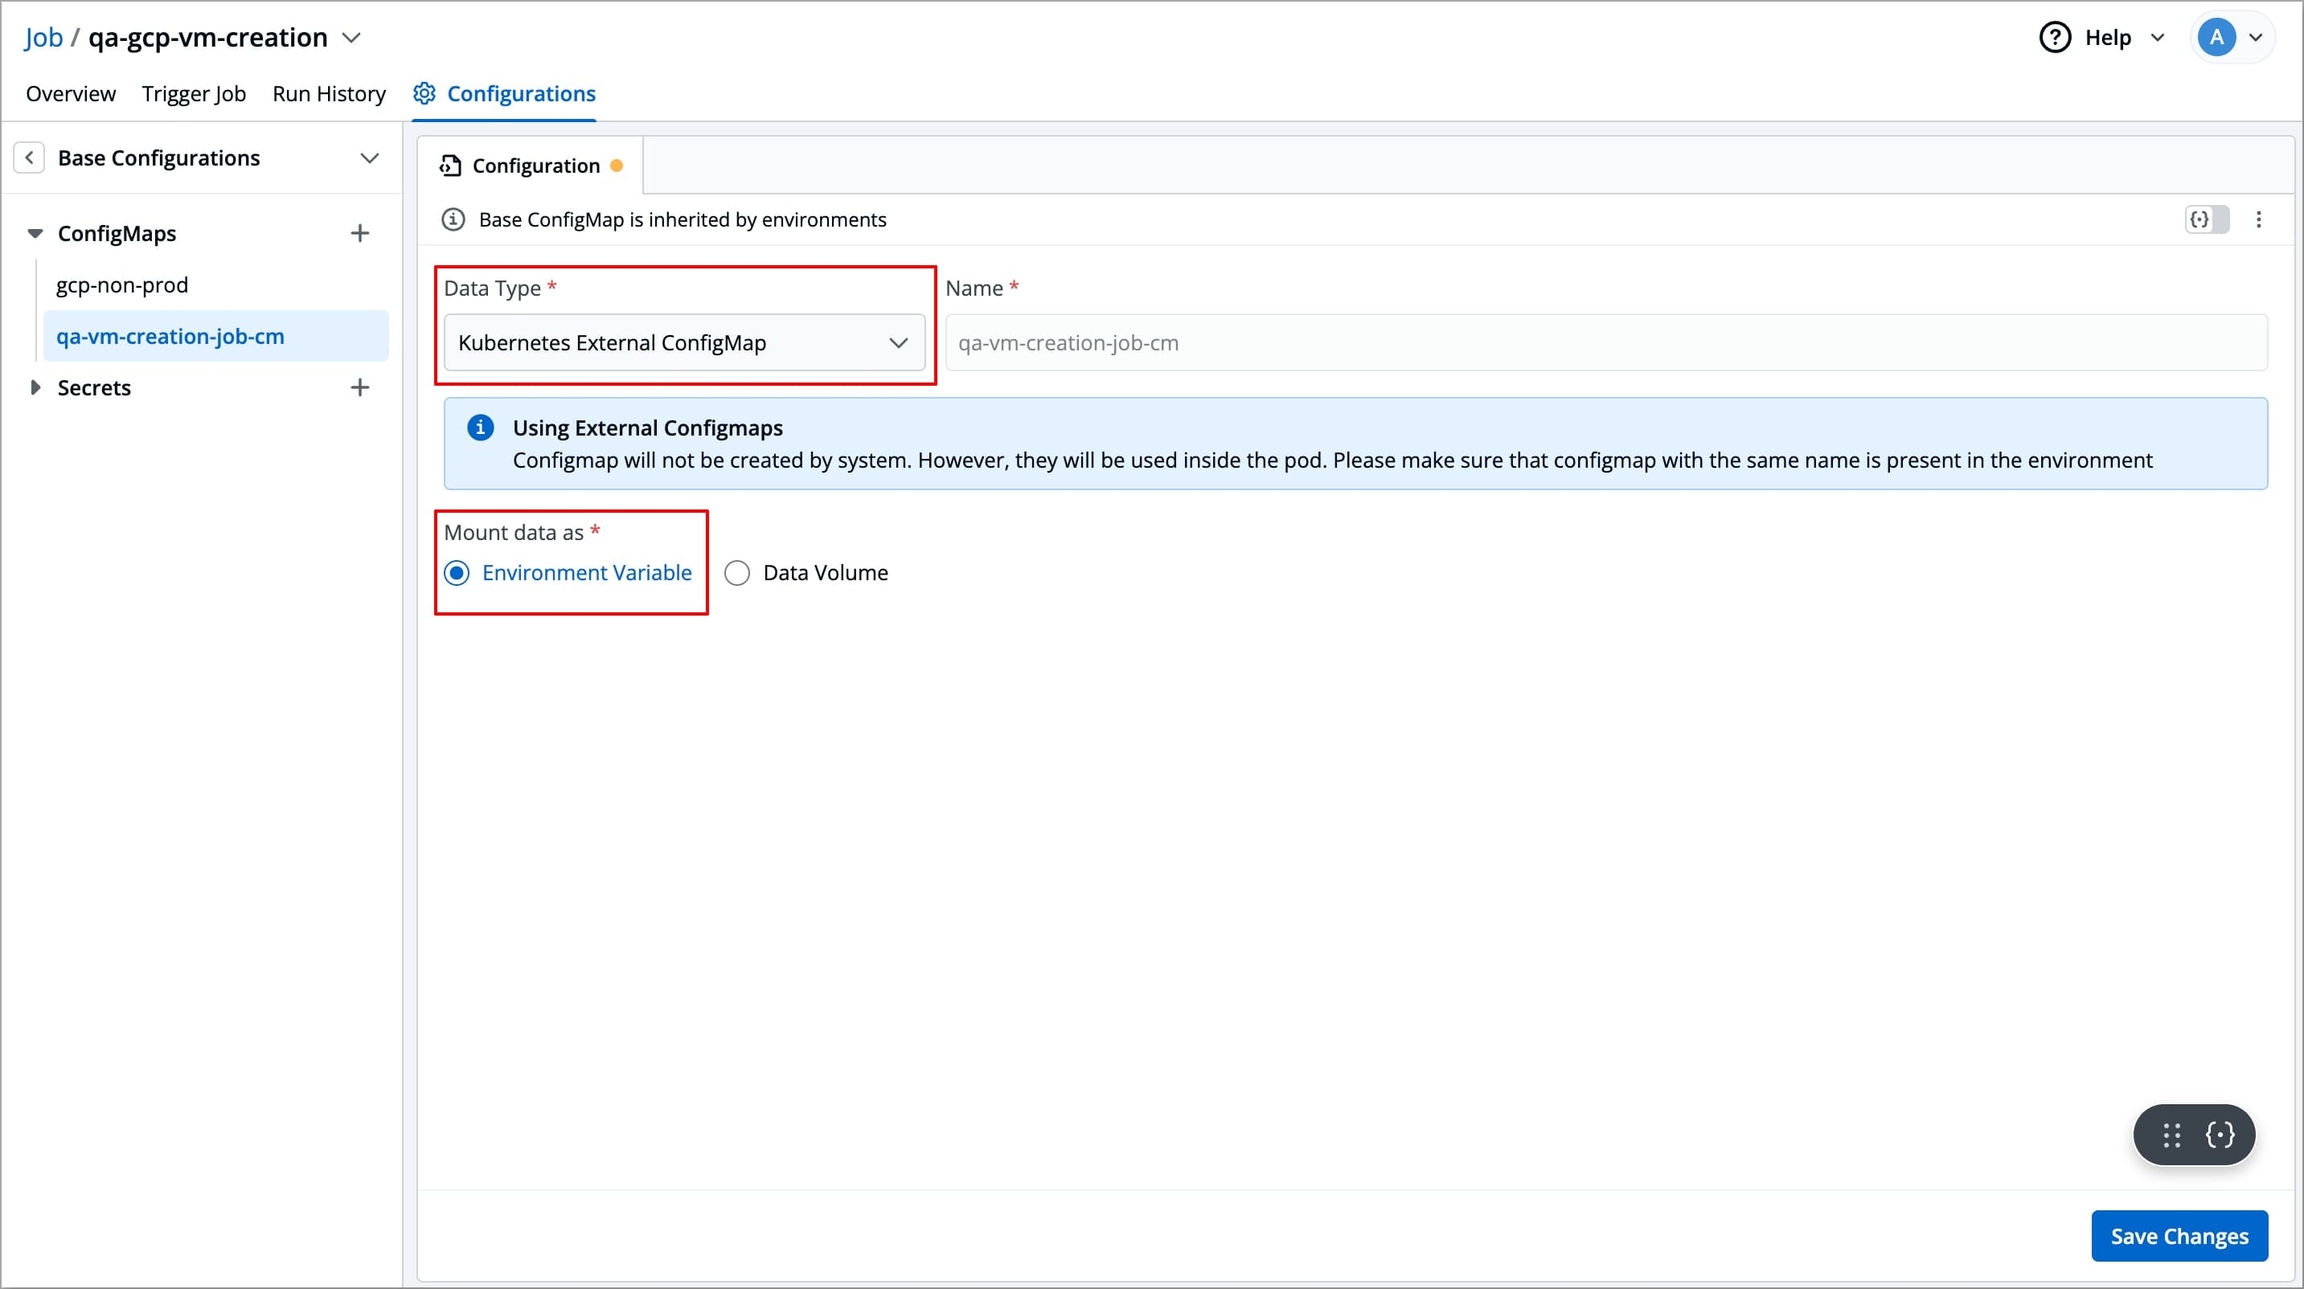
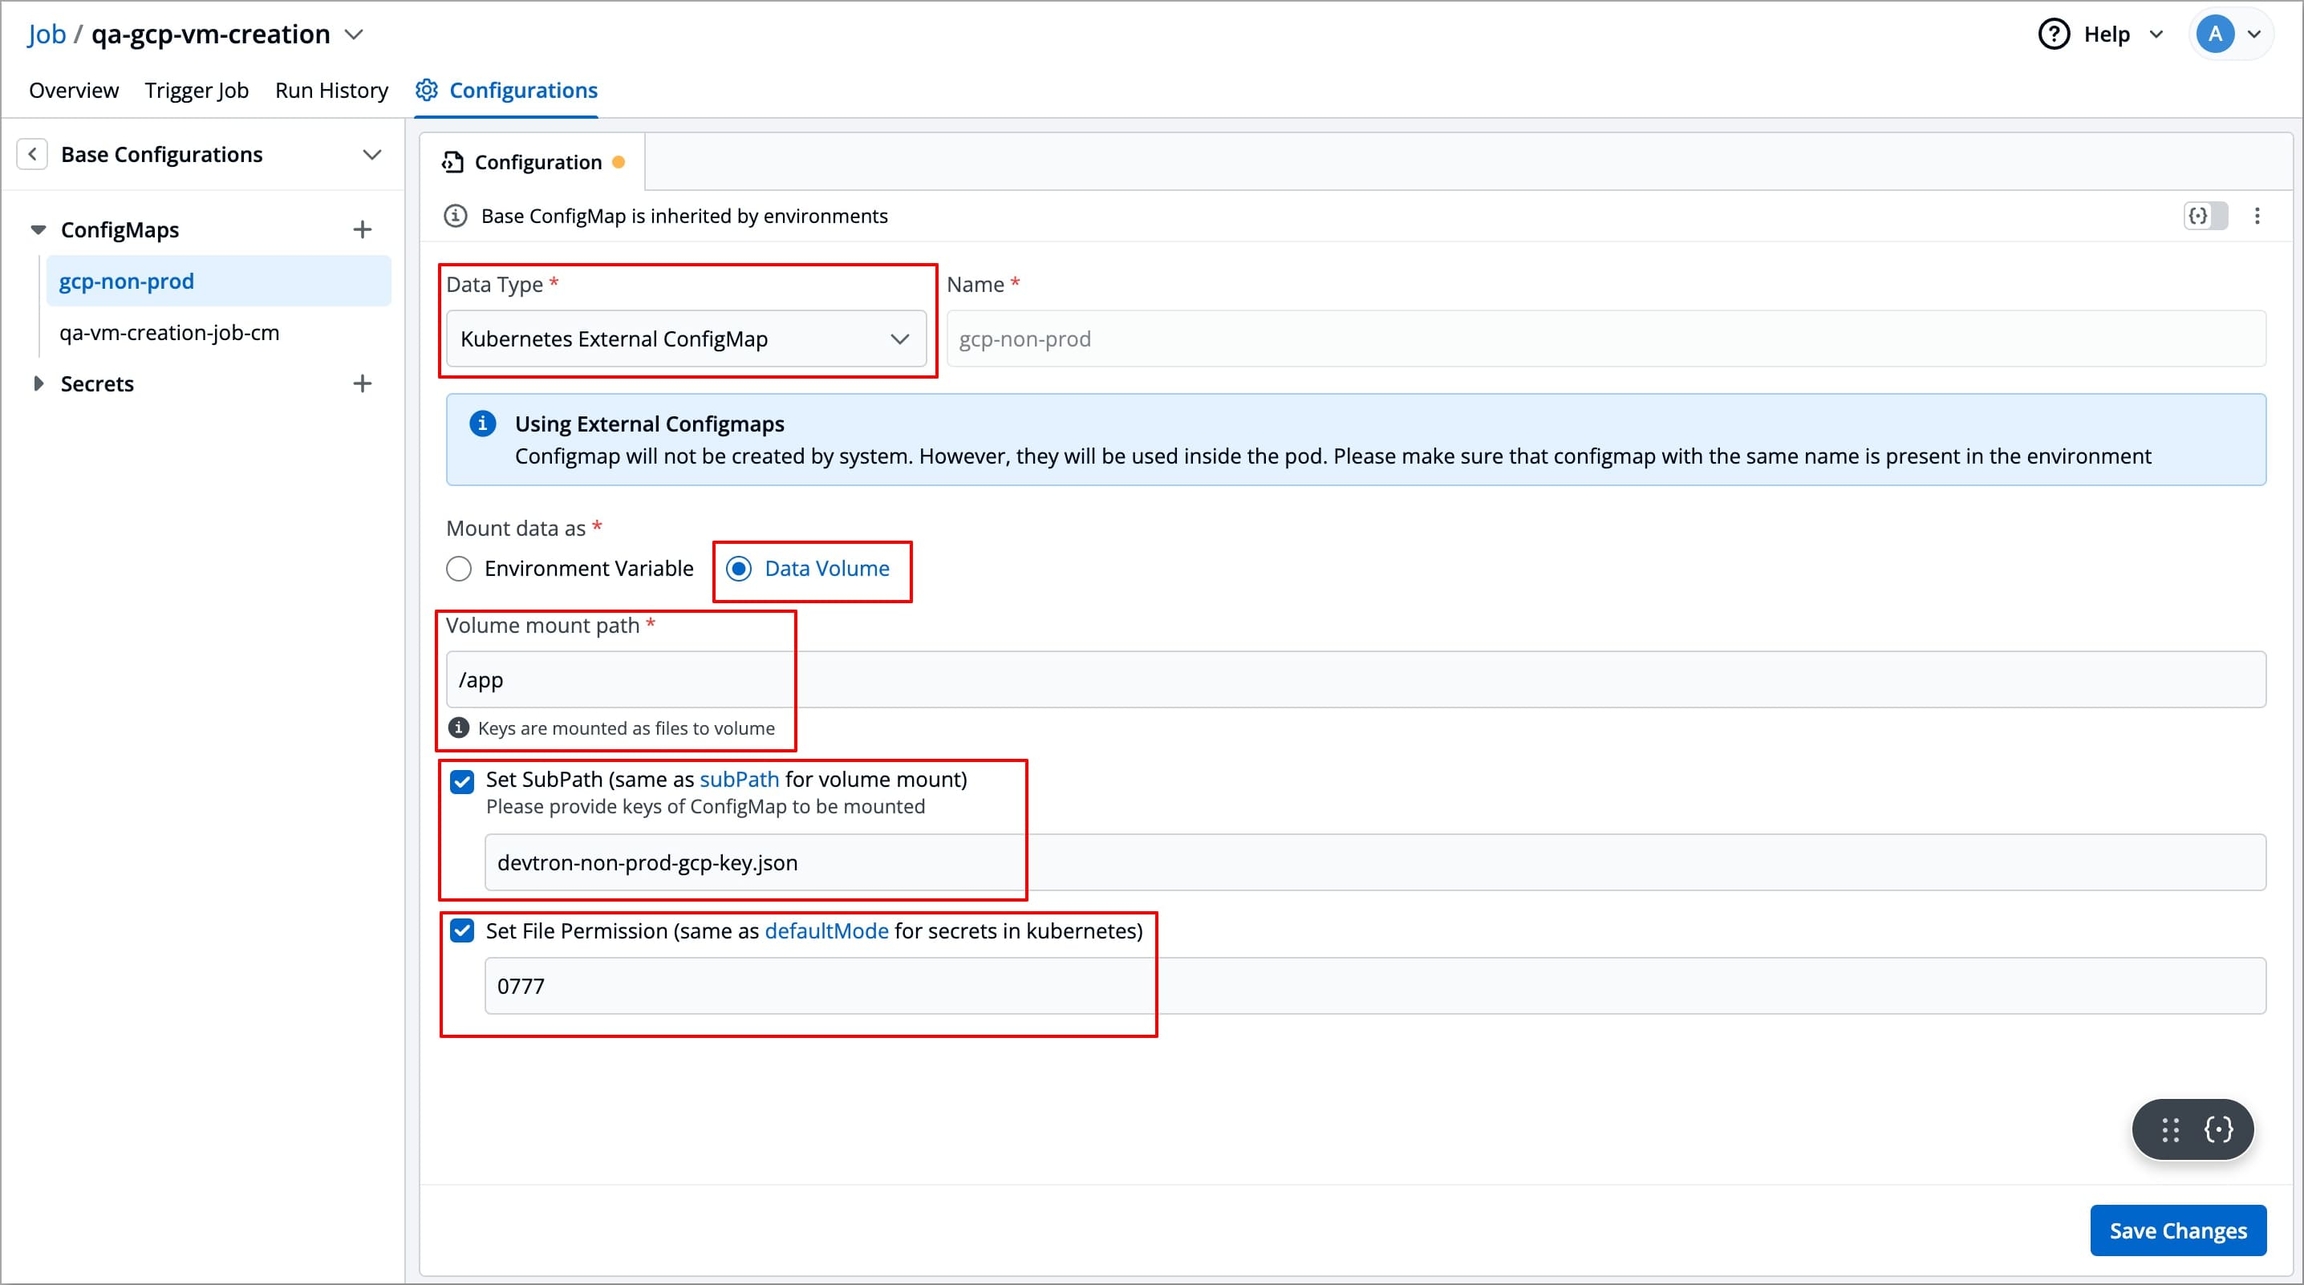
Kubernetes External ConfigMap: Select the Data Type as Kubernetes External ConfigMap if you have already created a ConfigMap using the kubectl command and want to use that in Devtron.
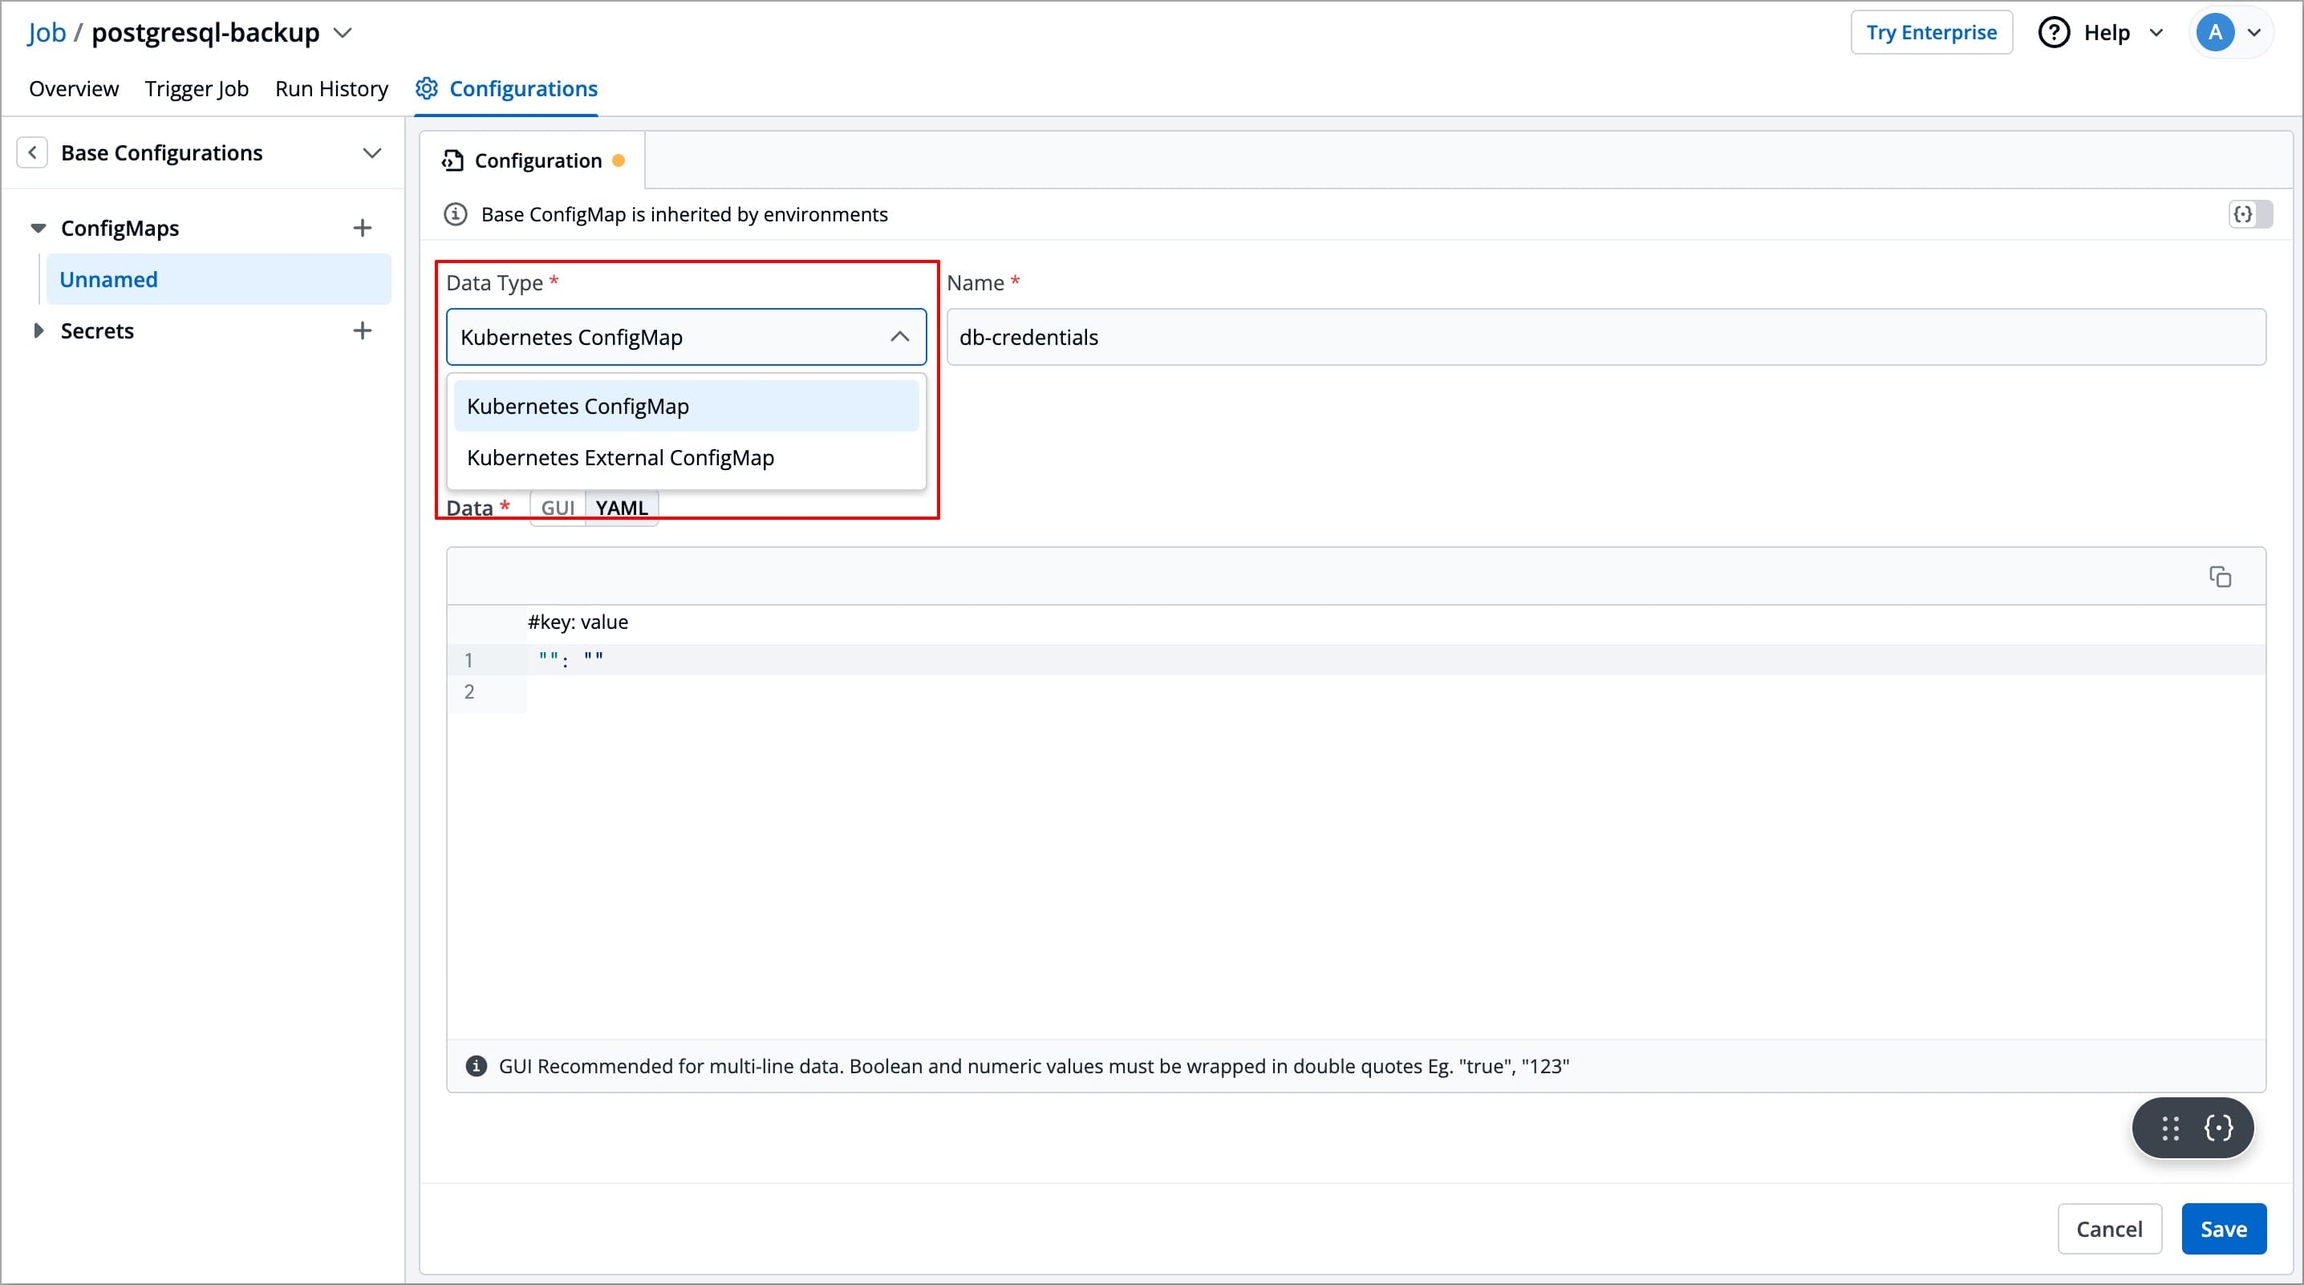
Figure 4: ConfigMap Data Type After selecting the data type, you can choose how to mount the data of your ConfigMap. Devtron allows you to mount ConfigMap Data in the following ways: Mount data as - Select how you want to mount the ConfigMap:
Environment Variable – Select this option if you want to inject Environment Variables in pods using ConfigMap.
Data Volume – Select this option if you want to configure a Data Volume that is accessible to Containers running in a pod and provide a Volume mount path. Go to Data Volume to know more.
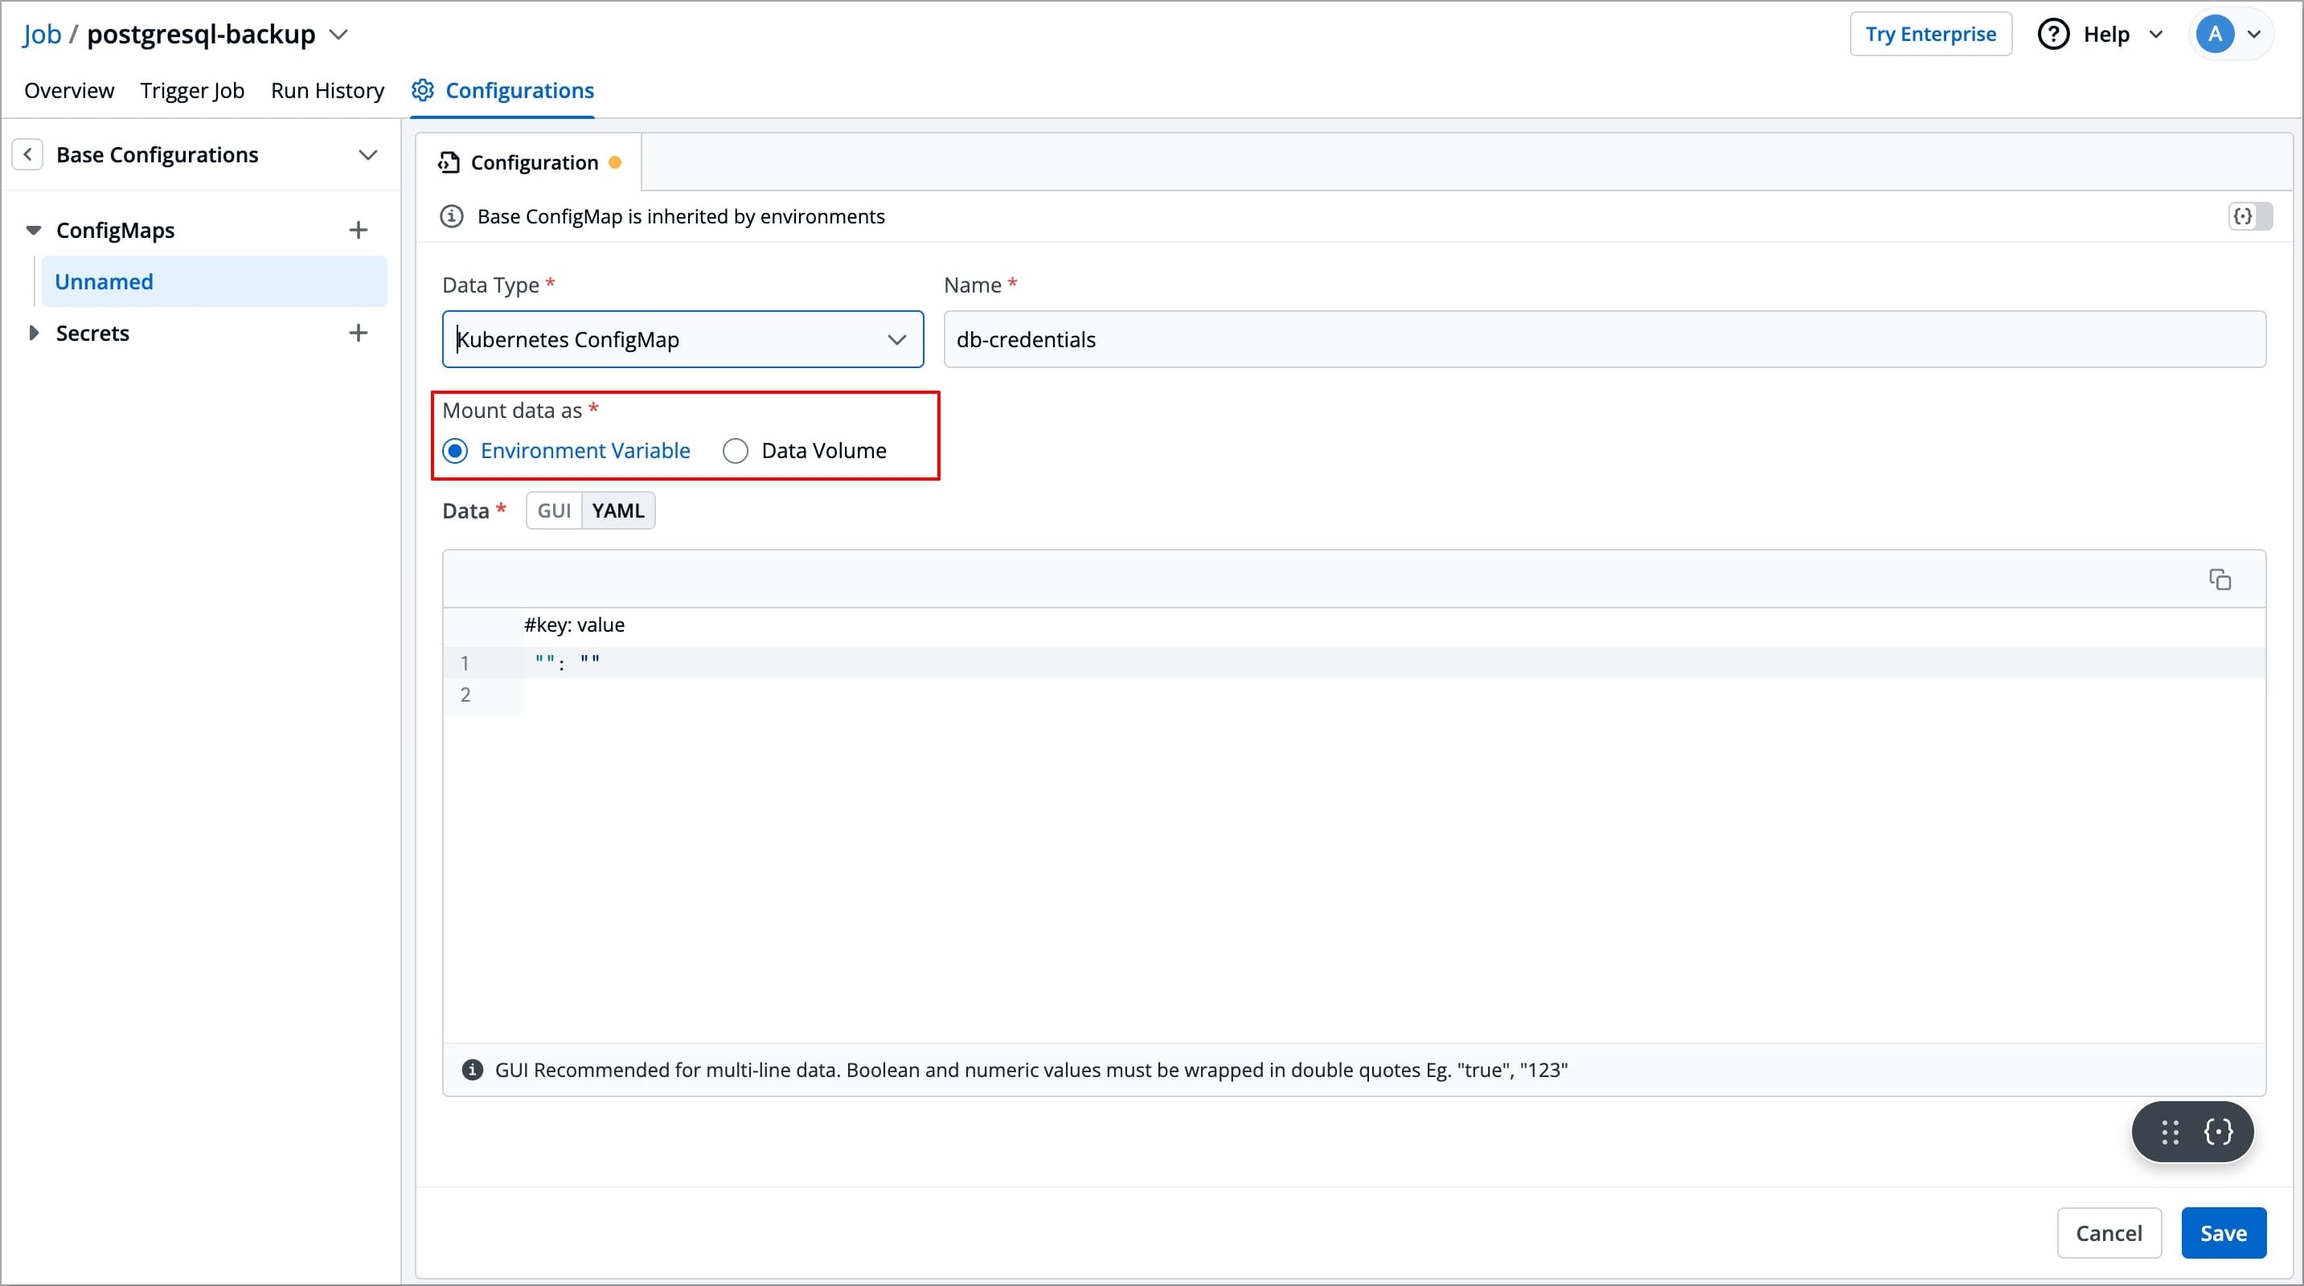
Figure 5: Mounting Data as Select Save to create a ConfigMap.
Mount Data as Environment Variables
This will pass your ConfigMap data into your Job pod as environment variables, thus making the configuration values directly accessible by your job.
For Kubernetes ConfigMap
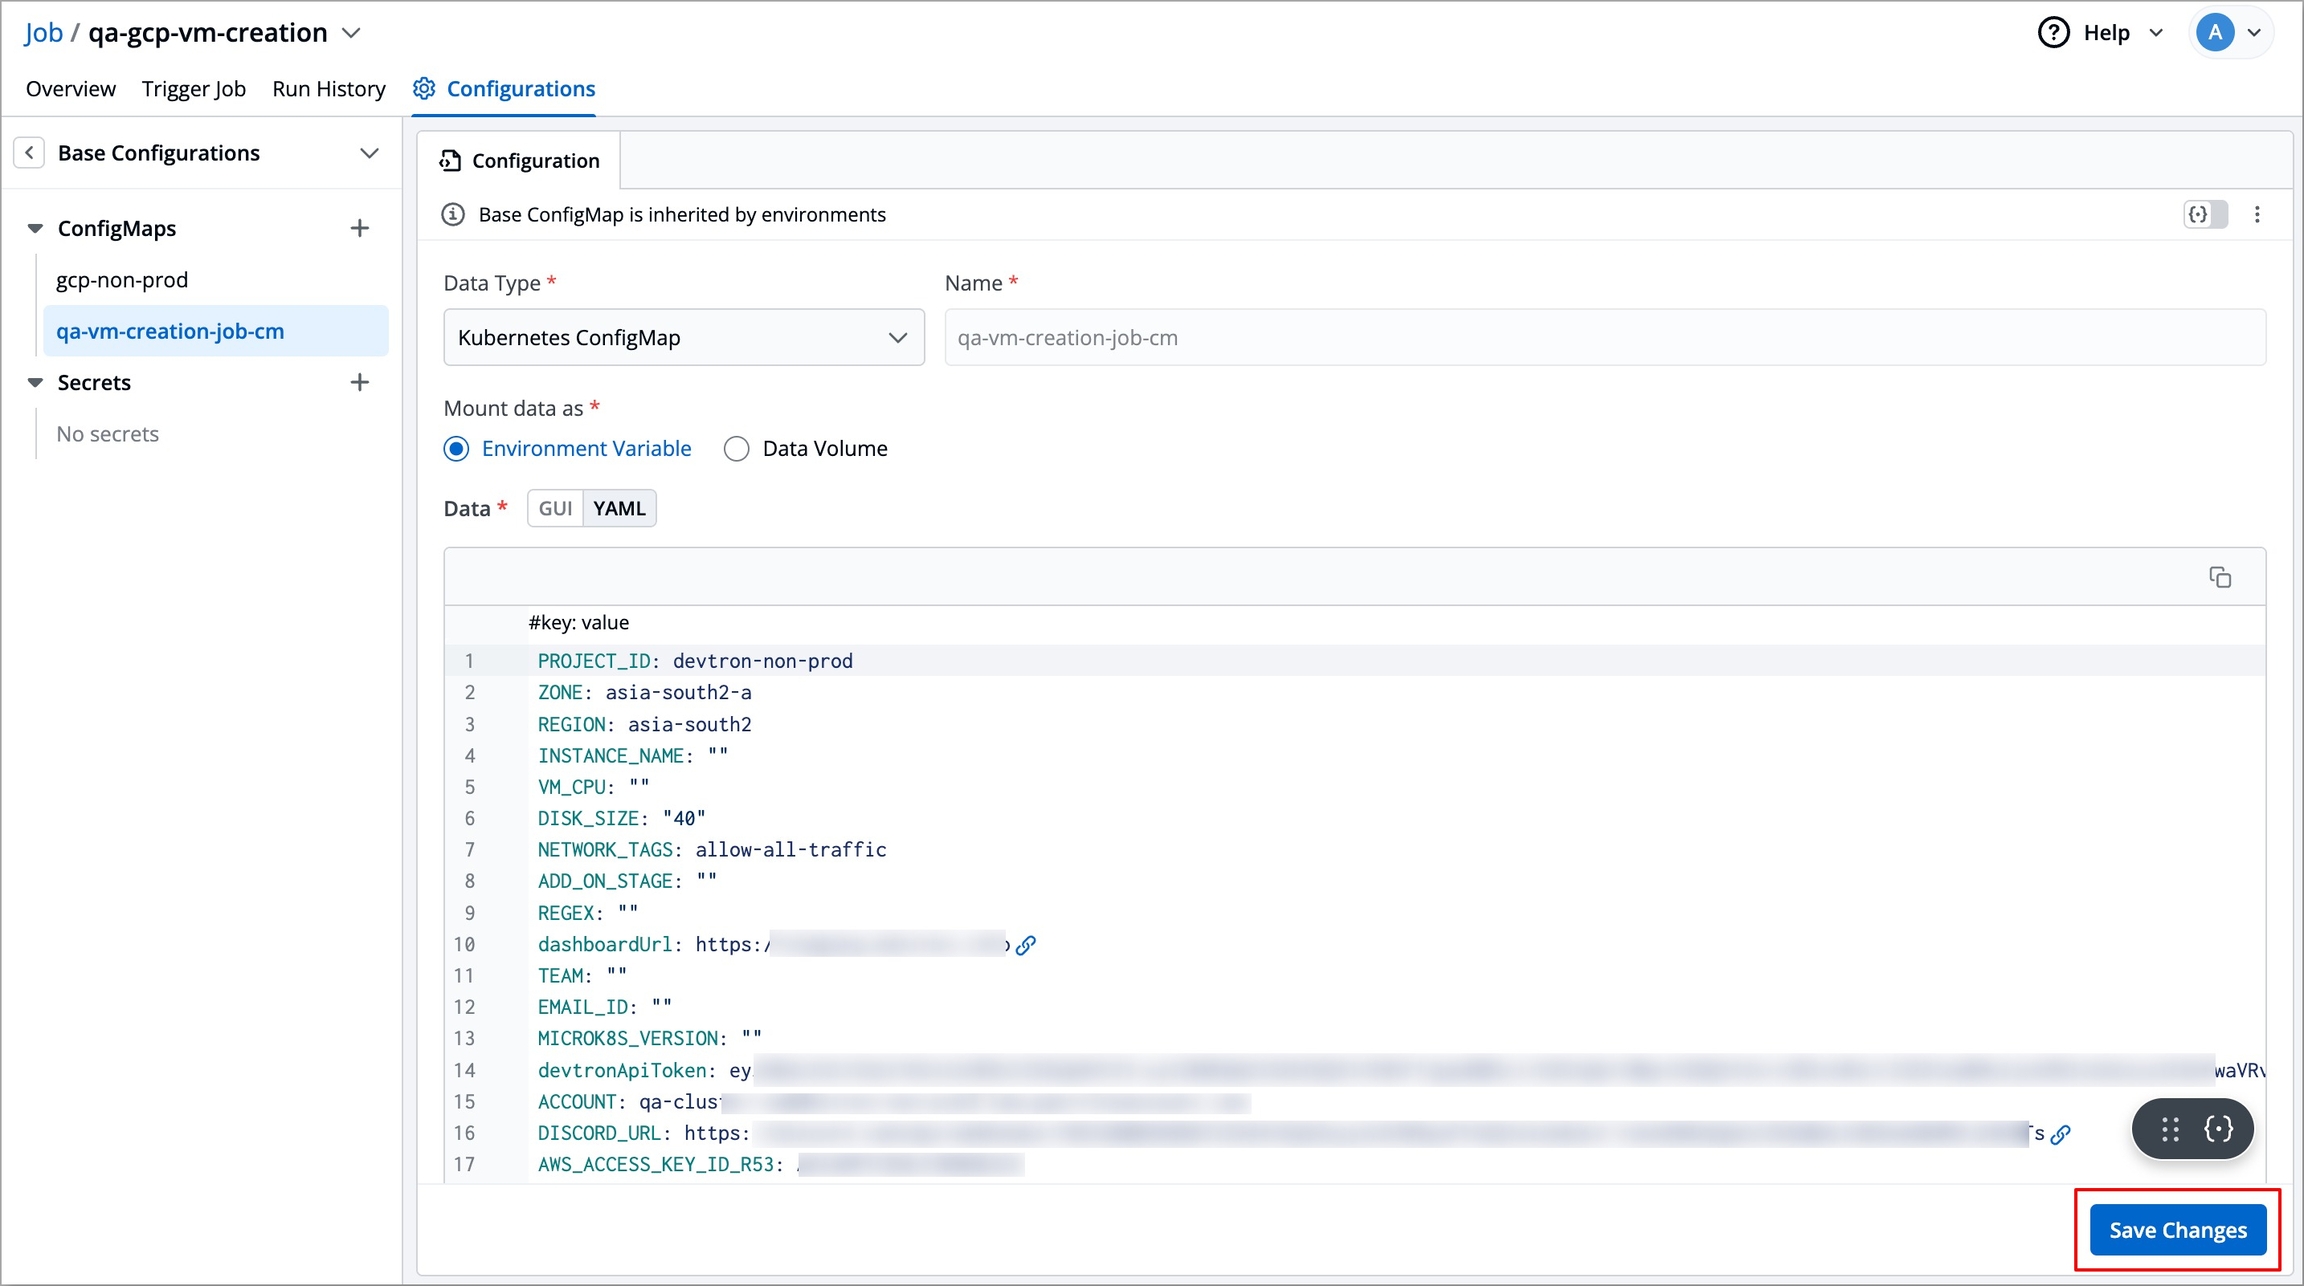
If you have selected Data type as Kubernetes ConfigMap and mount data as Environment Variable, then you also need to enter the required data (key-value pairs) in the Data field
Enter data in:
GUI mode – User-friendly interface. Click the +Add button and enter the Key and Value fields without quotes.
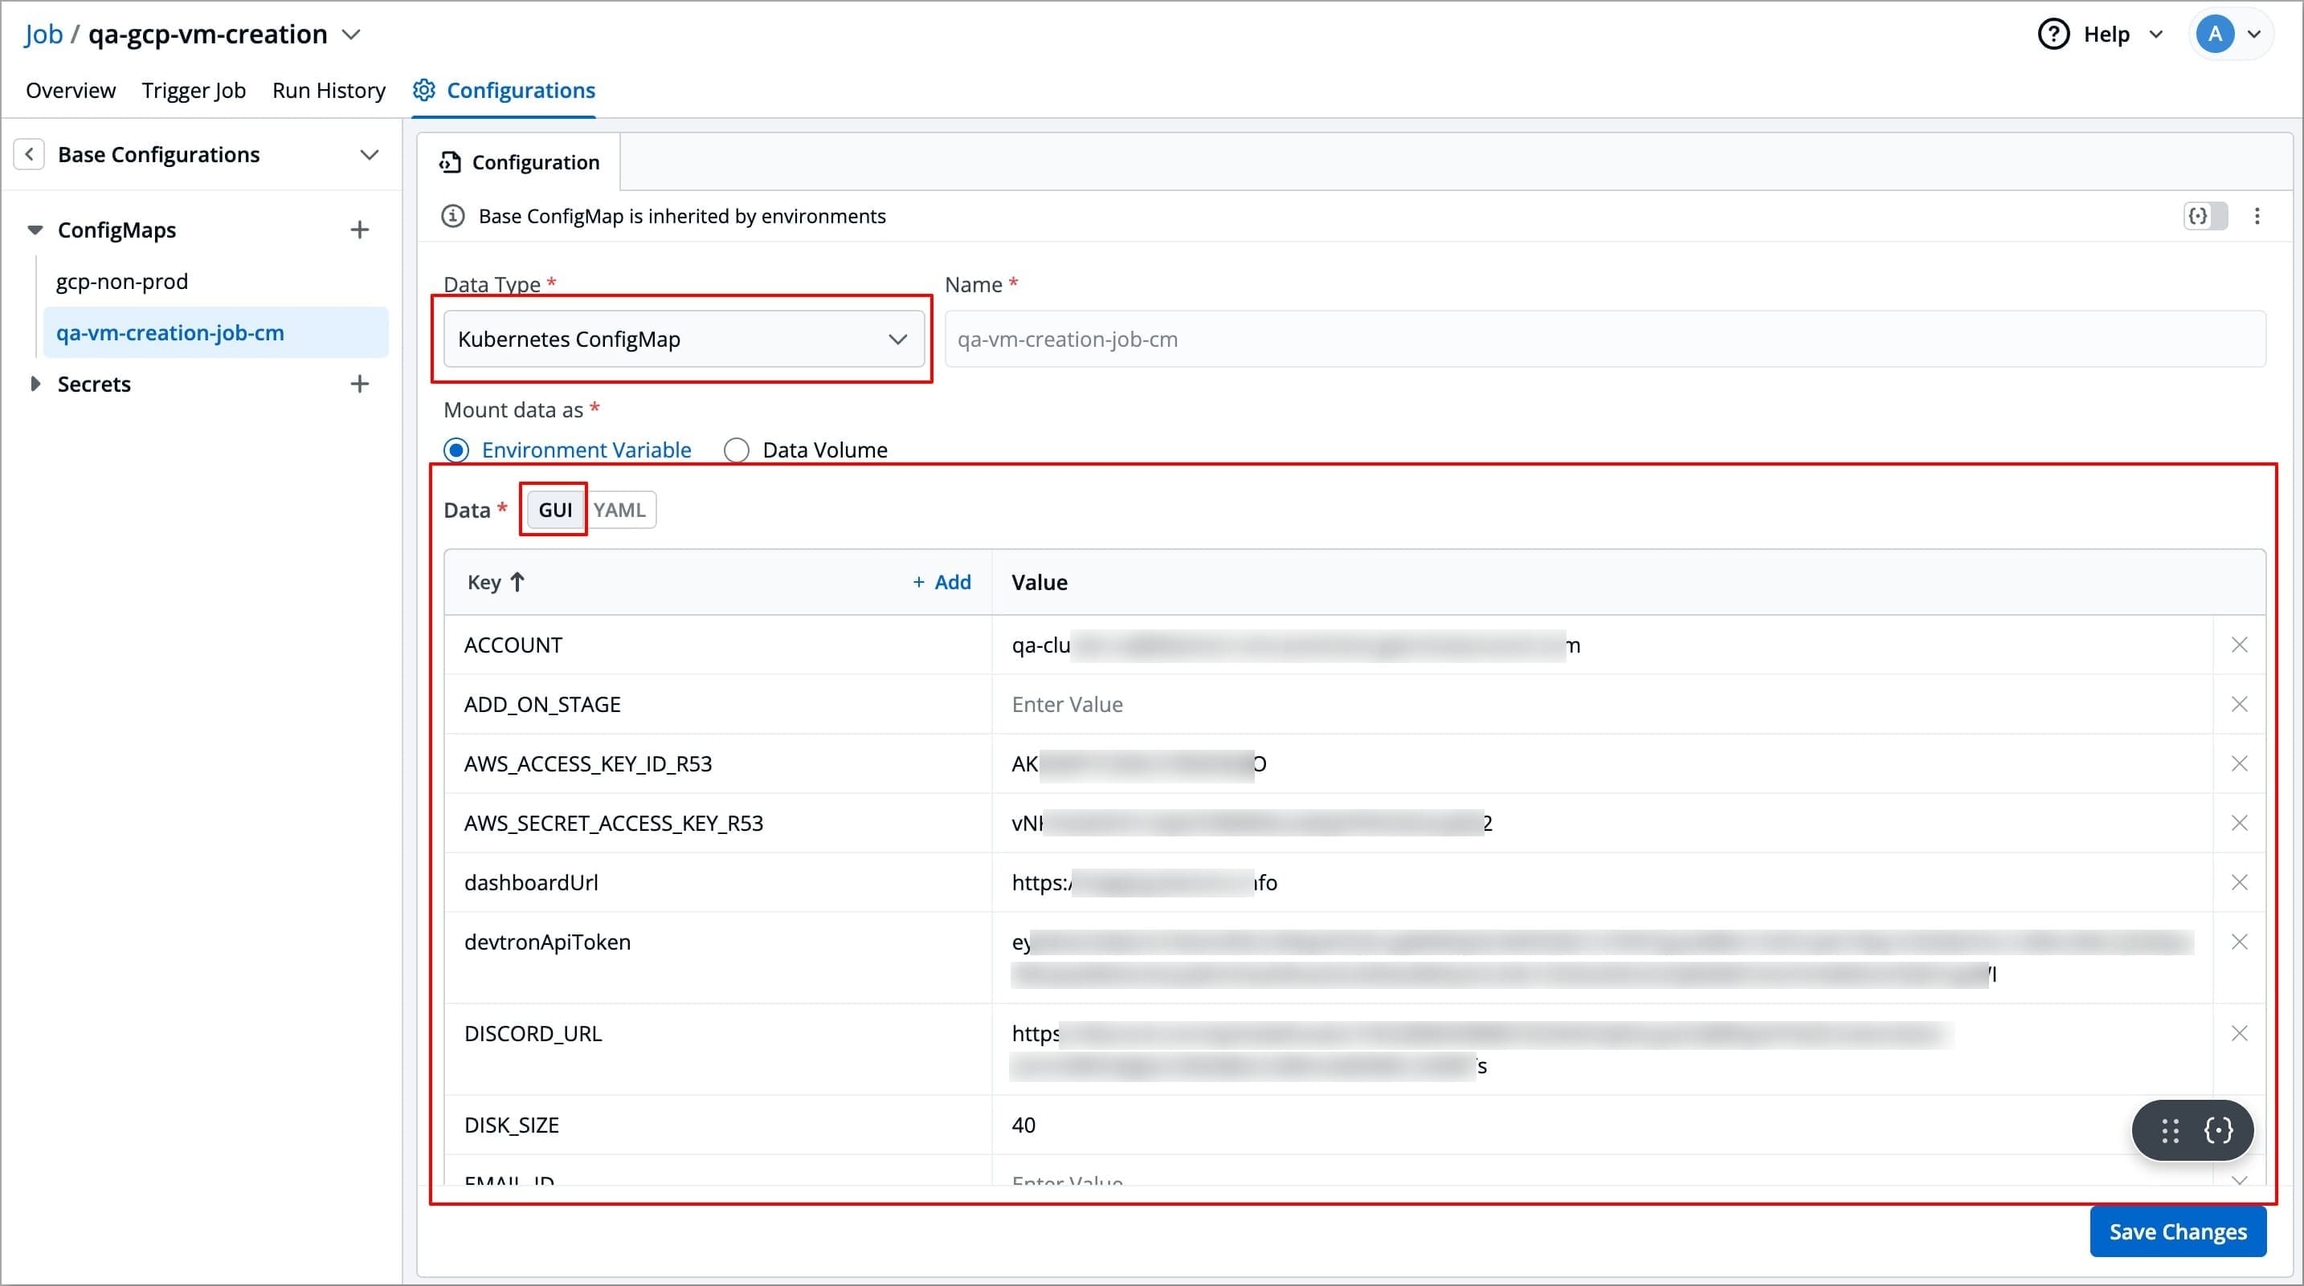
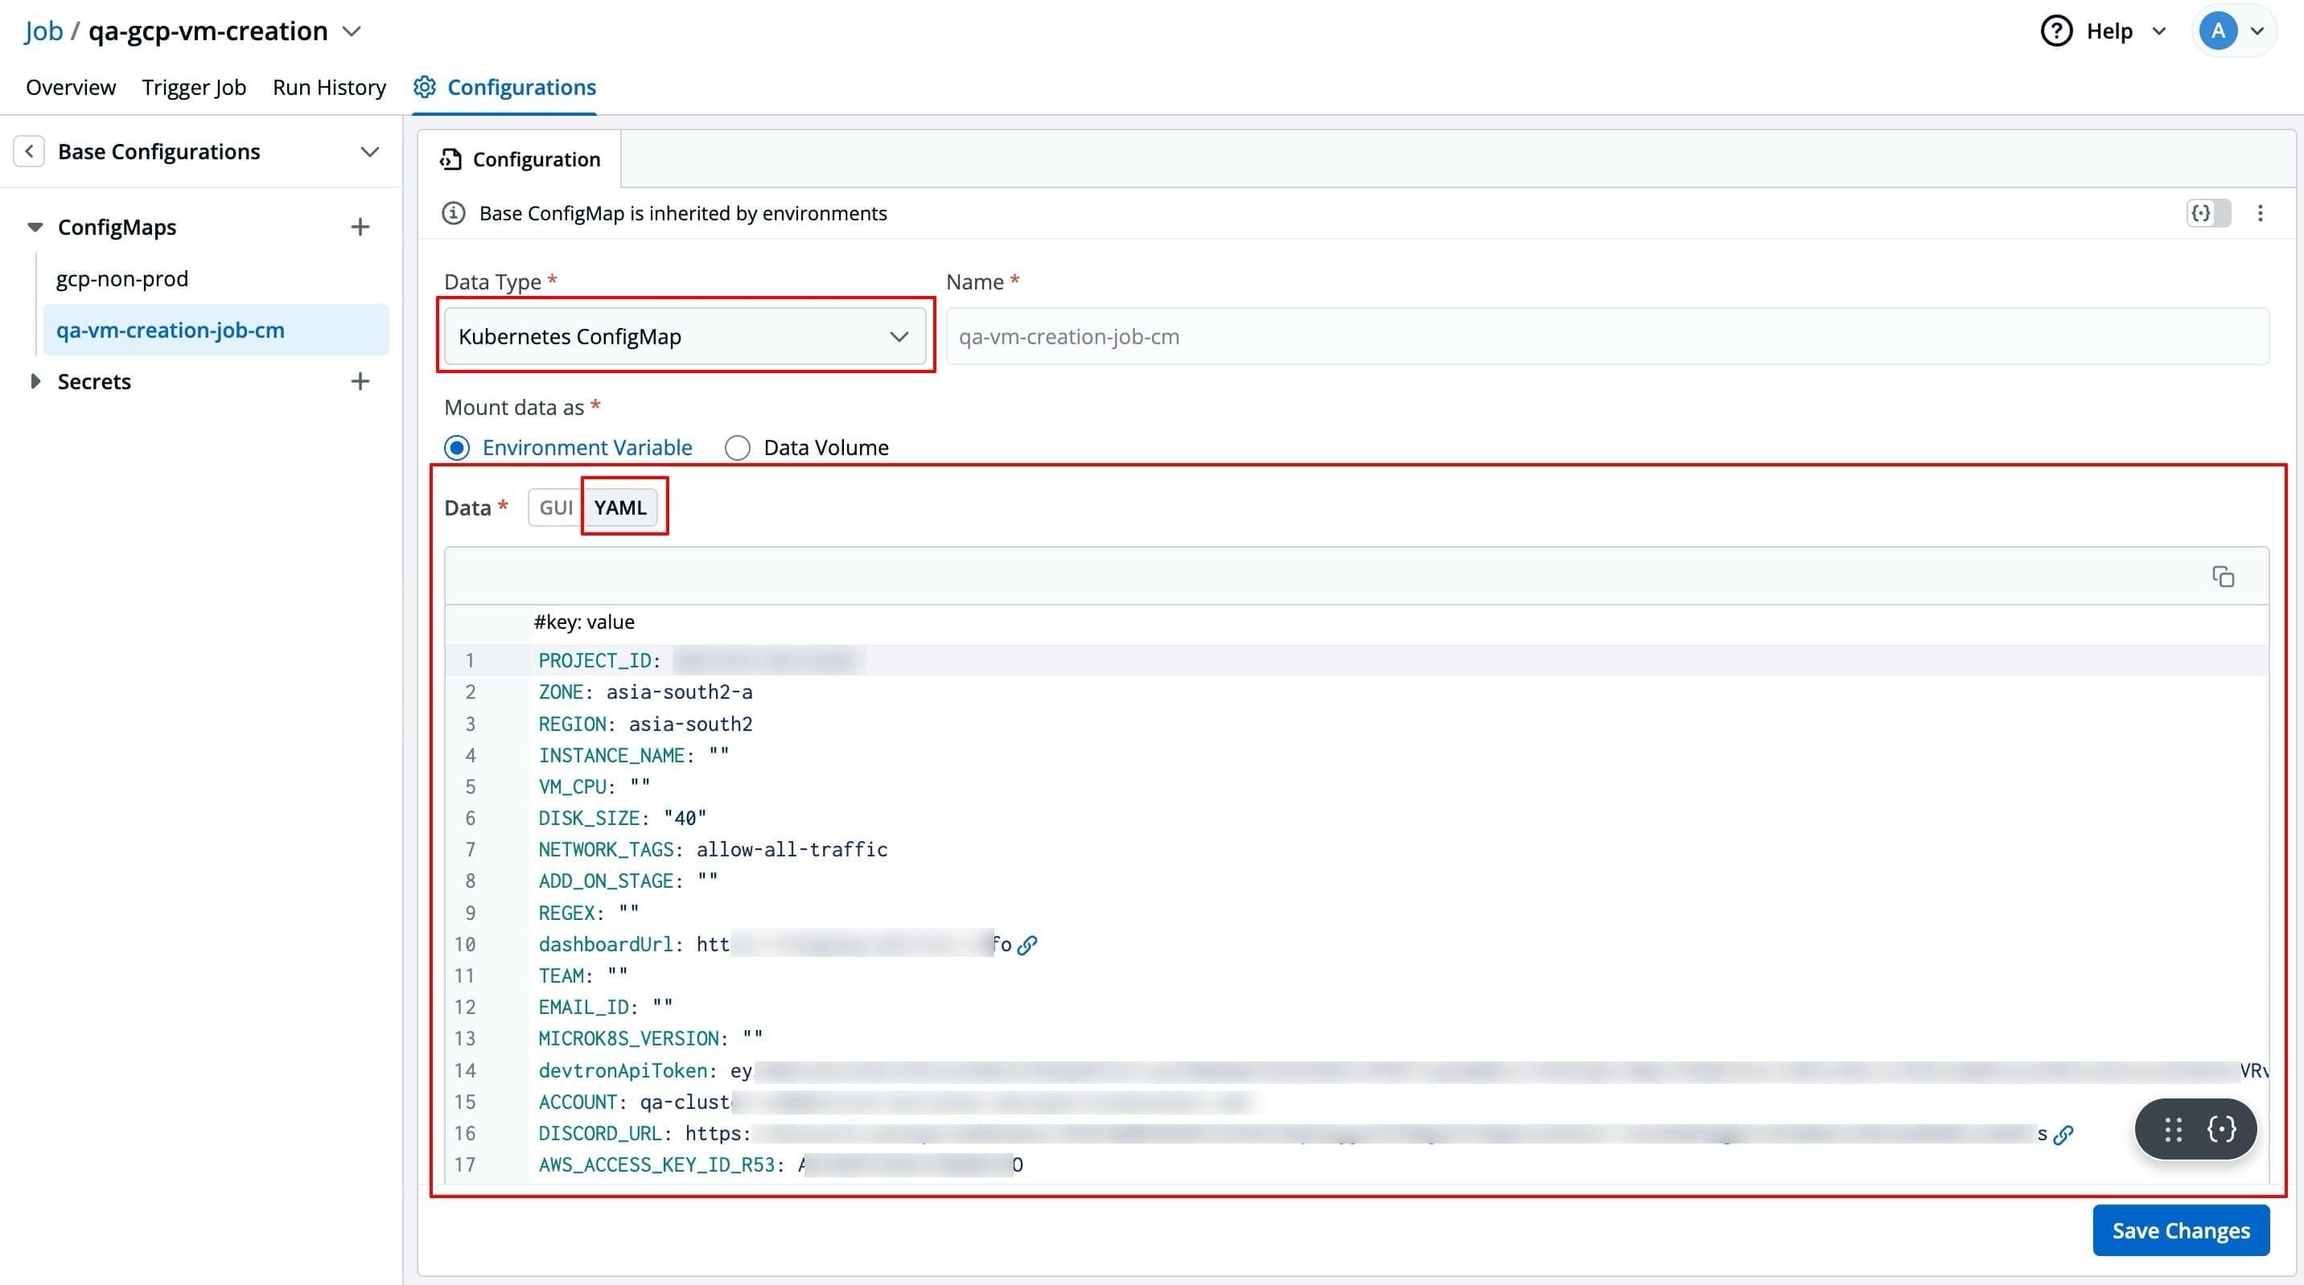
YAML mode – Raw YAML for entering key-value pairs in the format
key: value. Boolean and numeric values must be wrapped in double quotes.
For Kubernetes External ConfigMap
If you have selected Data type as Kubernetes External ConfigMap, then no data is required, as devtron will fetch the external ConfigMap data and use it to create a ConfigMap.
Mount Data as Data Volume
This option allows you to create a ConfigMap by passing the content of a file. The content could be plain text, json, yaml, bash script, etc.
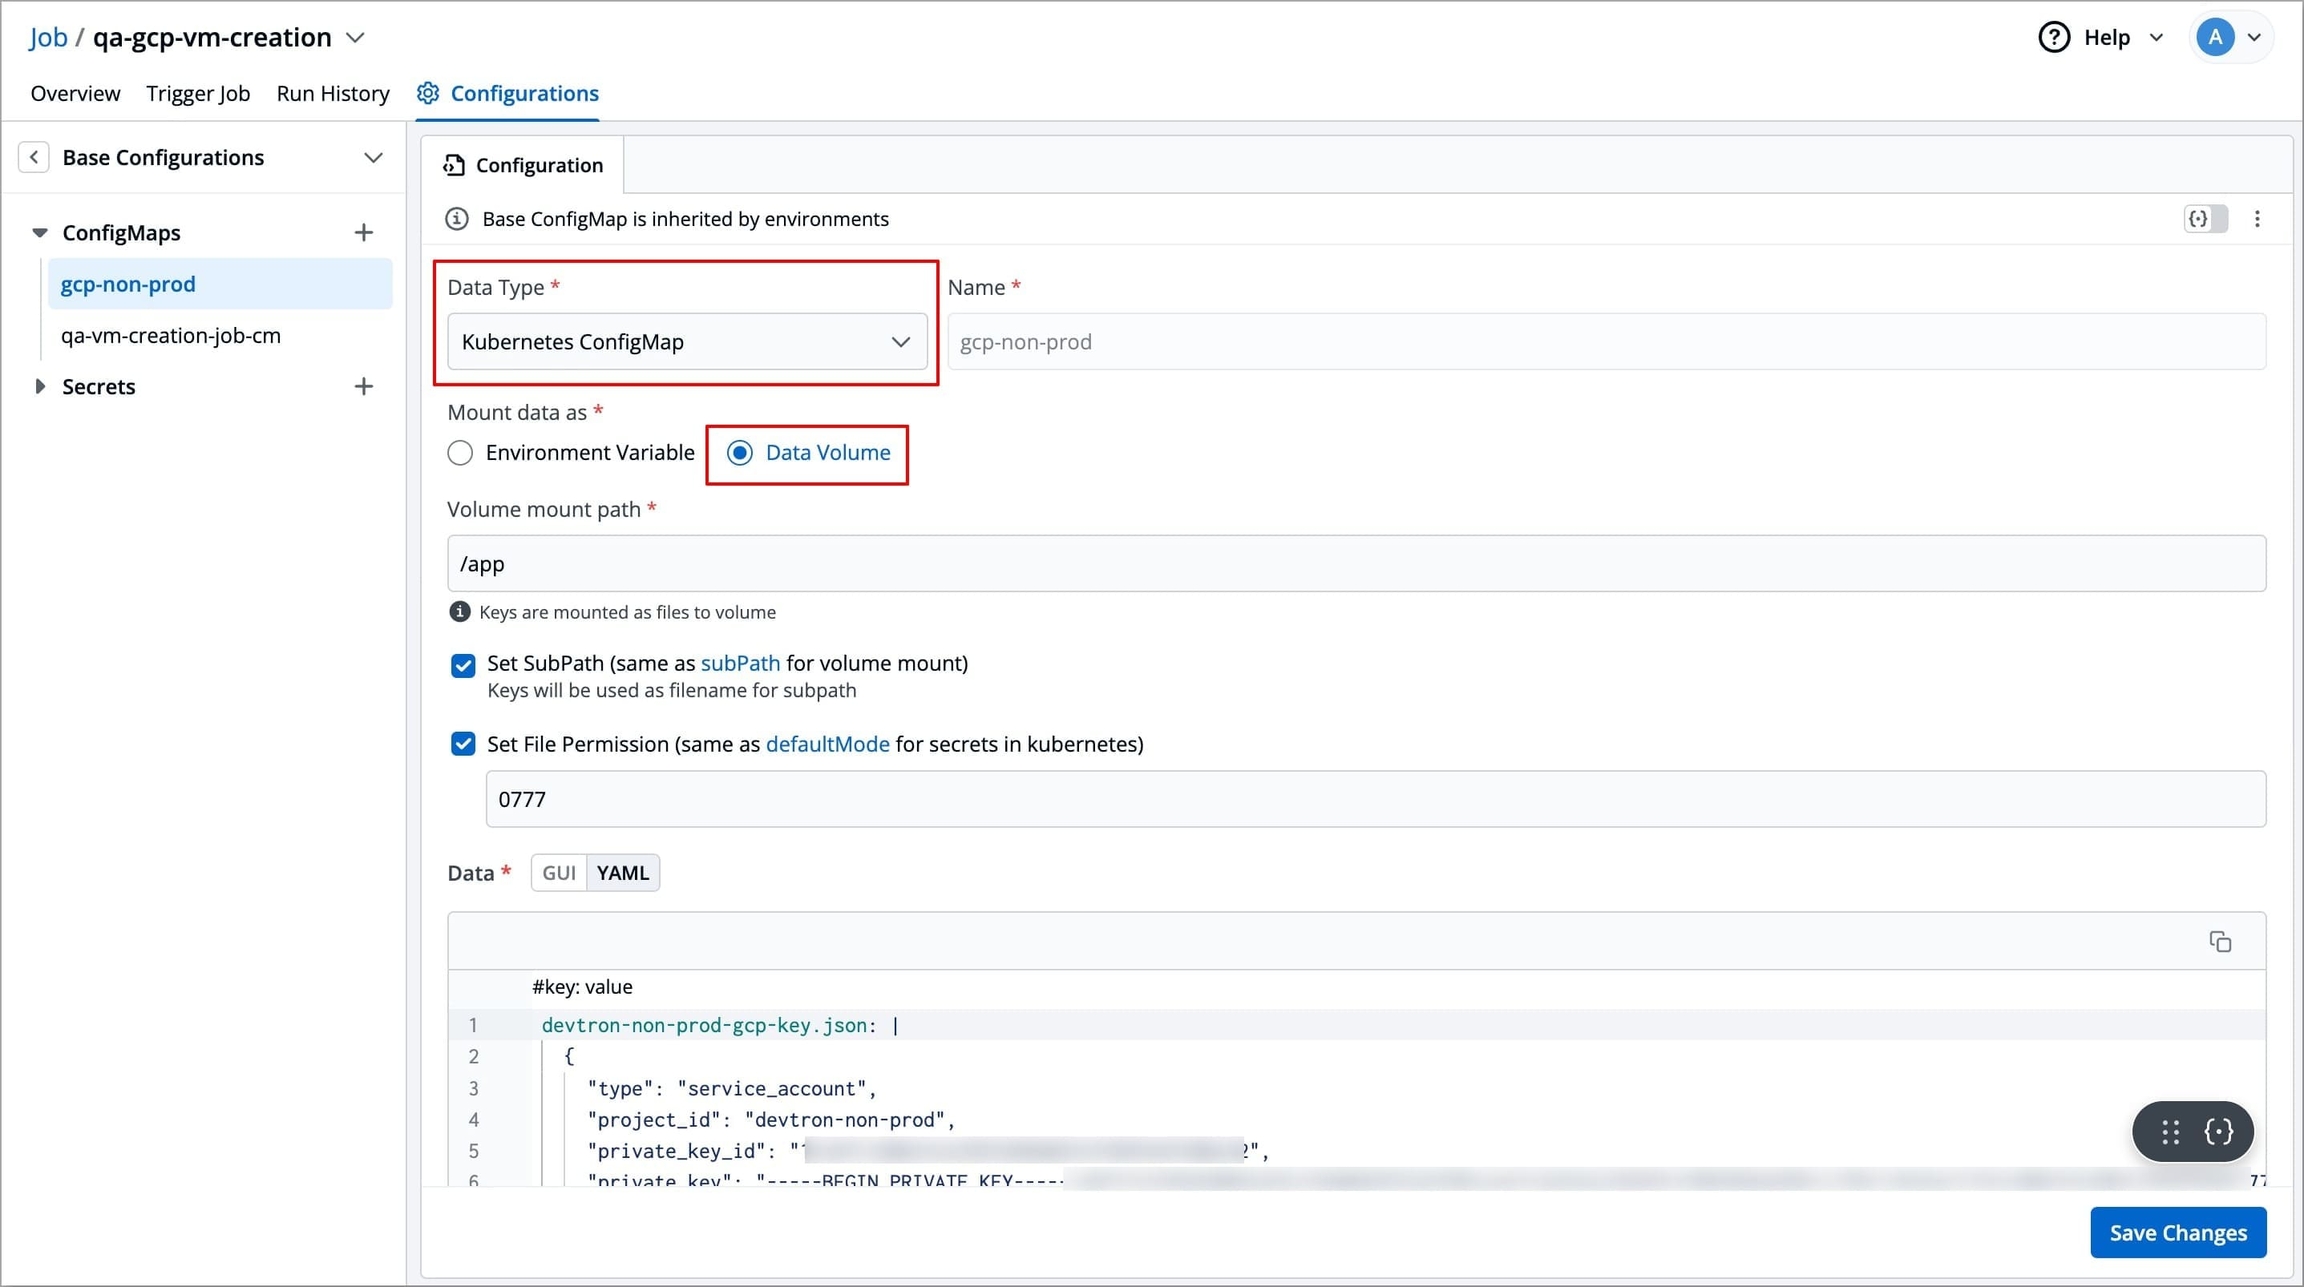
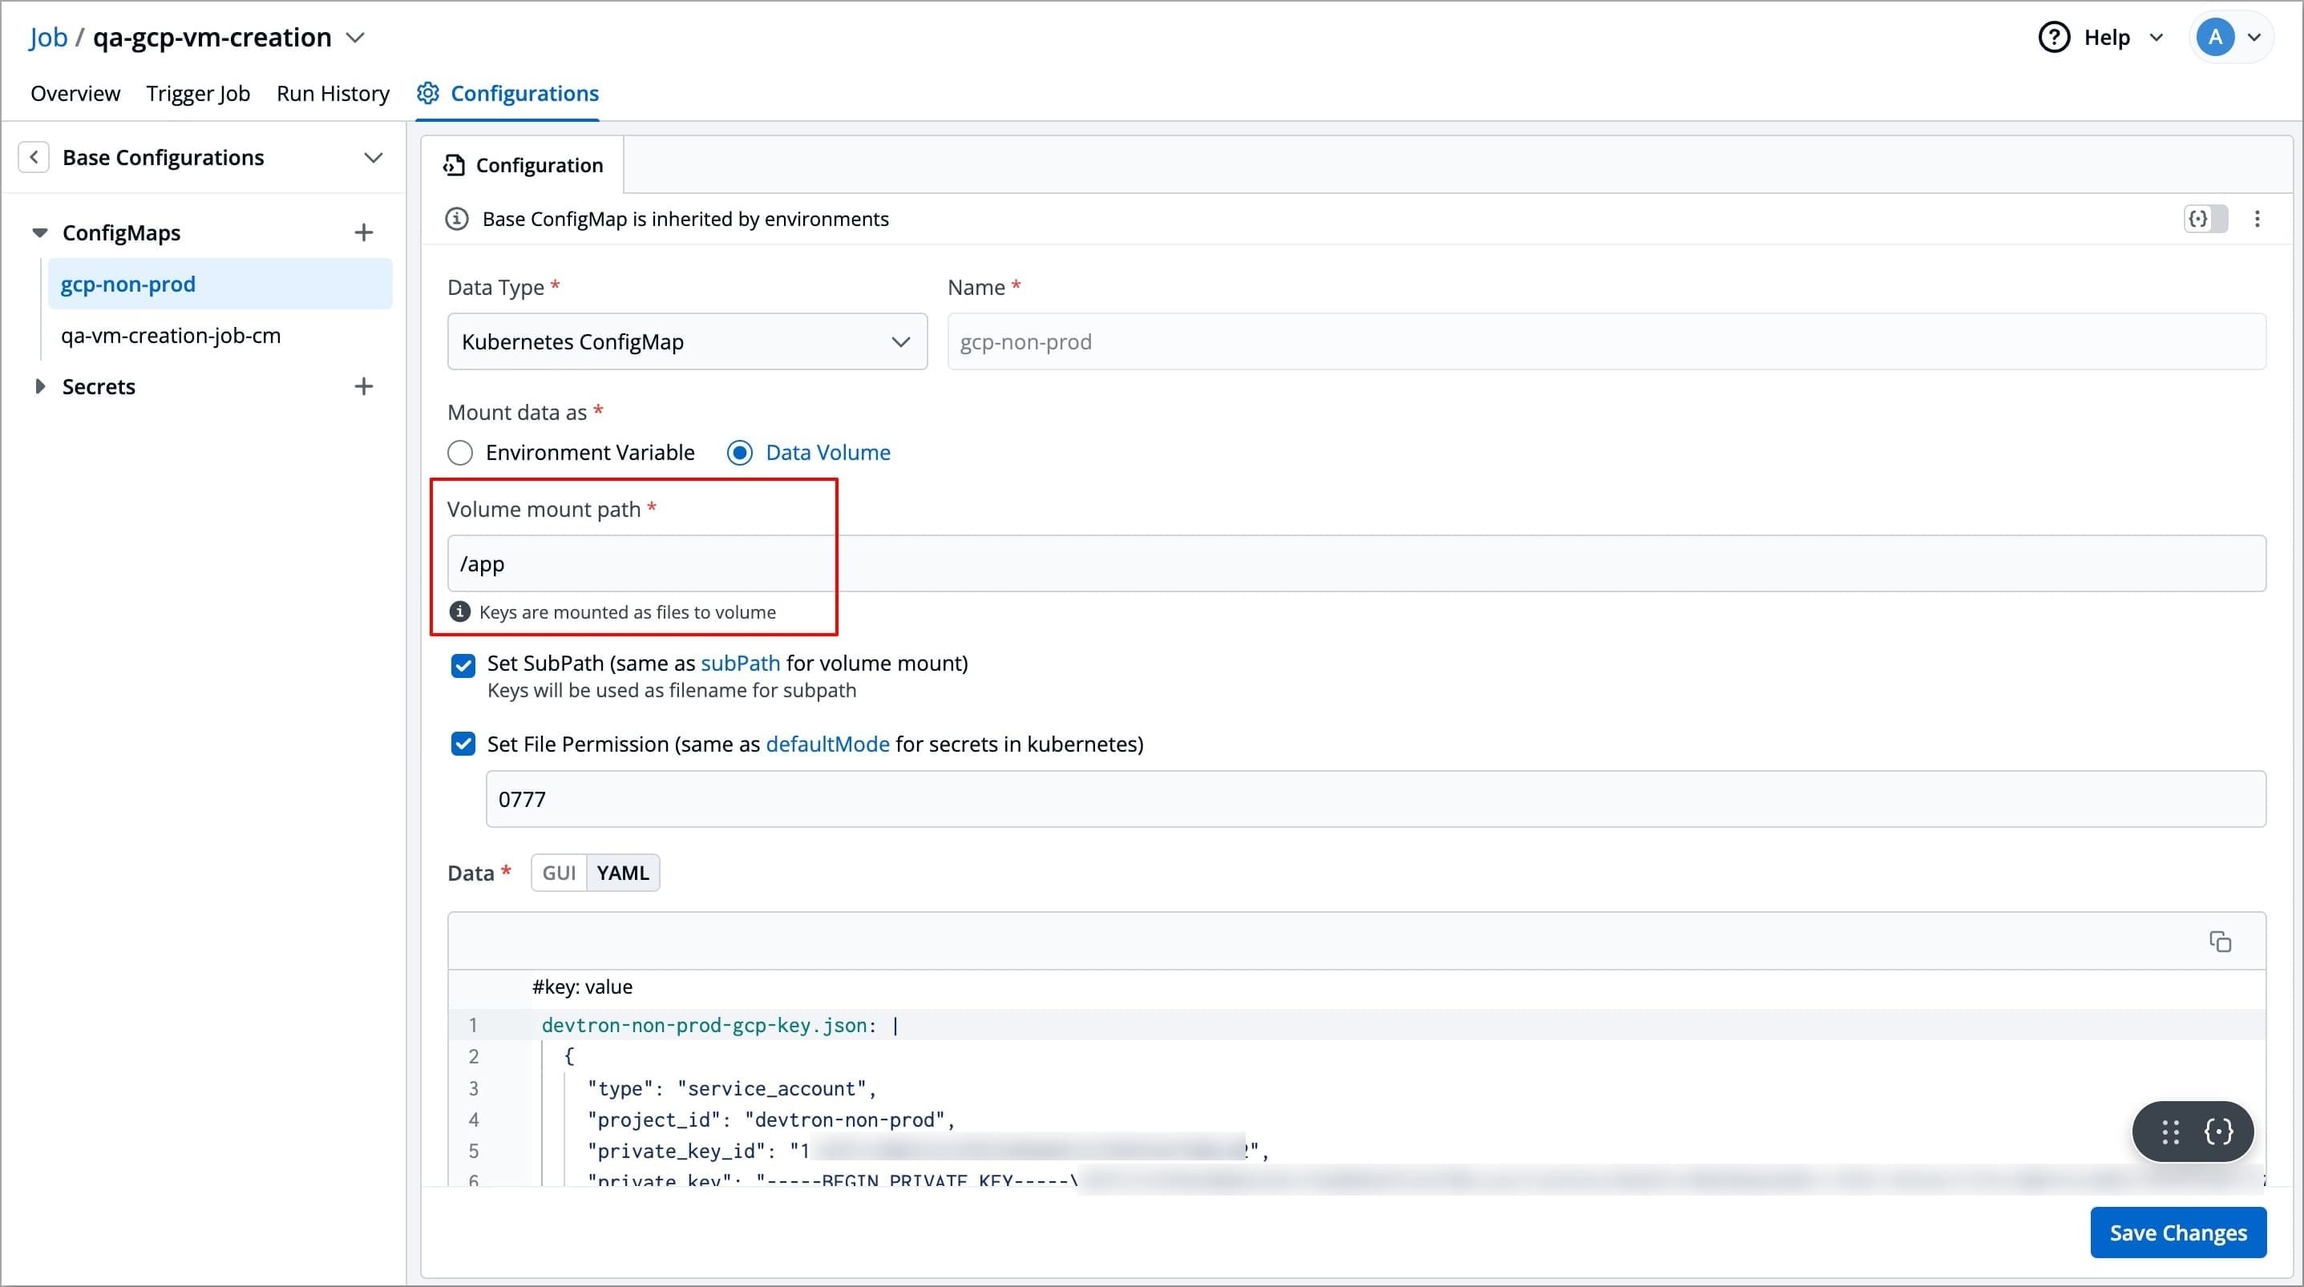
Volume Mount Path
Enter the folder path where the data volume should be mounted for it to be accessible to the containers running in a pod. Your keys will be mounted as files to that volume.
Set Sub Path
When mounting multiple files to the same location, you can use the Set Sub Path option to control how the files are handled. This setting allows you to control whether existing files are overwritten or preserved when mounting new files.
If Set Sub Path is enabled, the system will preserve existing files in the specified path and append the new file using the file name as a sub-path.
If Set Sub Path is disabled (unchecked), the system will delete any files already present in the specified path and then mount the new files.

Note
In case of Kubernetes ConfigMap, all keys will be mounted as files on the specified path. In case of Kubernetes External ConfigMap, manually specify the keys that should be mounted as files.
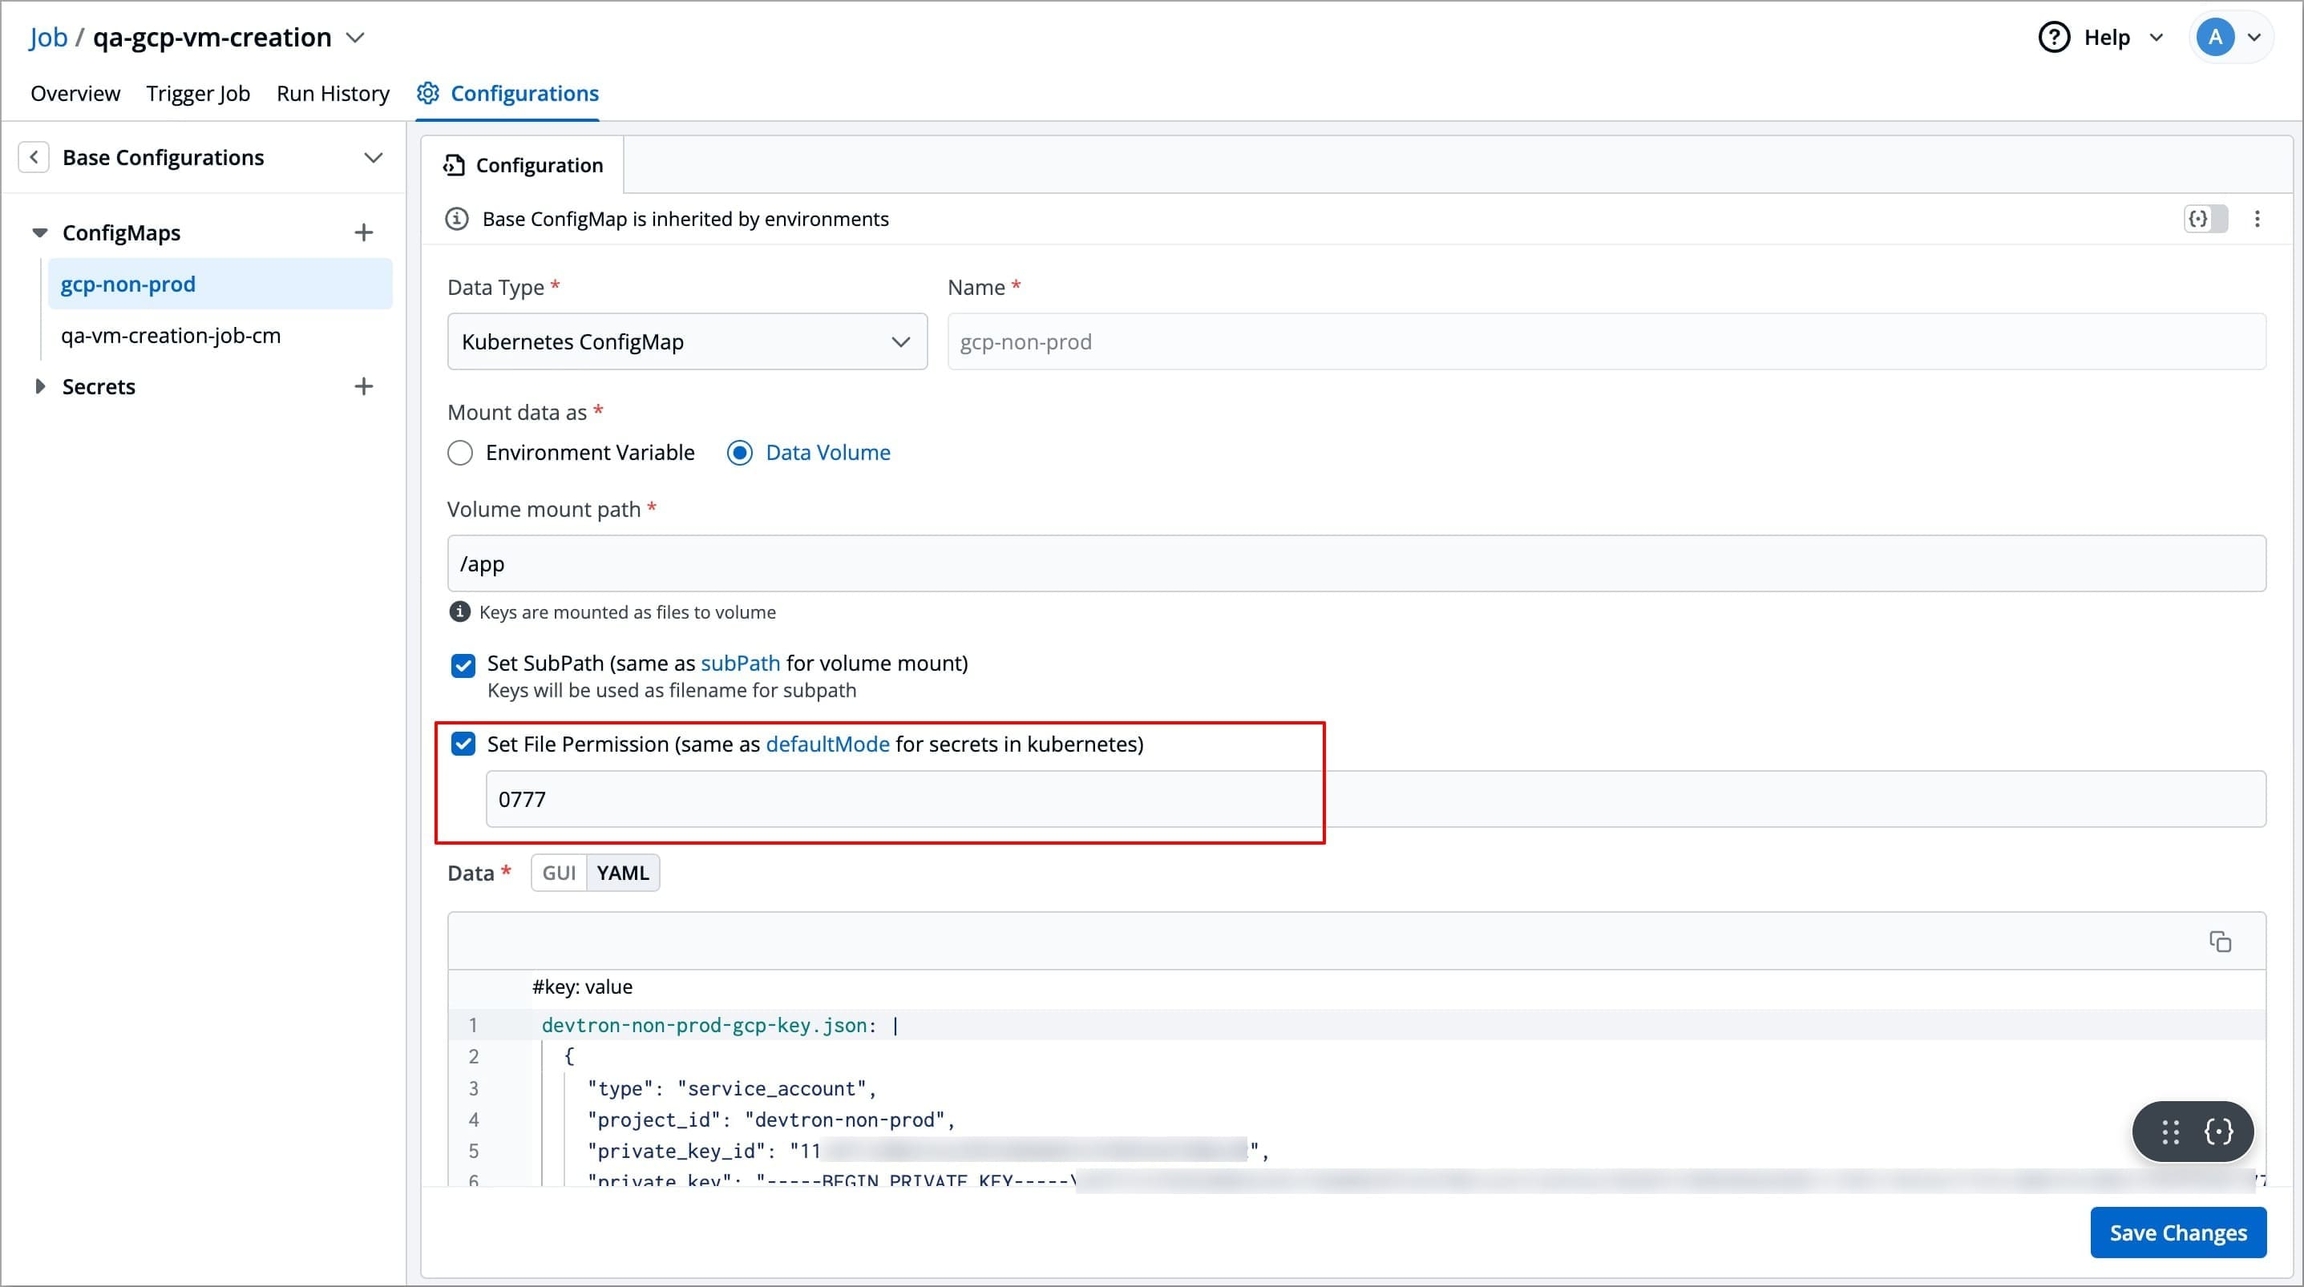
Set File Permission
The Set File Permission option applies permissions at the ConfigMap level, not to individual keys within the ConfigMap. Enabling this option will let you enter a 3-digit standard permission value to control access to the file.
The 3-digit numeric value represents the permission settings for the file:
First digit: Owner permissions (user).
Second digit: Group permissions.
Third digit: Other users' permissions.
Permission
Description
r (read)
Grants the ability to read the file.
w (write)
Grants the ability to modify the file.
x (execute)
Grants the ability to execute the file as a program.
For example, 755 means:
Owner can read, write, and execute (7),
Group can read and execute (5),
Others can read and execute (5).
Data
For Kubernetes ConfigMap
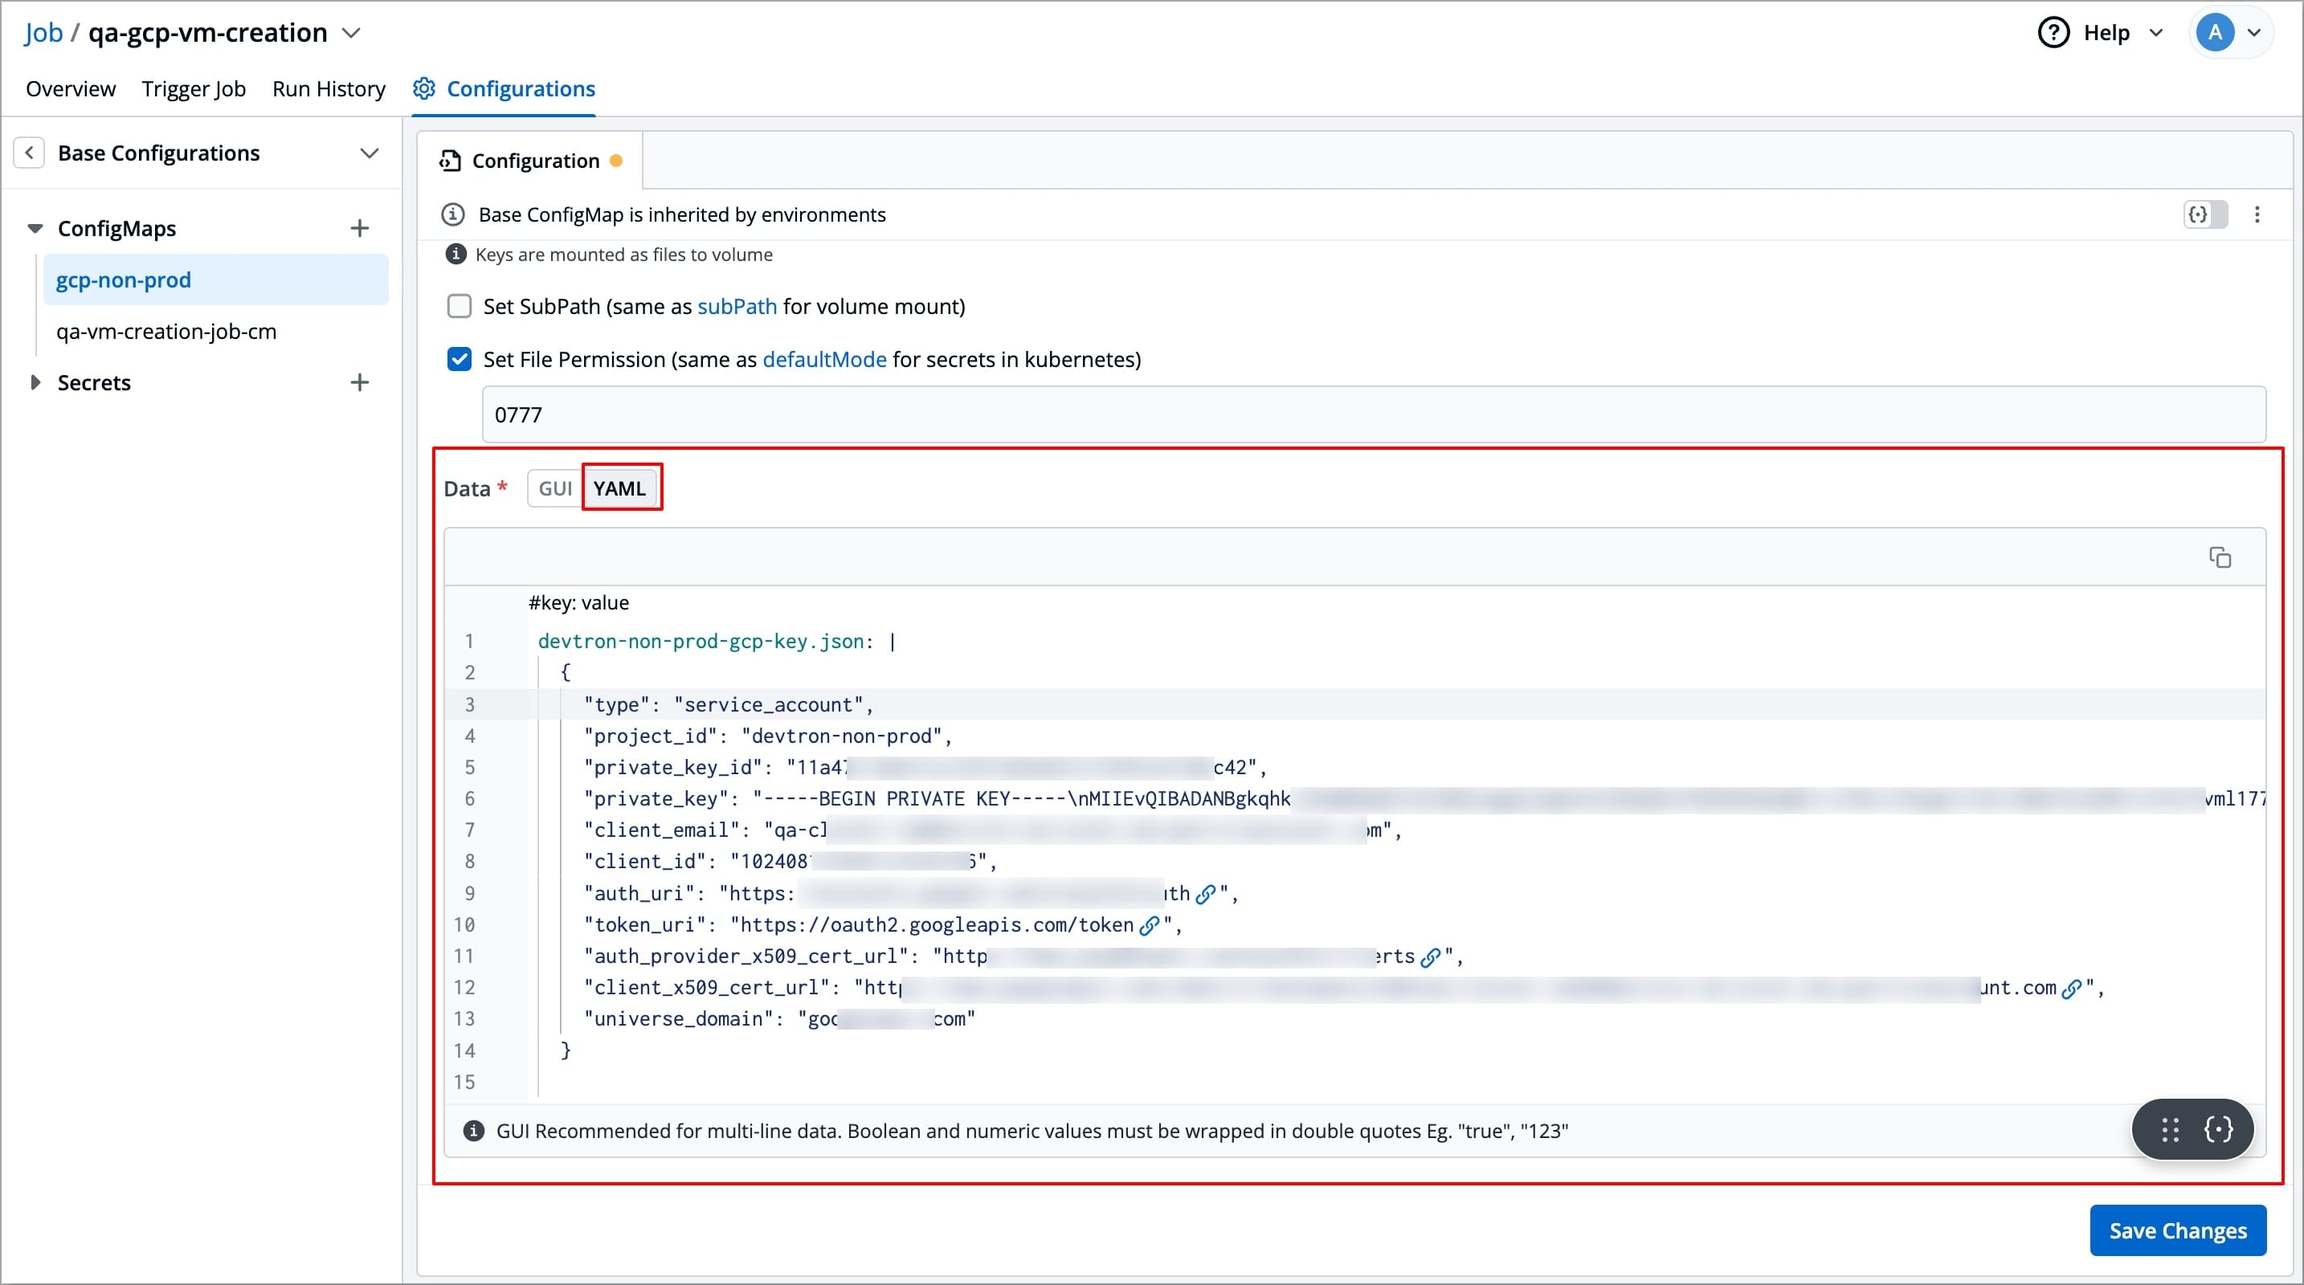
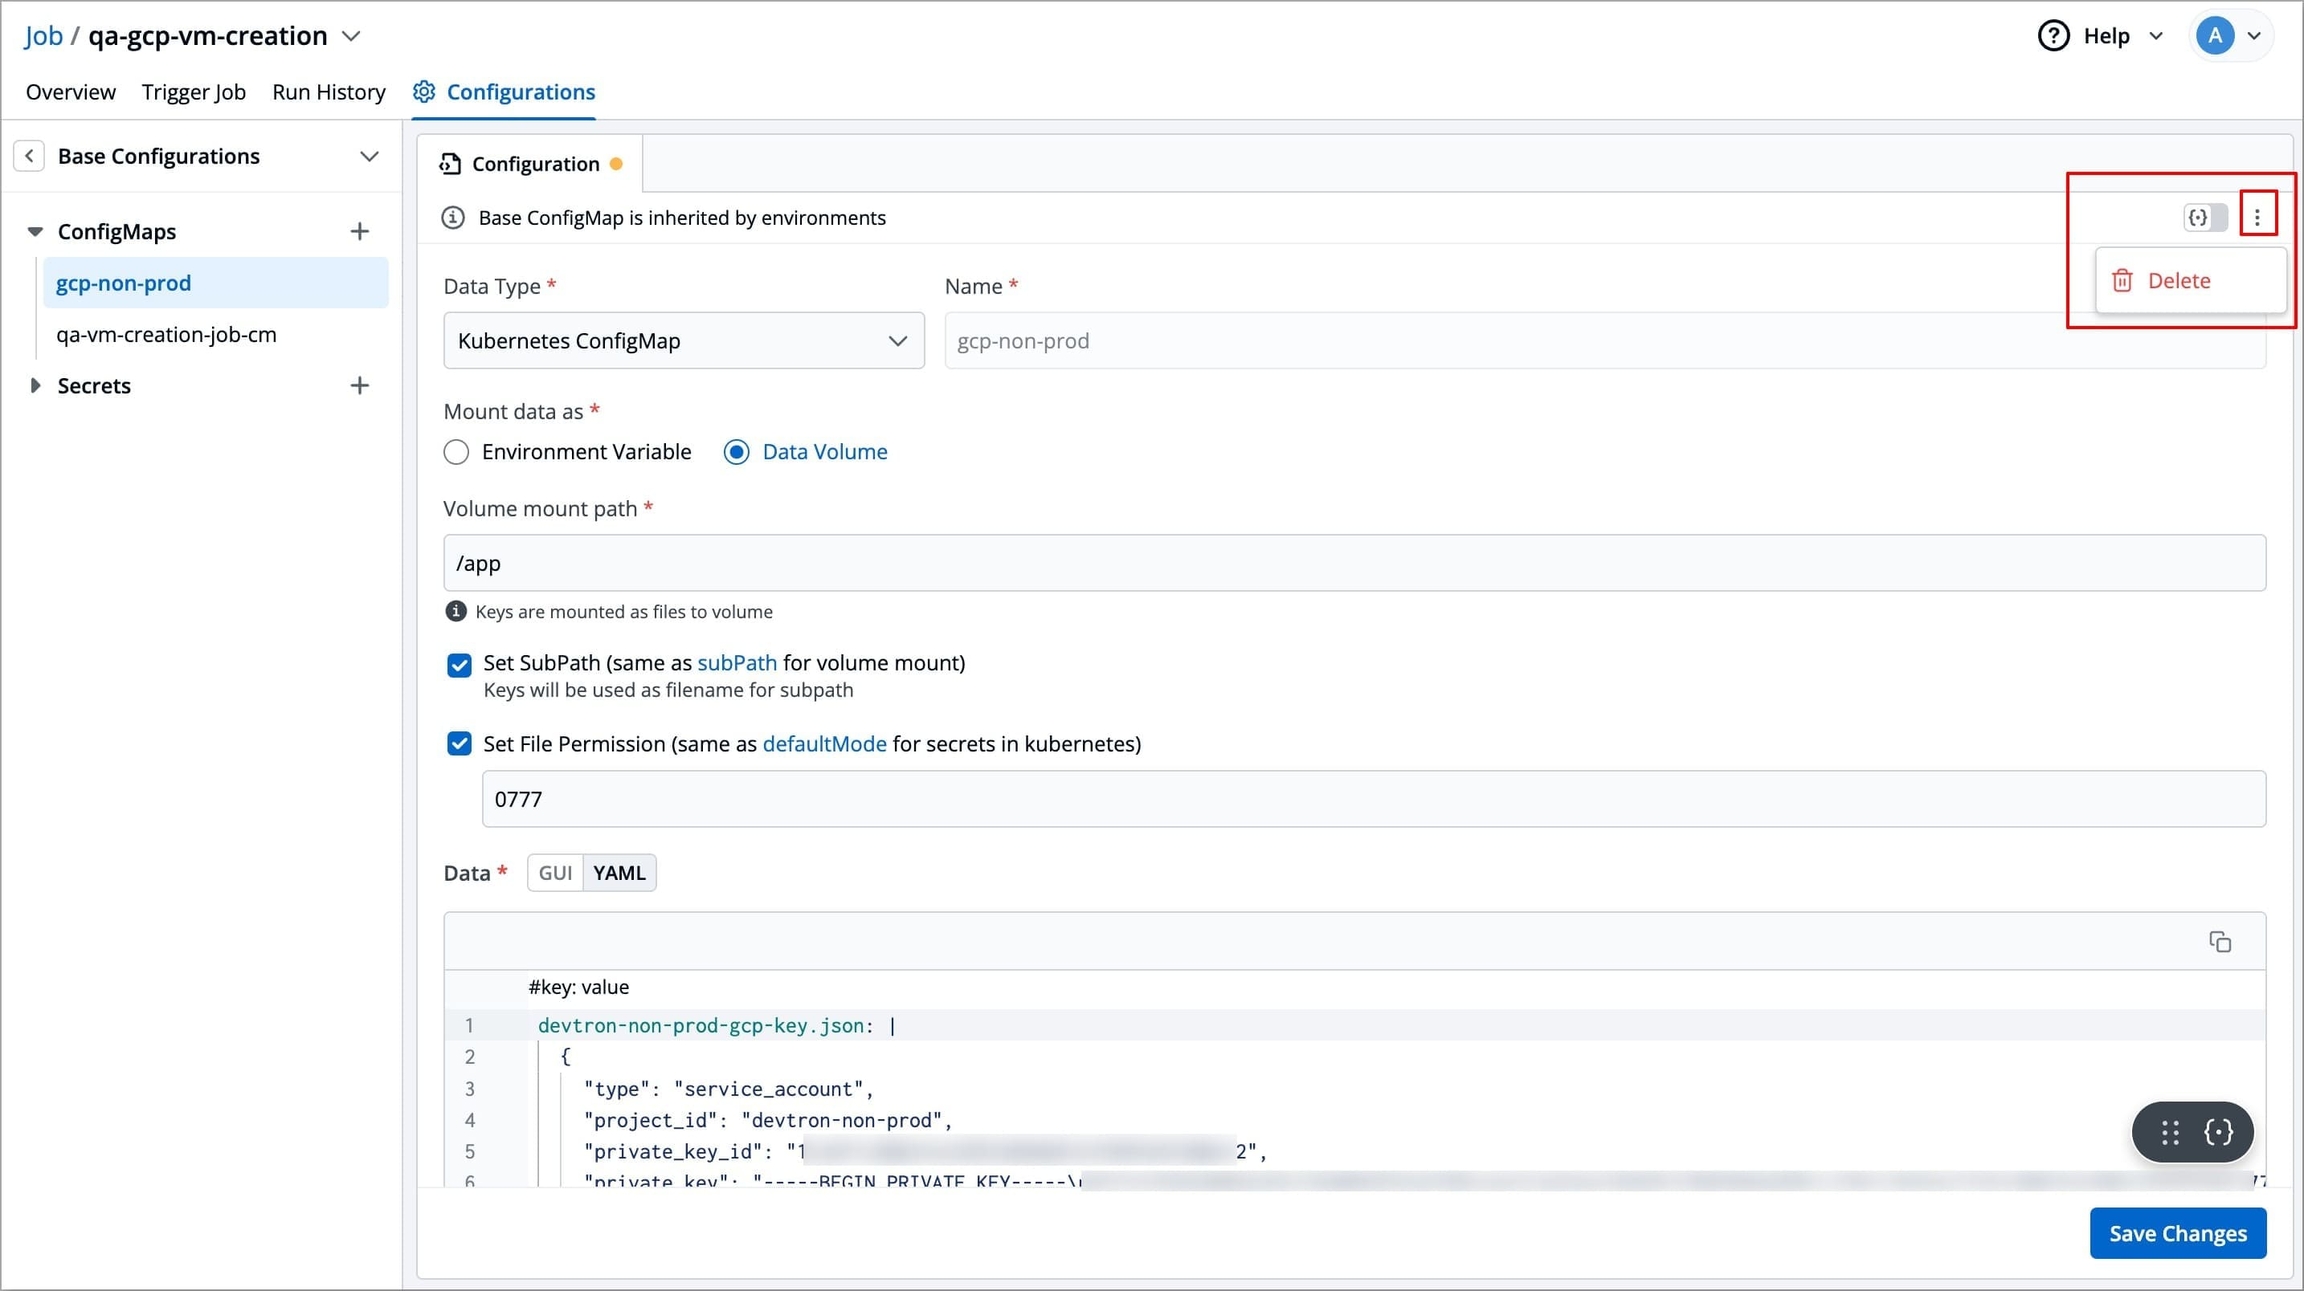
If you have selected Data type as Kubernetes ConfigMap and mount data as Data Volume, then you also need to enter the required data (key-value pairs) in the Data field.
The key of the ConfigMap should be your filename, and the value of the ConfigMap should be your file content. In the below example, your file.json is the key, and the JSON content is the value of that ConfigMap (below the pipe (|) symbol). This file will be created on your specified volume mount path.
Enter data in:
GUI mode – User-friendly interface. Click the +Add button and enter the Key and Value fields without quotes.

YAML mode – Raw YAML for entering key-value pairs in the format
key: value. Boolean and numeric values must be wrapped in double quotes.
For Kubernetes External ConfigMap
If you have selected Data type as Kubernetes External ConfigMap, then no data is required as devtron will fetch the external ConfigMap along with any volumes attach with it and use it to create a ConfigMap.
Update ConfigMap
Who Can Perform This Action?
Users need to have the Admin role or the Super Admin role. Refer the User permissions.
Click your ConfigMap available inside the list of ConfigMaps inside ConfigMaps & Secrets.
Modify its values.
Click Save Changes.
Delete ConfigMap
Who Can Perform This Action?
Users need to have the Admin role or the Super Admin role. Refer the User permissions.
You may delete a ConfigMap if not in use anymore. Once a ConfigMap is deleted, it will not be used in future deployments.
Click your ConfigMap available inside the list of ConfigMaps inside Base Configurations.
On the right side, click the kebab menu (3 vertical dots).
Click Delete.
Confirm the deletion in the dialog box.
After configuring ConfigMaps
Refer the Secrets section to configure secrets
Refer the Environment Override section to configure Environment Overrides.
Refer the Trigger Job section to trigger the job-pipeline.
Last updated
Was this helpful?