Overview
Last updated
Was this helpful?


Last updated
Was this helpful?
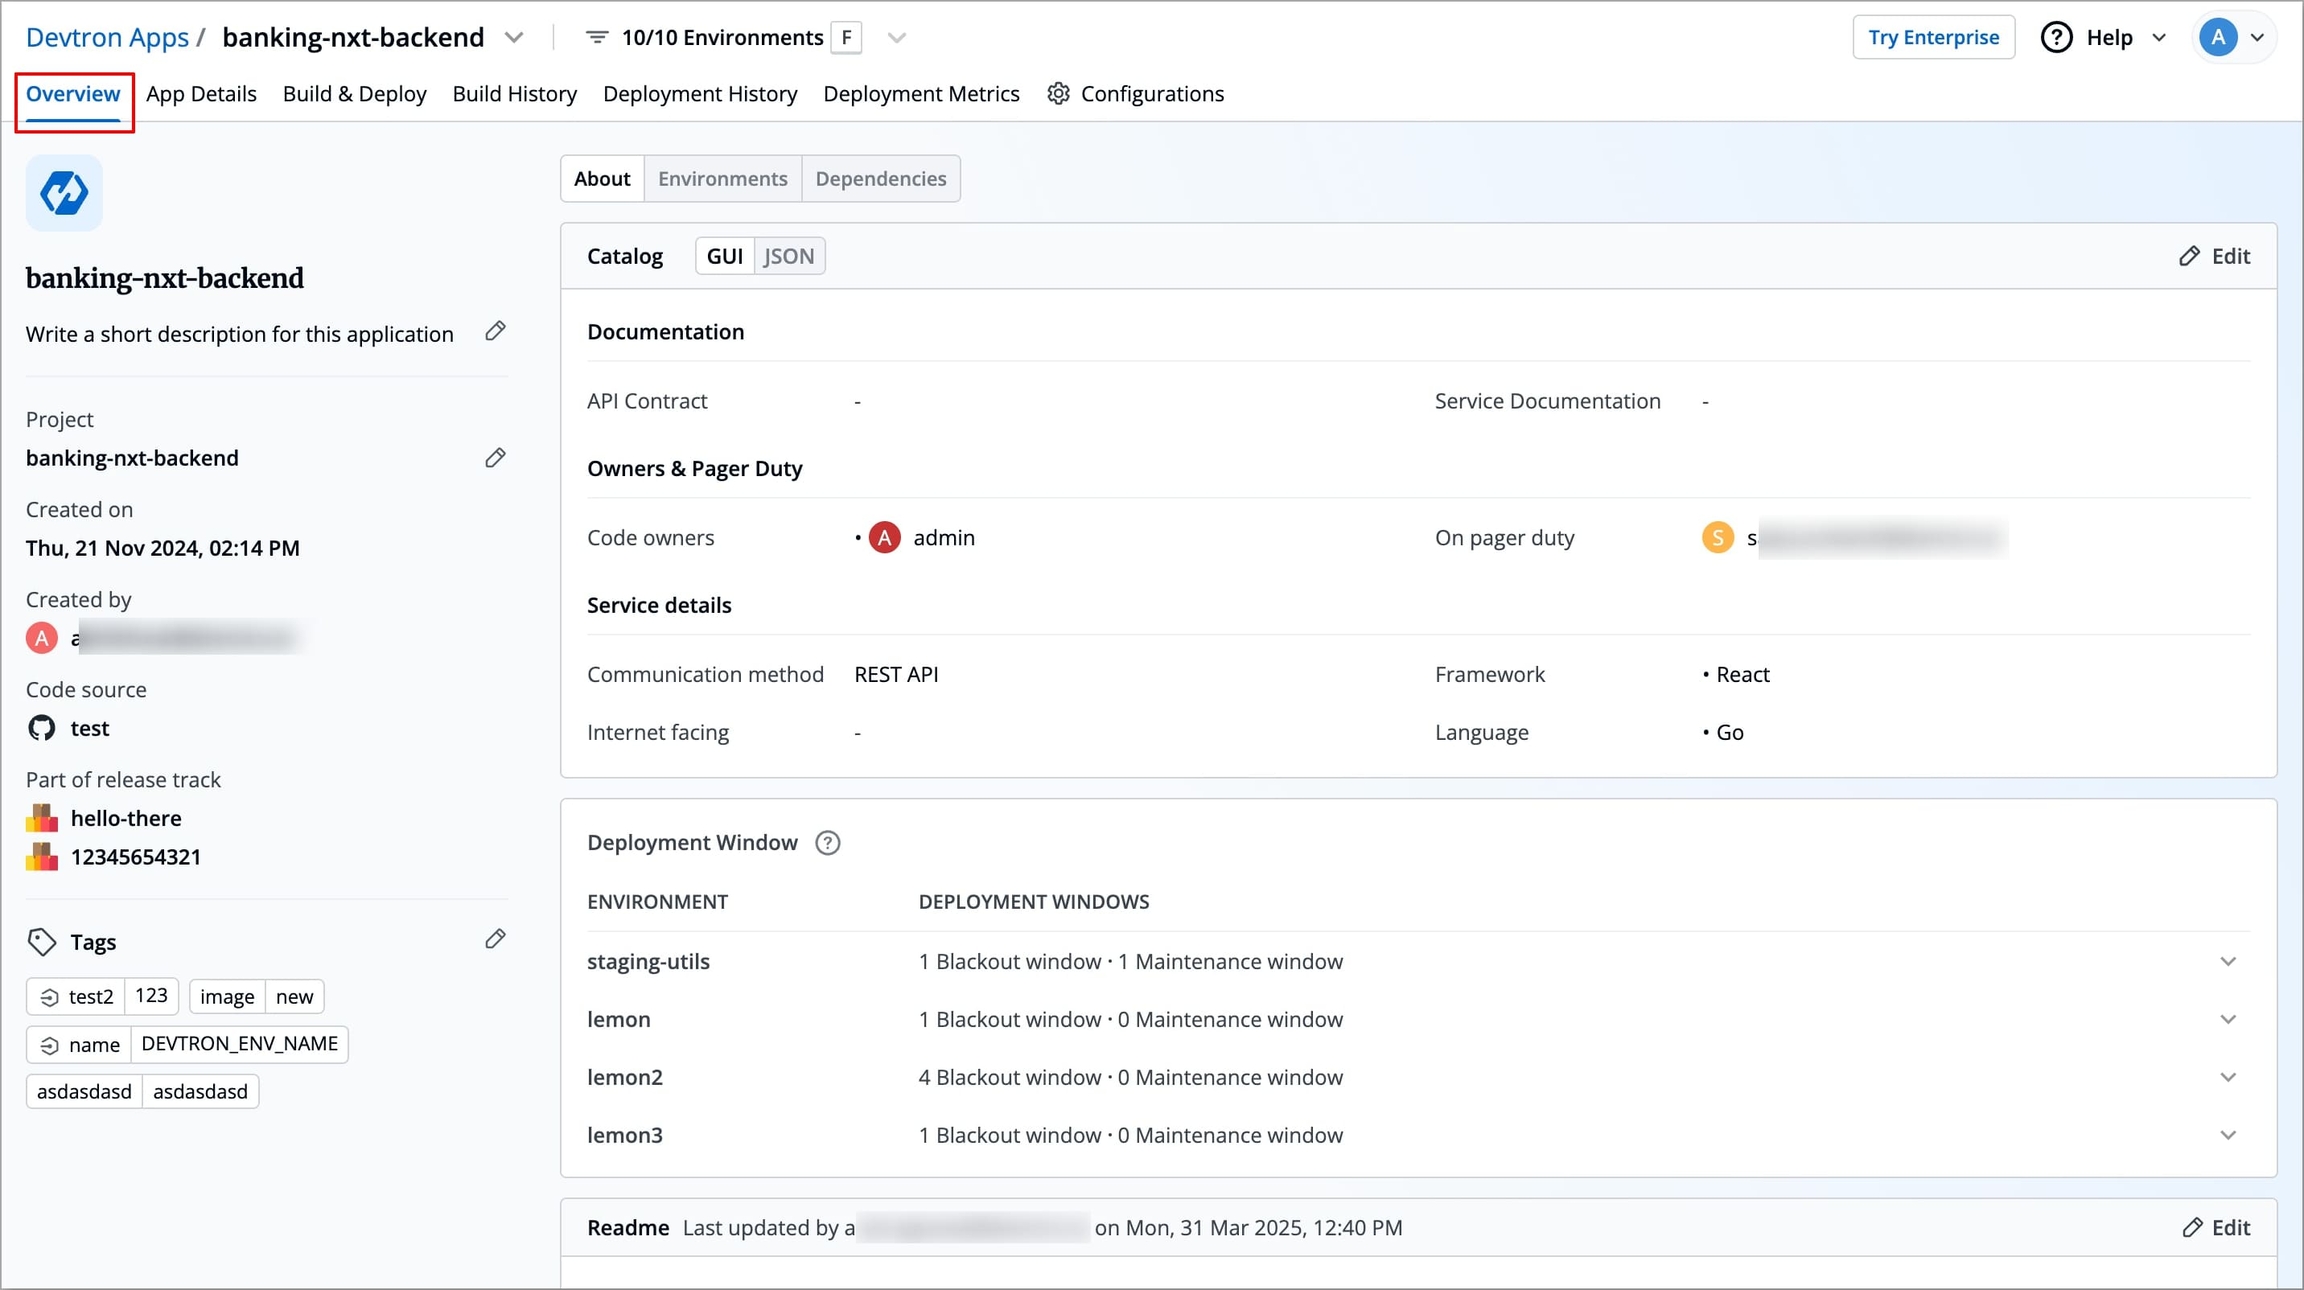
The Overview section contains the brief information of the application, any added tags, configured external links and deployment details of the particular application. In this section, you can also and if you added them while creating application.
The following details are provided on the Overview page:
App Name
Displays the name of the application.
Created on
Displays the day, date and time the application was created.
Created by
Displays the email address of a user who created the application.
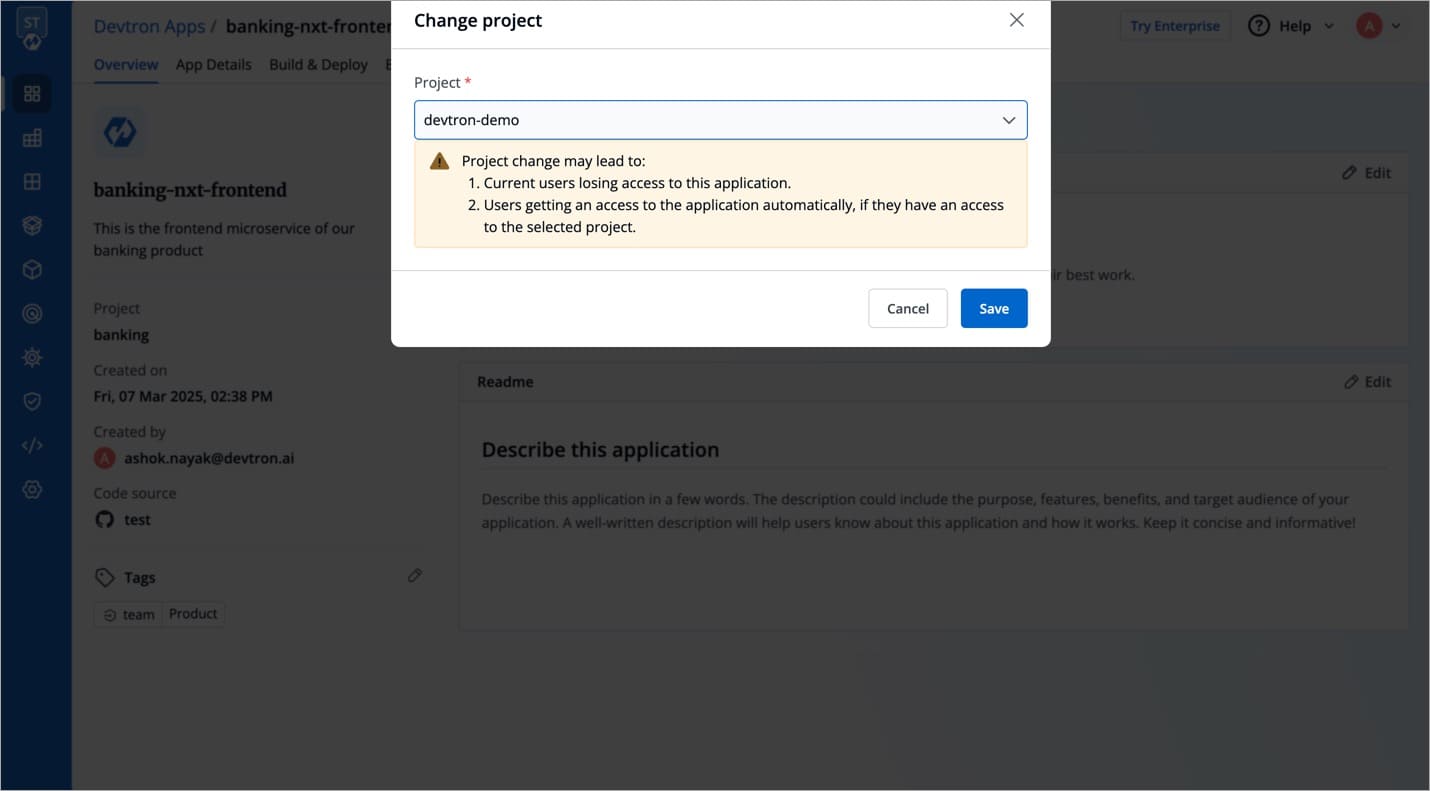
Project
Displays the current project of the application. You can change the project by selecting a different project from the drop-down list.
You can change the project of your application by clicking Project on the Overview section.
Click Project.
On the Change project dialog box, select the different project you want to change from the drop-down list.
Click Save. The application will be moved to the selected project.
The current users will lose the access to the application.
The users who already have an access to the selected project, will get an access to the application automatically.
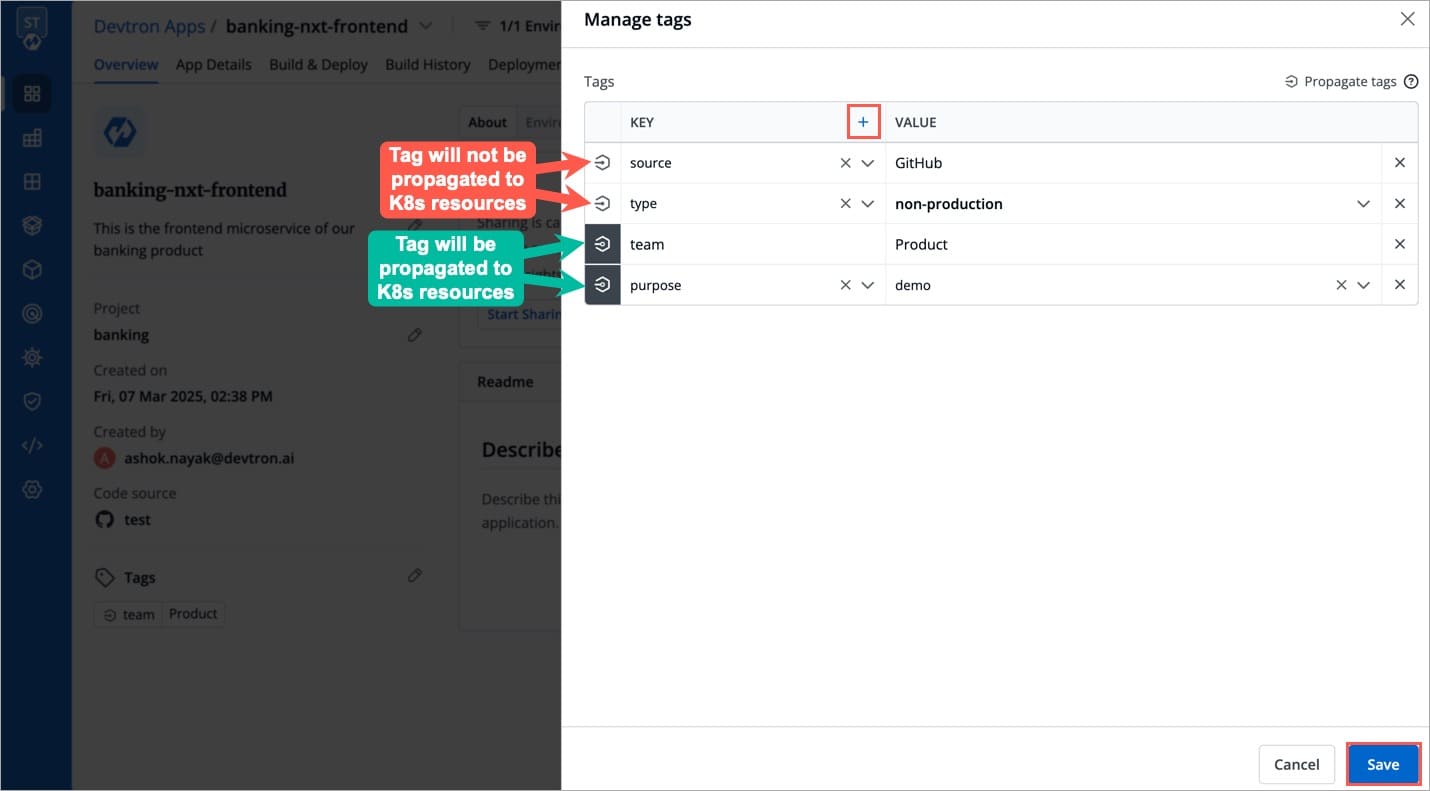
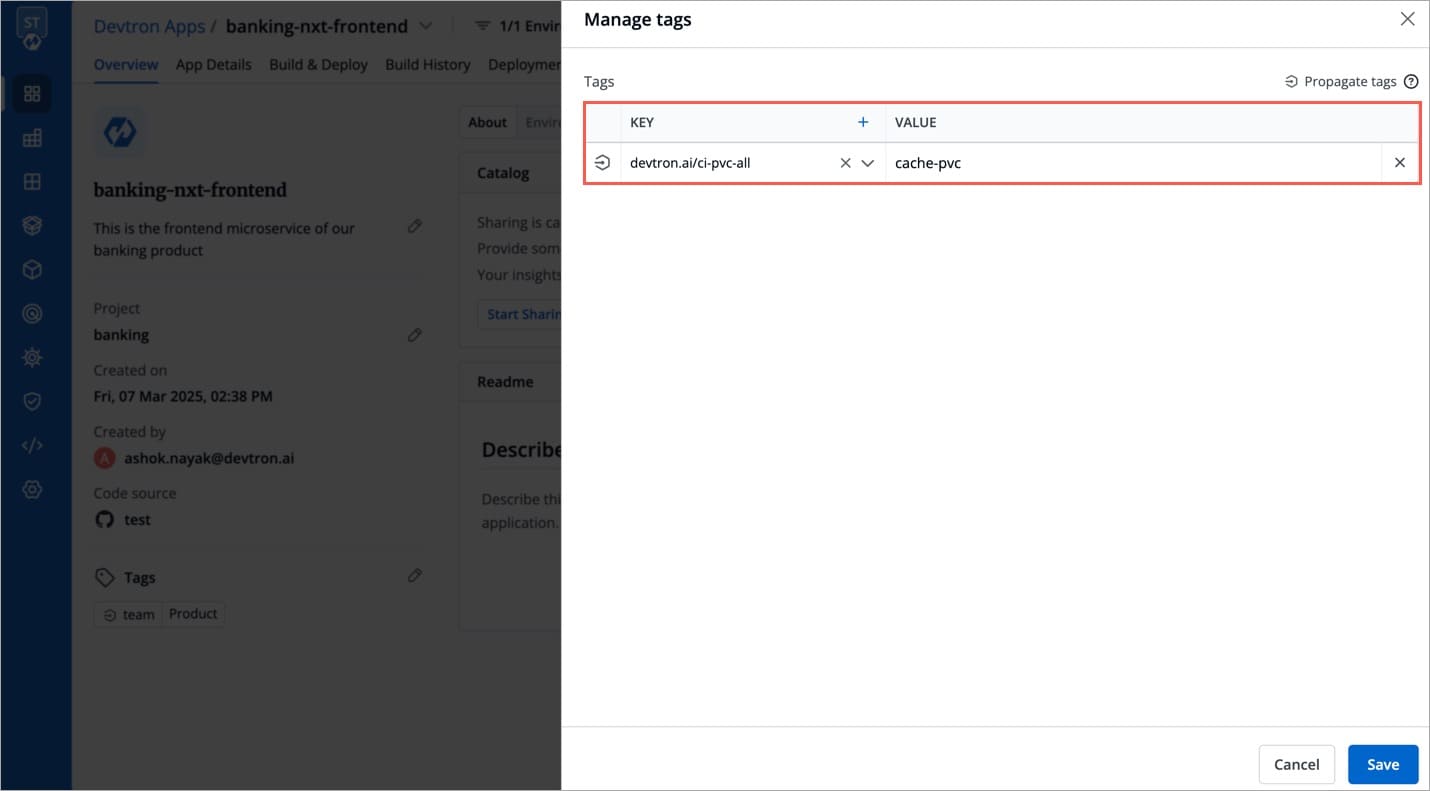
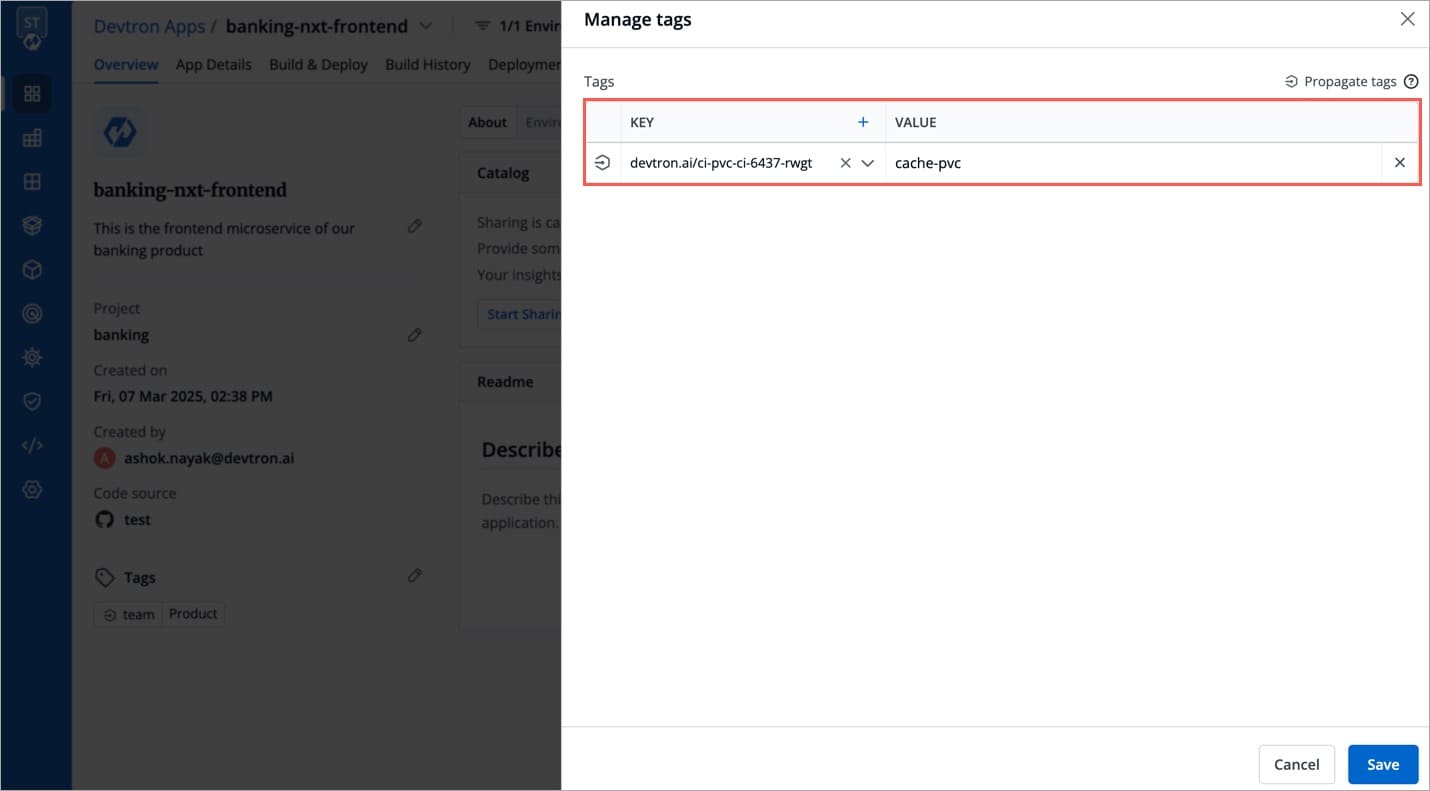
Tags are key-value pairs. You can add one or multiple tags in your application. When tags are propagated, they are considered as labels to Kubernetes resources. Kubernetes offers integrated support for using these labels to query objects and perform bulk operations e.g., consolidated billing using labels. You can use these tags to filter/identify resources via CLI or in other Kubernetes tools.
Manage tags is the central place where you can create, edit, and delete tags. You can also propagate tags as labels to Kubernetes resources for the application.
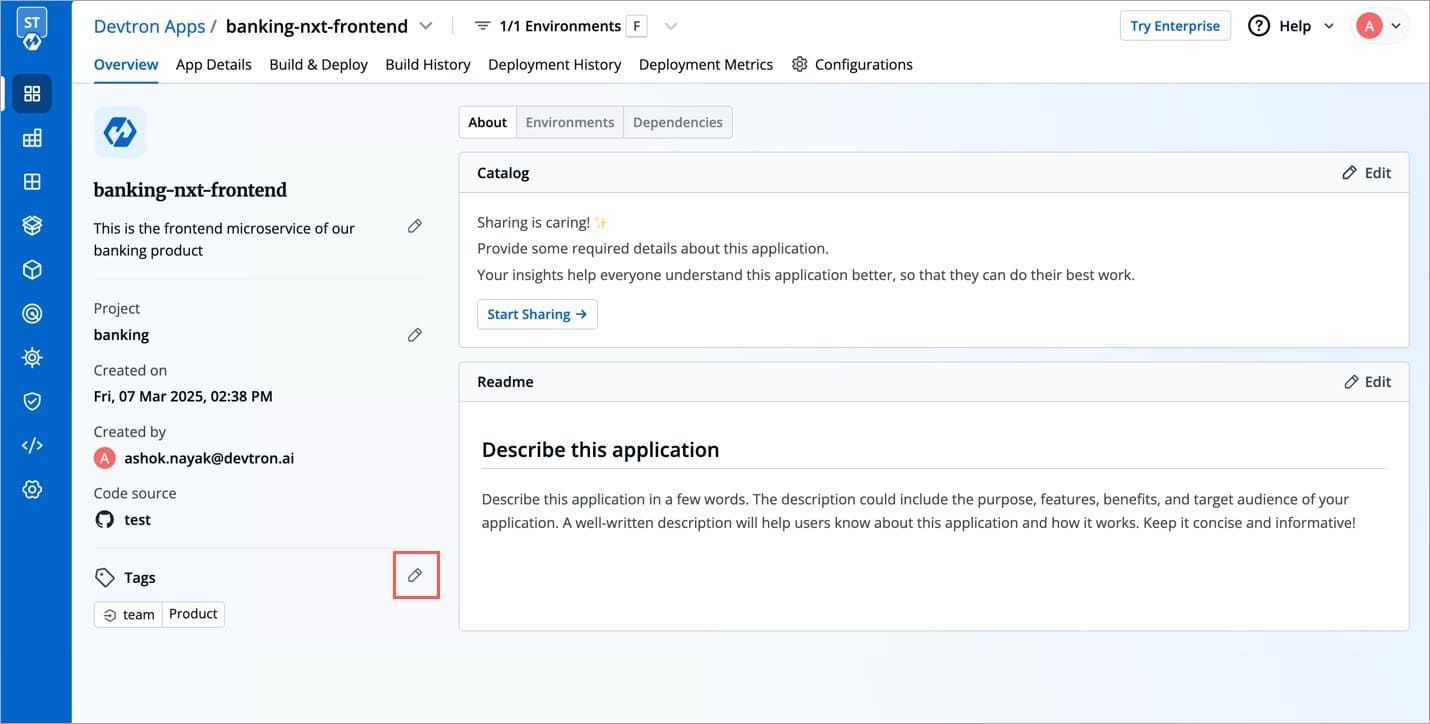
Click Edit.
On the Manage tags page, click + Add tag to add a new tag.
Click X to delete a tag.
Click Save.
The changes in the tags will be reflected in the Tags on the Overview section.
A PersistentVolumeClaim (PVC) volume is a request for storage, which is used to mount a PersistentVolume (PV) into a Pod. In order to optimize build time, you can configure PVC in your application.
If you want to optimize build time for the multiple target platforms (e.g., arm64, amd64), mounting a PVC will provide volume directly to a pod which helps in shorter build time by storing build cache. Mounting a PVC into a pod will provide storage for build cache which will not impact the normal build where the image is built on the basis of architecture and operating system of the K8s node on which CI is running.
The following configuration file describes persistent volume claim e.g.,cache-pvc.yaml, where you have to define the metadata name and storageClassname.
Create the PersistentVolumeClaim by running the following command:
In order to configure PVC:
Go to the Overview section of your application.
On the right-corner, click Edit.
For app level PVC mounting, enter the following:
key:devtron.ai/ci-pvc-all
Note: This PVC mounting will impact all the build pipelines of the application.
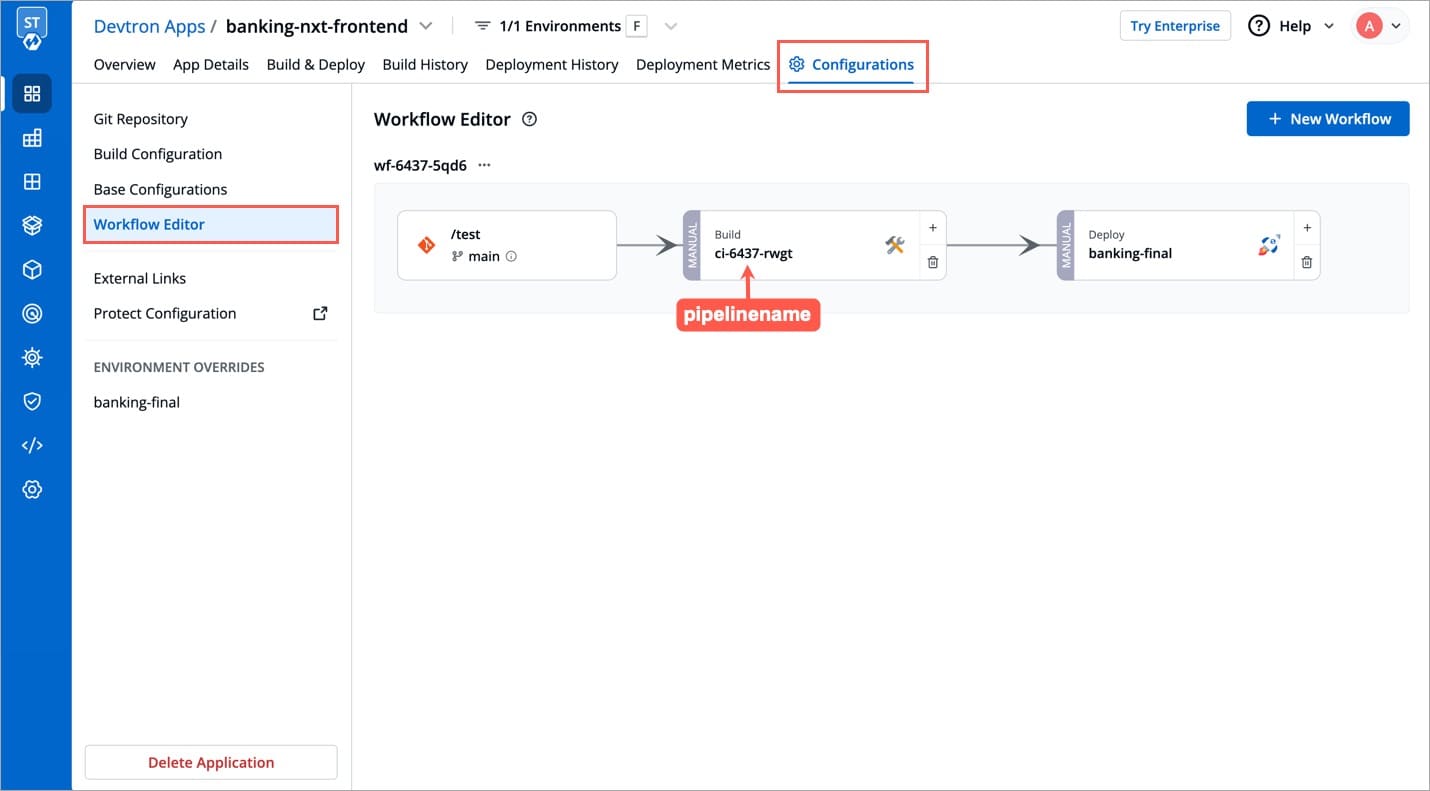
For pipeline level, enter the following:
key:devtron.ai/ci-pvc-{pipelinename}
Note: This PVC mounting will impact only the particular build pipeline.
To know the pipelinename detail, go to the App Configuration, click Workflow Editor the pipeline name will be on the Build pipeline as shown below.
Click Save.
Click the symbol on the left side of your tag to propagate a tag.
To remove the tags from propagation, click the symbol again.
For more detail, refer .
value: metadata name (e.g., cache-pvc) which you define on the .
value: metadata name which you define on the .