Cluster And Environments
The Global configuration provides a feature of Cluster & Environment in which you can add your Kubernetes clusters and environment.
Select the Cluster & Environment section of global configuration and click on Add Cluster to add your cluster.
Add Cluster:
To add a cluster on devtron, you must have superadmin access.
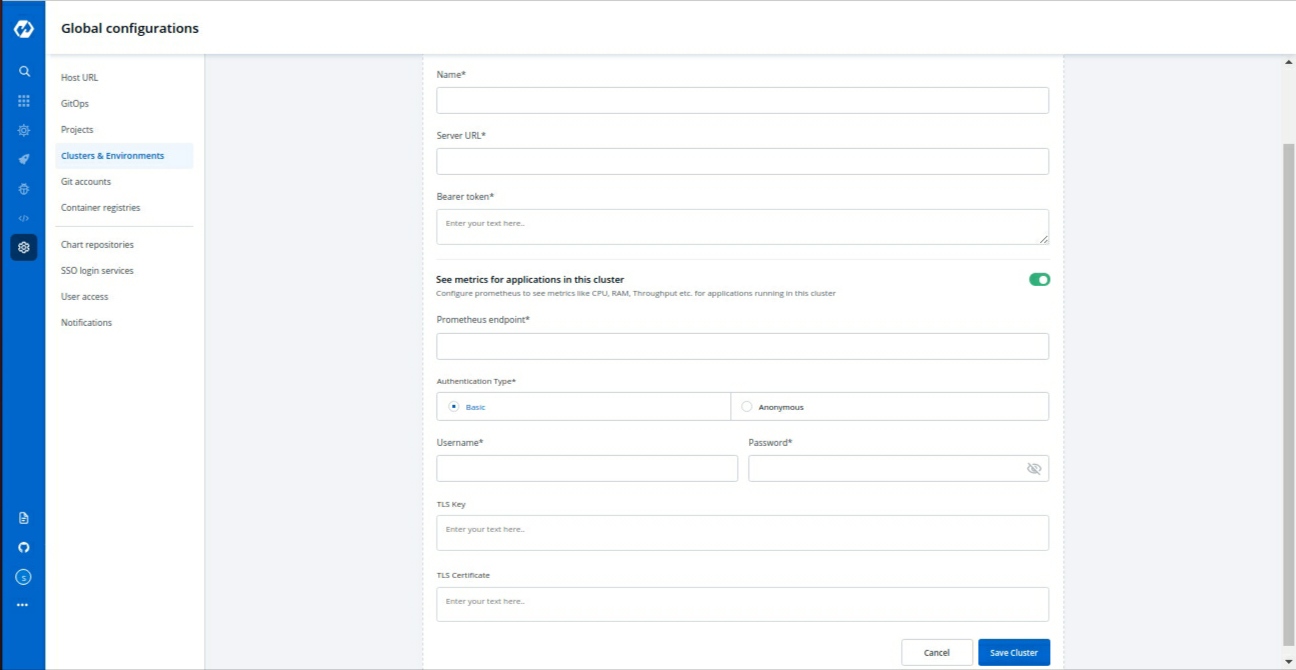
Navigate to the Global Configurations → Clusters and Environments on devtron and click on Add Cluster. Provide the below informations to add your kubernetes cluster:
Name
Kubernetes Cluster Info
Server URL
Bearer token
Prometheus Info
Prometheus endpoint
Basic
Username
Password
Anonymous
TLS Key
TLS Certificate
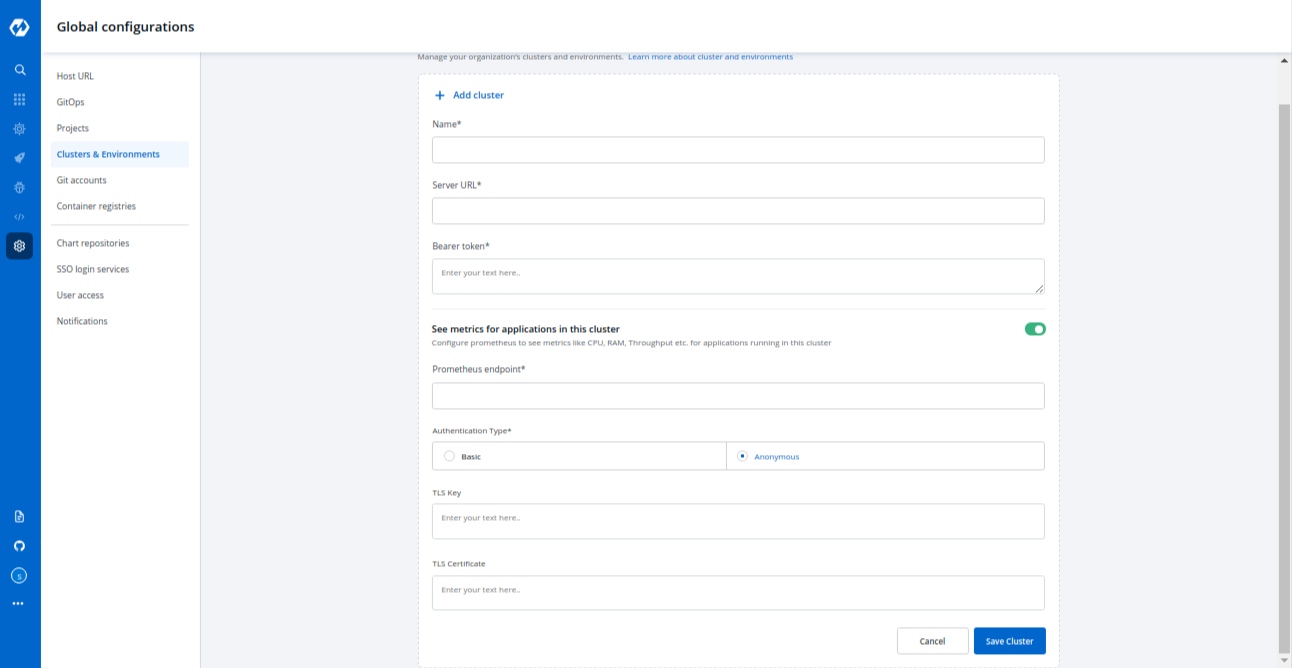
1. Name
Give a name to your cluster inside the name box.
2. Kubernetes Cluster Info
Provide your kubernetes cluster’s credentials.
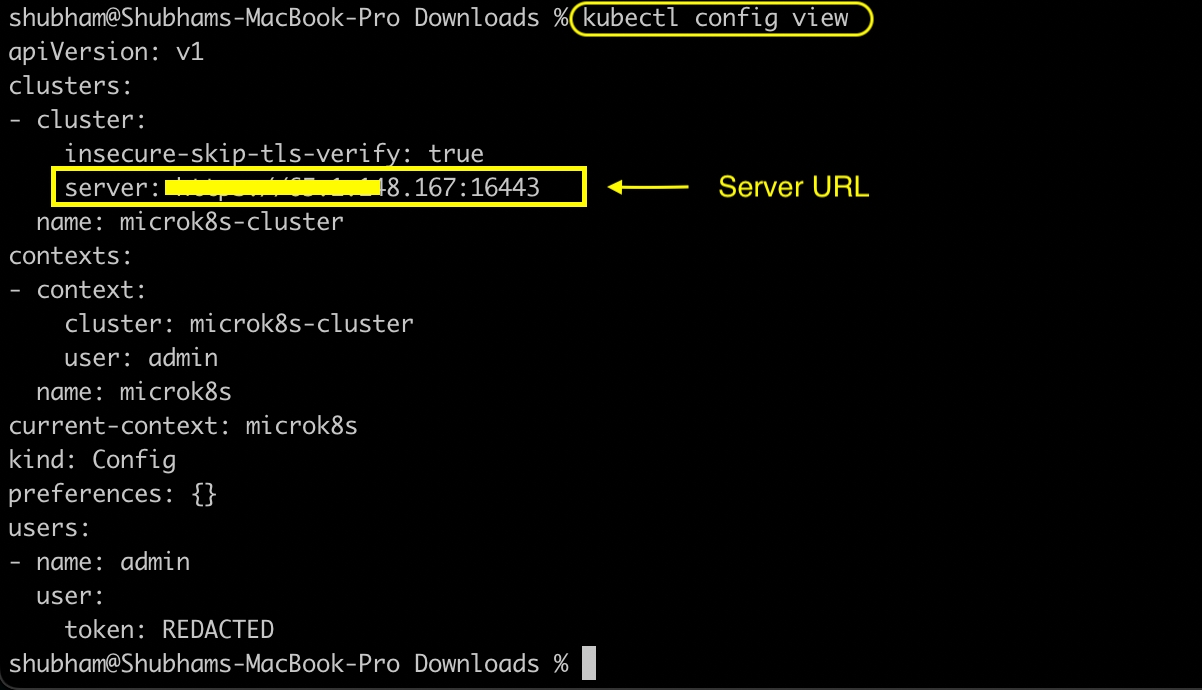
Server URL
Provide the endpoint/URL of your kubernetes cluster.It is recommended to use a self-hosted URL instead of cloud hosted. Self-hosted URL will provide the following benefits.
(a) Disaster Recovery - It is not possible to edit the server-url of a cluster. So if you're using an eks url, For eg- *****.eu-west-1.elb.amazonaws.com it will be a tedious task to add a new cluster and migrate all the services one by one. While using a self-hosted url For eg- clear.example.com you can just point to the new cluster's server url in DNS manager and update the new cluster token and sync all the deployments.
(b) Easy cluster migrations - Cluster url is given in the name of the cloud provider used, so migrating your cluster from one provider to another will result in waste of time and effort. On the other hand, if using a self-hosted url migrations will be easy as the url is of single hosted domain independent of the cloud provider.
To get the Server URL, run the following the command :
Bearer token
Provide your kubernetes cluster’s Bearer token for authentication purposes so that Devtron is able to communicate with your kubernetes cluster and can deploy your application in your kubernetes cluster.
Generate the Bearer Token by running the following command:
Please ensure that kubectl and jq are installed on the bastion on which you are running the command.
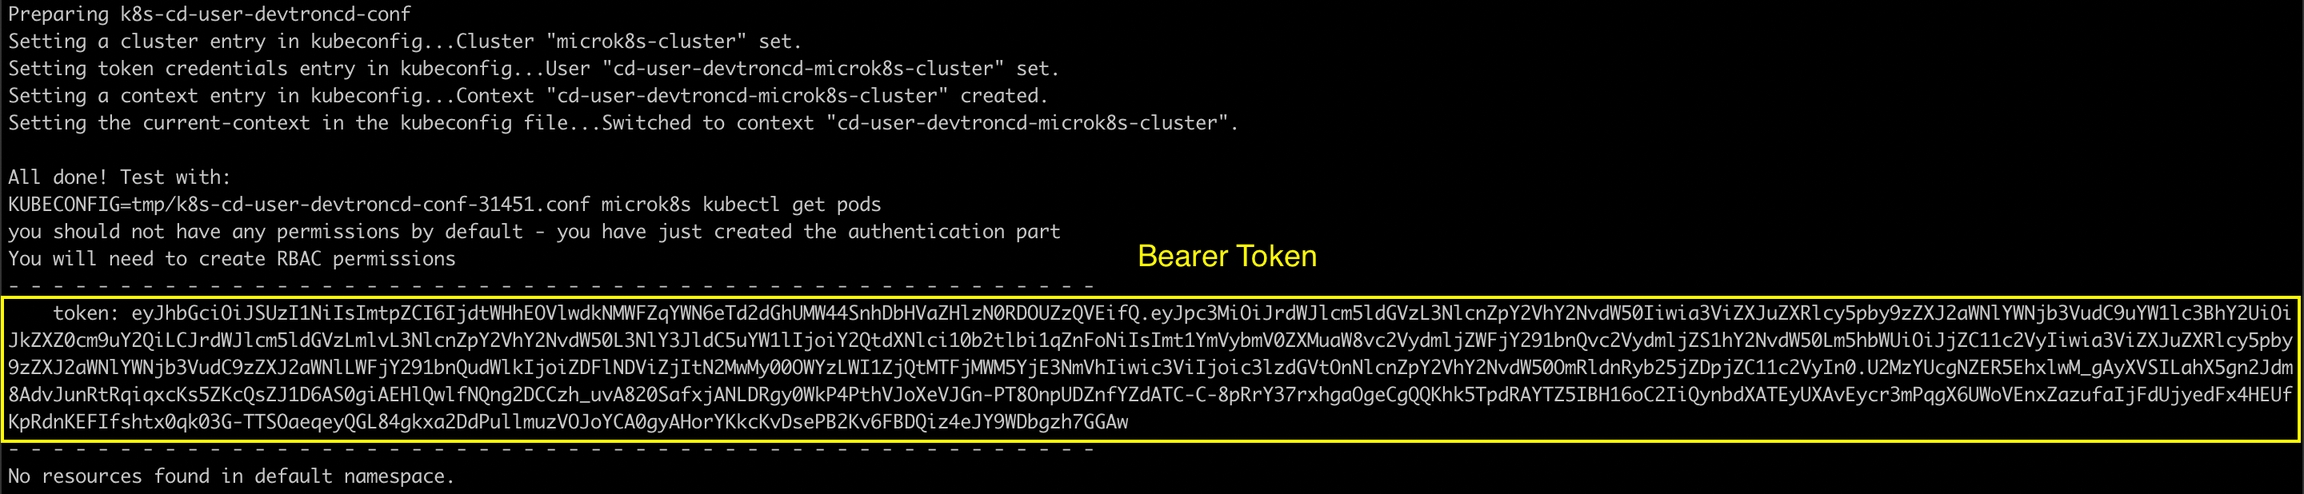
If you are using a microk8s cluster, run the following command to generate the bearer token:
3. Prometheus Info
Prometheus is a powerful solution to provide graphical insight into your application behavior. If you want to see your application matrix against your applications deployed in kubernetes, install Prometheus in your kubernetes cluster. The below inputs are required to configure your prometheus into Devtron’s tool.
Prometheus endpoint
Provide the URL of your prometheus. Prometheus supports two types of authentication Basic and Anonymous. Select the authentication type for your Prometheus setup.
Basic
If you select the basic type of authentication then you have to provide the Username and Password of prometheus for authentication.
Anonymous
If you select Anonymous then you do not have to provide any username and password for authentication.
TLS Key & TLS Certificate
TLS key and TLS certificate both options are optional, these options are used when you use a custom URL, in that case, you can pass your TLS key and TLS certificate.
K8s Version
on saving or update a cluster there is a call to fetch k8s version, it will store corresponding to cluster on db. used in listing api's and app detail page for grafana url.
Check the below screenshots to know how it looks like If you select the Basic authentication type
If you select the Anonymous authentication type
Now click on Save Cluster to save your cluster information.
Note:
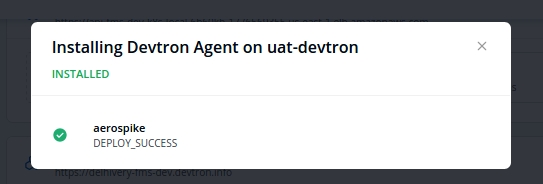
Your kubernetes cluster gets mapped with the Devtron when you save your kubernetes cluster Configuration. Now the agents of devtron will be installed on your cluster so that the components of devtron can communicate to your cluster. When the agent starts installing on your cluster, you can check the status of the agents in the Cluster & Environment tab also.
Click on Details to check what got installed inside the agents. A new window will be popped up displaying all the details about these agents.
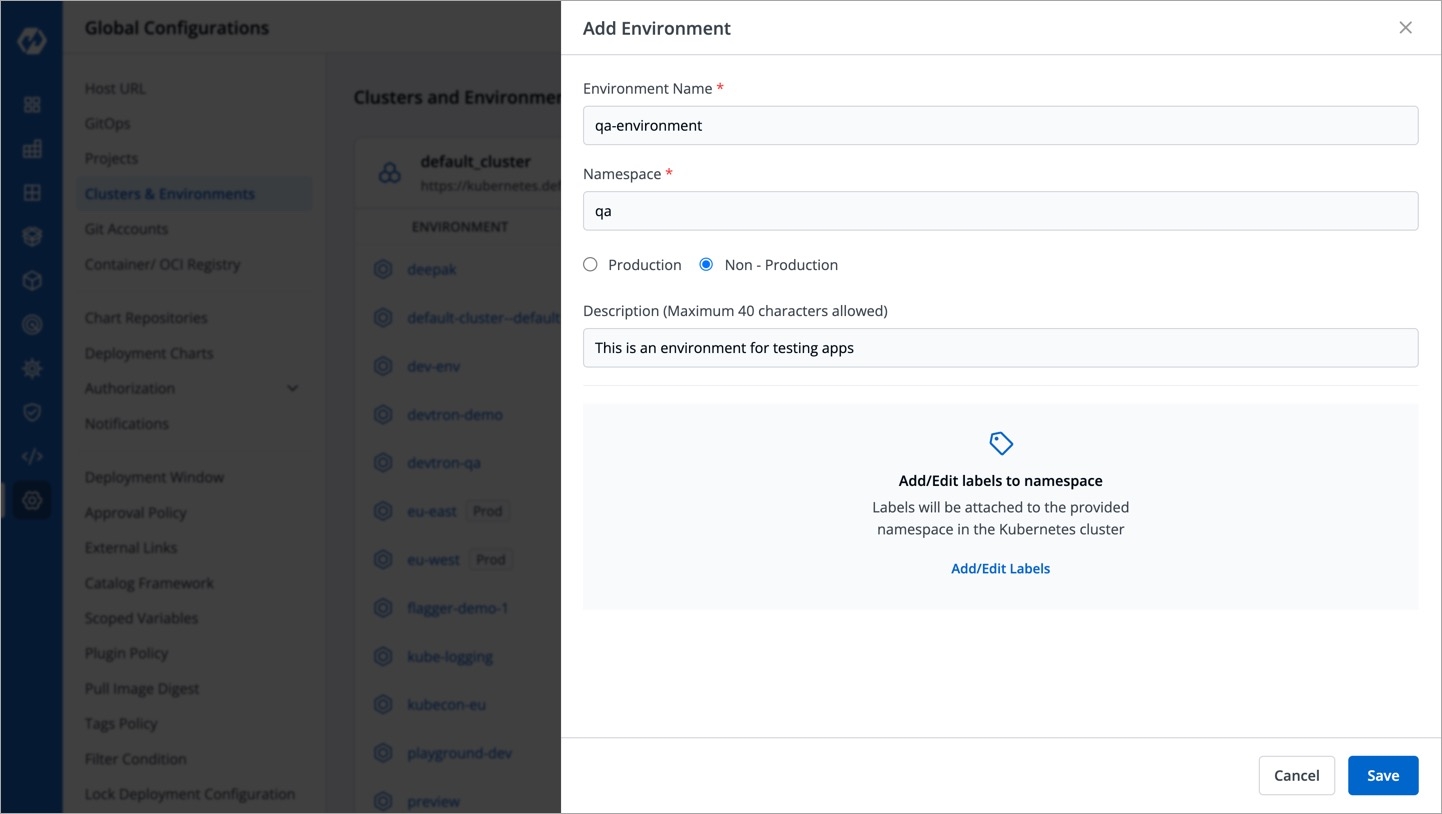
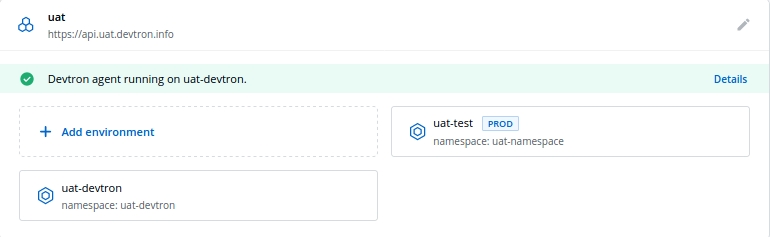
Add Environment
Once you have added your cluster in Cluster & Environment, you can add the environment also. Click on Add Environment, a window will be opened. Give a name to your environment in the Environment Name box and provide a namespace corresponding to your environment in the Namespace input box. Now choose if your environment is for Production purposes or for Non-production purposes. Production and Non-production options are only for tagging purposes. Click on Save and your environment will be created.
You can update an already created environment, Select and click on the environment which you want to update. You can only change Production and Non-production options here.
Note
You can not change the Environment name and Namespace name.
Click on Update to update your environment.
Last updated