User Permissions
Like any enterprise product, Devtron supports fine grained access control to the resources based on
Type of action allowed on the Devtron resources (Create Vs View)
Sensitivity of the data (Editing image Vs Editing memory)
Access can be added to the User either directly or via Groups.
Role-based Access Levels
Devtron supports 5 levels of access:
View: User with
viewonly access has the least privilege. This user can only view combination of environments, applications and helm charts on which access has been granted to the user. This user cannot view sensitive data like secrets used in applications or charts.Build and Deploy: In addition to
viewprivilege mentioned in above, user withbuild and deploypermission can build and deploy the image of permitted applications and helm charts to permitted environments.Admin: User with
adminaccess can create, edit, delete and view permitted applications in permitted projects.Manager: User with
manageraccess can do everything that anadmintype user can do, in addition they can also give and revoke access of users for the applications and environments of which they aremanager.Super Admin: User with
super adminprivilege has unrestricted access to all Devtron resources. Super admin can create, modify, delete and view any Devtron resource without any restriction; its like Superman without the weakness of Kryptonite. Super Admin can also add and delete user access across any Devtron resource, add delete git repository credentials, container registry credentials, cluster and environment.
User Roles And Permissions
1. Custom Applications
View
Yes
No
No
No
No
Build and Deploy
Yes
No
No
No
Yes
Admin
Yes
Yes
Yes
Yes
Yes
Manager
Yes
Yes
Yes
Yes
Yes
Super Admin
Yes
Yes
Yes
Yes
Yes
2. Helm Charts
View Only
Yes
No
No
No
Build and Deploy
Yes
No
No
No
Admin
Yes
Yes
Yes
Yes
Manager
Yes
Yes
Yes
Yes
Super Admin
Yes
Yes
Yes
Yes
3. User Access
Manager
Yes
Yes
Yes
Super Admin
Yes
Yes
Yes
4. Global Configurations
Super Admin
Yes
Yes
Yes
To control the access of User and Group-
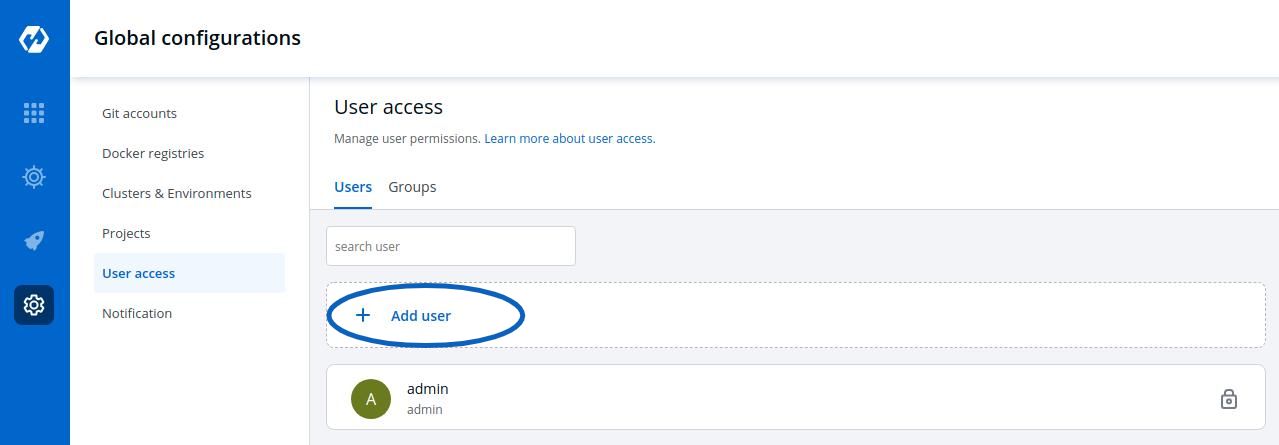
Go to the left main panel -> Select Global Configurations -> Select User Access
Users
1. Add new user
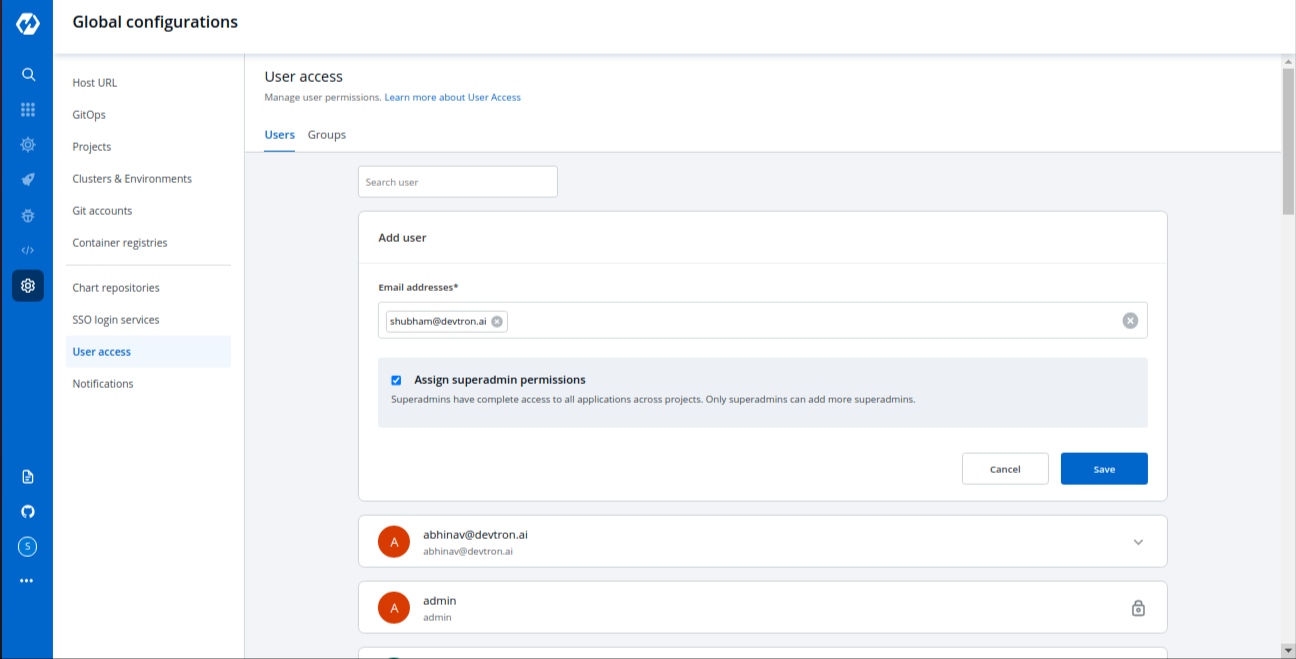
Click on Add User, to add one or multiple users.
2. Create User Permissions
When you click on Add User, you will see 6 options to set permission for users which are as follow:
Email addresses
Assign super admin permissions
Group Permissions
Devtron Apps Permissions
Project
Environment
Applications
Roles
Helm Apps Permissions
Project
Environment or cluster/namespace
Applications
Permission
Chart group permissions
Email addresses:
In the Email address box, you have to provide the mail ID of the user to whom you want to give access to your applications.
IMP Please note that Email address should be same as that in the email field in the JWT token returned by OIDC provider.
Assign super admin permissions
If you check the option Assign super admin permissions, the user will get full access to your system and the rest of the options will disappear. Please check above to see permission levels. Only users with super admin permissions can assign super admin permissions to a user.
Click on Save and your user will be saved with super admin permissions.
We suggest that super admin privileges should be given to only select few.
If you don’t want to assign super admin permissions then you have to provide the rest of the information.
Devtron Apps permissions
Access to devtron applications can be given to user by attaching permission directly to his/her email id through the Devtron Apps section. This section has 4 options to manage the permissions of your users.
Project
Select a project from the drop-down to which you want to give permission to the users. You can select only one project at a time if you want to select more than one project then click Add row.
Environment
In the Environment section, you can select one or more than one or all environments at a time. Click on the environment section, you will see a drop-down of your environments and select any environment on which you want to give permission to the user.
IMP If all environments option is selected then user gets access to all current environments and any new environment which gets associated with this application later.
Applications
Similarly, you can select Applications from the drop-down corresponding to your selected Environments. In this section, you can also give permissions to one or more than one or to all applications at a time.
IMP If all applications option is selected then user gets access to all current applications and any new application which gets associated with this project later.
Roles
Inside the
Role, you actually choose which type of permissions you want to give to the users.
There are four different view access levels/Role available for both User and Group as described above:
You can add multiple rows, for Devtron app permission.
Once you have finished assigning the appropriate permissions for the listed users, Click on Save.
Helm Apps Permissions
Access to devtron applications can be given to user by attaching permission directly to his/her email id through the Devtron Apps section. This section has 4 options to manage the permissions of your users.
Project
Select a project from the drop-down to which you want to give permission to the users. You can select only one project at a time if you want to select more than one project then click Add row.
Environment or cluster/namespace
In the Environment section, you can select one or more than one or all environments at a time. Click on the environment section, you will see a drop-down of your environments and select any environment on which you want to give permission to the user.
IMP If all environments option is selected then user gets access to all current environments and any new environment which gets associated with this application later.
Applications
Similarly, you can select Applications from the drop-down corresponding to your selected Environments. In this section, you can also give permissions to one or more than one or to all applications at a time.
IMP If all applications option is selected then user gets access to all current applications and any new application which gets associated with this project later.
Permission
Inside the
Role, you actually choose which type of permissions you want to give to the users.
There are four different view access levels/Role available for both User and Group as described above:
Chart Group Permissions
You can also manage the access of users to Chart Groups in your project.
NOTE: You can only give users the ability to create or edit, not both.
Click on the checkbox of Create, if you want the users to create, view, edit, or delete the chart groups.
To permit a user to only edit the chart groups, check Specific chart group from Edit drop-down. In the following field, select the chart group for which you want to grant the user edit permission.
Go to Edit drop-down, if you want to allow or deny users to edit the chart groups.
Select on Deny option from the drop-down, if you want to restrict the users to edit the chart groups.
Select the Specific Charts option from the drop-down and then select the chart groups for which you want to allow users to edit, from the other drop-down menu.
Click on Save, once you have configured all the required permissions for the users.
View
Only can view chart groups
Create
Can create, view, edit or delete
Edit
Deny: Can't edit chart groups
Specific chart groups: can edit specific chart group
3. Edit User Permissions
You can edit the user permissions, by clicking on the downward arrow.
Then you can edit the user permissions here.
After you have done editing the user permissions, click on Save.
If you want to delete the user/users with particular permissions, click on Delete.
Last updated