Runtime Parameters
Runtime parameters let you pass dynamic inputs to a CI build pipeline or a job at the time of triggering, without changing the pipeline configuration. These inputs are made available to your build/job as environment variables, so the same pipeline can behave differently across runs (for example, passing a different image tag, a feature flag, or an environment-specific configuration file).
Earlier, you had to enter both the key and the value for every parameter on each trigger. With the enhanced runtime parameters, the keys (and their types) are predefined by the pipeline or plugin. At trigger time, you only supply the values — keys and types are shown as read-only. This reduces repetitive input and prevents typos in key names.
Users need Build & Deploy permission or above (along with access to the environment and application) to pass runtime parameters. For jobs, users need the Admin or Super Admin role. Refer to User Permissions.
Parameter Types
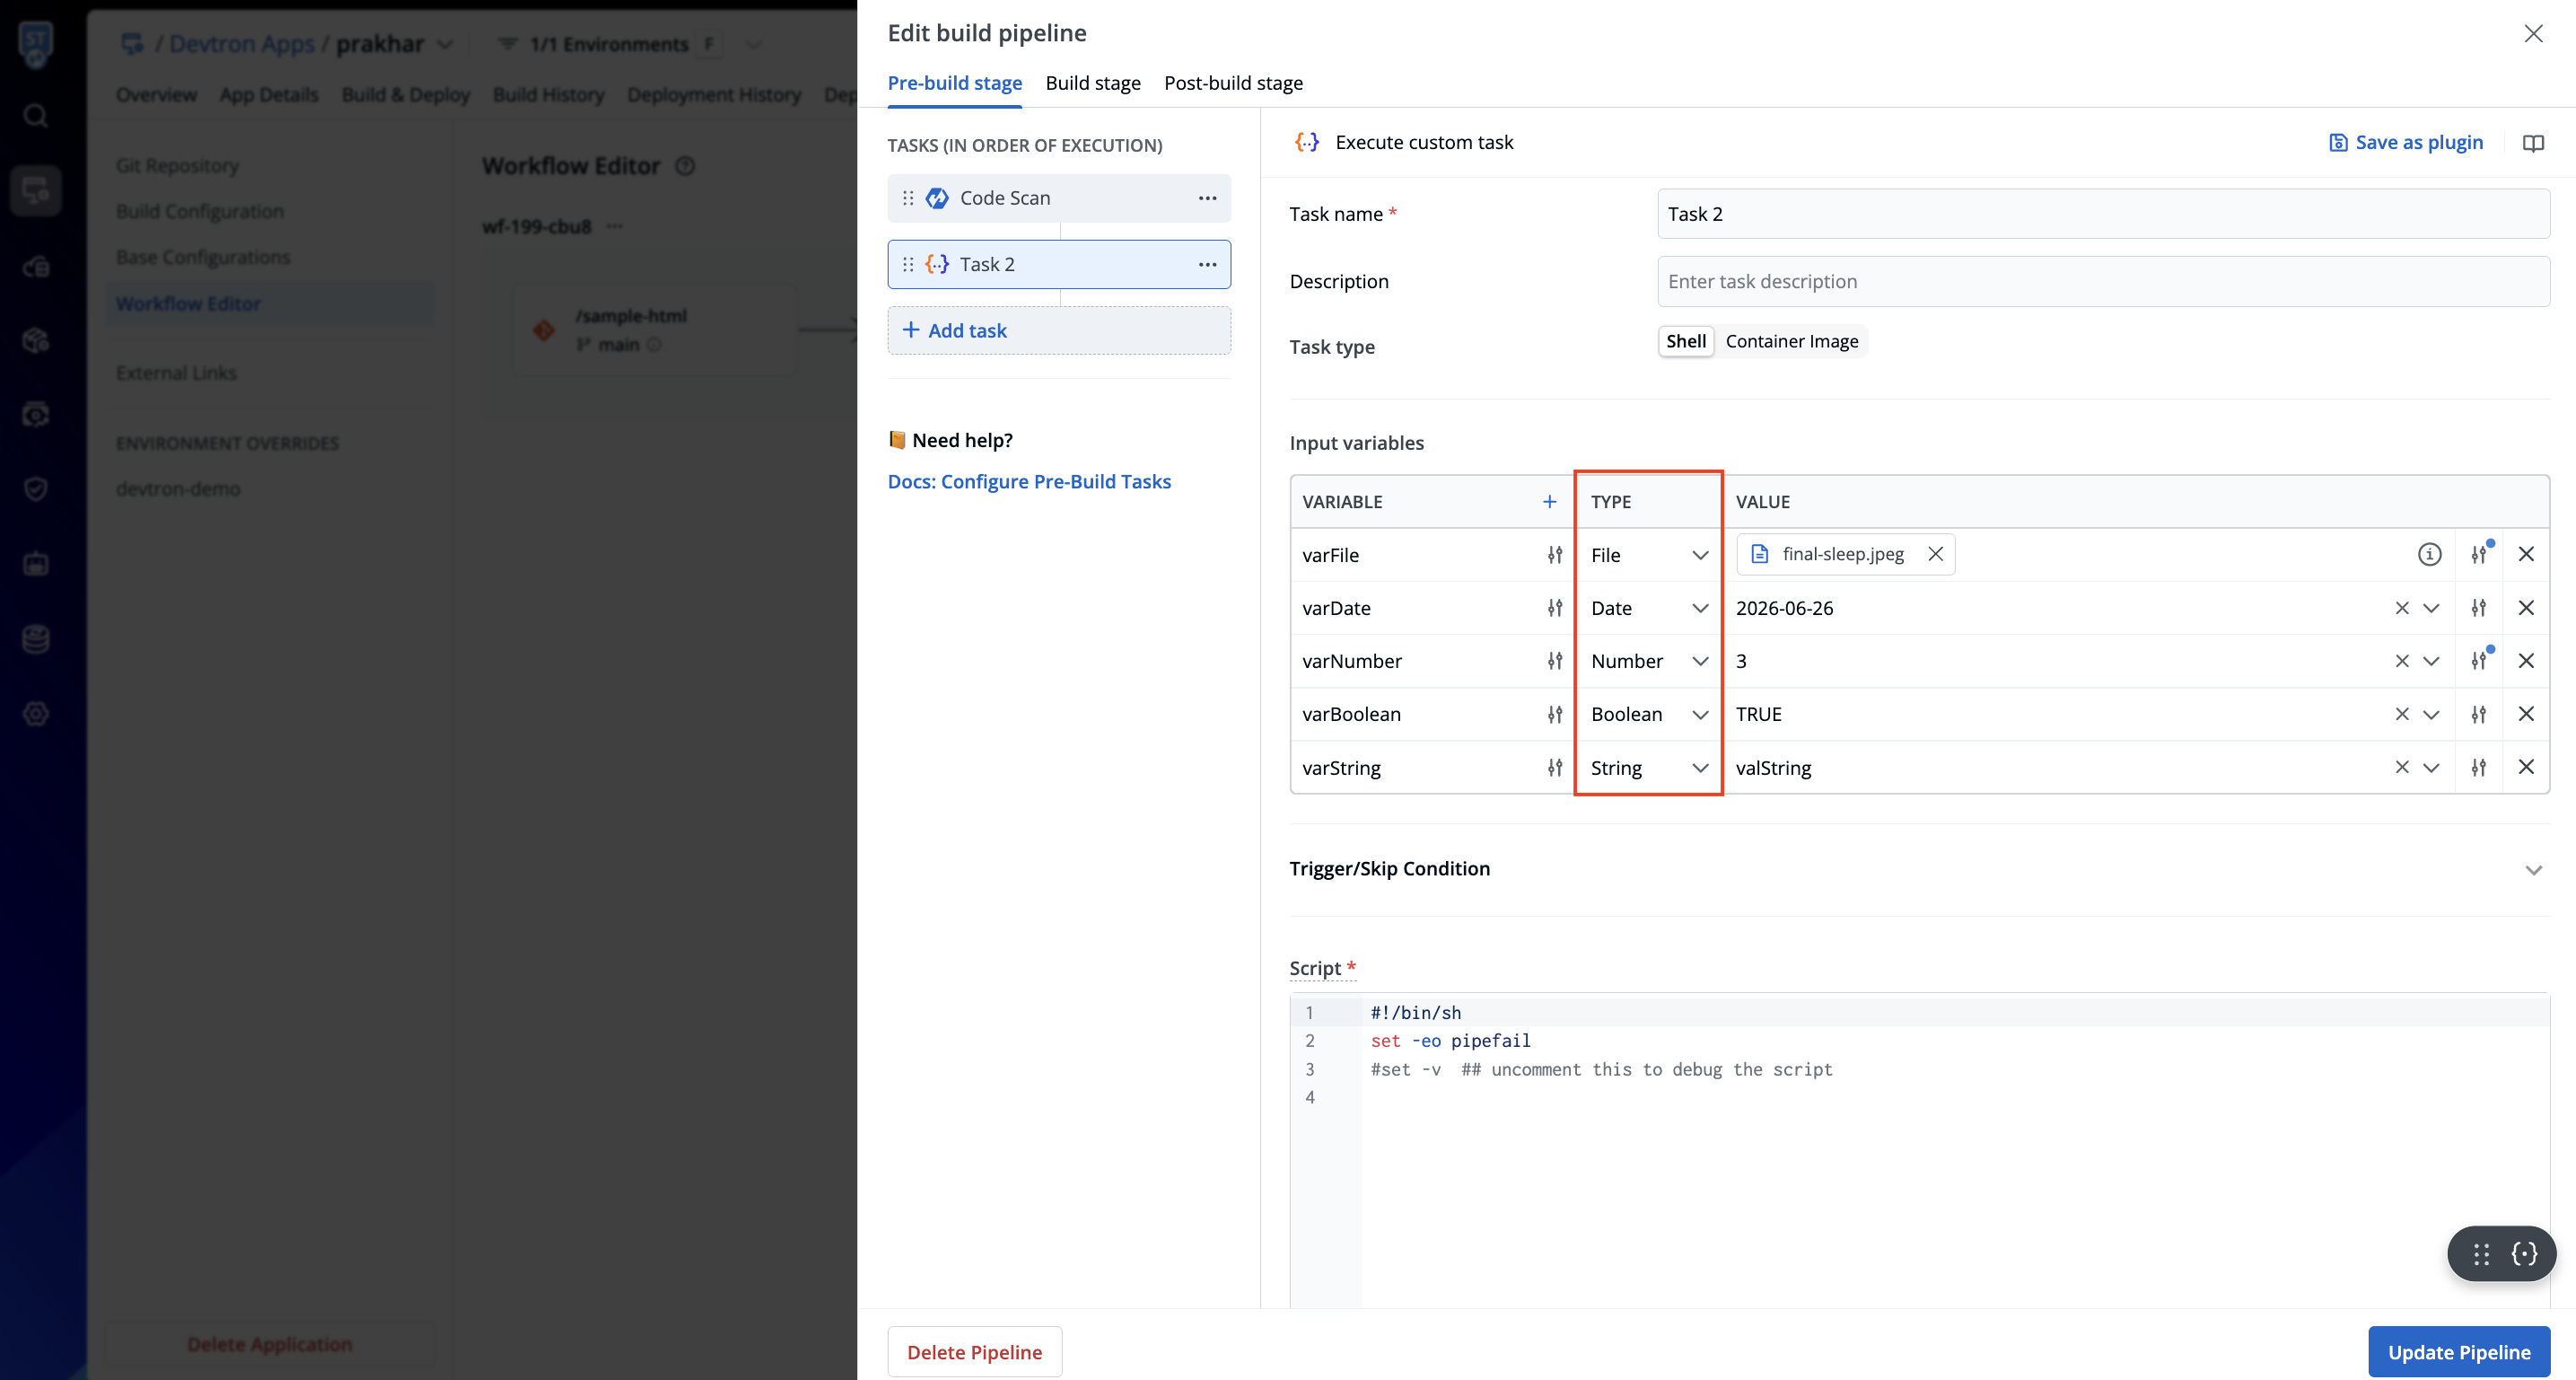
Each runtime parameter has a type (format) that defines what kind of value it accepts. Devtron supports the following types:
| Type | Description |
|---|---|
String | A plain text value, e.g., release-2.1. |
Number | A numeric value, e.g., 8080. |
Boolean | A true or false value, typically used as a feature flag. |
Date | A date value, validated against the expected date format. |
File | A file uploaded at trigger time. Devtron mounts the uploaded file inside the build/job container so your script can read it during execution. |
The File type is useful when your build or job needs an external file — such as a config file, certificate, or dataset — that you don't want to commit to your Git repository.
Passing Runtime Parameters to a CI Build
To pass runtime parameters before triggering a CI build:
-
On the CI pipeline, click Select Material and choose the Git commit you want to build.
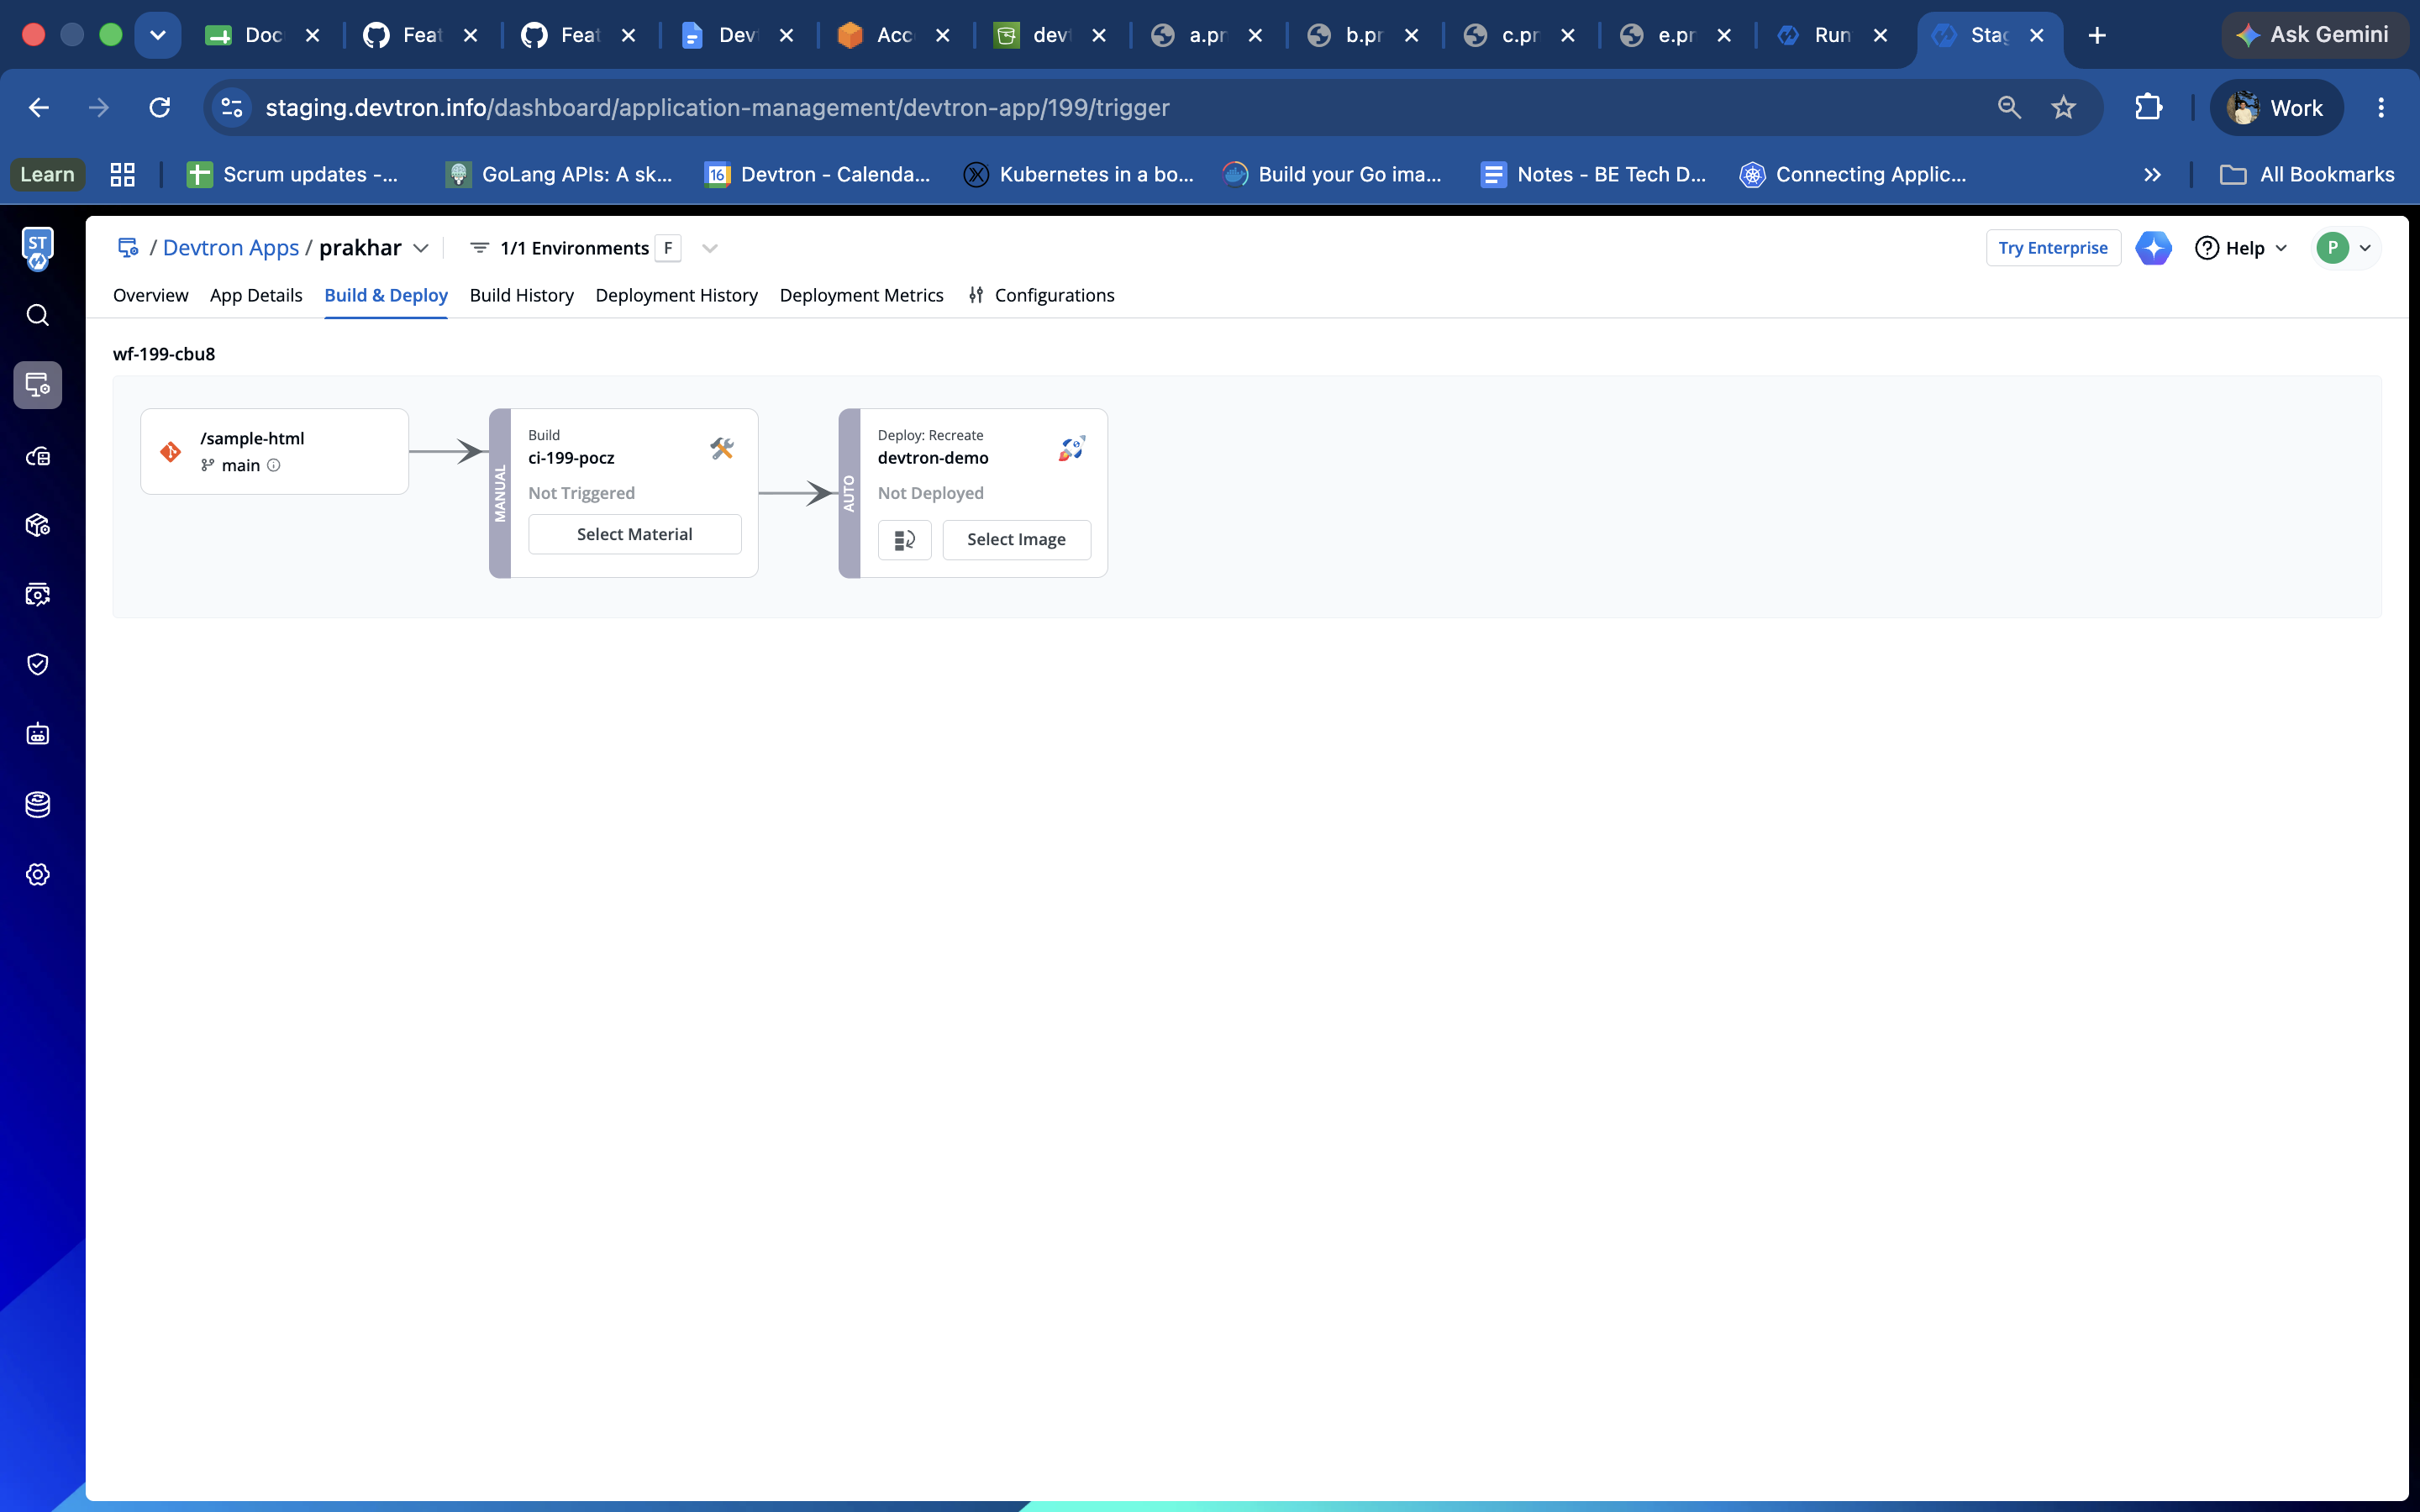
Figure 2: Selecting Material -
Go to the Parameters tab available on the same screen.
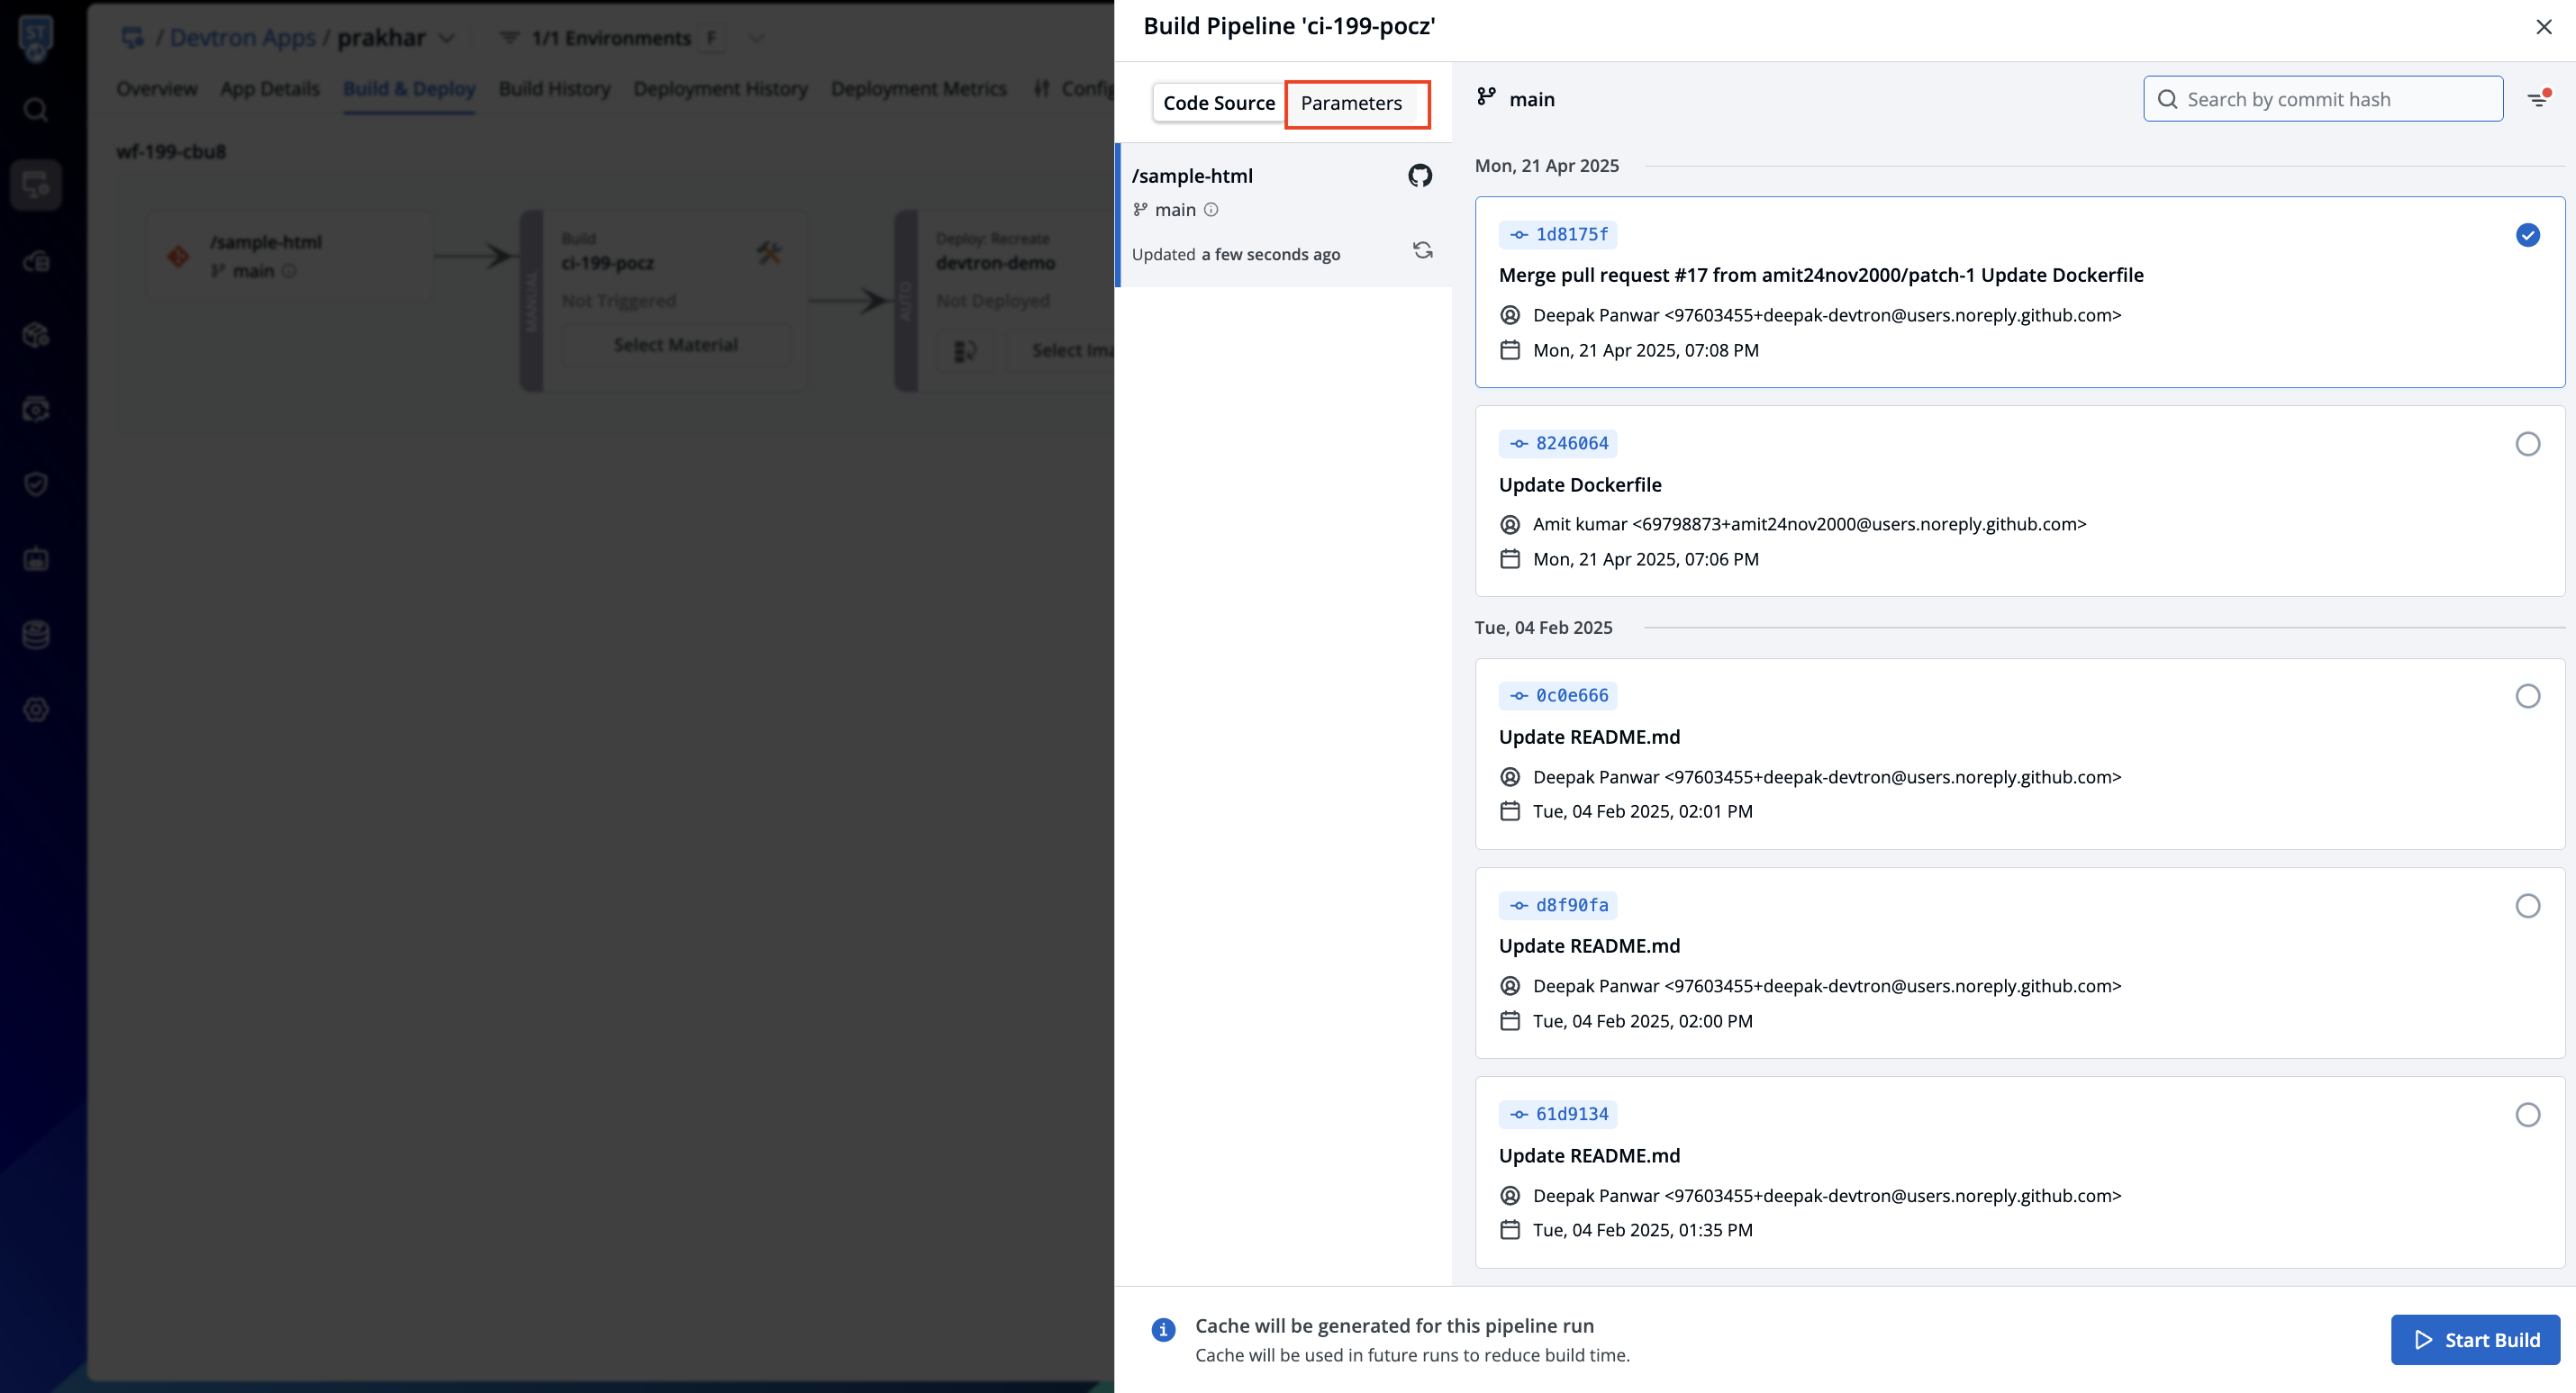
Figure 3: Parameters Tab -
The Key and Type columns are read-only. Enter a value for each parameter. Required parameters are marked with an asterisk (
*); optional parameters can be left blank or set to their default value.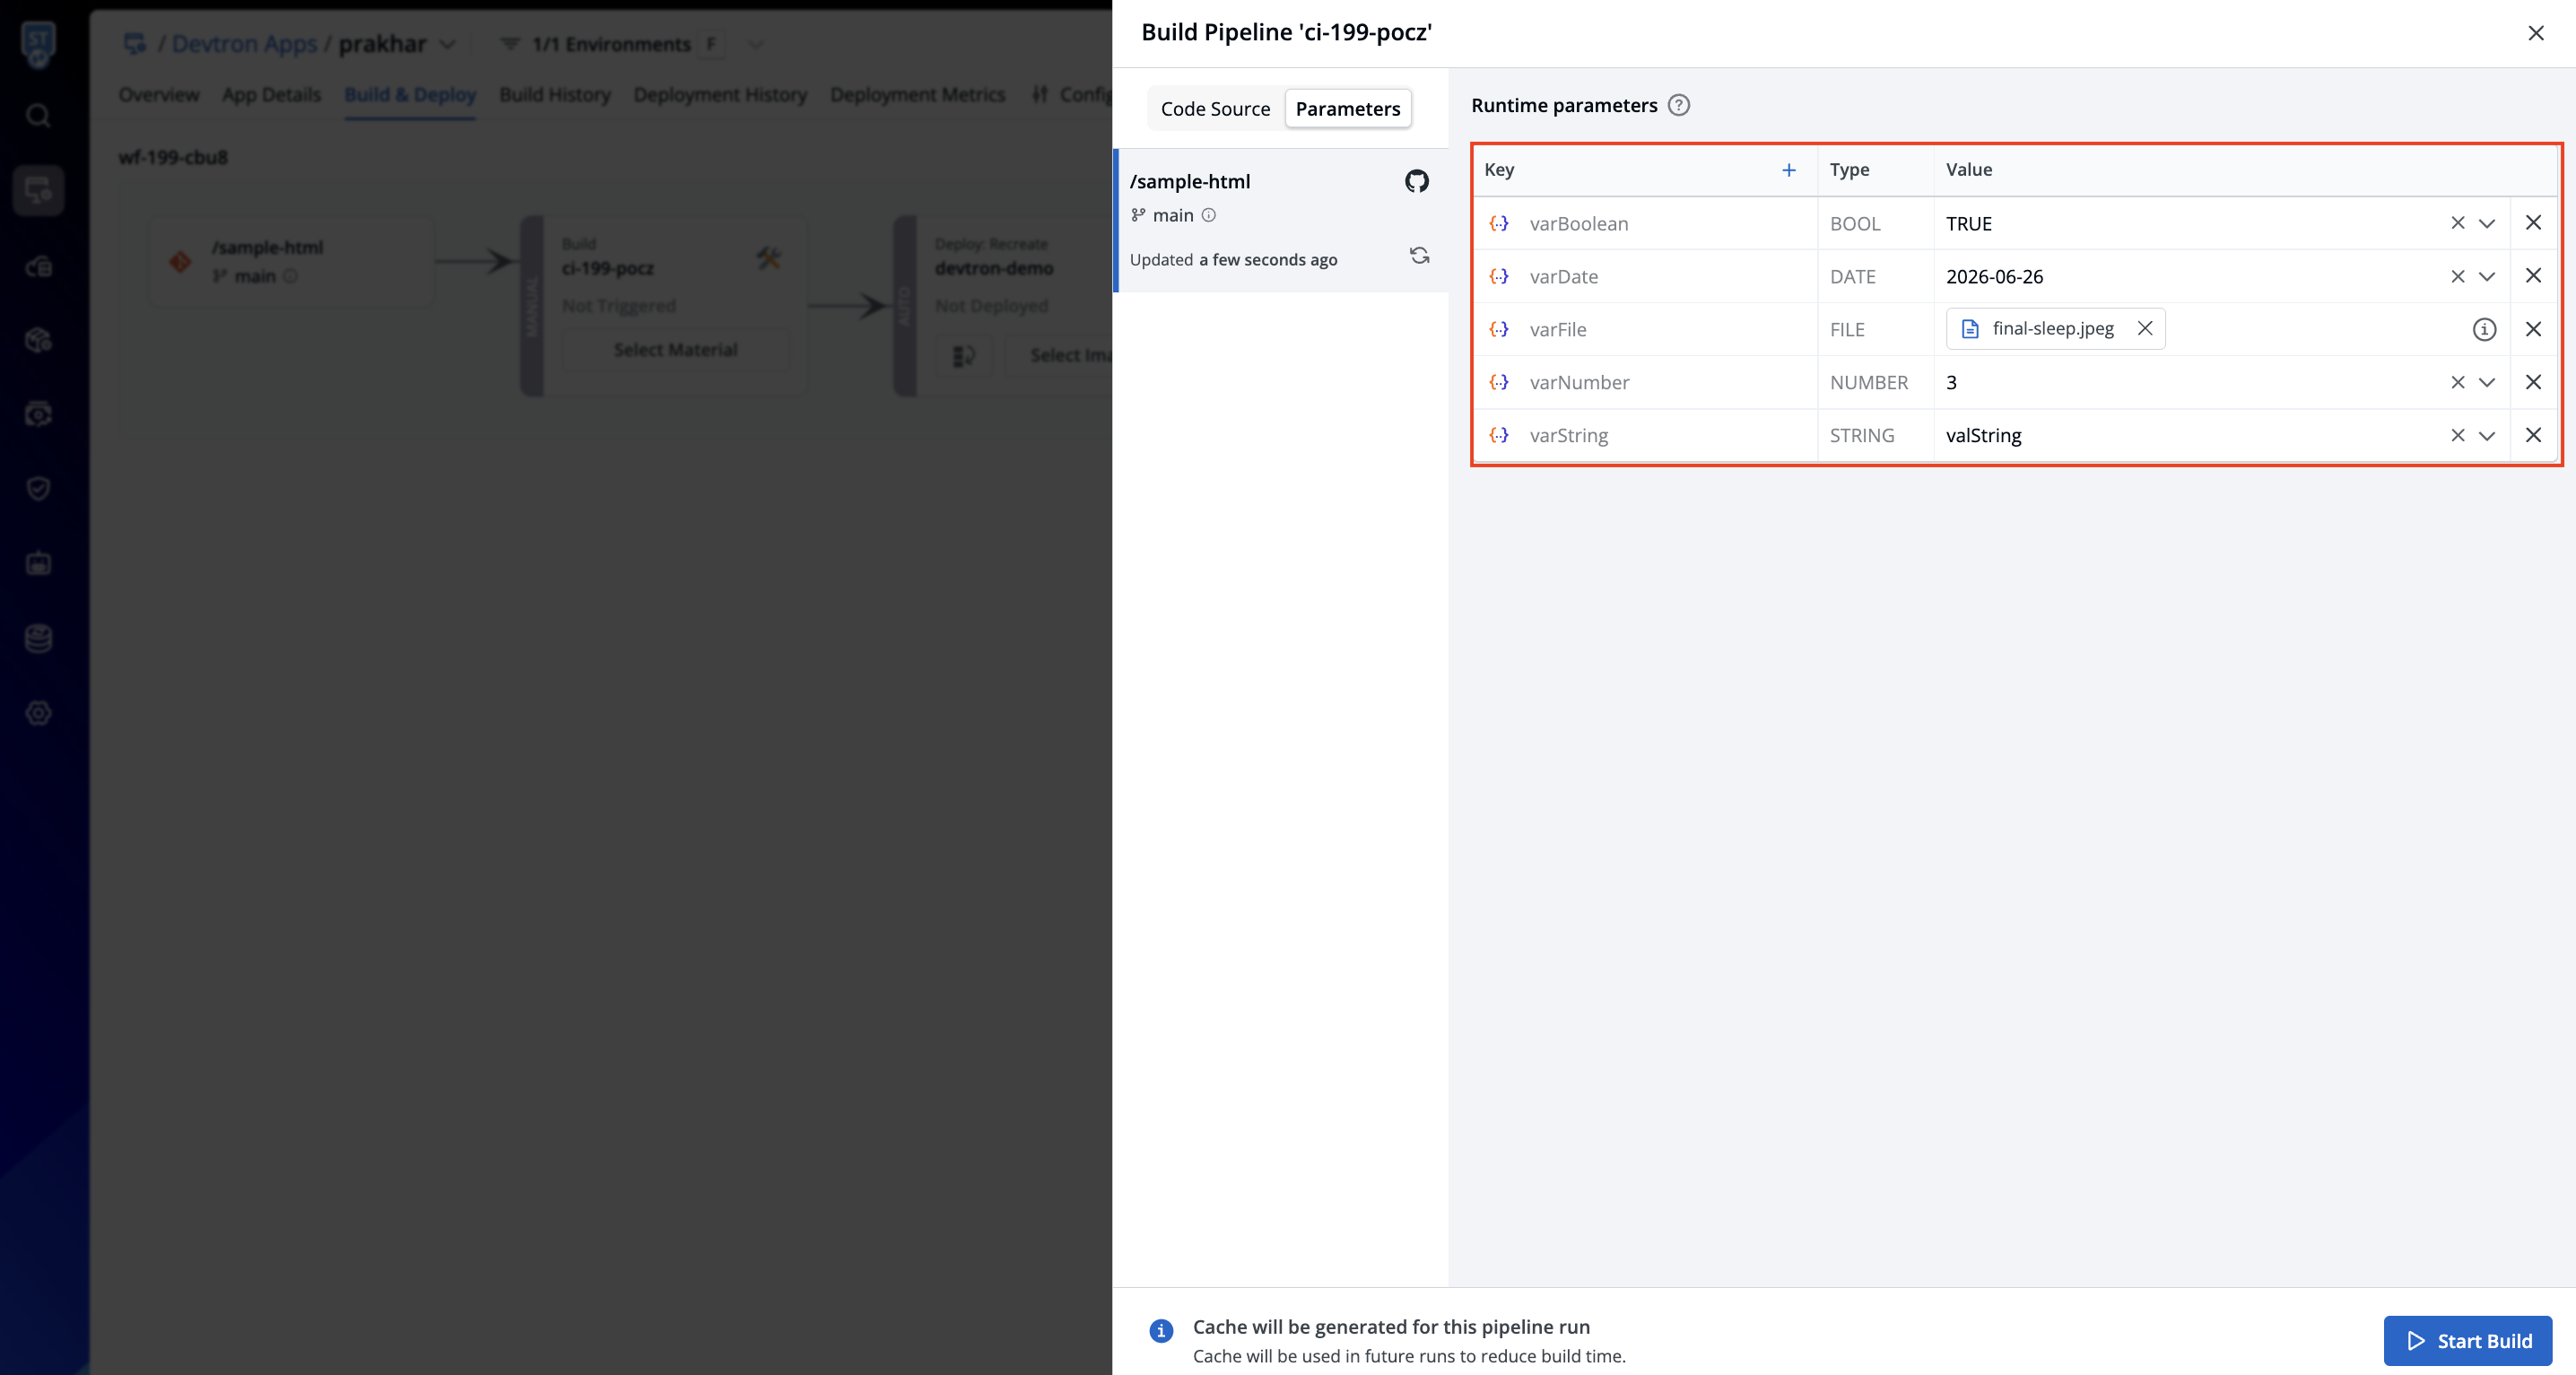
Figure 4: Entering Parameter Values -
For a parameter of type File, click the upload control and select the file to attach. The file will be mounted into the build container at runtime.
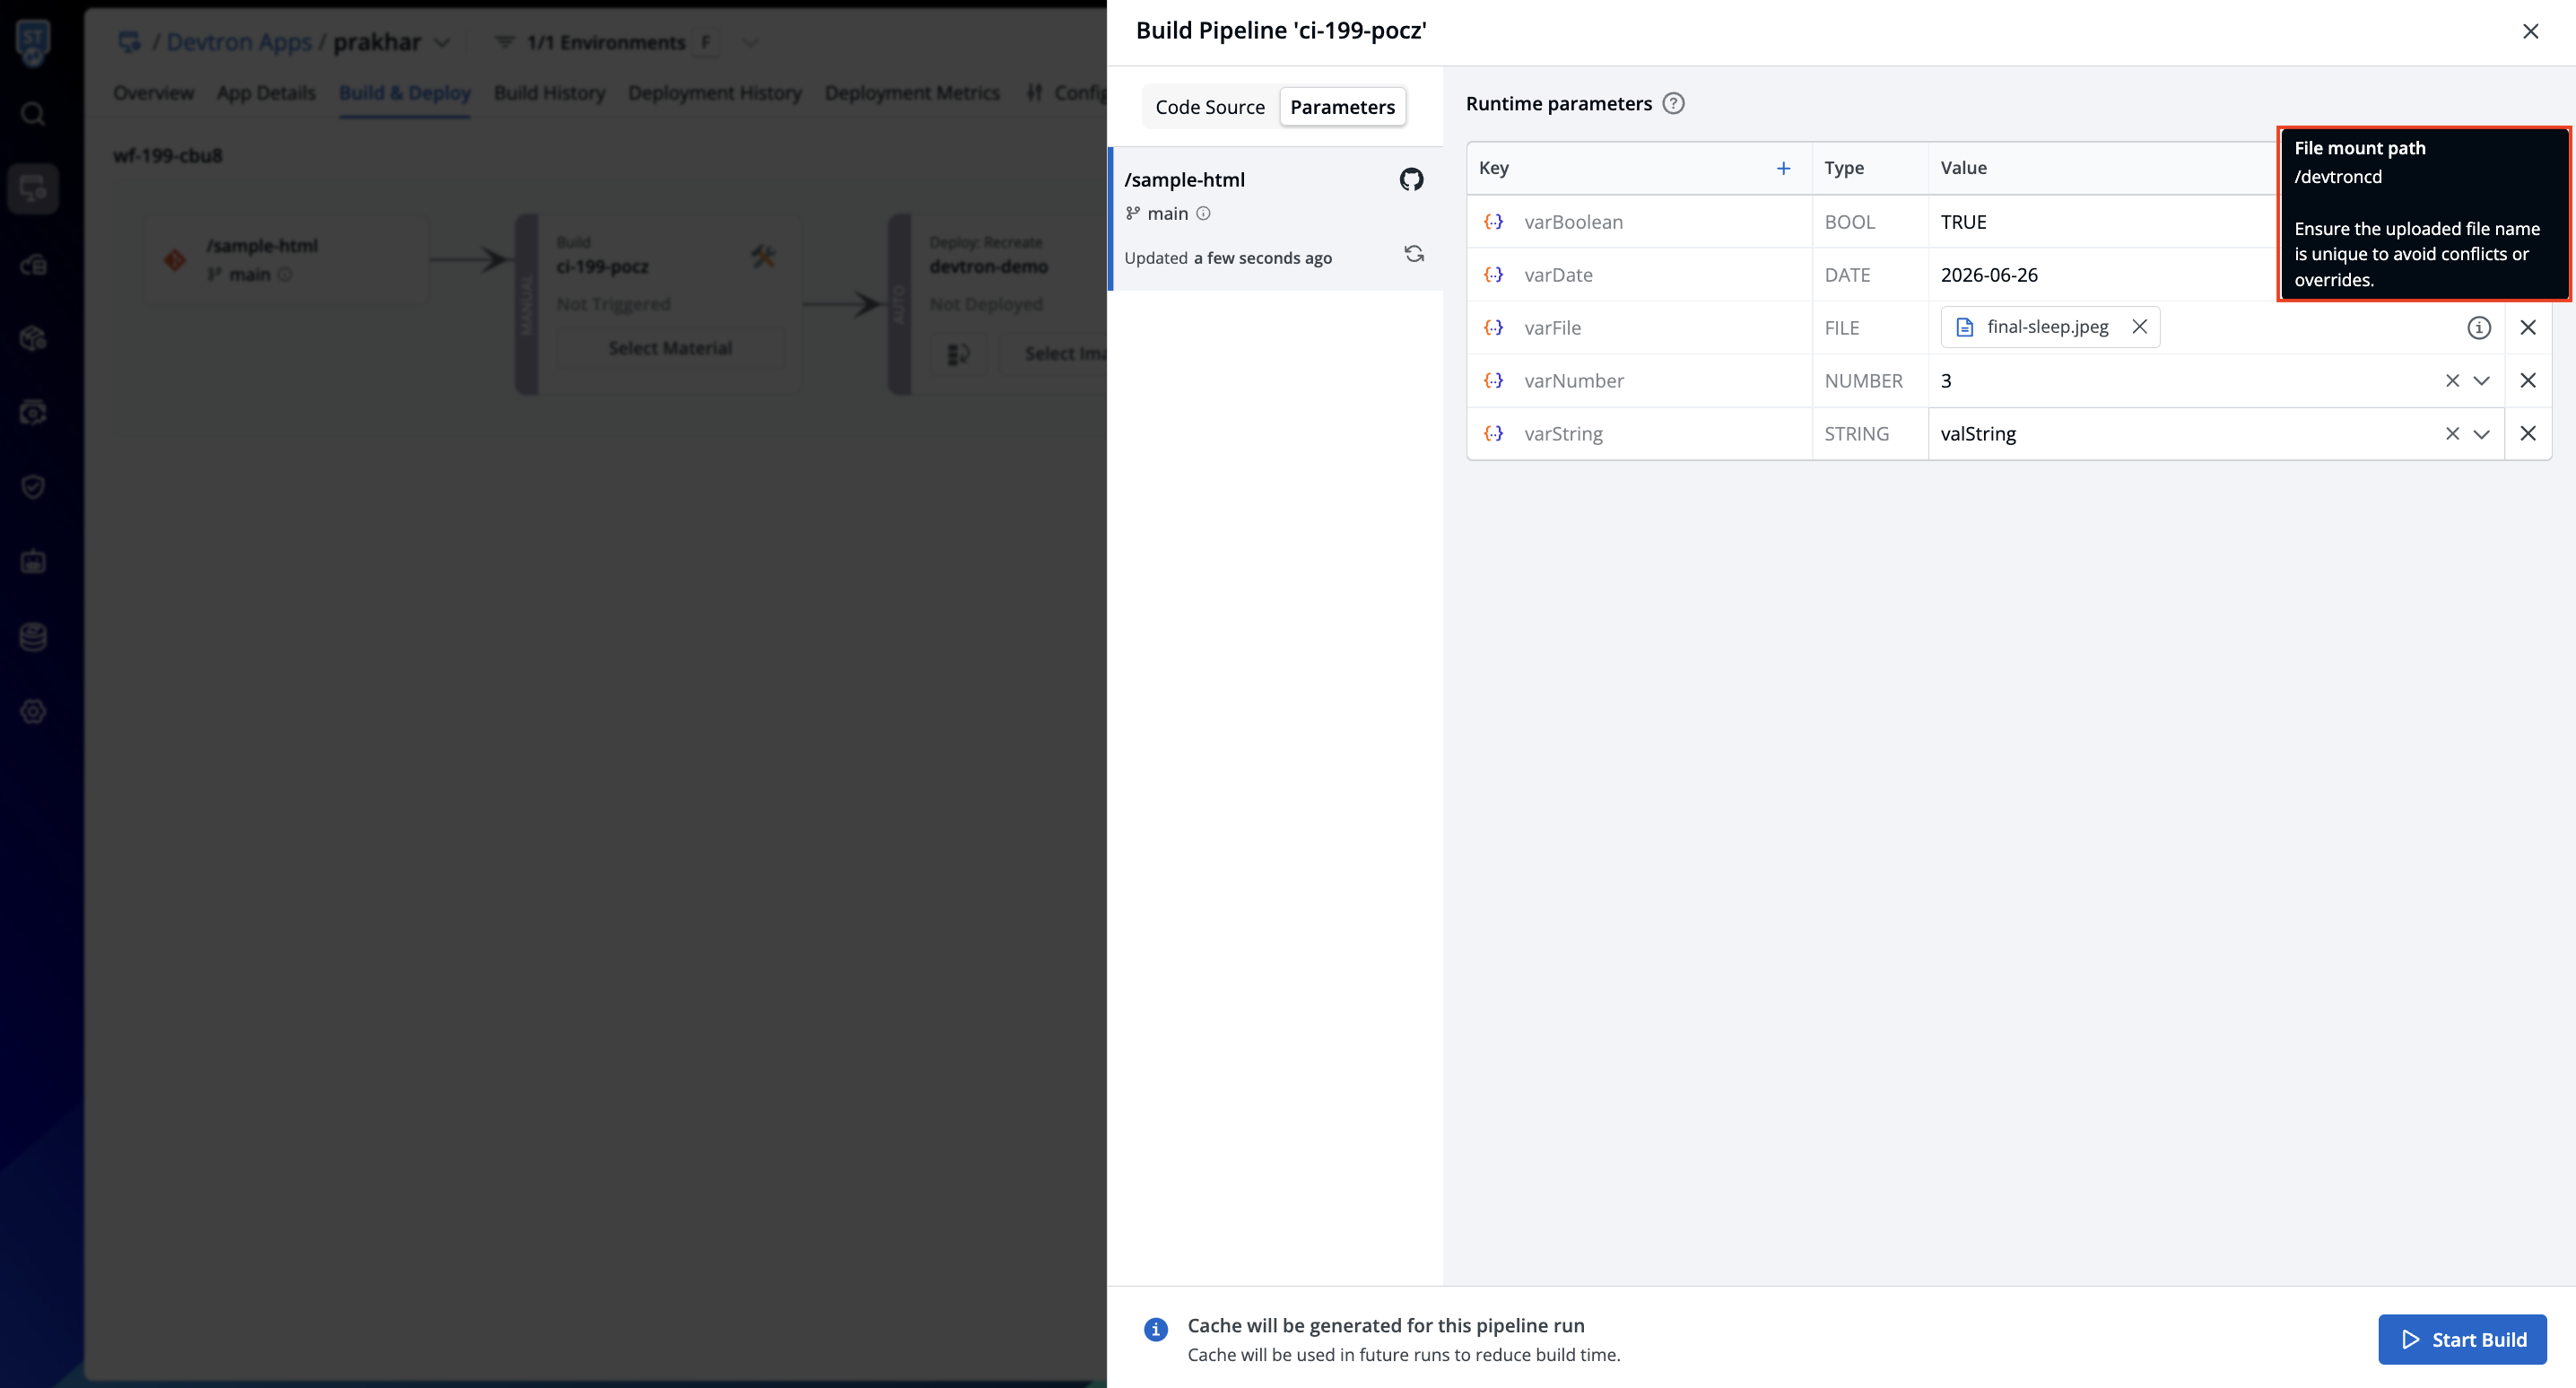
Figure 5: Uploading a File Parameter -
Click Start Build.
You can access the passed values inside your build by referencing the corresponding keys in the environment variable dictionary.
If you trigger builds in bulk, you can pass runtime parameters from Application Groups.
Passing Runtime Parameters to a Job
The flow for jobs mirrors the CI build flow:
-
Navigate to the Trigger Job tab of your job and click Select Material for the pipeline you want to run.
-
Select the Parameters tab to configure the job's runtime inputs (if any). The Key and Type columns are read-only; enter values for each required parameter (denoted by
*). Optional parameters can be configured as needed or left blank.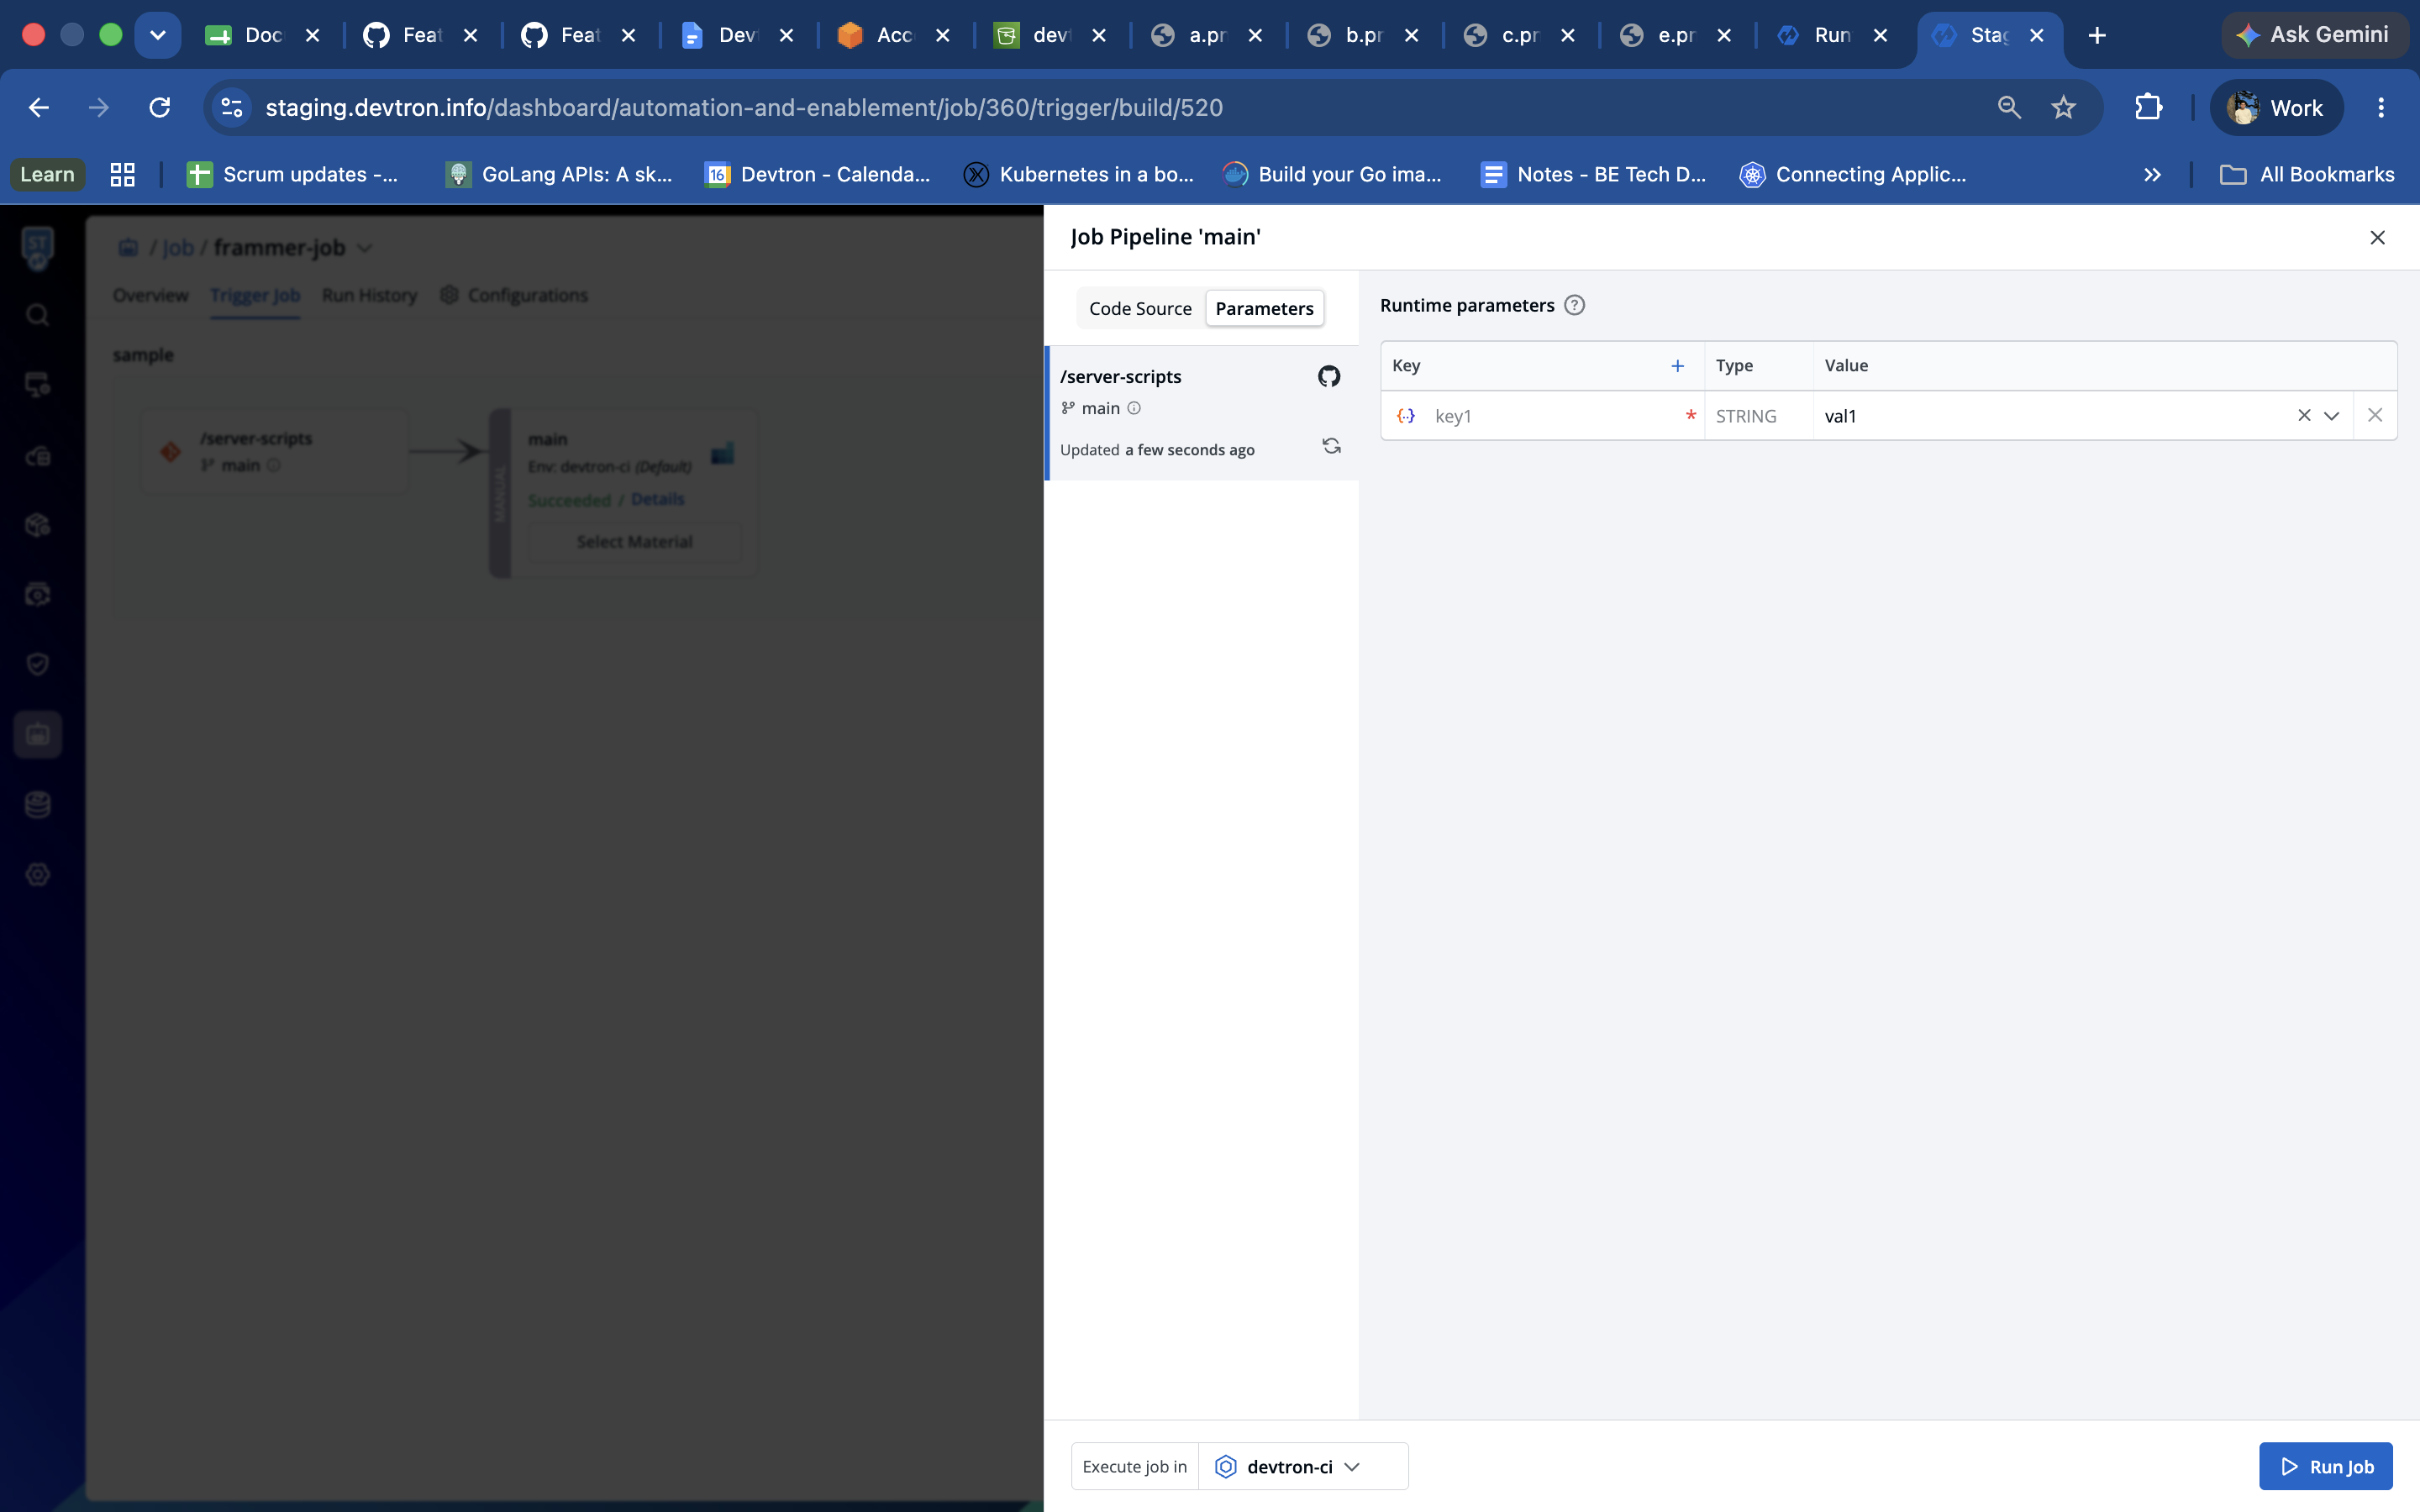
Figure 6: Configuring Runtime Parameters for a Job -
Pick the target environment from the Execute job in dropdown, then click Run Job.
For the complete job-triggering walkthrough, refer to Triggering Job Pipeline.
Default Values and Optional Parameters
A predefined parameter can have a default value. When a default value is set:
- The field is pre-populated at trigger time, so you can run the pipeline without re-entering it.
- You can still override the default by entering a different value before triggering.
A parameter can also be marked as optional, which means it is allowed to have an empty value. Optional parameters can be left blank at trigger time, and the build/job will run without them.
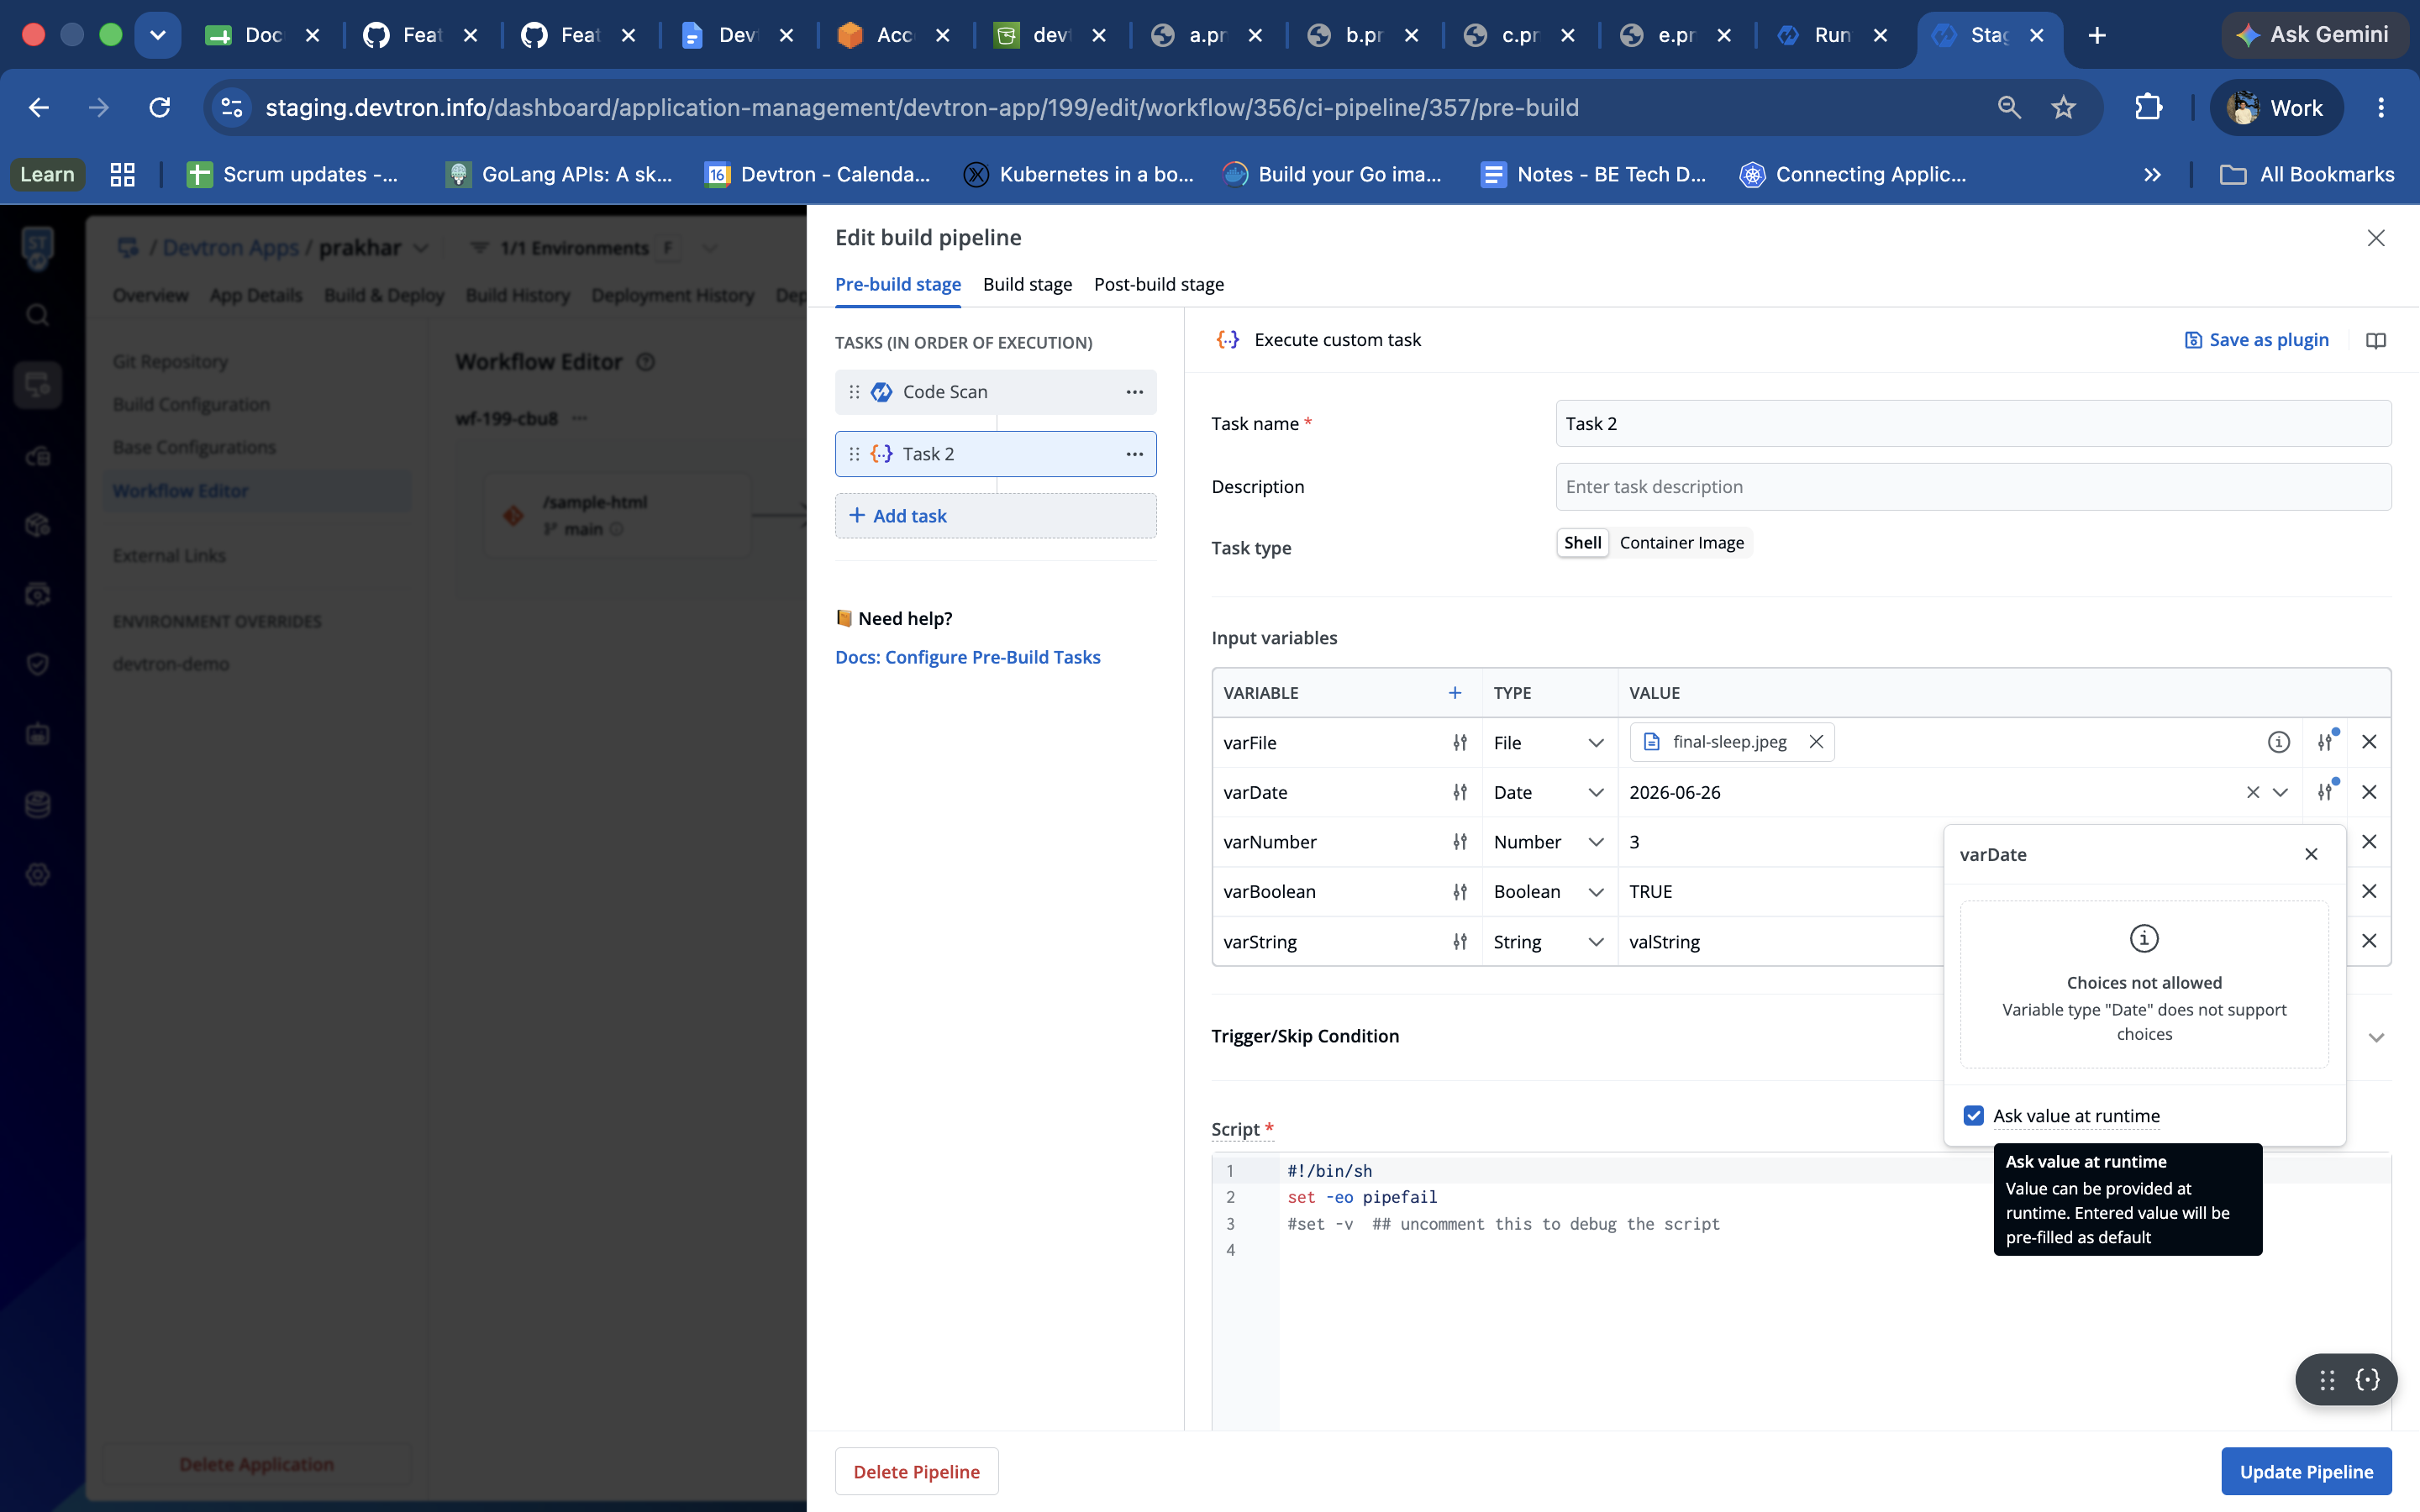
Optional (Empty) Variables in 'Save as Plugin'
When you convert a custom script task into a reusable plugin using Save as Plugin, you can now save input variables without assigning a value to them — i.e., the plugin can have optional variables.
This is useful when you want to ship a reusable plugin whose inputs are filled in later by whoever uses it, instead of baking in fixed values. While saving the plugin, use the toggle to mark each input variable as mandatory or optional:
- Mandatory — the user must provide a value when using the plugin.
- Optional — the variable can be left empty; no value is required.
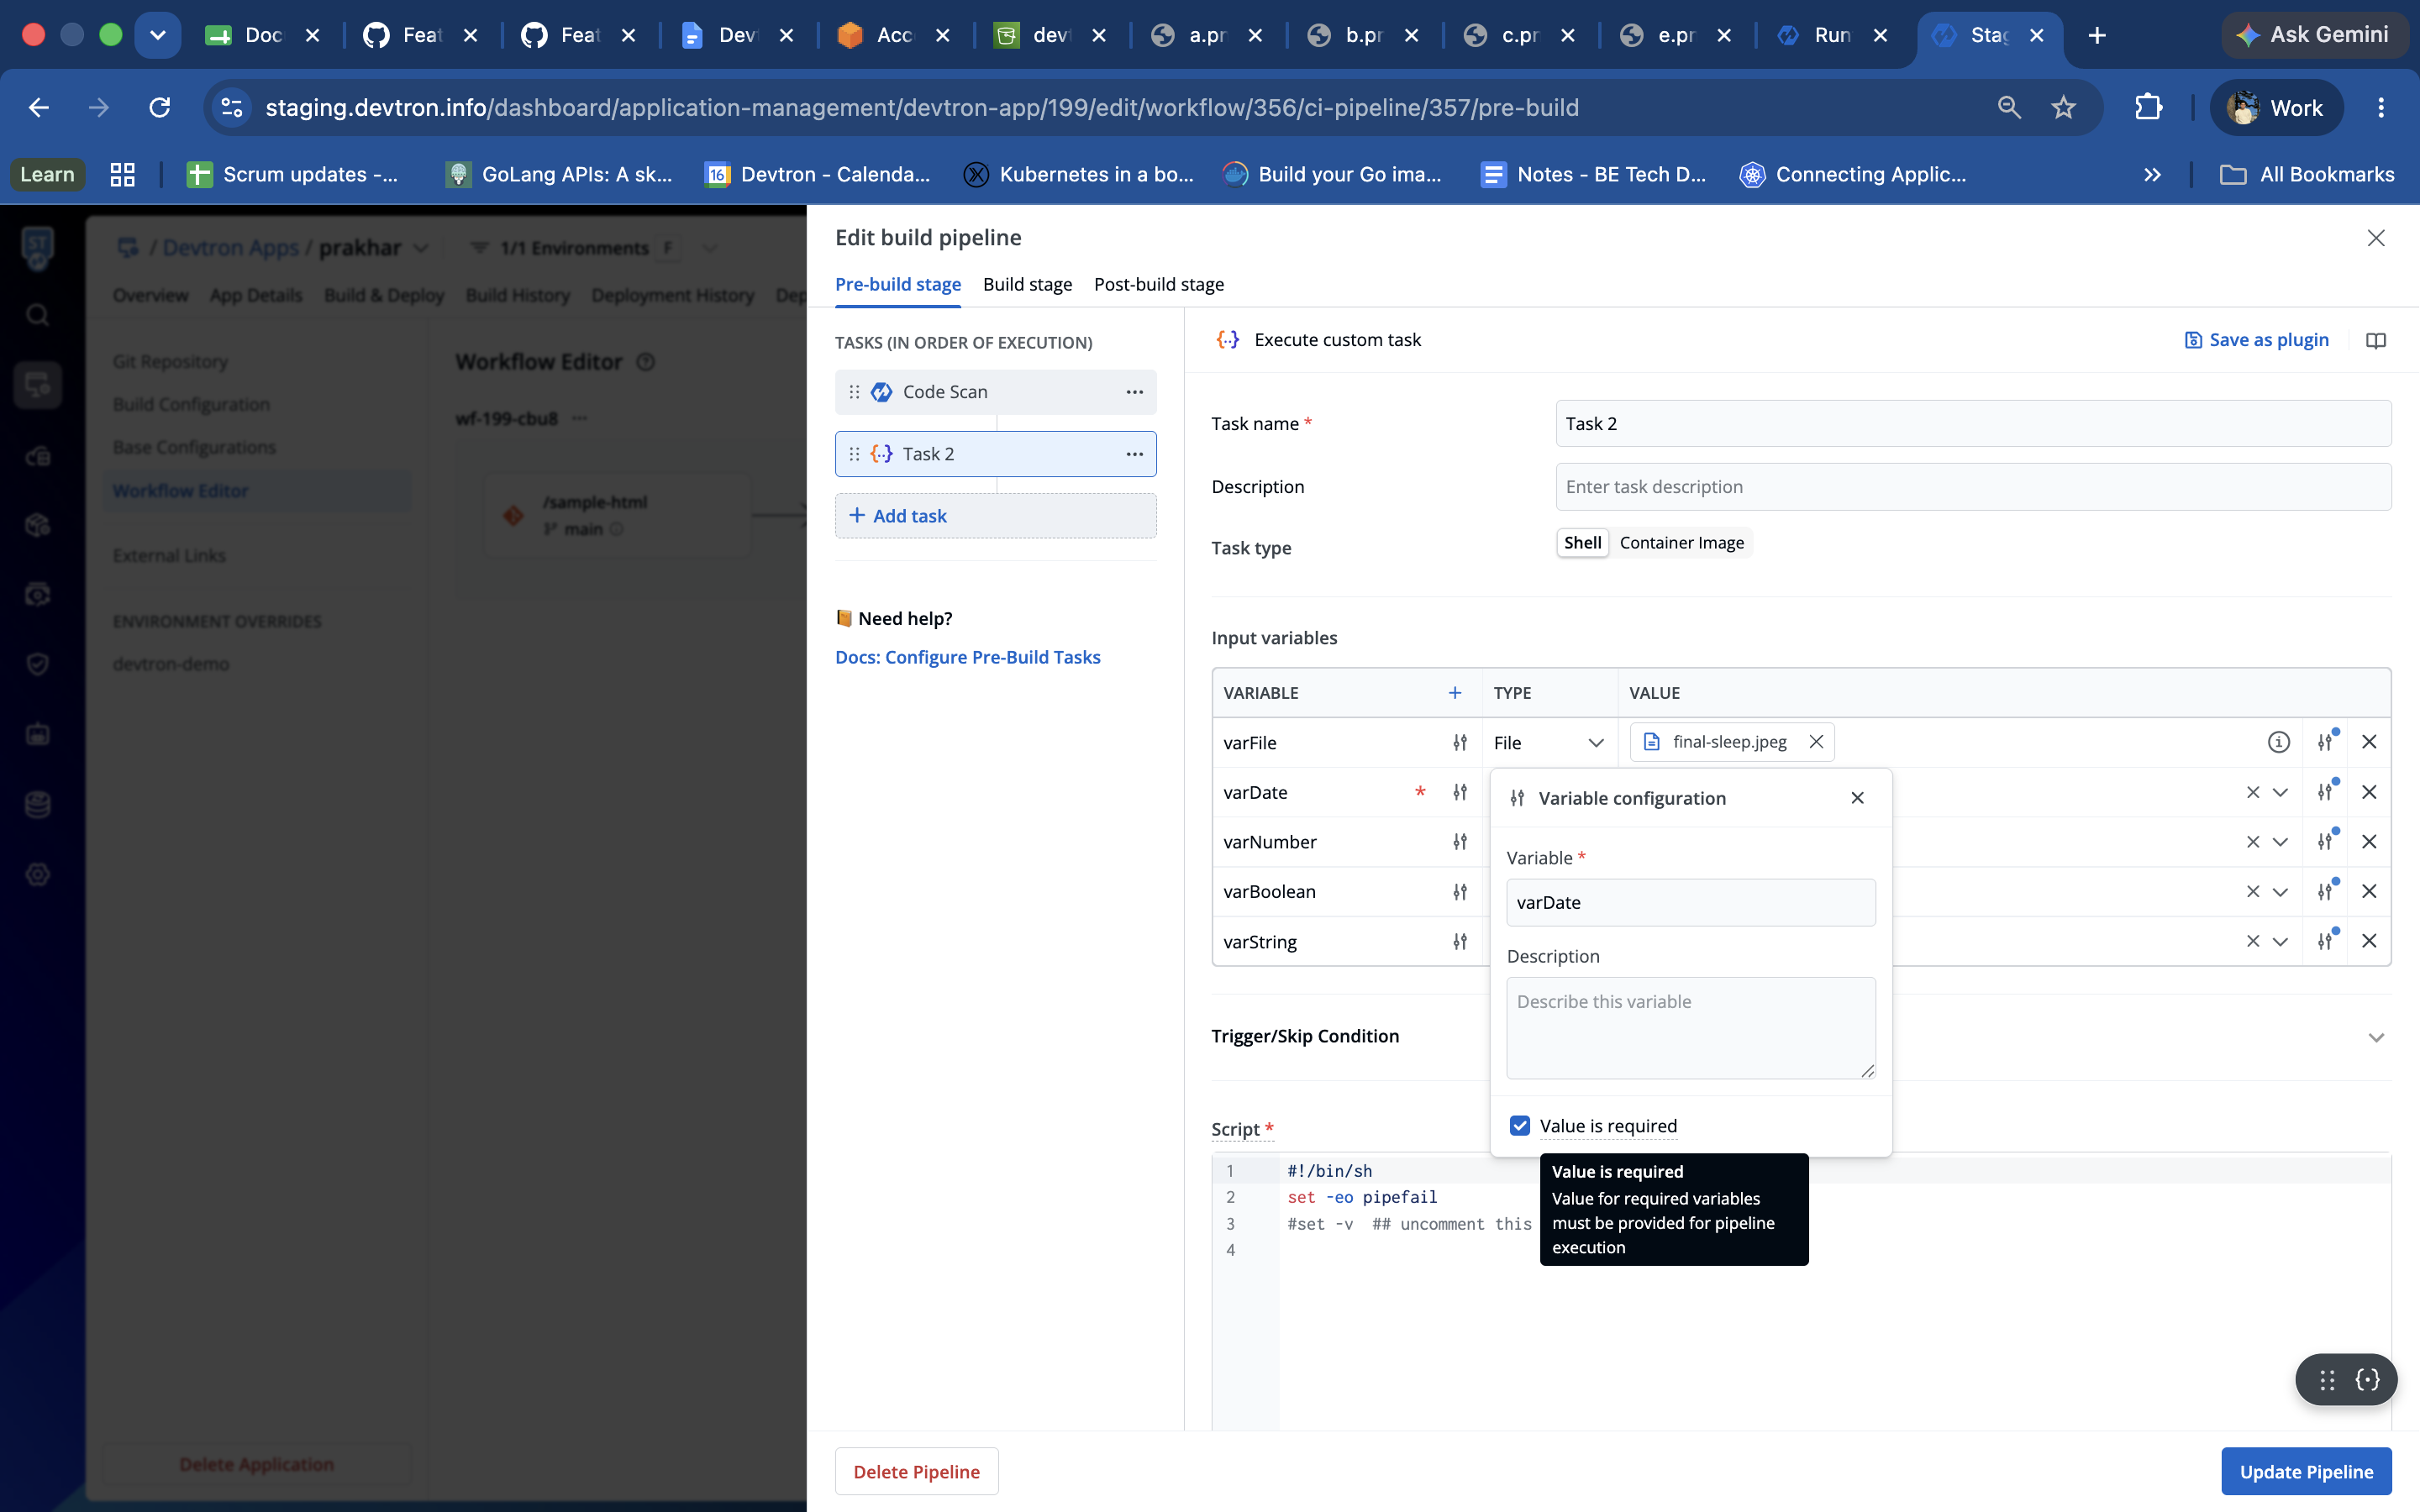
For the full plugin creation flow, refer to Creating a Plugin.