Deployment Charts
Introduction
Devtron Apps leverage helm charts to carry out deployment of your images and configuration. Devtron includes predefined Helm charts (e.g., Deployment, Rollout, StatefulSet) that cover majority of your use cases.
For any use case not addressed by the default Helm charts, you can upload your own Helm chart and use it as a deployment chart in Devtron.
Tutorial
This video contains a quick walkthrough of the steps mentioned in the Preparing a Deployment Chart section of this page and the subsequent uploading of the deployment chart on Devtron.
Preparing a Deployment Chart
Below is the 5-step prerequisite you can follow to have your chart ready for uploading.
1. Create a Helm Chart
You can use the following command to create a Helm chart:
helm create my-custom-chart
Note:
Chart.yamlis a metadata file that gets created when you create a helm chart. The following table consists the fields that are relevant to you inChart.yaml.
| Field | Description |
|---|---|
Name | Name of the Helm chart (Required). |
Version | This is the chart version. Update this value for each new version of the chart (Required). |
Description | Give a description to your chart (Optional). |
Click here to view a sample 'Chart.yaml' file.
2. Create an Image Descriptor Template File
The Image Descriptor Template file is a GO template that produces a valid JSON file upon processing. It allows Devtron to dynamically inject values from the CD pipeline into your Helm chart during deployment. Therefore, details like image repository, tag, and environment are automatically populated at the placeholders specified in .image_descriptor_template.json.
-
In the root directory of your chart, create a file named
.image_descriptor_template.jsonusing the following command:touch .image_descriptor_template.json -
Ensure the above file is created in the directory where the main
Chart.yamlexists (as shown below):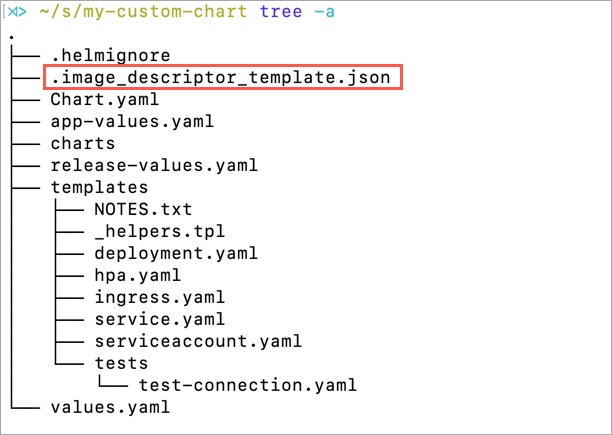
-
Paste the following content in
.image_descriptor_template.jsonfile:{
"server": {
"deployment": {
"image_tag": "{{.Tag}}",
"image": "{{.Name}}"
}
},
"pipelineName": "{{.PipelineName}}",
"releaseVersion": "{{.ReleaseVersion}}",
"deploymentType": "{{.DeploymentType}}",
"app": "{{.App}}",
"env": "{{.Env}}",
"appMetrics": {{.AppMetrics}}
}You can customize this template to include only the values your deployment needs. For instance, if you only require the image repository and tag, your template would look like:
{
    "image": {
        "repository": "{{.Name}}",
        "tag": "{{.Tag}}"
    }
}
If your code editor highlights a syntax error (property or EOF error) in the above JSON, ignore it.
3. Add app-values.yaml
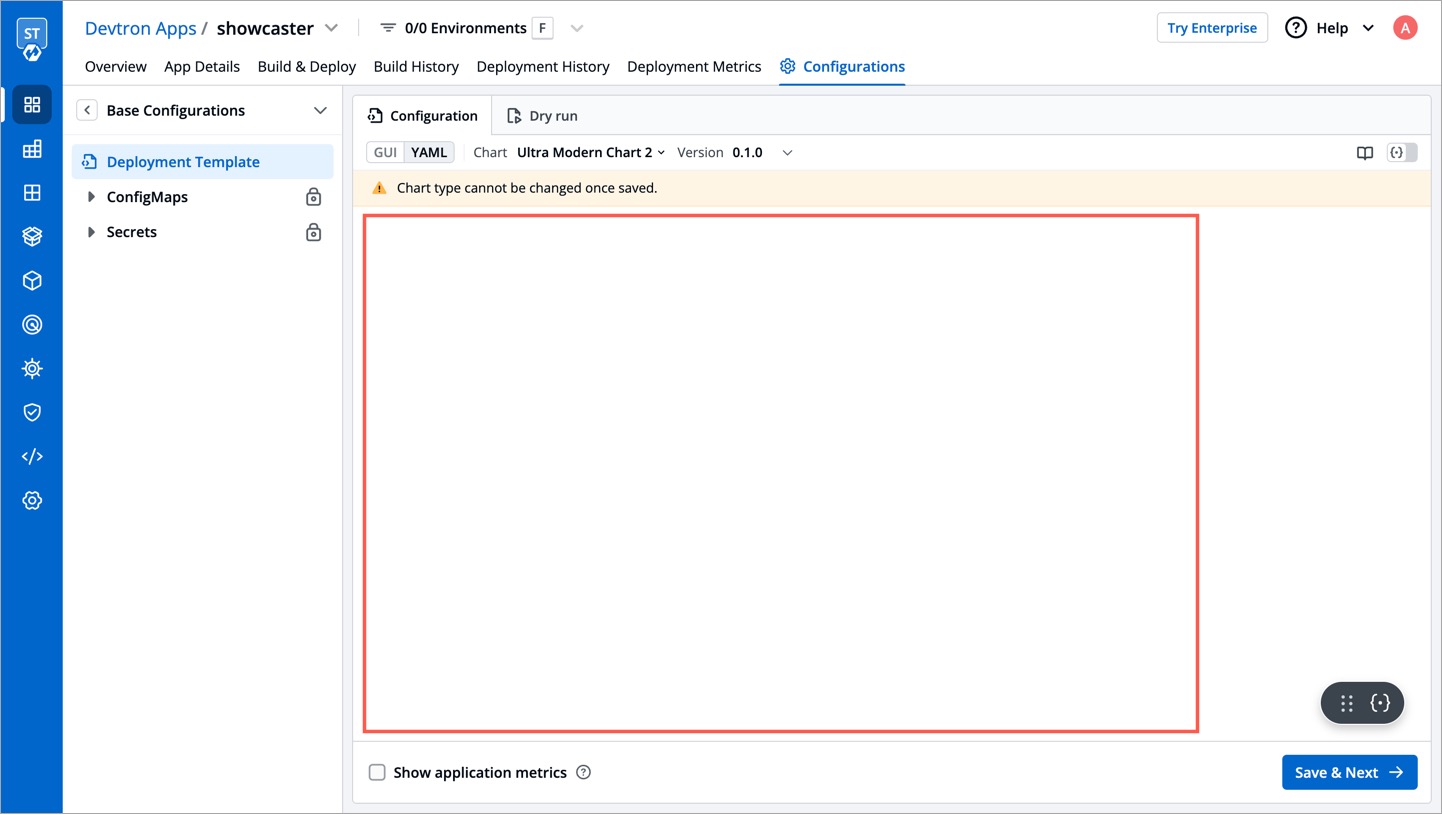
In the root directory of your chart, Devtron expects an app-values.yaml file. It uses this file to determine the values to be displayed on the deployment template as shown below.
The app-values.yaml file is simply a subset of your values.yaml file. Therefore, you can insert specific entries from values.yaml that you wish to display.
However, if you upload the chart without an app-values.yaml or with an empty one, your deployment template will appear blank (as shown below) or null.
4. Add release-values.yaml
The release-values.yaml file contains essential values needed for deployment that aren’t covered by app-values.yaml. For example:
- Some dynamic values (such as
IMAGE_TAGandIMAGE_REPOfrom the image descriptor JSON file) are populated here because they are needed for deployment. - You can use
autoPromotionSecondsto decide how long to keep old pods running once the latest pods of new release are available.
In the root directory of your chart, create a file named release-values.yaml with the following command:
touch release-values.yaml
Use the following content in the release-values.yaml file (edit it as per your requirement):
server:
 deployment:
   image_tag: IMAGE_TAG
   image: IMAGE_REPO
   enabled: false
dbMigrationConfig:
  enabled: false

pauseForSecondsBeforeSwitchActive: 0
waitForSecondsBeforeScalingDown: 0
autoPromotionSeconds: 30

#used for deployment algo selection
orchestrator.deploymant.algo: 1
5. Package the chart in a tgz format
The Helm chart to be uploaded must be packaged as a versioned archive file in the format: <helm-chart-name>-x.x.x.tgz.
Both <helm-chart-name> and x.x.x will be automatically fetched from the name and version fields present in the Chart.yaml file, respectively."
Ensure you navigate out of the Helm chart folder before packaging it in a '.tgz' format
Run the following command to package the chart:
helm package my-custom-chart
The above command will generate a <helm-chart-name>-x.x.x.tgz file.
Uploading a Deployment Chart
Only super admin users can upload a deployment chart. A super admin can upload multiple versions of a chart.
Steps
-
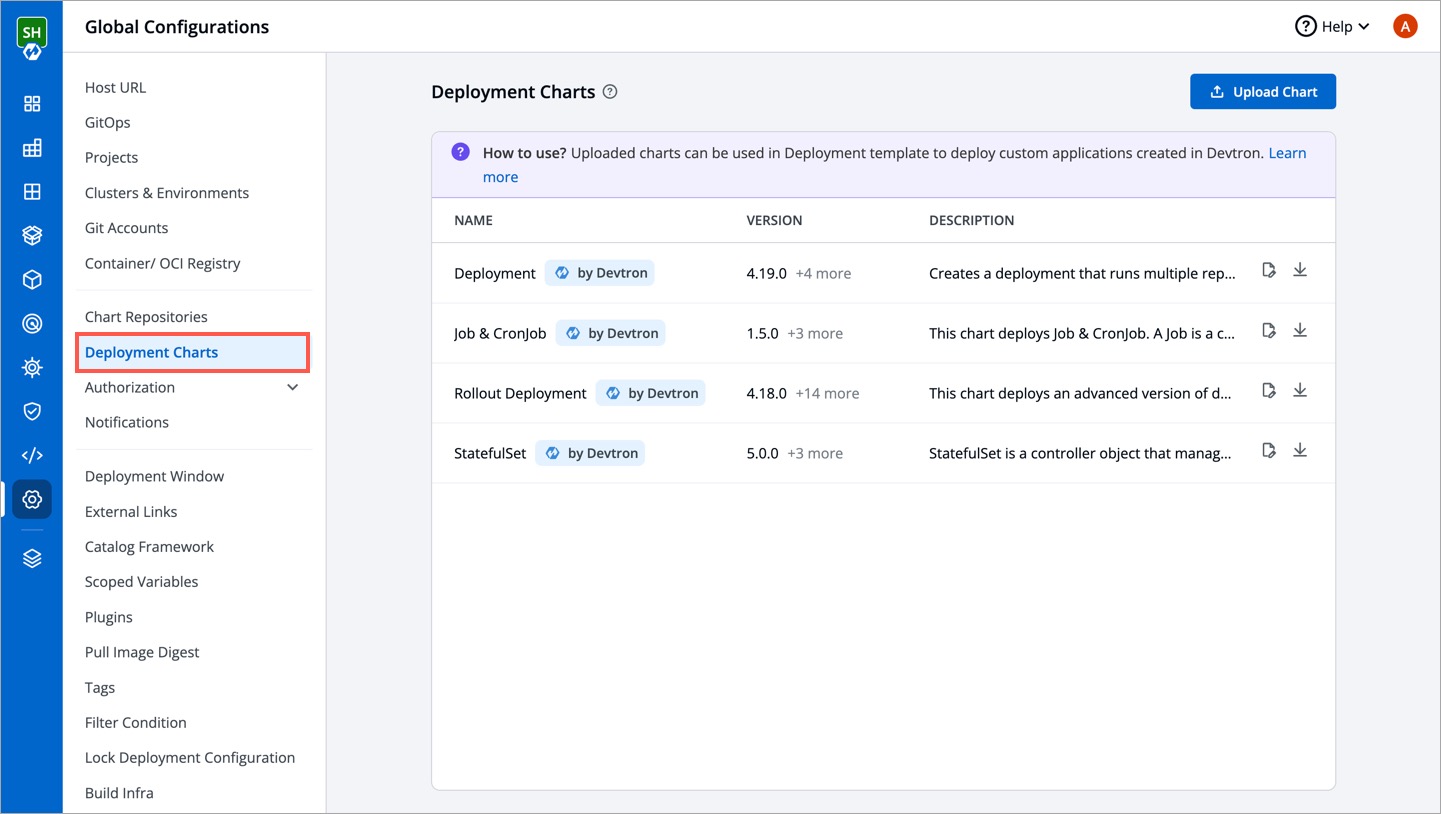
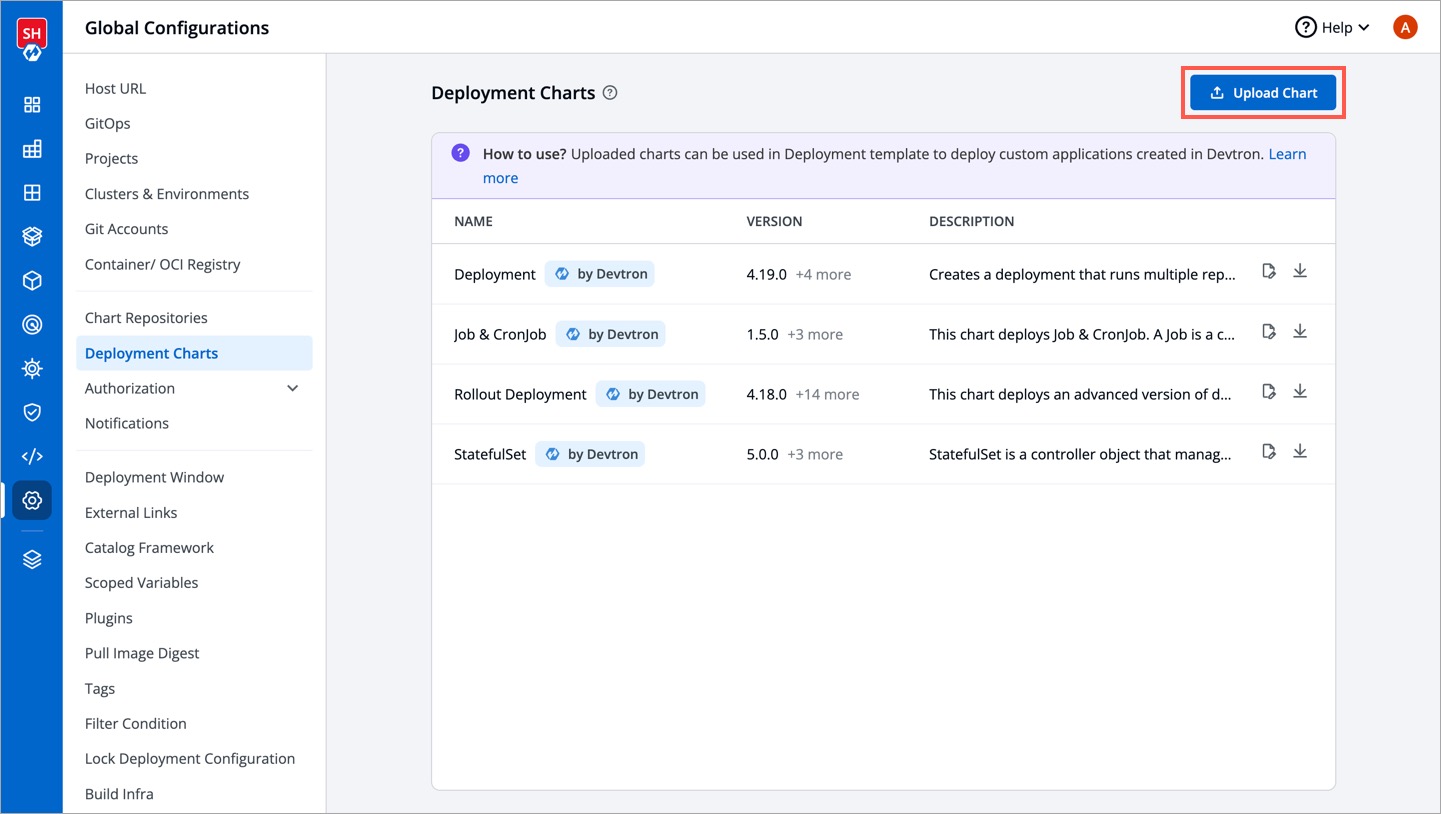
Go to Global Configurations → Deployment Charts.
-
Click Upload Chart.
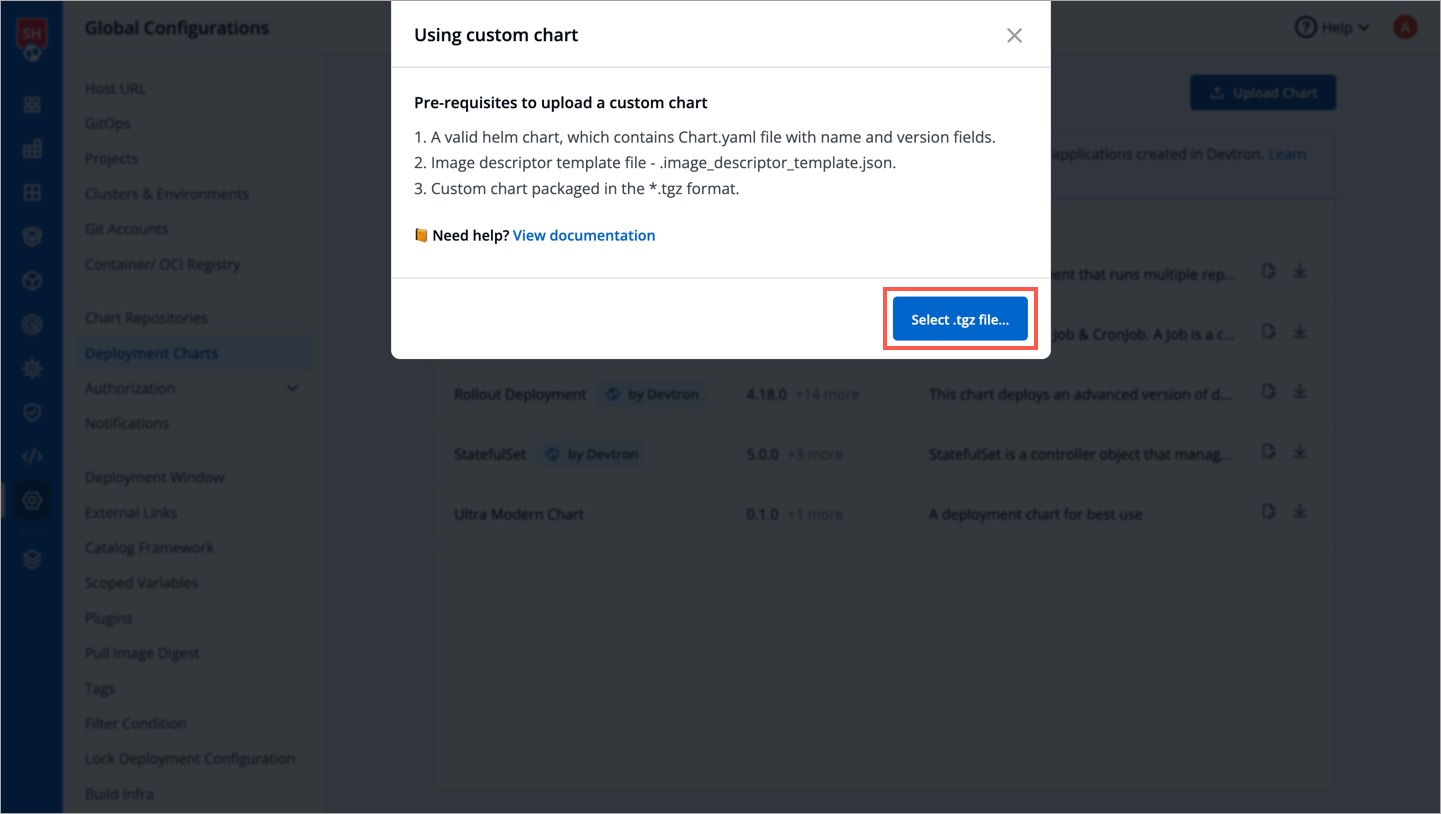
-
Click Select .tgz file and upload your packaged deployment chart (in .tgz format).
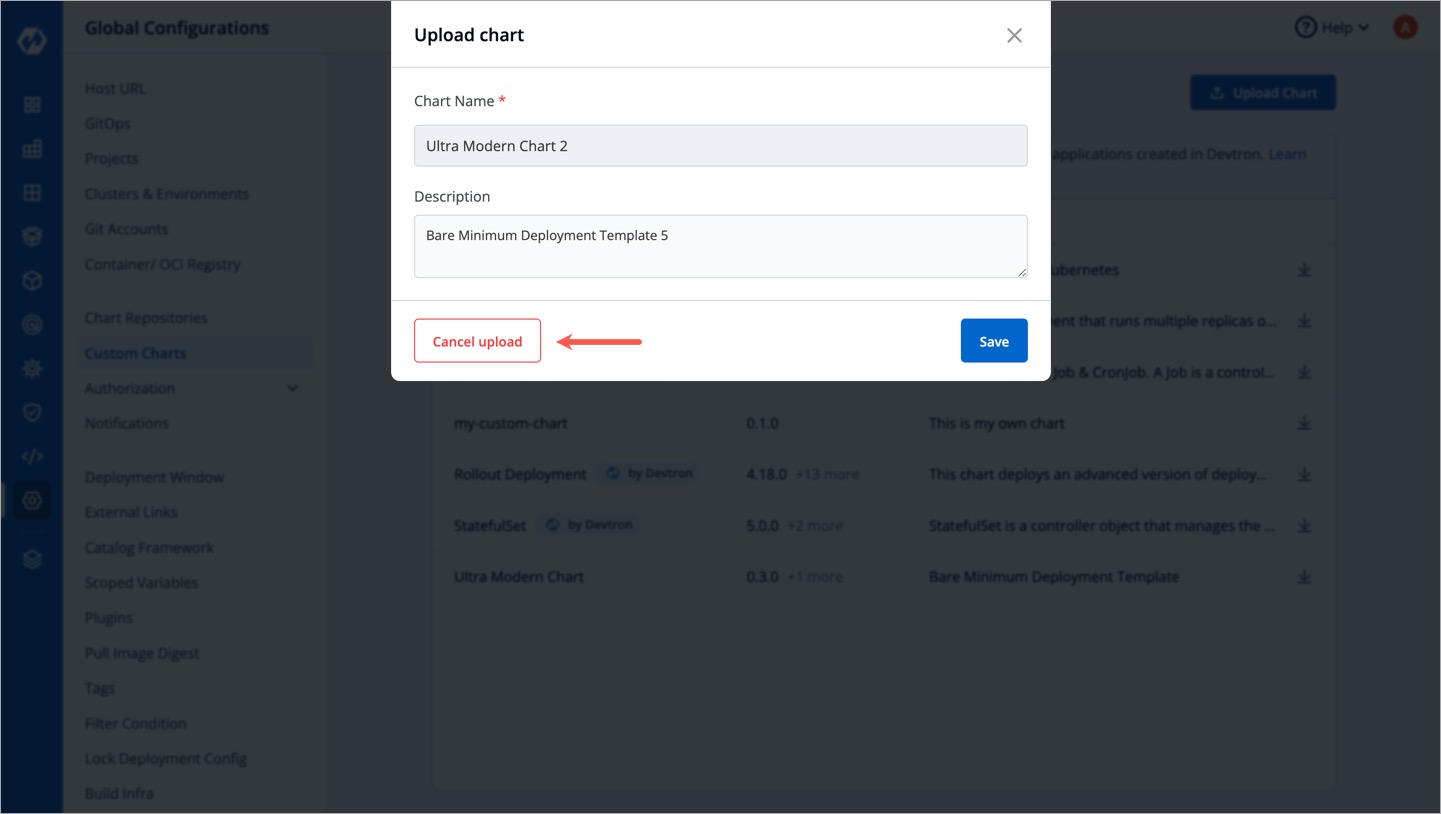
The system initiates the validation of your uploaded chart. You may also click Cancel upload if you wish to abort the process.
Validation Checks
In the uploading process, your file will be validated against the following criteria:
- Supported archive template should be in
*.tgzformat. Chart.yamlmust include the name and the version number..image_descriptor_template.jsonfile should be present.
The following are interpretations of the validation checks performed:
| Validation Status | Description | User Action |
|---|---|---|
| Success | The files uploaded are validated (View Snapshot) | Enter a description for the chart and select Save or Cancel upload |
| Unsupported template | The archive file do not match the required template (View Snapshot) | Upload another chart or Cancel upload |
| New version detected | You are uploading a newer version of an existing chart (View Snapshot) | Enter a Description and select Save to continue uploading, or Cancel upload |
| Already exists | There already exists a chart with the same version (View Snapshot) |
|
Viewing Deployment Charts
Only super-admins can view deployment charts.
To view the list of available deployment charts, go to Global Configurations → Deployment Charts page.
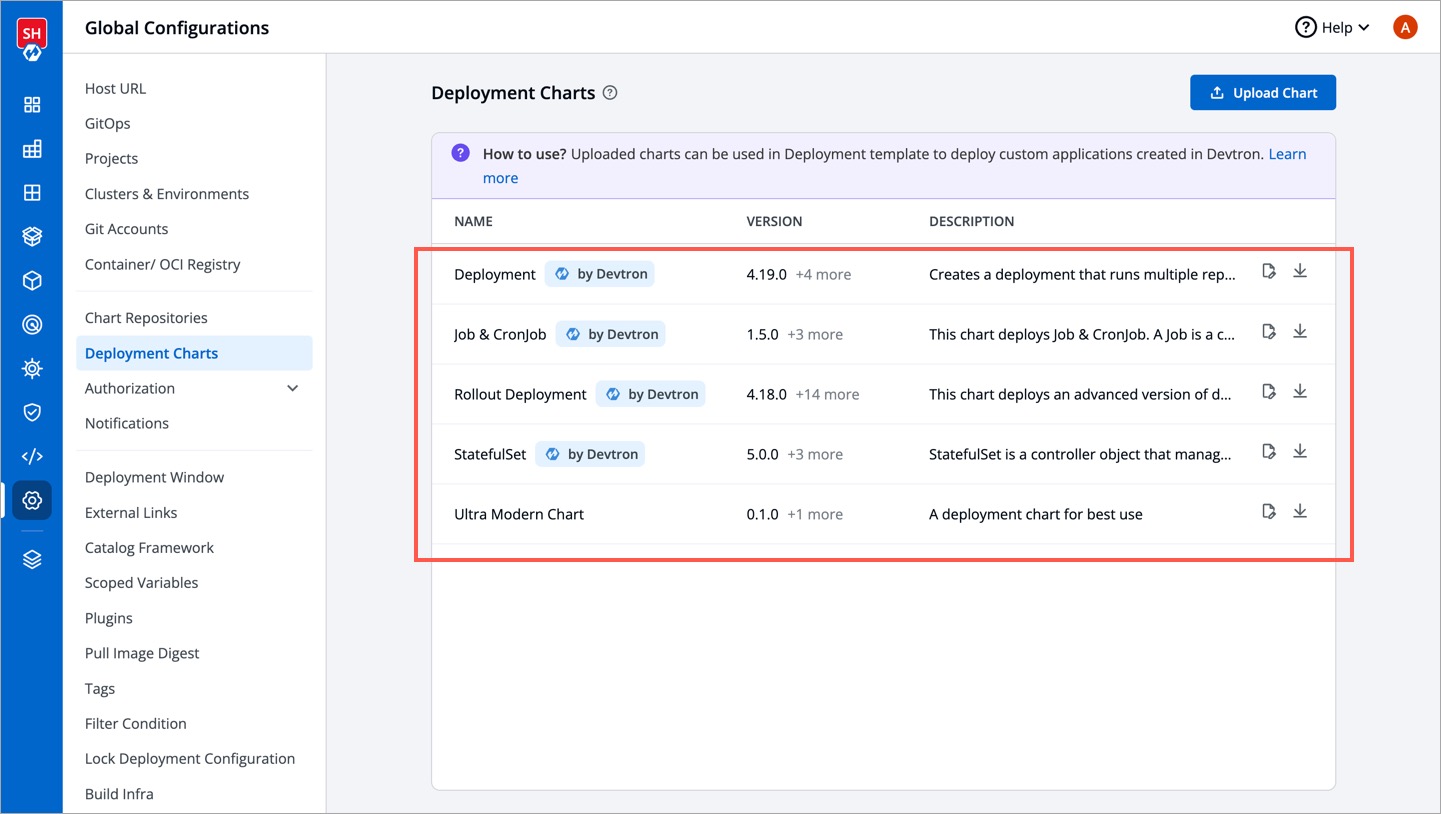
- You can search a chart by its name, version, or description.
- You can add new charts or chart versions by clicking Upload Chart.
Using Deployment Chart in Application
Once you successfully upload a deployment chart, you can start using it as a deployment template for your application. Refer Deployment Template to know more.
The deployment strategy for a deployment chart is fetched from the chart template and cannot be configured in the CD pipeline.
Editing GUI Schema of Deployment Charts 
Only super-admins can edit the GUI schema of deployment charts.
This section is an extension of Customize GUI feature. Refer the document to know more about the significance of having a custom GUI schema for your deployment templates.
You can edit the GUI schema of the following deployment charts:
- Default charts provided by Devtron (Deployment, Job & CronJob, Rollout Deployment, and StatefulSet)
- Custom charts uploaded by you
Tutorial
Steps
In this example, we will edit the Deployment chart type provided by Devtron.
-
Click the edit button next to the chart as shown below.

-
A GUI schema is available for you to edit in case of Devtron charts. In case of custom charts, you may have to define a GUI schema yourself. To know how to create such GUI schema, refer RJSF JSON Schema Tool.

-
You may start editing the schema by excluding existing fields/objects or including more of them. Click the Refer YAML button to view all the supported fields.
-
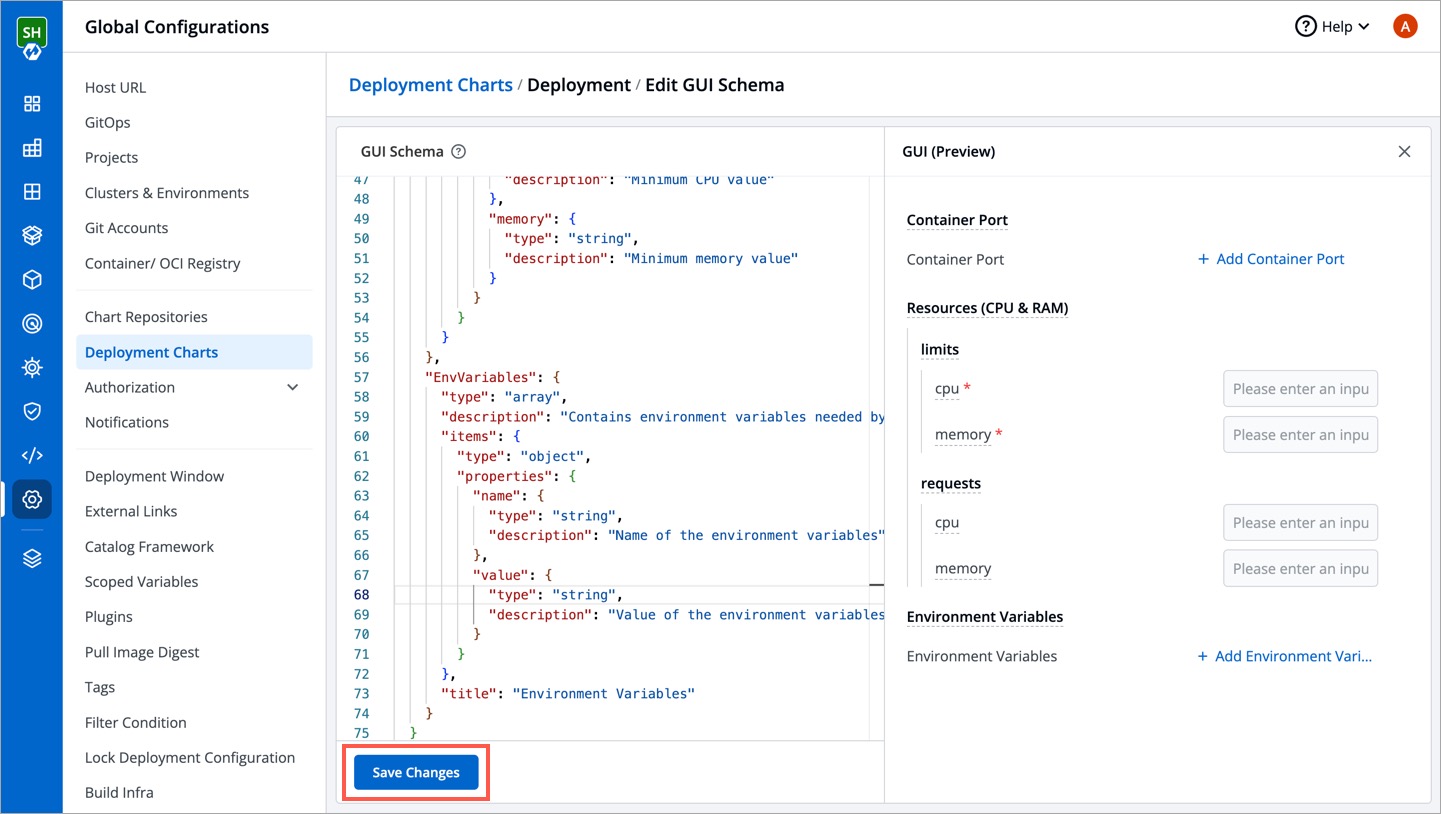
While editing the schema, you may use the Preview GUI option for a real-time preview of your changes.

-
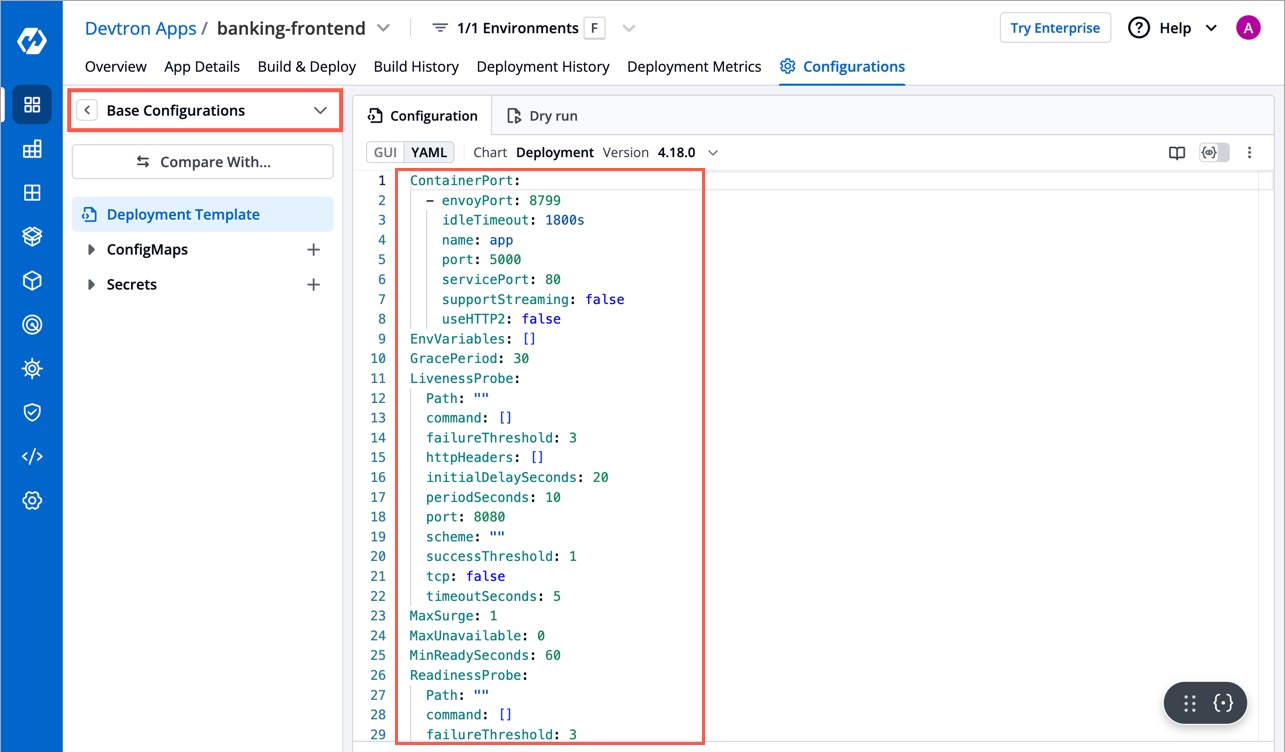
Click Save Changes.
Next, if you go to Configurations (tab) → Base Configurations → Deployment Template, you will be able to see the deployment template fields (in GUI) as per your customized schema.