Container/OCI Registry
Introduction
While container registries are typically used for storing images built by the CI Pipeline, an OCI registry can store container images as well as other artifacts such as helm charts. In other words, all container registries are OCI registries, but not all OCI registries are container registries.
You can configure a container registry using any registry provider of your choice. It allows you to build, deploy, and manage your container images or charts with easy-to-use UI.
Add Container Registry
Steps
-
From the left sidebar, go to Global Configurations → Container/OCI Registry.

-
Click Add Registry.

-
Choose a provider from the Registry provider dropdown. View the Supported Registry Providers.
-
Choose the Registry type:
- Private Registry: Choose this if your images or artifacts are hosted or should be hosted on a private registry restricted to authenticated users of that registry. Selecting this option requires you to enter your registry credentials (username and password/token).
- Public Registry: Unlike private registry, this doesn't require your registry credentials. Only the registry URL and repository name(s) would suffice.
-
Assuming your registry type is private, here are few of the common fields you can expect:
Fields Description Name Provide a name to your registry, this name will appear in the Container Registry drop-down list available within the Build Configuration section of your application Registry URL Provide the URL of your registry in case it doesn't come prefilled (do not include oci://,http://, or/https://in the URL)Authentication Type The credential input fields may differ depending on the registry provider, check Registry Providers Push container images Tick this checkbox if you wish to use the repository to push container images. This comes selected by default and you may untick it if you don't intend to push container images after a CI build. If you wish to to use the same repository to pull container images too, read Registry Credential Access. Push helm packages Tick this checkbox if you wish to push helm charts to your OCI registry Use as chart repository Tick this checkbox if you want Devtron to pull helm charts from your registry and display them on chart store. Also, you will have to provide a list of repositories (present within your registry) for Devtron to successfully pull the helm charts. Set as default registry Tick this checkbox to set your registry as the default registry hub for your images or artifacts -
Click Save.
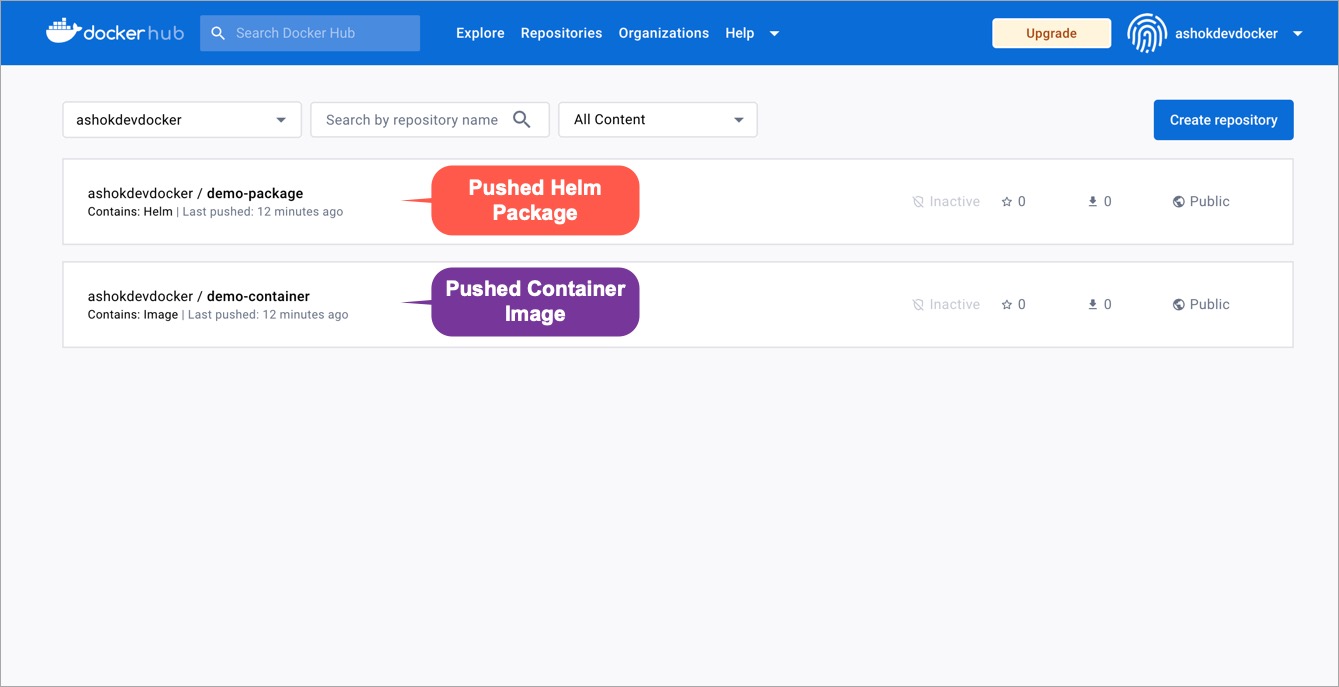
Push Helm Packages
Upon enabling this option, Devtron supports the pushing of helm charts to your OCI registry.
This is possible through isolated clusters that facilitate air-gapped deployments. In other words, it generates a helm package that you can use to deploy your application in air-gapped clusters.
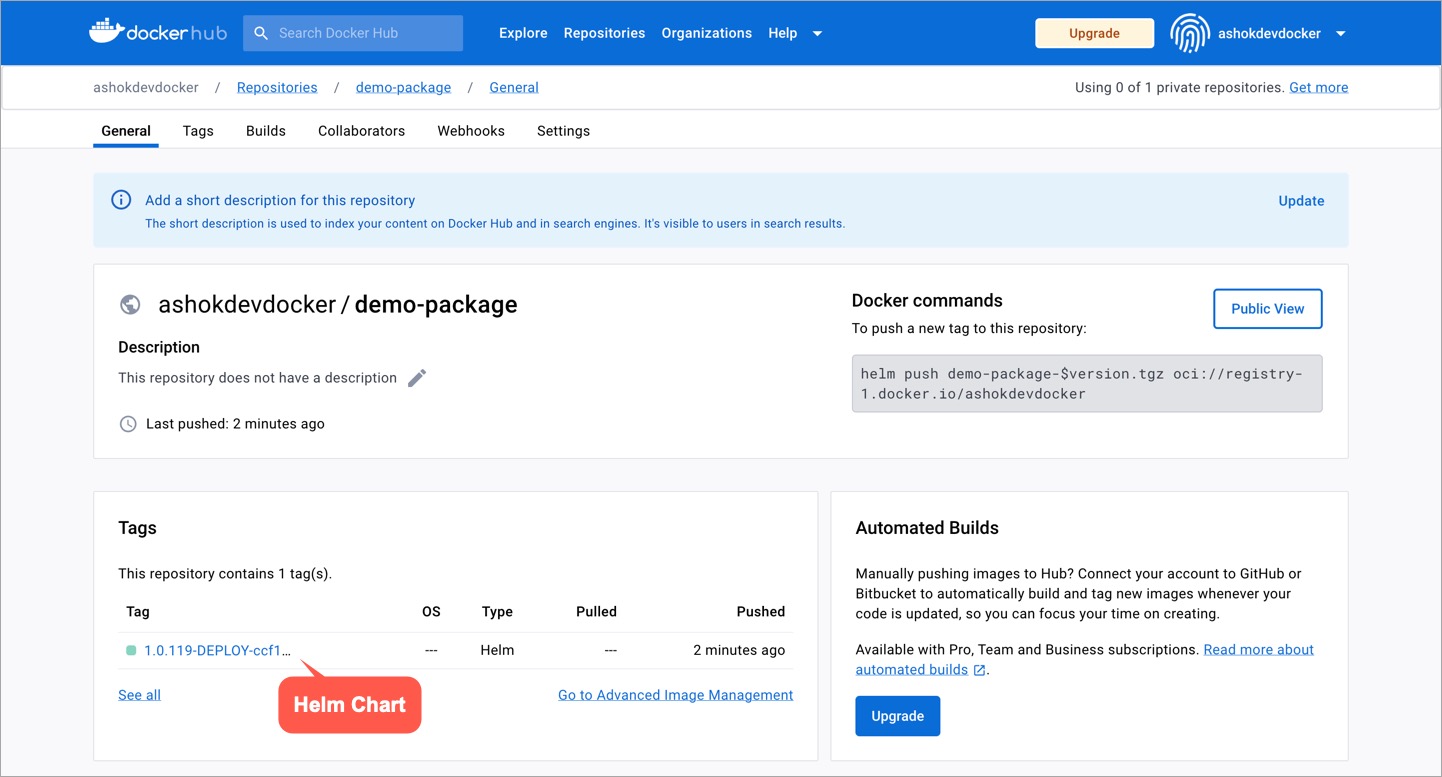
If you have configured your CD pipeline to push the helm package to your OCI registry, you can view the pushed helm package in your registry as shown below:
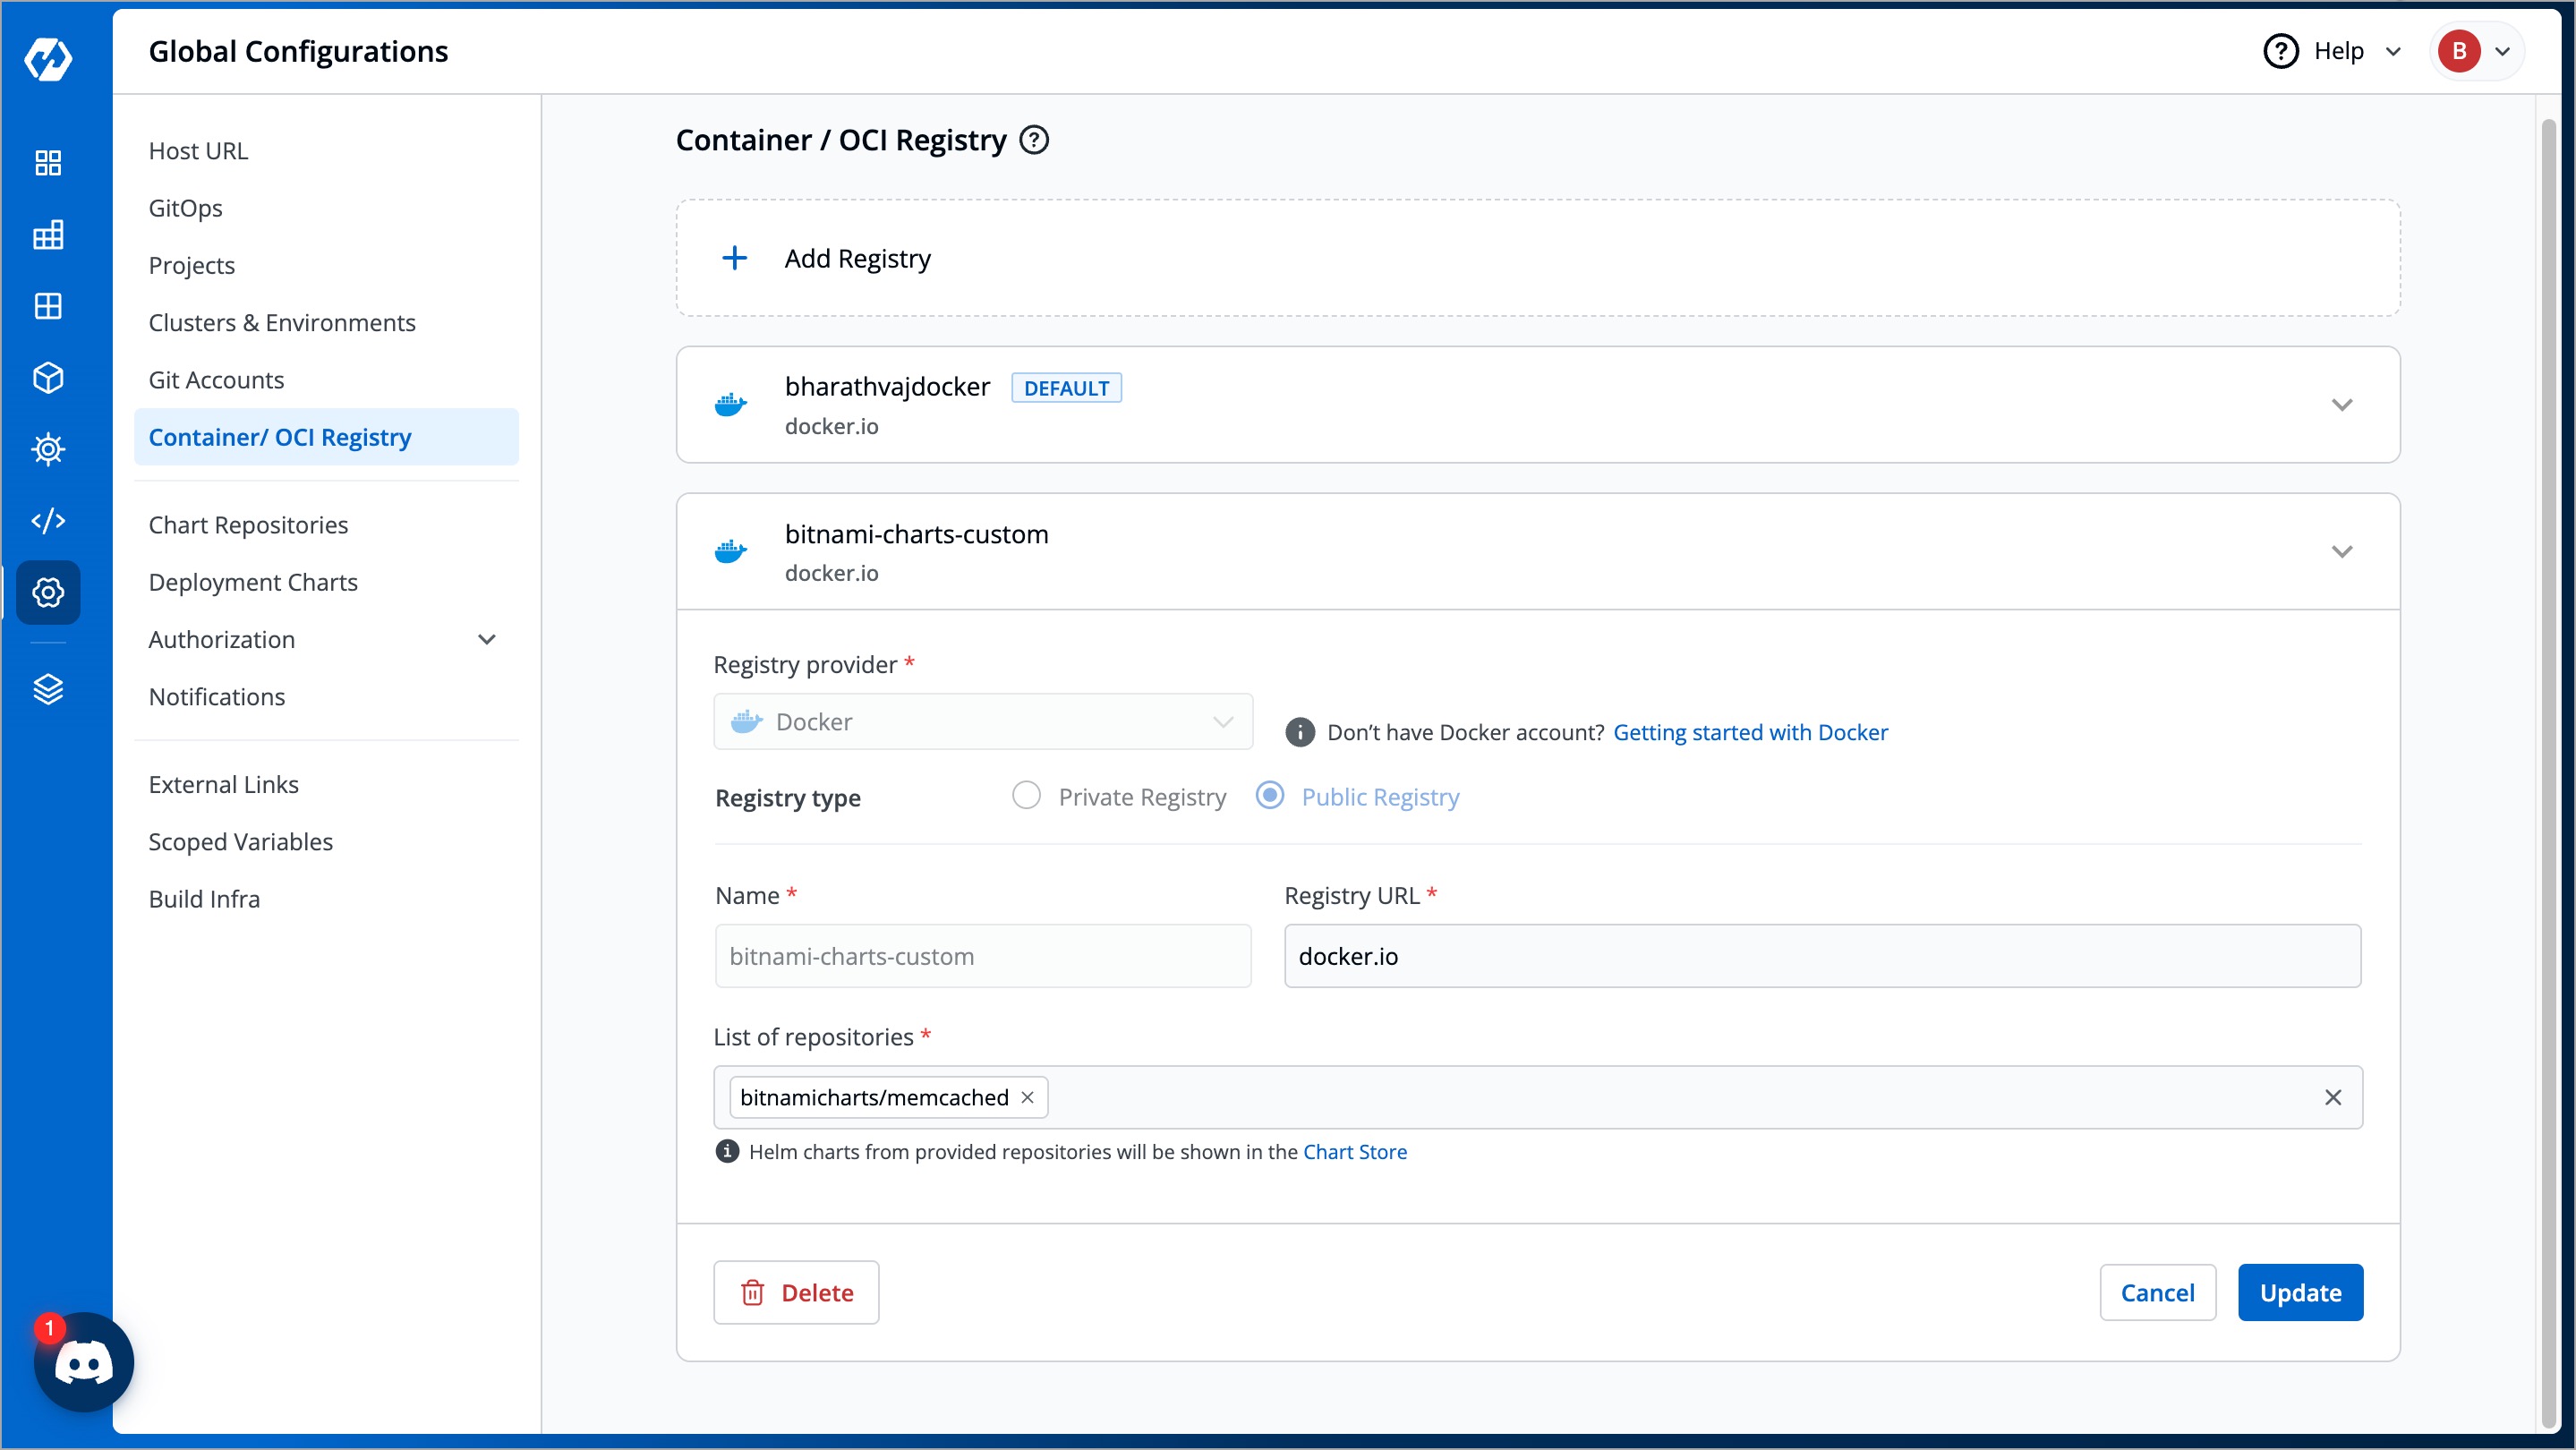
OCI registry with Use as chart repository option enabled.
Unlike Helm repos, OCI registries do not have an index file to discover all the charts. If you have helm packages pushed to your OCI registry, you can that registry as a chart repository.
Upon enabling this option, Devtron can use your OCI registry as the chart source and pull the helm charts to display them on your Chart Store for easy deployment.
Tutorial
Steps
Search your OCI registry in the list and click it.
In the List of repositories field, add your chart repo(s). You can find the username from your registry provider account.
Supported Registry Providers
ECR
Amazon ECR is an AWS-managed container image registry service. The ECR provides resource-based permissions to the private repositories using AWS Identity and Access Management (IAM). ECR allows both Key-based and Role-based authentications.
Before you begin, create an IAM user and attach the ECR policy according to the authentication type.
Provide the following additional information apart from the common fields:
| Fields | Description |
|---|---|
| Registry URL | Example of URL format: xxxxxxxxxxxx.dkr.ecr.<region>.amazonaws.com where xxxxxxxxxxxx is your 12-digit AWS account ID |
| Authentication Type | Select one of the authentication types:
|
Docker
Provide the following additional information apart from the common fields:
| Fields | Description |
|---|---|
| Username | Provide the username of the Docker Hub account you used for creating your registry. |
| Password/Token | Provide the password/Token corresponding to your docker hub account. It is recommended to use Token for security purpose. |
Azure
For Azure, the service principal authentication method can be used to authenticate with username and password. Visit this link to get the username and password for this registry.
Provide the following additional information apart from the common fields:
| Fields | Description |
|---|---|
| Registry URL/Login Server | Example of URL format: xxx.azurecr.io |
| Username/Registry Name | Provide the username of your Azure container registry |
| Password | Provide the password of your Azure container registry |
Artifact Registry (GCP)
JSON key file authentication method can be used to authenticate with username and service account JSON file. Visit this link to get the username and service account JSON file for this registry.
Remove all the white spaces from JSON key and wrap it in a single quote before pasting it in Service Account JSON File field
Provide the following additional information apart from the common fields:
| Fields | Description |
|---|---|
| Registry URL | Example of URL format: region-docker.pkg.dev |
| Service Account JSON File | Paste the content of the service account JSON file |
Google Container Registry (GCR)
JSON key file authentication method can be used to authenticate with username and service account JSON file. Please follow link to get the username and service account JSON file for this registry.
Remove all the white spaces from JSON key and wrap it in single quote before pasting it in Service Account JSON File field
Quay
Provide the following additional information apart from the common fields:
| Fields | Description |
|---|---|
| Username | Provide the username of your Quay account |
| Token | Provide the password of your Quay account |
Other
Provide below information if you select the registry type as Other.
| Fields | Description |
|---|---|
| Registry URL | Enter the URL of your private registry |
| Username | Provide the username of your account where you have created your registry |
| Password/Token | Provide the password or token corresponding to the username of your registry |
| Advanced Registry URL Connection Options |
|
You can use any registry which can be authenticated using docker login -u <username> -p <password> <registry-url>. However these registries might provide a more secured way for authentication, which we will support later.
Registry Credential Access
You can create a Pod that uses a Secret to pull an image from a private container registry. You can use any private container registry of your choice, for e.g., Docker Hub.
Super-admin users can decide if they want to auto-inject registry credentials or use a secret to pull an image for deployment to environments on specific clusters.
- To manage the access of registry credentials, click Manage.
There are two options to manage the access of registry credentials:
| Fields | Description |
|---|---|
| Do not inject credentials to clusters | Select the clusters for which you do not want to inject credentials |
| Auto-inject credentials to clusters | Select the clusters for which you want to inject credentials |
- You can choose one of the two options for defining credentials:
Use Registry Credentials
If you select Use Registry Credentials, the clusters will be auto-injected with the registry credentials of your registry type. As an example, If you select Docker as Registry Type, then the clusters will be auto-injected with the username and password/token which you use on the Docker Hub account.
Click Save.

Specify Image Pull Secret
You can create a Secret by providing credentials on the command line.

Create this Secret and name it regcred (let's say):
kubectl create -n <namespace> secret docker-registry regcred --docker-server=<your-registry-server> --docker-username=<your-name> --docker-password=<your-pword> --docker-email=<your-email>
where,
- namespace is your sub-cluster, e.g., devtron-demo
- your-registry-server is your Private Docker Registry FQDN. Use
https://index.docker.io/v1/for Docker Hub. - your-name is your Docker username
- your-pword is your Docker password
- your-email is your Docker email
You have successfully set your Docker credentials in the cluster as a Secret called regcred.
Typing secrets on the command line may store them in your shell history unprotected, and those secrets might also be visible to other users on your PC during the time when kubectl is running.
Enter the Secret name in the field and click Save.
Delete an OCI Registry
If you prefer to delete an OCI registry, follow the instructions below:
-
Navigate back to Container/OCI Registry page.
-
Select your preferred OCI registry.
-
Click the Delete button. The OCI registry will be deleted.
If you used an OCI registry as a chart source, deleting the OCI registry will remove all its associated charts from the Chart Store.