

Create a New Job
In Devtron, jobs can be created in two ways:
Blank Job: This allows you to create a new job from scratch by manually defining all configurations.
Clone Job: This allows you to create a new job by reusing the configuration of an existing job.
Create a Blank Job
Who Can Perform This Action?
Users need to have the Admin role or the Super Admin role. Refer the User permissions.
To create a new Blank Job in Devtron, follow these steps:
Navigate to Devtron Dashboard → Jobs.
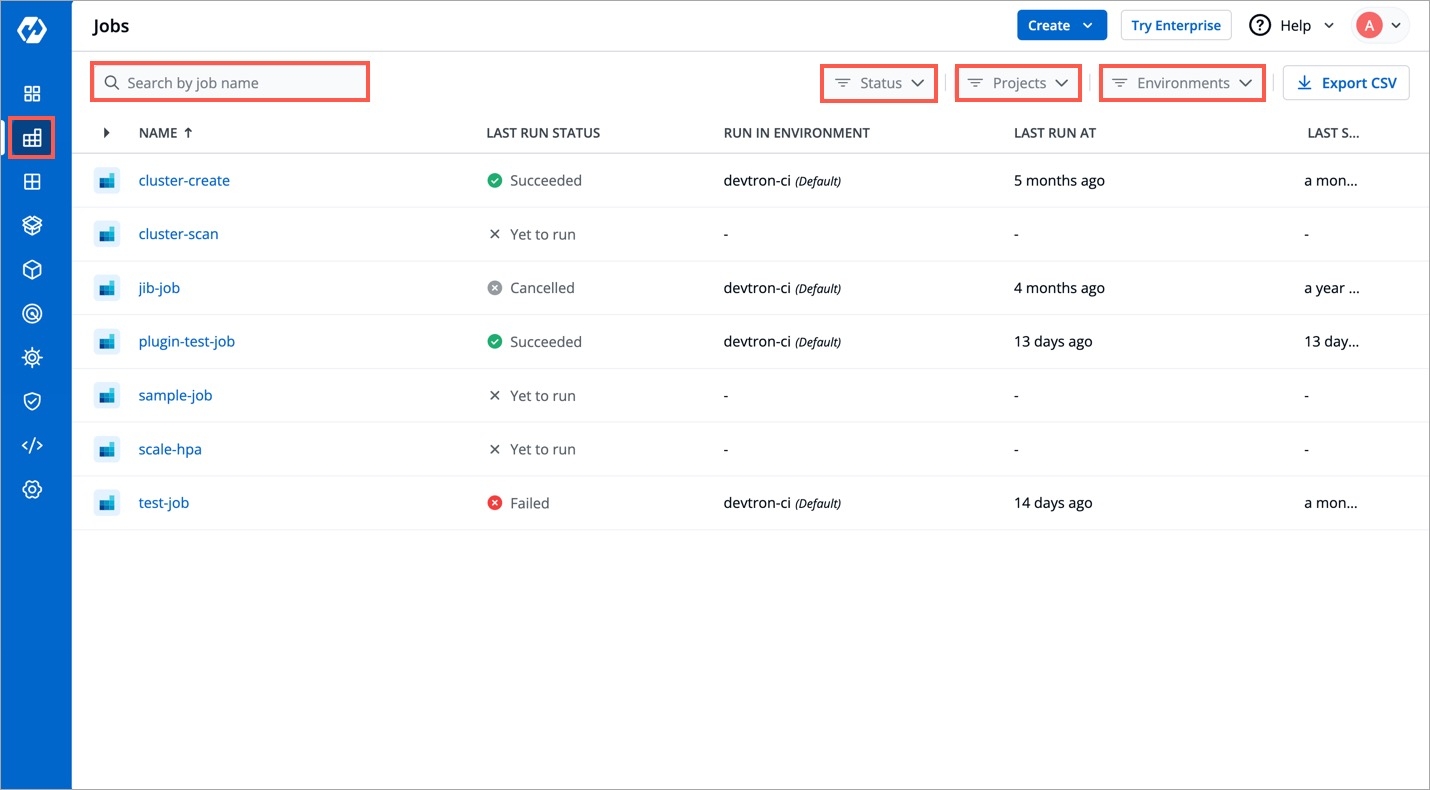
Figure 1: Job's Page Click Create button in the top-right corner and select Job from the drop-down list.
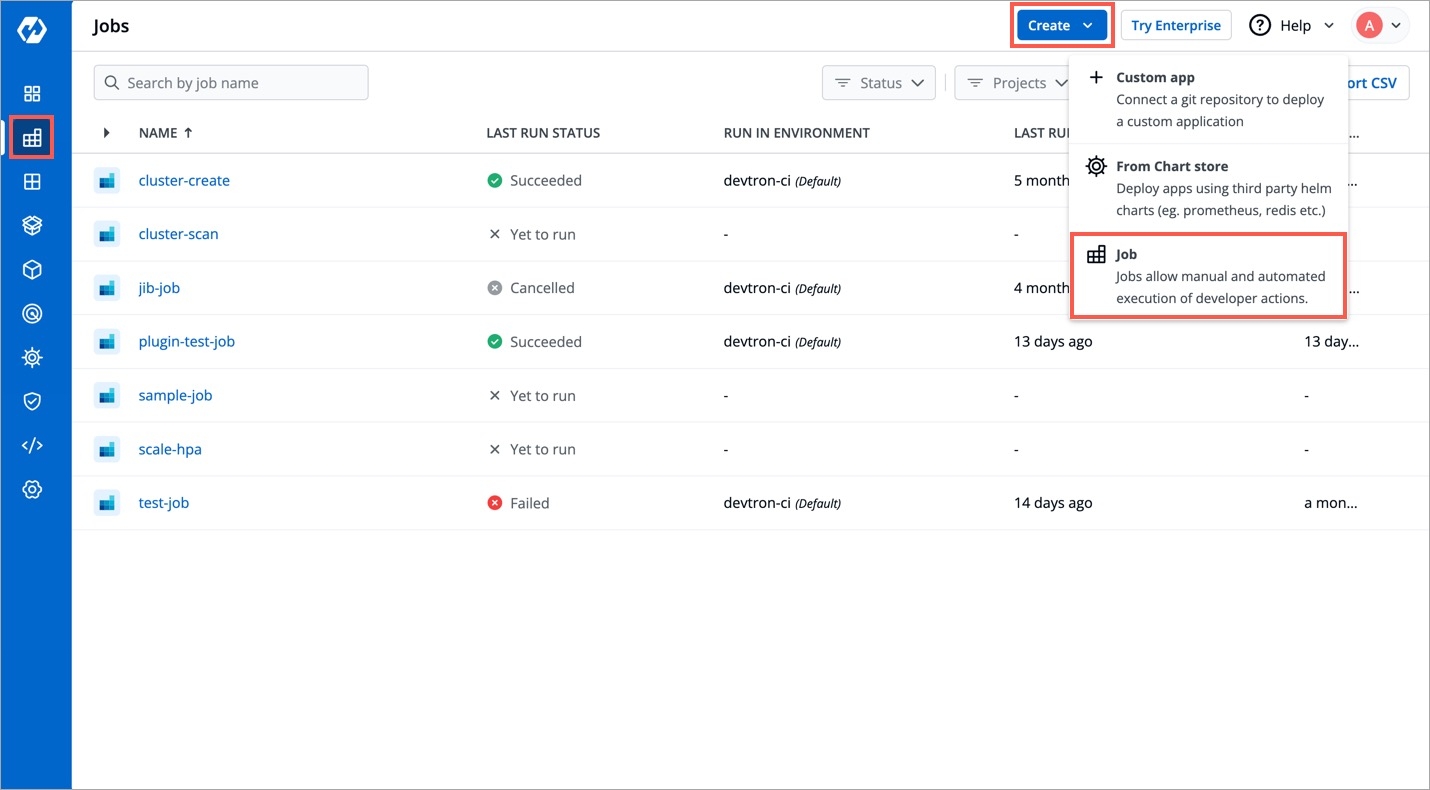
Figure 2: Selecting Job The Create Job page opens. From the left panel, select Blank job, then enter the required details as listed in the table below.
FieldsDescriptionProjectSelect the project from the dropdown.
Job NameUser-defined name for the job in Devtron.
DescriptionEnter the description for the job.
TagsKey-value pairs used for identifying and organizing the application and can be propagated as Kubernetes labels. To learn more refer Tags section.
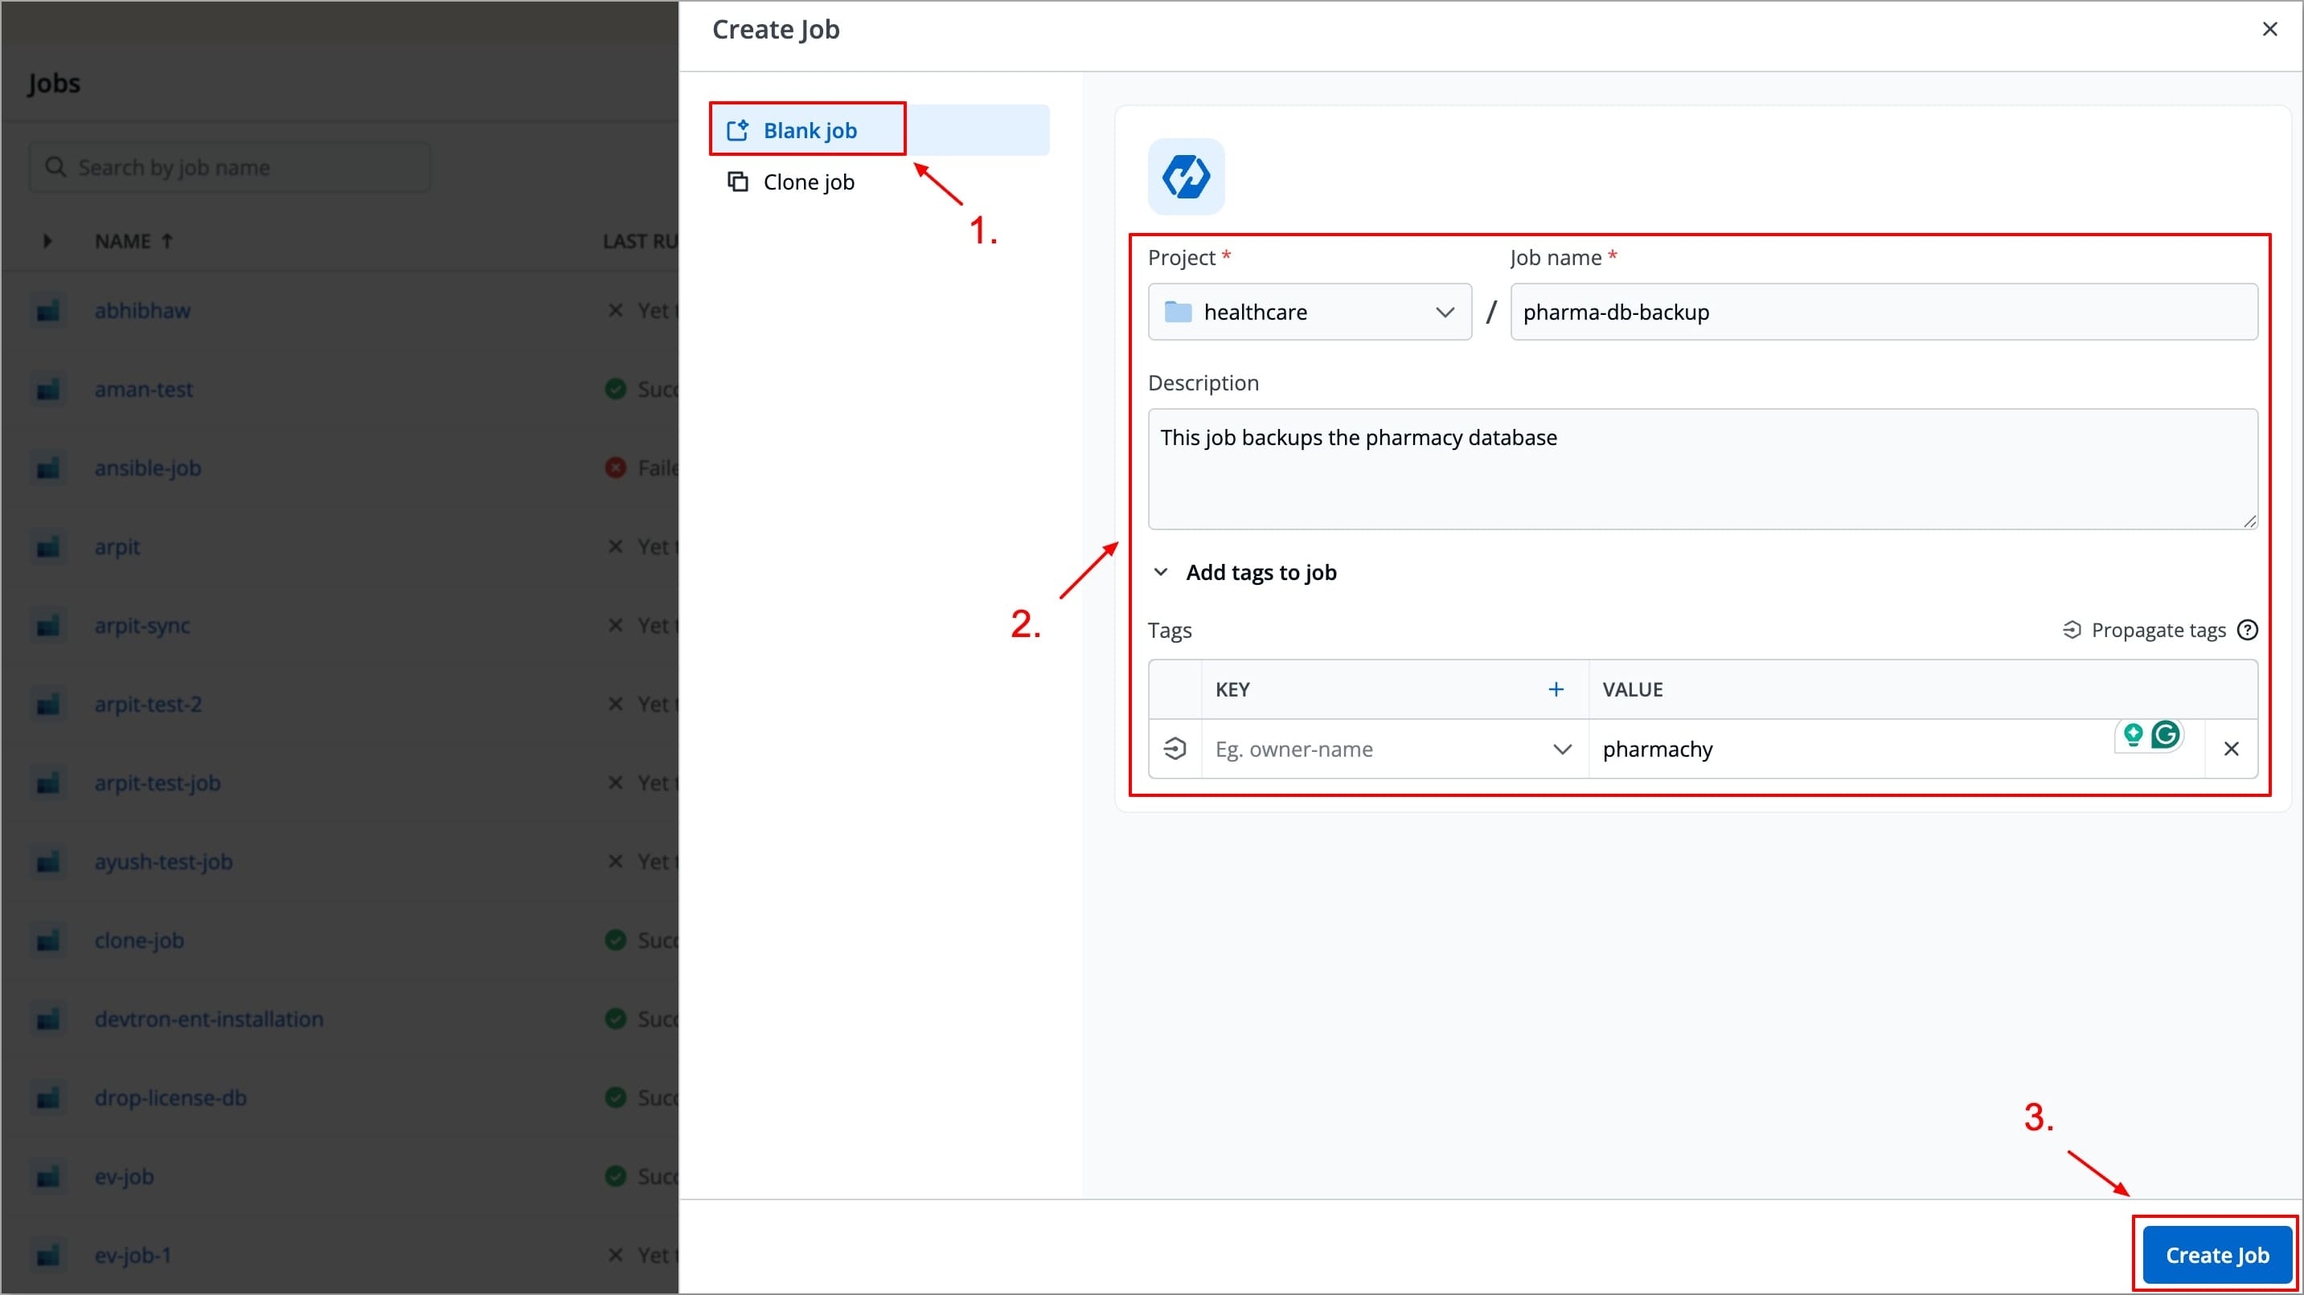
Figure 3: Creating Blank Job Click Create Job. The job will be created, and you will be automatically redirected to the Configurations page to continue setting up the job pipeline.
Create a Clone Job
Who Can Perform This Action?
Users need to have Admin role or above (along with access to the environment and applications) to perform environment override.
To create a new Clone Job in Devtron, follow these steps:
From the Devtron Dashboard, navigate to Jobs.
Click the Create button in the top-right corner and select Job from the drop-down list.
Figure 4: Selecting Job The Create Job page opens. From the left panel, select Clone Job, then enter the required details as listed in the table below.
FieldsDescriptionProjectSelect the project from the dropdown.
Job NameUser-defined name for the job in Devtron.
DescriptionEnter the description of a job.
TagsKey-value pairs used for identifying and organizing the application and can be propagated as Kubernetes labels. To learn more refer Tags section.
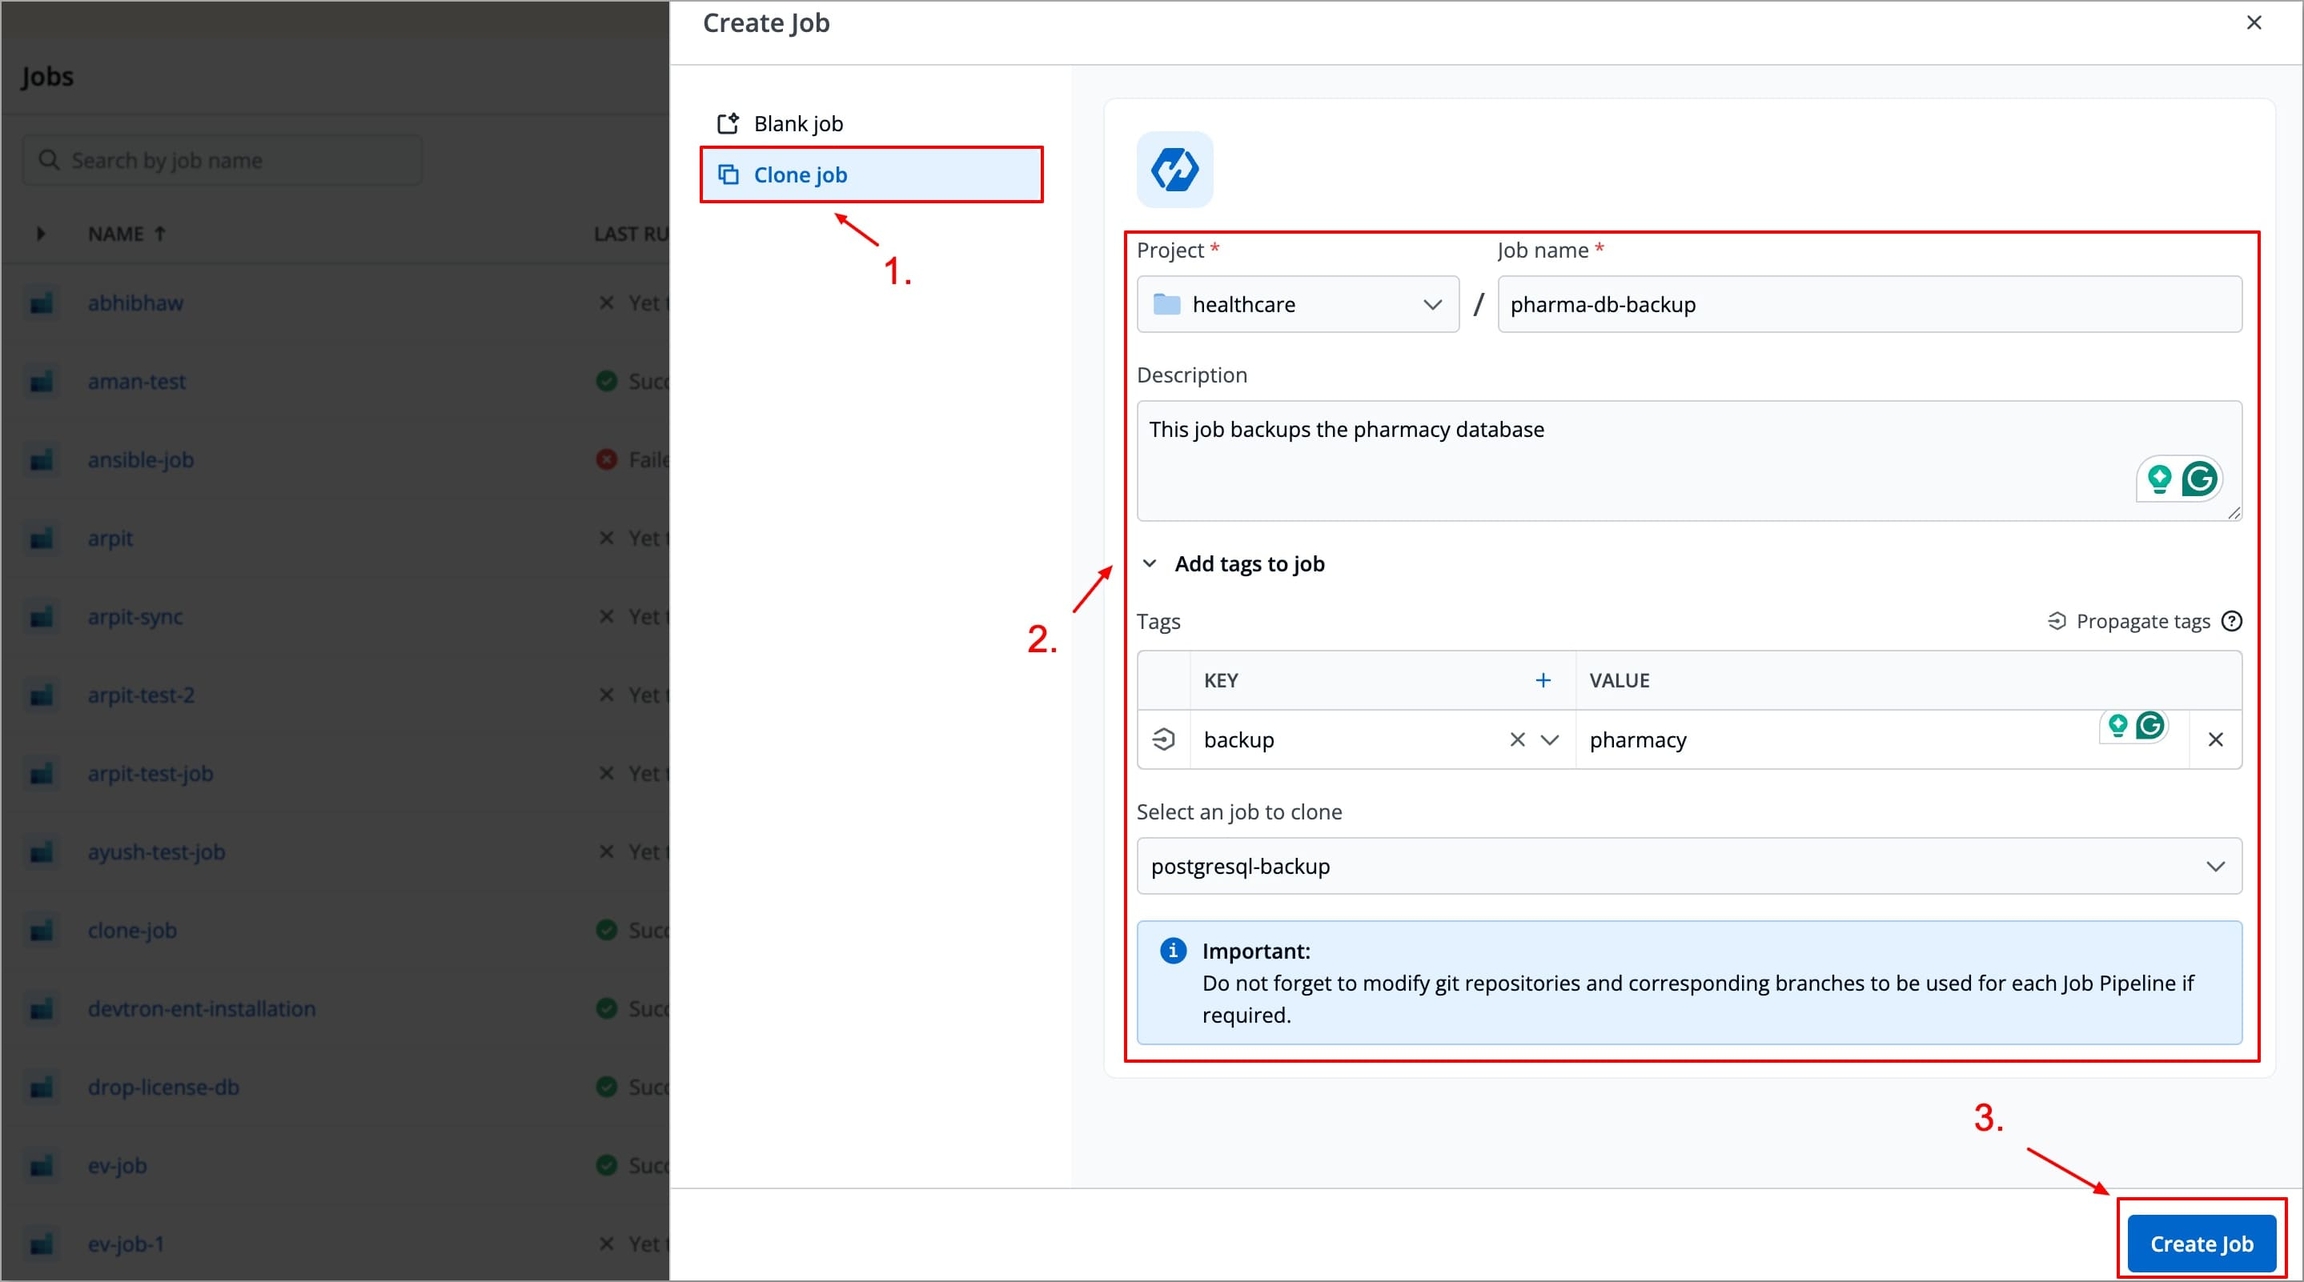
Figure 5: Creating Clone Job Click Create Job. The Clone job will be created, and you will be automatically redirected to the Configurations page, where the configuration will be pre-populated based on the selected source job. You may review and modify these settings as required.
Delete Job
Who Can Perform This Action?
Users need to have the Admin role or the Super Admin role. Refer the User permissions.
To delete a job, you have to first delete any configured pipelines in that job workflow.
Navigate to Jobs → Select the job → Configurations → Workflow Editor.
Select the job pipeline you wish to delete, and an edit job pipeline modal window will appear.
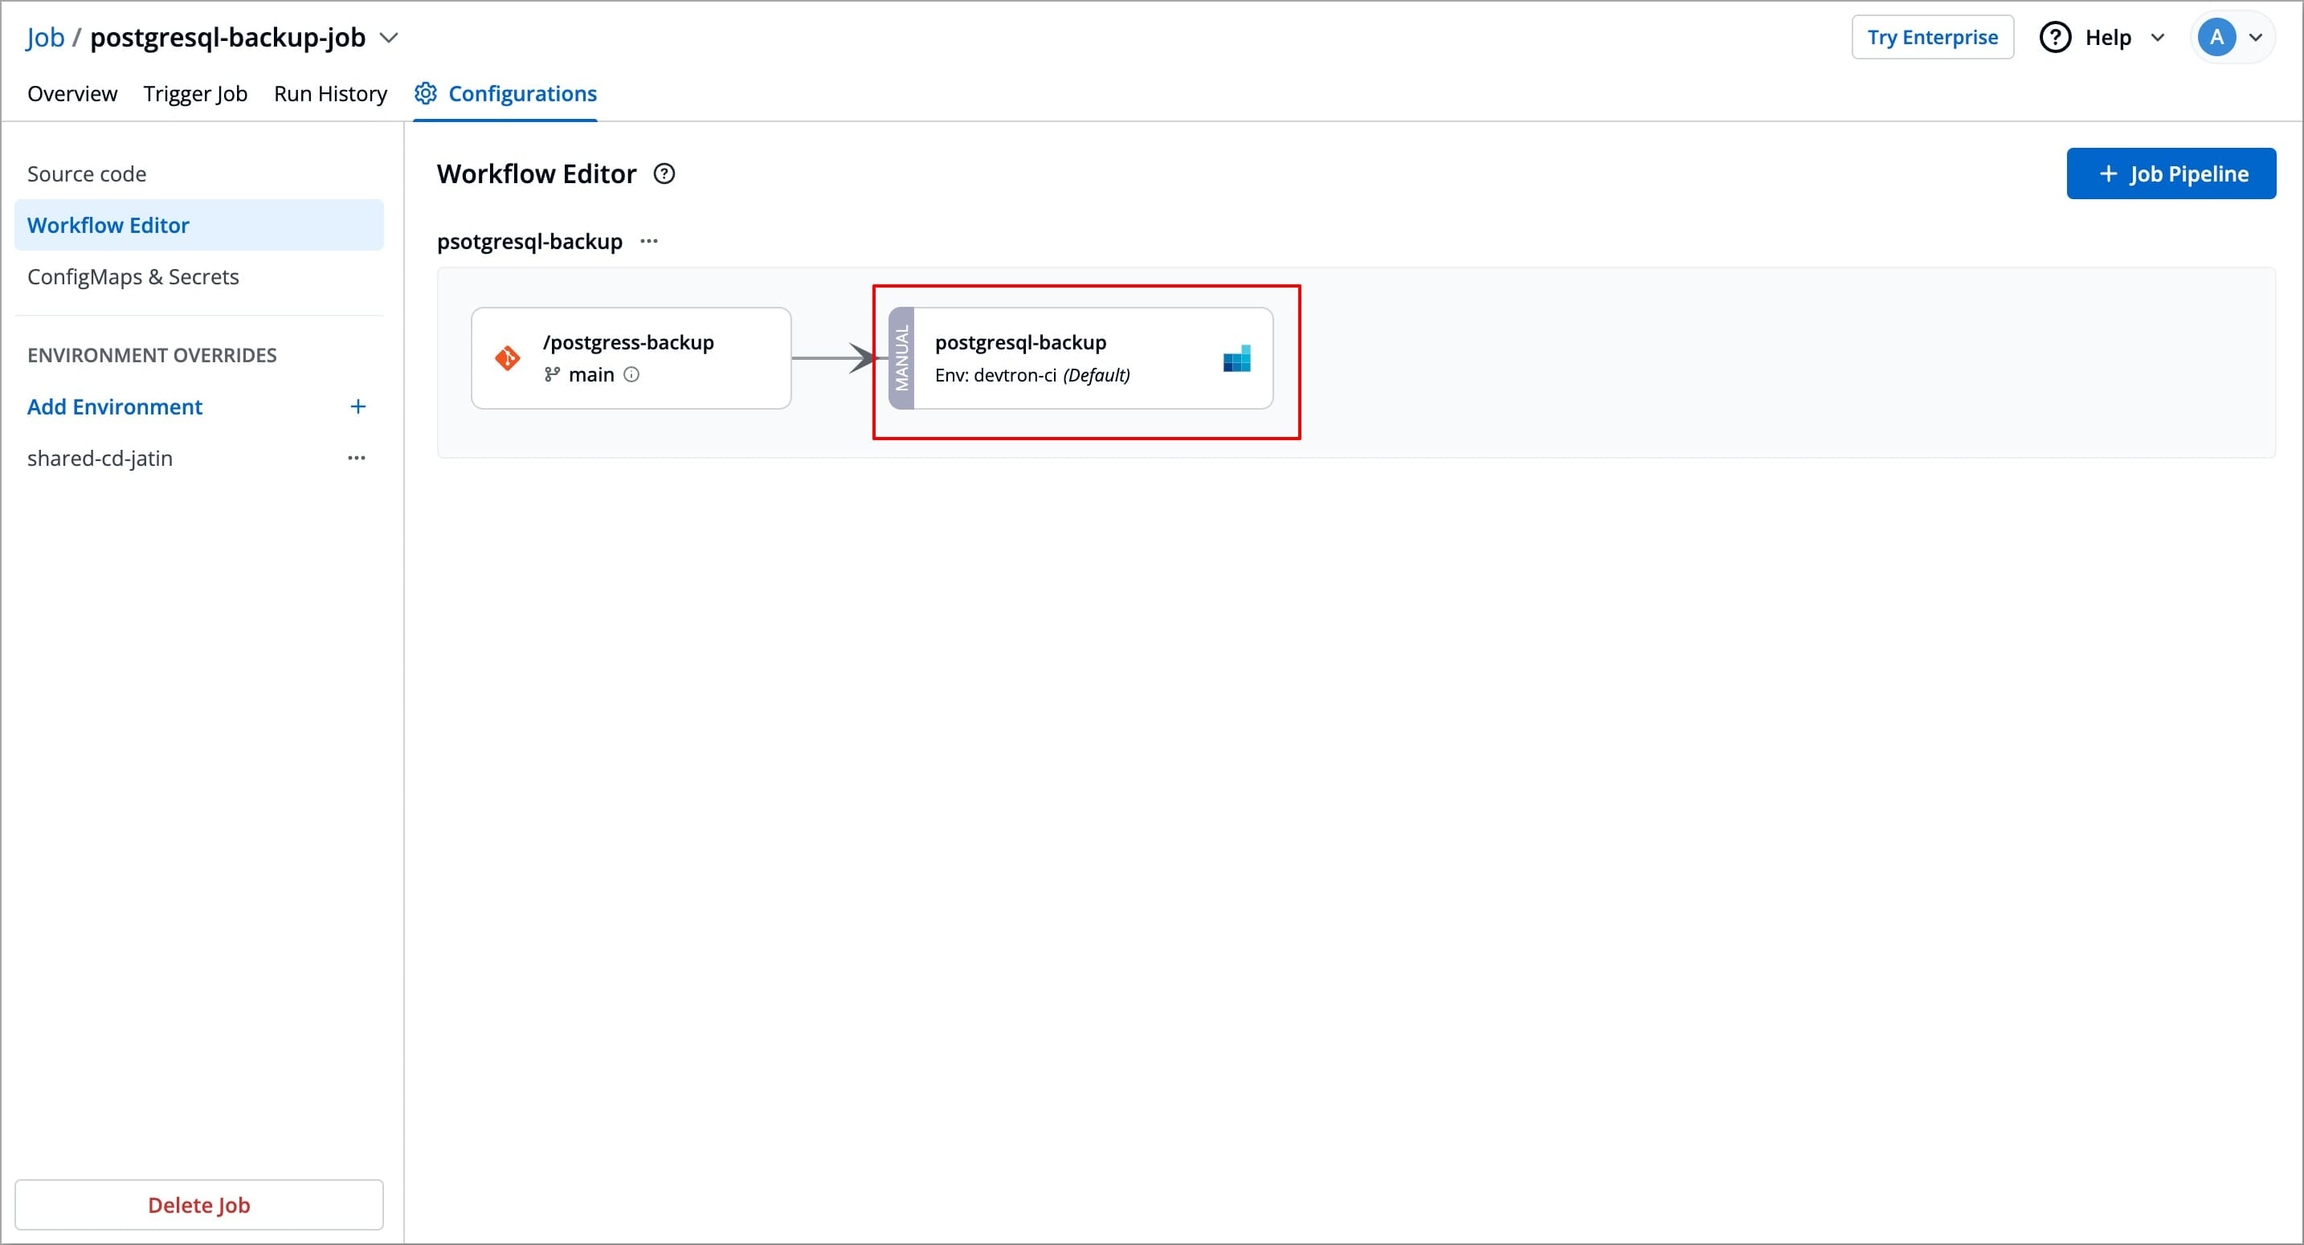
Figure 6: Selecting Job Pipeline Select Delete Pipeline at the bottom left corner of the edit job pipeline modal window to delete the job pipeline.
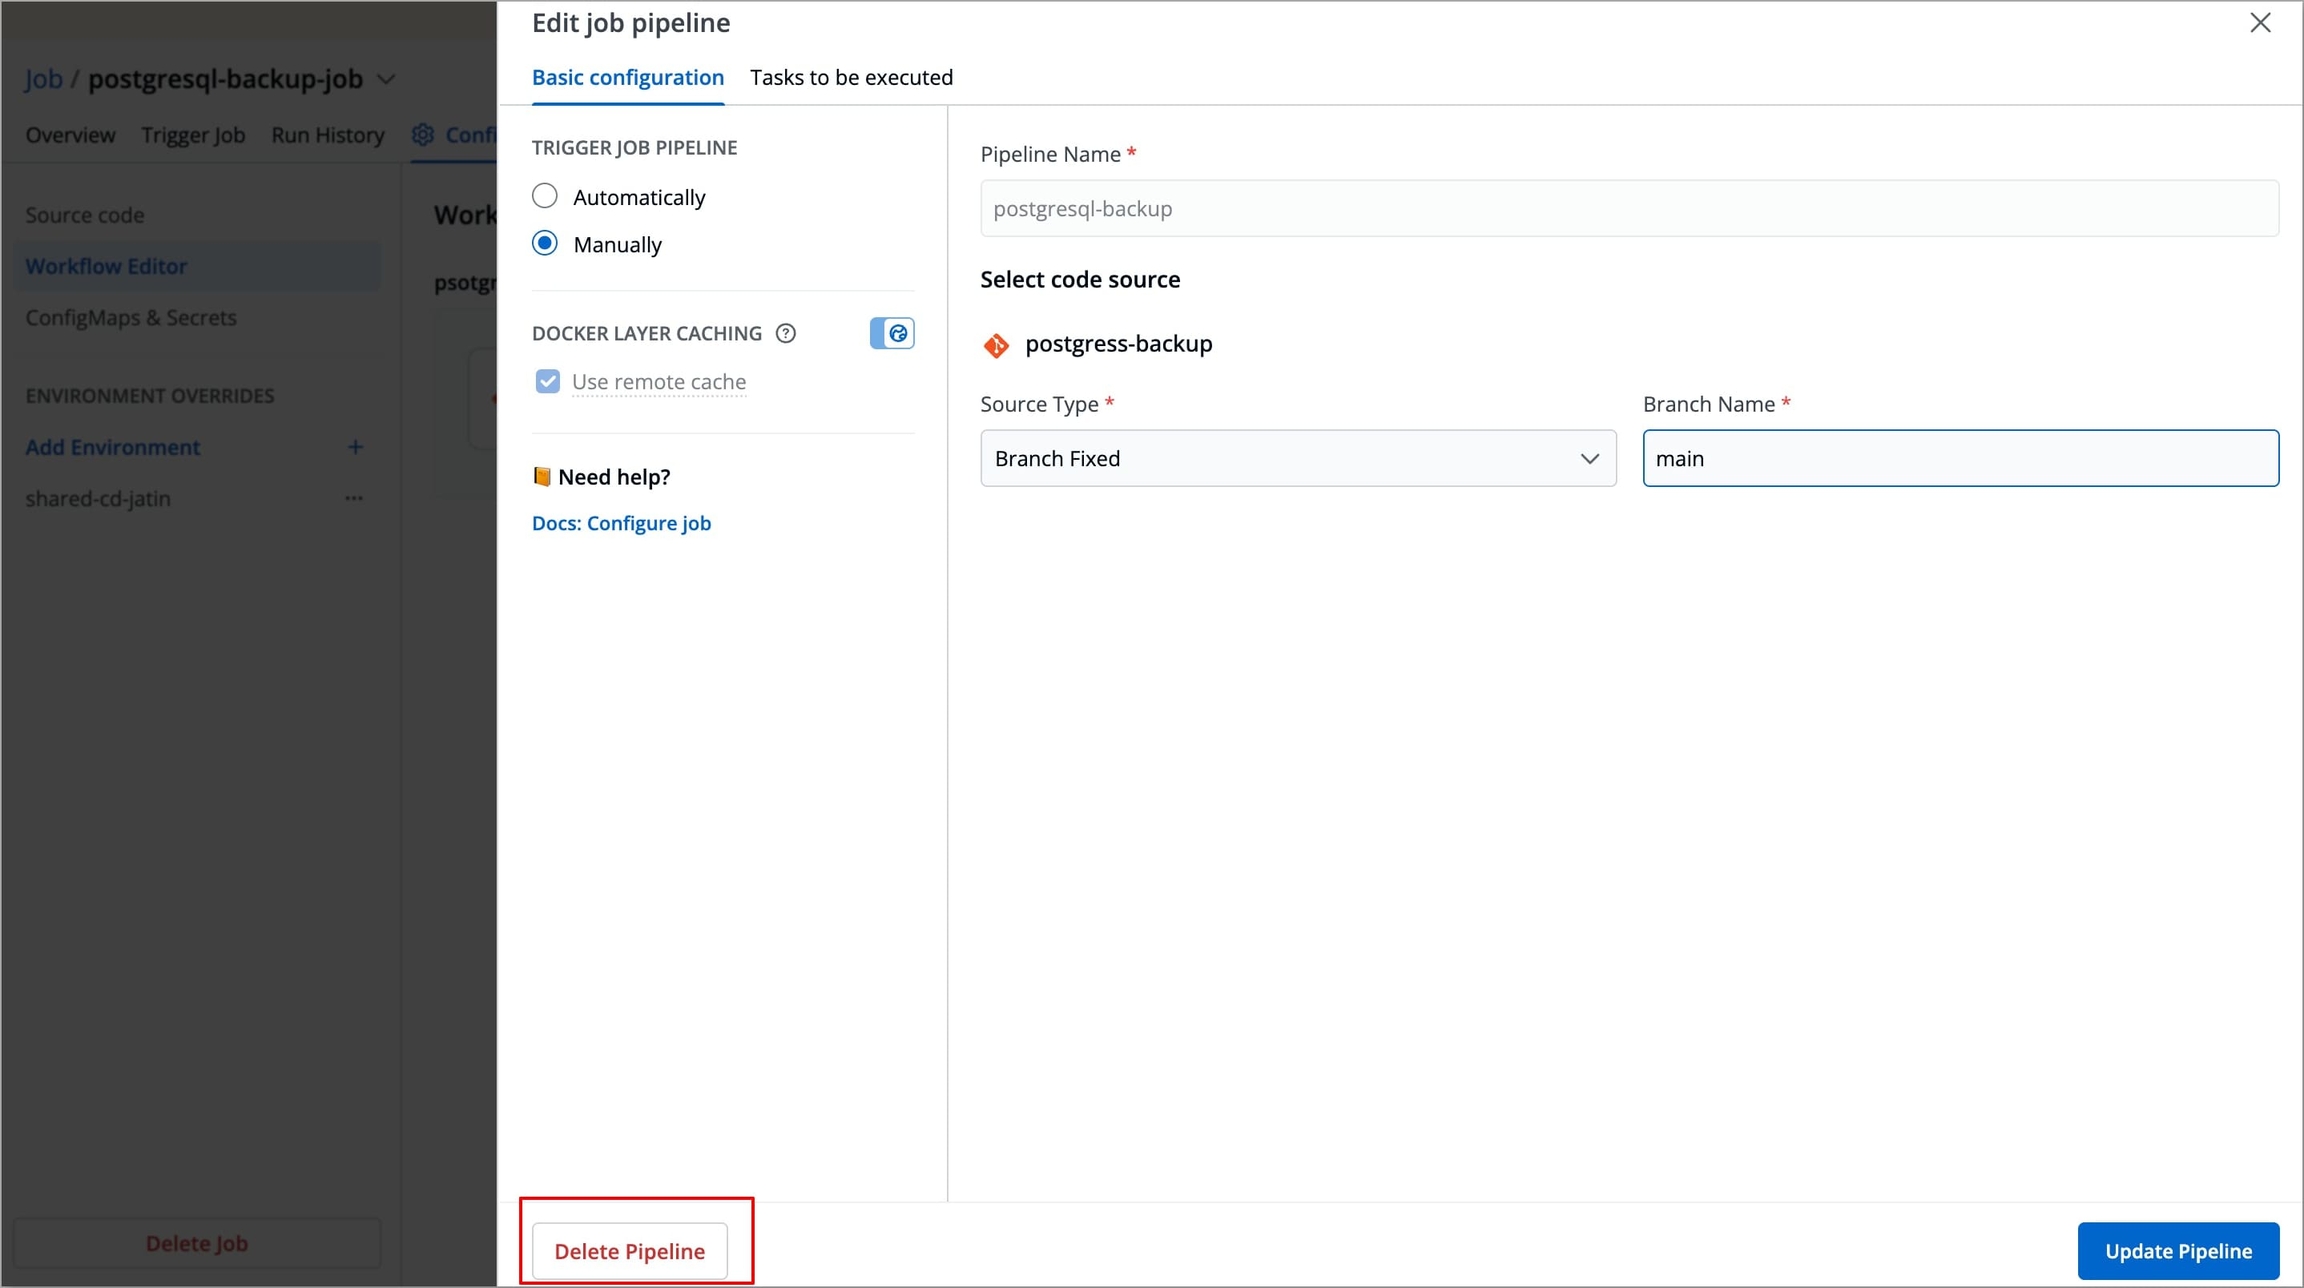
Figure 7: Deleting Job Pipeline A pop-up window will appear asking you to confirm the Delete Pipeline action.
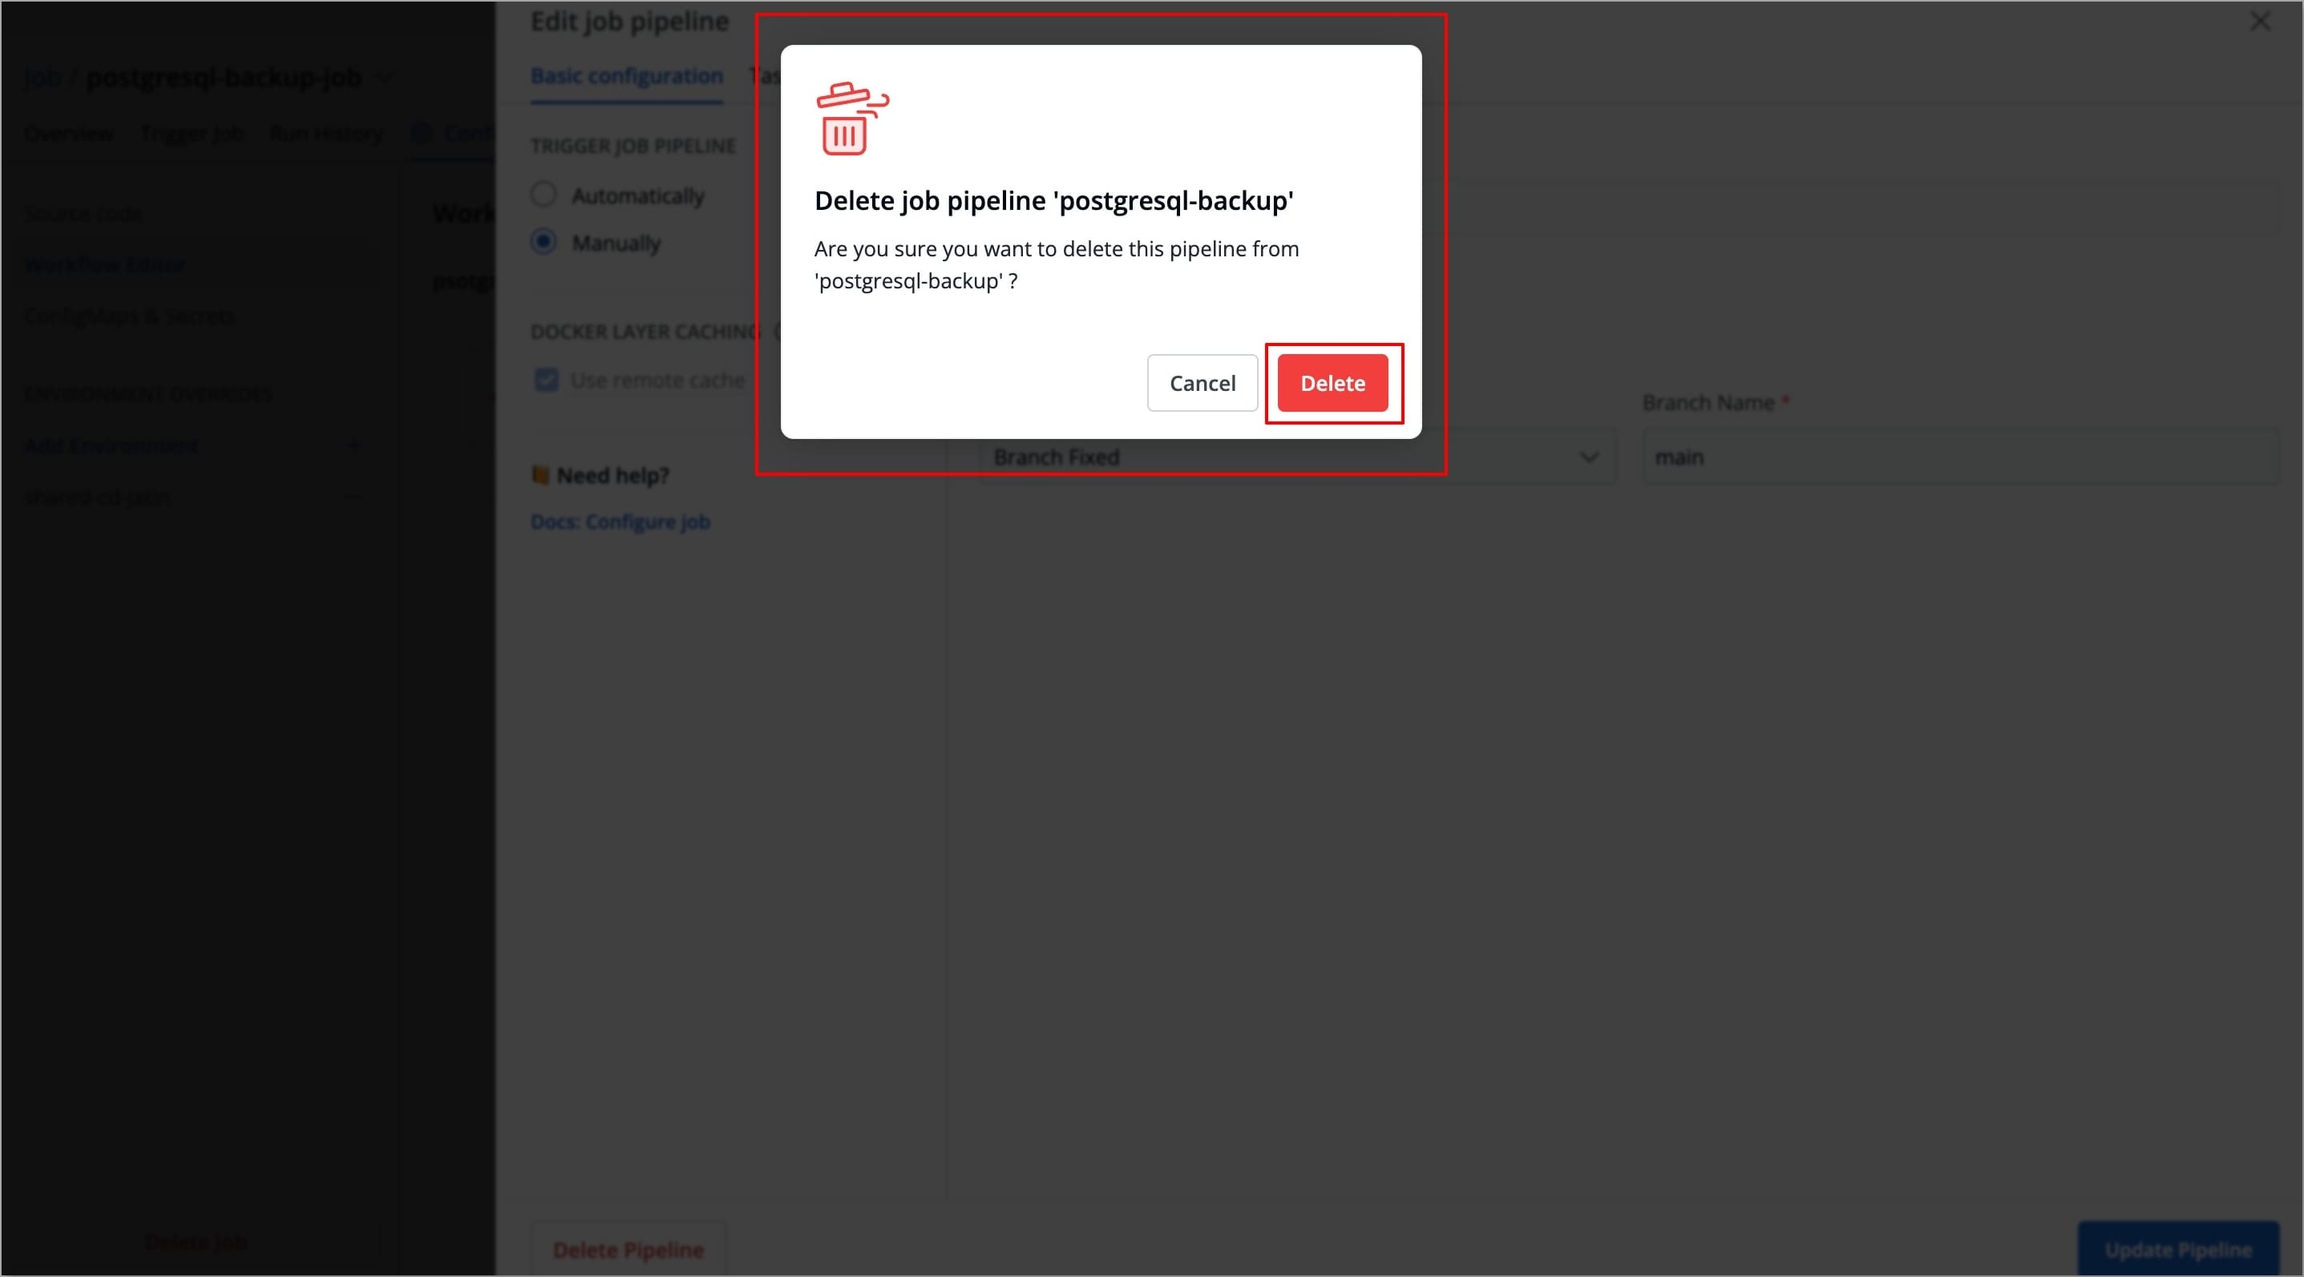
Figure 8: Confirming Delete Job Pipeline After deleting any configured pipelines in a job workflow, select Delete Job to delete the job.
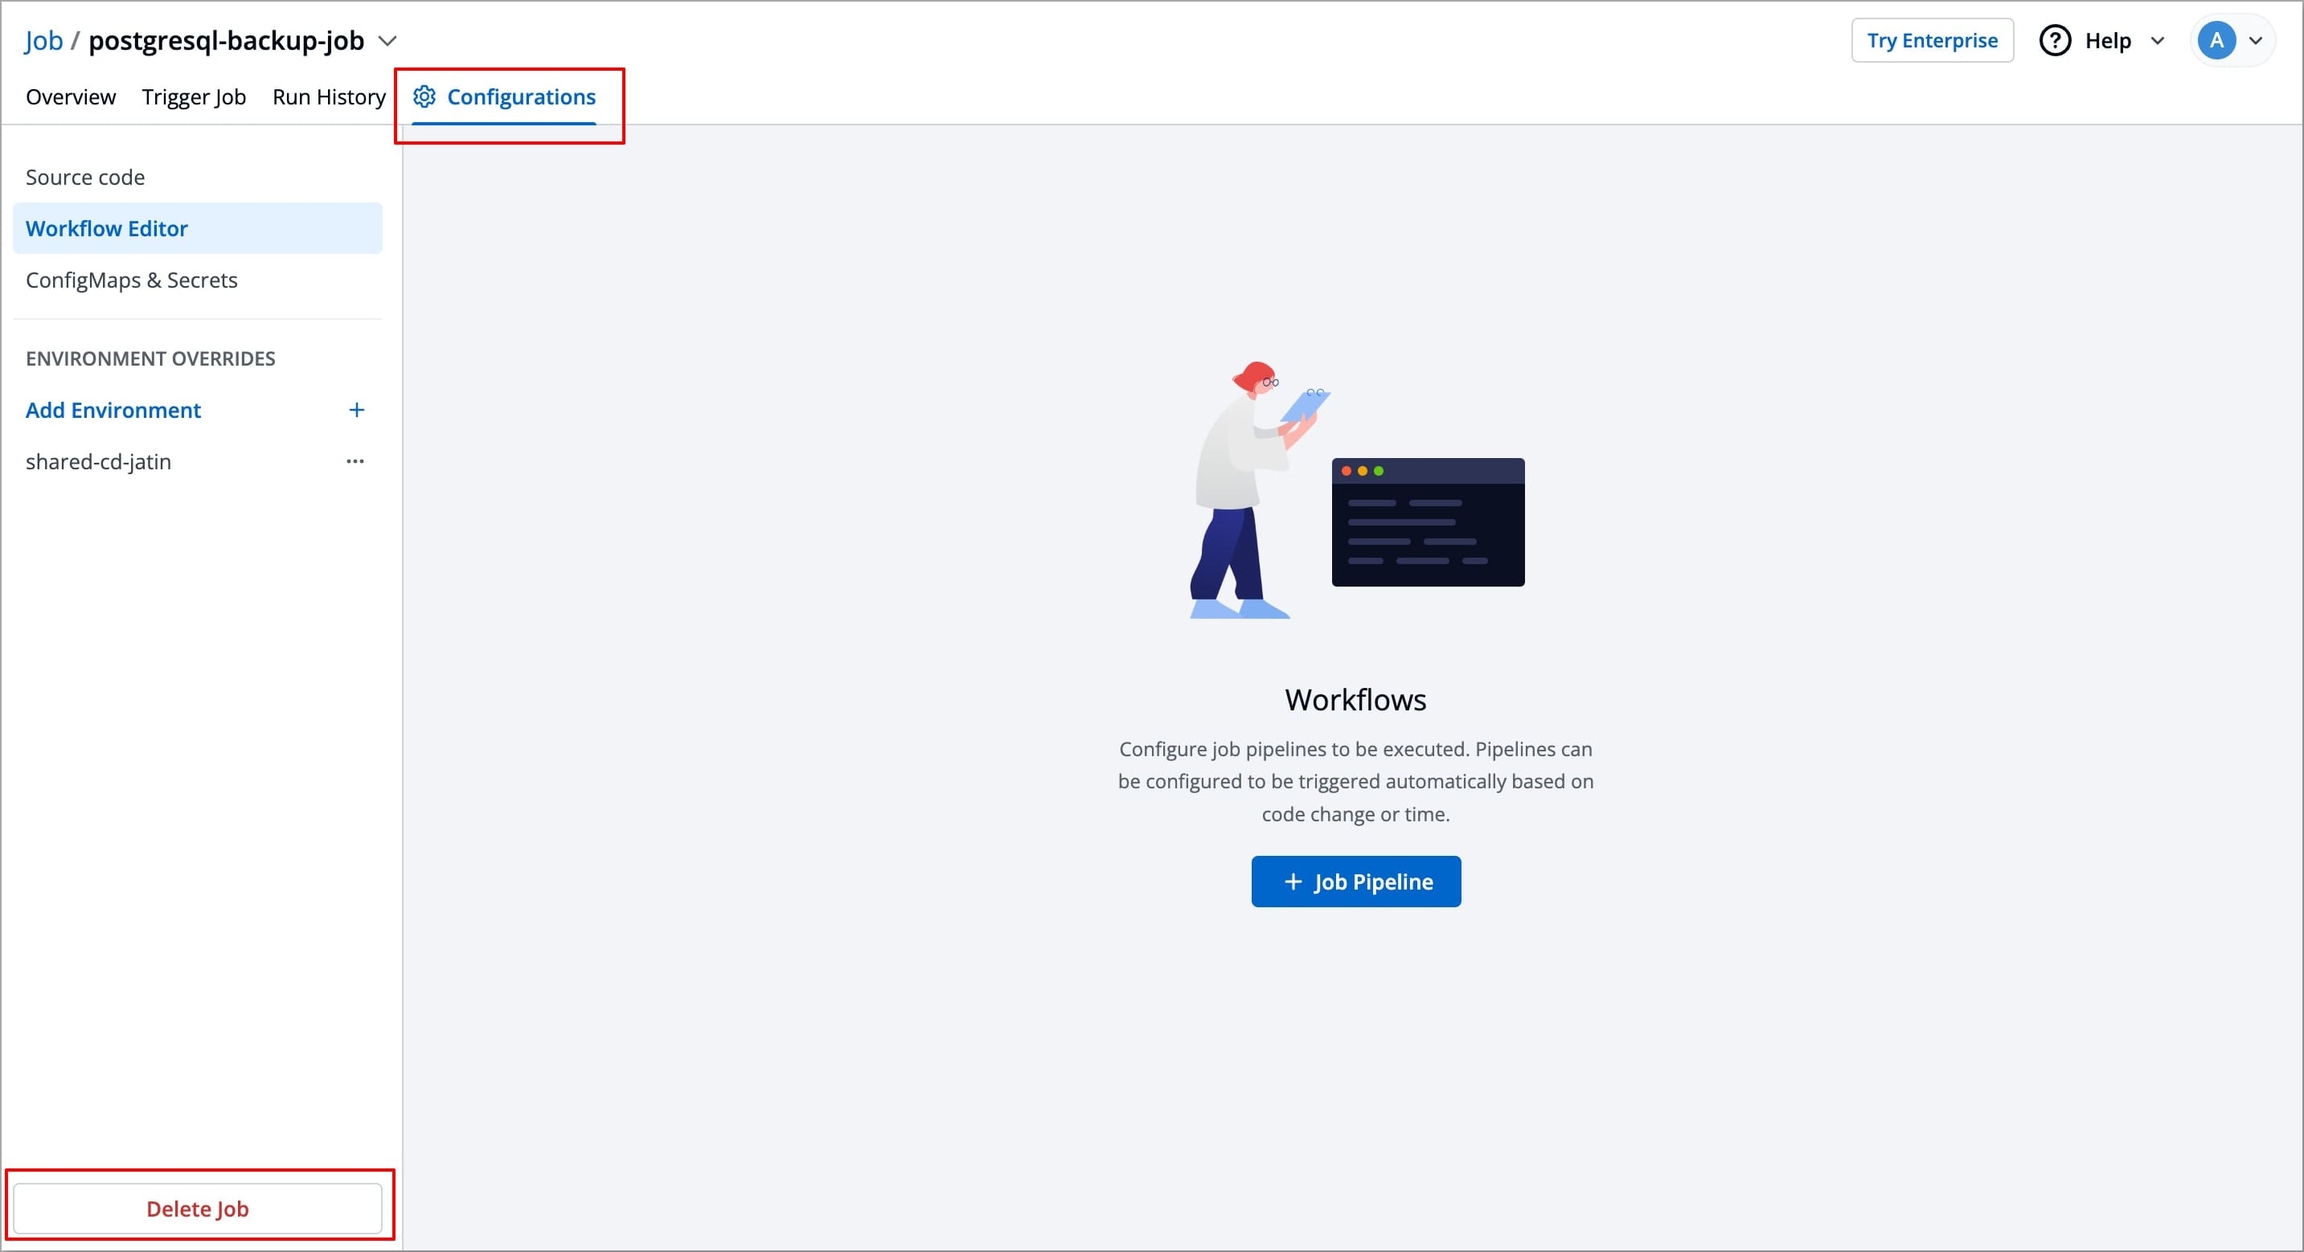
Figure 9: Deleting Job A pop-up window will appear asking you to confirm the Delete Job action.
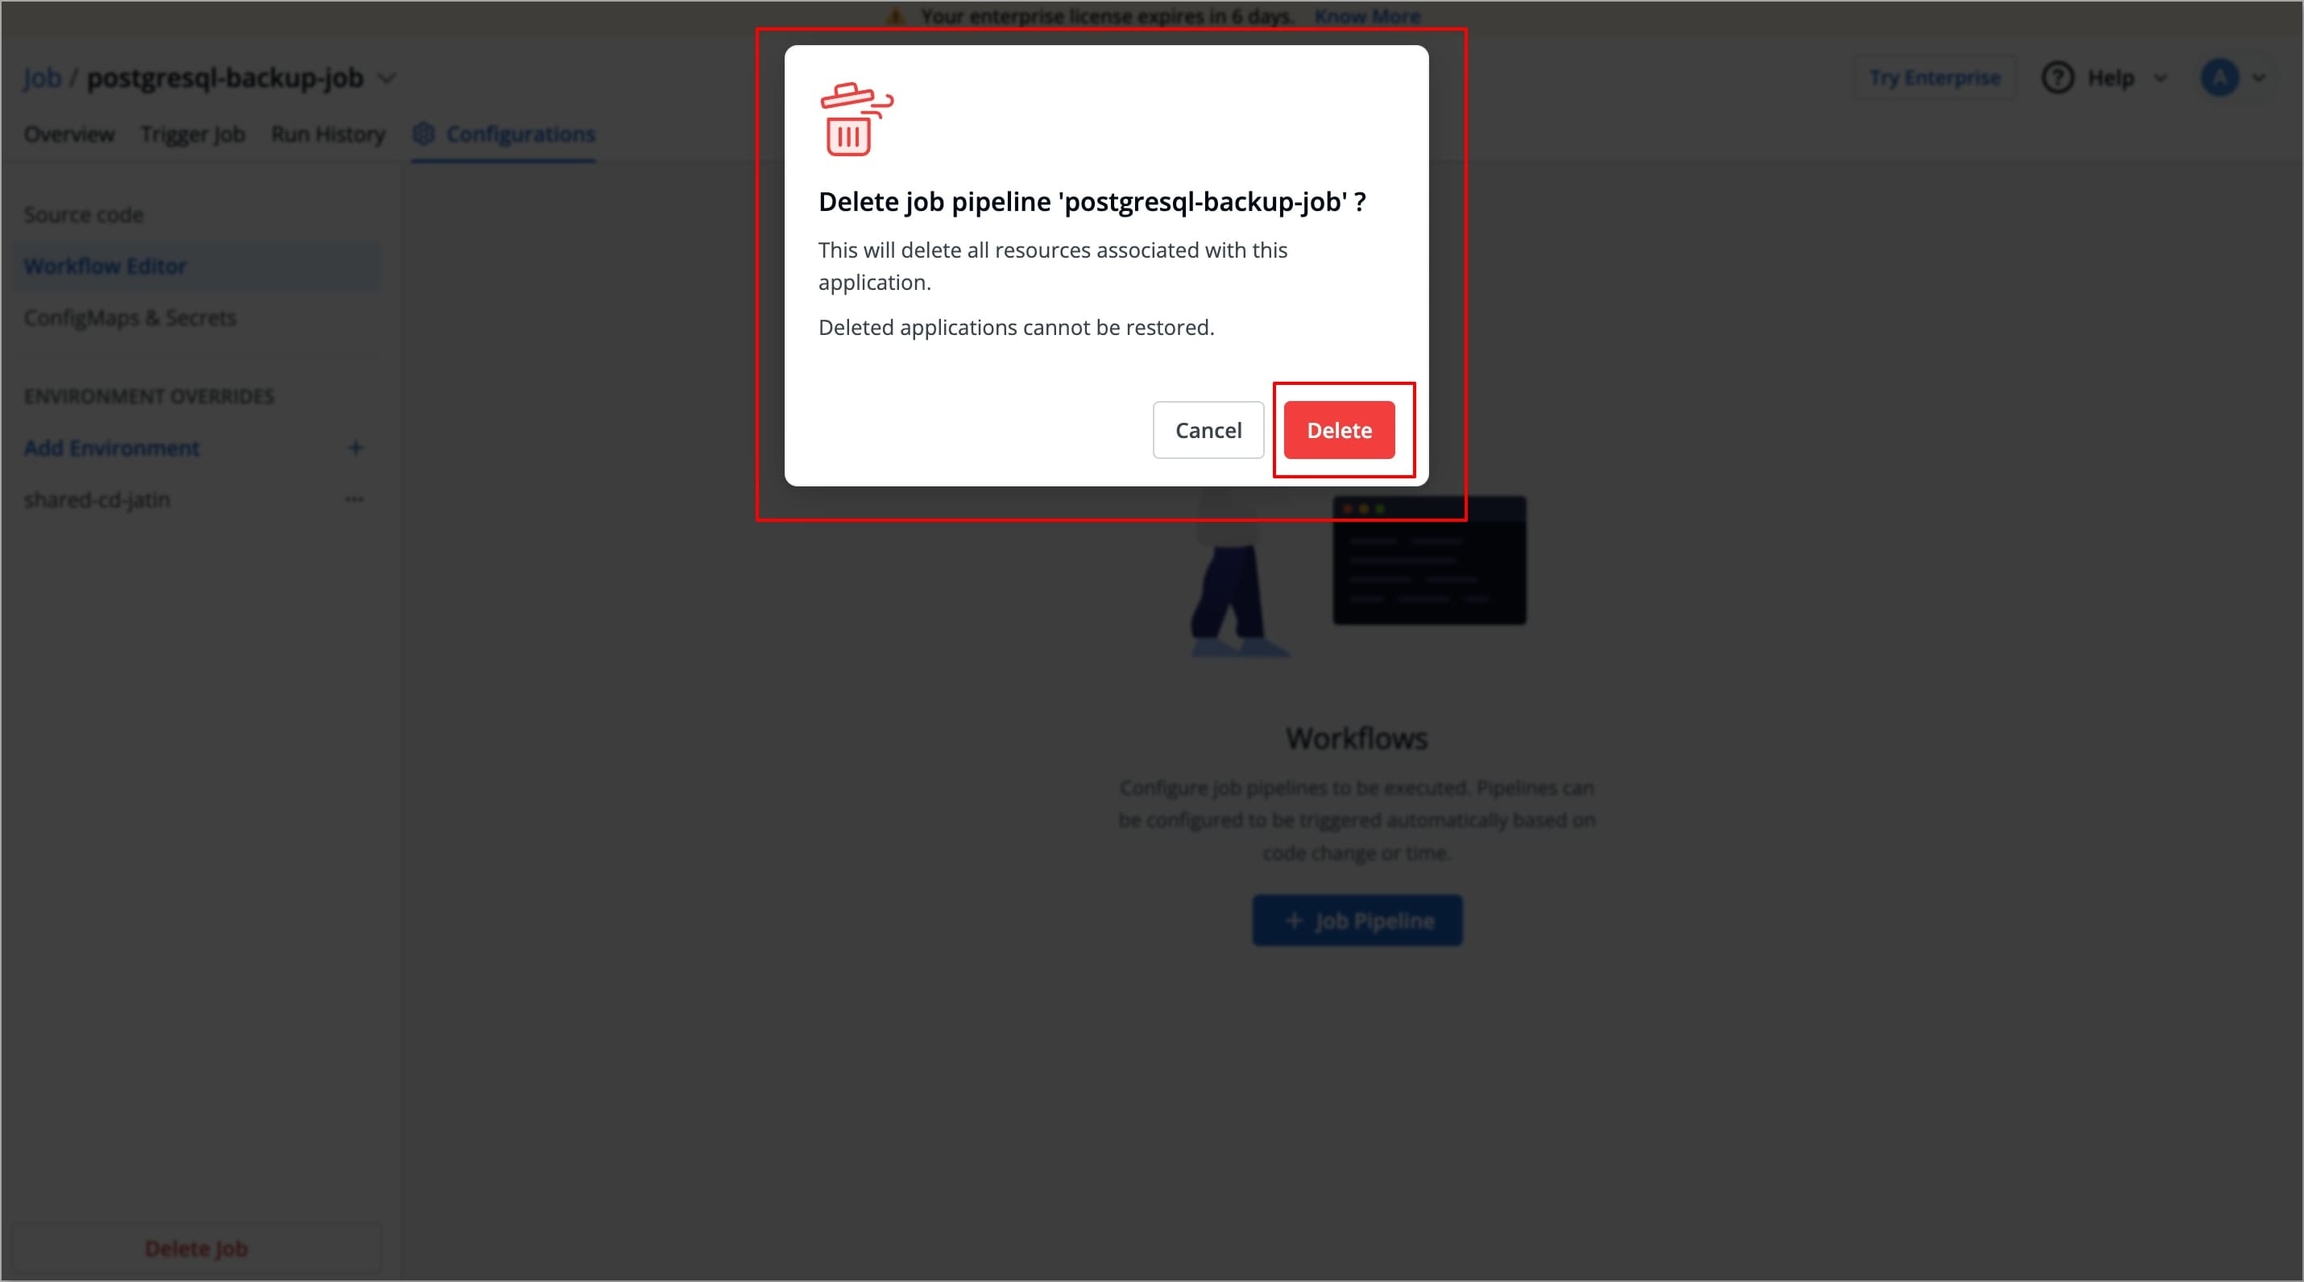
Figure 10: Confirming Delete Job
After creating a job, the next step is to configure the job. Refer to the Configurations section to configure the job.
Extras
Tags
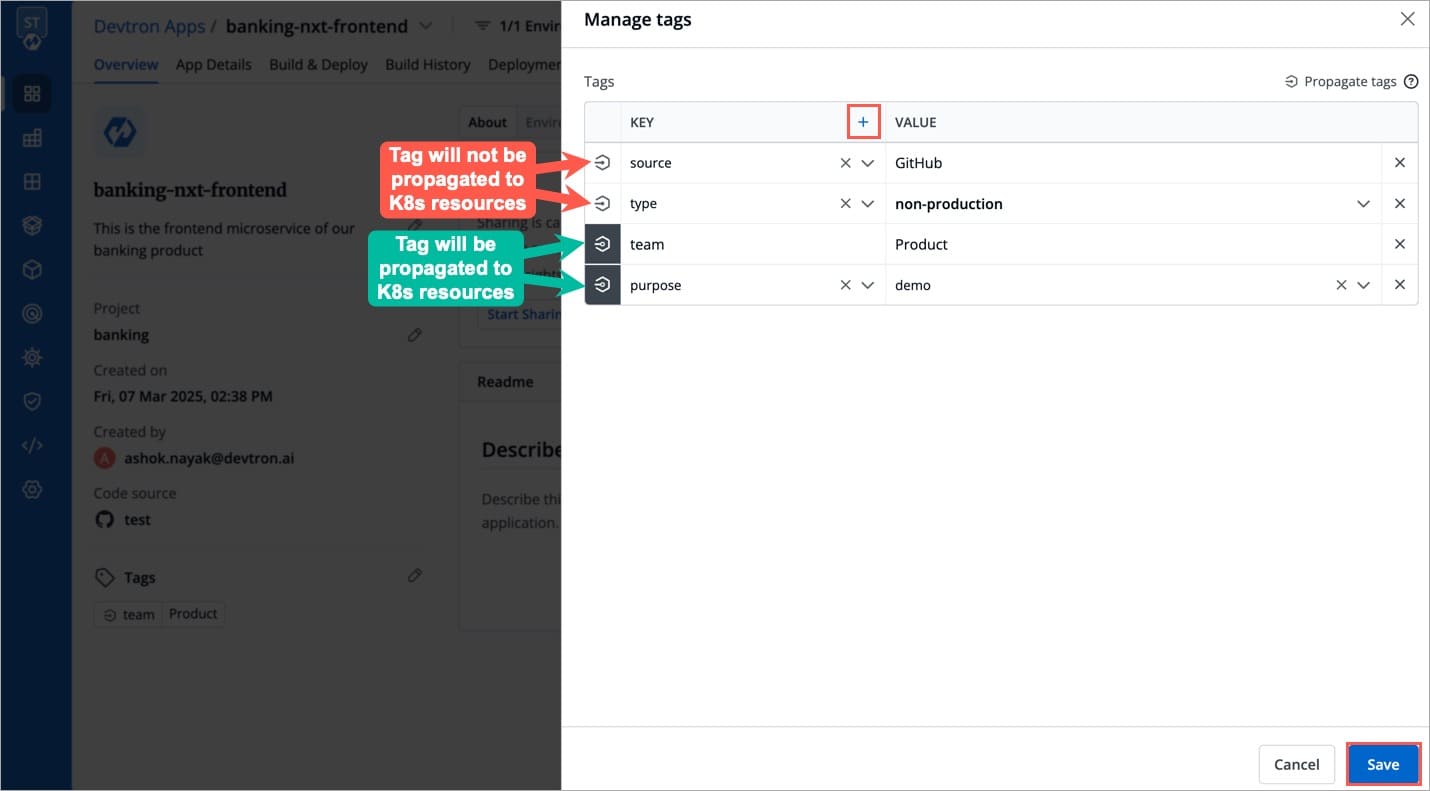
Tags are Key-value pairs used for identifying and organizing the application. Users can propagate tags as Kubernetes labels to enable filtering, bulk operations, and integrations with Kubernetes tools. To do so, follow the steps below.
Click the Add tags to job dropdown on the Create job page.
Under the Tags section, Click
+to add a new tag.You can click
Xicon to delete an existing tag.You can click the propagation icon
 to propagate a tag (turns dark grey when propagated), click again to remove propagation.
Last updated
Was this helpful?