

Release Hub
Prerequisite
Create a Tenant before proceeding with any action in Release Hub.
Introduction 
This section allows you to define release tracks, create and version software releases, add applications, select container images, and deploy releases to specified tenant installations.
Creating Release Tracks and Versions
This involves the creation of release tracks and software versions. A release track helps you organize and keep track of different versions of your software. So if you ship multiple products (say HRMS, Web Builder, Video Editing Tools), you can create separate release tracks for each.
Click + Release Track.

Figure 1: Creating New Release Track Give a name to the track, e.g.,
numero(Optional) Add a description of the track.
Click Create Release Track.
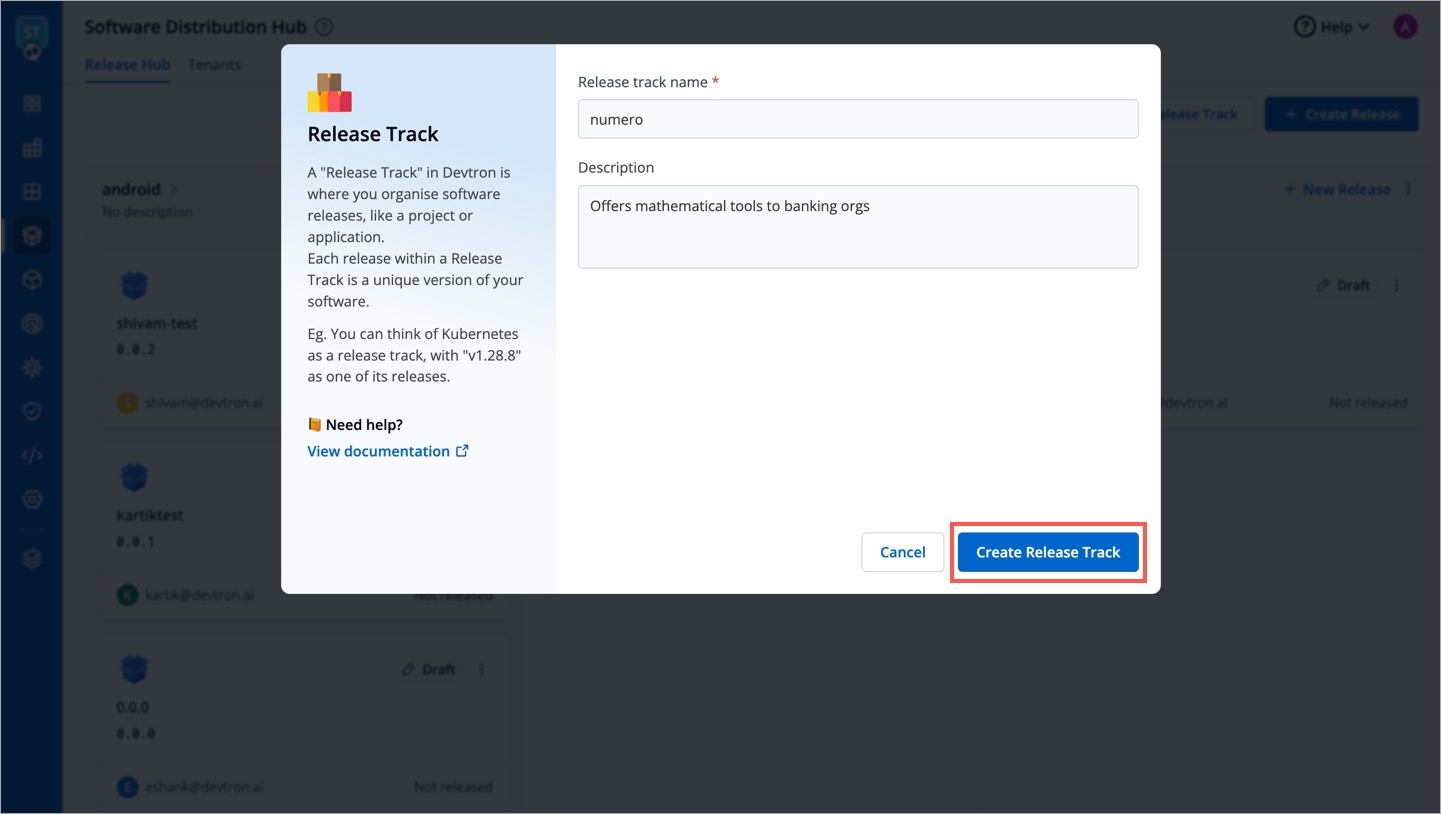
Figure 2: Entering Track Details Click + Create Release.
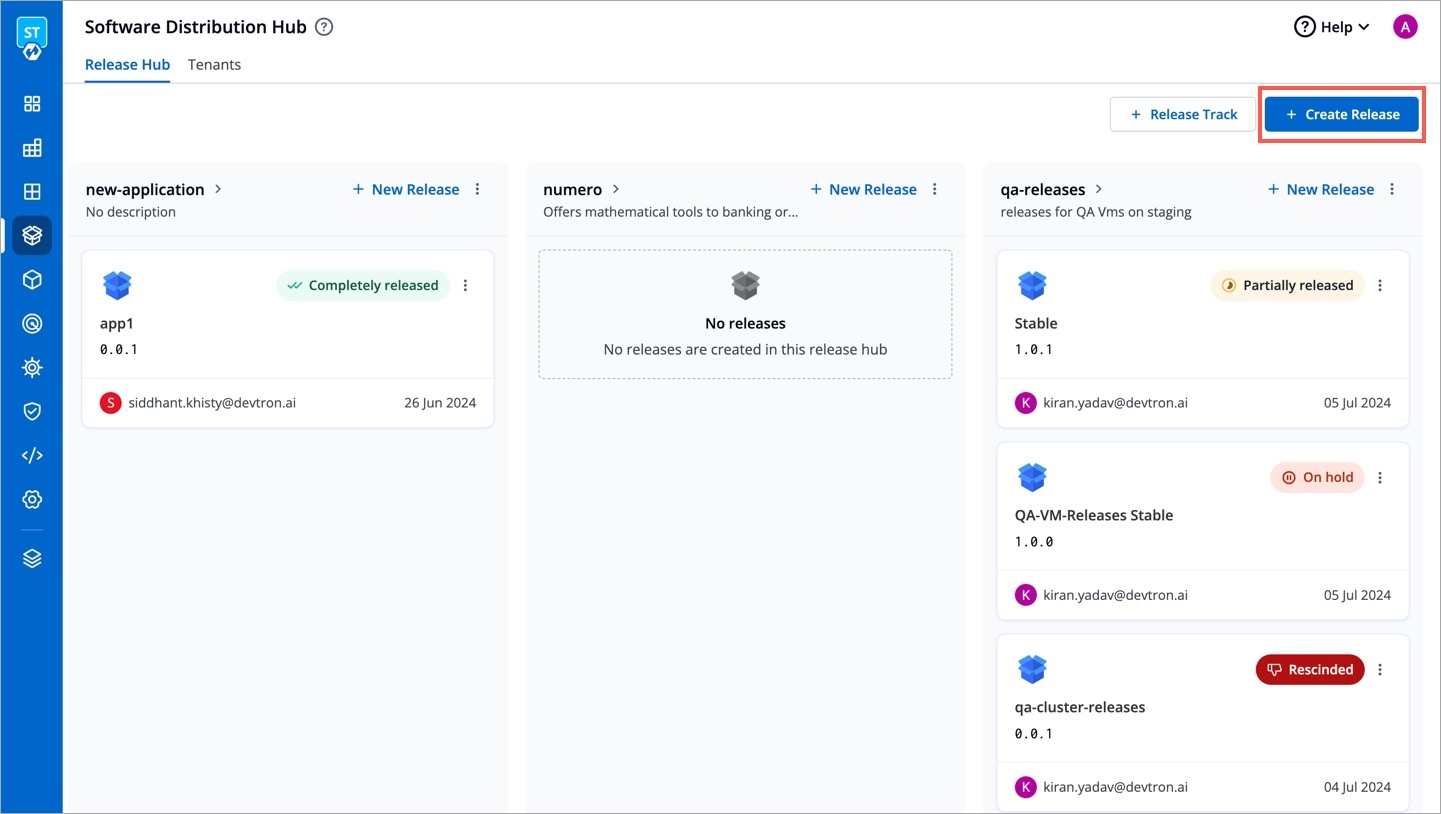
Figure 3: Creating New Release Select a track (e.g., numero) from the Release Track dropdown.
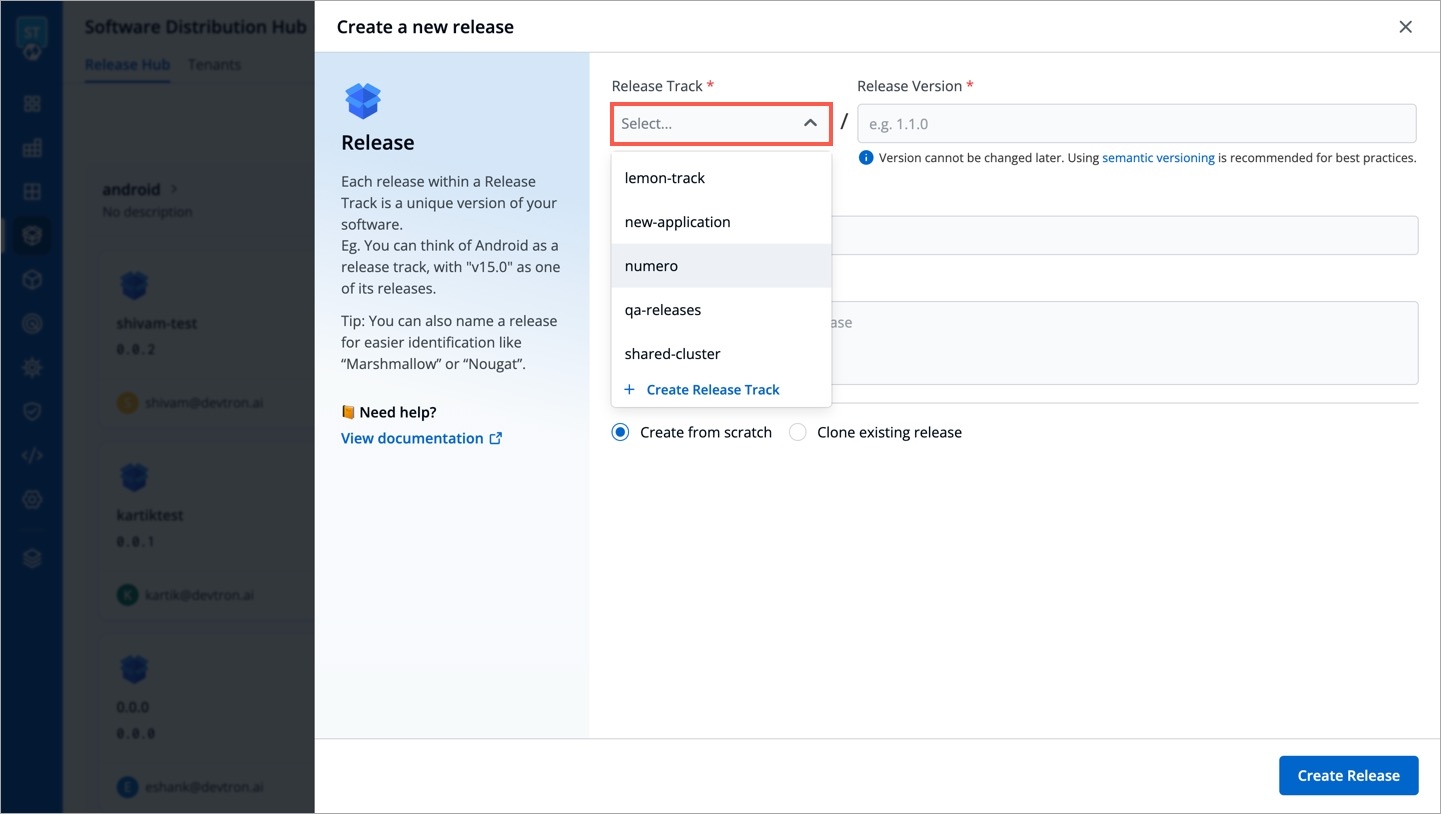
Figure 4: Choosing Release Track Enter a semantic version in Release Version field, e.g.,
1.0.0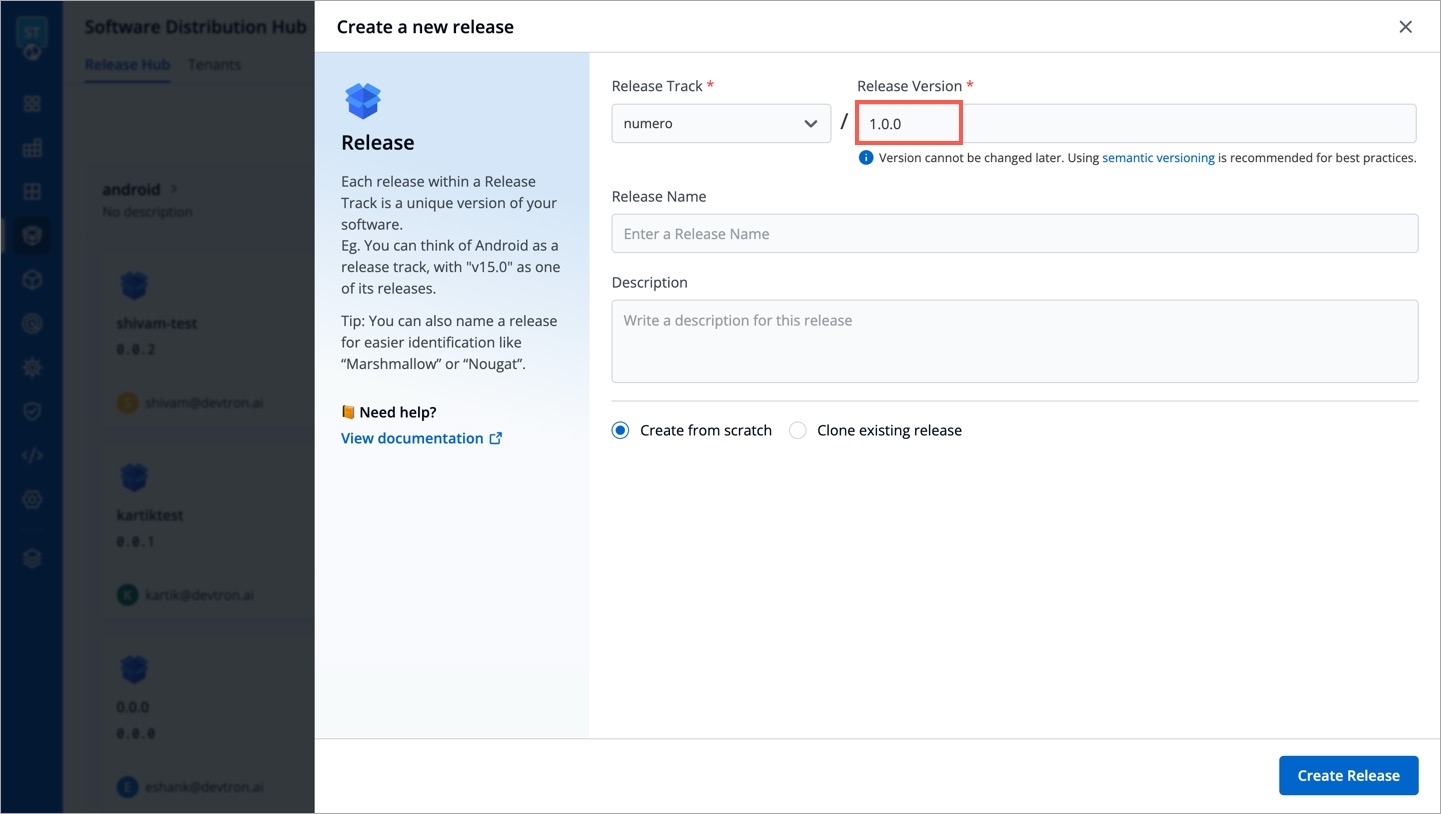
Figure 5: Versioning the Release (Optional) Give a name to the release, e.g.,
numero-beta. If you don’t provide one, the name will be same as release version (i.e., 1.0.0).(Optional) Add a description of the release.
Click Create Release.

Figure 6: Saving Release Details
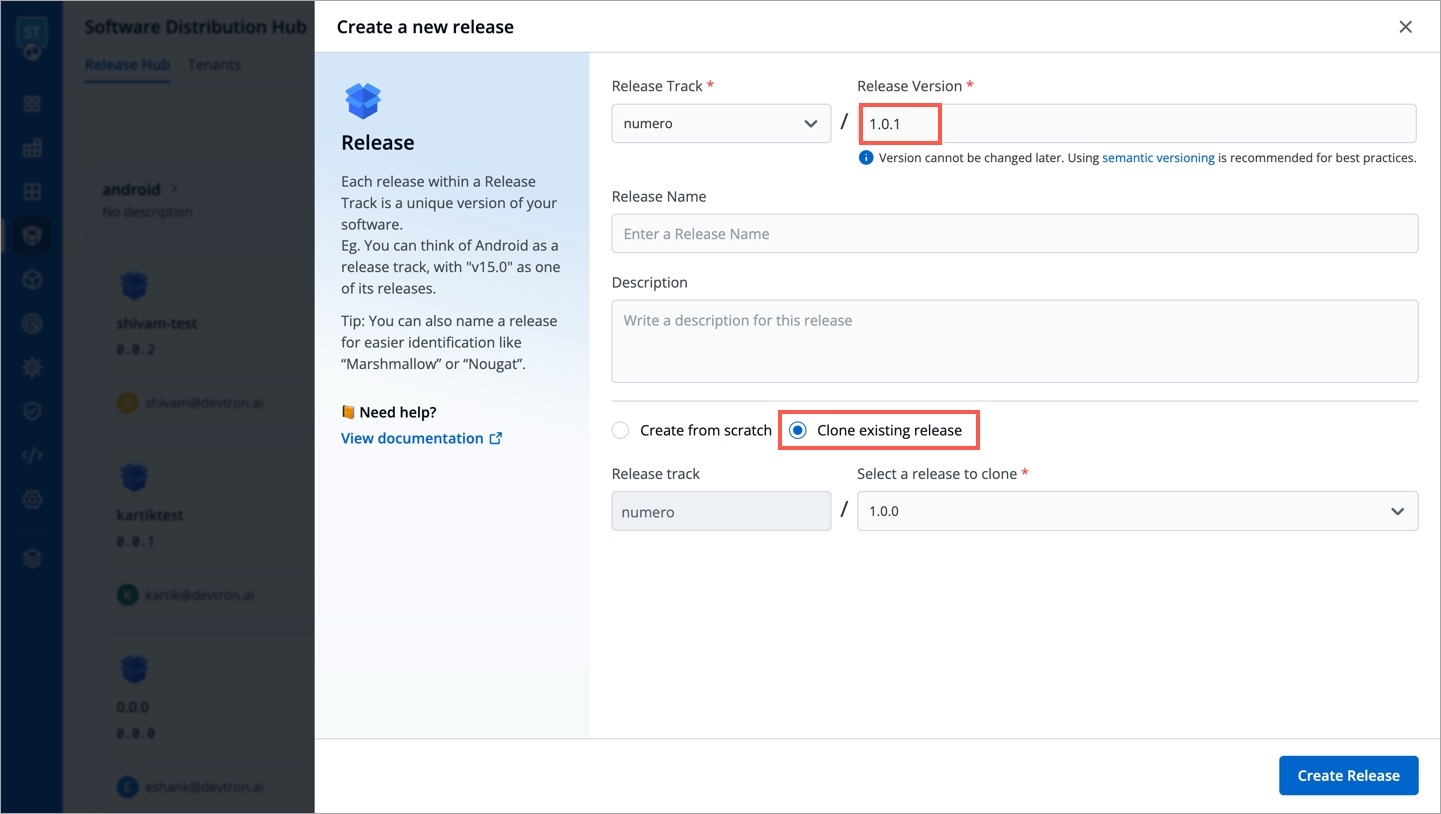
If you are creating your first release, you may proceed with the Create from scratch option. However, for subsequent versions of your release (say 1.0.1), you may clone an existing release (e.g., 1.0.0) as shown below. Please note, you can only clone releases belonging to the same track.
Adding Applications
Who Can Perform This Action?
Users need to have super-admin permission to add applications to a release track.
This involves the inclusion of applications you wish to rollout in the release version created by you.
Click + Add Application button present within the release you created.
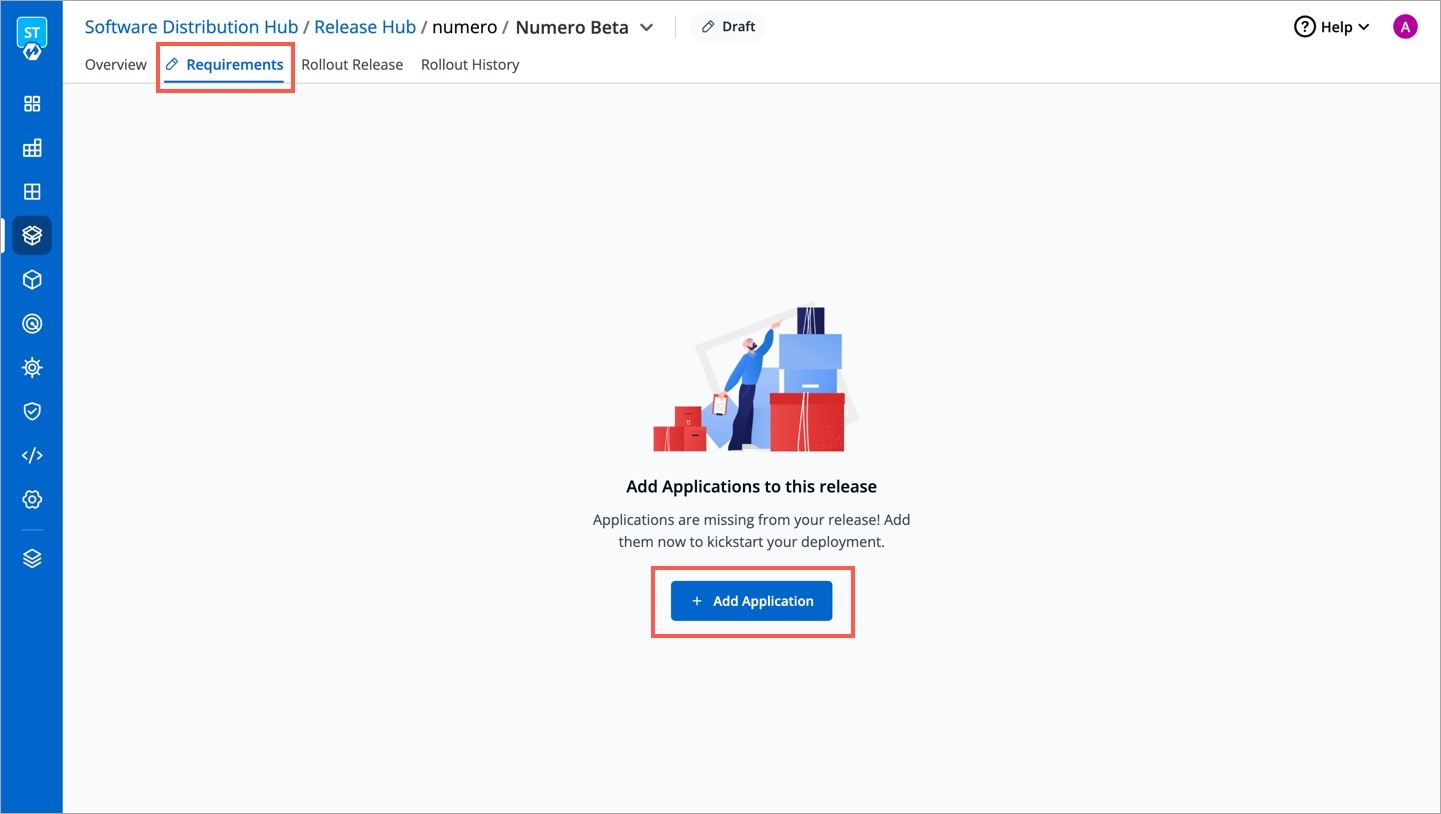
Figure 8: Adding Apps to Release Click the Search and add applications dropdown.
Use the checkbox to add applications from your projects.
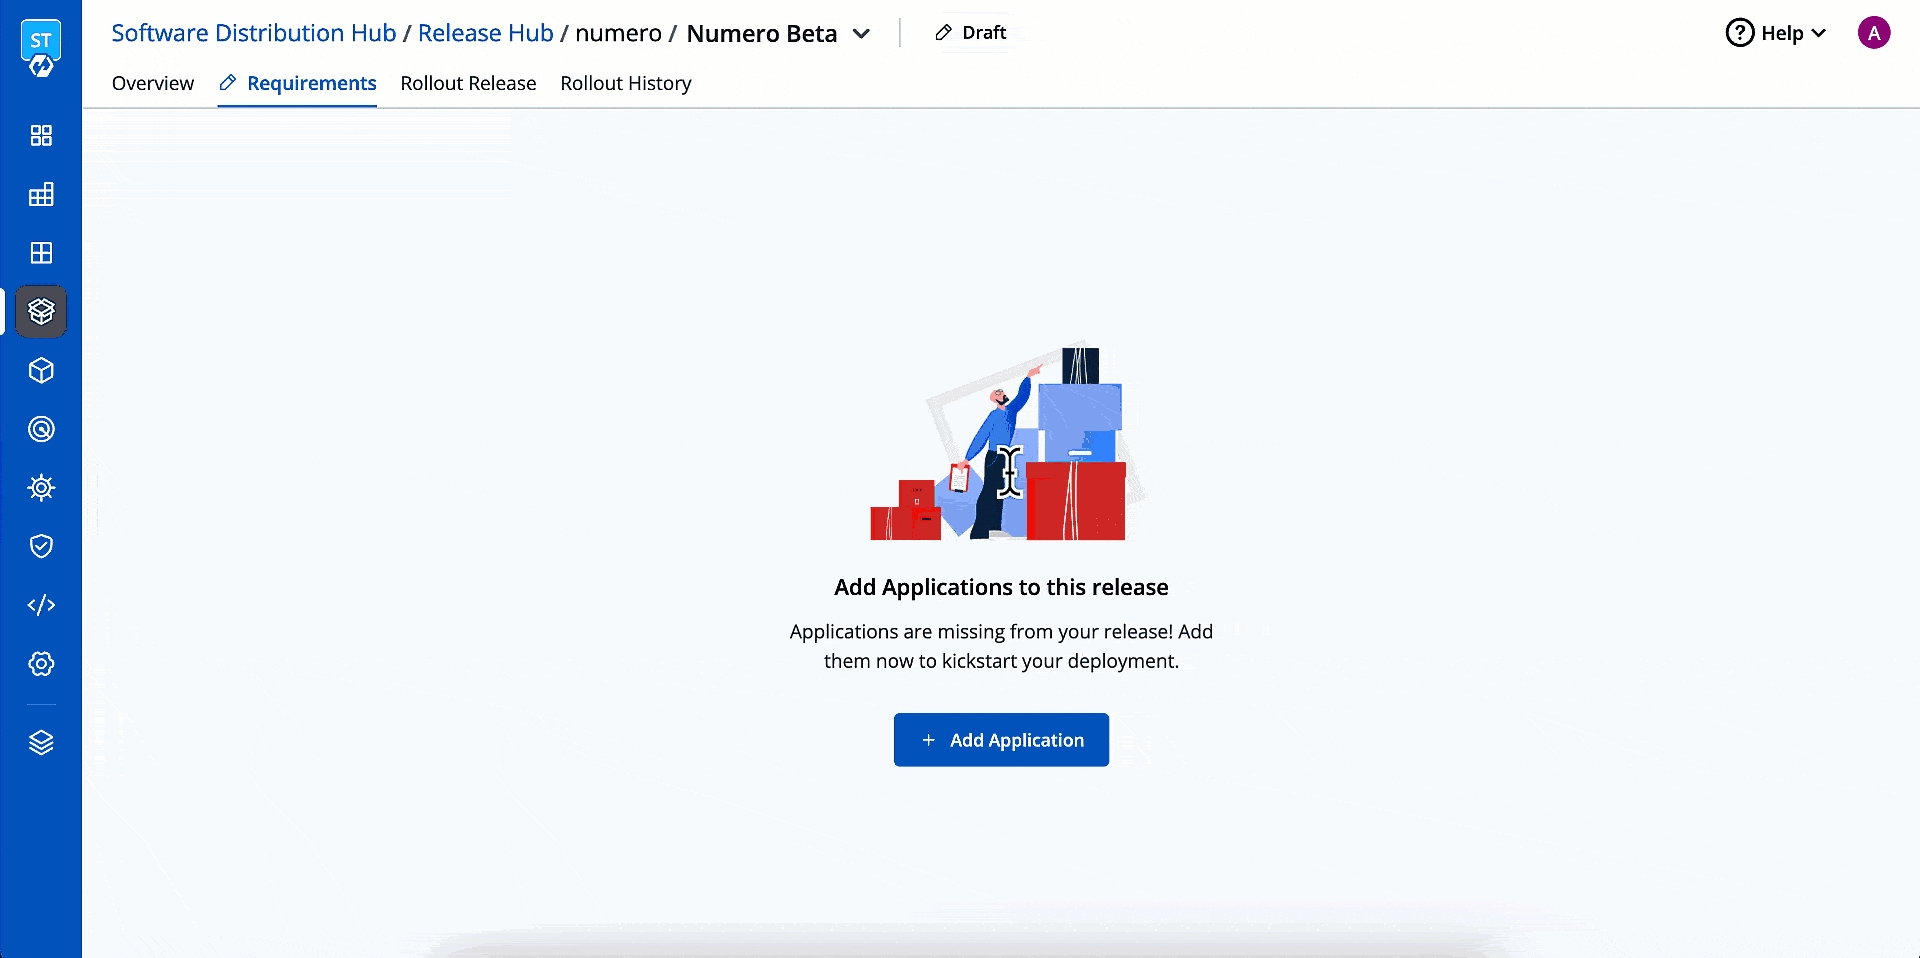
Figure 9: Choosing Applications Click Add Release Stage.
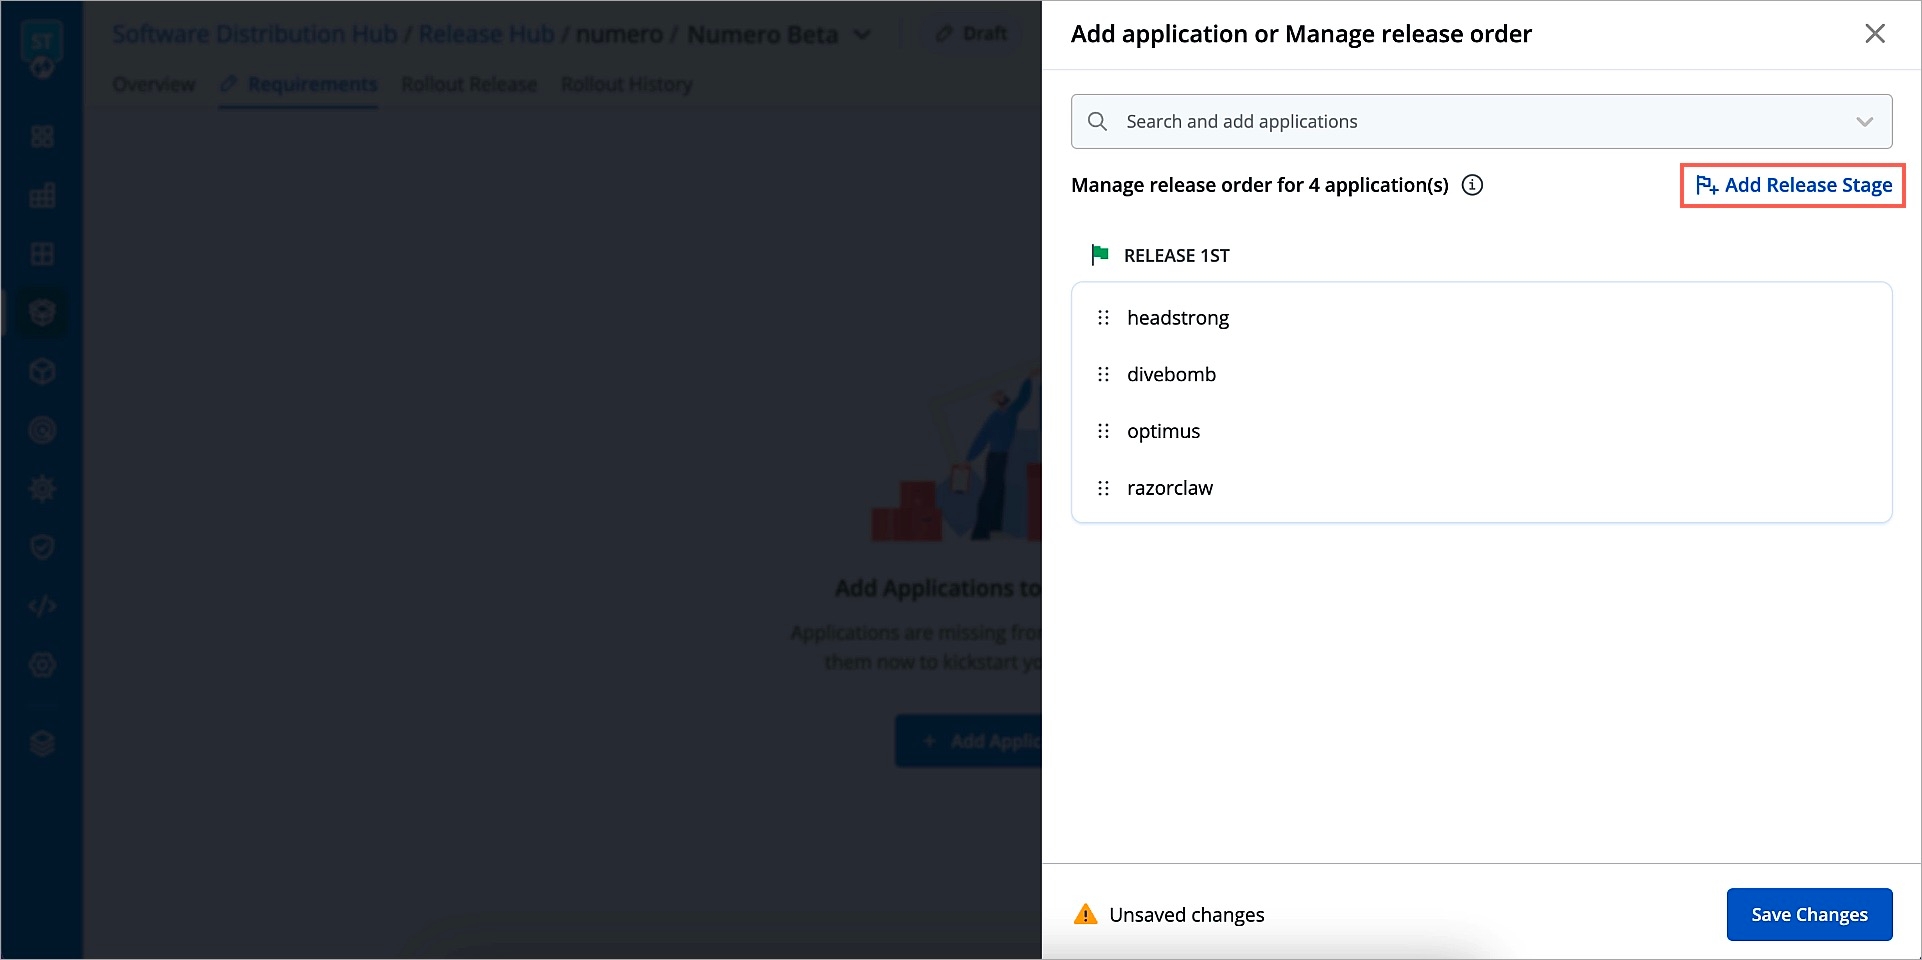
Figure 10: Dividing Release in Stages
Importance of Release Stages
By default, your selected applications will be set to release in one go. However, you can also release them in stages. In other words, you can decide which set of applications should be released first, subsequently which ones to release next, and the ones to release last. For example, if you're adding a new payment system (backend) and an updated checkout page (frontend), you would release the payment system first to ensure payments can be processed correctly.
Use the drag-and-drop feature to move applications from one stage to another.

Figure 11: Rearranging the Sequence
The drag-and-drop feature is designed specifically for moving applications between different release stages. It is not meant to alter the sequence of applications within the same stage.
Once you have finalized the sequence and stages, click Save Changes.
Selecting Images
Who Can Perform This Action?
Users need to have super-admin permission to select images for selected applications.
Select a workflow available for your application. All the images available in the selected workflow will appear.

Figure 12: Selecting Image from Specific Workflow
Note
Only the images that were built already will appear. If there are no images present, trigger the CI pipeline of the application first to obtain the image.
Click SELECT next to the image you wish to deploy from the list.
Repeat the above steps for other applications you added in the release.
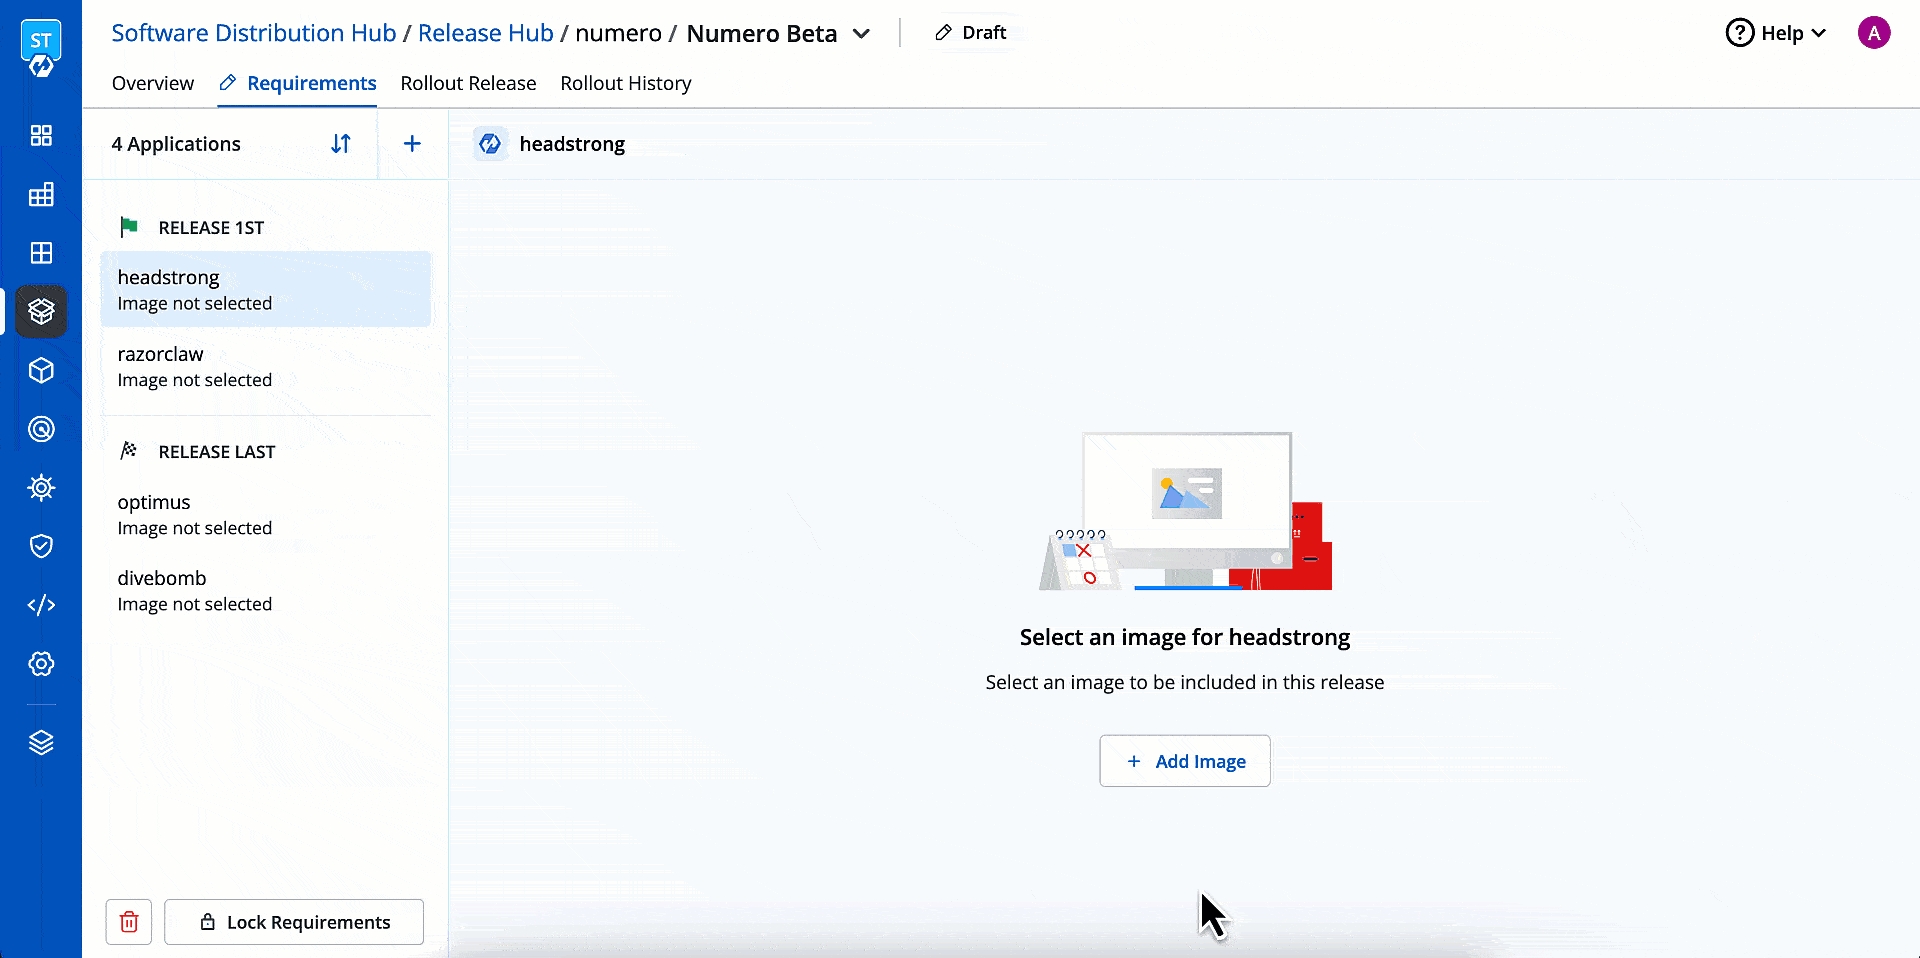
Figure 13: Repeating Steps for Other Applications Click Save.
Tip
In case you don’t have the correct images ready for any of your applications, you can partially save your changes at this point, and return once they are ready.
You may add release instructions for each application using the in-built Markdown editor. This can be detailed deployment notes and configuration guidelines for the team.
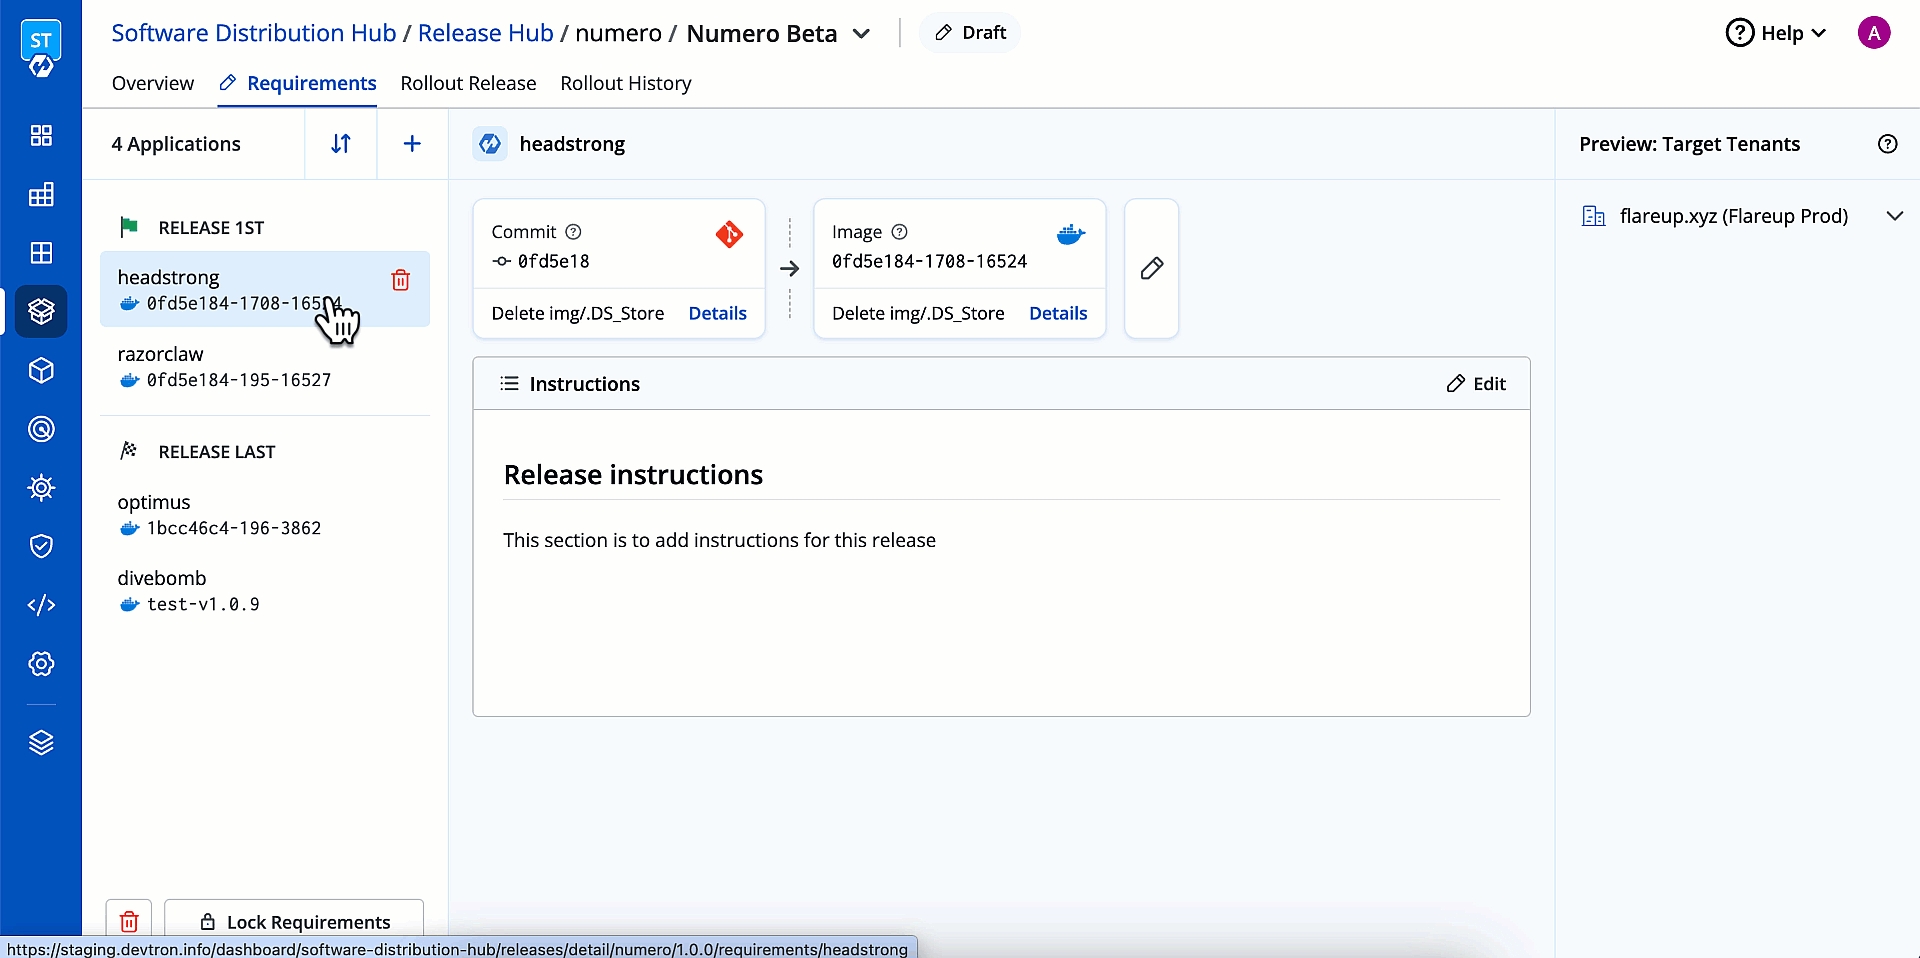
Figure 14: Adding Release Instructions Before locking the requirements, make sure the release order is correct, add applications if needed, and include environments in tenants (if not done already). Once you have finalized them, click Lock Requirements.

Figure 15: Locking Requirements
Deploying Release
Who Can Perform This Action?
Users with build & deploy permission or above (for the application and target environment) can deploy a release.
Prerequisite
All your requirements need to be locked and tenants must be configured.
This involves the deployment of the release to the specified tenant installations.
Go to the Rollout Release tab.
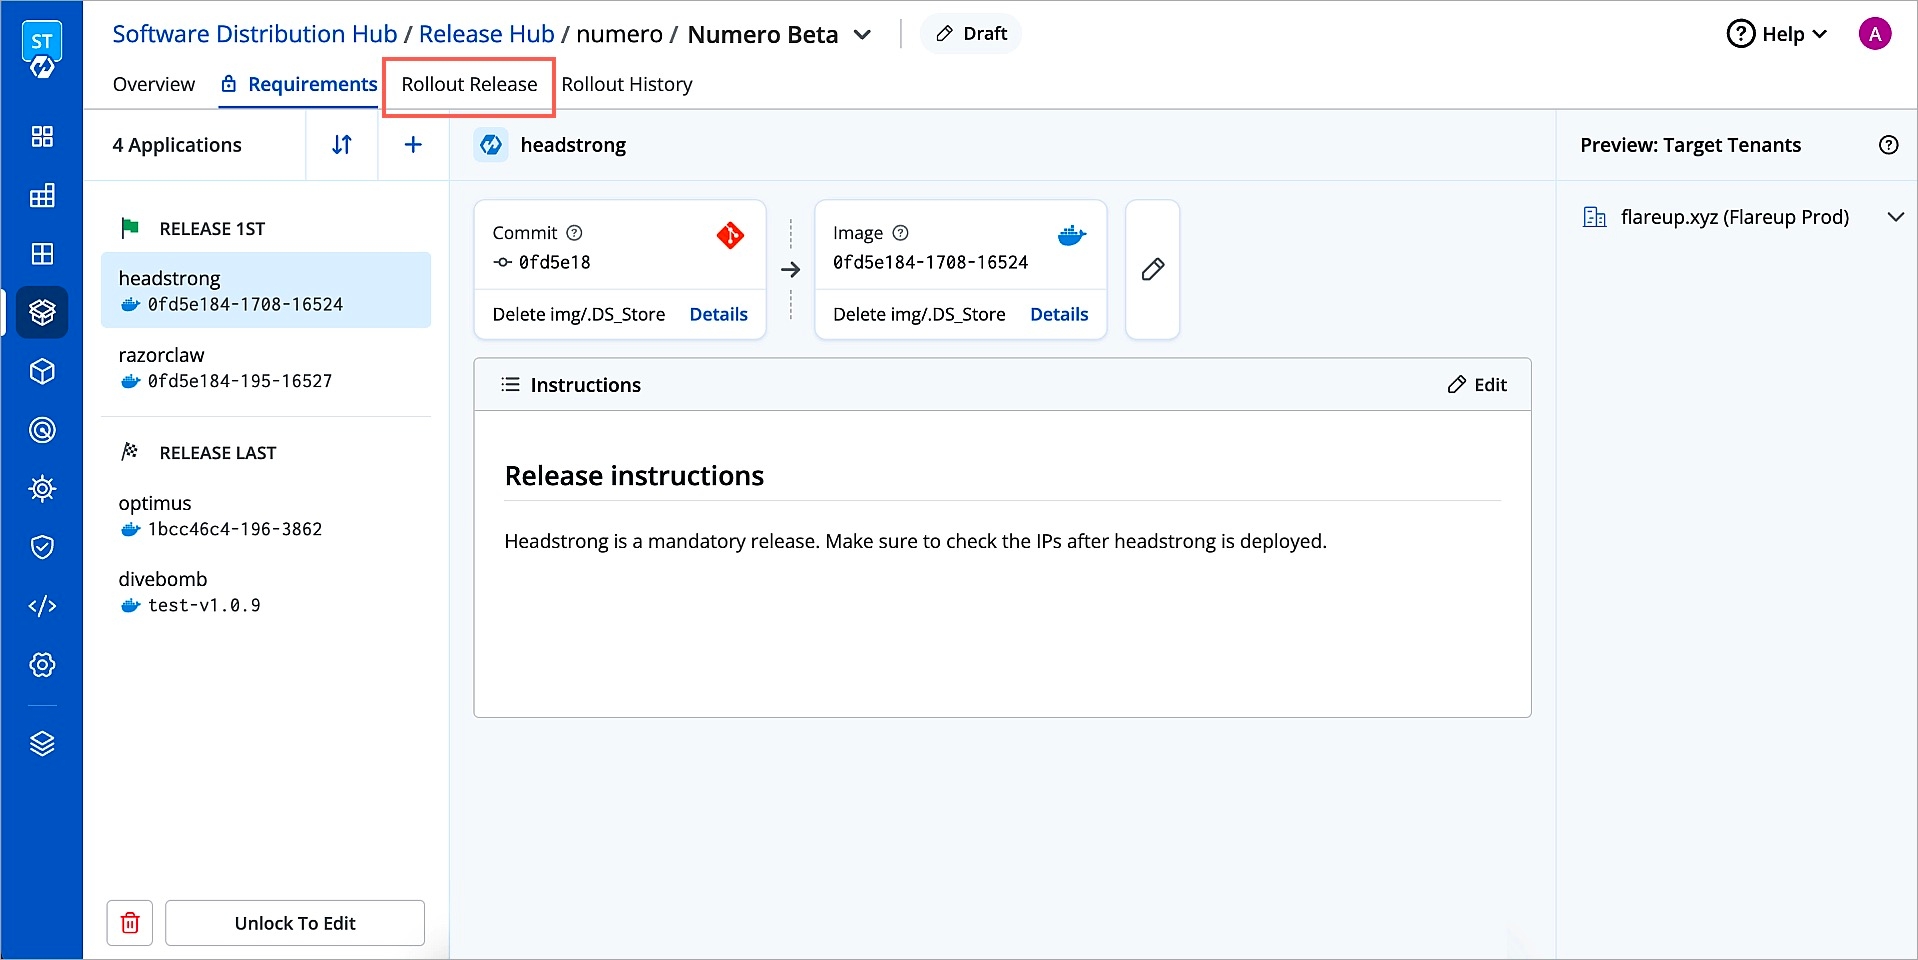
Figure 16: Rollout Release Page Your release needs to be marked as ready to proceed further. If it isn’t, you can mark it Ready for release from this screen.
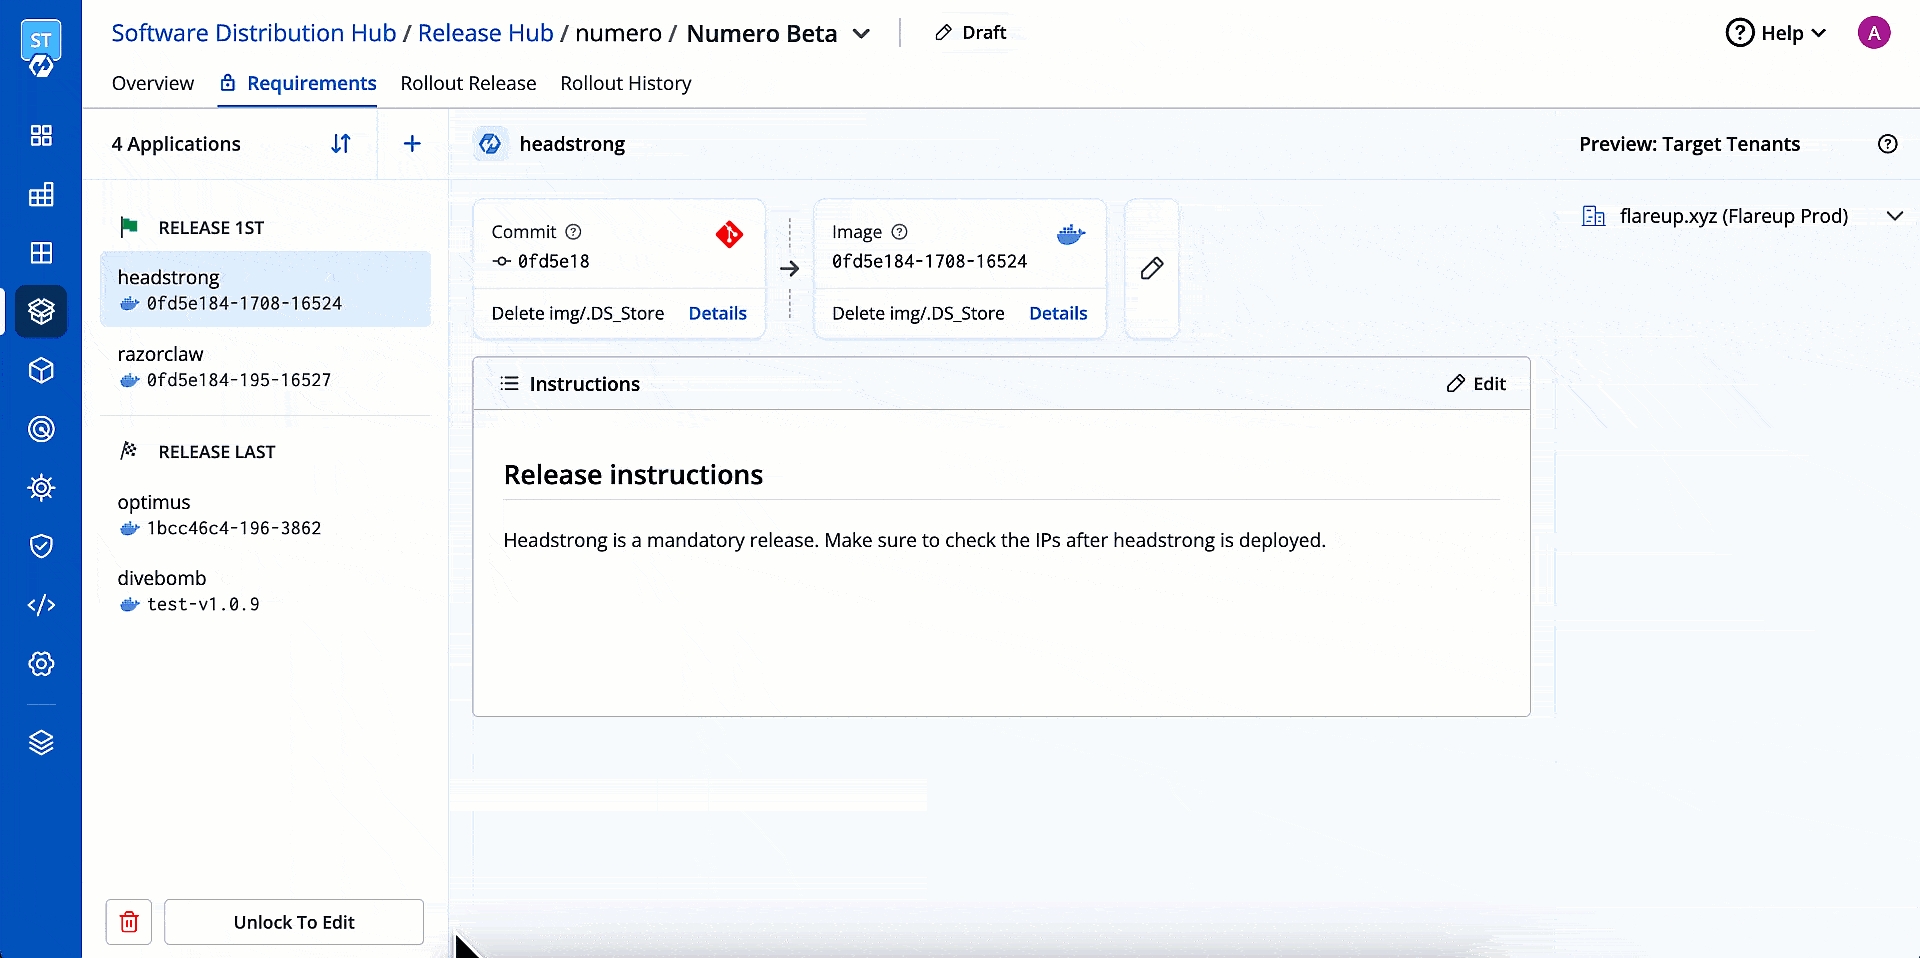
Figure 17: Marking a Release as Ready Optionally, you can also do so by changing the status from Draft state to Ready for release within your release track.
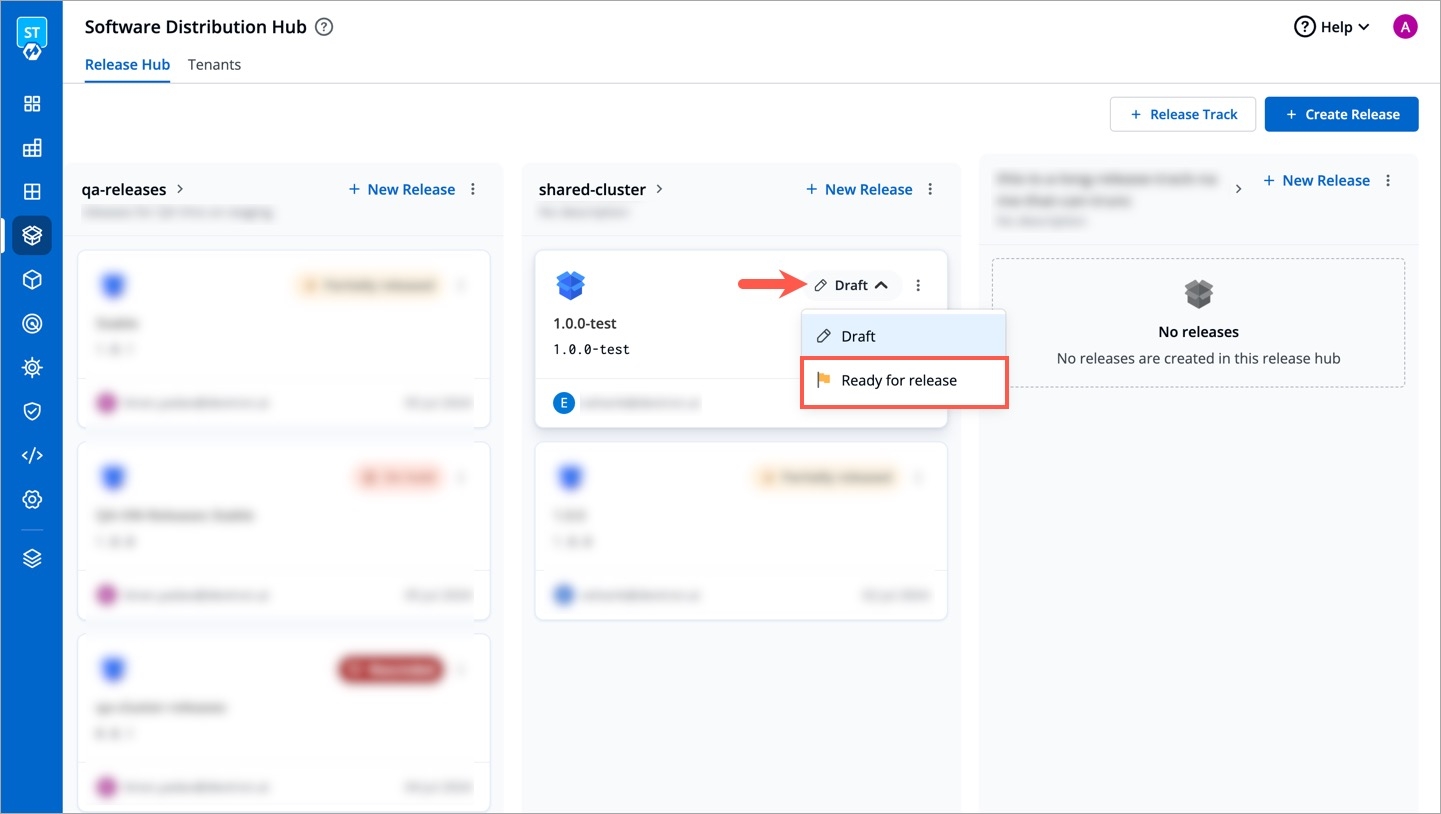
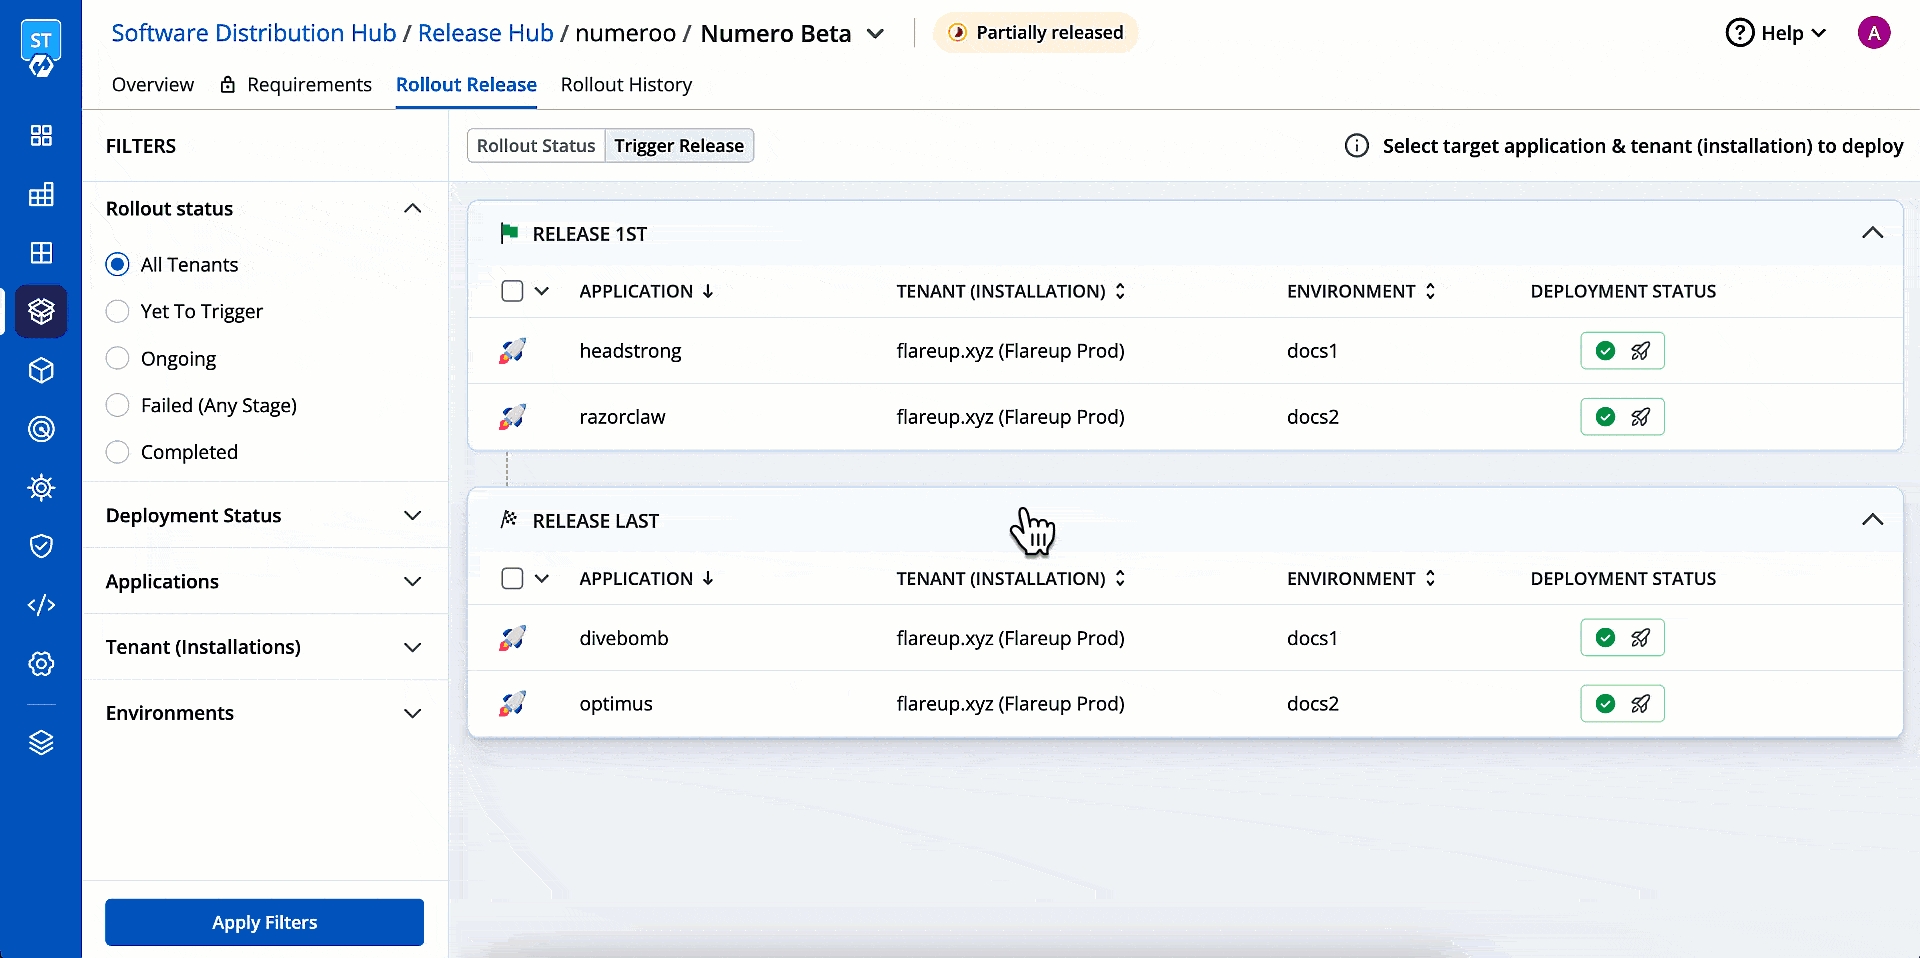
Figure 18: Alternative Way of Marking Use the checkbox to select the applications belonging to the first release stage. You may use the filters on the left-hand side to make it easier.
Click Deploy.
If the application workflow has pre-deployment/post-deployment stage, you get a dropdown where you can specifically trigger either pre-deployment, deployment, or post-deployment stage.
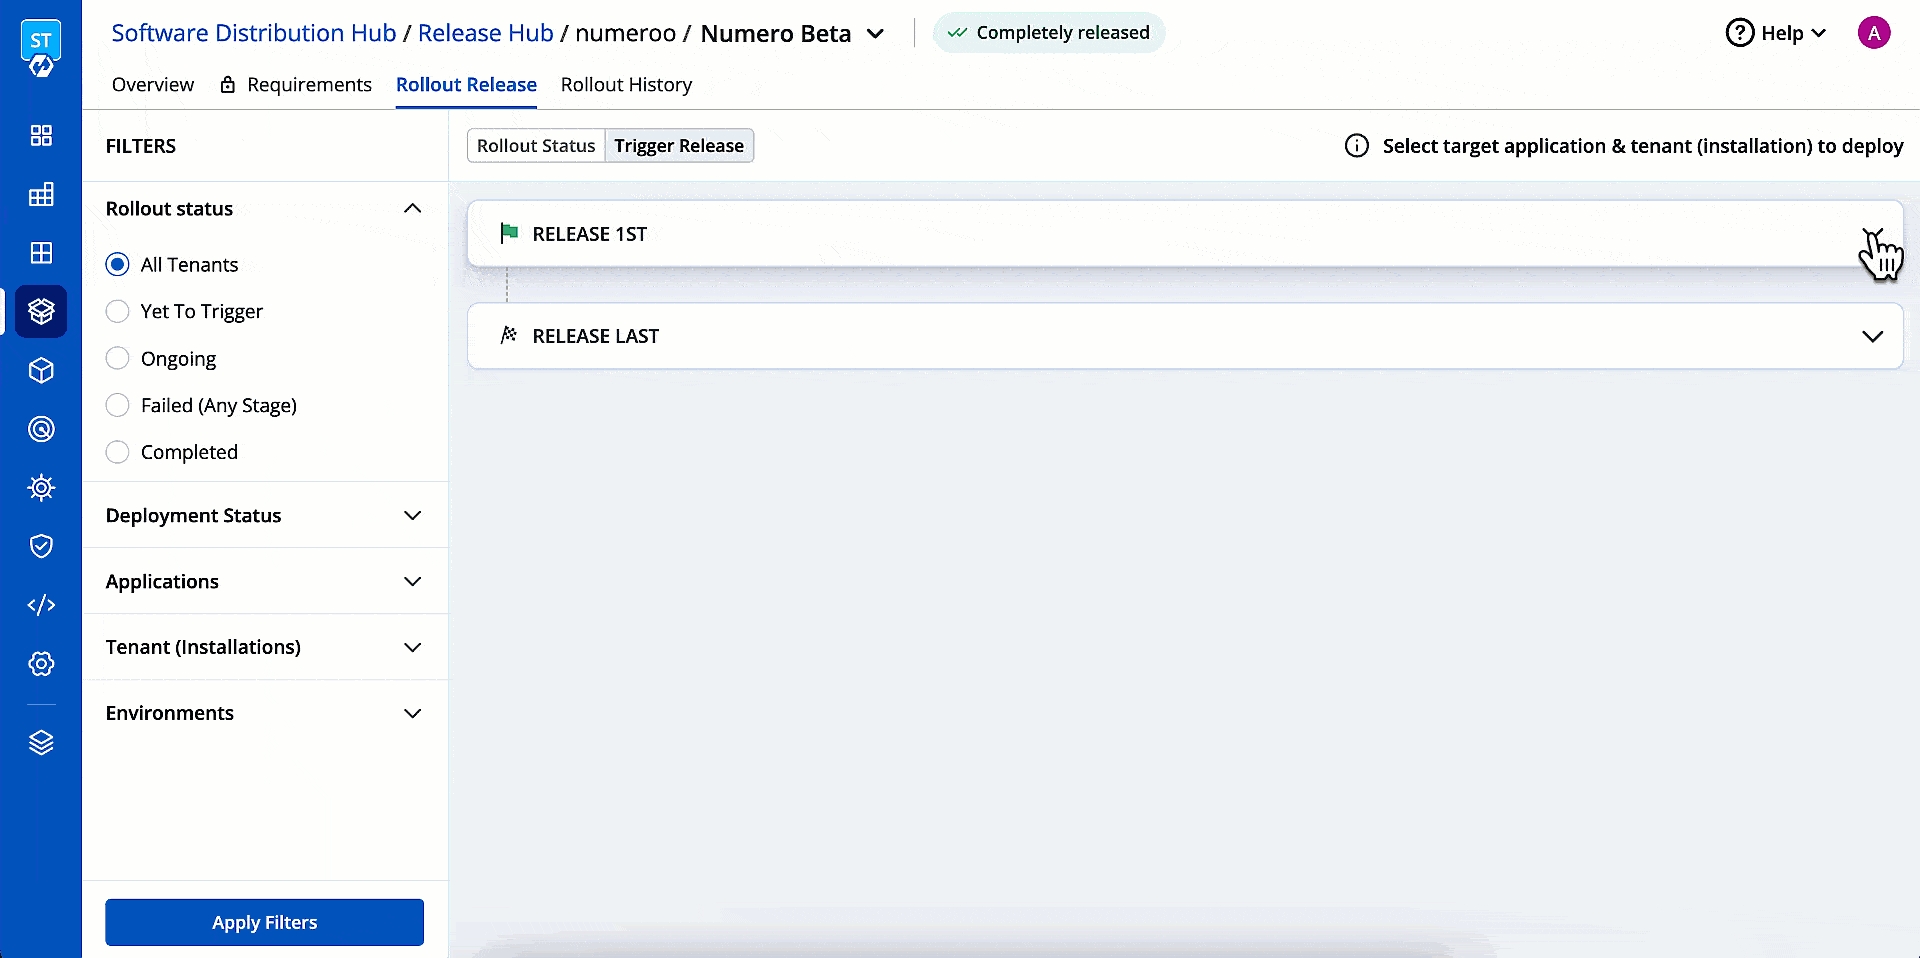
Figure 19: Pre/Post Deployment Once the applications from the first release stage are successfully deployed, select the applications from the subsequent release stage and deploy.
An application can be deployed on the tenant in the next release stage only if other applications in the previous stage are deployed successfully on the given tenant.
Here we covered the process of performing a production installation on just one tenant. Similarly, you can perform installations on your other tenants (if any).
Extras
Viewing Rollout Status
You can view the status of your release at a particular tenant under Rollout Status. Moreover, you can go to Rollout History tab to view the deployment history.
You can view the following statuses
All Tenants
Overview of rollout status across all tenants installations
Yet to Trigger
Shows tenant installations for which rollout has not yet started
Ongoing
Shows tenant installations for which deployment is currently in progress
Failed
Shows tenant installations where rollout has encountered issues because some deployment stage failed
Completed
Shows tenant installations where deployment has successfully finished and services are live
Apart from the rollout status, you can also see the release status:
If the applications are partially released, the release status shows
Partially released.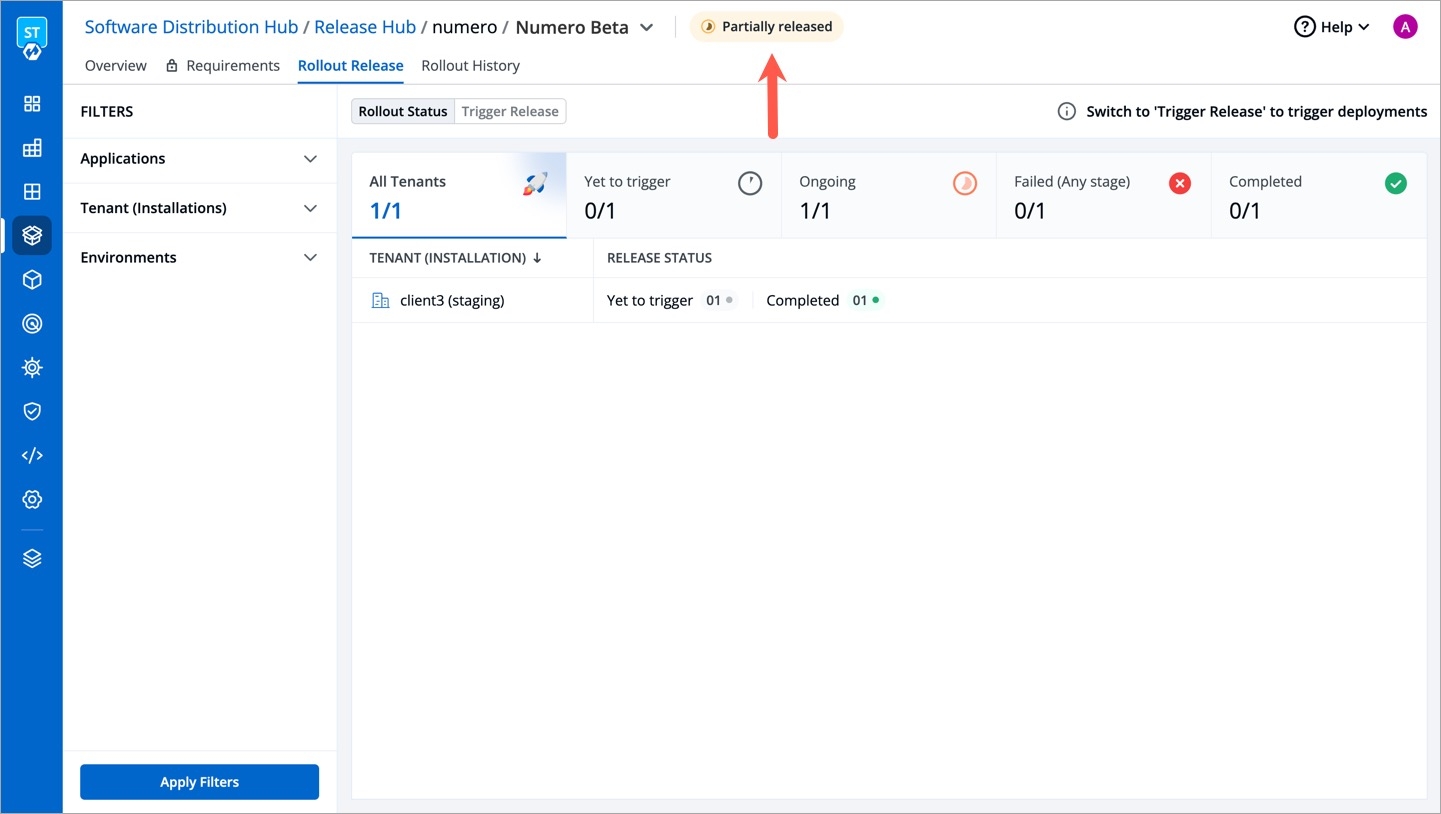
Figure 21: Partial Release If all the applications in a release are successfully deployed, the release status shows
Completely Released.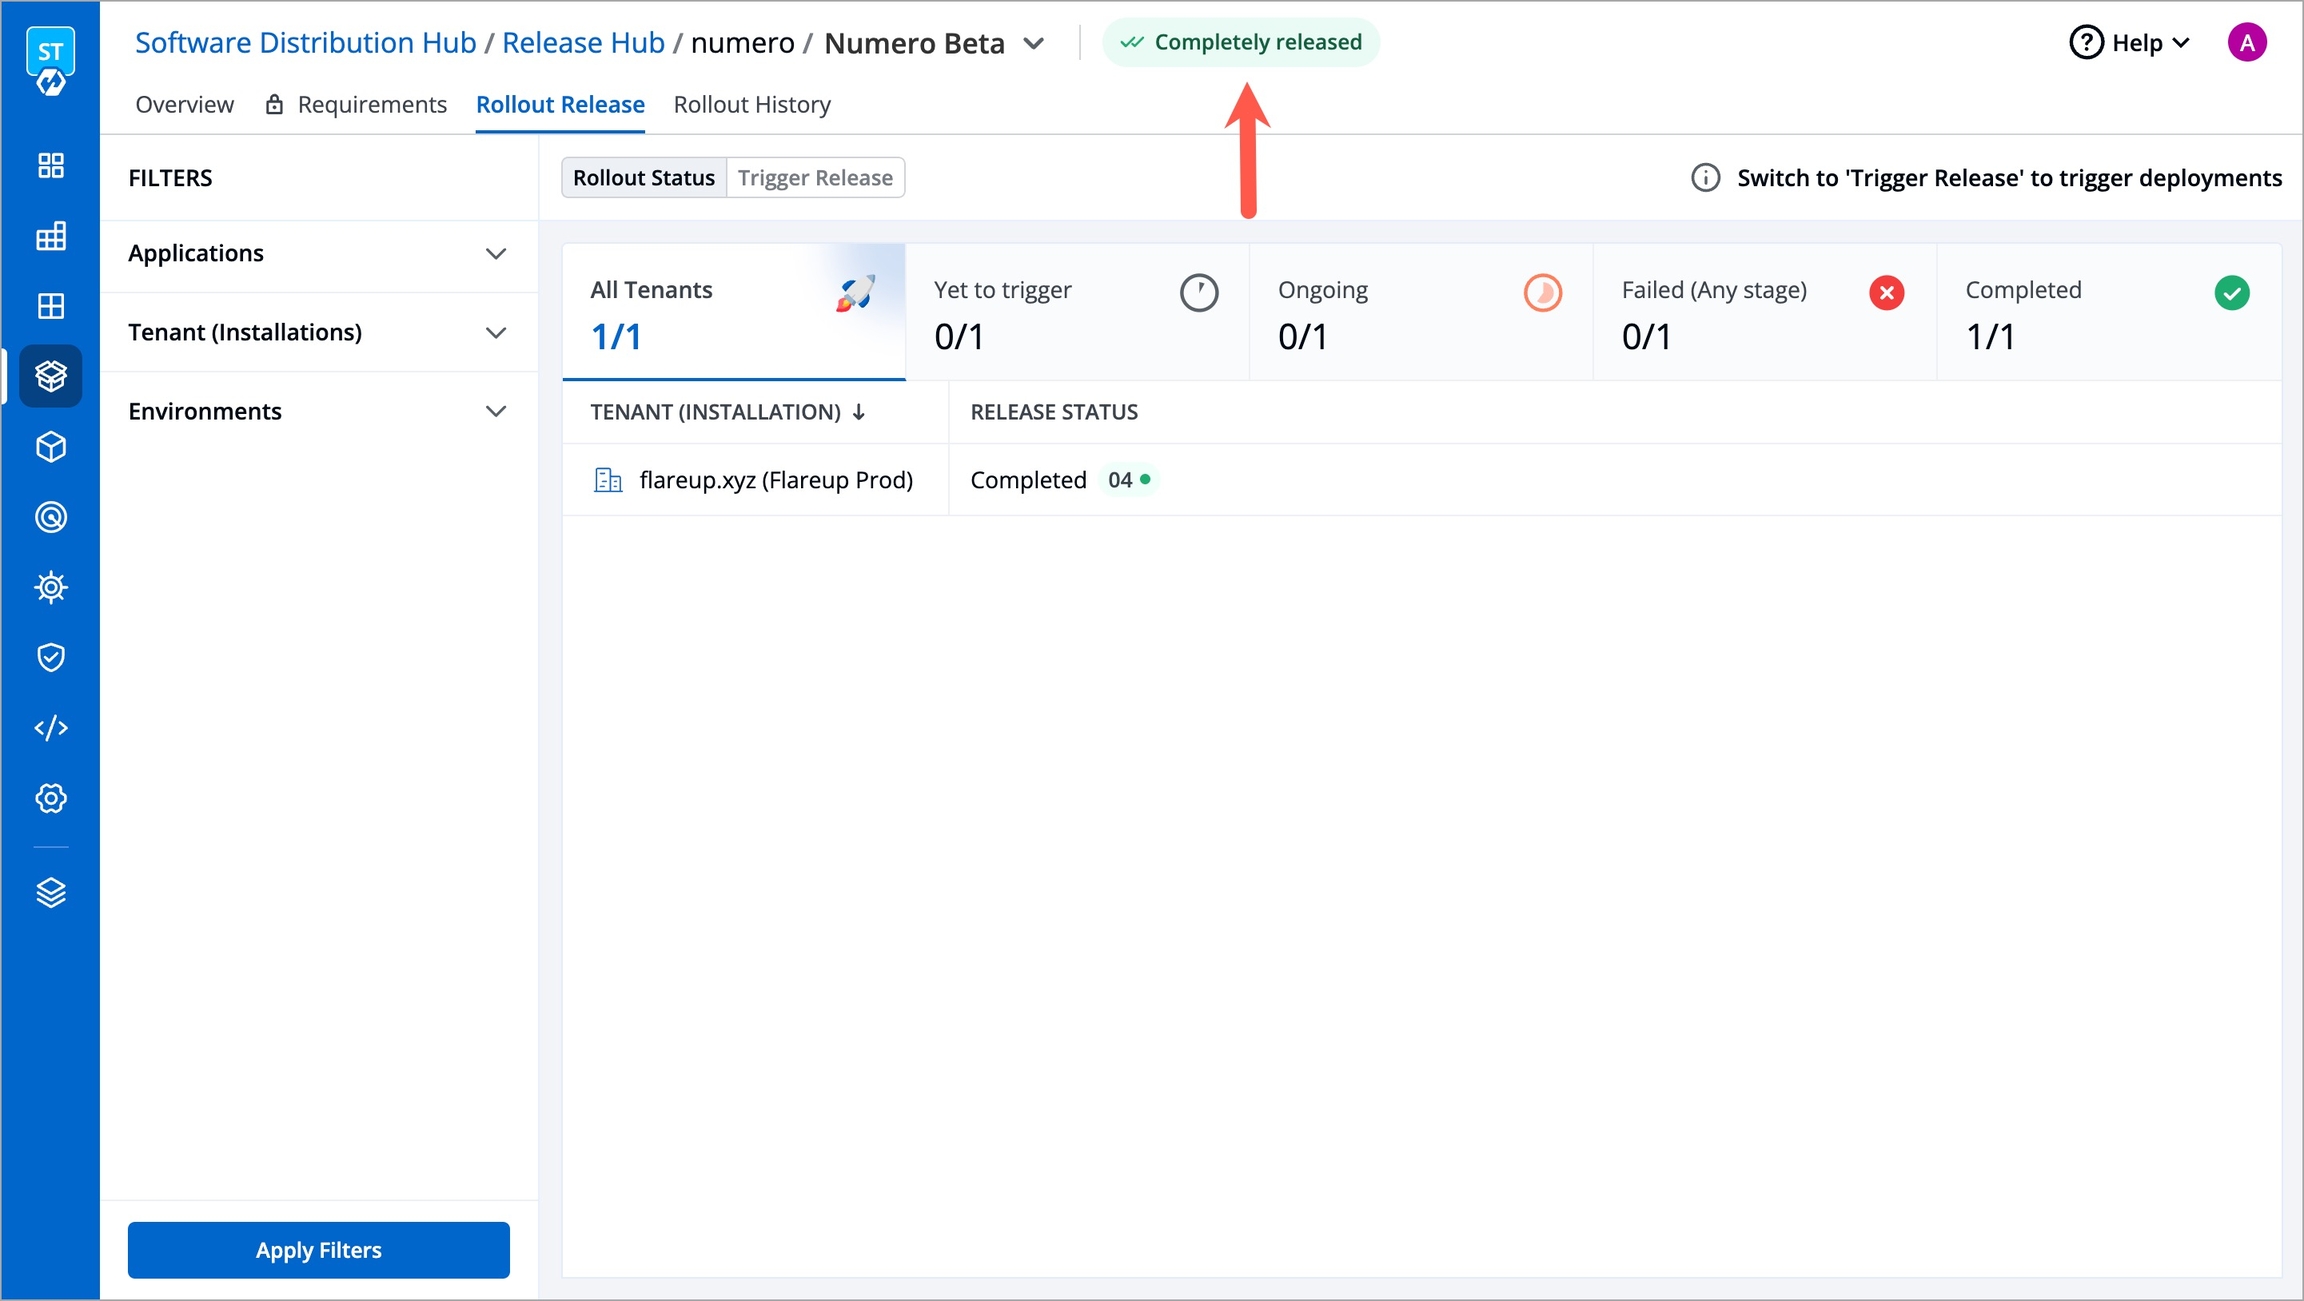
Figure 22: Full Release Alternatively, you can view the release status directly in the release track too.
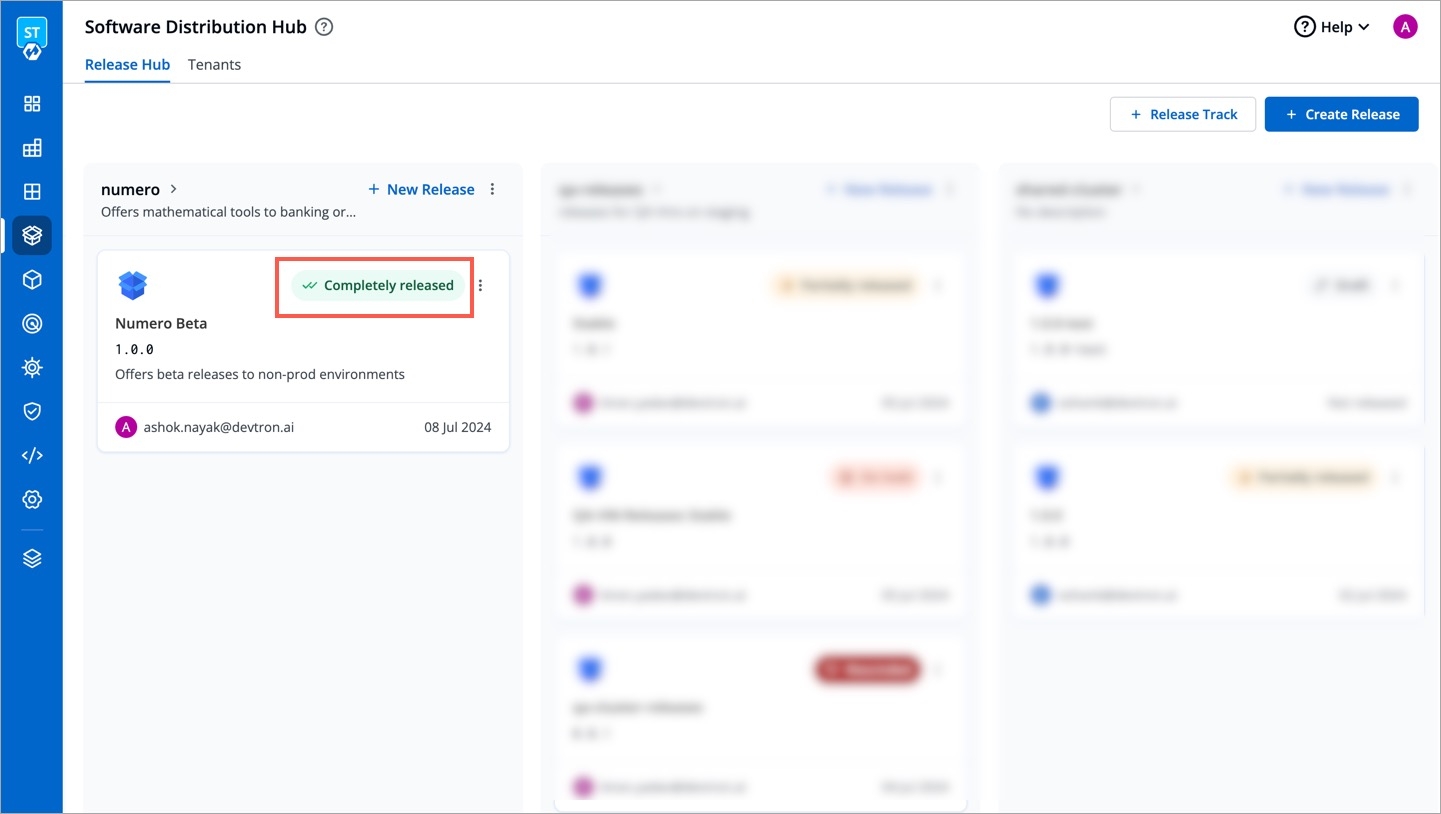
Figure 23: Alternative Way of Checking Status
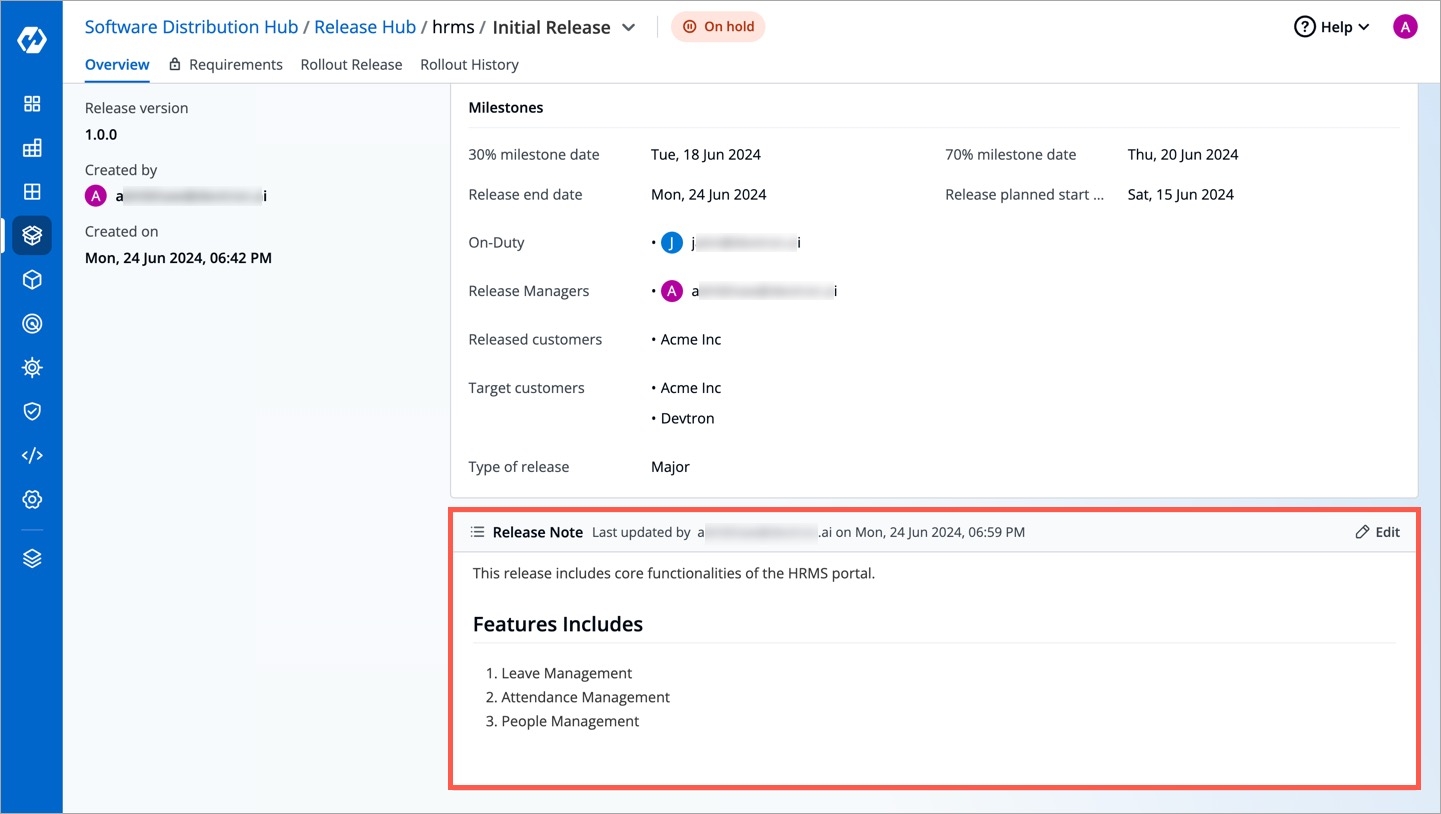
Putting a Release on Hold
If a release is put on hold, none of the applications (in any release stage) can be deployed in that release.

When to use:
When a release was marked as ready, but is still not ready for deployment
If issues are found during pre-deployment checks
When waiting for approval from stakeholders before proceeding
Why to use:
To prevent the release from being deployed prematurely
To allow time for additional testing, review, or completion of necessary tasks
To ensure that all requirements and dependencies are met before deployment
Rescinding a Release
When a release is rescinded, it is marked as invalid or buggy, and cannot be used for further deployments. This action ensures that that the release cannot be modified further and no applications within the rescinded release can be deployed. However, deploying from the Build & Deploy page of Applications or Application Groups will still be possible.
When to use:
When a release is found to be buggy or has critical issues
If the release does not meet the required standards or specifications
When a decision is made to cancel the release entirely
Why to use:
To ensure that faulty or incomplete software is not deployed
To maintain the integrity and reliability of the software environment
To provide a clear indication that the release is no longer valid and should not be used
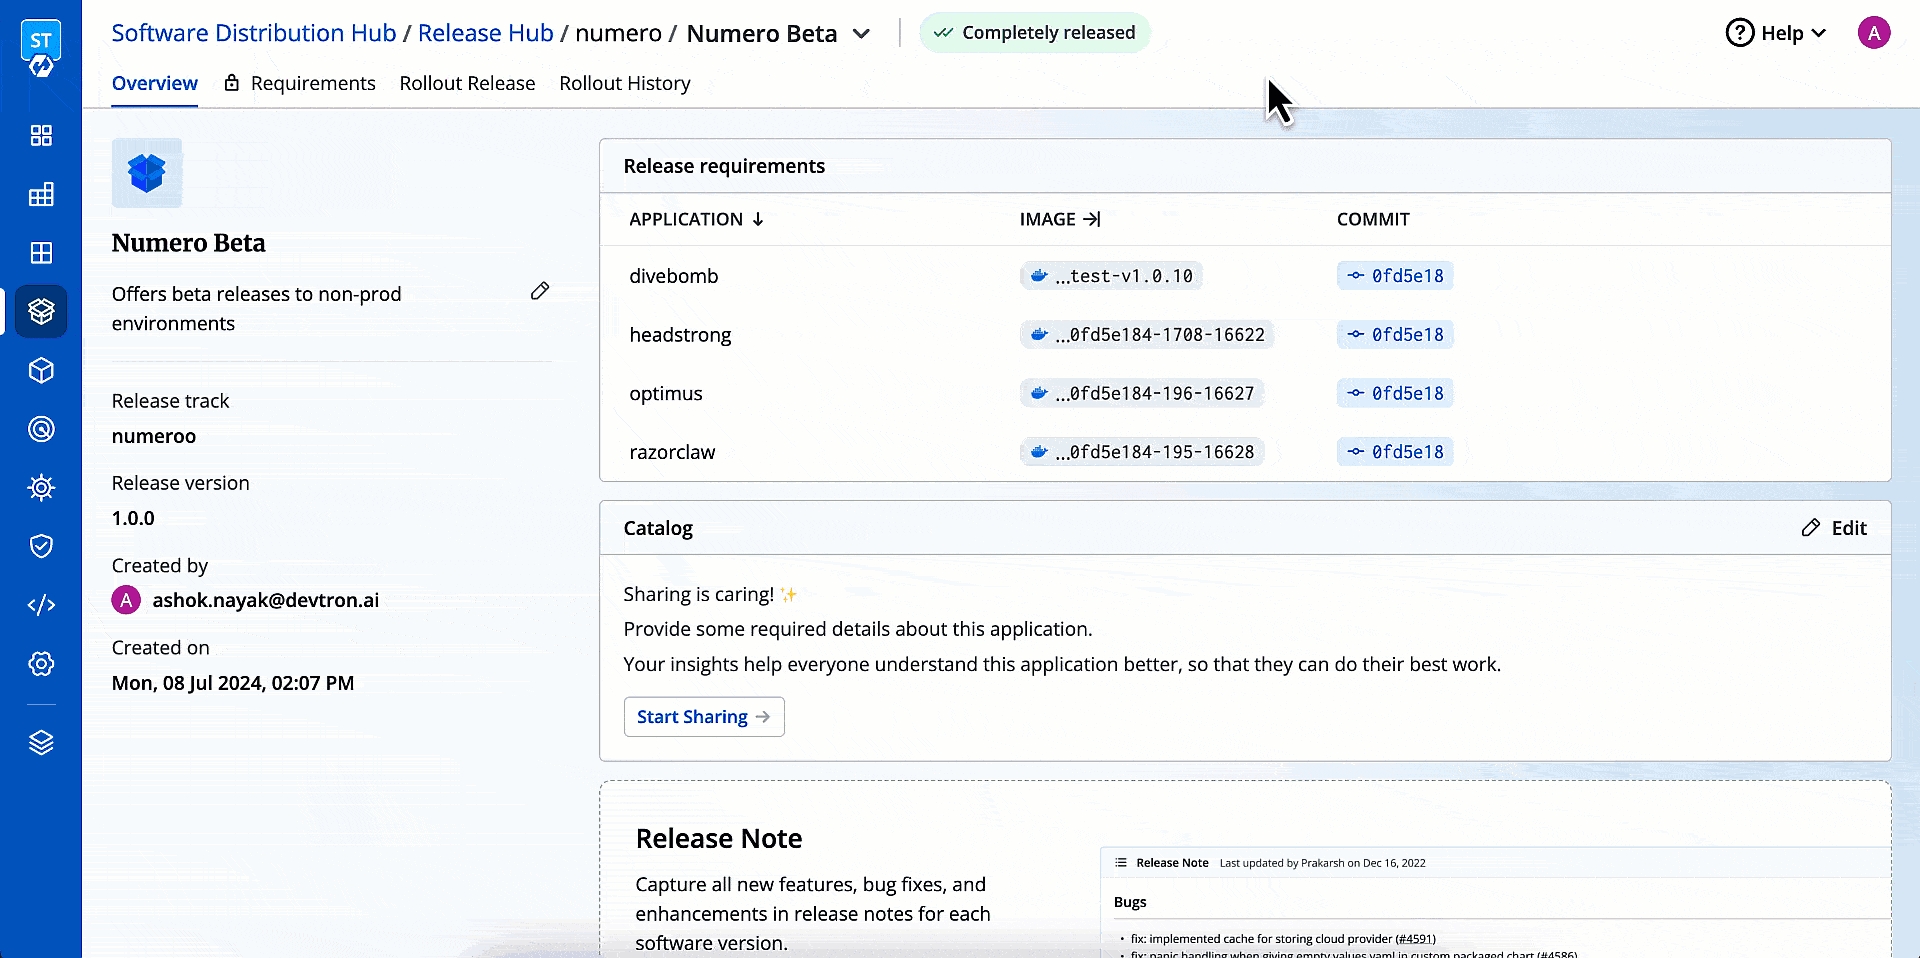
Adding a Release Note
In the Overview section, you get a Markdown editor to add release notes. You can add text, images, links, and many more to clearly communicate updates and changes in each release. This keeps everyone informed and might contribute to a smoother deployment process.
Release Catalog
Based on the schema provided in the catalog framework, you can add relevant details for release. Refer Catalog Framework for more details.

Last updated
Was this helpful?