Devtron Kubernetes Desktop Client
Introduction
The Devtron Kubernetes Desktop Client is a lightweight dashboard that is installed outside your Kubernetes cluster on a arm64 / amd64 based architecture to help you manage your Kubernetes resources with a unified view.
The Devtron Kubernetes Desktop Client comes packaged with the following modules:
- Kubernetes Resource Browser - To manage all Kubernetes resources in your cluster(s)
- Clusters - To perform troubleshooting and node operations on the cluster(s) you connect from the Devtron Kubernetes Desktop Client
Try Devtron Freemium to access all the enterprise features for free and forever, limited to adding one additional cluster. Install Devtron Freemium
Steps
-
Run the following command in your terminal to automatically download the executable file. Devtron Kubernetes Desktop Client will automatically opened in your default browser.
wget -O devtron-install.bash https://cdn.devtron.ai/k8s-client/devtron-install.bash && [ -f devtron-install.bash ] && sh devtron-install.bash start
-
In case you closed the Devtron Kubernetes Desktop Client browser tab by mistake, you can reopen it by executing the following command in your terminal:
sh devtron-install.bash open -
When installing the Devtron Kubernetes Desktop Client, if you encounter any errors, or if the tab opened in your default browser fails to load, or you encounter any issue because of the existence of the application, run the following command to delete the application.
rm -rf .devtron/
-
Open your terminal and enter the following command to download and run a bash script for generating the kubeconfig:
curl -O https://raw.githubusercontent.com/devtron-labs/utilities/main/kubeconfig-exporter/kubernetes_export_sa.sh && bash kubernetes_export_sa.sh cd-user devtroncdThe cluster credentials are displayed in the output of the command.
Upon executing the above-mentioned command, if you encounter an error saying that you already have a service account named cd-user, change the service account name in the command from cd-user to cd-user1 or cd-user2.
-
Fetch the cluster credentials (
Cluster name,Server URL,Bearer token) from the terminal and note them aside.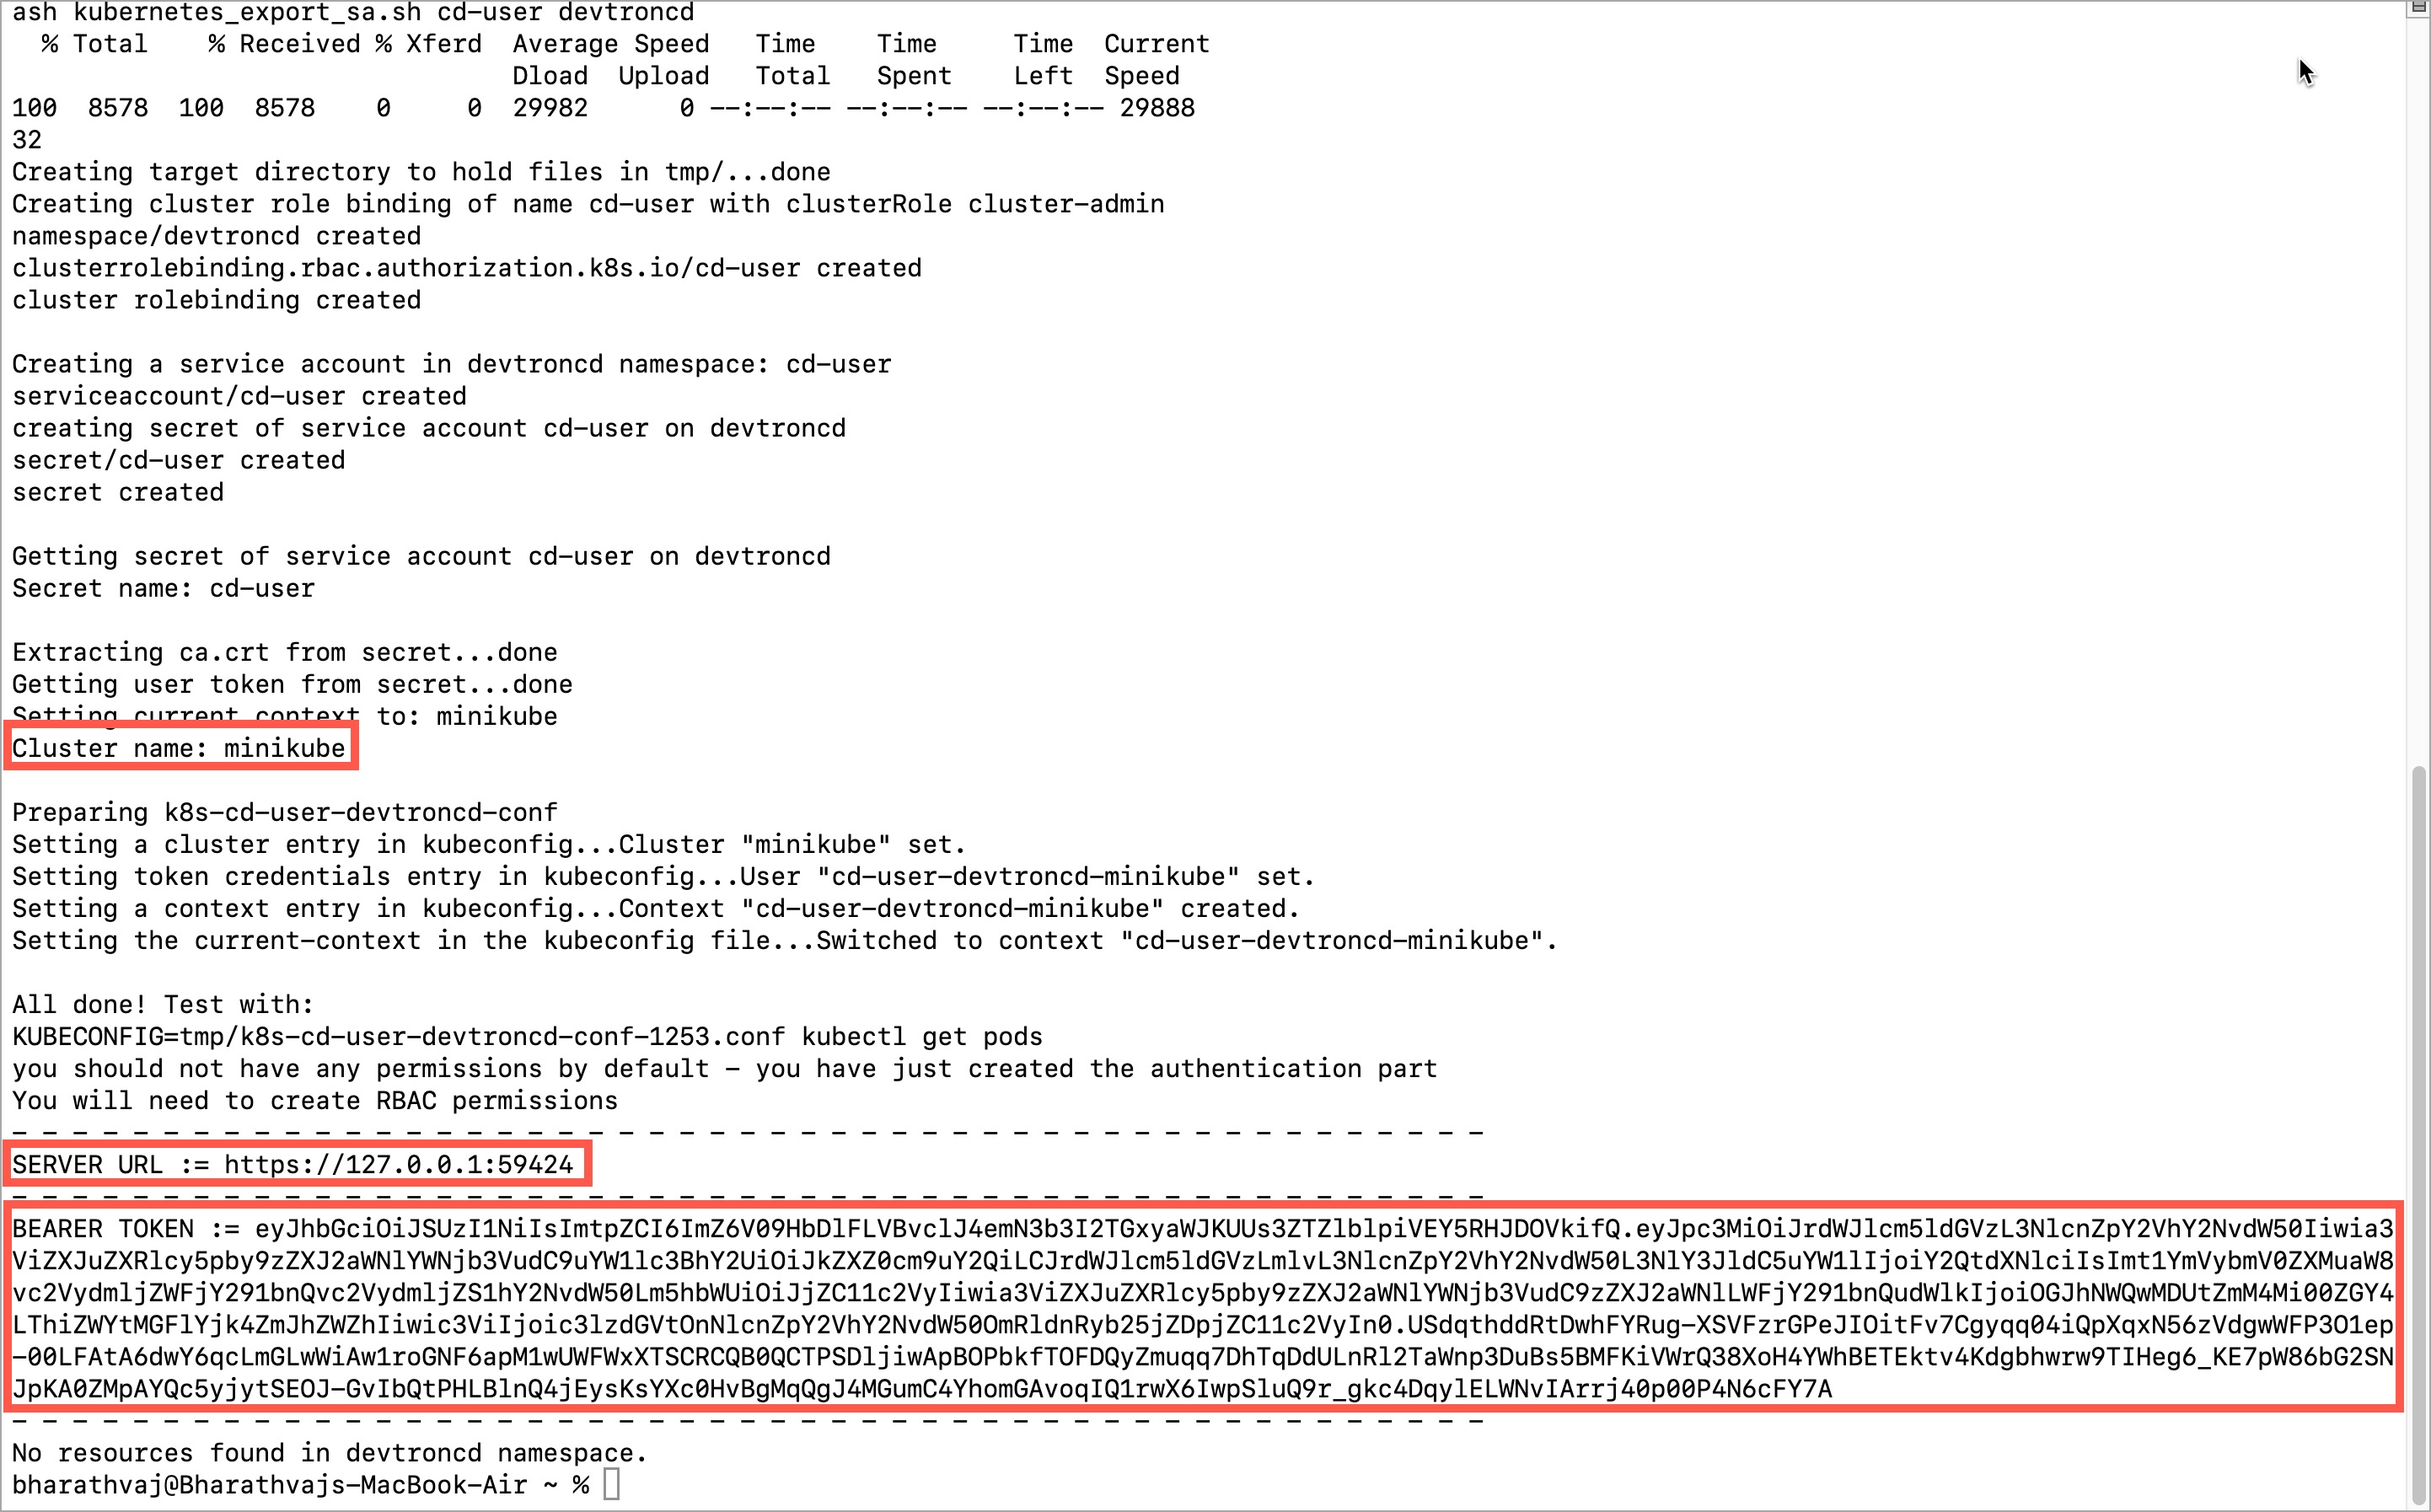
Figure 1: Fetch Cluster Credentials -
Navigate to Global Configurations → Clusters & Environments → Add cluster and paste the credentials in their respective fields.

Figure 2a: Add a Cluster 
Figure 2b: Add Cluster Credentials -
Click Save Cluster. This cluster will now be displayed in the Kubernetes Resource Browser page. Refer Kubernetes Resource Browser or Clusters in the Devtron Kubernetes Desktop Client for more information.
-
To stop the Devtron Kubernetes Desktop Client, run the following command in your terminal:
sh devtron-install.bash stop
The next time, if you wish to run the Devtron Kubernetes Desktop Client again, run the following command in your terminal:
sh devtron-install.bash start
Kubernetes Resource Browser
Kubernetes Resource Browser, in short, is a central interface from which you can view logs, edit live manifests, and even perform CRUD operations (create, read, update, or delete) on resources like pods, deployments, configmaps, jobs, and many more in the cluster(s).
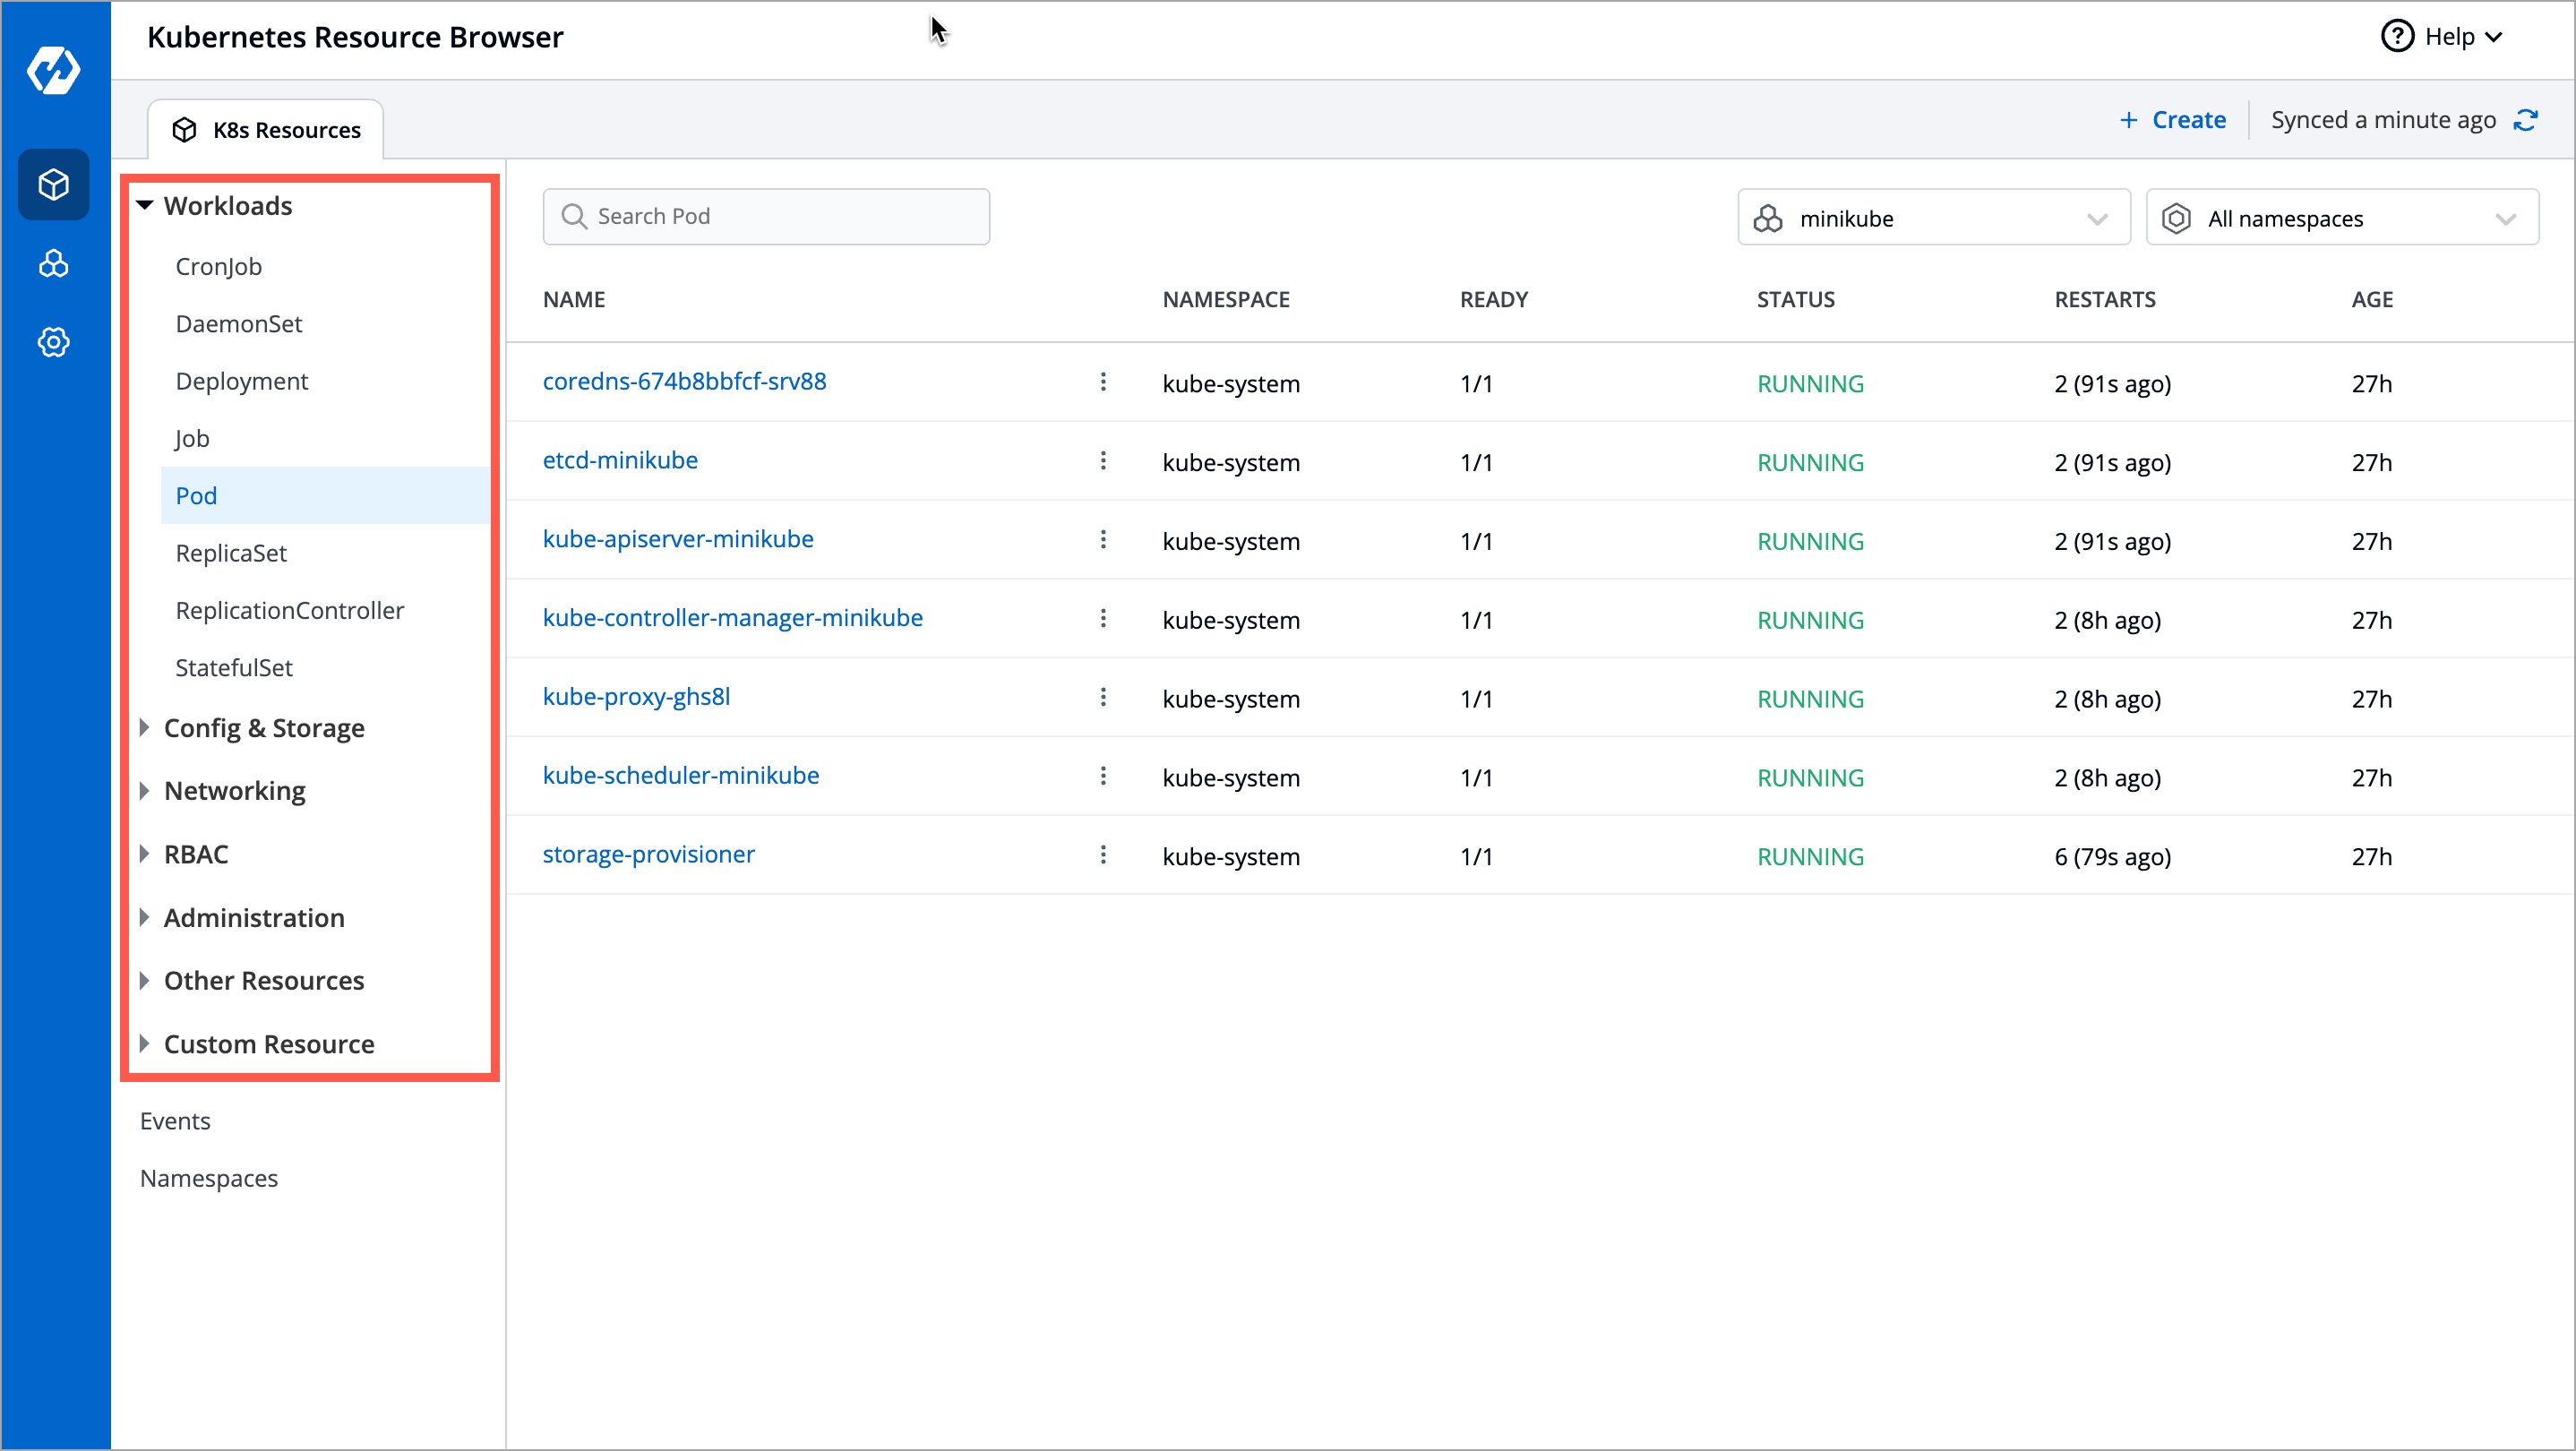
On the left side bar, under the K8s Resources tab, the Kubernetes resources are grouped into the following categories:
-
Workloads
-
Config & Storage
-
Networking
-
RBAC
-
Administration
-
Other Resources
-
Custom Resource
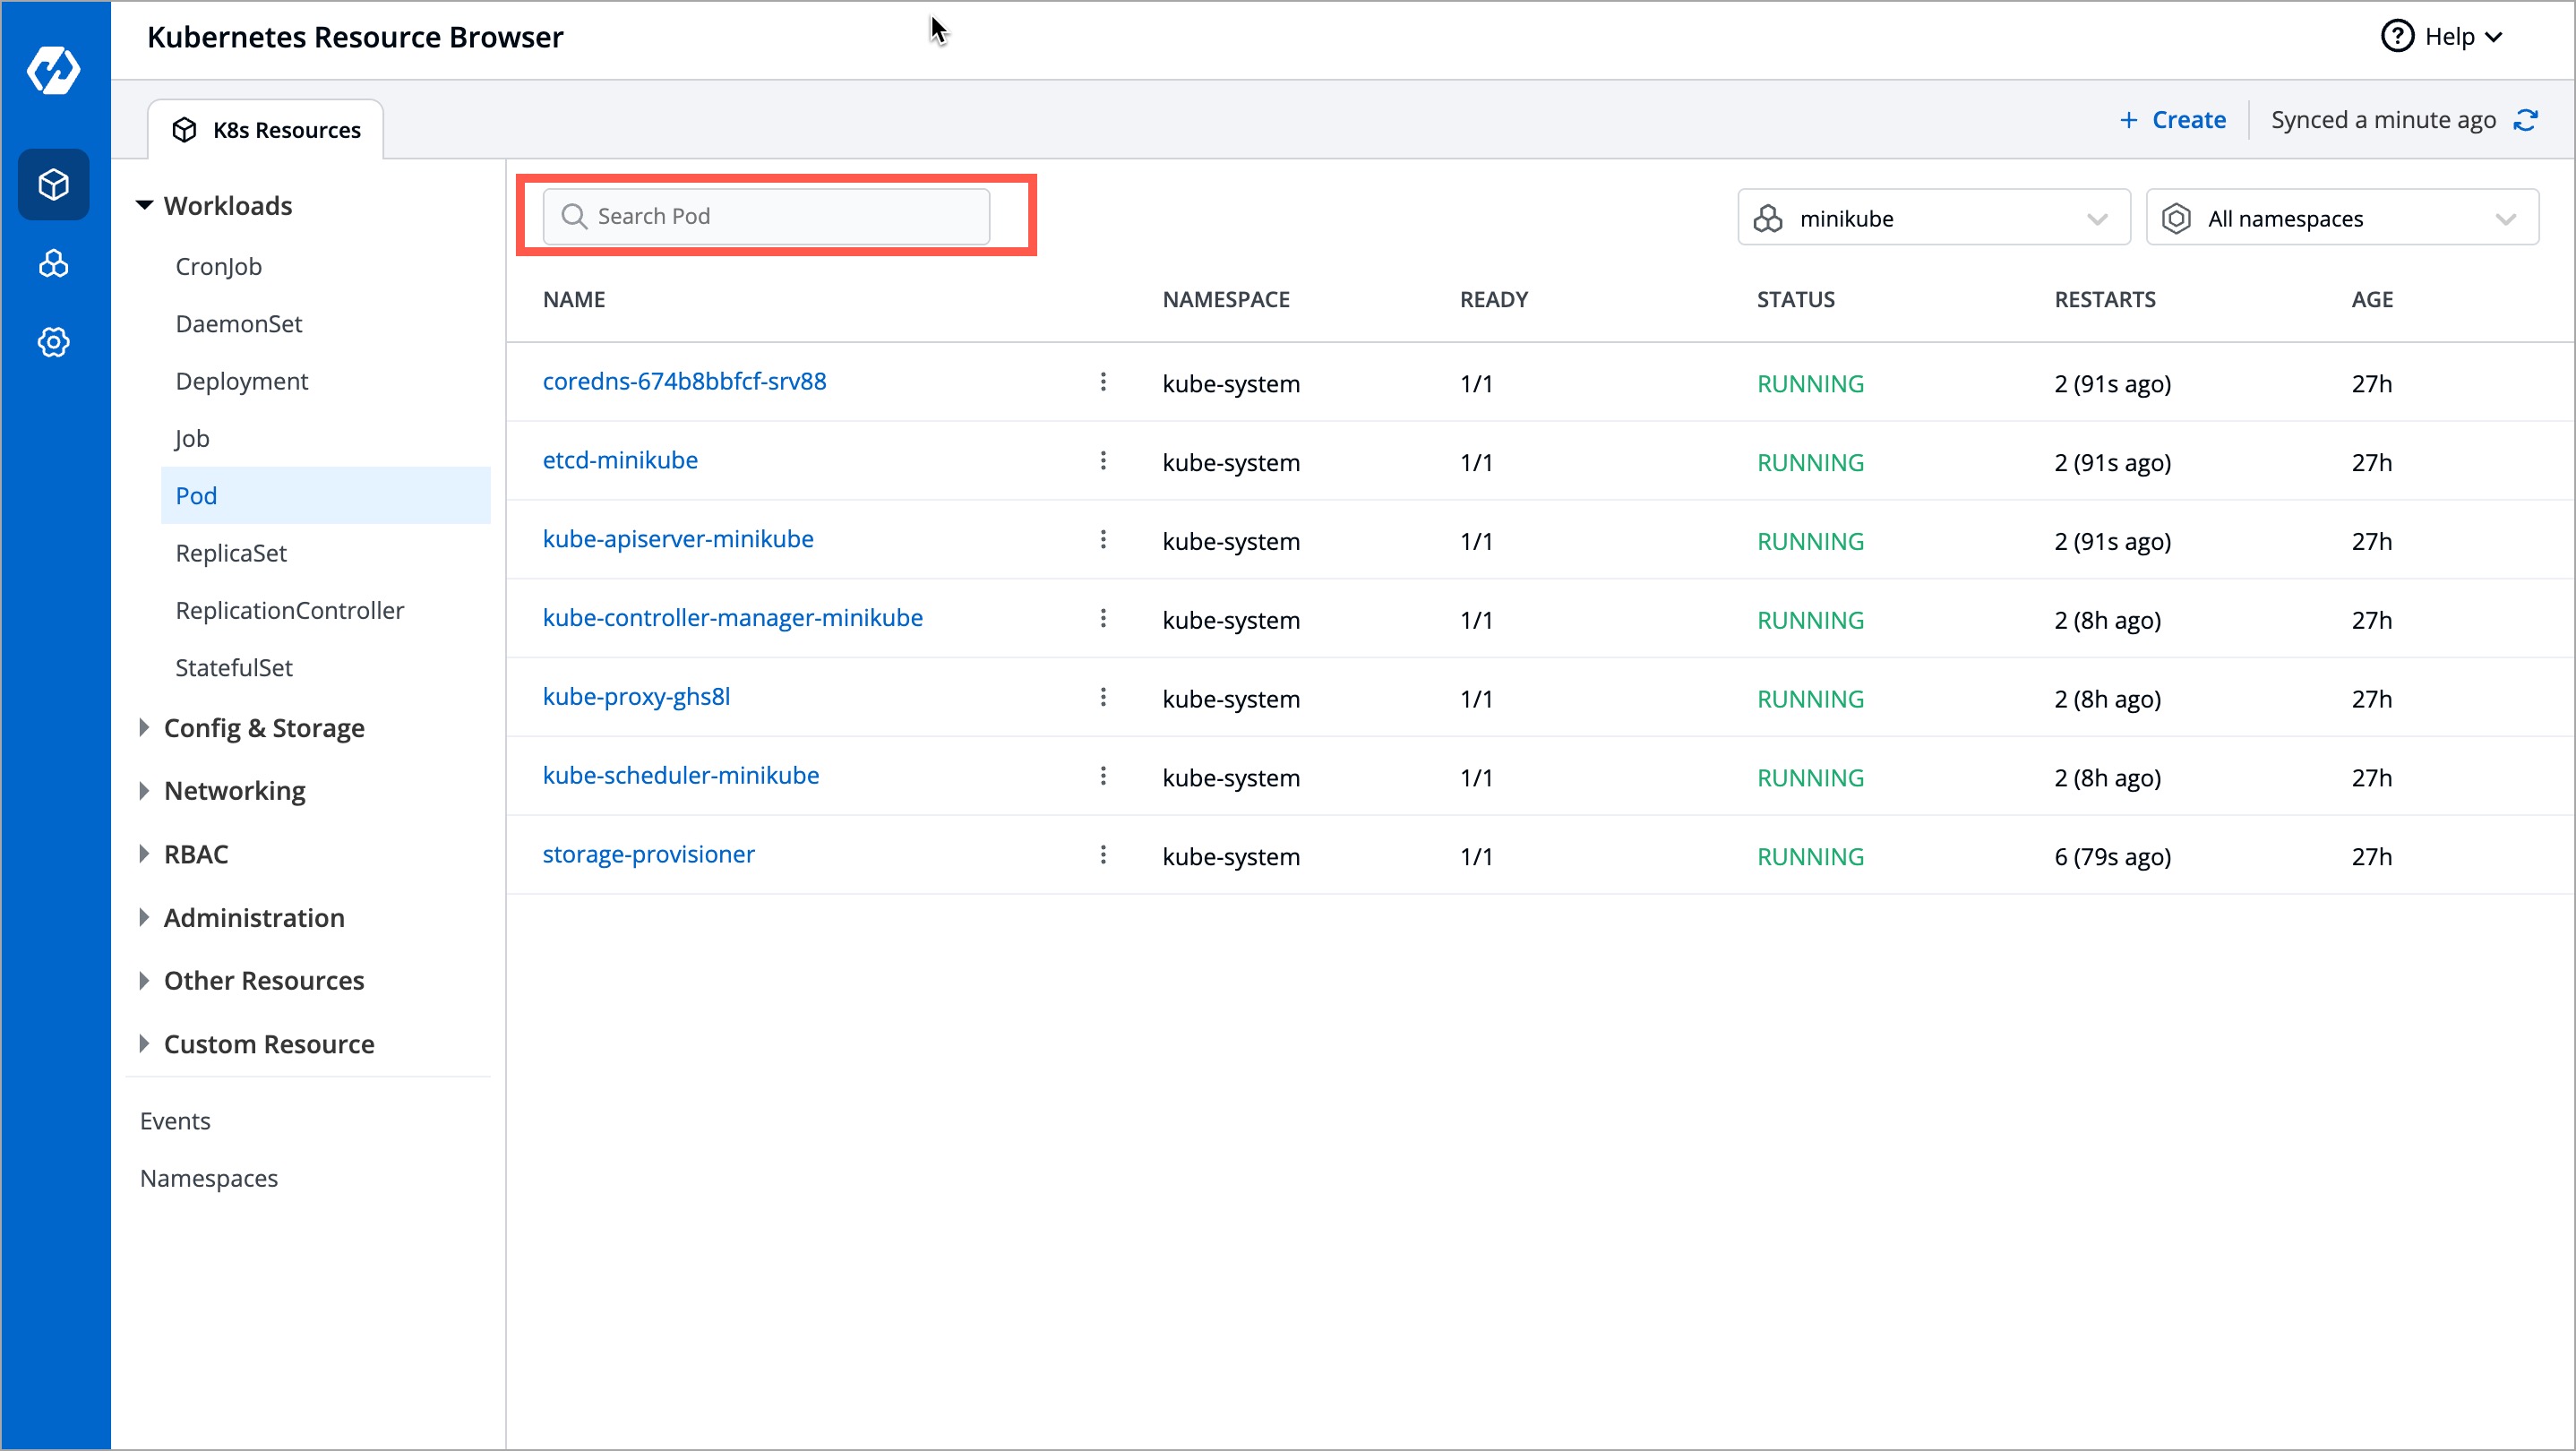
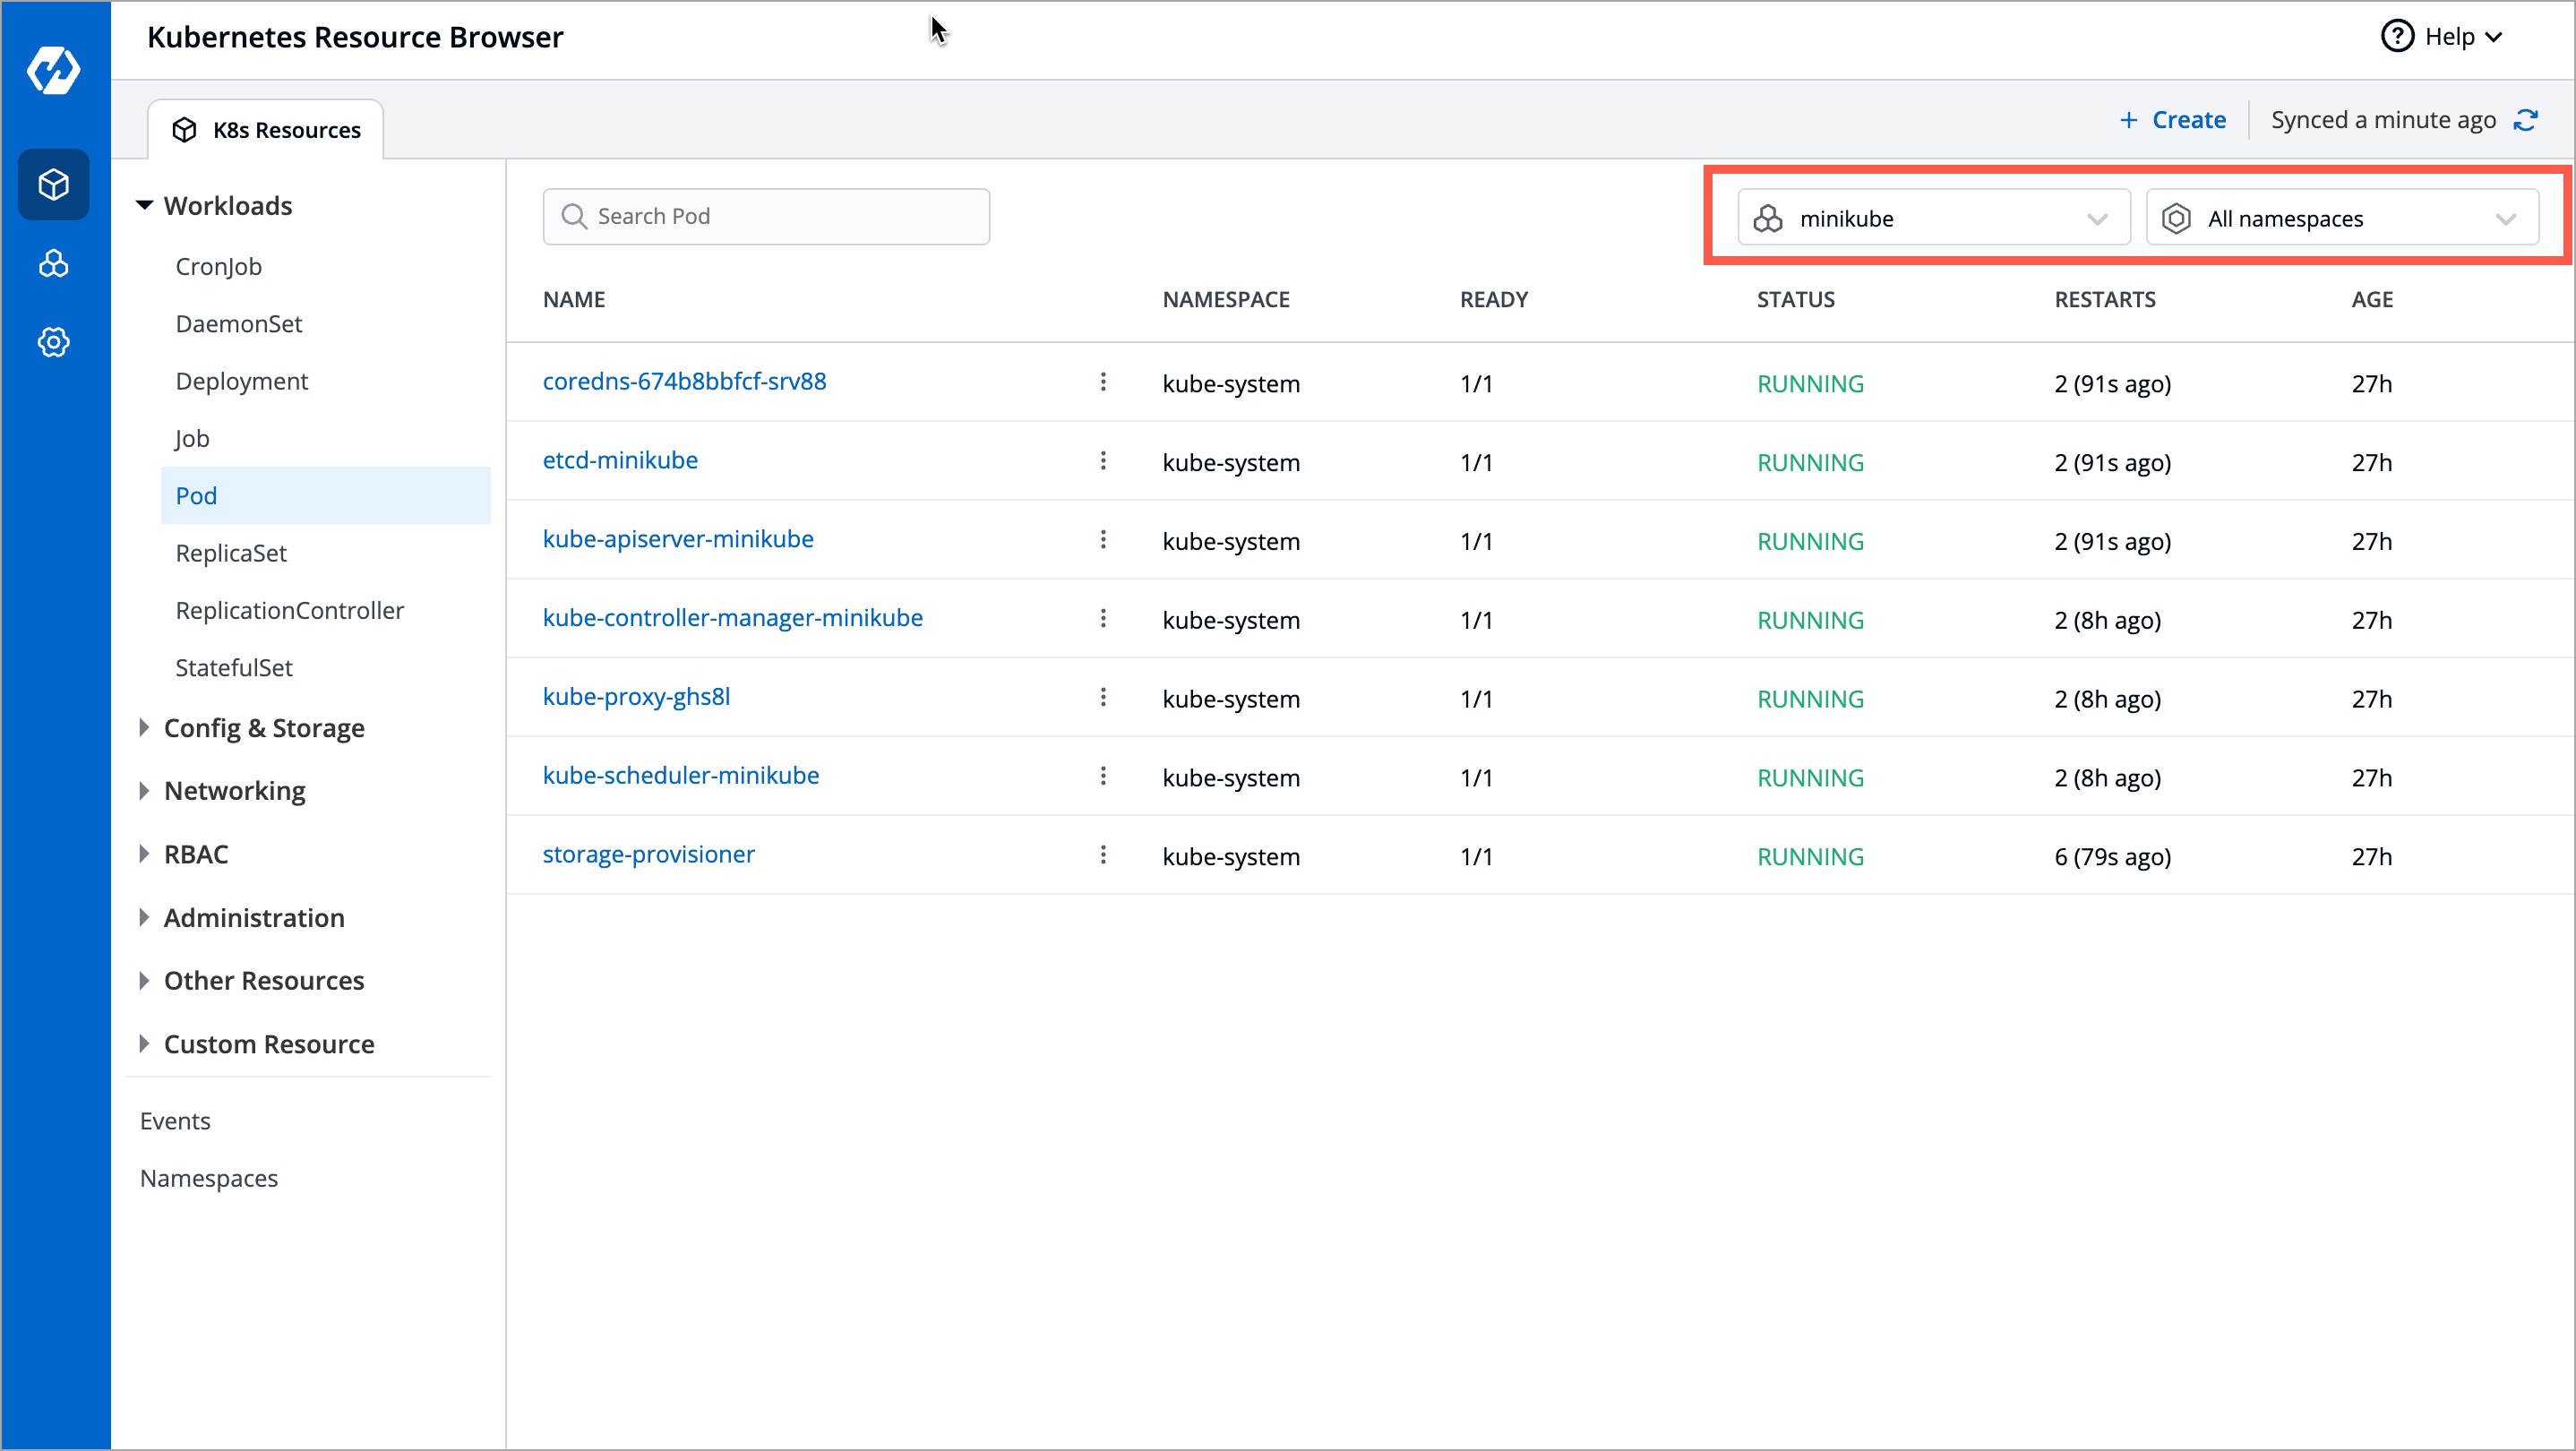
For the convenience of the user, the Resource Browser page comes with a search box and filters to locate resource kinds quickly.
Create a Resource
Sample Script for Creating a Pod
apiVersion: v1
kind: Pod
metadata:
  name: my-sample-pod
  labels:
    app: sampleApp
spec:
  containers:
  - name: nginx-container
    image: nginx:latest
    ports:
    - containerPort: 80
View a Resource
Update a Resource
Delete a Resource
Clusters
Devtron Kubernetes Desktop Client allows you to add multiple clusters and manage all of them from your local machine. The Clusters module allows you to view CPU and Memory metrics like CPU Capacity, Memory Capacity, and much more.
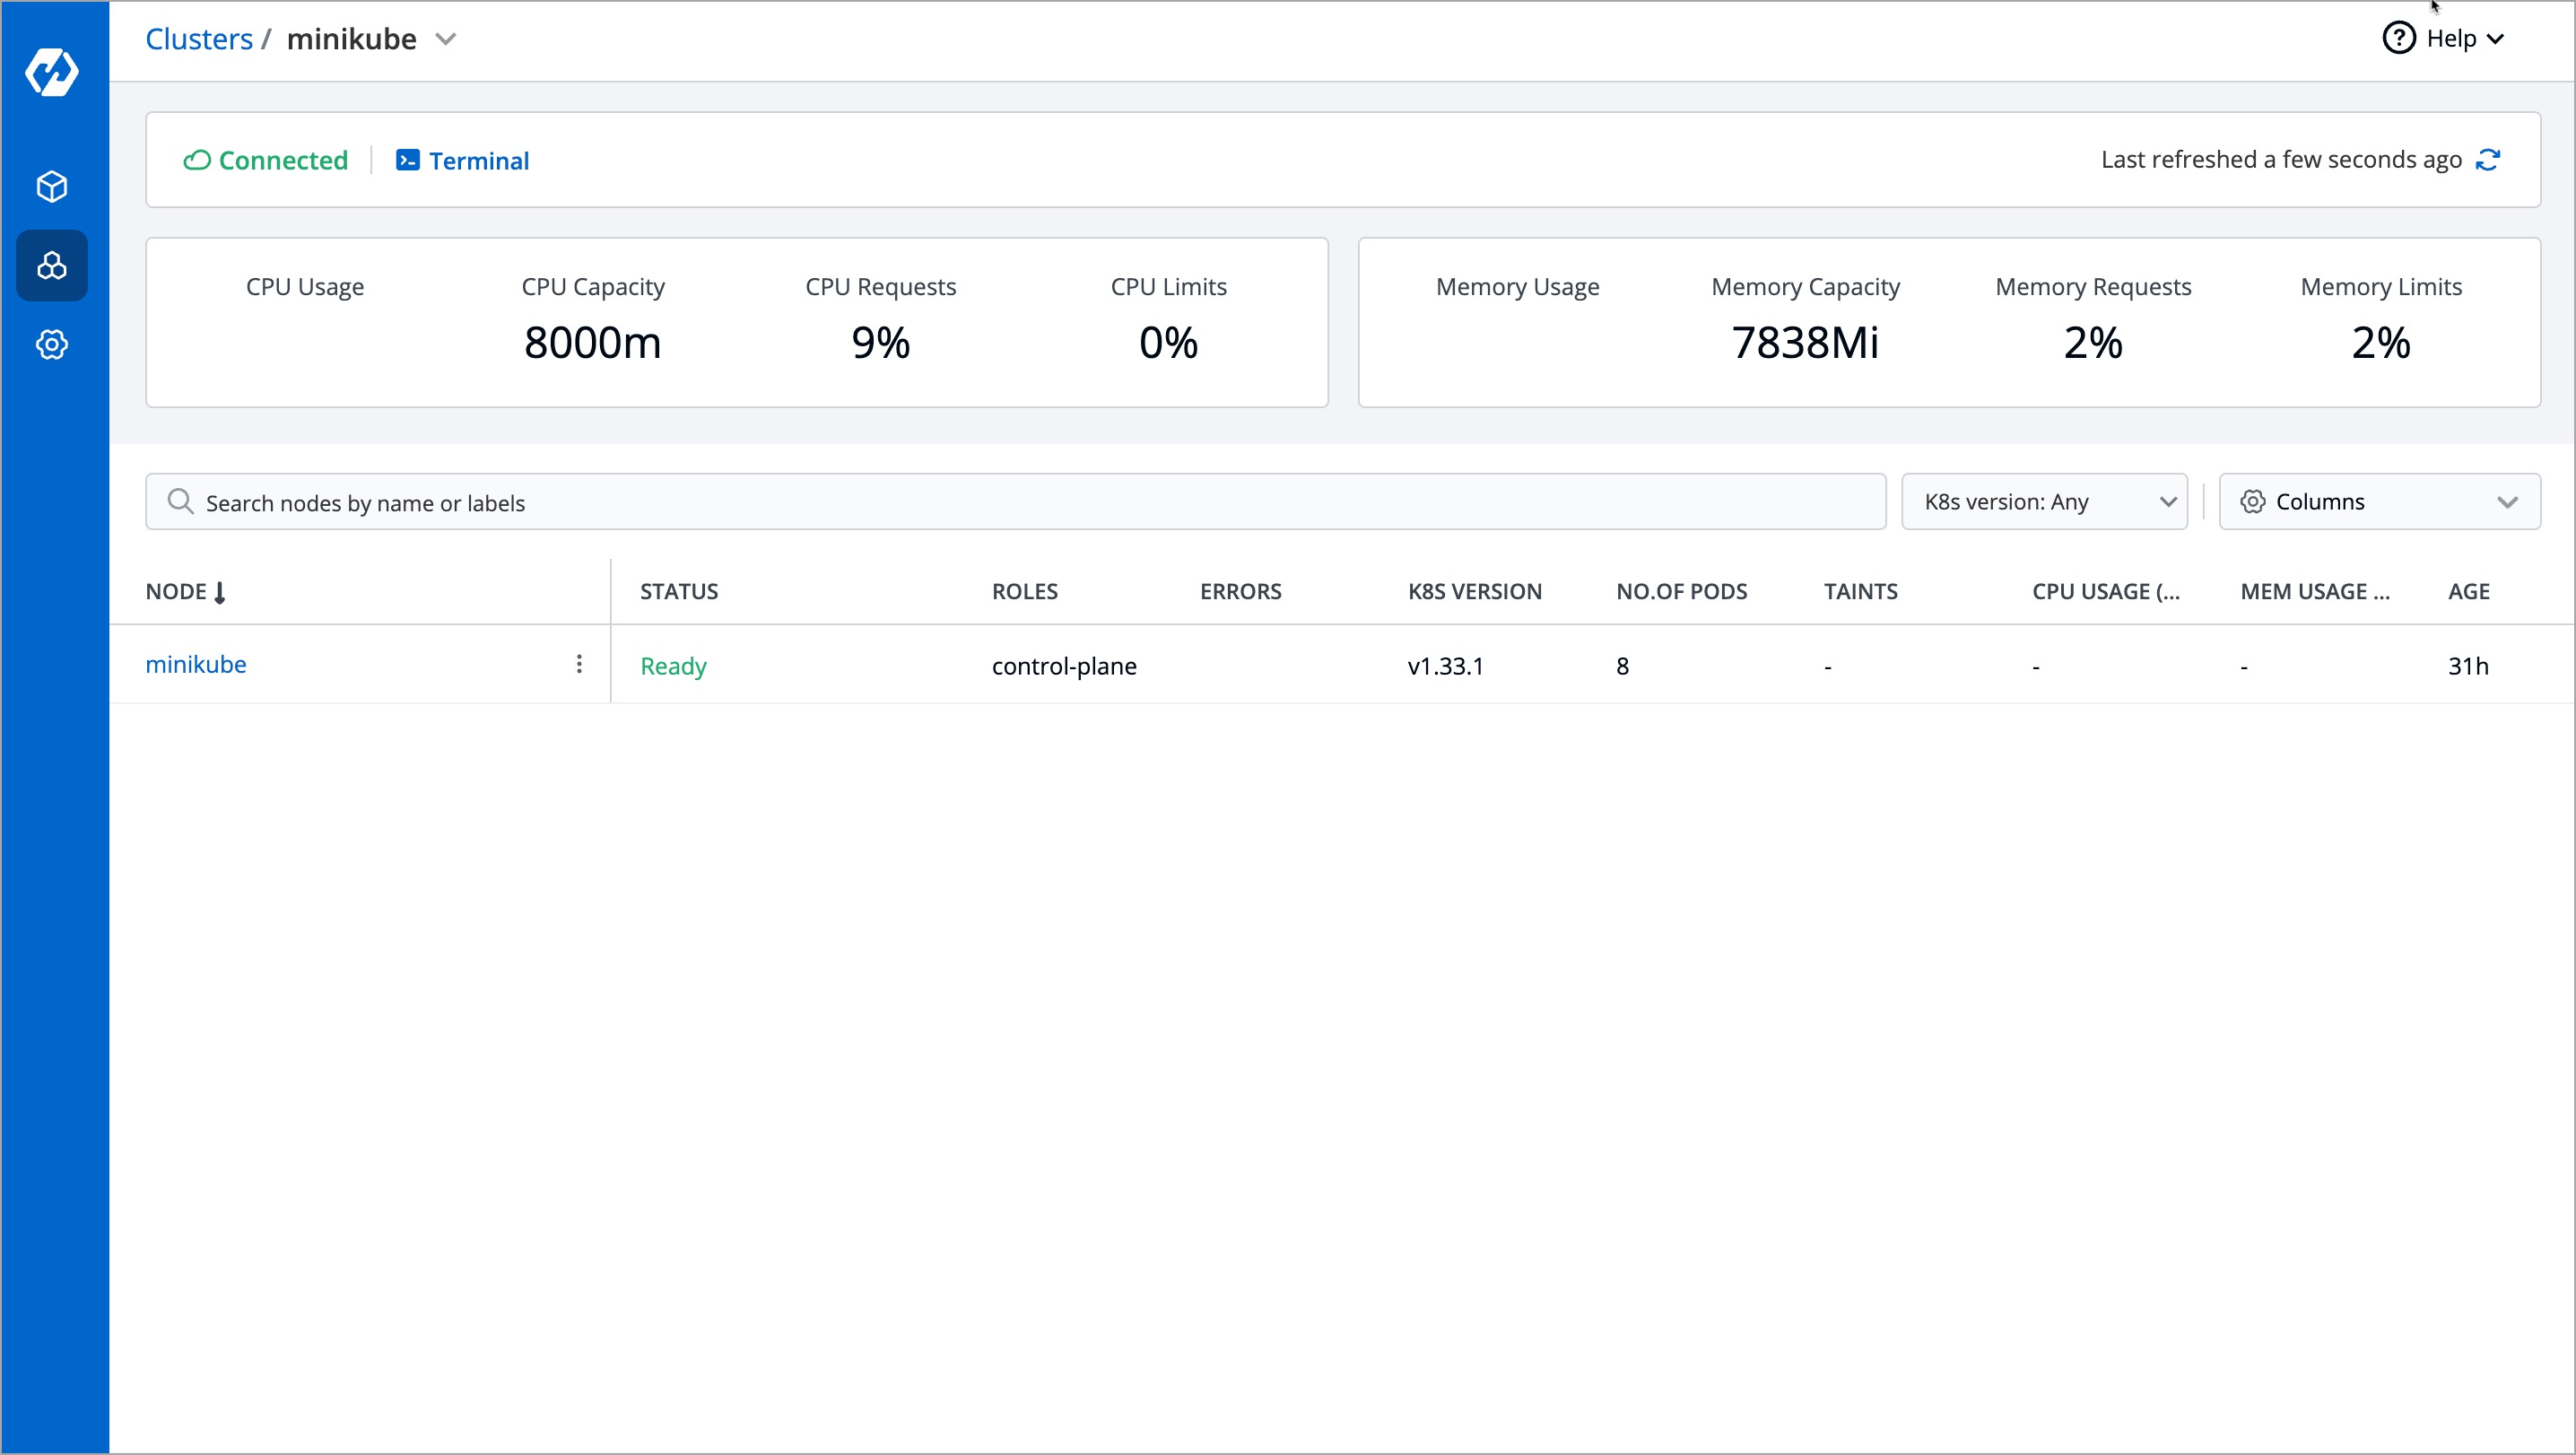
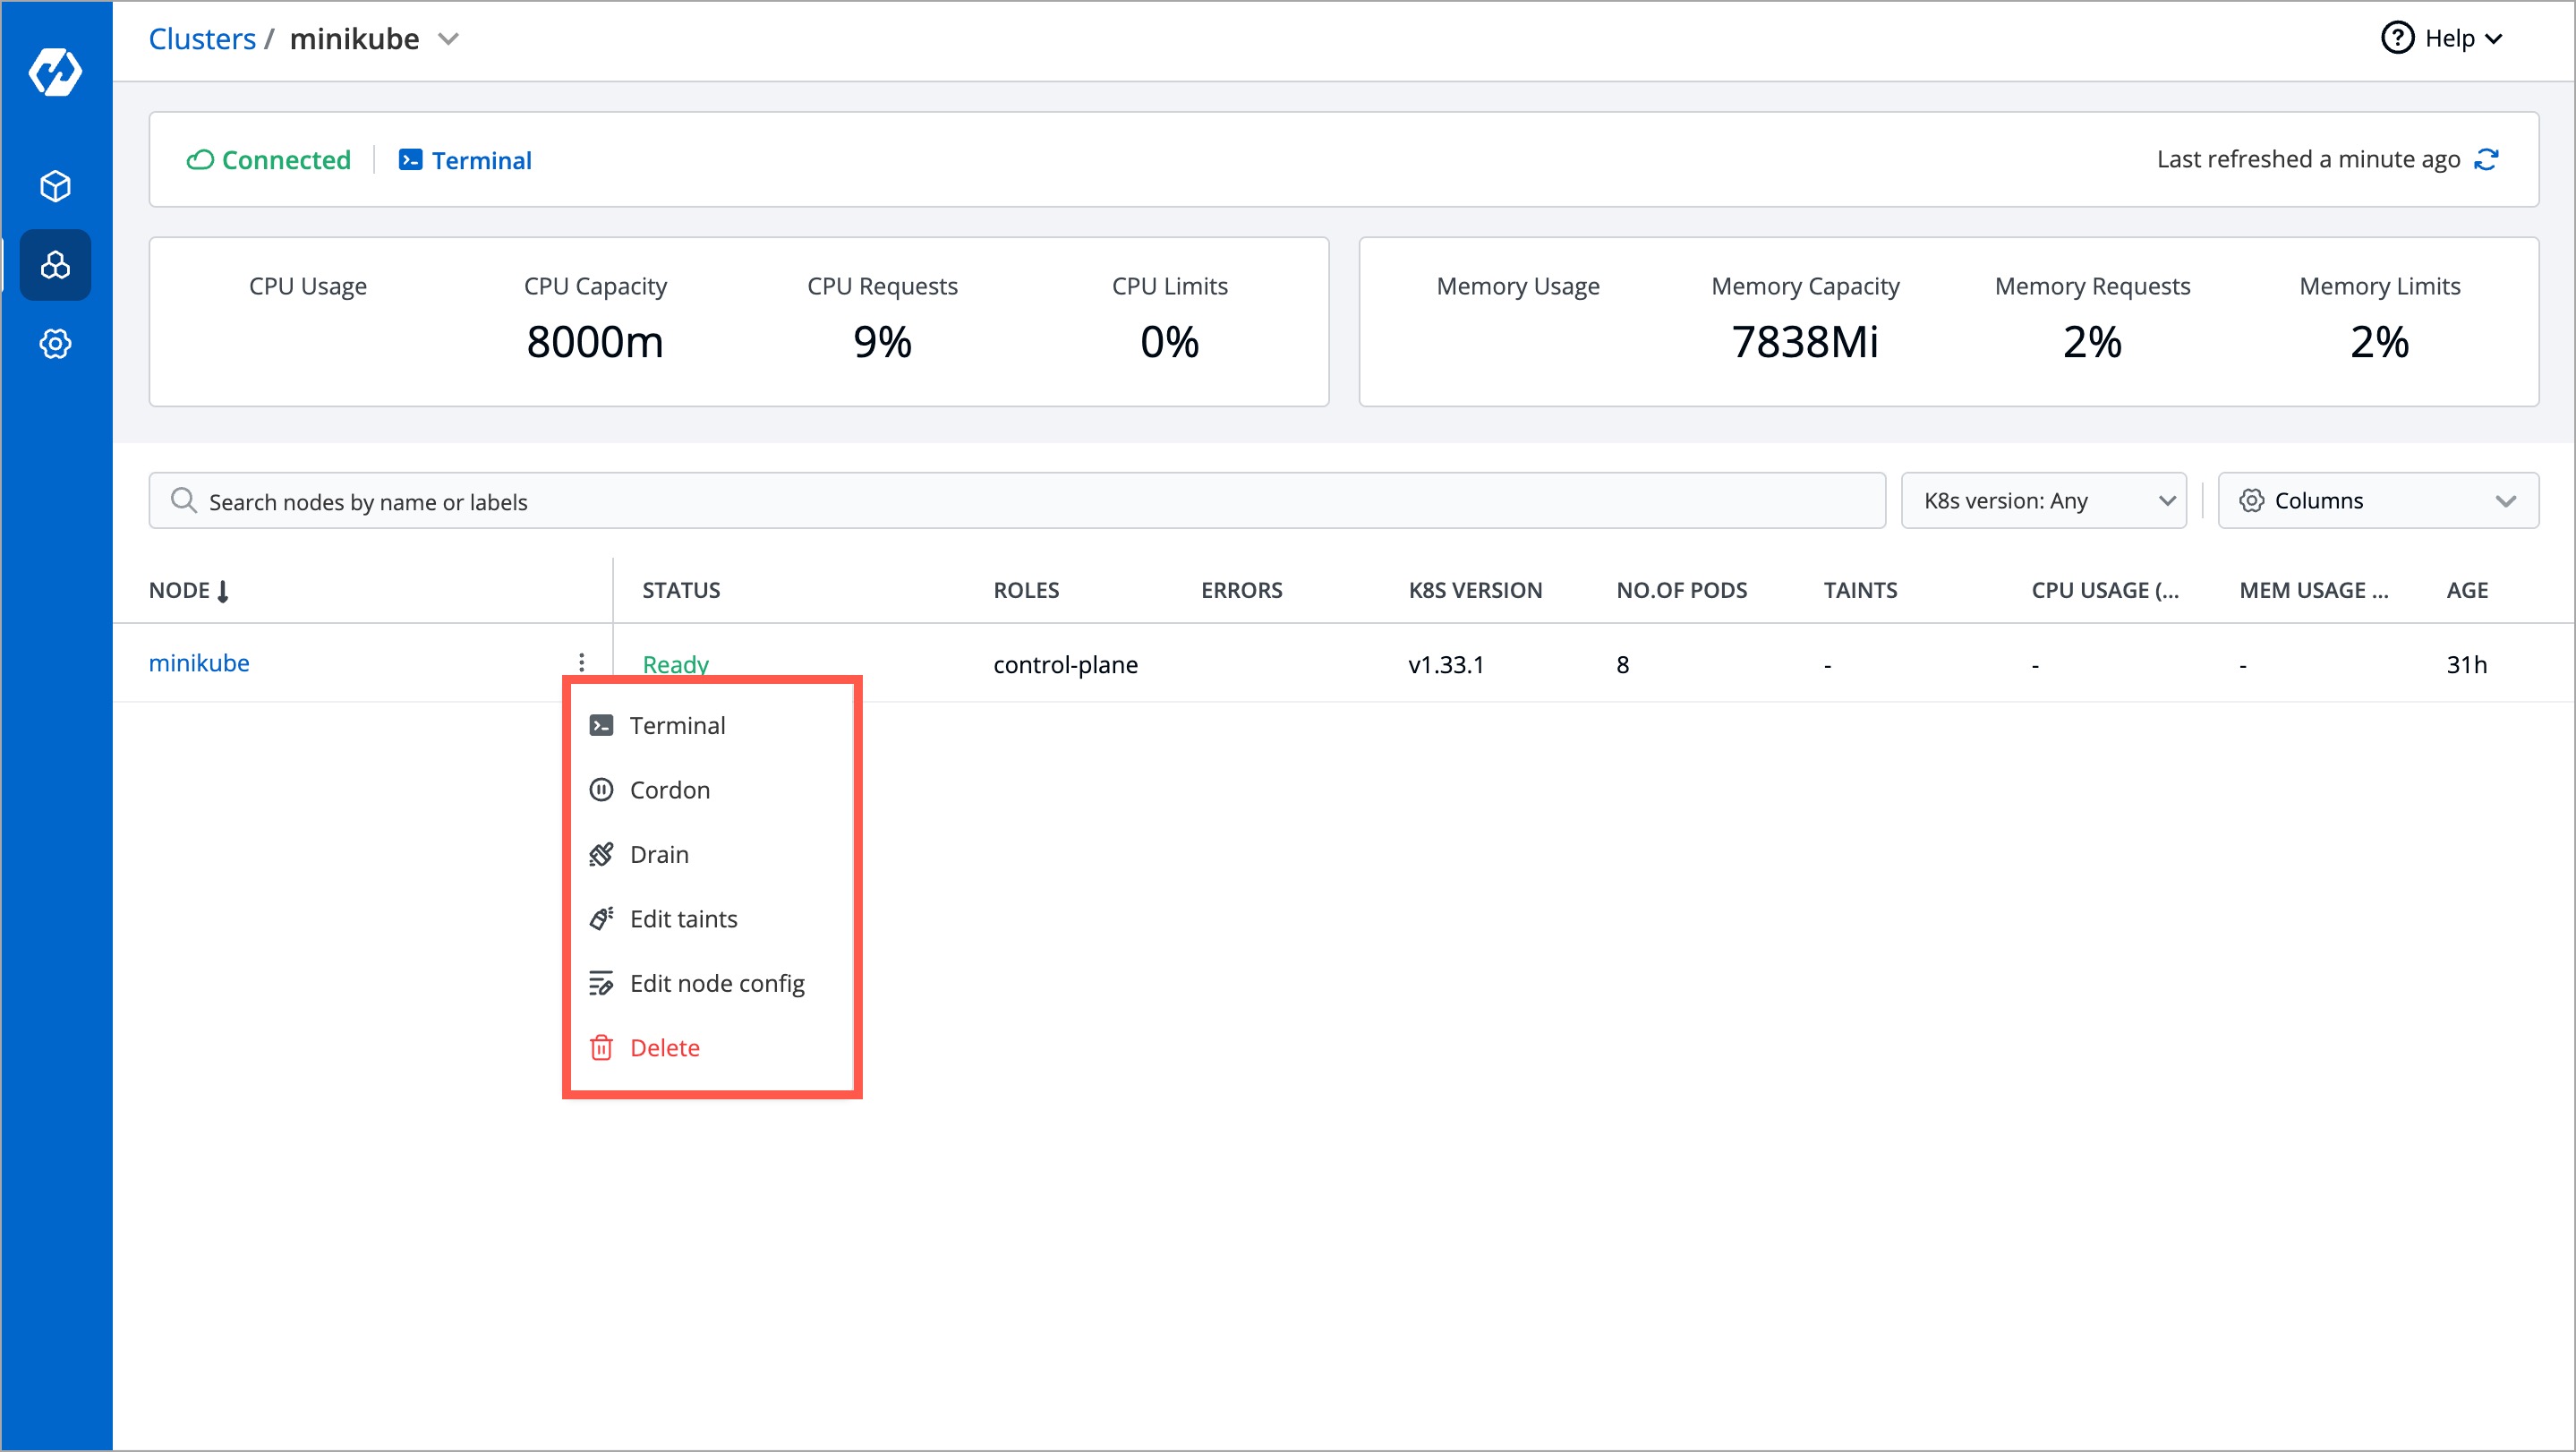
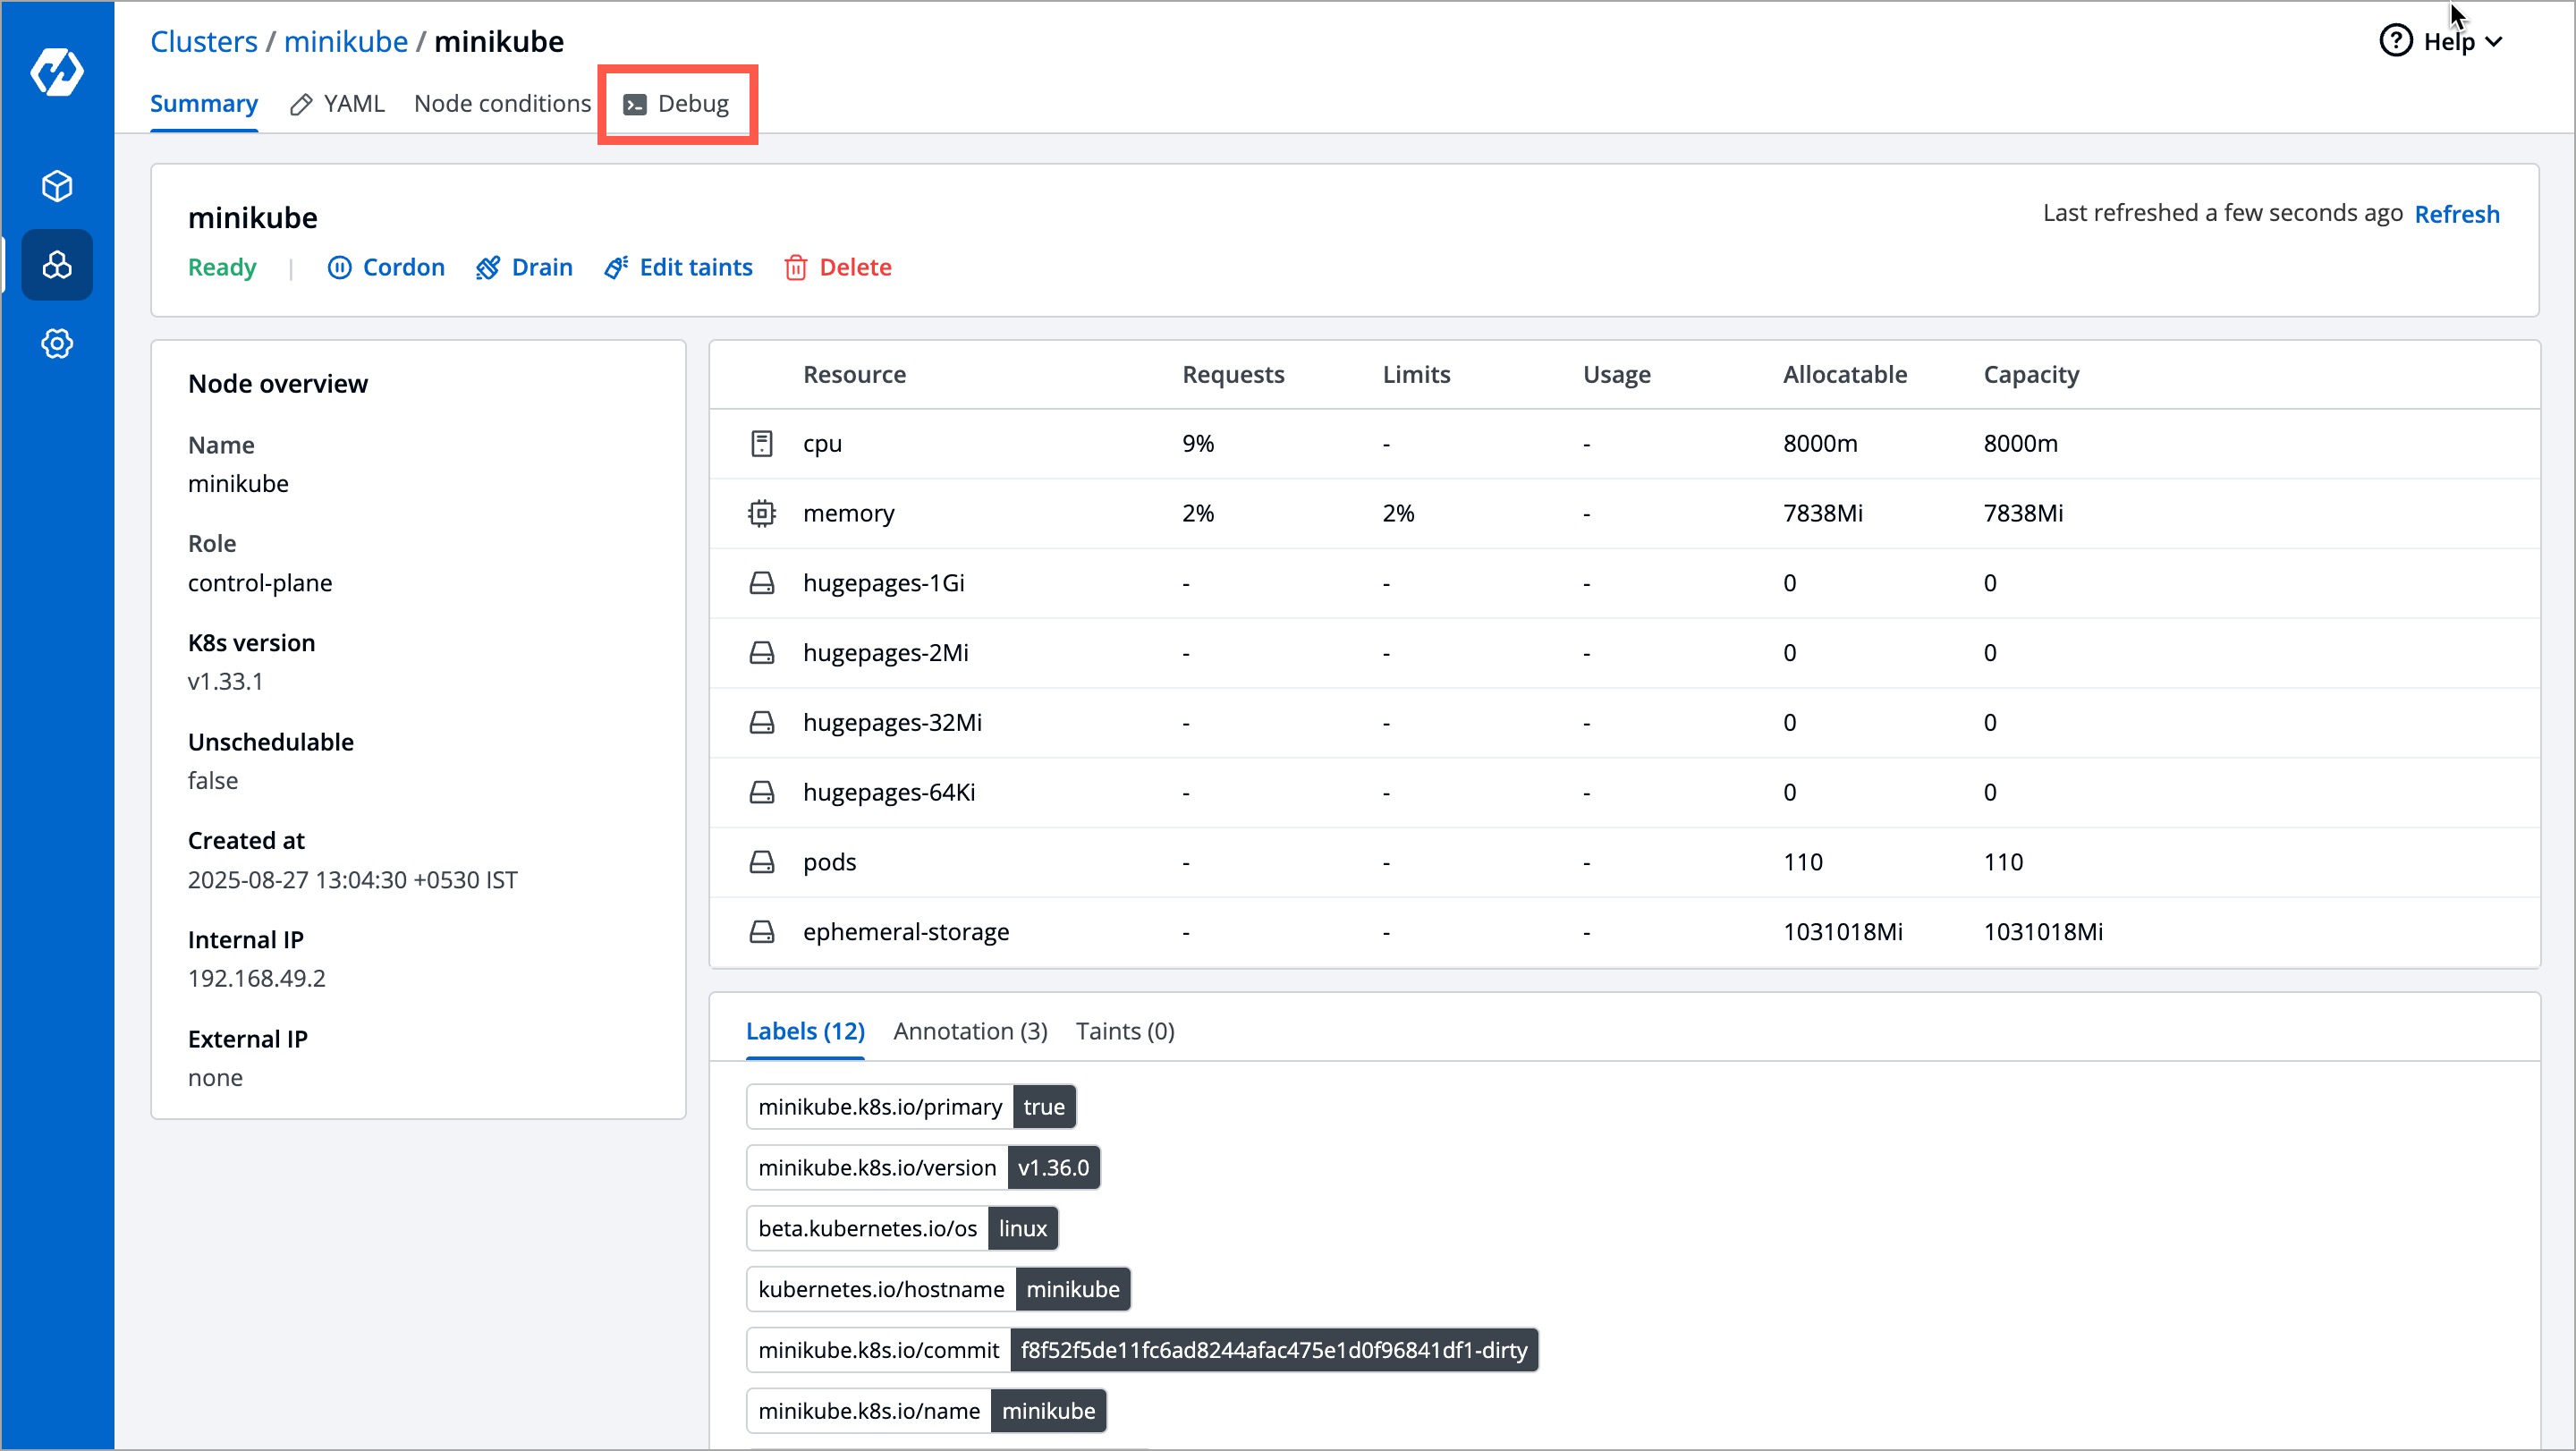
Perform Node Operations
You can perform node operations such as Cordon, Drain, and Taints either from the (⋮) icon displayed against the cluster name or by clicking the cluster itself.
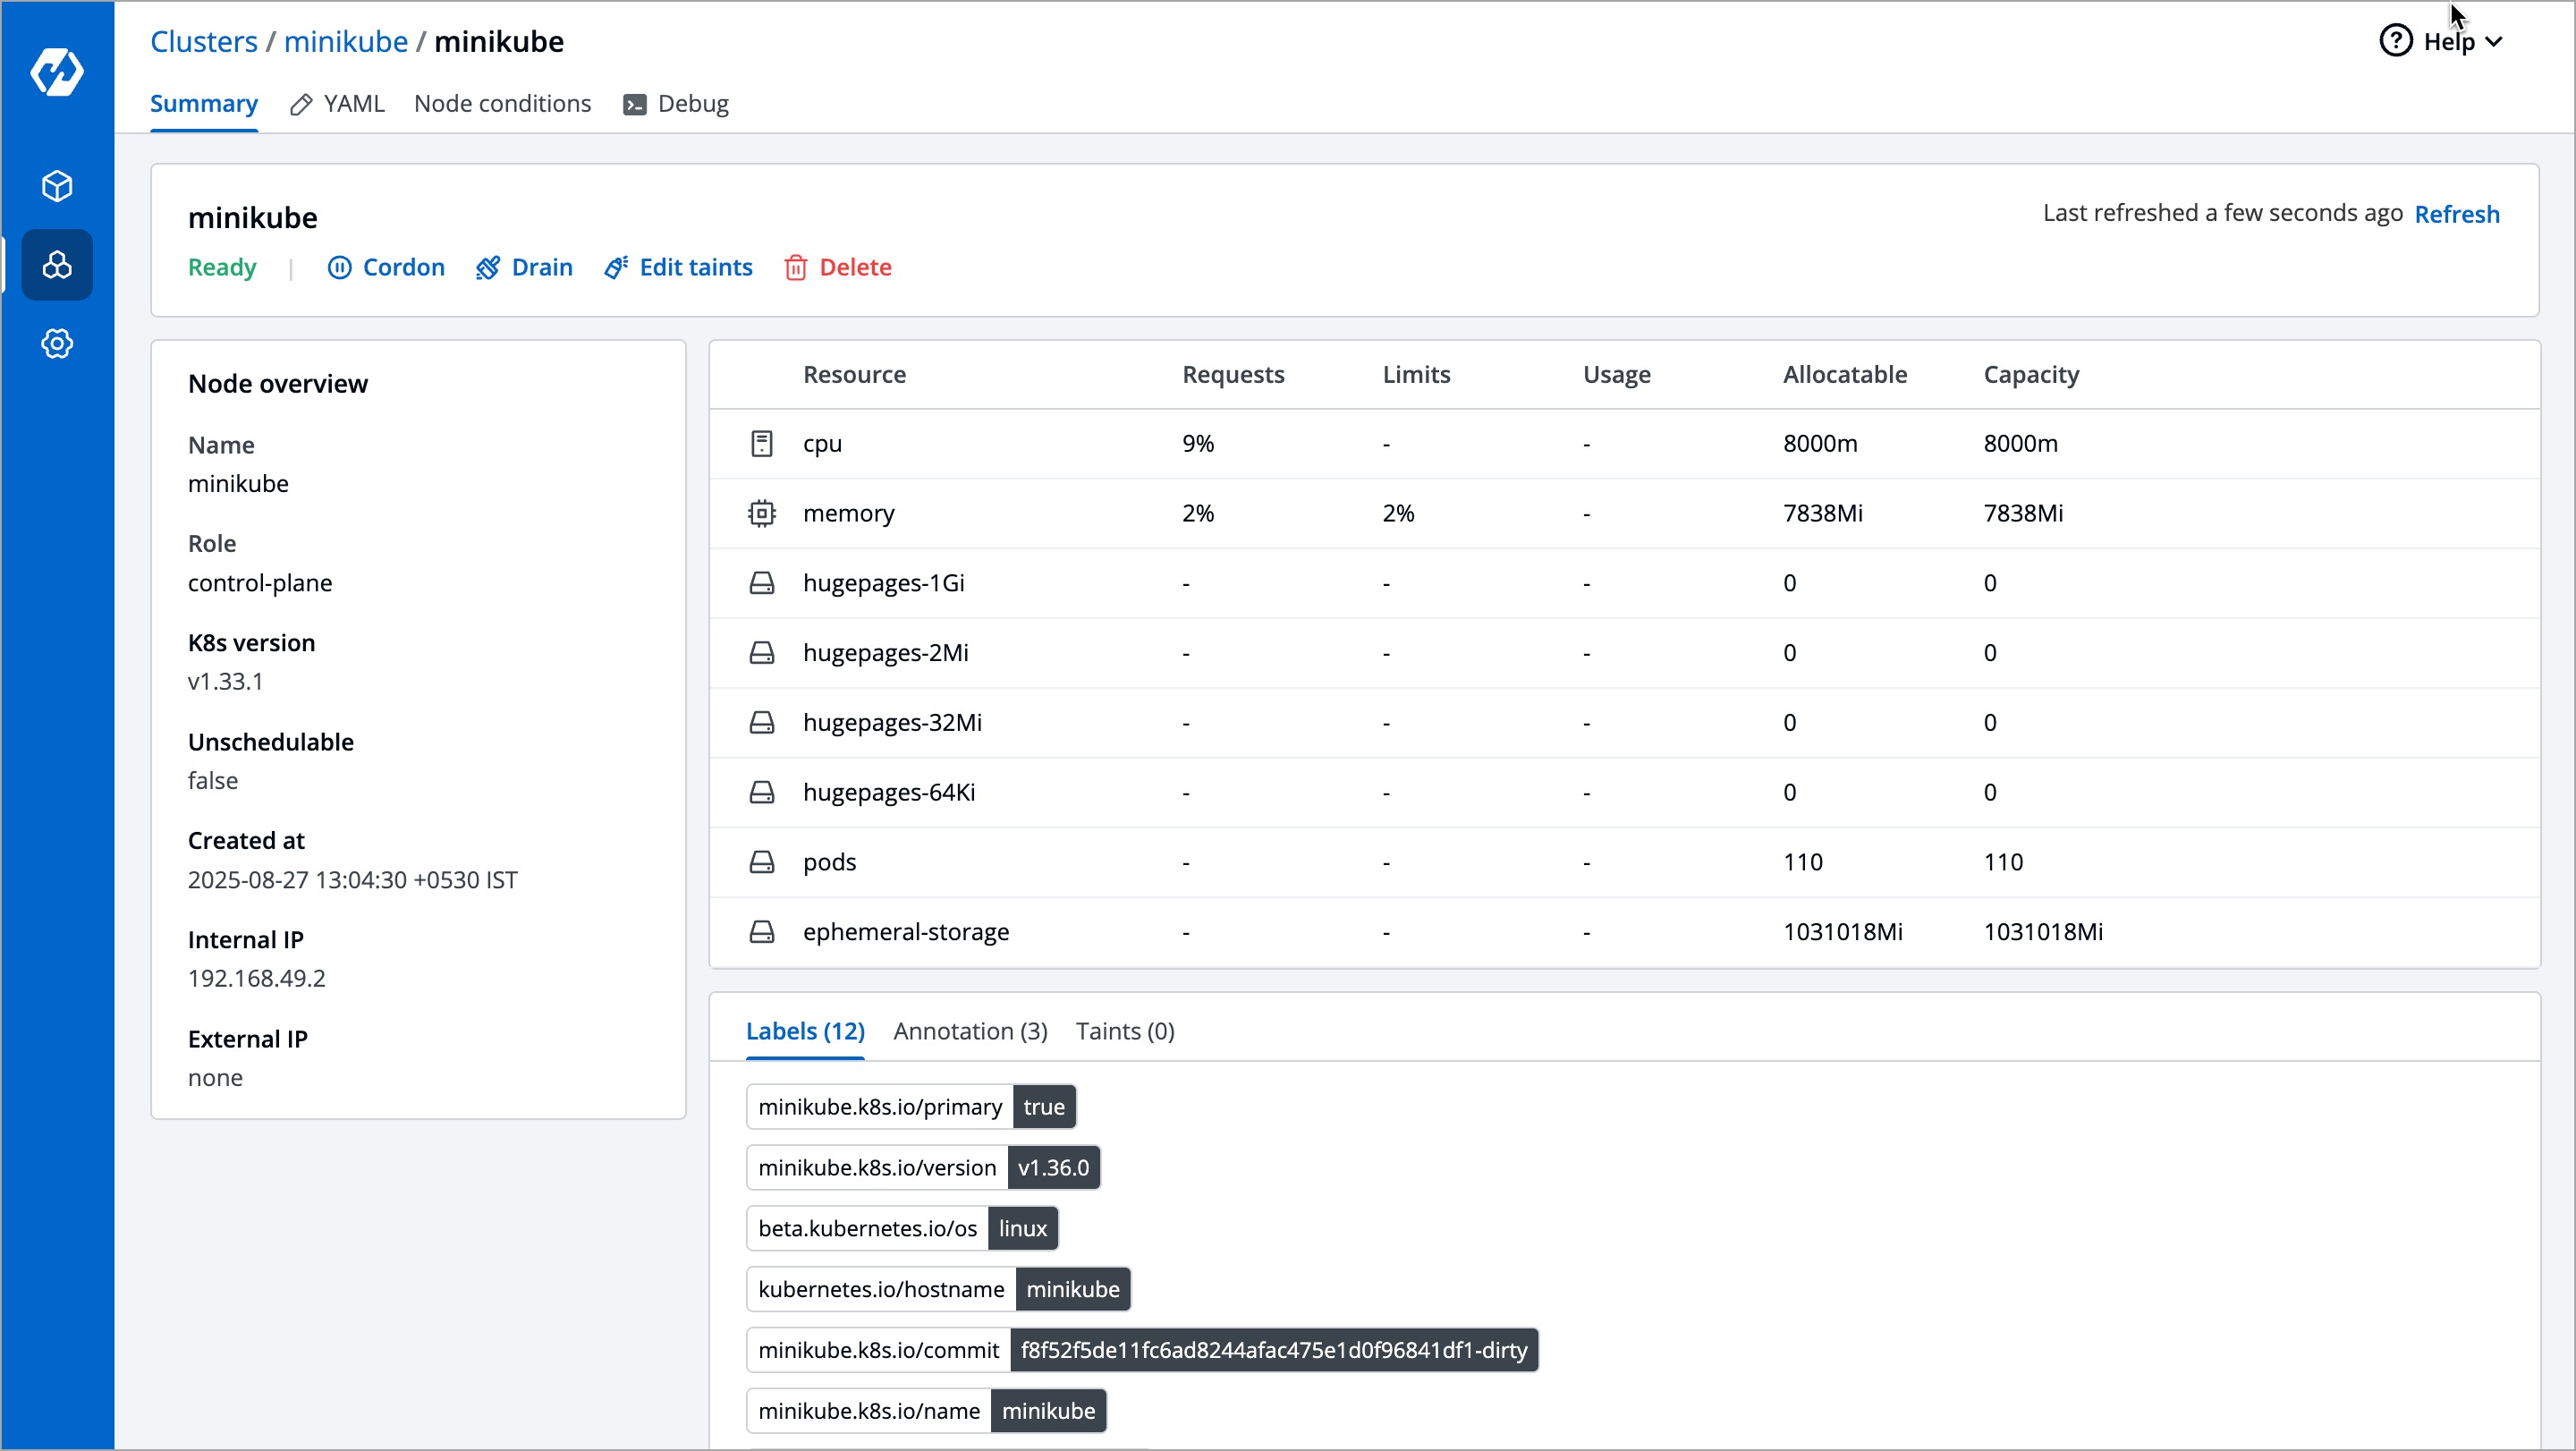
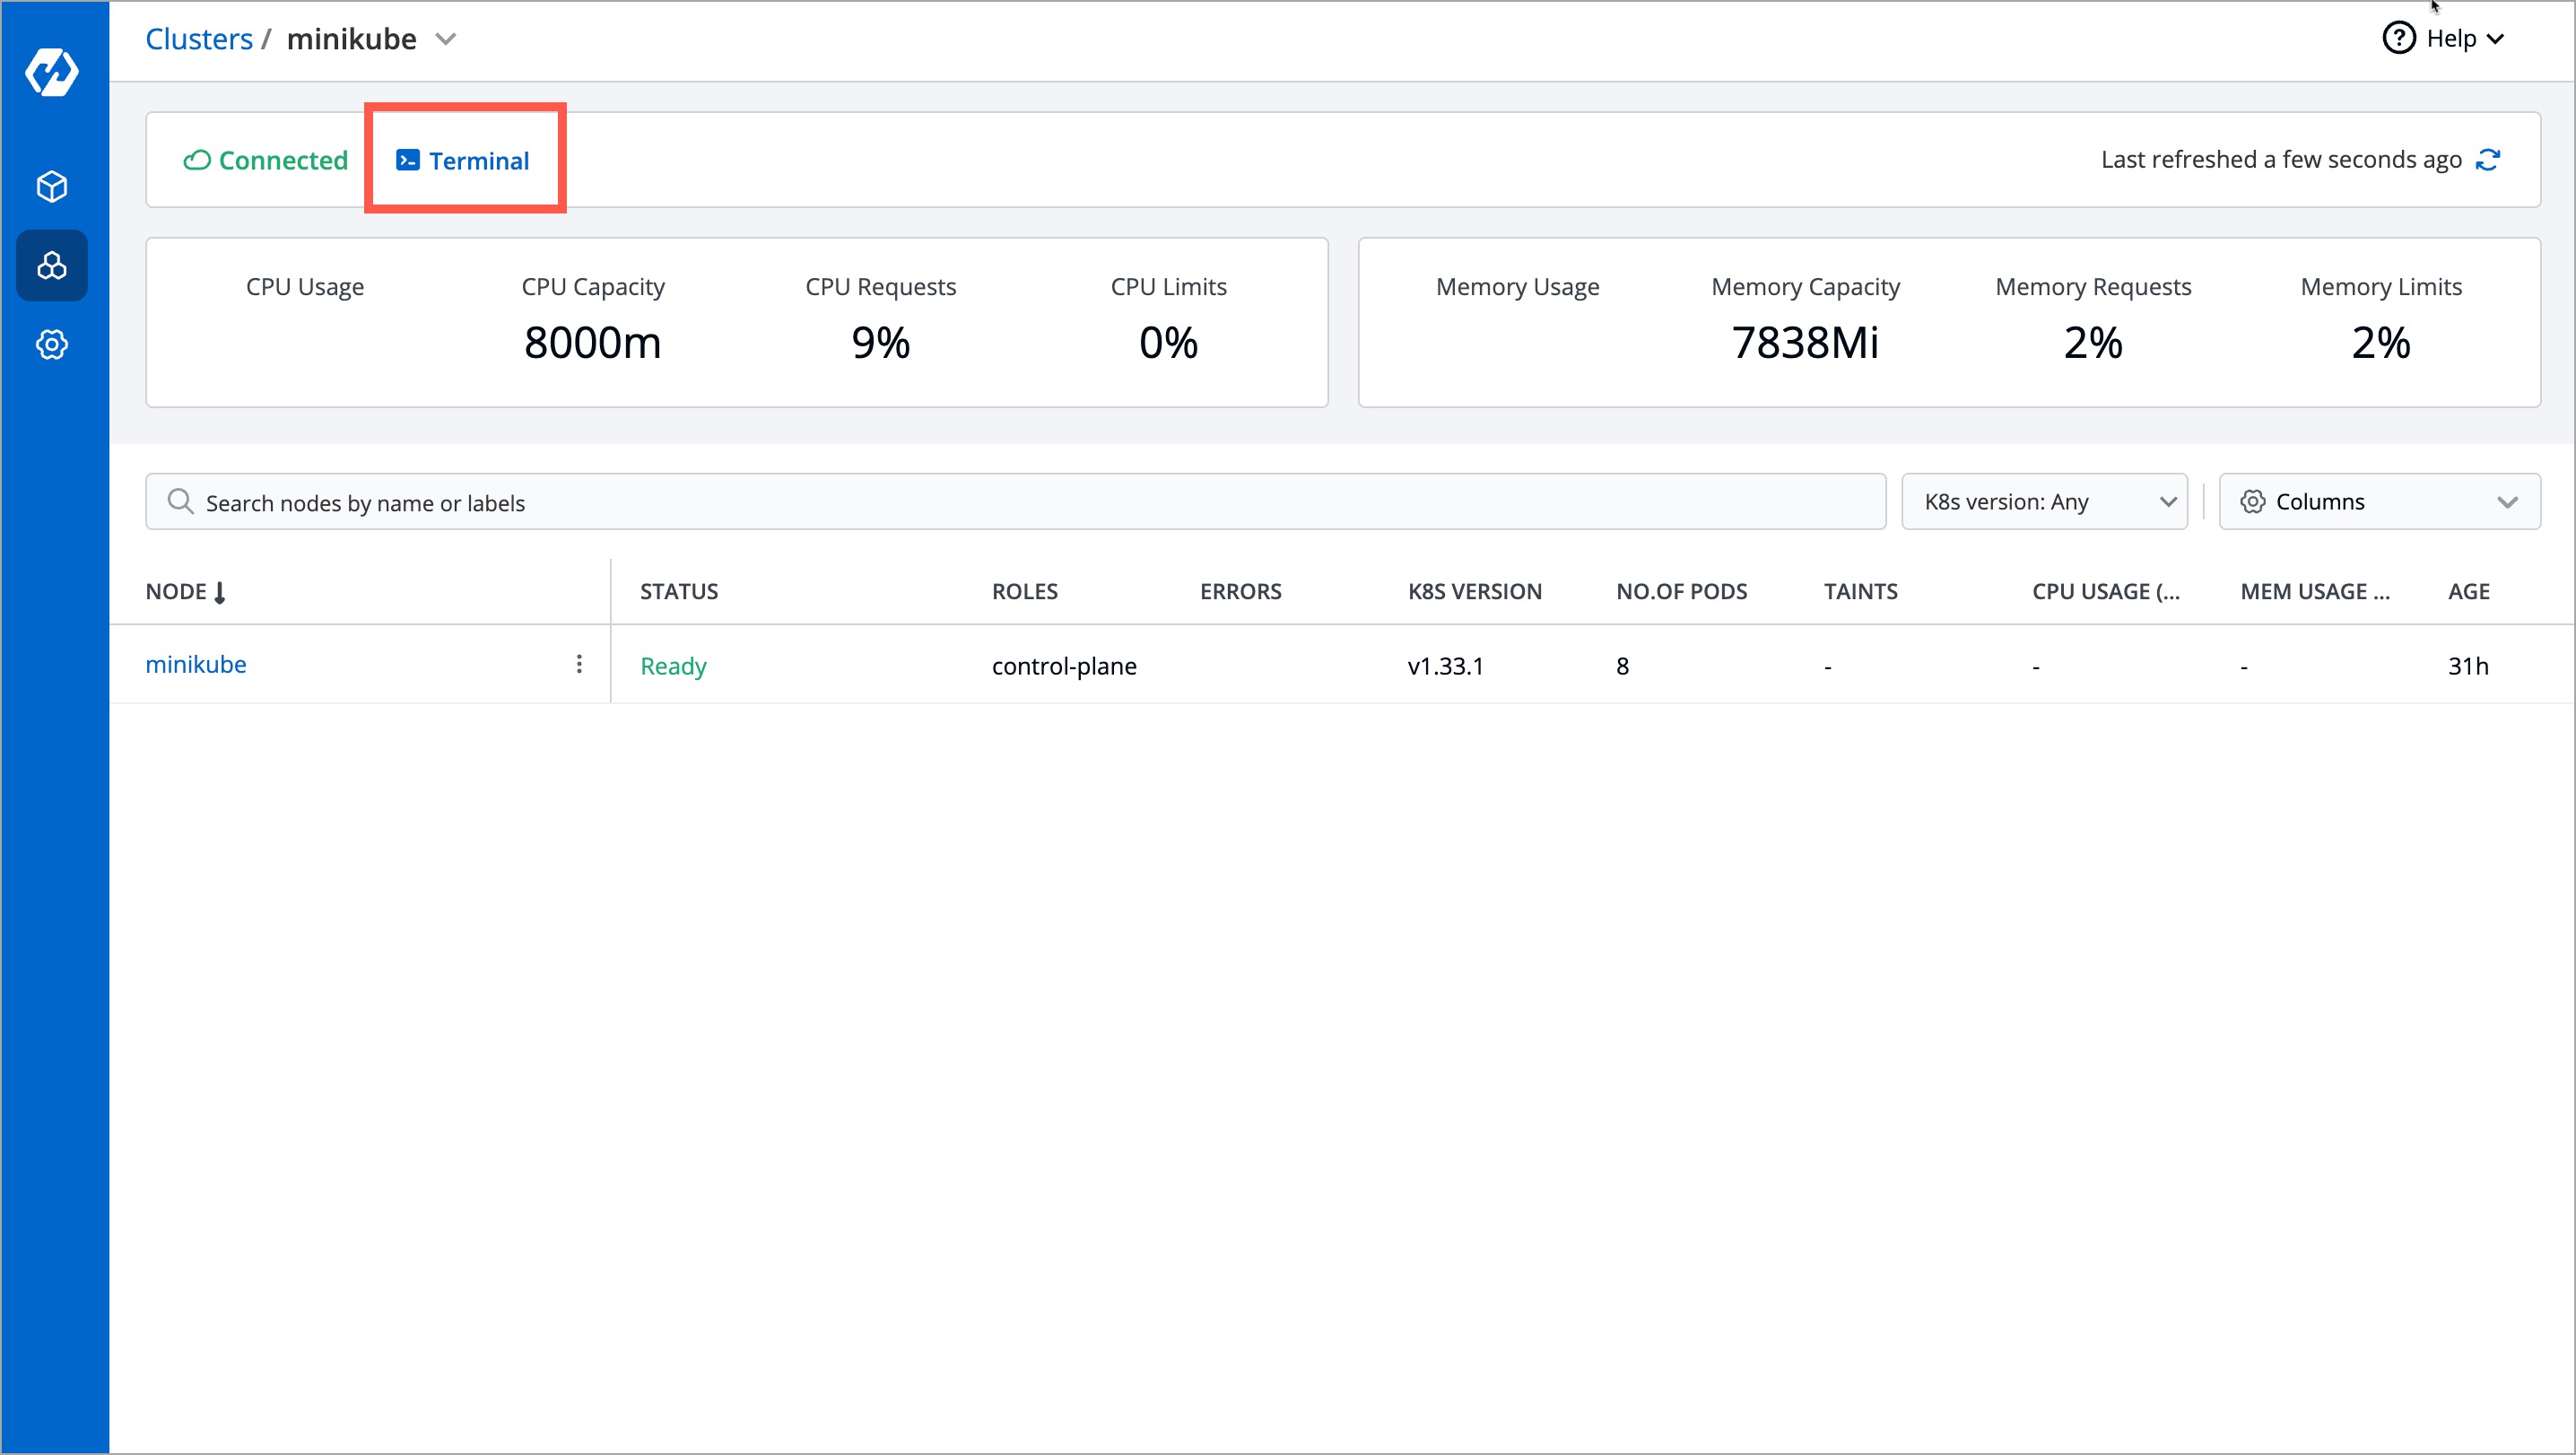
Access Cluster Terminal
At any time, you can debug and troubleshoot any issues in your cluster using the Cluster Terminal. You can access the Cluster Terminal by either clicking Terminal option in the Overview page or by clicking the cluster and then clicking the Debug option. The same Cluster Terminal will be opened irrespective of the option that you choose.
Upgrade Devtron Kubernetes Desktop Client
To upgrade your Devtron Kubernetes Desktop Client, run the following command in your terminal. The Devtron Kubernetes Desktop Client will automatically be stopped, and the downloaded latest executable file will be opened in the default browser.
sh devtron-install.bash upgrade