Configuring Scoop
Introduction 
To enable Pod Last Restart Snapshot, you must configure Scoop in your target cluster. Scoop collects pod restart events from your cluster and sends them to Devtron, allowing the platform to display details such as restart reason, timestamp, and pre-restart logs directly in the Pod Listing view.
Steps to Configure Scoop
1. Deploying Scoop Chart
To use Pod Last Restart Snapshot for your workloads, you must deploy the scoop chart in every cluster for which you want to access restart details for its pods. For this demonstration, we are deploying it in the default cluster.
-
Go to Infrastructure Management → Chart Store.
-
Search the
devtron-scoopchart and click on it. A new page will open.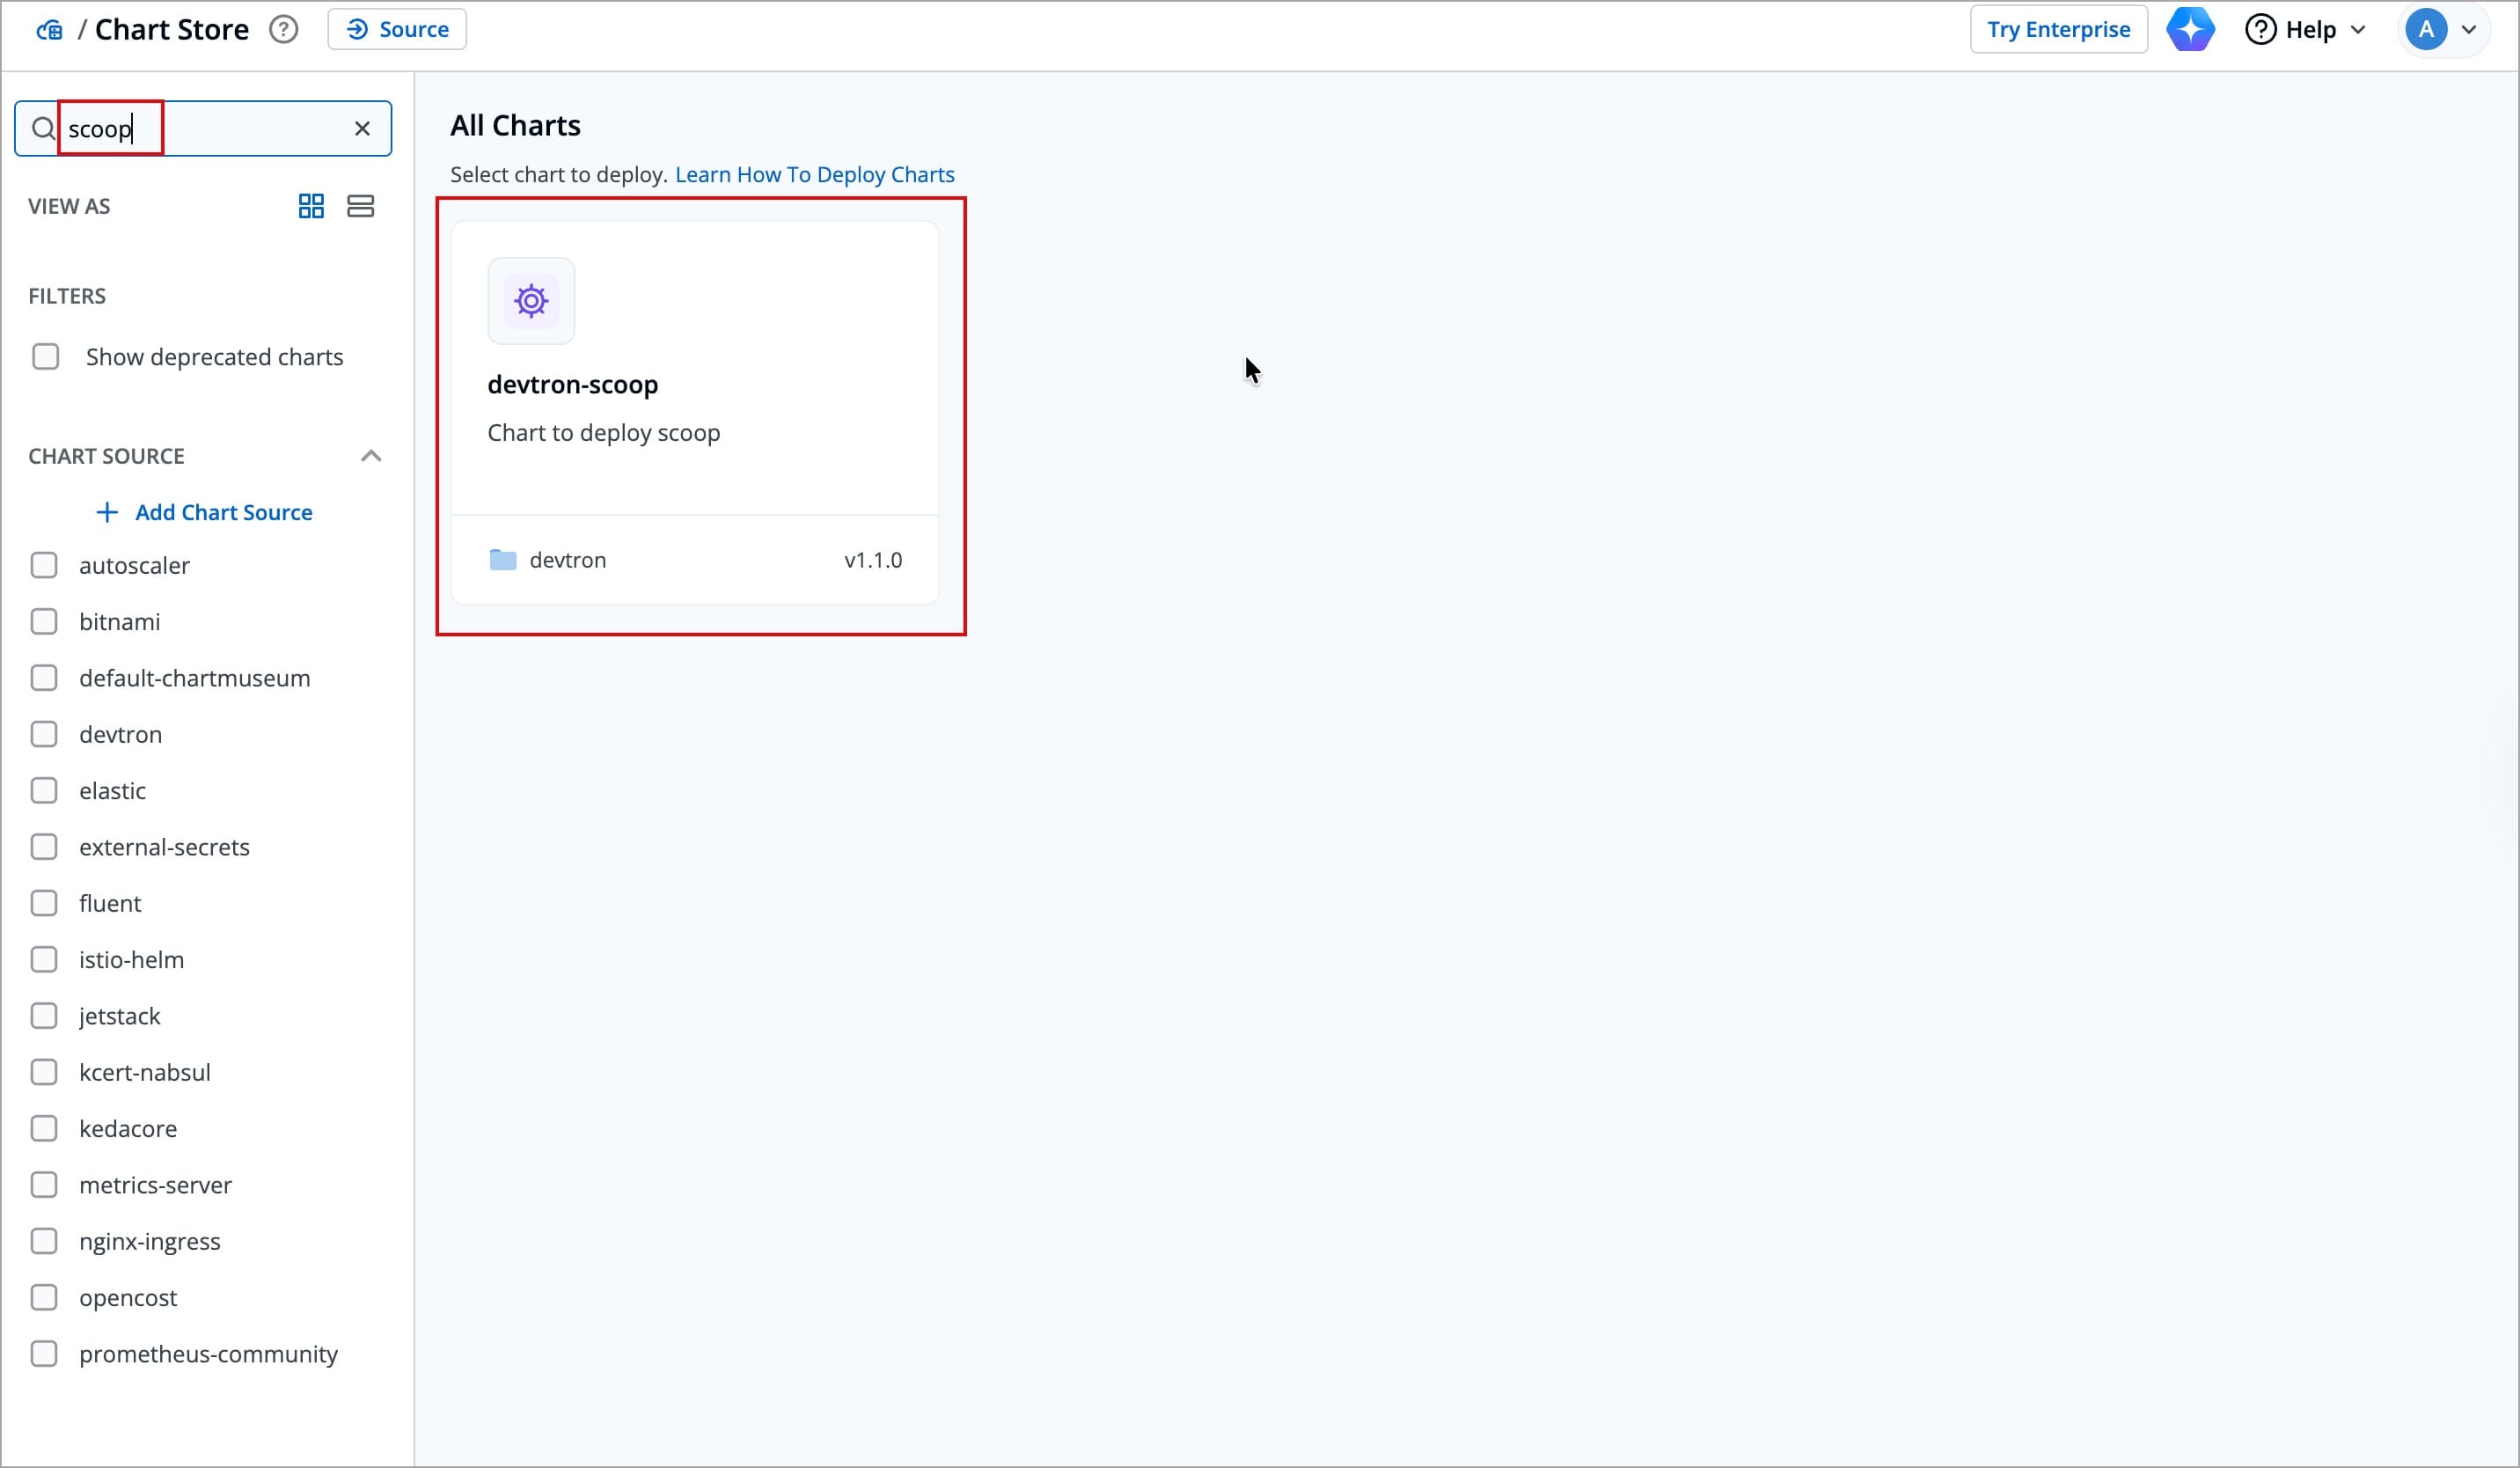
-
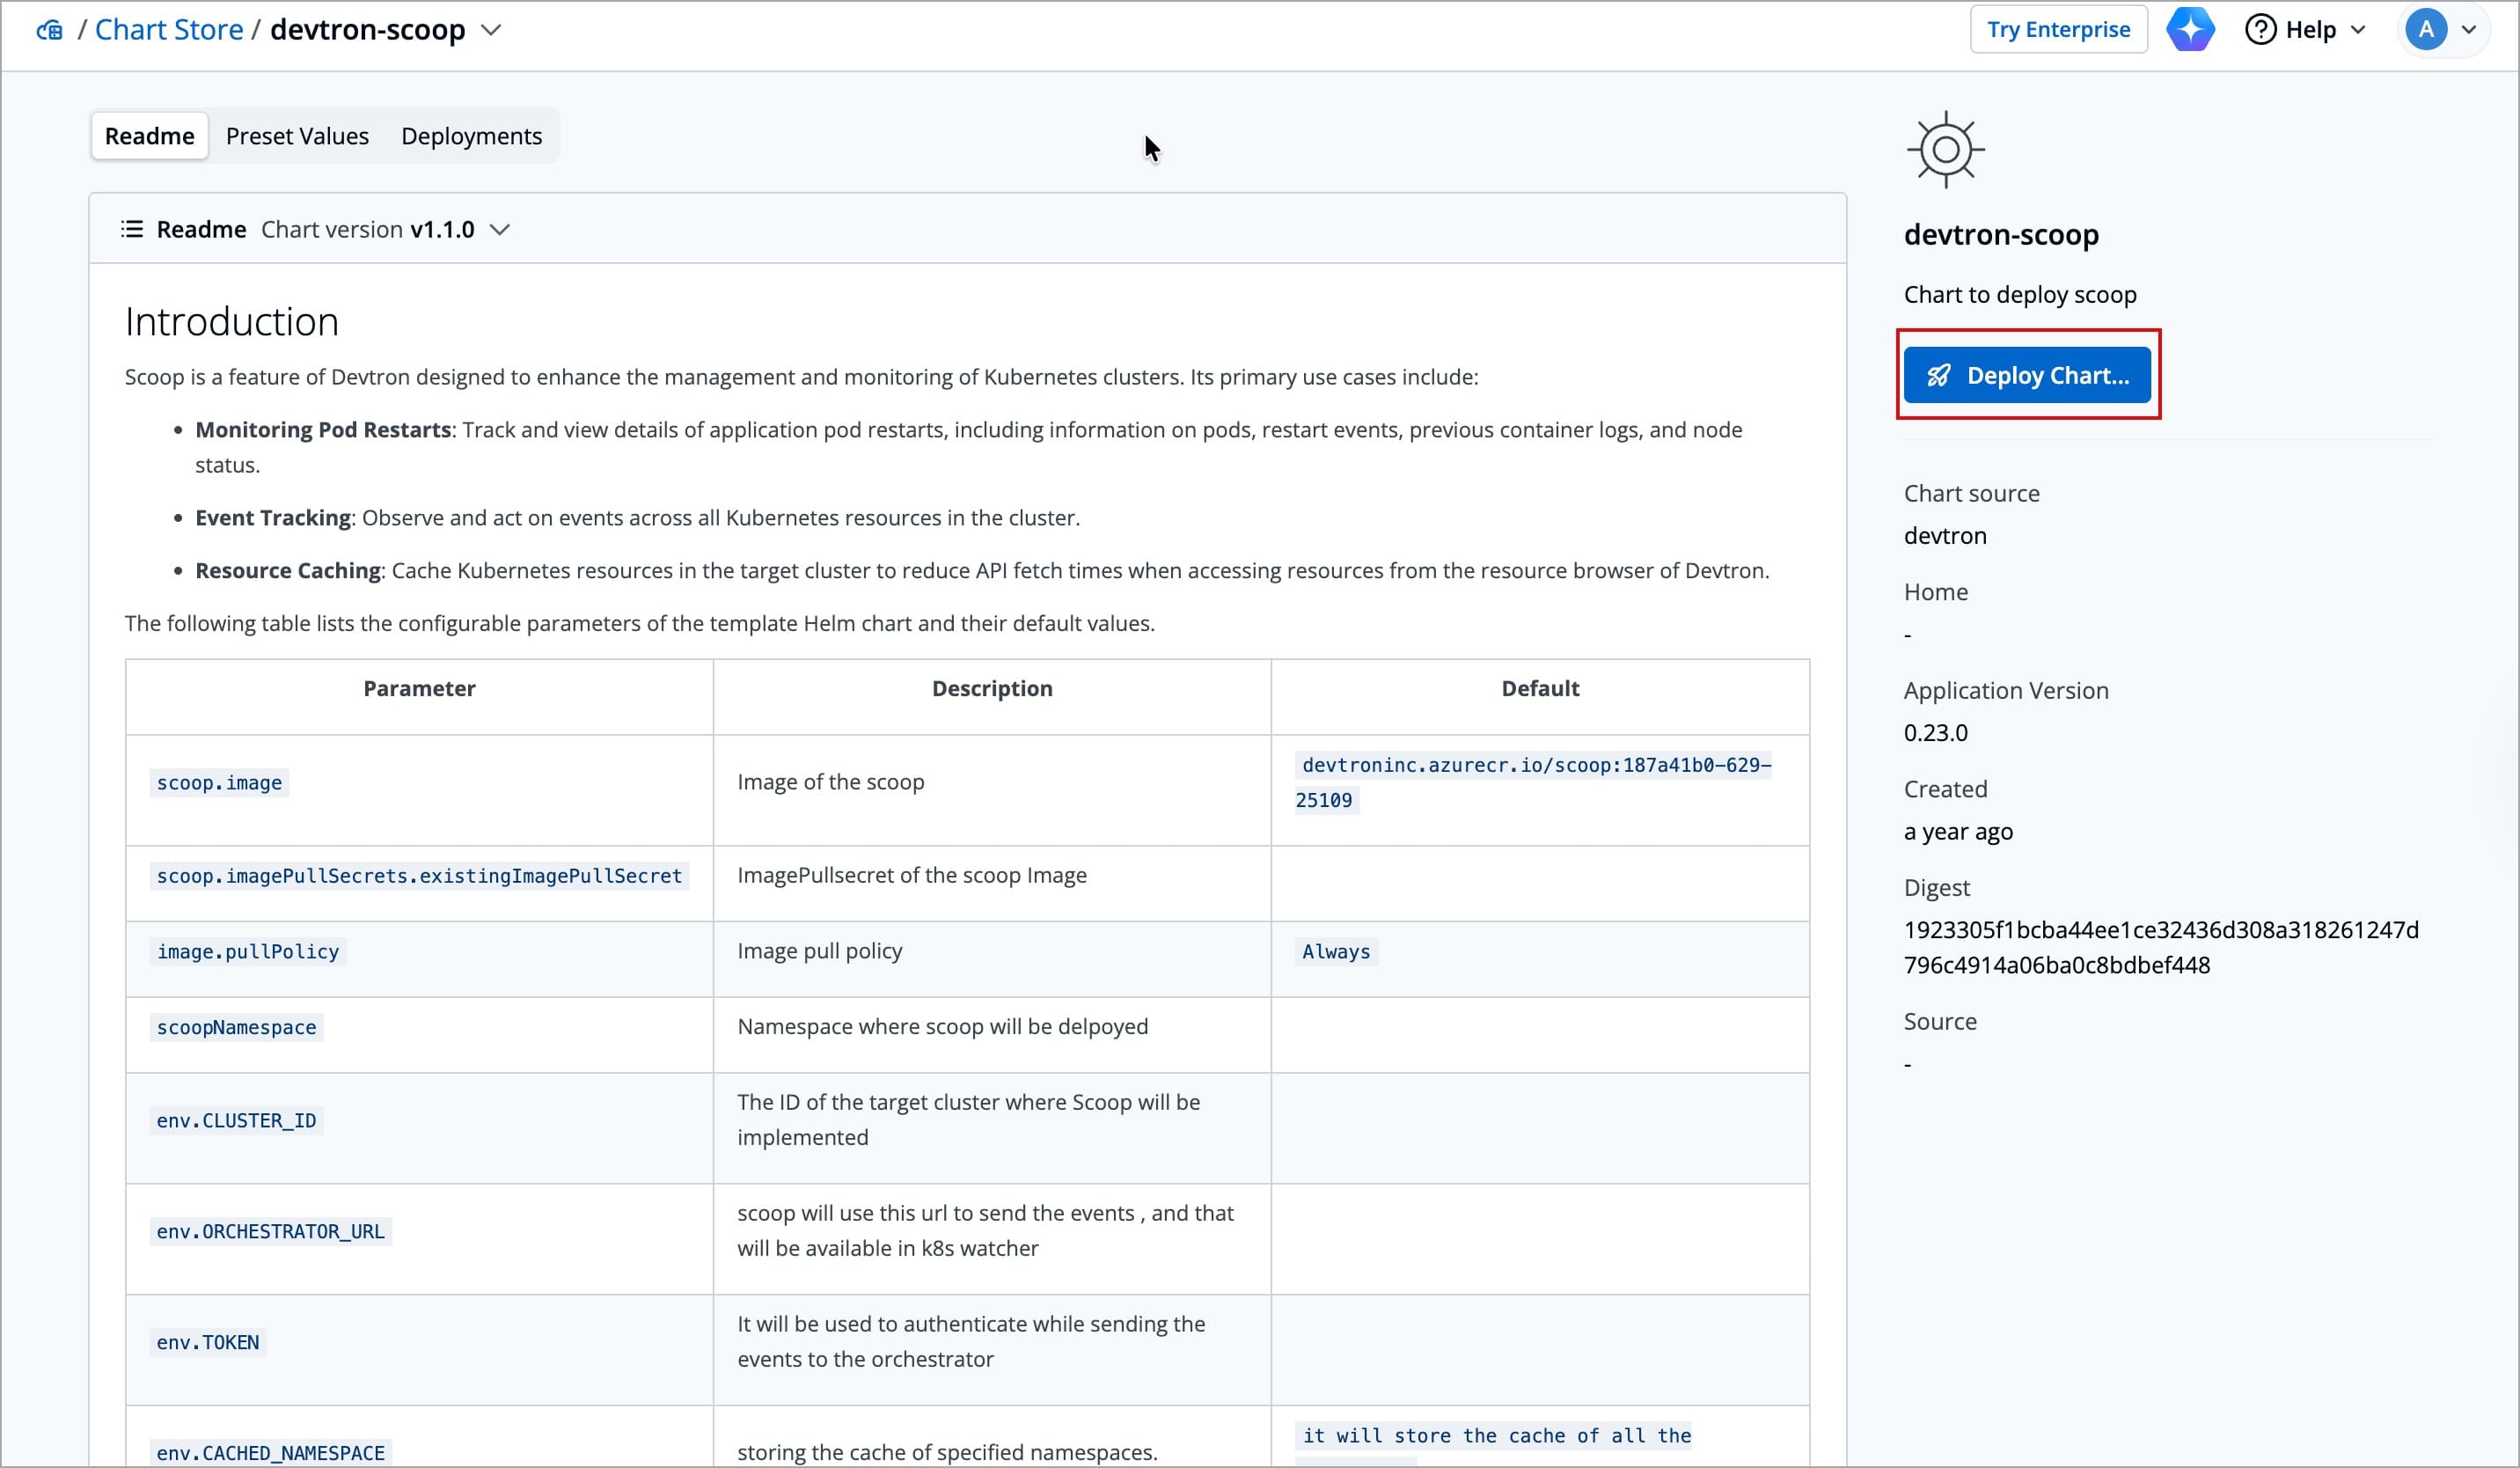
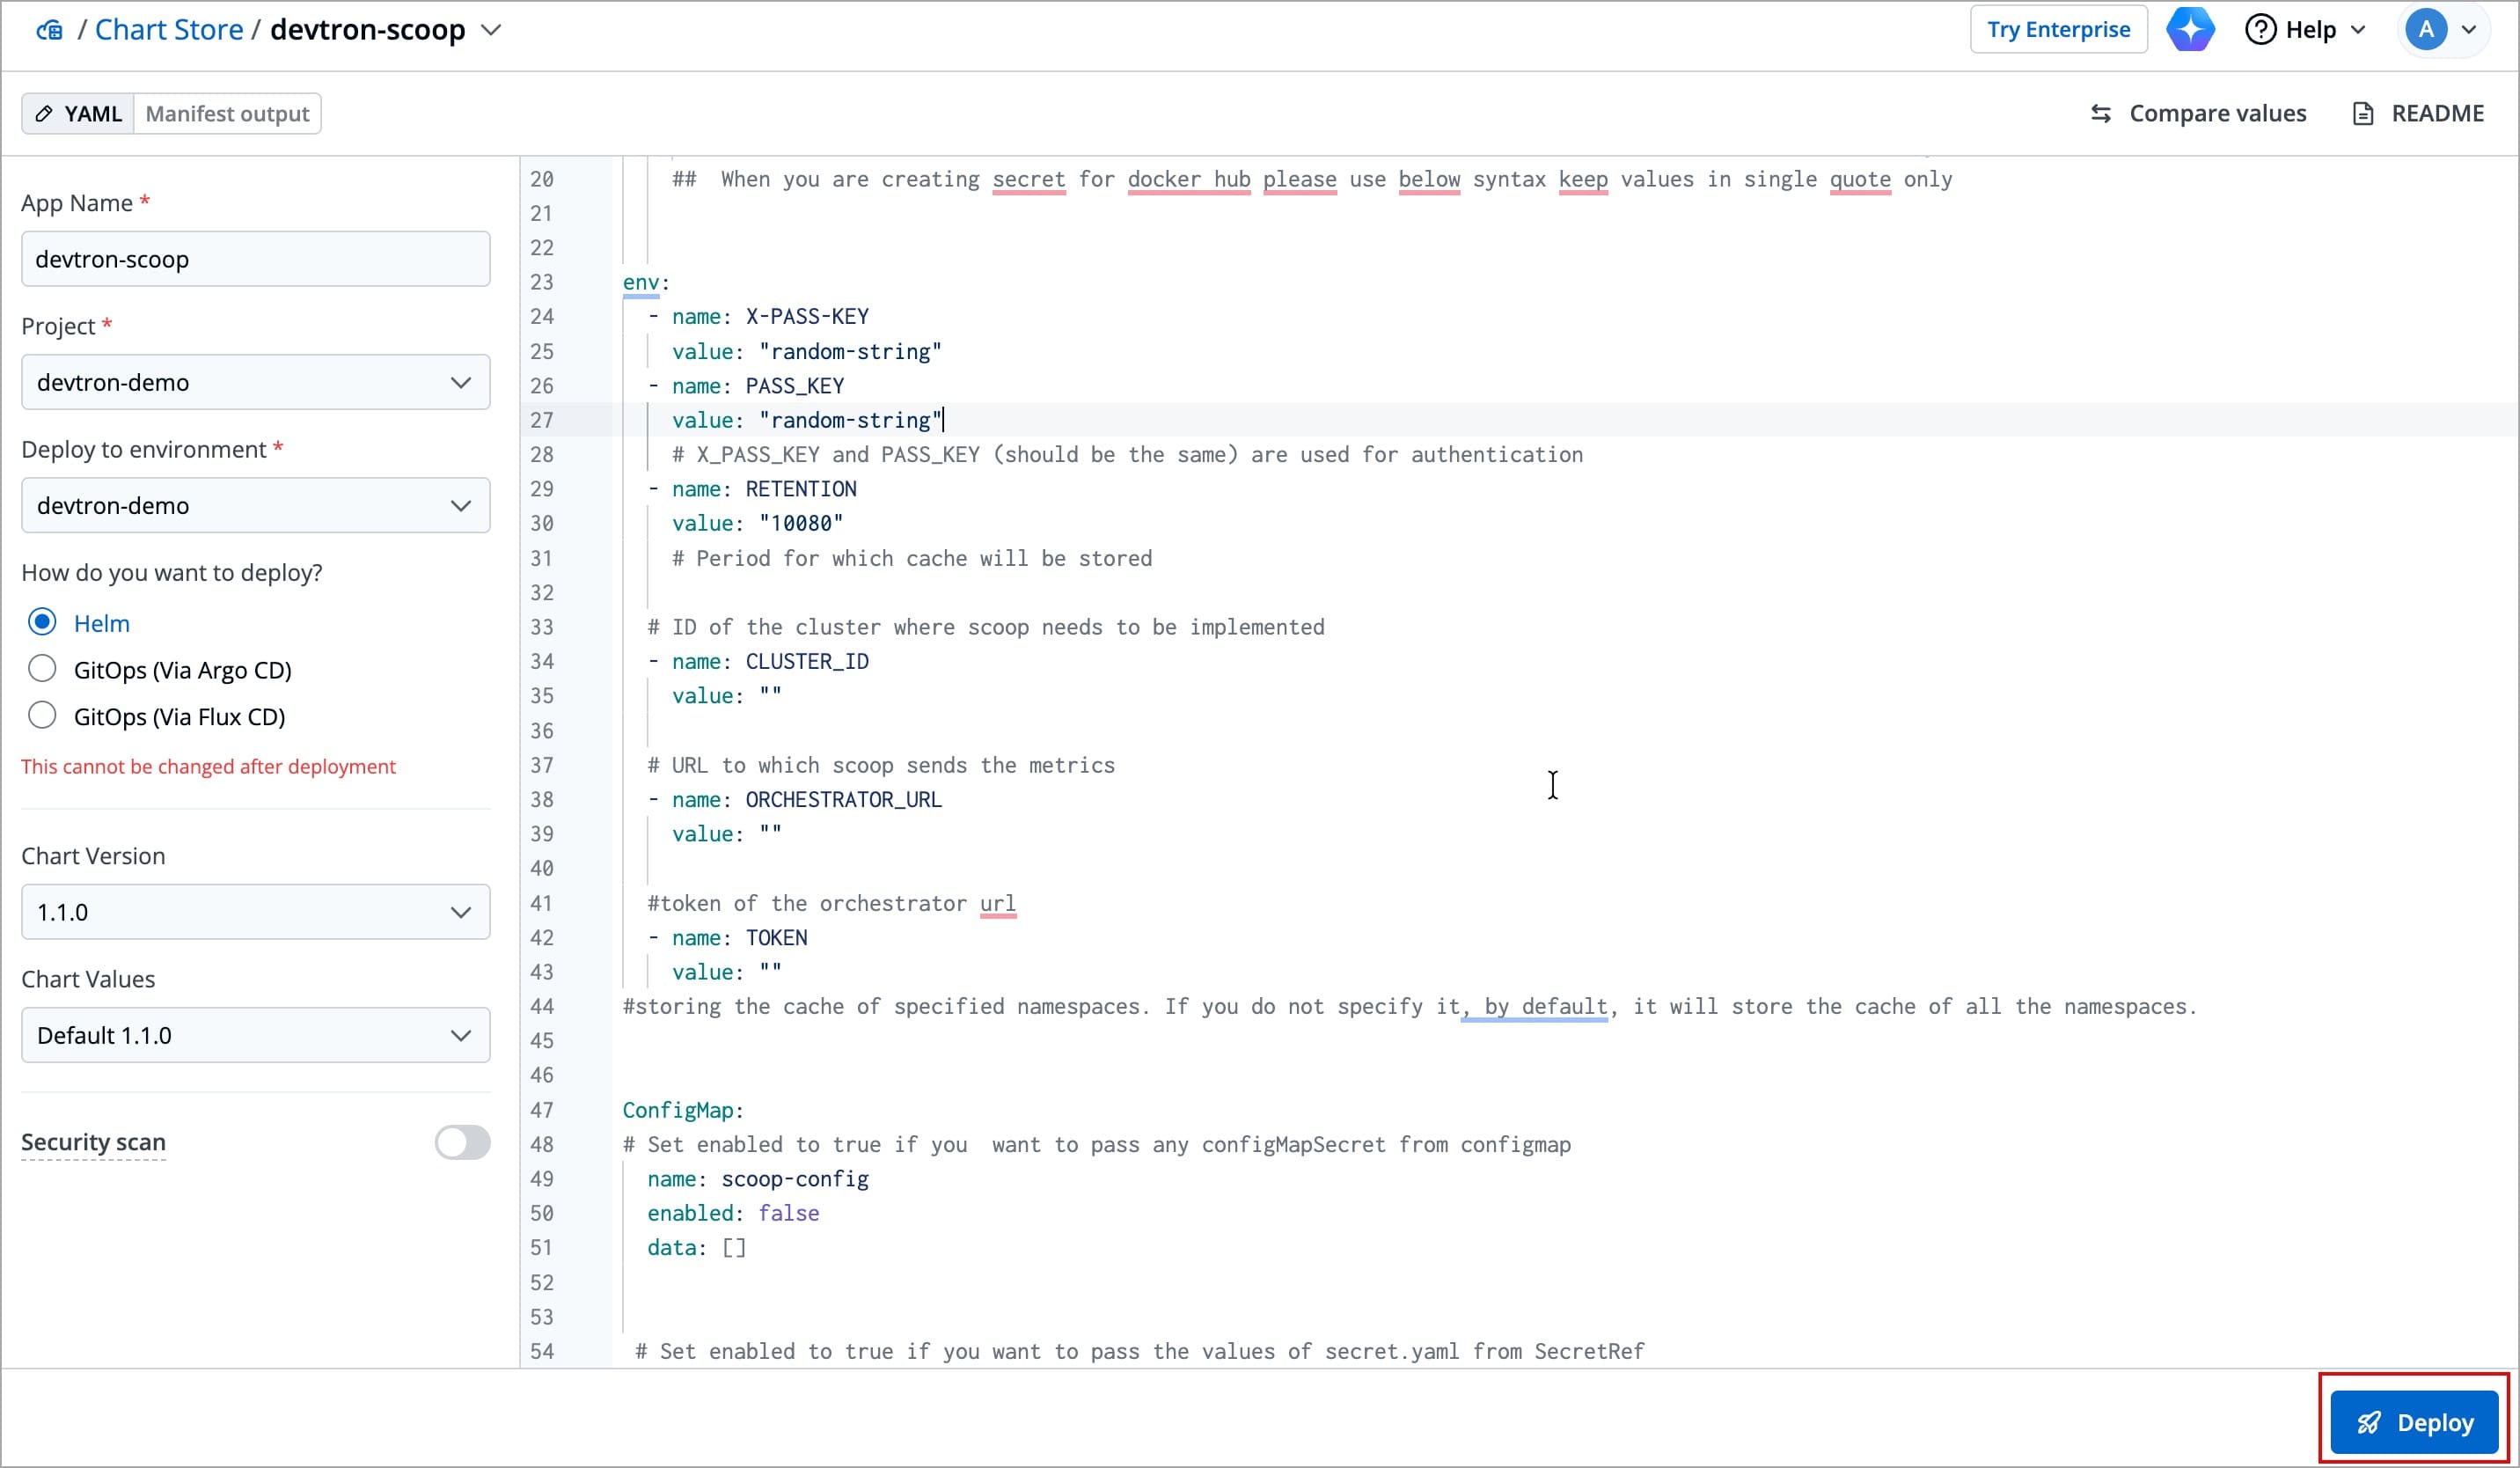
Click Deploy Chart, and a new page will open.
-
Enter the required details in the left pane:
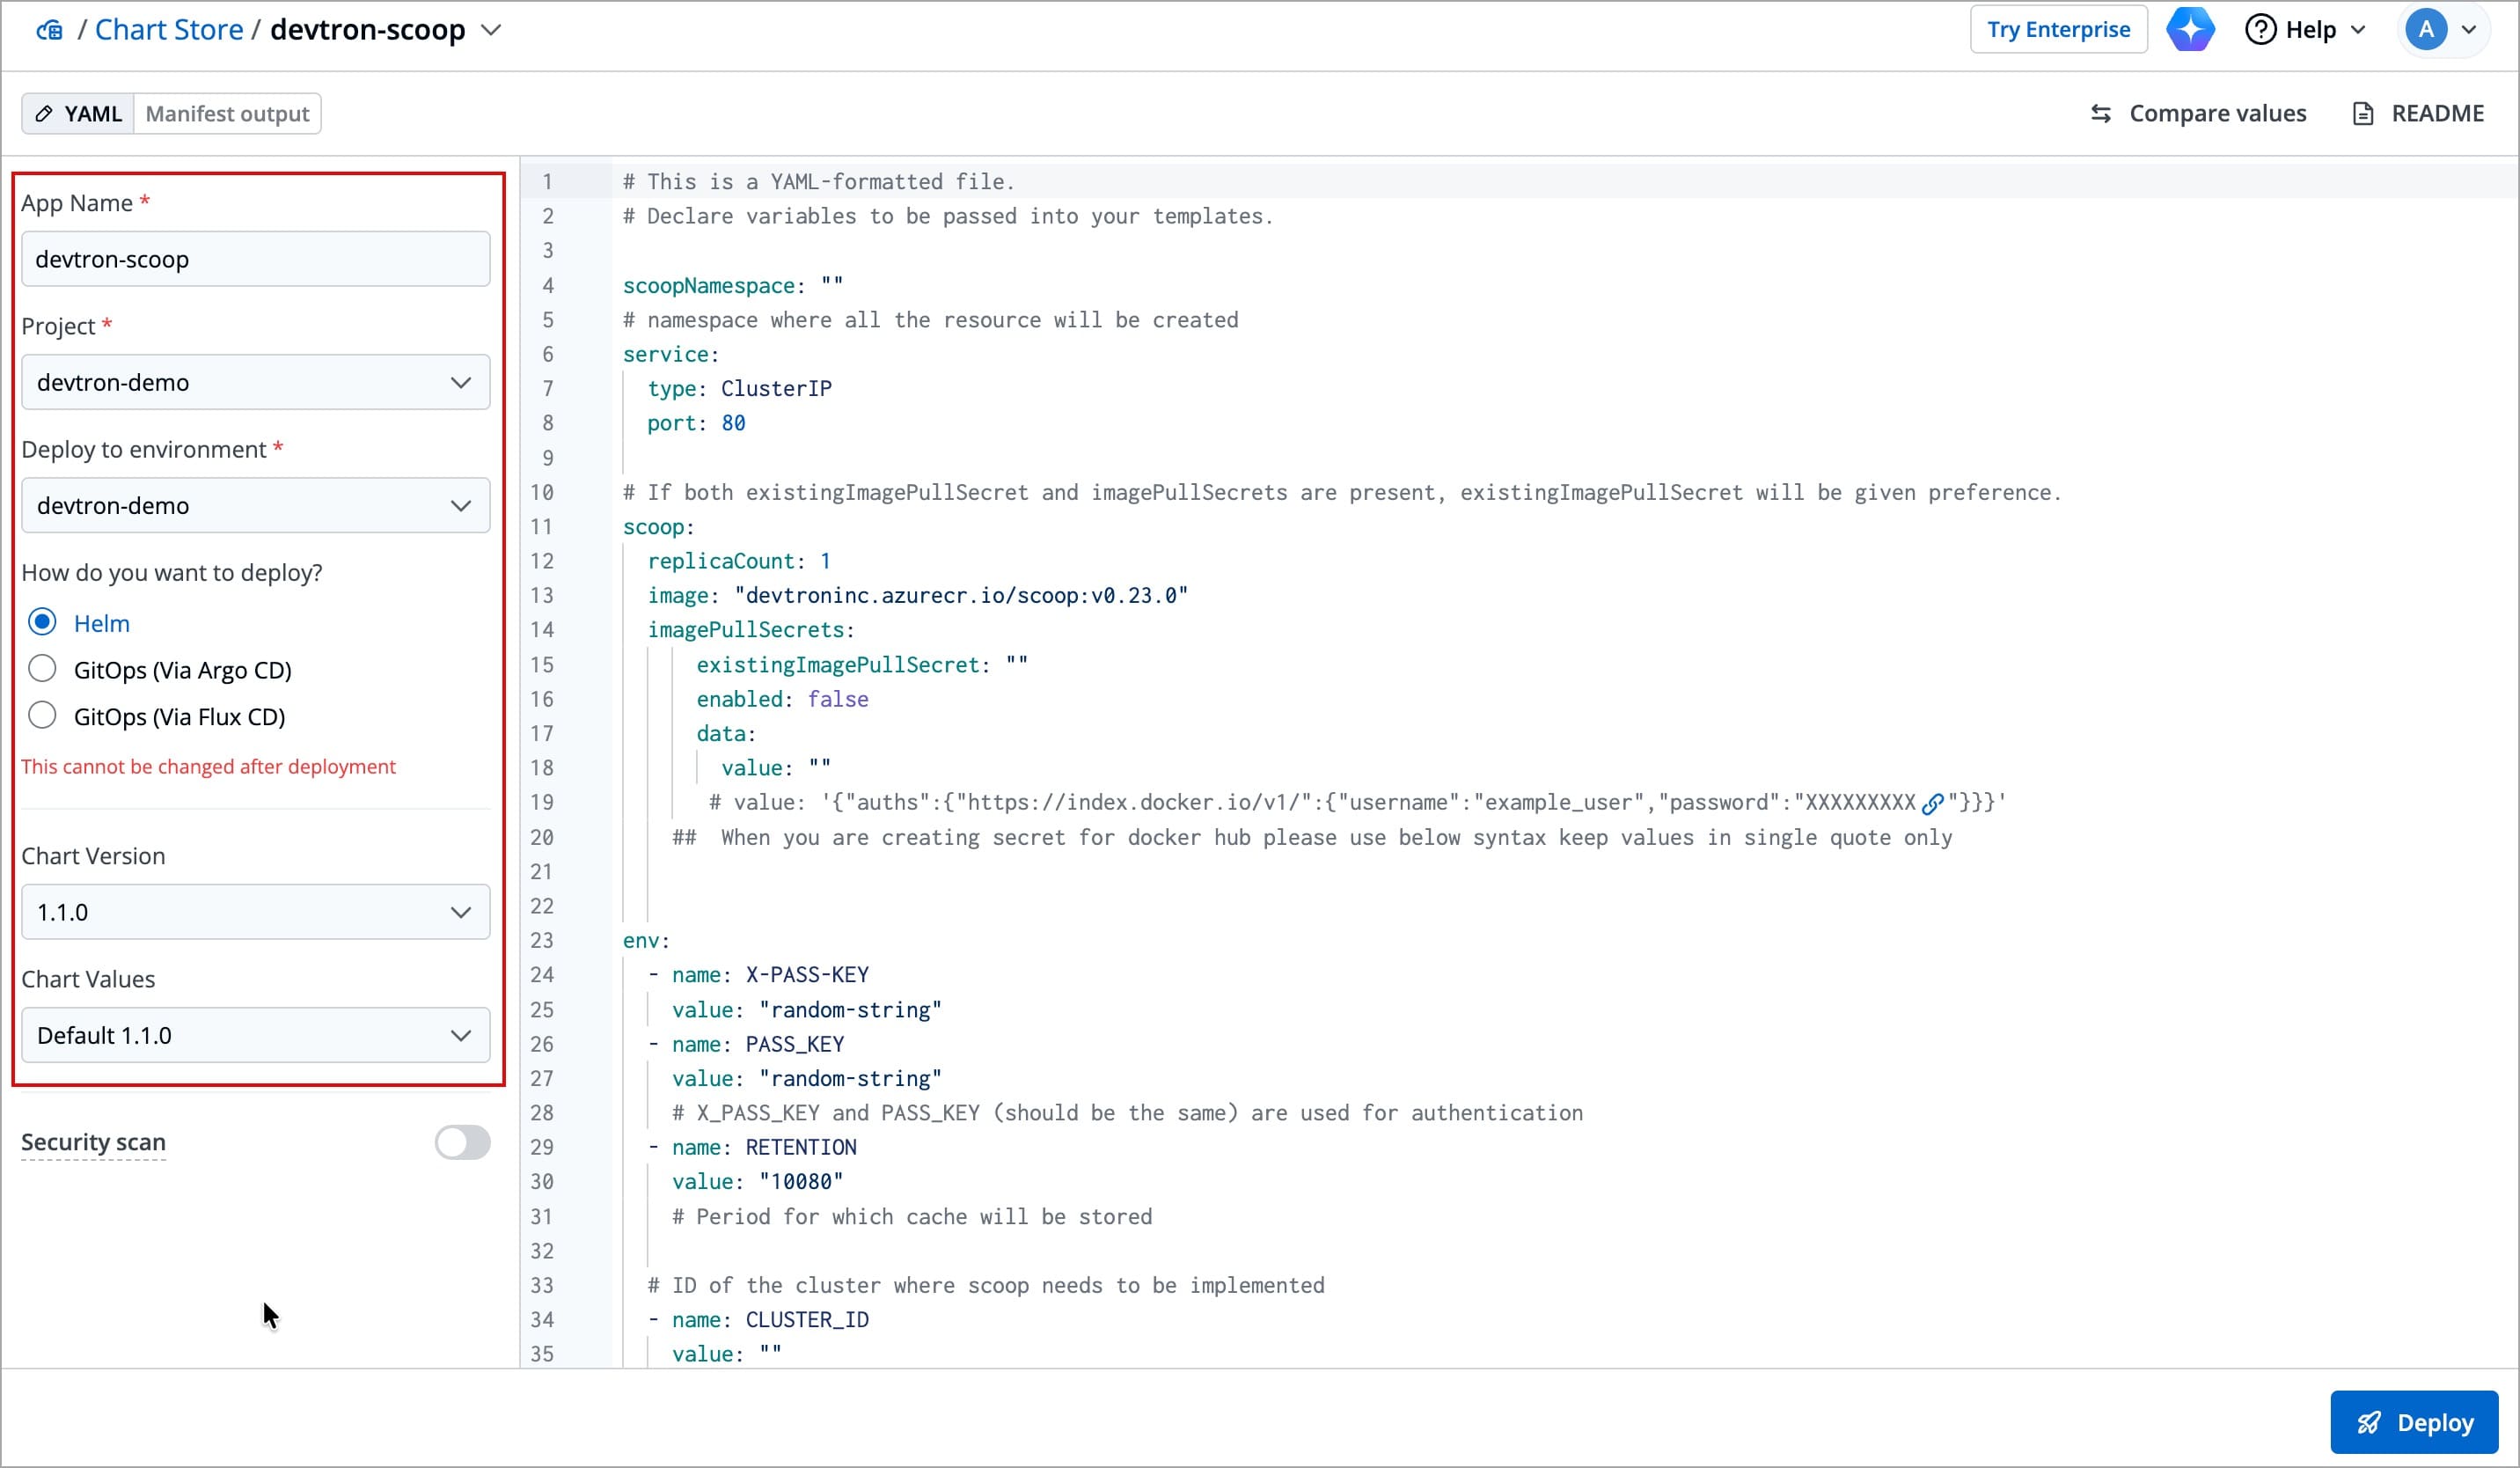
Field Description App Name Give your app a name, e.g. devtron-scoopProject Select your project Deploy to environment Choose the target environment Deployment type Select Helm as the deployment method Chart Version Select the latest chart version Chart Values Choose the default one for the latest version -
In the right pane, search for the keyword
PASS_KEY, and specify any value of your choice (We recommend using a random string for better security).- If you leave the value unchanged, the default value
random-stringwill be used as the passkey for authentication.
- If you leave the value unchanged, the default value
-
Note down the value you have specified for
PASS_KEY. If you left the value unchanged, then thePASS_KEYvalue israndom-string. We will need this value in later configuration steps.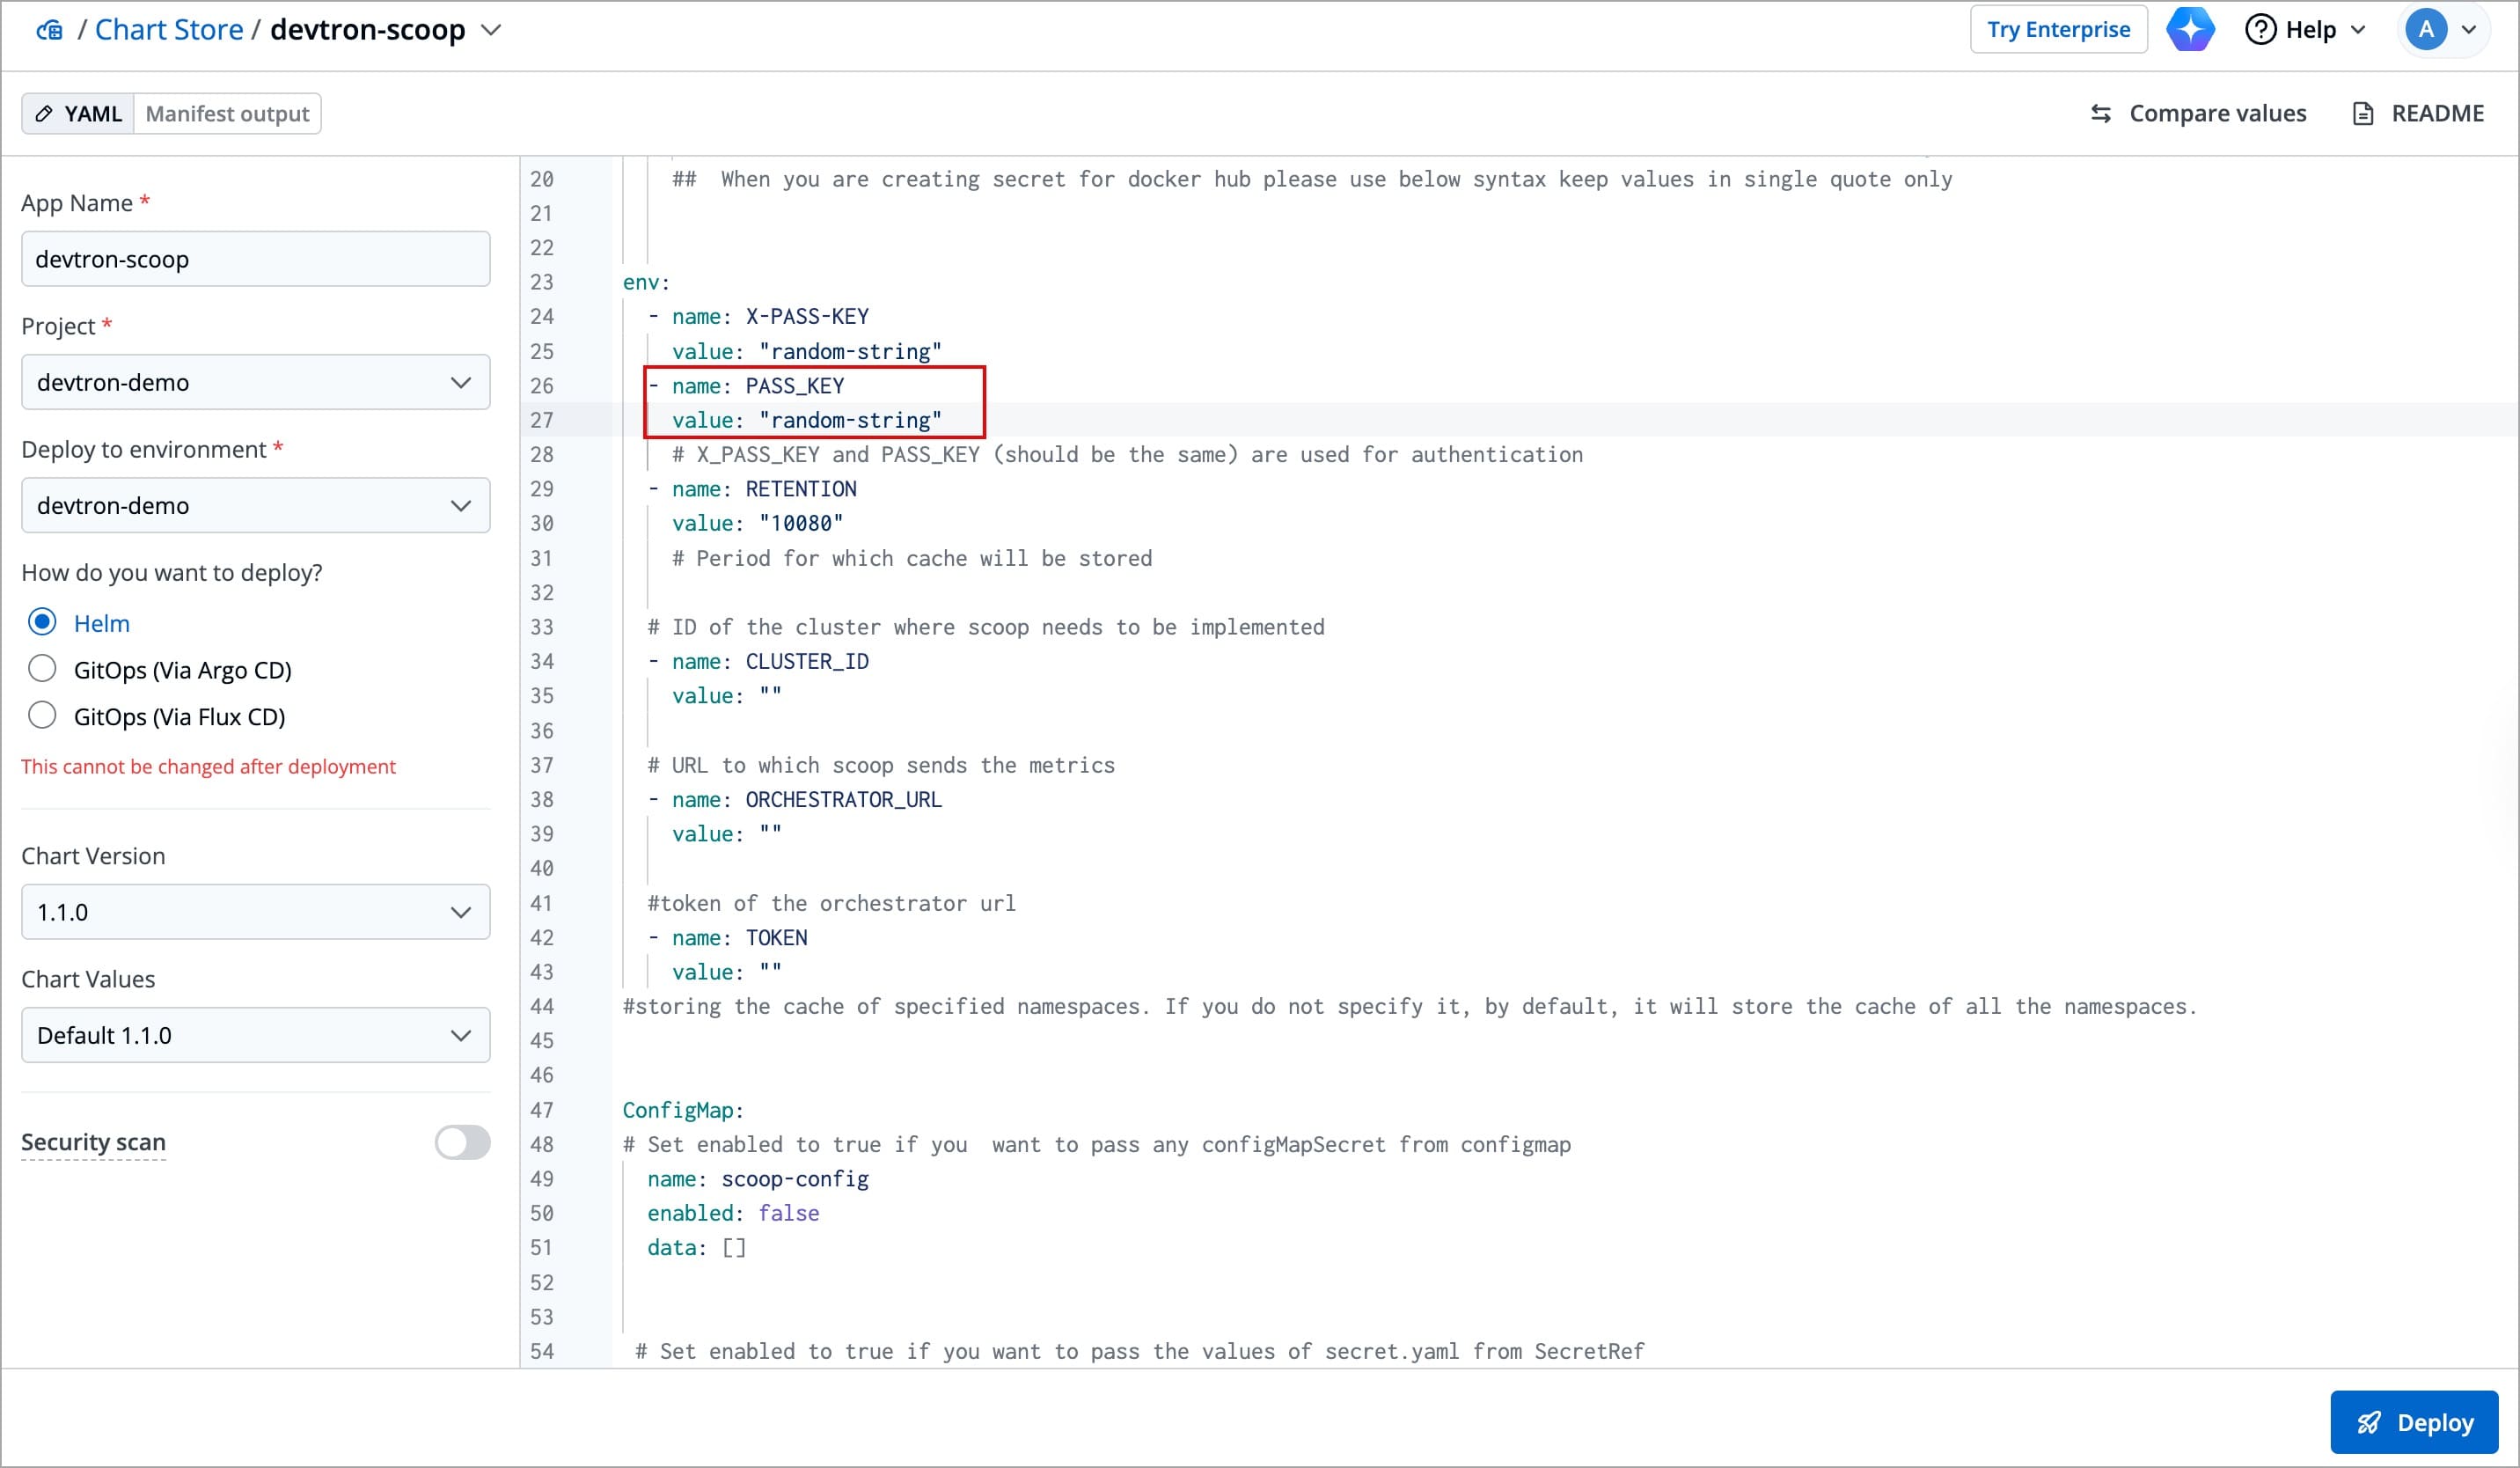
-
Click Deploy.
2. Check Service Endpoint
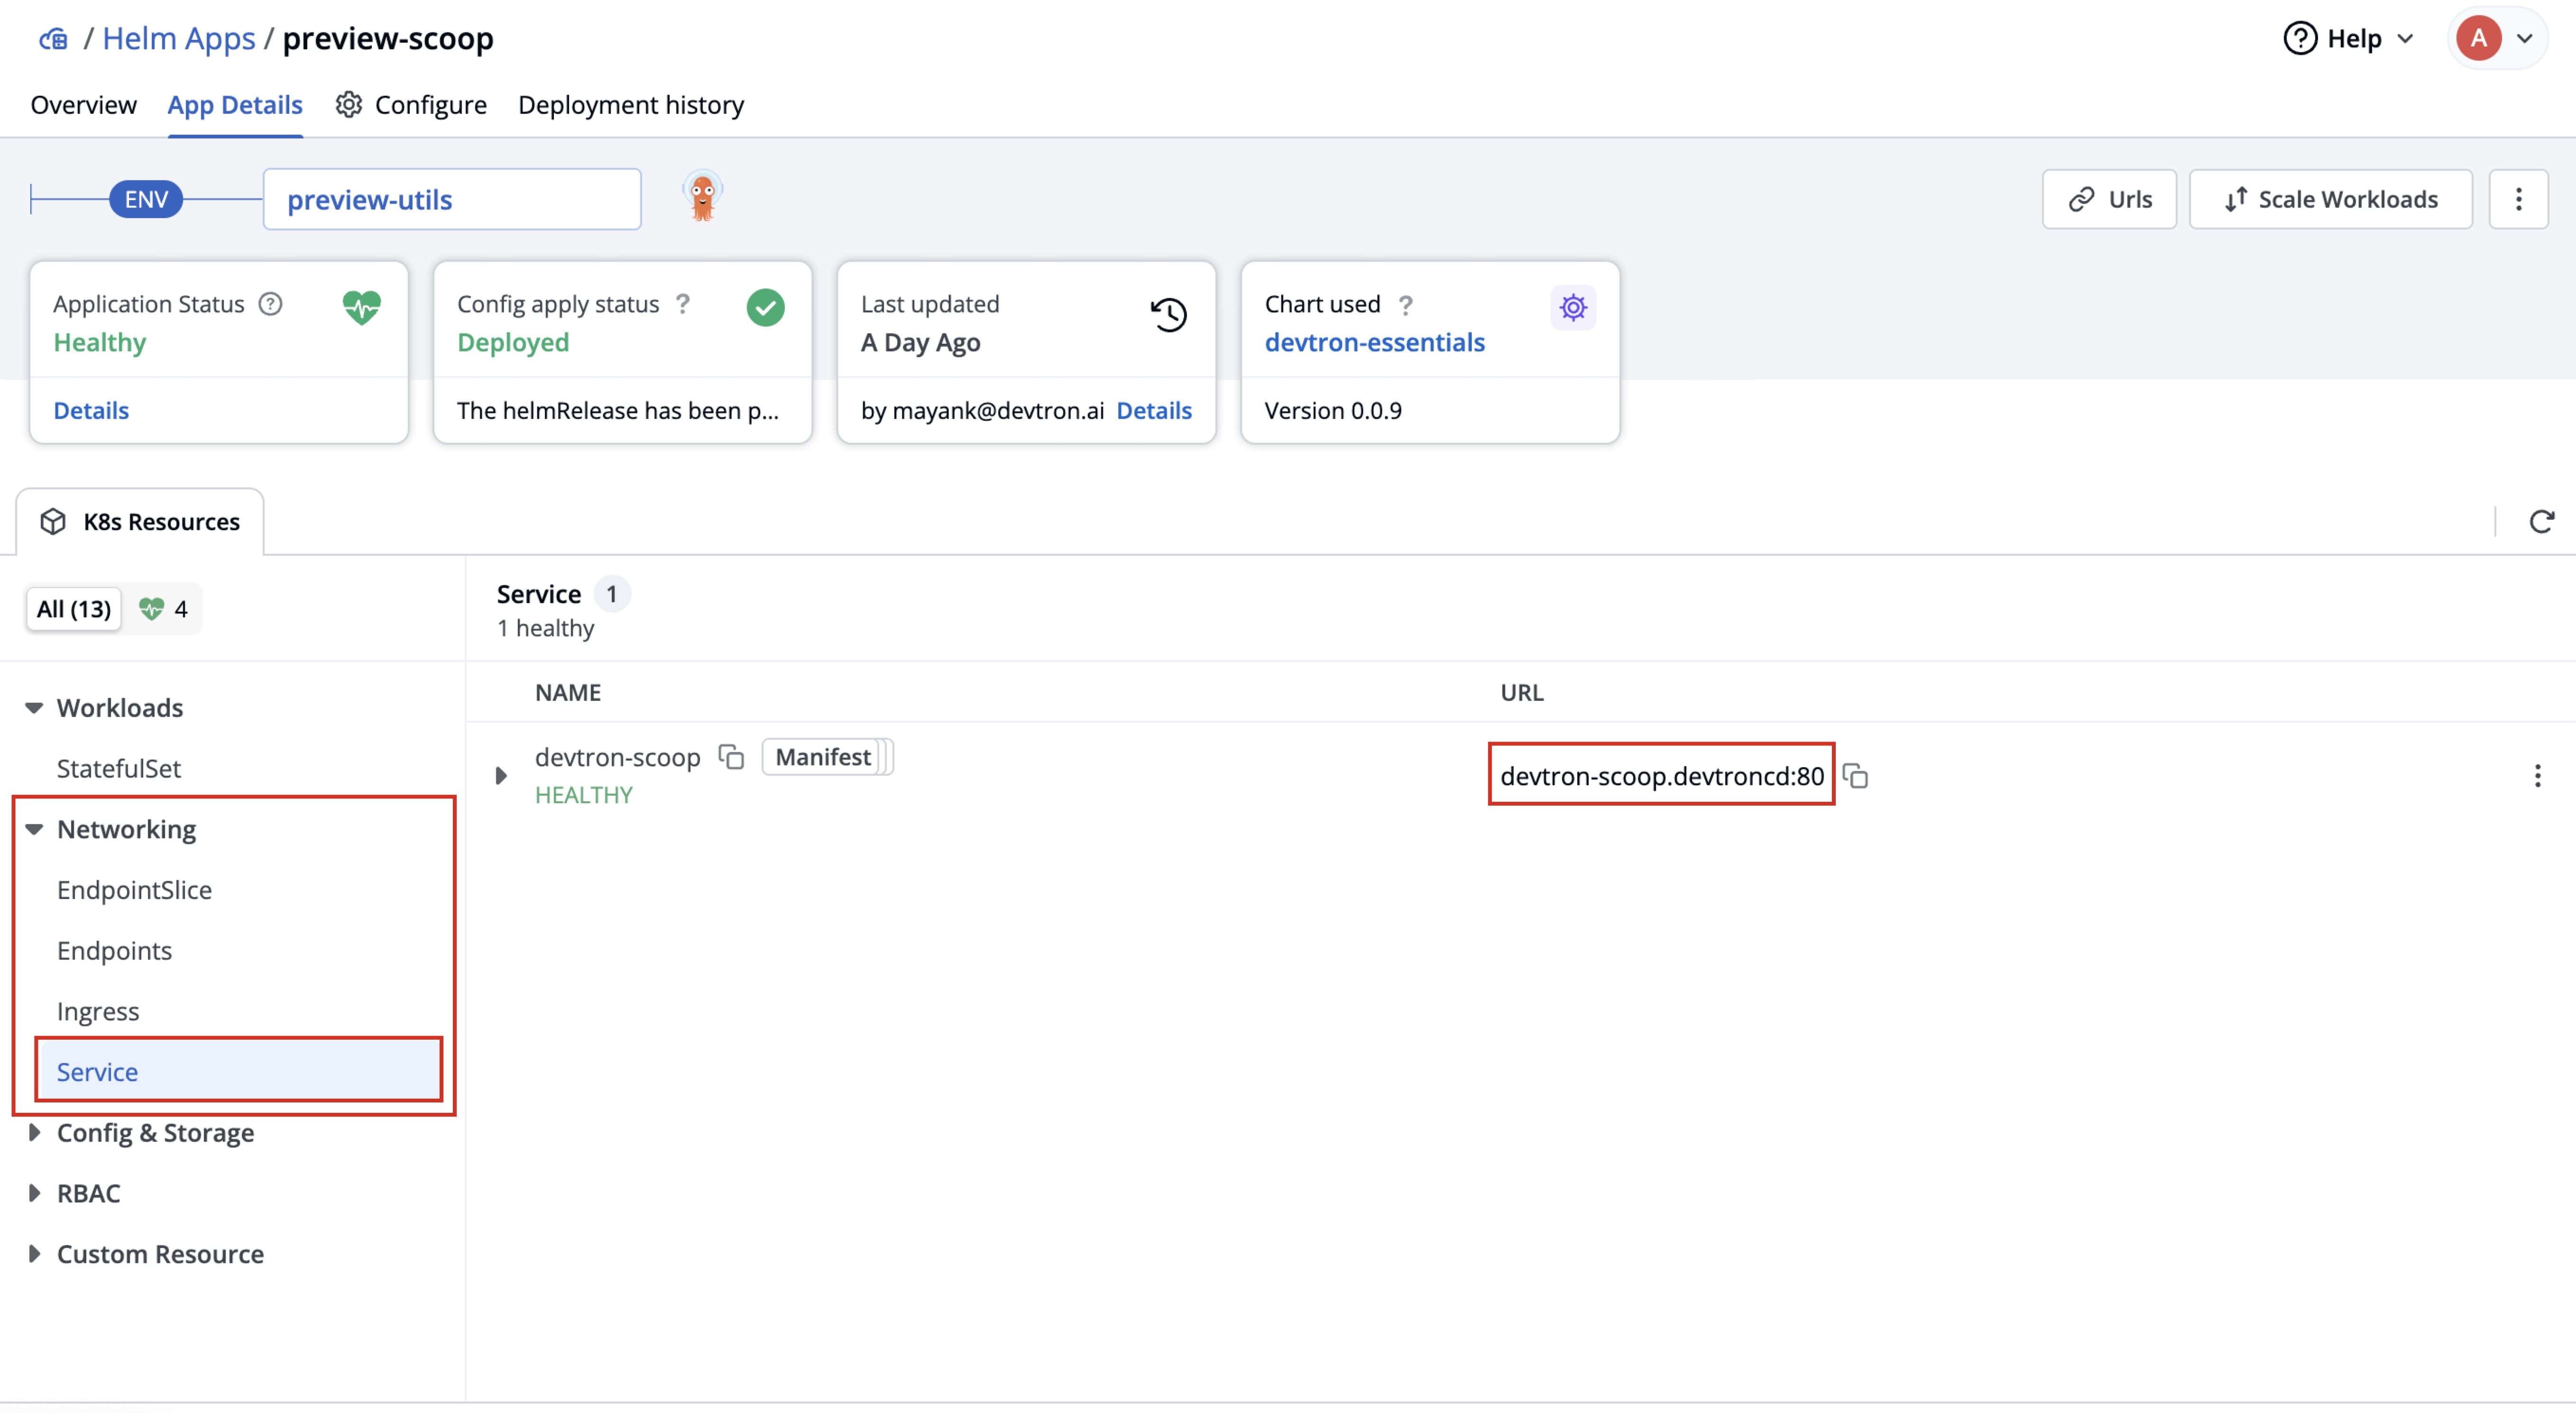
After deploying scoop chart (devtron-scoop), you need to check the service endpoint URL for each cluster where you have deployed the Scoop chart.
-
In the App Details page of the deployed chart, expand Networking and click on Service.
-
Locate the service entry with the URL in the format:
<service-name>.<namespace>:<port>. Note the values ofserviceName,namespace, andportfor each cluster as you will require them in later configuration steps.
3. Fetching Cluster ID
You need to fetch the cluster ID for each cluster where you have deployed the scoop chart (devtron-scoop).
-
Go to Infrastructure Management → Resource Browser.
-
Click on the cluster, in which you have deployed the
devtron-scoopchart. A new page will open. -
Look at the URL in your browser’s address bar.
For example:
https://abc.devtron.com/dashboard/infrastructure-management/resource-browser/1/node/k8sEmptyGroup.Here, the number appearing after
/resource-browser/is the cluster ID. In this example, the cluster ID is1.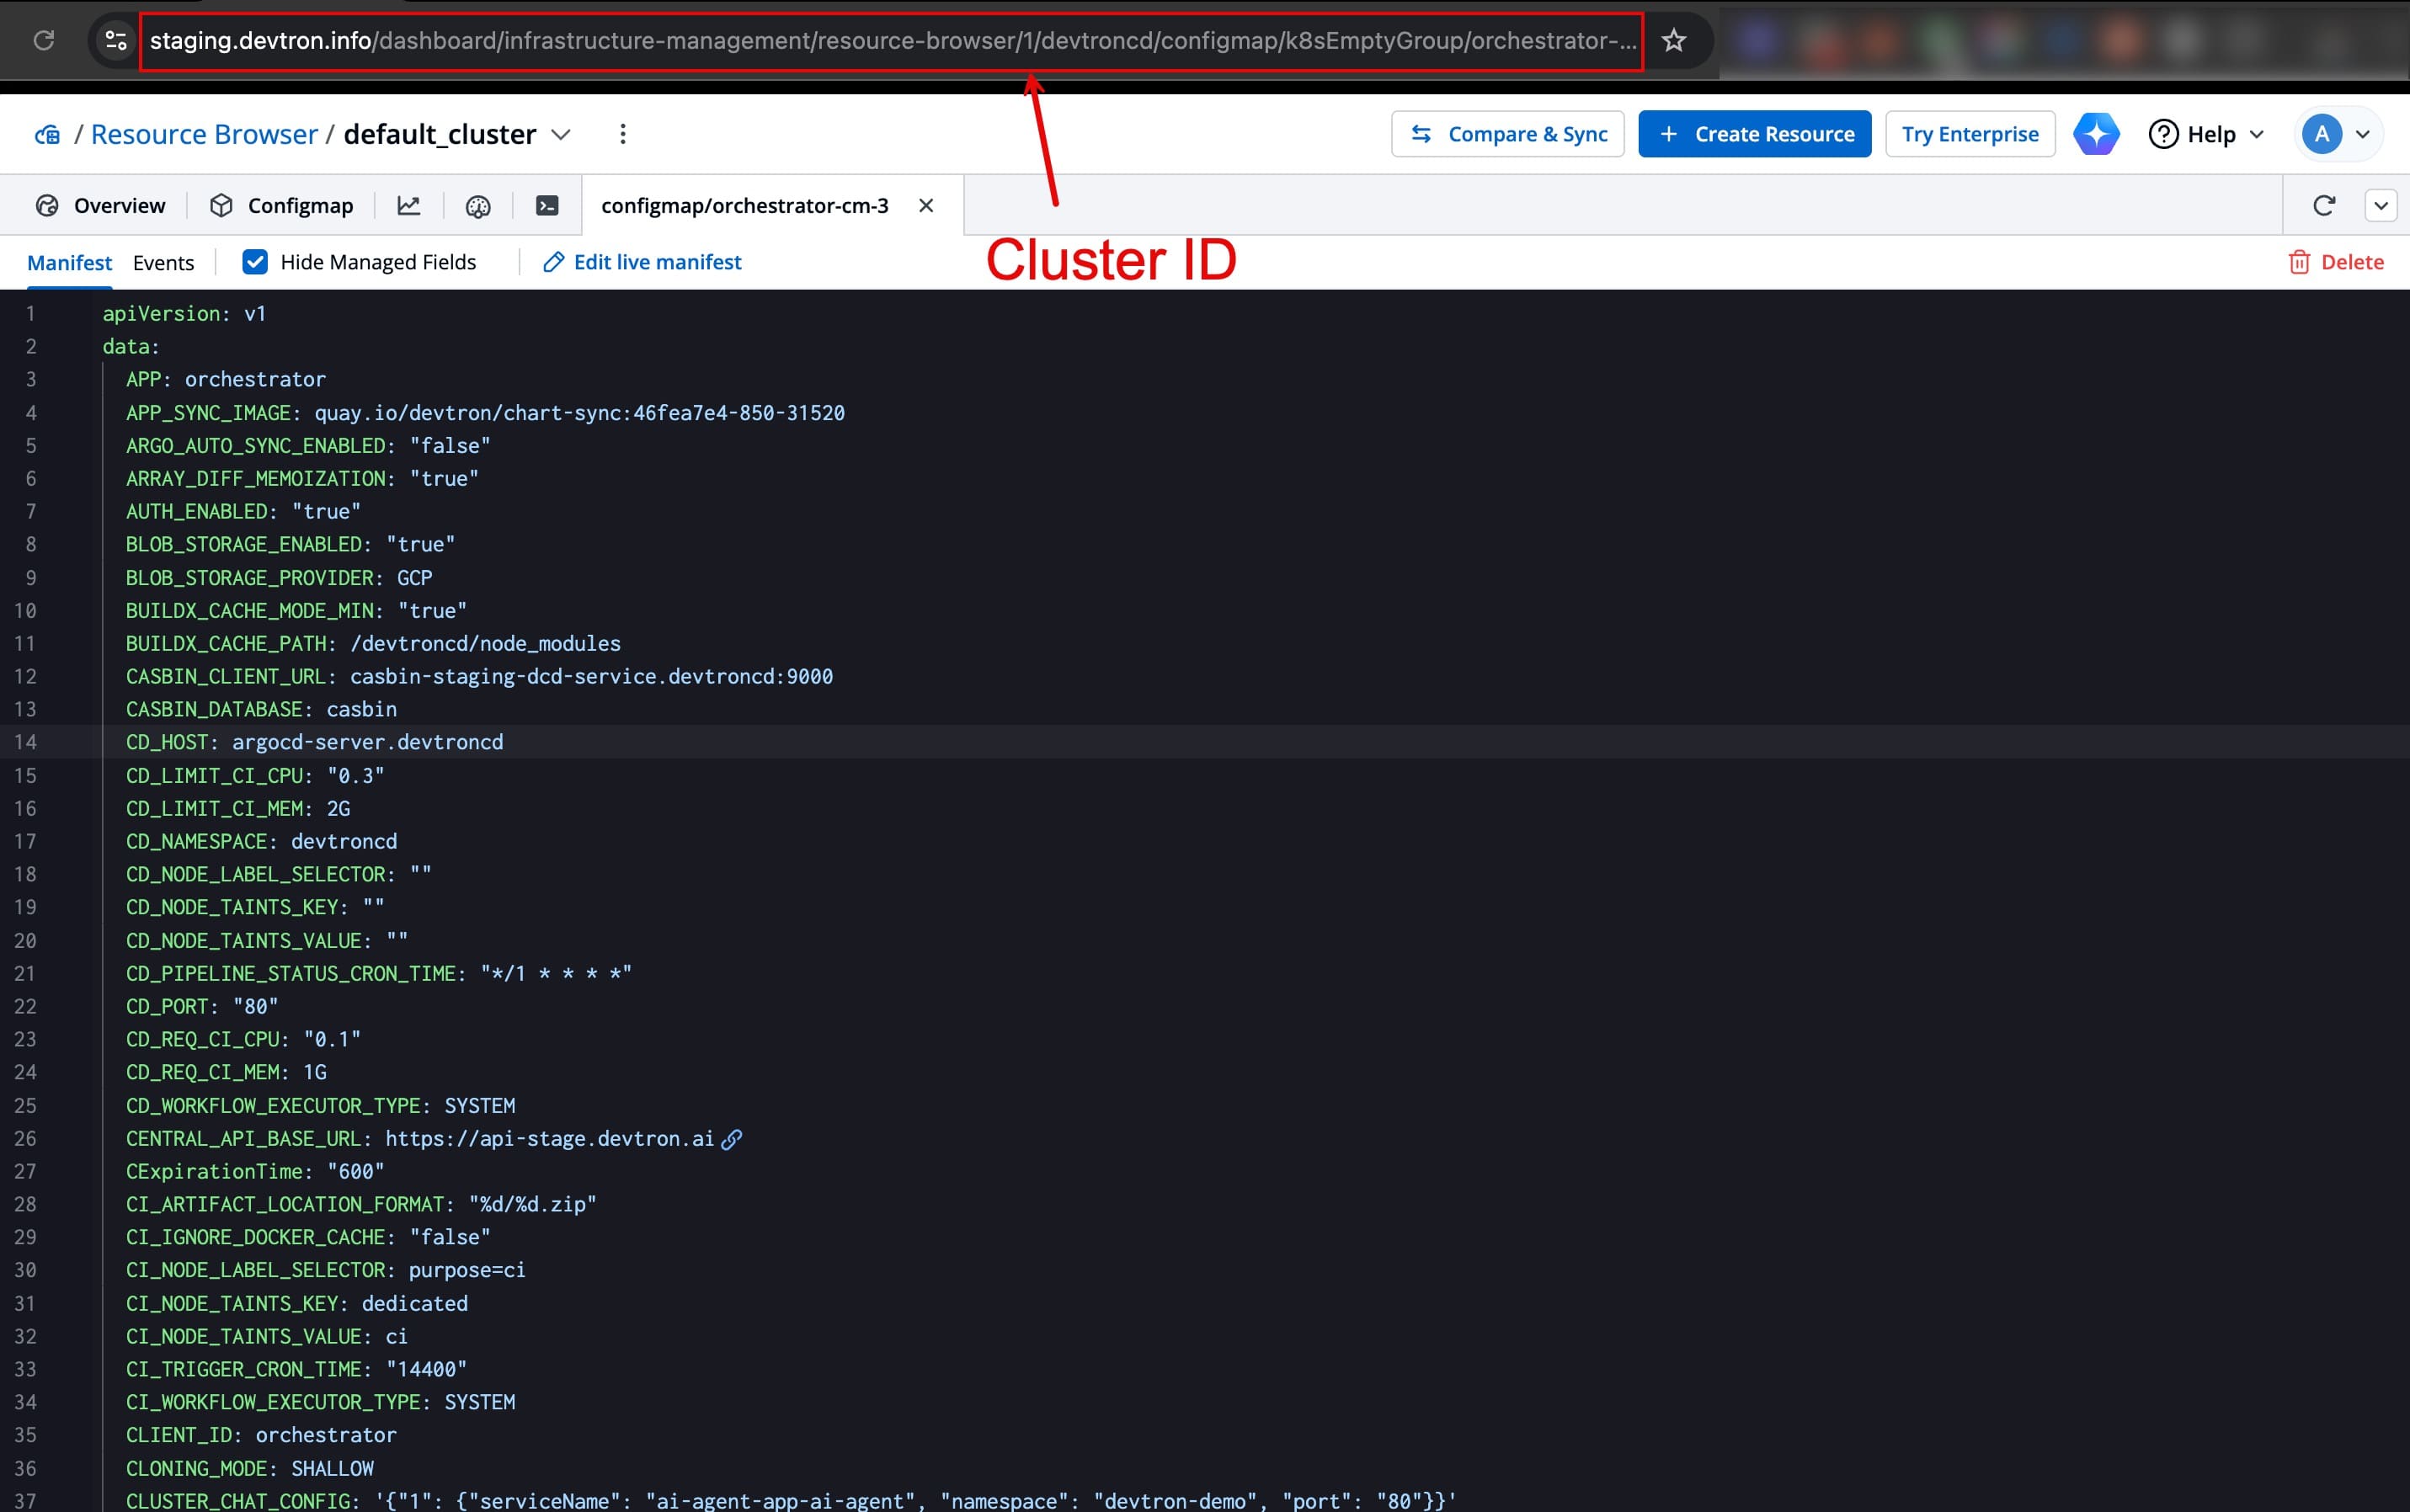
Before proceeding to the next step, ensure, that you have noted the values of PASS_KEY, serviceName, namespace, and port for each cluster where you have deployed the Scoop chart.
4. Update ConfigMap
Now that you’ve collected all the required values for: cluster ID, serviceName, namespace, port, and PASS_KEY for all the clusters where you have deployed the Scoop chart. The next step is to add them to the devtron-cm / orchestrator-cm ConfigMap
::: info Note The orchestrator-cm ConfigMap will be available only if you have Devtron managed setup. :::
-
In a new tab, go to Infrastructure Management → Resource Browser →
default-Cluster→ Config & Storage → ConfigMap -
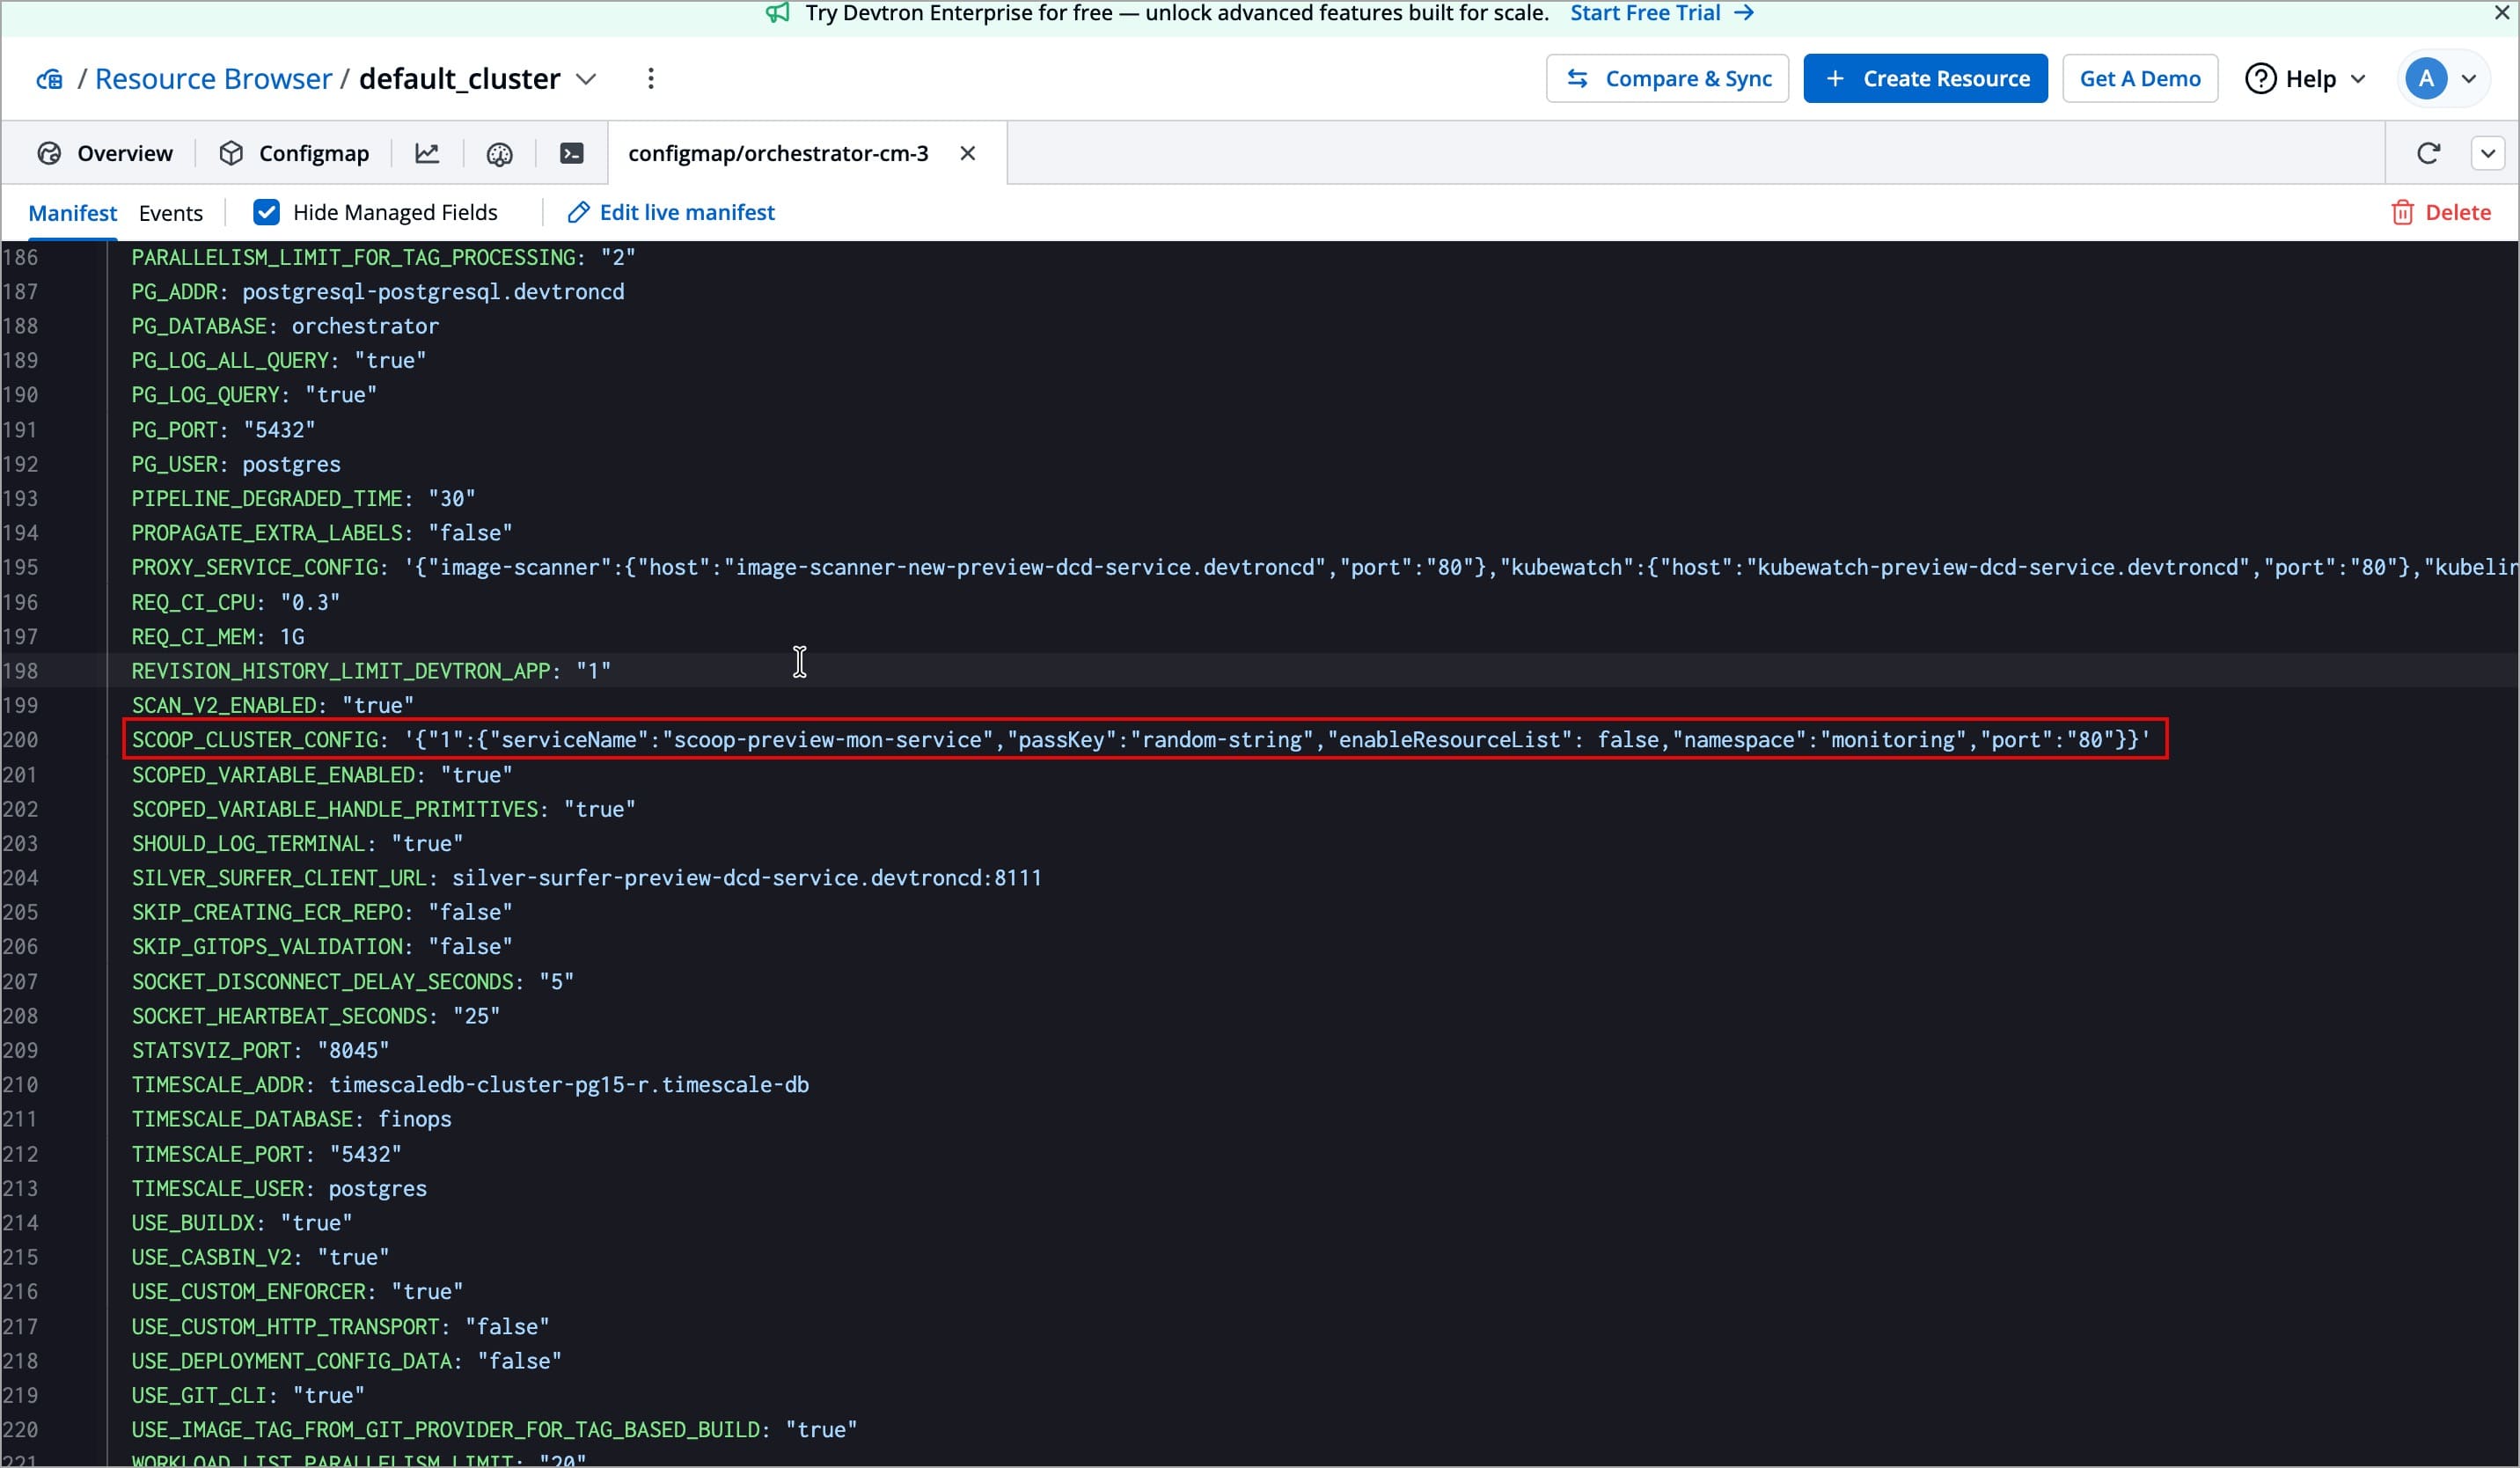
Edit the devtron-cm / orchestrator-cm ConfigMap by clicking Edit Live Manifest
Ensure the following entry is present in the ConfigMap (create one if it doesn’t exist). This flag defines the target clusters and their endpoints of the Scoop service deployed in those clusters:
SCOOP_CLUSTER_CONFIG: |-
    {
        "1": {           # Cluster_ID
            "serviceName": "scoop-service",
            "passKey": "random-string",
            "enableResourceList": false,
            "namespace": "devtroncd",
            "port": "80"
        },
        "2": {          # Cluster_ID
            "serviceName": "scoop-service",
            "passKey": "random-string",
            "enableResourceList": false,
            "namespace": "monitoring",
            "port": "80"
        }
    }
You can also mention the flag in a single-line format instead of the multi-line format shown above. In this case, the YAML indicator
|-is removed, and the entire JSON block is written on one line, as shown below:SCOOP_CLUSTER_CONFIG: '{"1":{"serviceName":"scoop-service","passKey":"random-string","enableResourceList":false,"namespace":"devtroncd","port":"80"},"2":{"serviceName":"scoop-service","passKey":"custom-passkey","enableResourceList":false,"namespace":"monitoring","port":"80"}}'Both formats work the same, the multi-line format is just easier to read and maintain.
Understanding the configuration
Field Description SCOOP_CLUSTER_CONFIG The key that stores connection details for all your clusters |- A YAML indicator that allows you to write the JSON block across multiple lines for better readability "1" and "2" The cluster IDs of your clusters (as seen in the Resource Browser URL). Each ID represents a unique cluster where Scoop is deployed serviceName The name of the Scoop service you noted from the Service tab while checking the endpoint passKey The value of authentication key ( PASS_KEY) that you defined (or left as default) during Scoop chart deploymentenableResourceList A flag that controls whether resource-level details are fetched. Keep it false unless you specifically need that data namespace The namespace of the Scoop service you noted from the Service tab while checking the endpoint port The port number of the Scoop service you noted from the Service tab while checking the endpoint In this example:
- Cluster 1 (with cluster ID
1) usesscoop-service(service name), running in thedevtroncdnamespace on port80. - Cluster 2 (with cluster ID
2) usesscoop-service(service name), running in themonitoringnamespace on port80.
- Cluster 1 (with cluster ID
-
After editing, click Review and save changes to review the changes you have made.
-
Click Apply Changes.
5. Restart Deployment
-
Go to Infrastructure Management → Resource Browser →
default cluster→ Workloads → Deployment. -
Click the checkbox next to the
devtronDeployment workload and restart it using the⟳button.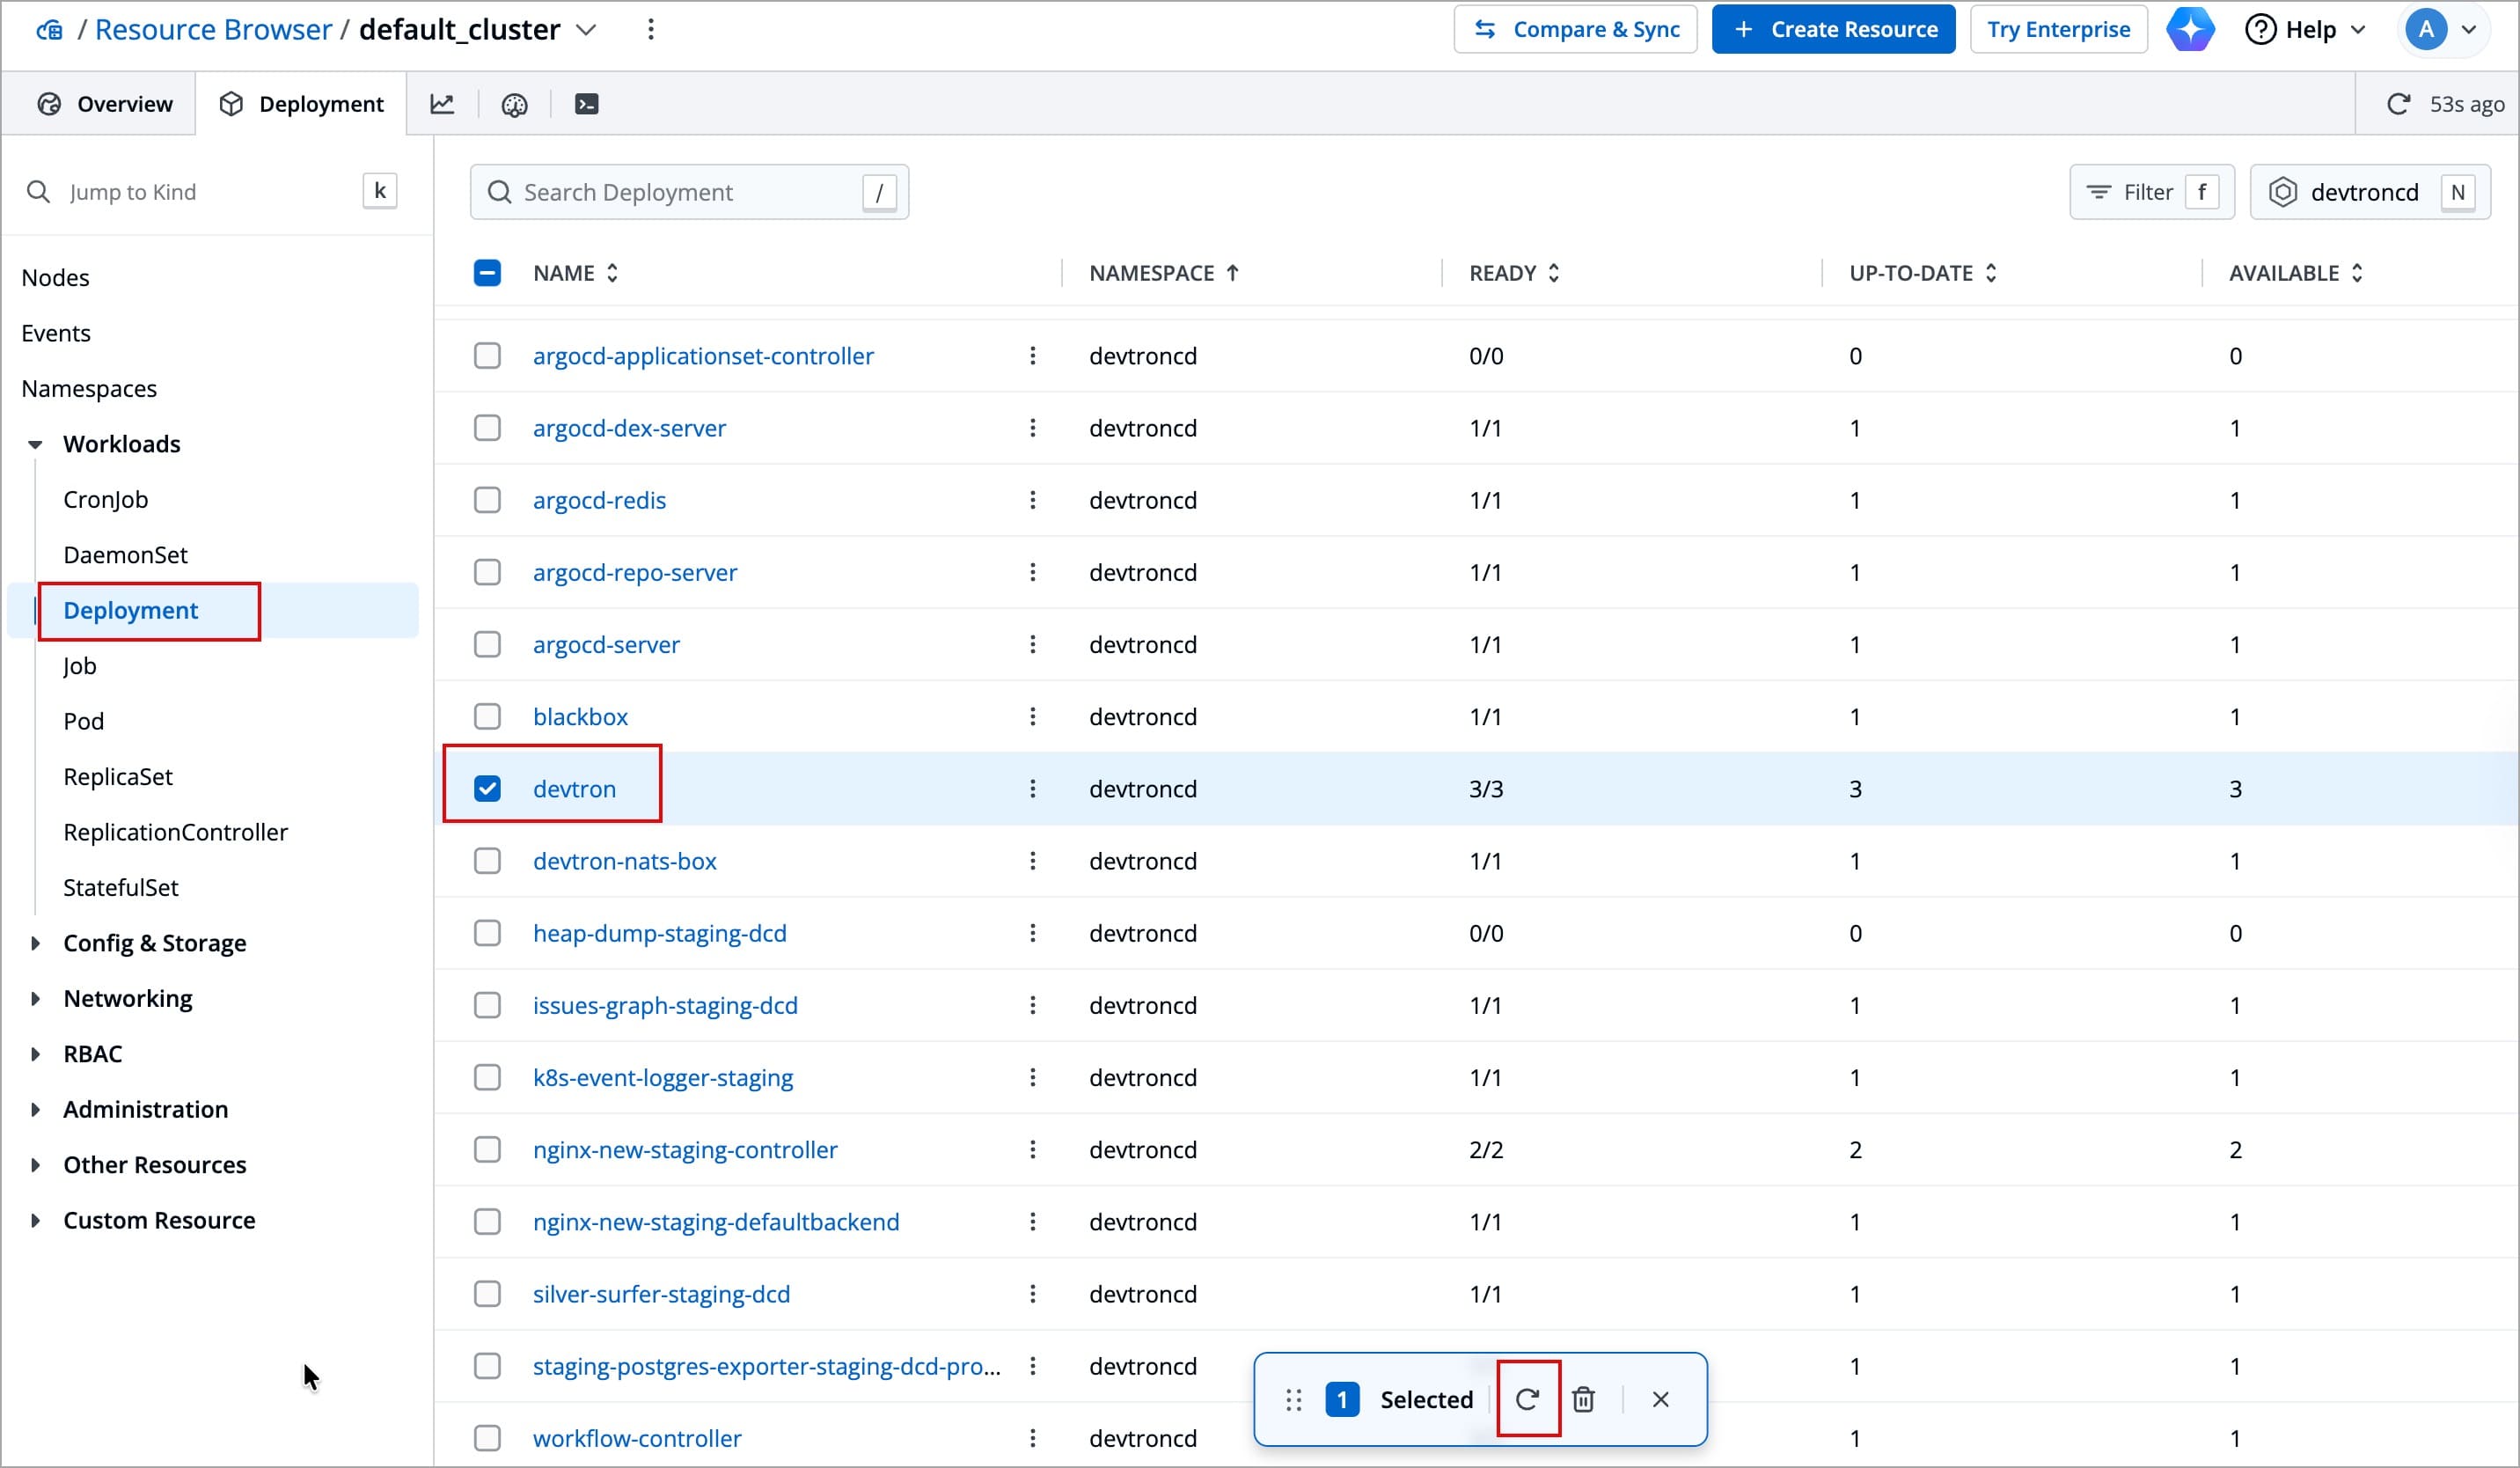
6. Perform Hard Refresh
Perform a hard refresh of the browser to clear the cache:
- Mac: Hold down
CmdandShiftand then pressR - Windows/Linux: Hold down
Ctrland then pressF5
Adding More Clusters to Scoop Configuration
If you want to enable Pod Last Restart Snapshot for more or new clusters in the future, you don’t need to recreate or remove the existing configuration. Instead, you can follow the same process:
- Deploy the Scoop chart in each of the new clusters.
- Collect the respective cluster ID, serviceName, namespace, port, and PASS_KEY values.
- Edit the existing devtron-cm ConfigMap and add the new cluster configurations under the same
SCOOP_CLUSTER_CONFIGflag.
You should not delete or replace the existing SCOOP_CLUSTER_CONFIG flag, you just need to append the new cluster configurations.
For example, if your ConfigMap currently contains configurations for two clusters (1 and 2) and you want to add two more (3 and 4), your updated configuration should include all four clusters:
Multi-line Format
SCOOP_CLUSTER_CONFIG: |-
    {
        "1": {
            "serviceName": "scoop-service",
            "passKey": "random-string",
            "enableResourceList": false,
            "namespace": "devtroncd",
            "port": "80"
        },
        "2": {
            "serviceName": "scoop-service",
            "passKey": "random-string",
            "enableResourceList": false,
            "namespace": "monitoring",
            "port": "80"
        },
        "3": {
            "serviceName": "scoop-service",
            "passKey": "random-string",
            "enableResourceList": false,
            "namespace": "staging",
            "port": "80"
        },
        "4": {
            "serviceName": "scoop-service",
            "passKey": "random-string4",
            "enableResourceList": false,
            "namespace": "prod",
            "port": "80"
        }
    }
Single-line Format
SCOOP_CLUSTER_CONFIG: '{"1":{"serviceName":"scoop-service","passKey":"random-string","enableResourceList":false,"namespace":"devtroncd","port":"80"},"2":{"serviceName":"scoop-service","passKey":"random-string","enableResourceList":false,"namespace":"monitoring","port":"80"},"3":{"serviceName":"scoop-service","passKey":"unique-key-3","enableResourceList":false,"namespace":"staging","port":"80"},"4":{"serviceName":"scoop-service","passKey":"unique-key-4","enableResourceList":false,"namespace":"prod","port":"80"}}'