Manage Schema
Introduction 
Ideally, all resources such as microservices, clusters, jobs, and pods should include detailed information, so users know what each resource does, how to use it, and its technical specifications.
To achieve this, Devtron provides a feature called Catalog, which lets a super-admin define a custom JSON schema that renders a form for resource owners to fill. After defining a schema, it generates a form that users can fill out, and the entered data appears in a clear GUI format.
Currently, Devtron supports catalog for the following resource types (a.k.a. resource kind):
There are two parts involved in the creation of a desirable resource catalog:
Managing a Schema
Only a super-admin can create/edit a schema.
The Catalog schema you define applies to all resources of that type. For example, managing the schema for one Devtron application updates the catalog for every Devtron app in your system.
- Go to the Overview tab of your resource (for example, a Devtron App, or Helm App, or Job, or Cluster) and locate the Catalog section.
Here, we’re defining schema for a Devtron application as an example. You can define schemas for all other supported resource types (Helm App, or Job, or Cluster) in exactly the same way.
-
Click Manage Schema. A new page will open.

Figure 2: Clicking 'Manage Schema' -
Enter a Name and Description (optional). The Kind field is automatically filled with the resource type (such as Devtron application, Helm application, cluster, or job) based on where you opened Manage Schema.
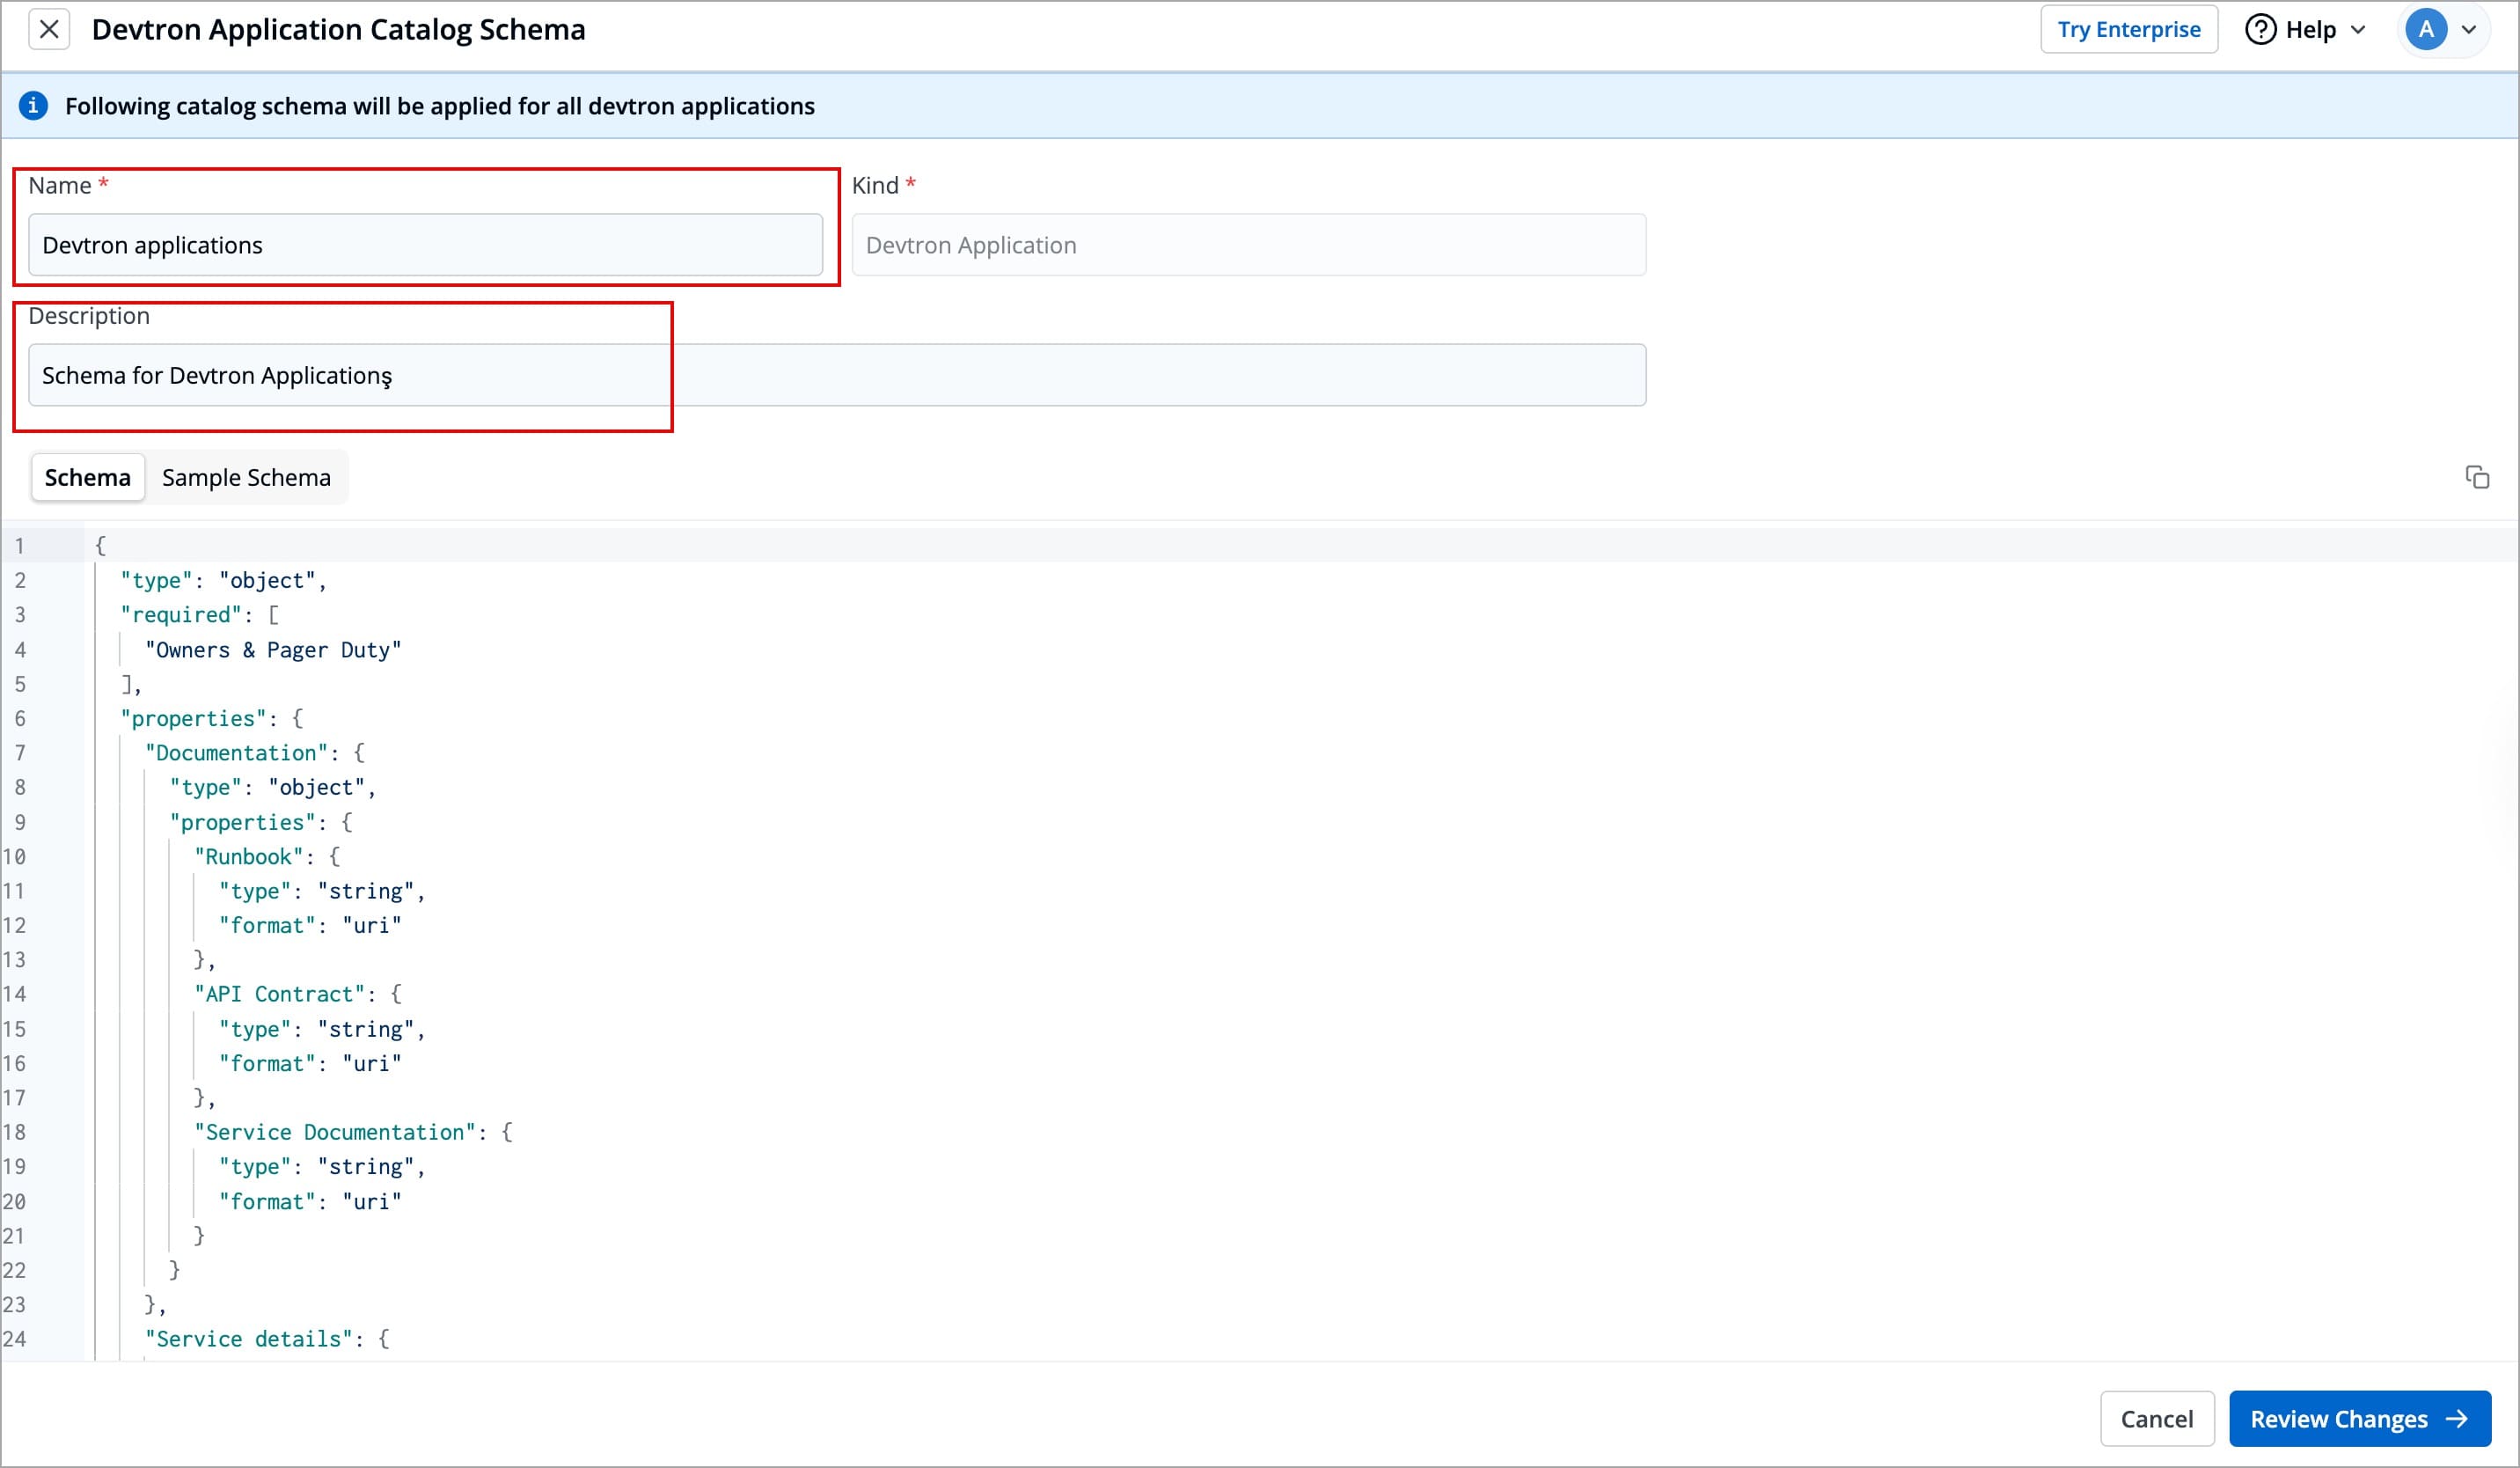
Figure 3: Entering Details -
There is a sample schema available for you to create your own customized schema. Using this schema, you can decide the input types that render within the form, for e.g., a dropdown of enum values, a boolean toggle button, text field, label, and many more.
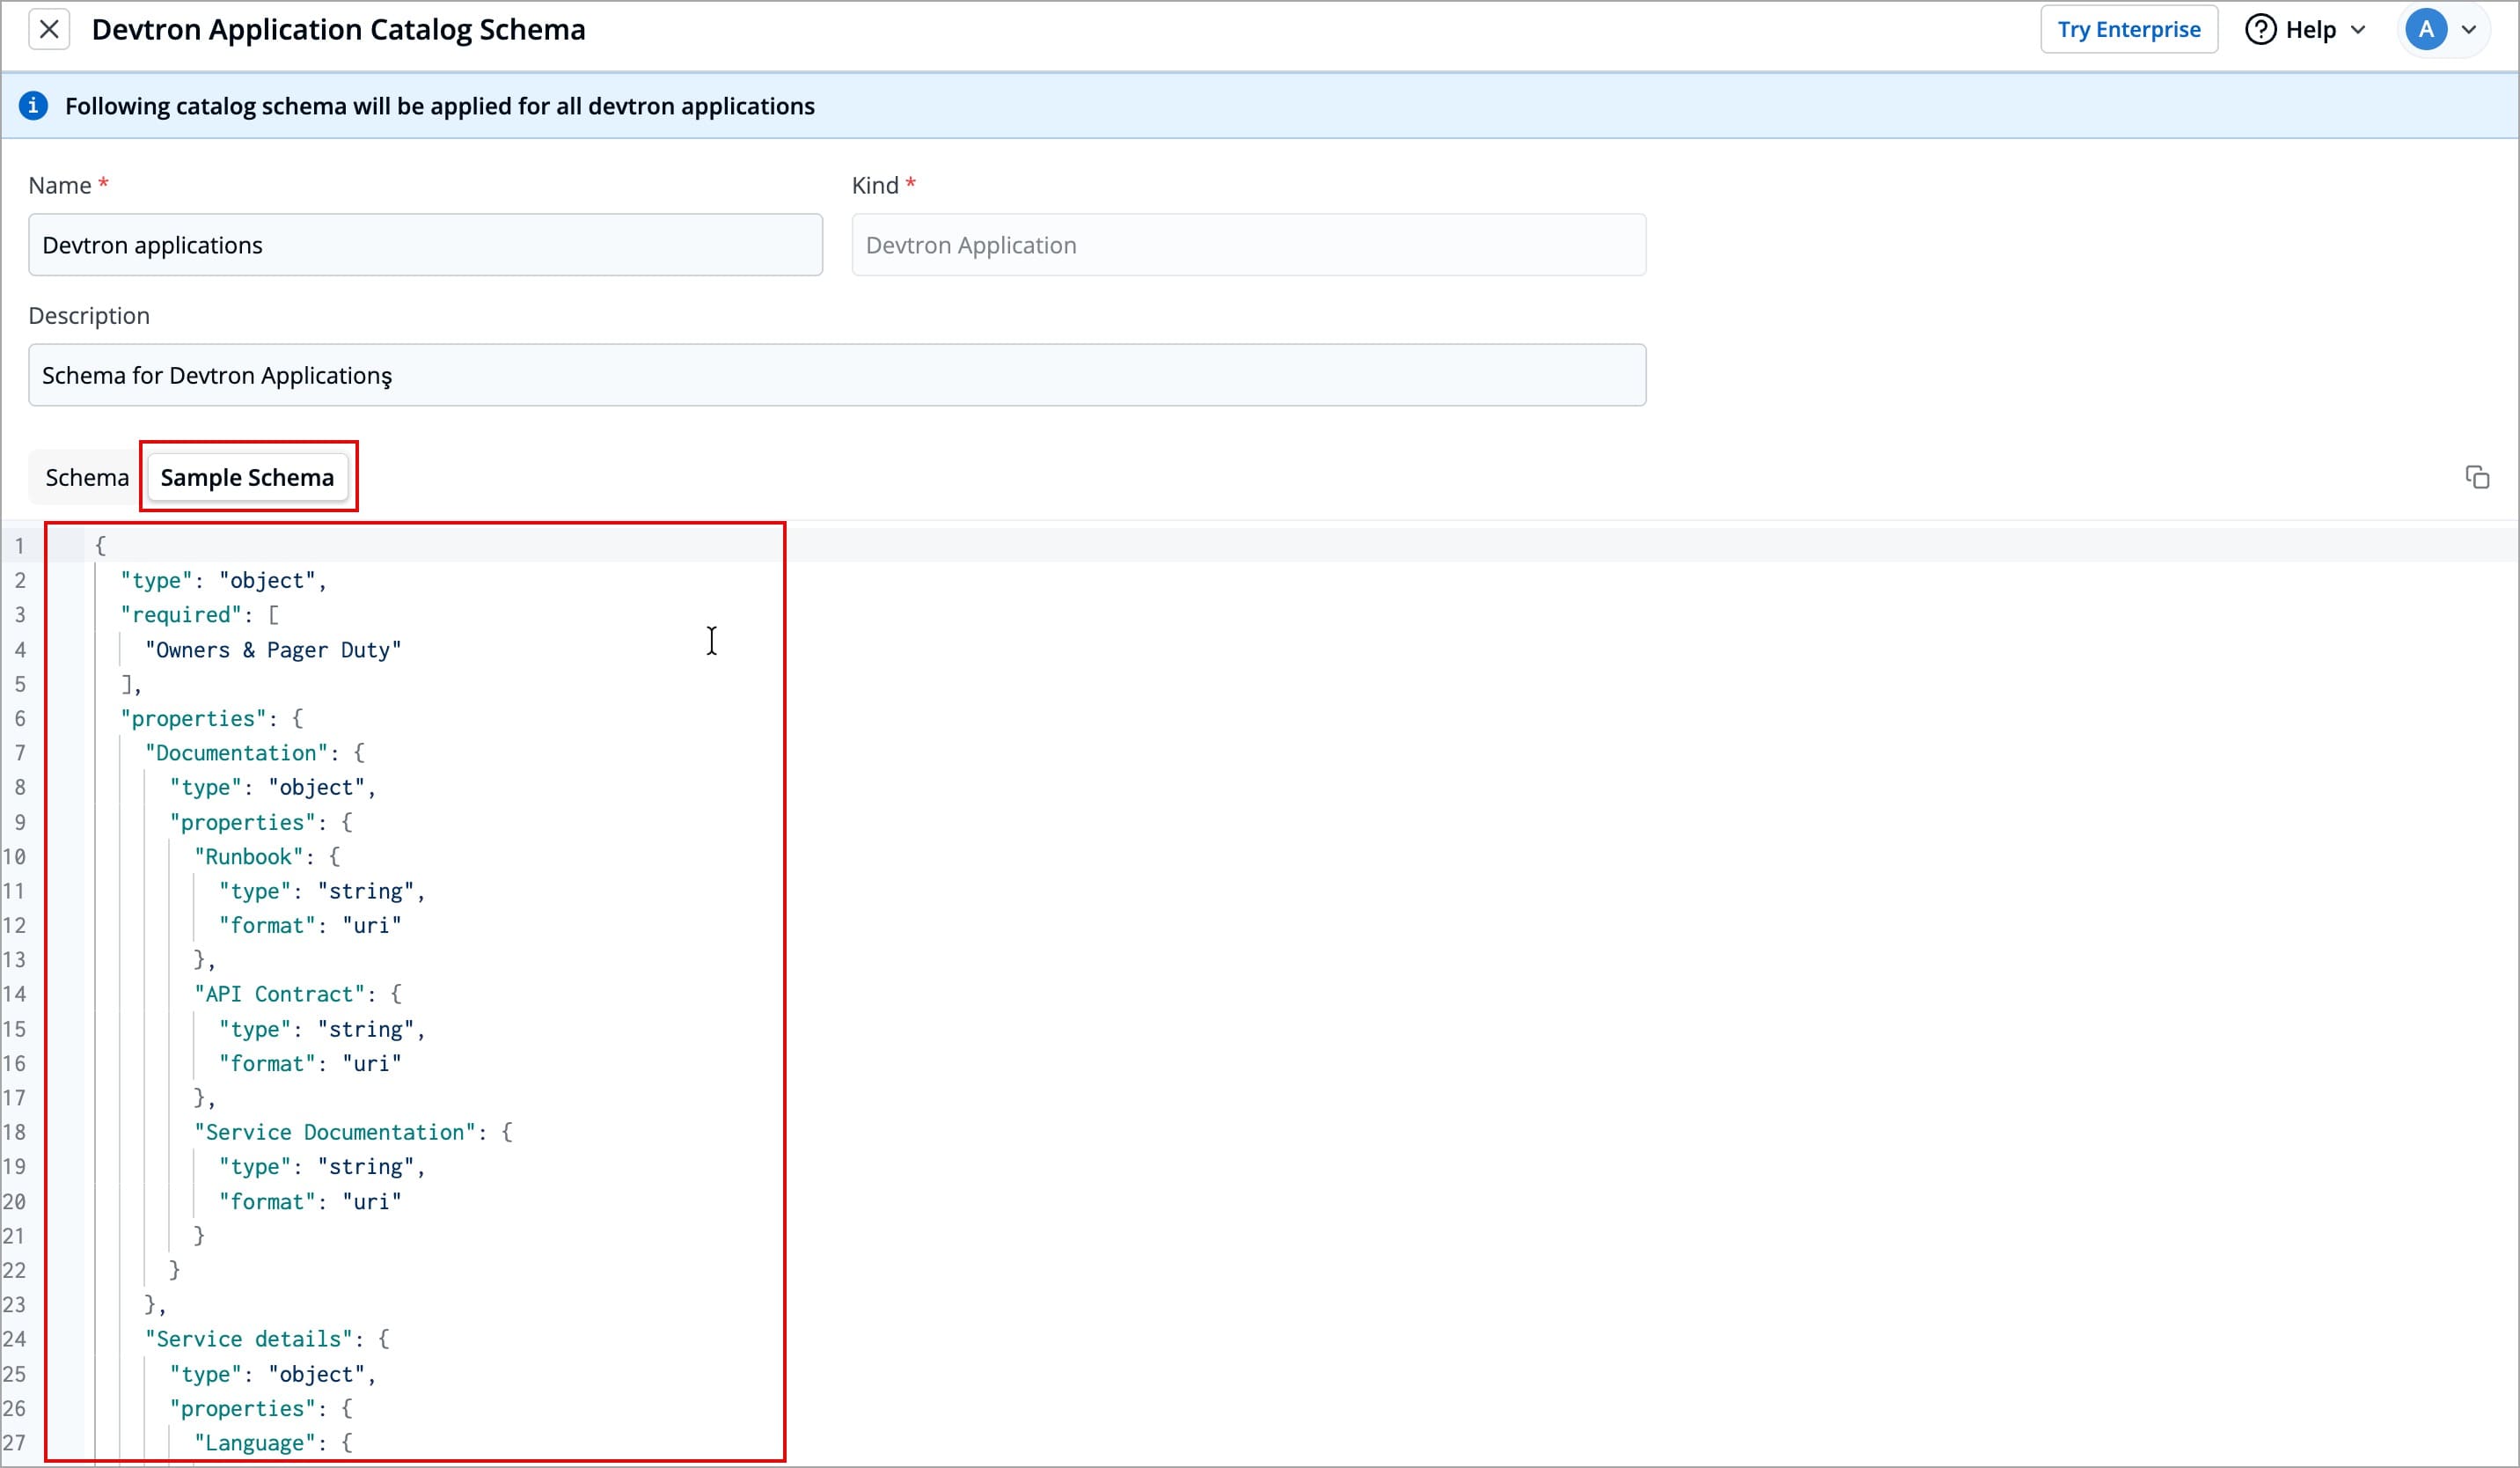
Figure 4a: Using Sample Schema 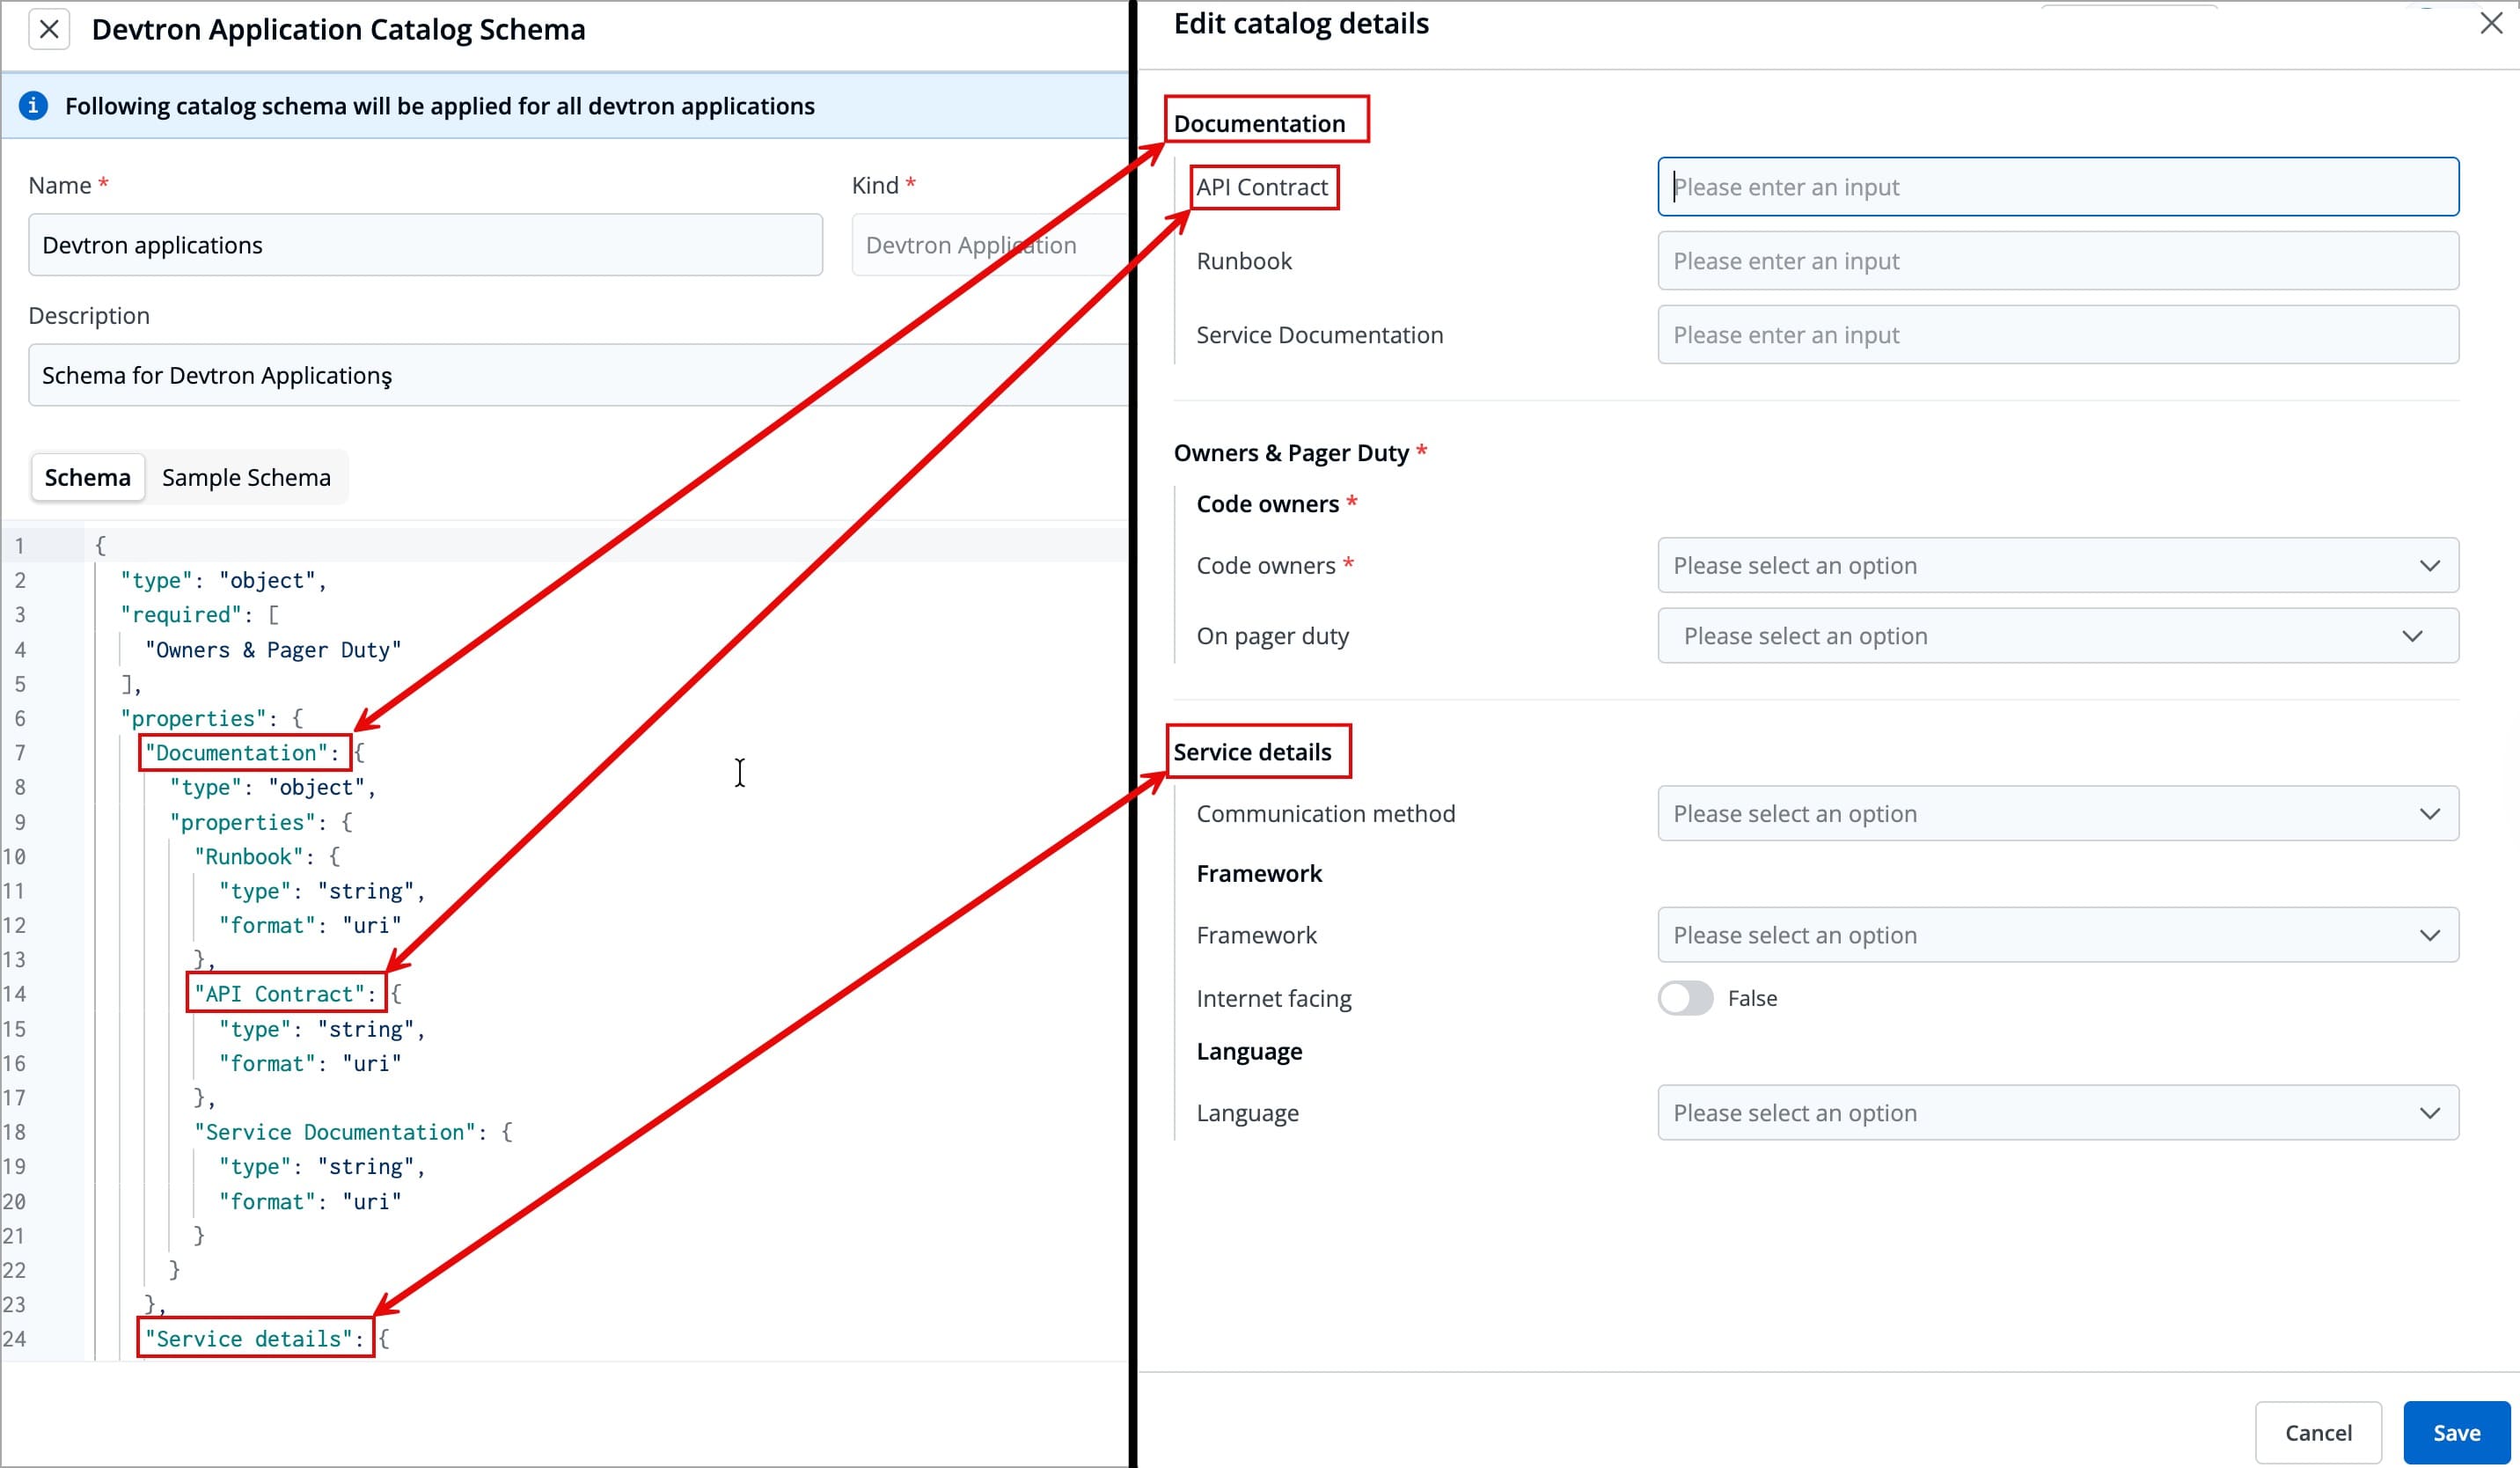
Figure 4b: Expected Future Output -
After defining your schema, click Review Changes.
-
You get a side-by-side comparison (diff) highlighting the changes you made.
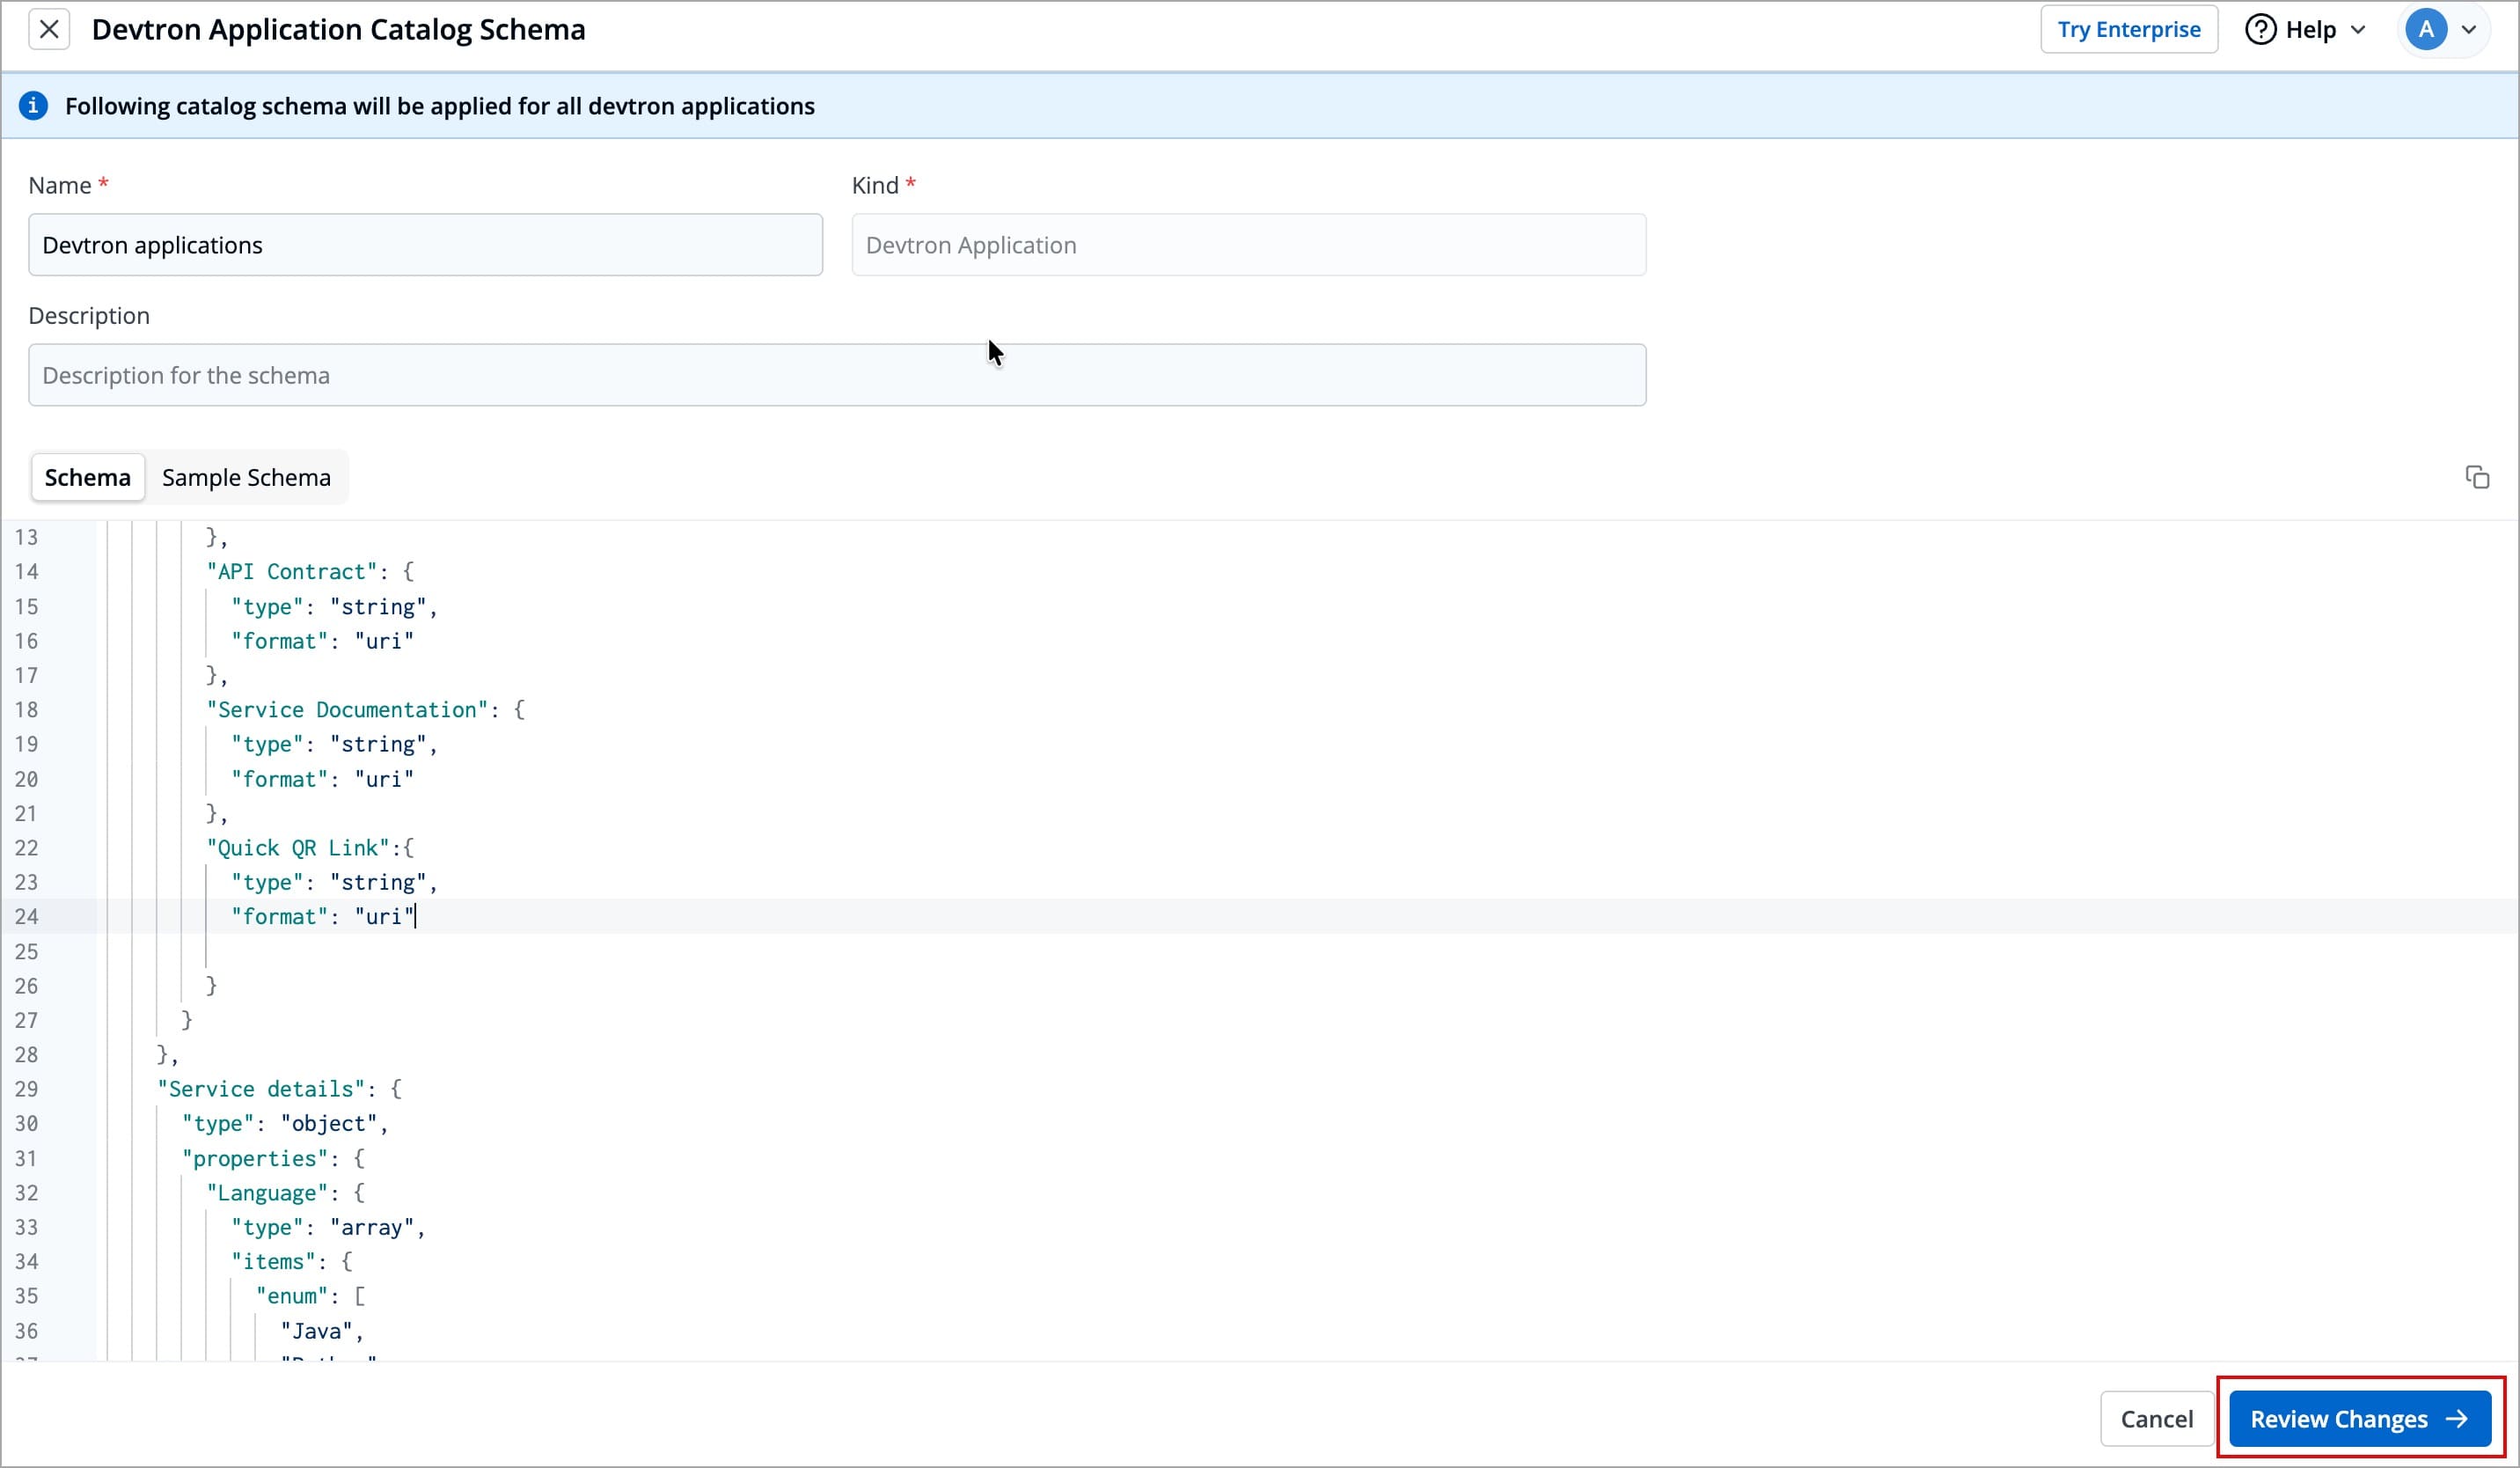
Figure 5a: Clicking 'Review Changes' 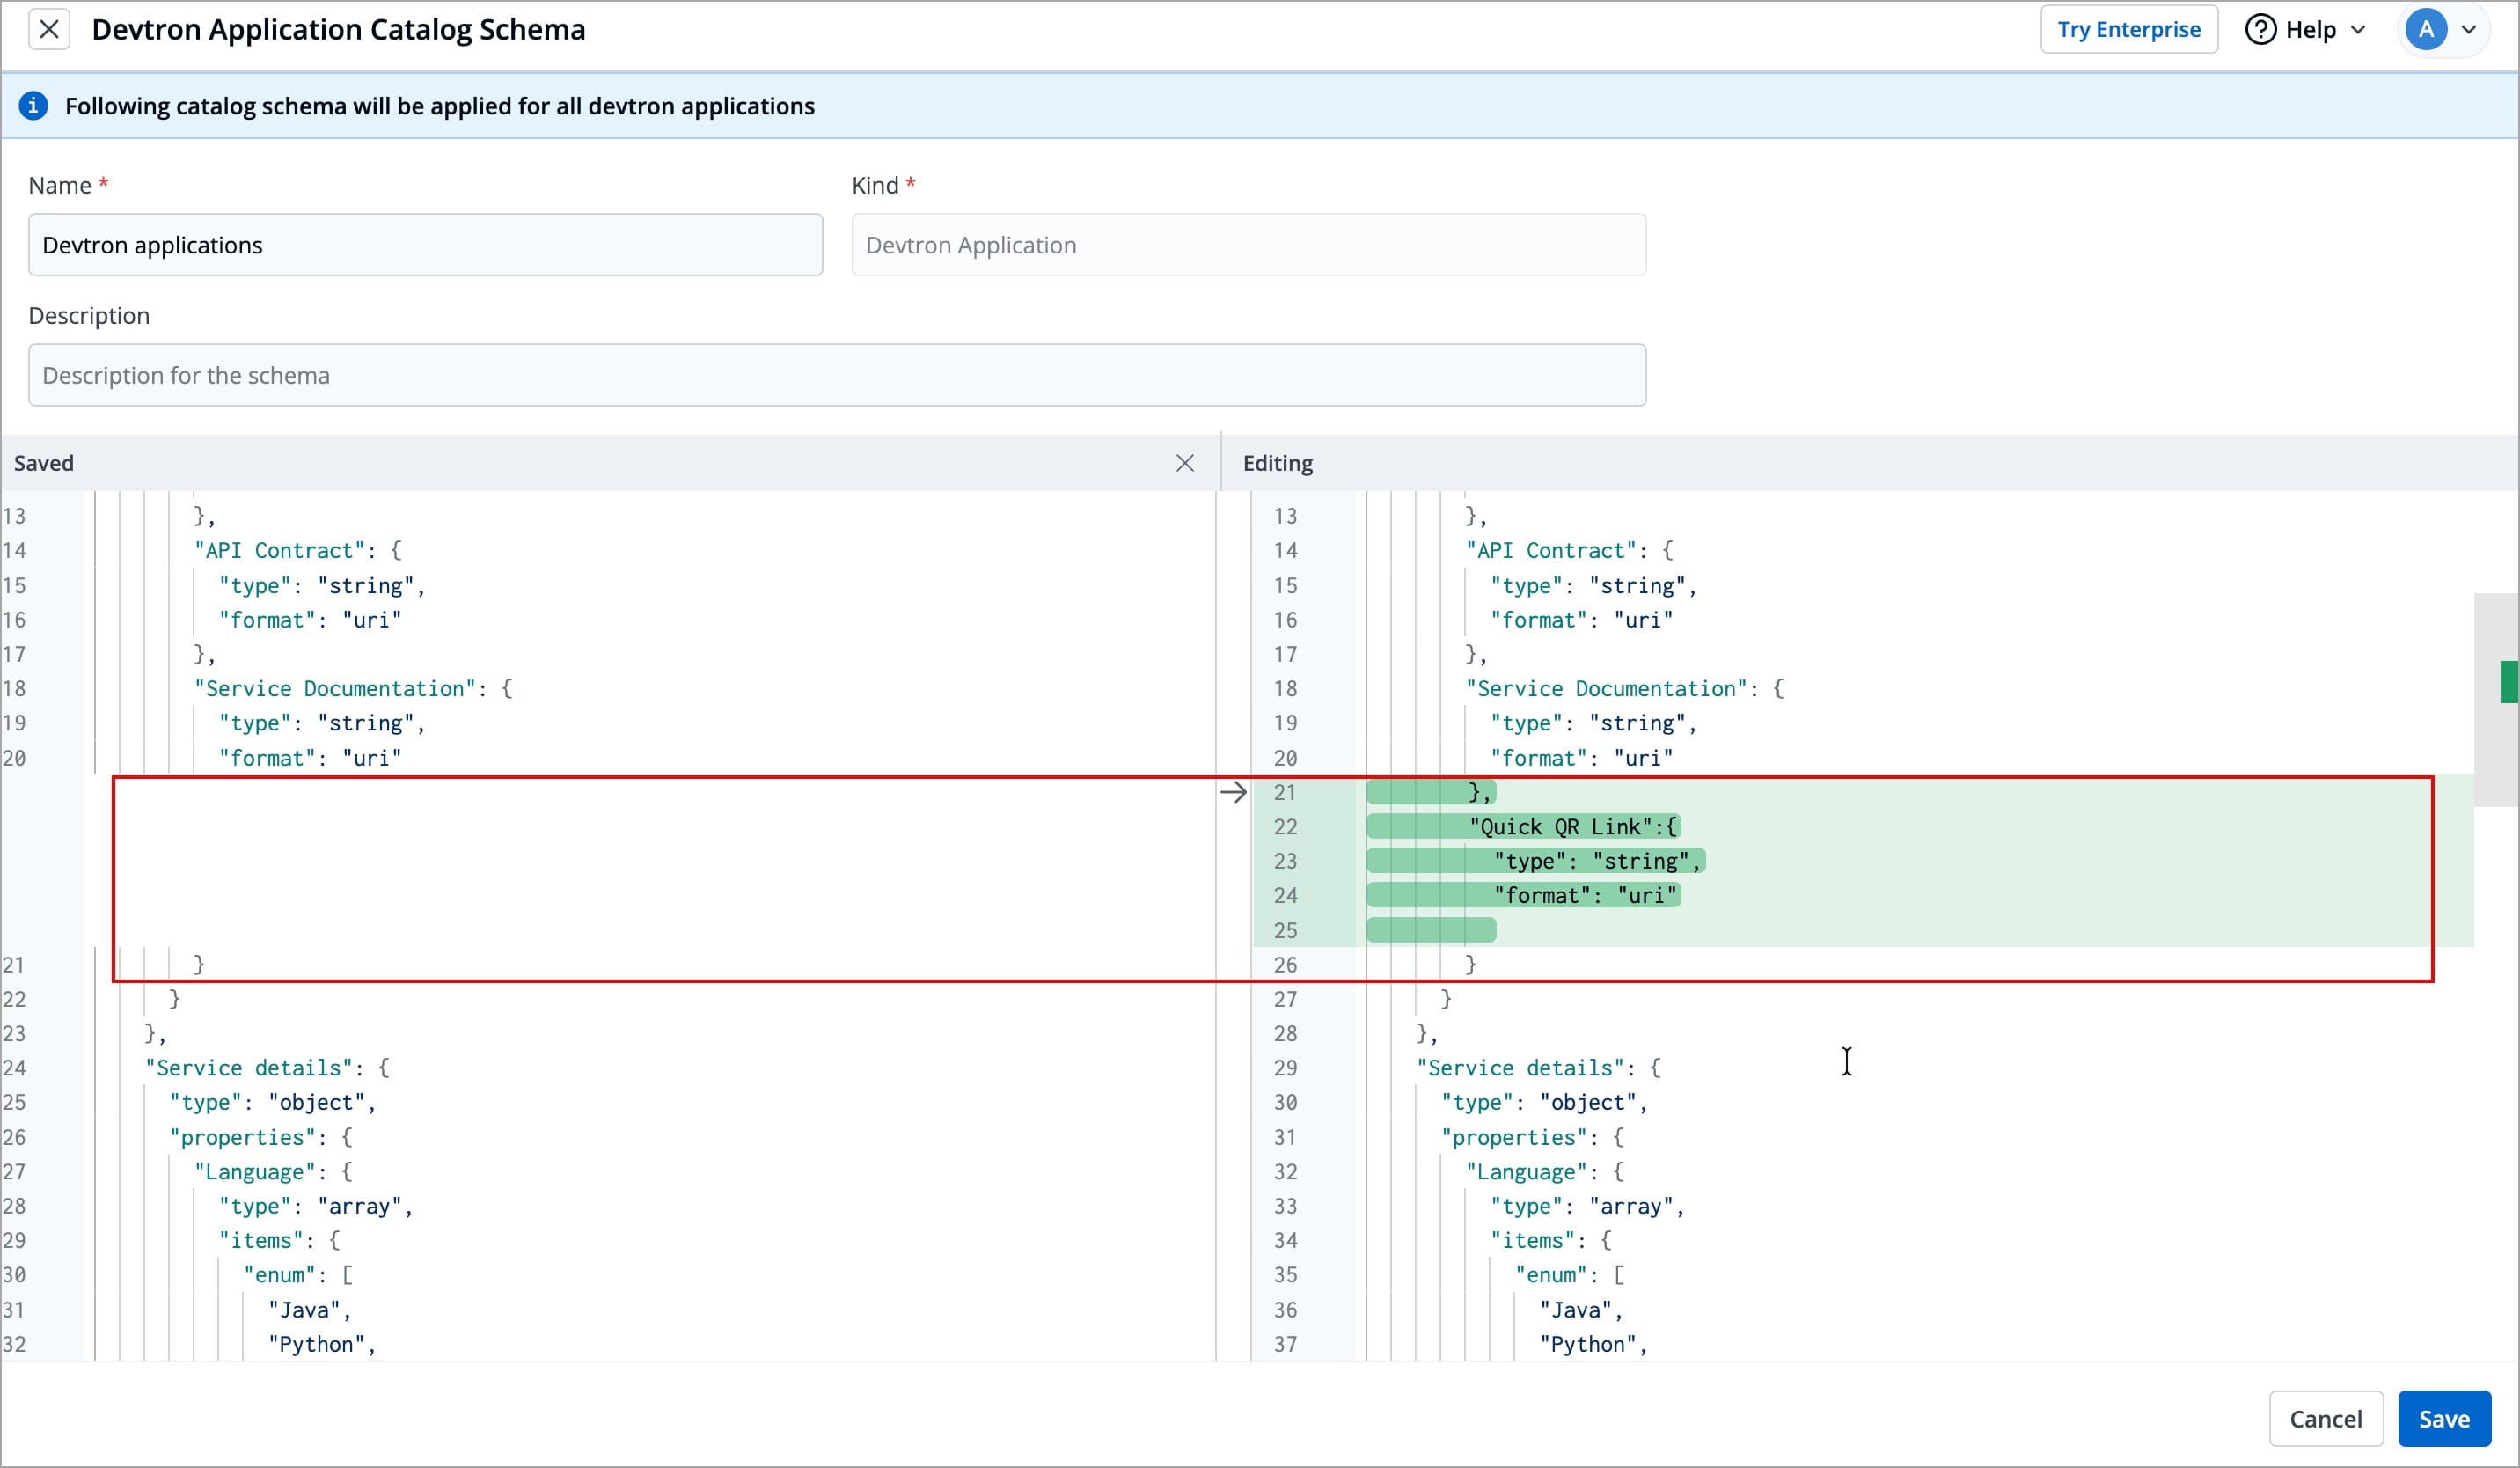
Figure 5b: Change Diff -
Click Save.
Note: If you edit a field (of an existing schema) for which users have already filled the data, that data will be erased. You will receive a prompt (as shown below) to confirm whether you want to proceed with the changes.
![]()
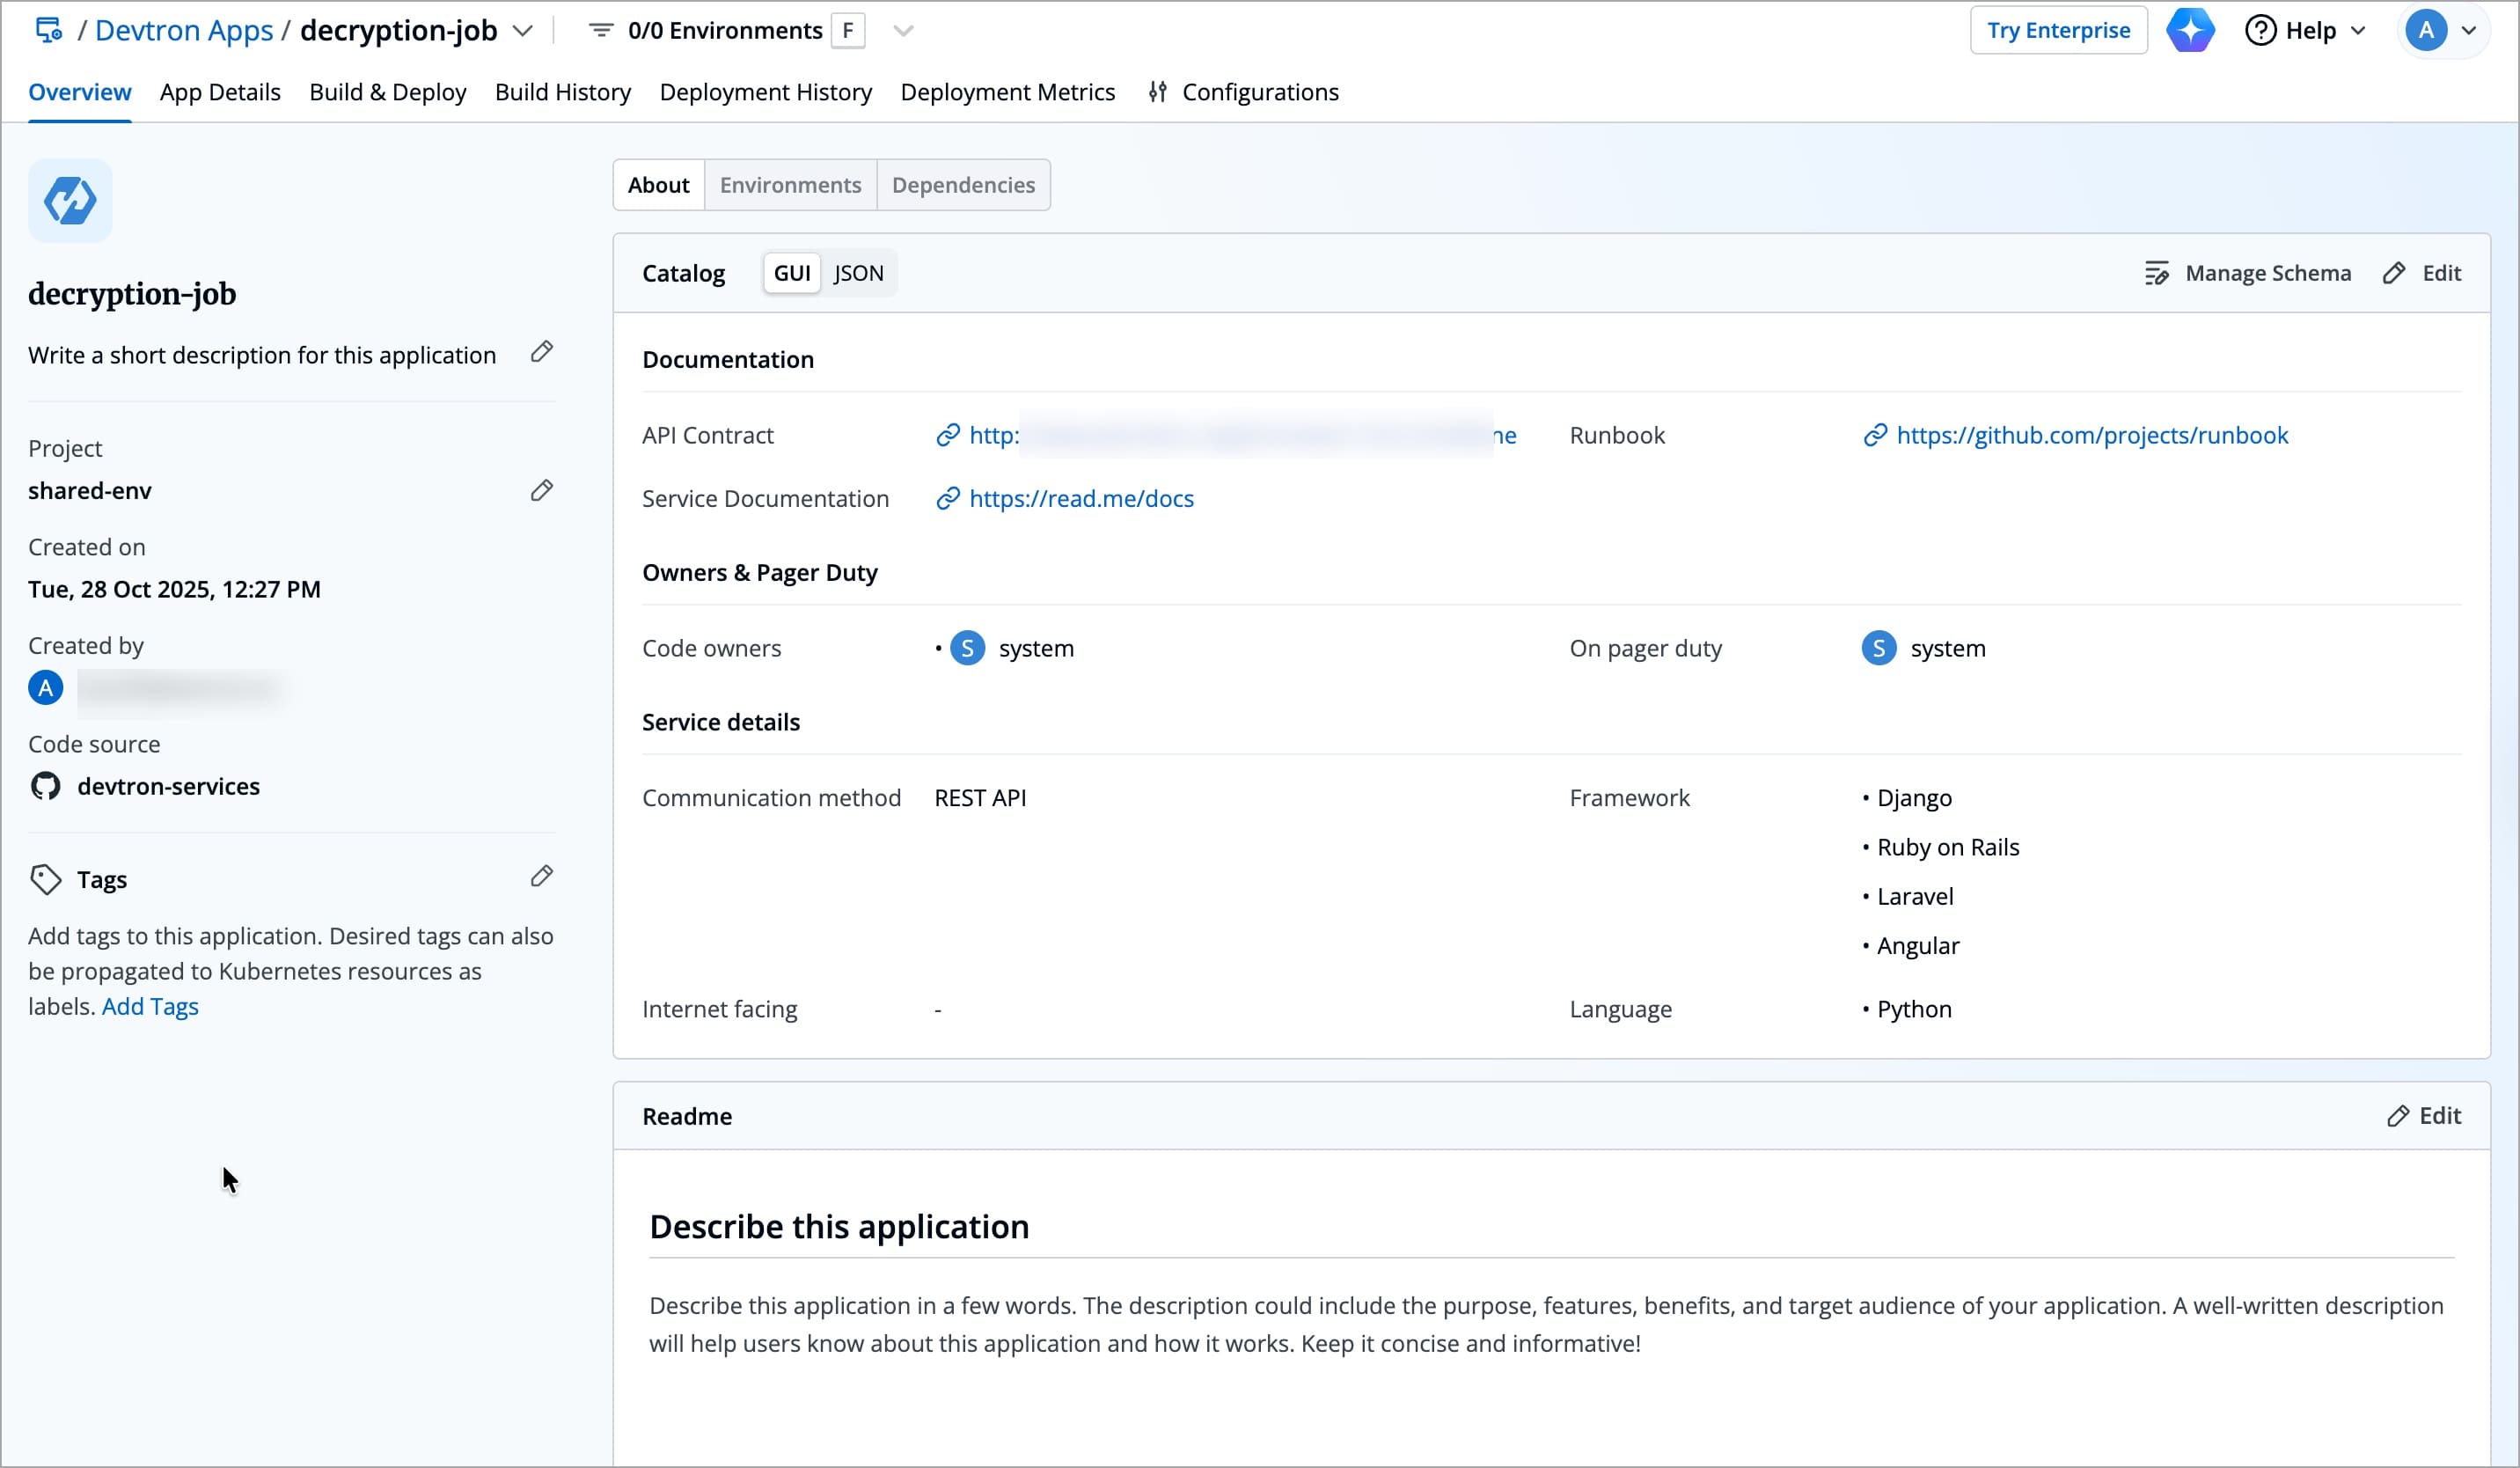
Filling the Schema-Generated Form
Once a schema is defined, the form generated from it appears in the Overview section of that resource.
-
Since we defined a schema for Devtron applications in the above example, go to the Overview tab of your application (any Devtron application). Click the Edit button within the
Aboutsection.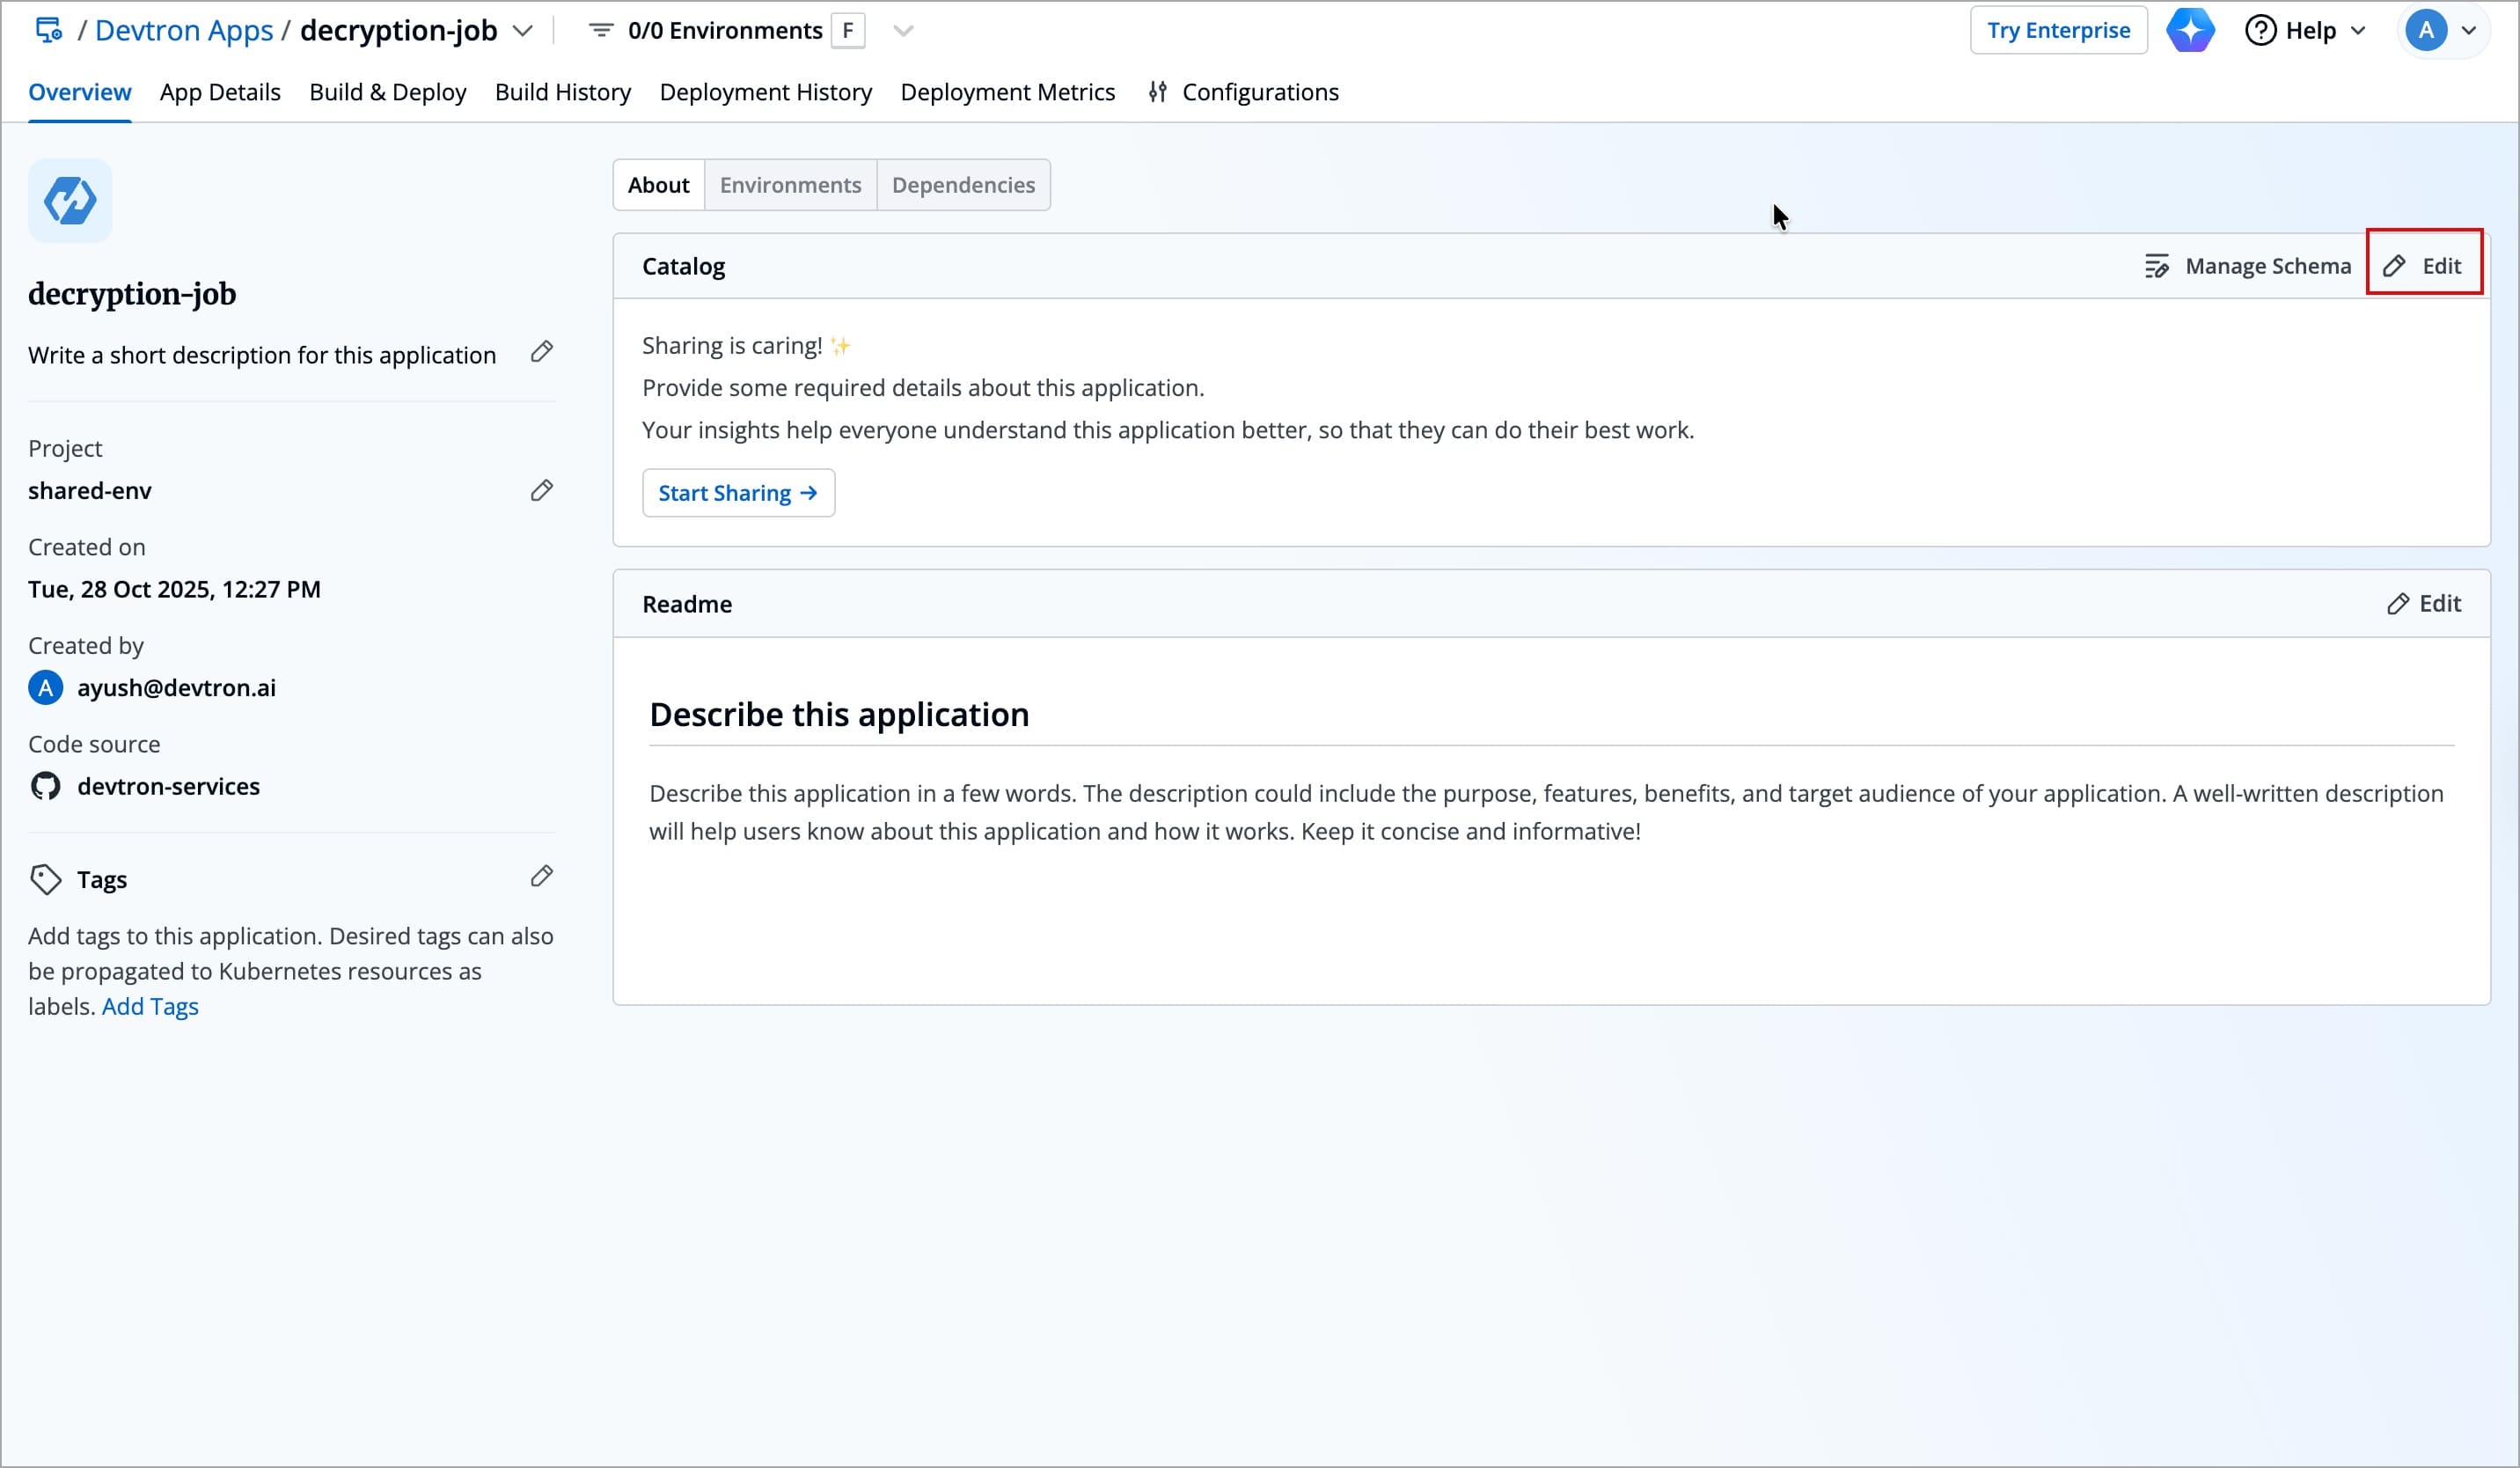
Figure 7: Clicking 'Edit' -
The schema created for Devtron applications would render into an empty form as shown below.
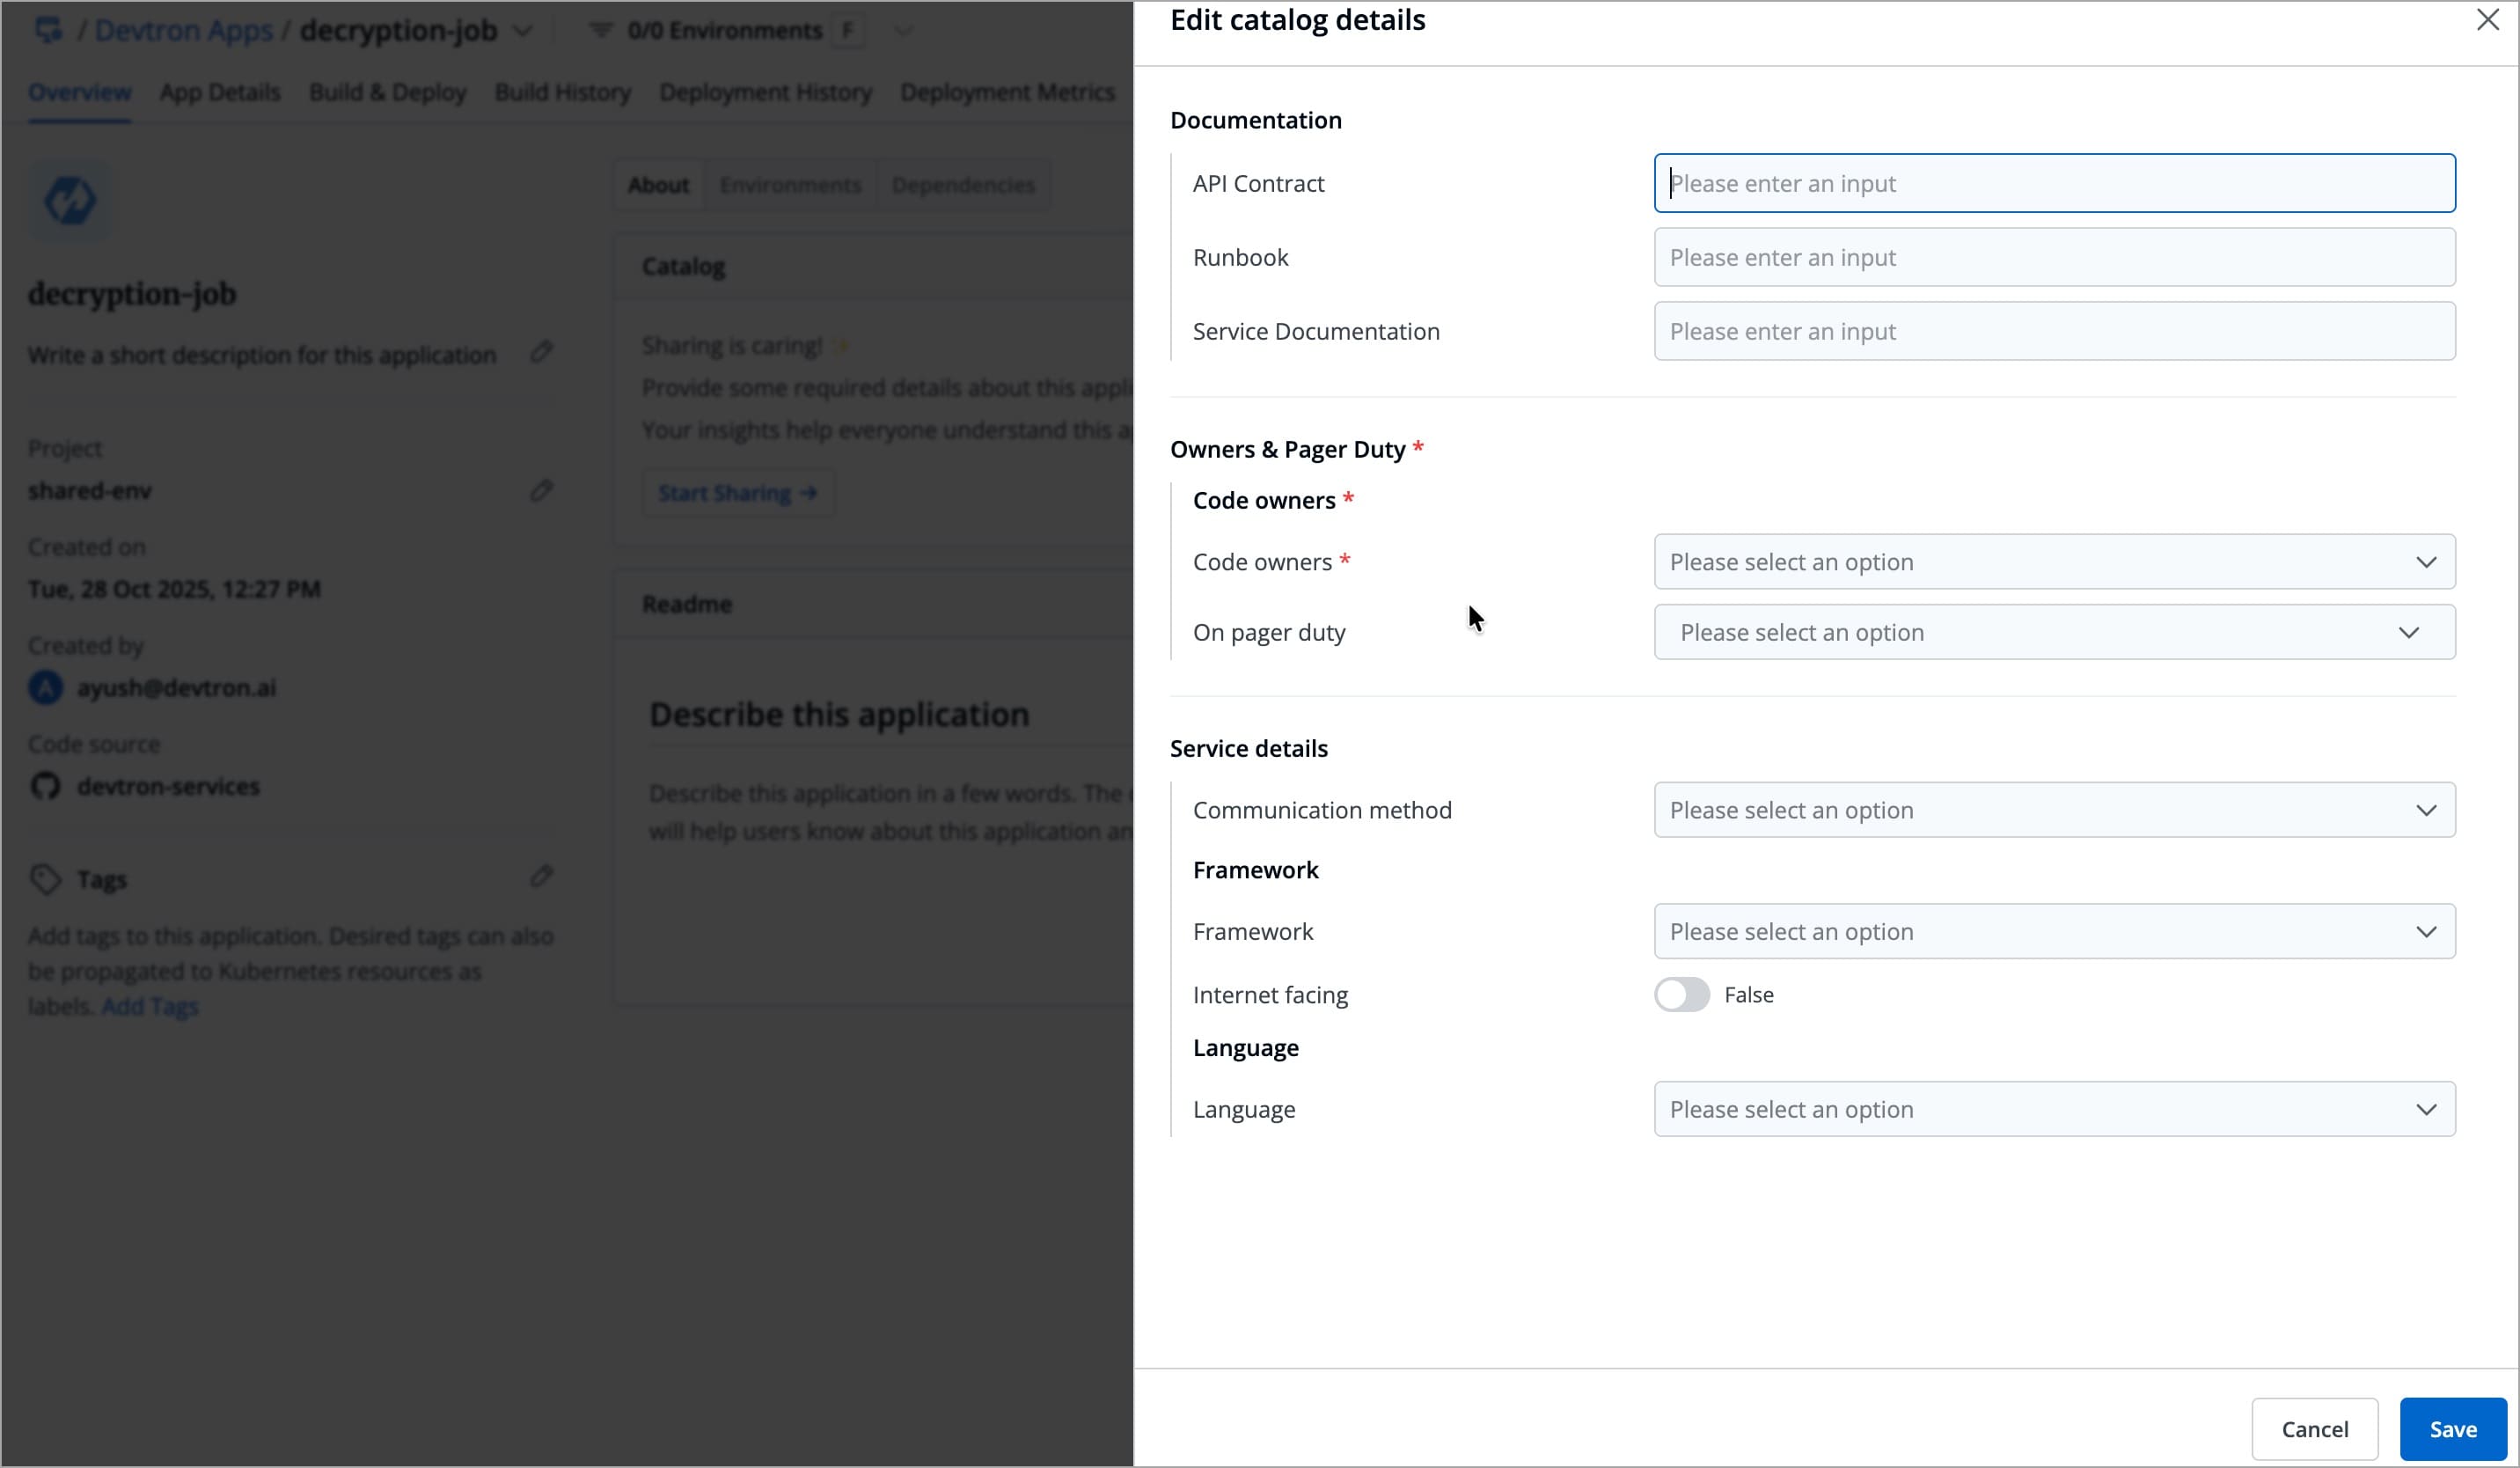
Figure 8: Rendered Empty Form -
Fill as many details as an application owner to the best of your knowledge and click Save.
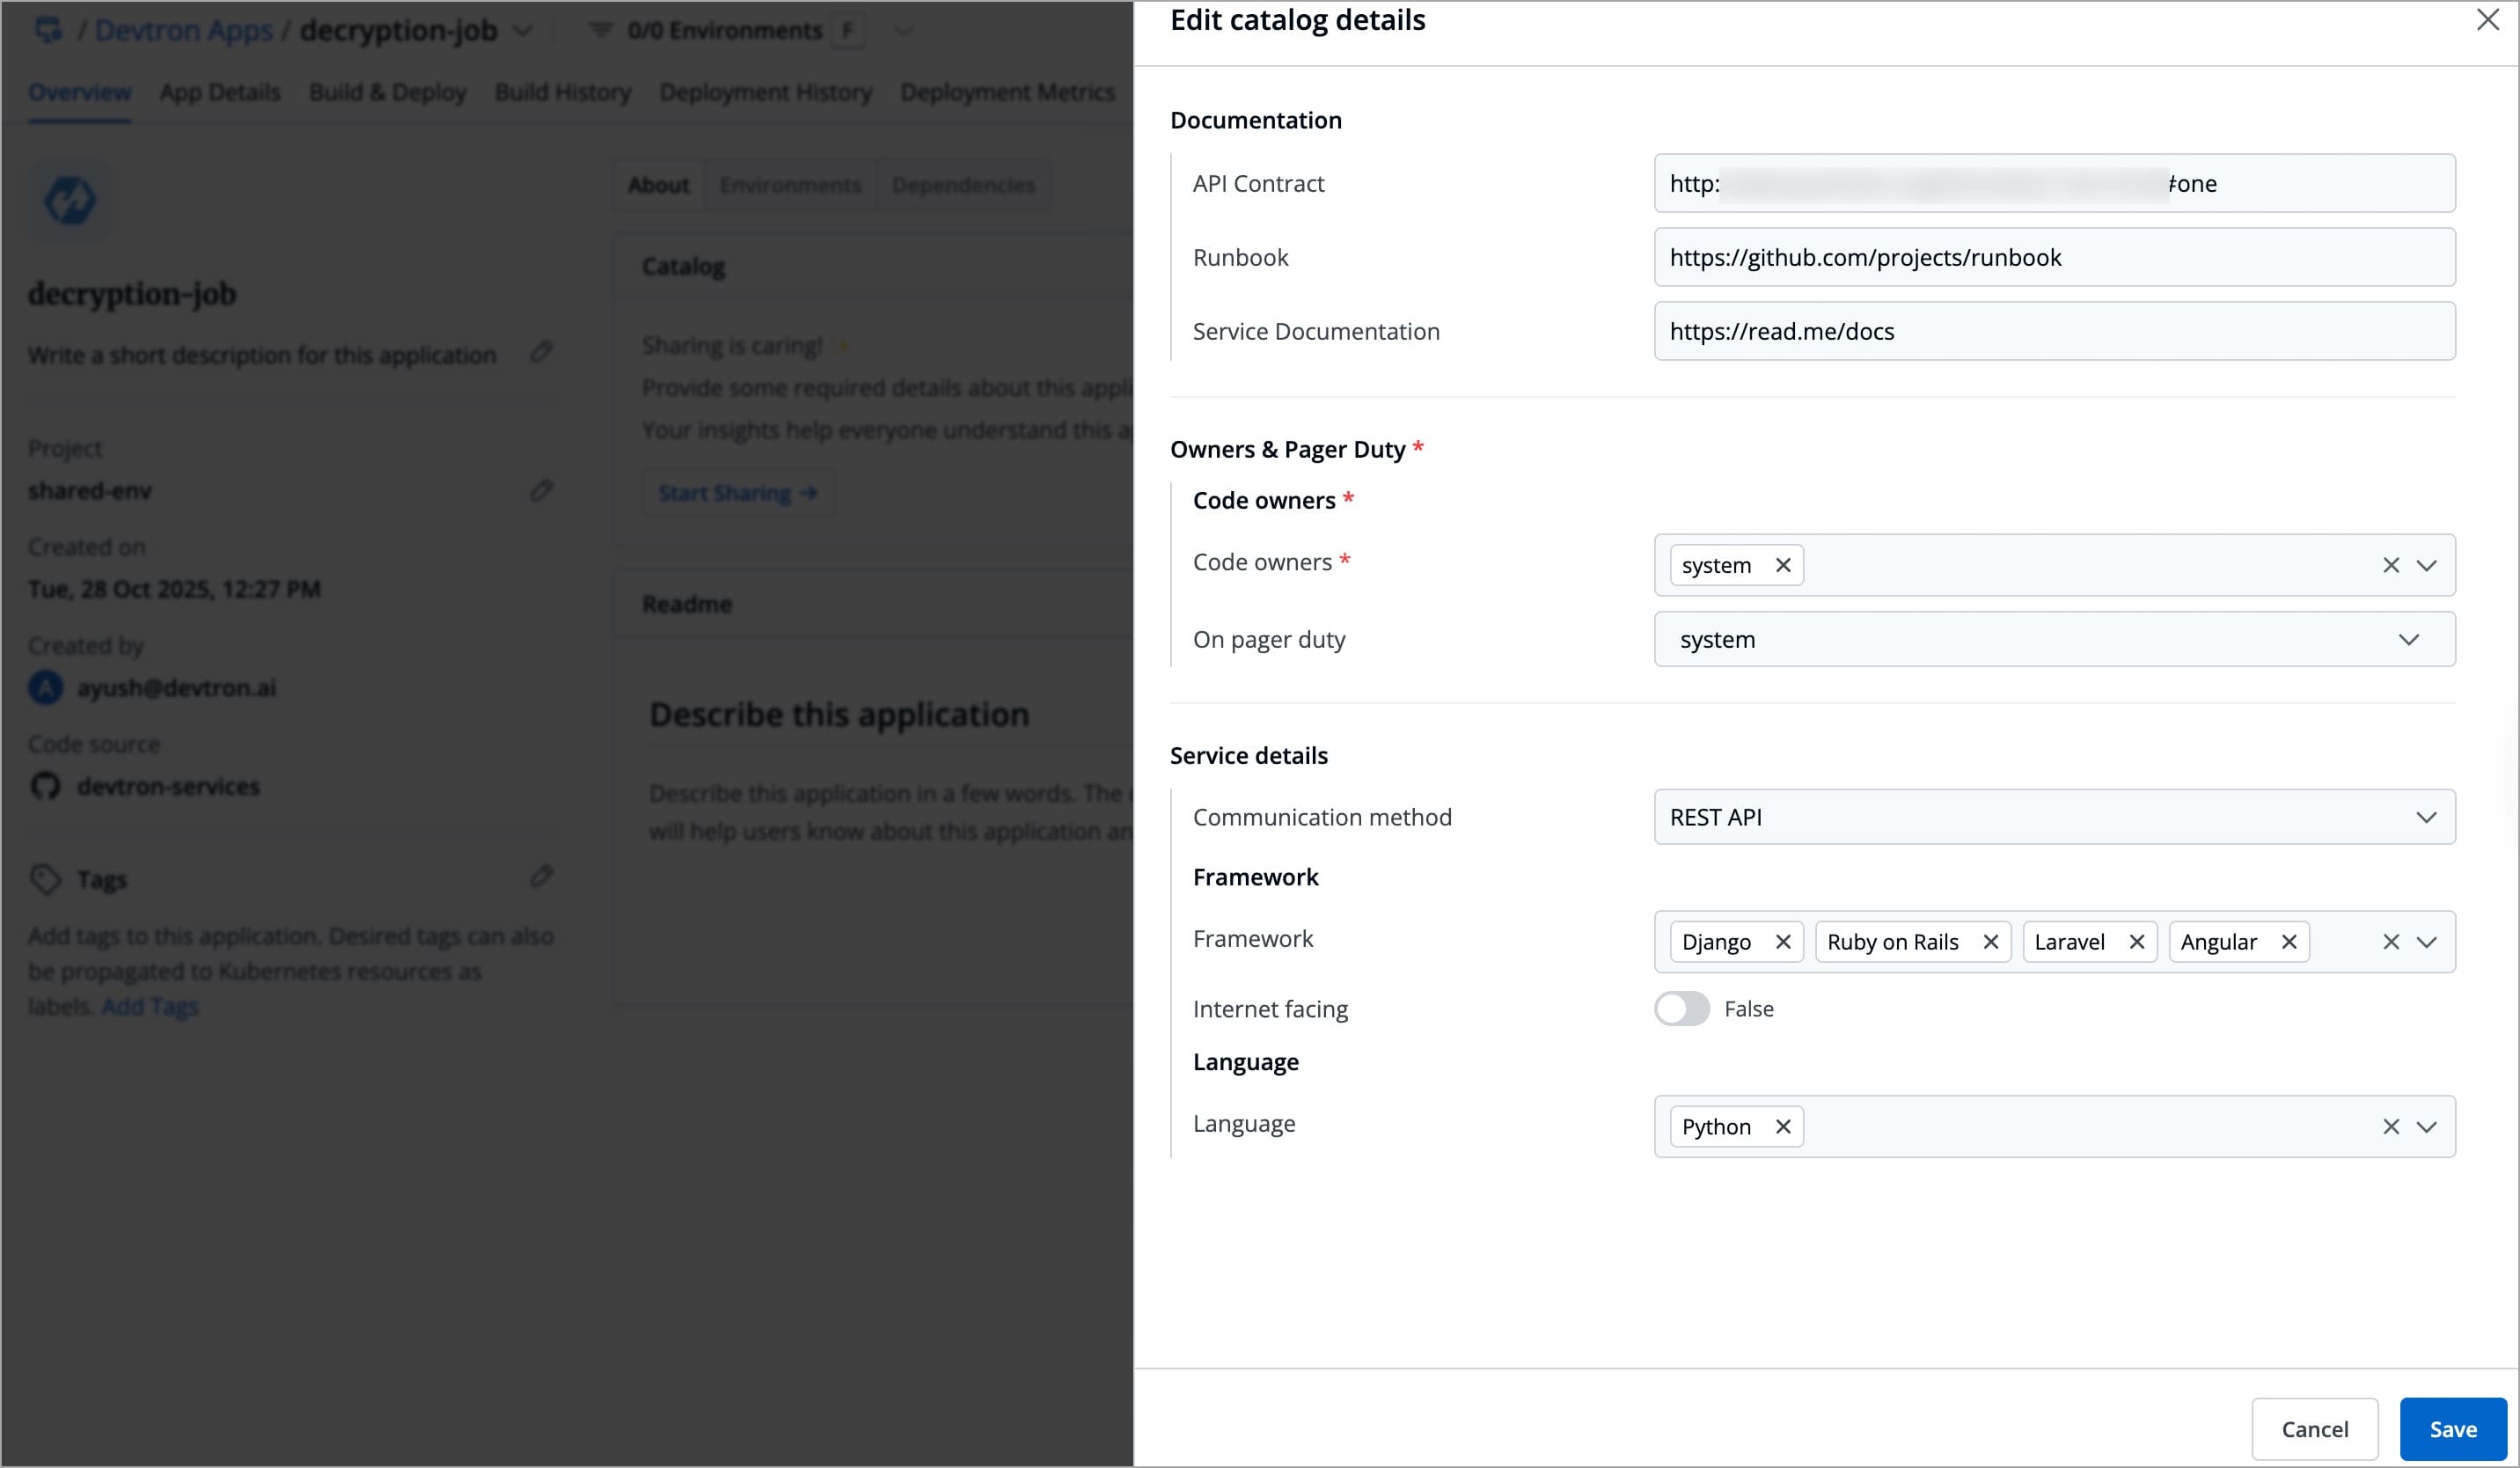
Figure 9: Filled Form -
Your saved data would be visible in a GUI format (and also in JSON format) as shown below.
Figure 10a: App Catalog Data in GUI Format 
Figure 10b: App Catalog Data in JSON Format
This catalog data would be visible to all the users who have access to the application, but its data can be edited only by the resource owners (in this case, application admin/managers).