Git Repository
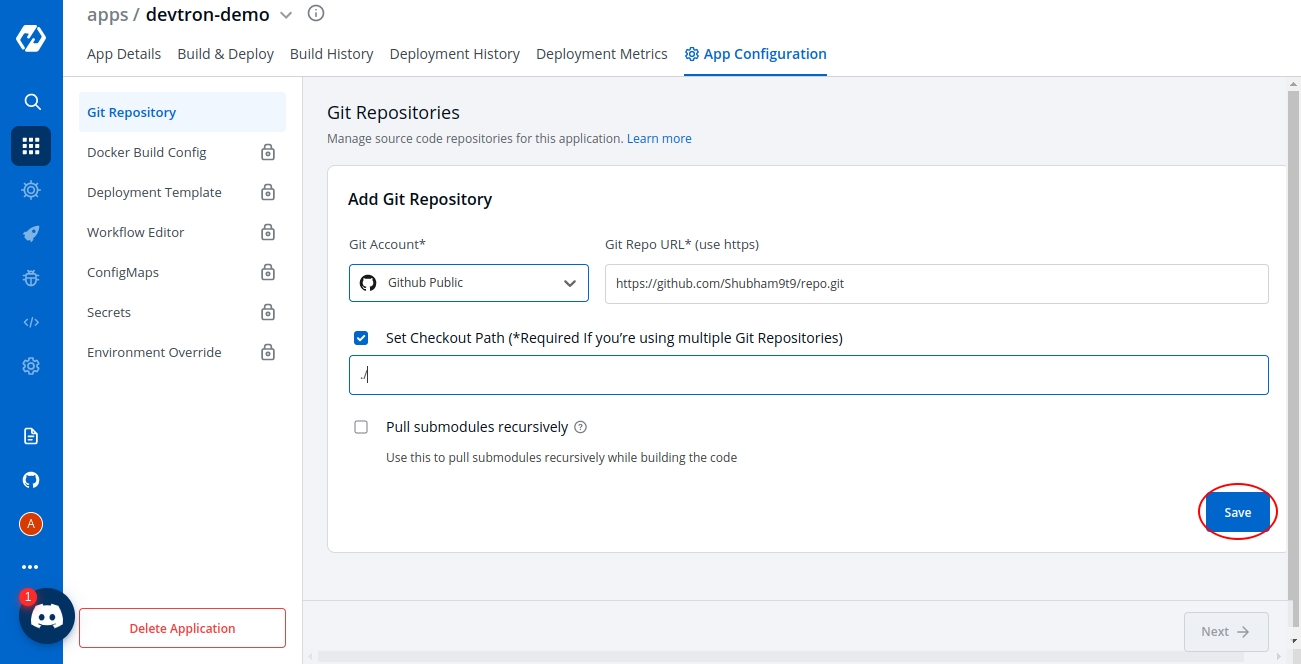
Git Repository is used to pull your application source code during the CI step. Select Git Repository section of the App Configuration. Inside Git Repository when you click on Add Git Repository you will see three options as shown below:
Git Account
Git Repo URL
Checkout Path
Devtron also supports multiple git repositories in a single deployment. We will discuss this in detail in the multi git option below.

1. Git Account
In this section, you have to select the git account of your code repository. If the authentication type of the Git account is anonymous, only public git repository will be accessible. If you are using a private git repository, you can configure your git provider via git accounts.
2. Git Repo URL
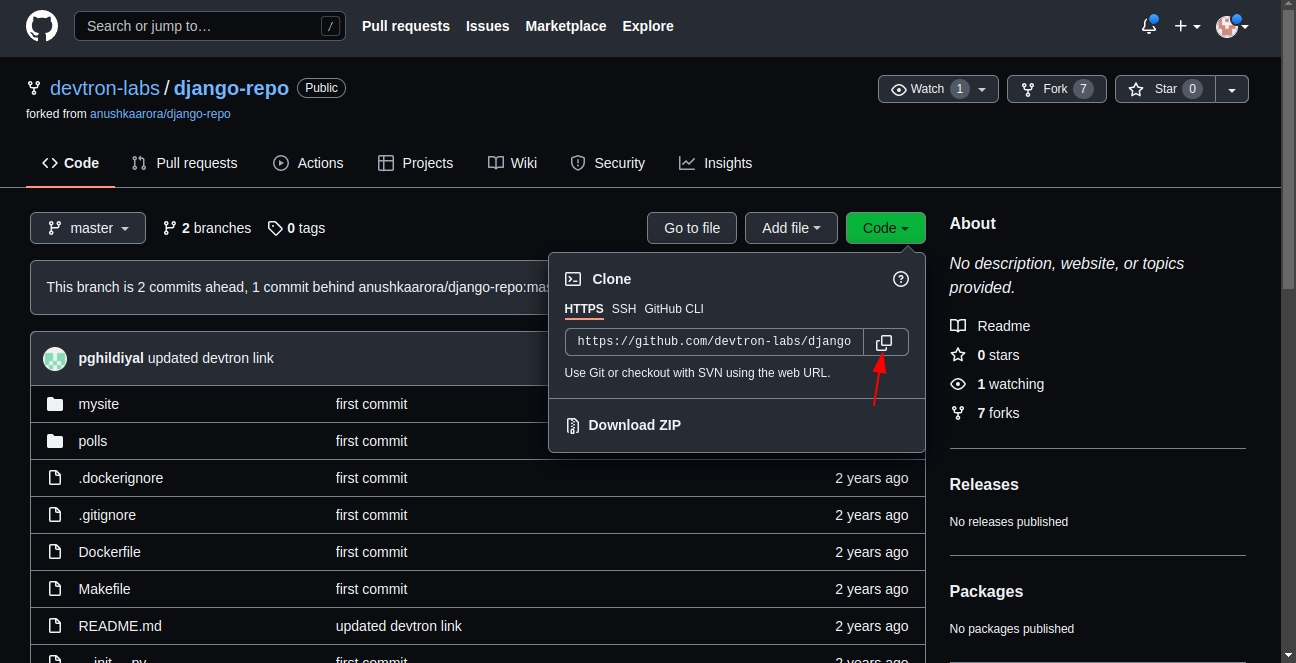
Inside the git repo URL, you have to provide your code repository’s URL. For Example- https://github.com/devtron-labs/django-repo
You can find this URL by clicking on the '⤓ code' button on your git repository page.
Note:
Copy the HTTPS/SSH url of the repository
Please make sure that you've added your dockerfile in the repo.

3. Checkout Path
After clicking on checkbox, git checkout path field appears. The git checkout path is the directory where your code is pulled or cloned for the repository you specified in the previous step.
This field is optional in case of a single git repository application and you can leave the path as default. Devtron assigns a directory by itself when the field is left blank. The default value of this field is ./

If you want to go with a multi-git approach, then you need to specify a separate path for each of your repositories. The first repository can be checked out at the default ./ path as explained above. But, for all the rest of the repositories, you need to ensure that you provide unique checkout paths. In failing to do so, you may cause Devtron to checkout multiple repositories in one directory and overwriting files from different repositories on each other.
4. Pull Modules Recursively:
This checkbox is optional and is used for pulling git submodules present in a repo. The submodules will be pulled recursively and same auth method which is used for parent repo will be used for submodules.
5. Multi Git:
As we discussed, Devtron also supports multiple git repositories in a single application. To add multiple repositories, click on add repo and repeat steps 1 to 3. Repeat the process for every new git repository you add. Ensure that the checkout paths are unique for each.
Note: Even if you add multiple repositories, only one image will be created based on the docker file as shown in the docker build config.
Why do we need Multi Git support-
Let’s look at this with an example:
Due to security reasons, you may want to keep sensitive configurations like third party API keys in a separate access restricted git repositories and the source code in a git repository that every developer has access to. To deploy this application, code from both the repositories is required. A multi-git support will help you to do that.
Few other examples, where you may want to have multiple repositories for your application and will need multi git checkout support:
To make code modularize, you are keeping front-end and back-end code in different repositories.
Common Library extracted out in different repo so that it can be used via multiple other projects.
Due to security reasons you are keeping configuration files in different access restricted git repositories.
How Devtron's 'Checkout Path' Works
The checkout path is used by Devtron to assign a directory to each of your git repositories. Once you provide different checkout paths for your repositories, Devtron will clone your code at those locations and these checkout paths can be referenced in the docker file to create docker image for the application. Whenever a change is pushed to any the configured repositories, the CI will be triggered and a new docker image file will be built based on the latest commits of the configured repositories and pushed to the container registry.
Last updated
