For the Jobs, you must configure the following sections before you run and trigger the job:
Job allows manual and automated execution of your source code. Job pipeline will not have CI/CD pipeline as the job is limited to your source code only. You can also configure preset plugins in your job pipeline.
With job, you can execute your source code quickly and easily without going through CI/CD pipelines, which also optimize time.
There are two main steps in executing Job:
In the next section, we will learn on how to create, configure, trigger a job. You can also view the details on the Overview tab and Run History.
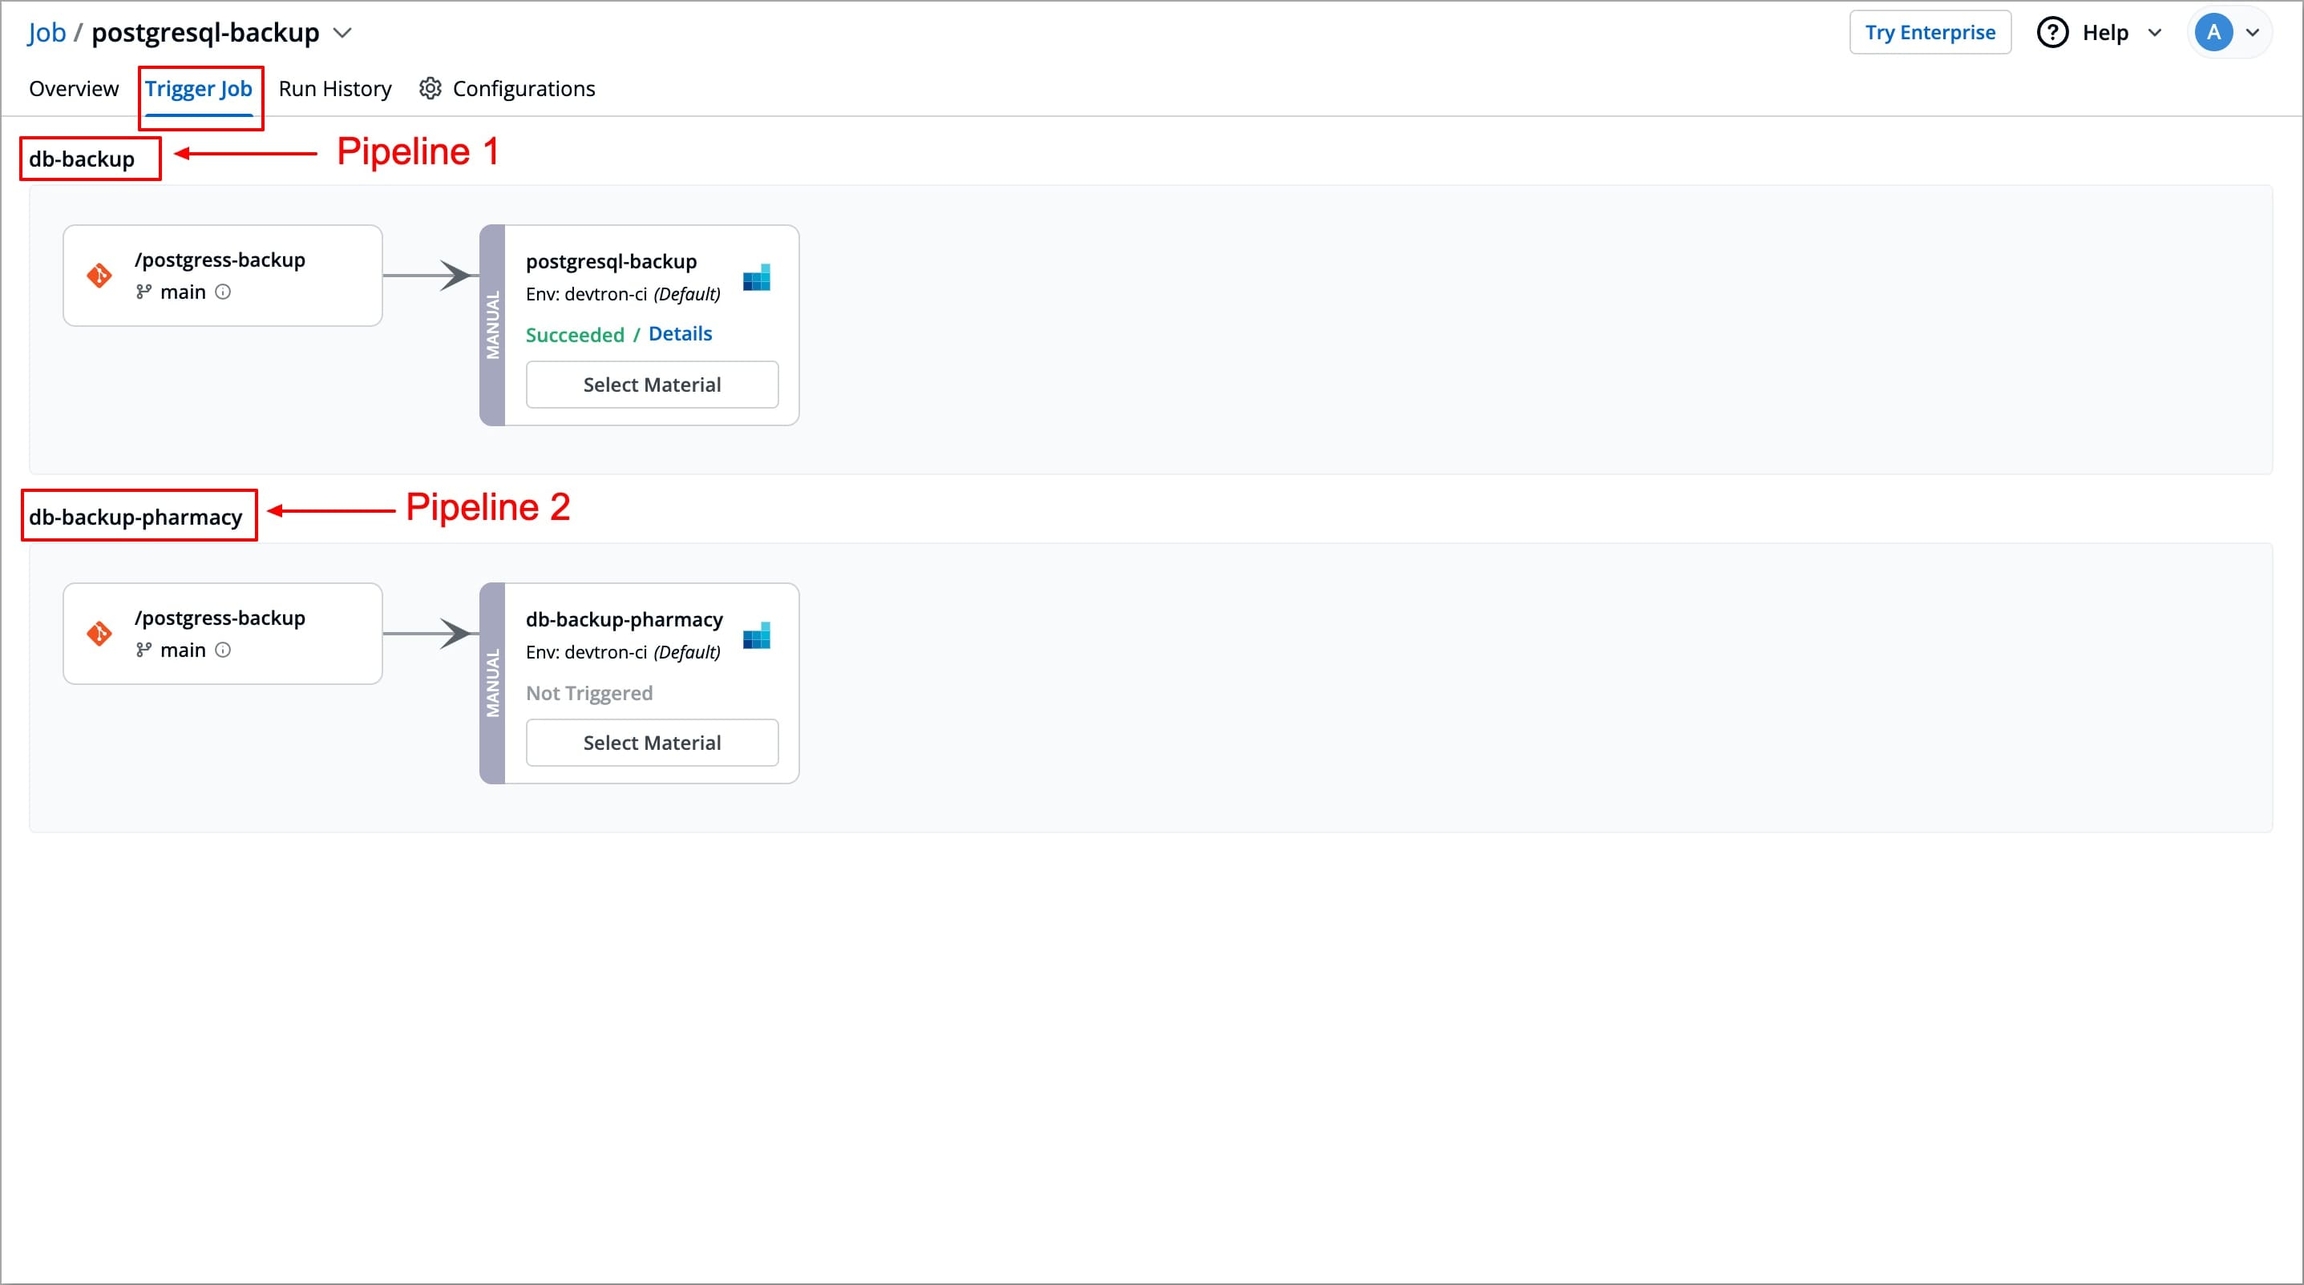
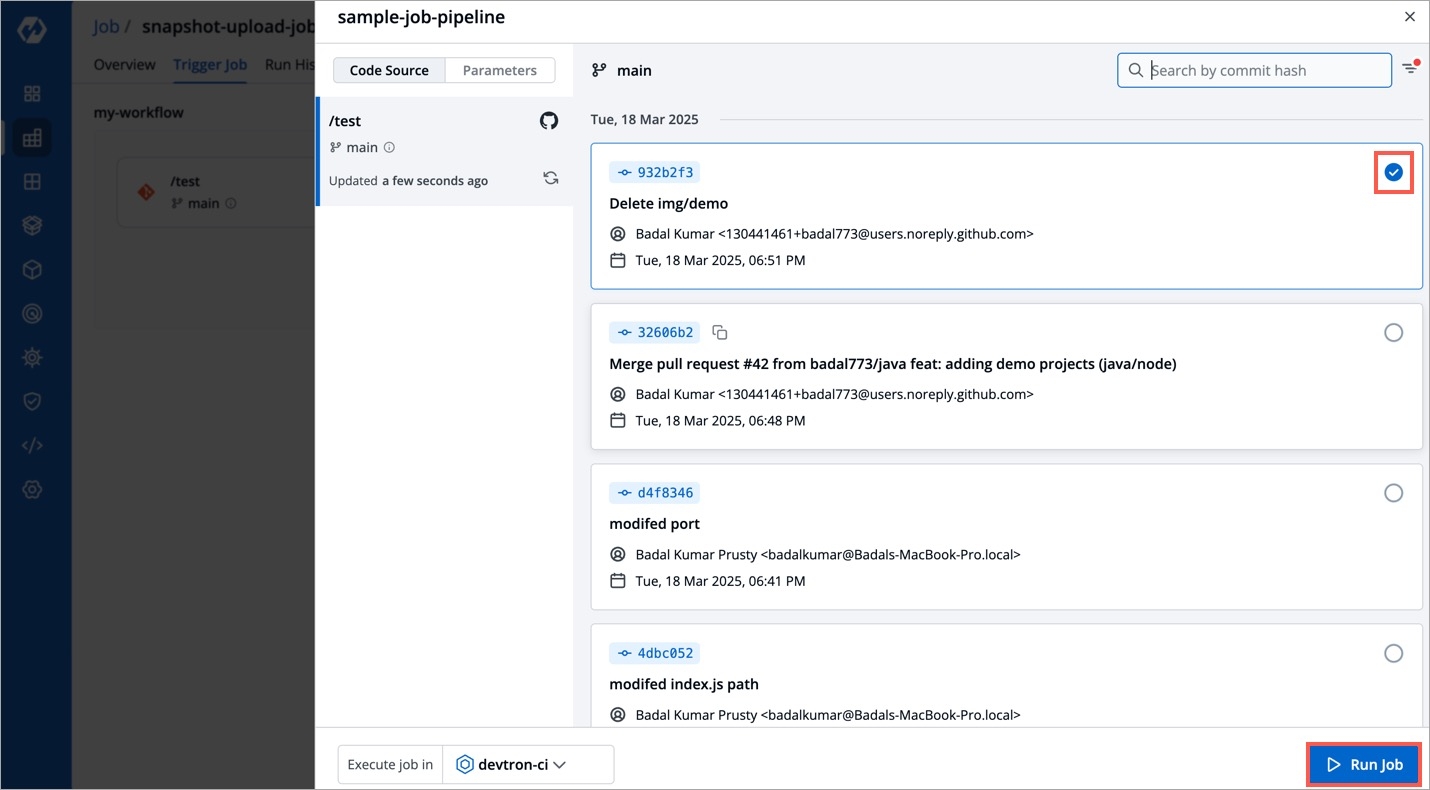
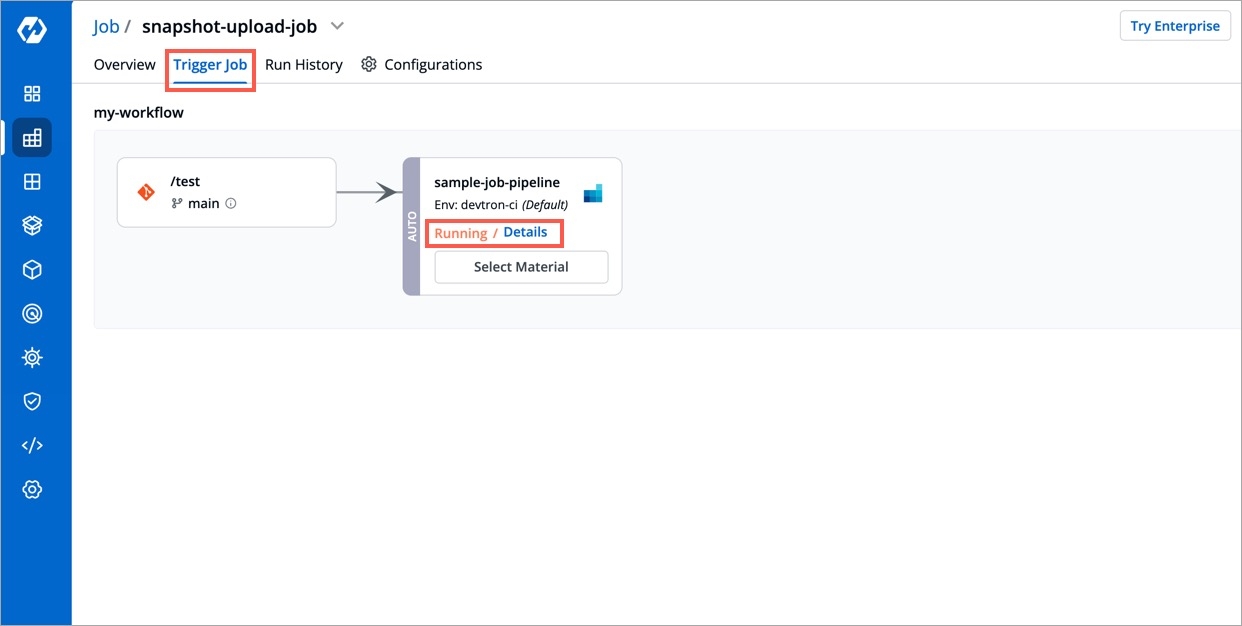
The Job Pipeline can be triggered by selecting Select Material
Job Pipelines that are set as automatic are always triggered as soon as a new commit is made to the git branch they're sensing. However, Job pipelines can always be manually triggered as and if required.
Various commits done in the repository can be seen here along with details like Author, Date etc. Select the commit that you want to trigger and then click on Run Job to trigger the job pipeline.
Refresh icon, refreshes Git Commits in the job Pipeline and fetches the latest commits from the Git Repository.
Ignore Cache : This option will ignore the previous build cache and create a fresh build. If selected, will take a longer build time than usual.
It can be seen that the job pipeline is triggered here and is the Running state.
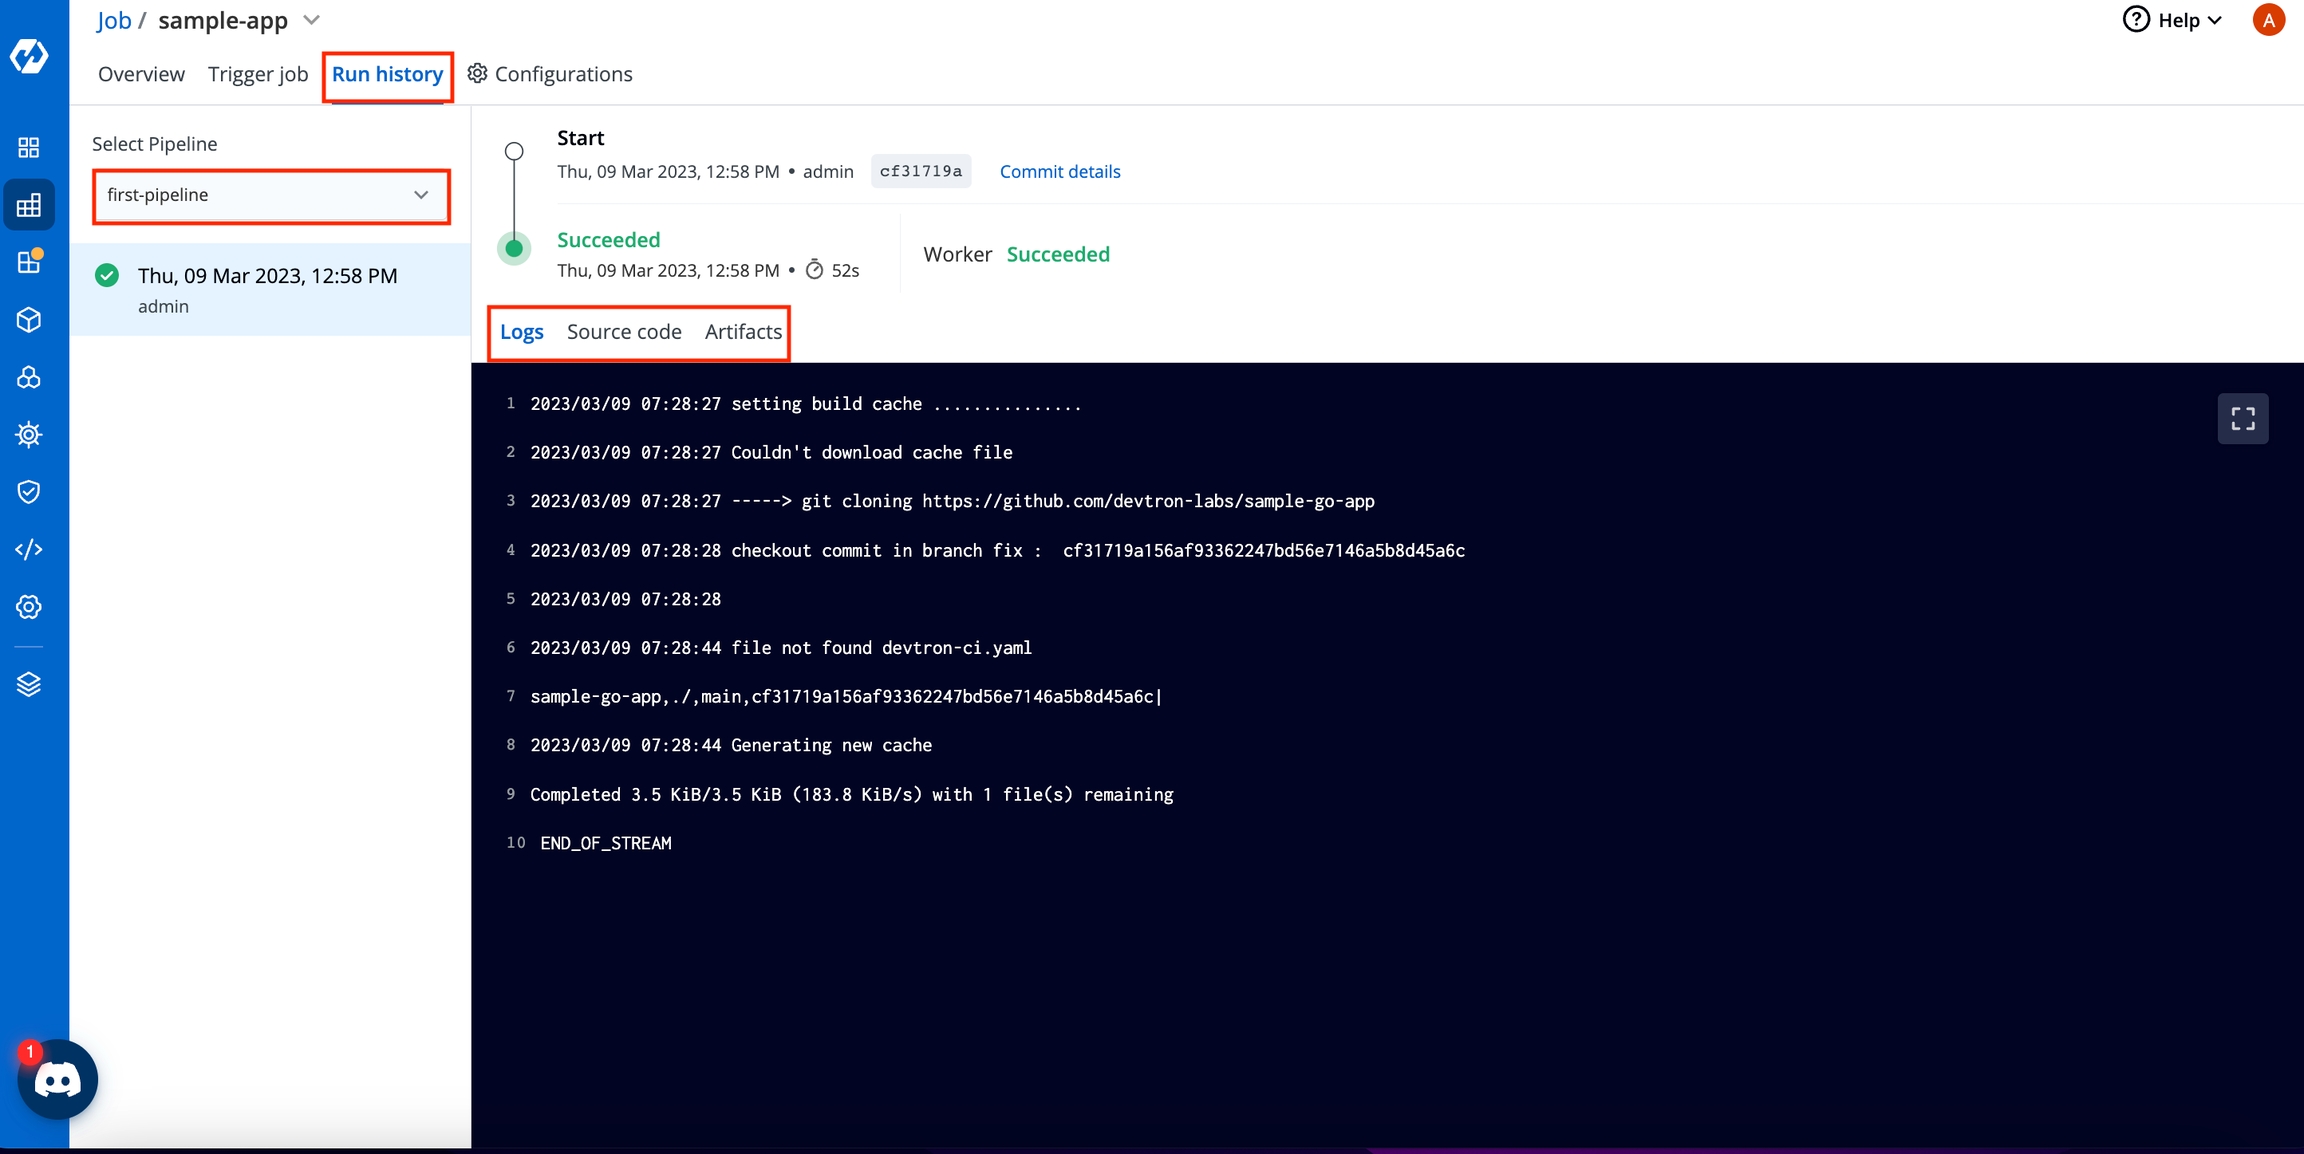
Click your job pipeline or click Run History to get the details about the job pipeline such as logs, reports etc.
Click Source code to view the details such as commit id, Author and commit message of the Git Material that you have selected for the job.
Click Artifacts to download the reports of the job, if any.
If you have multiple job pipelines, you can select a pipeline from the drop-down list to view th details of logs, source code, or artifacts.
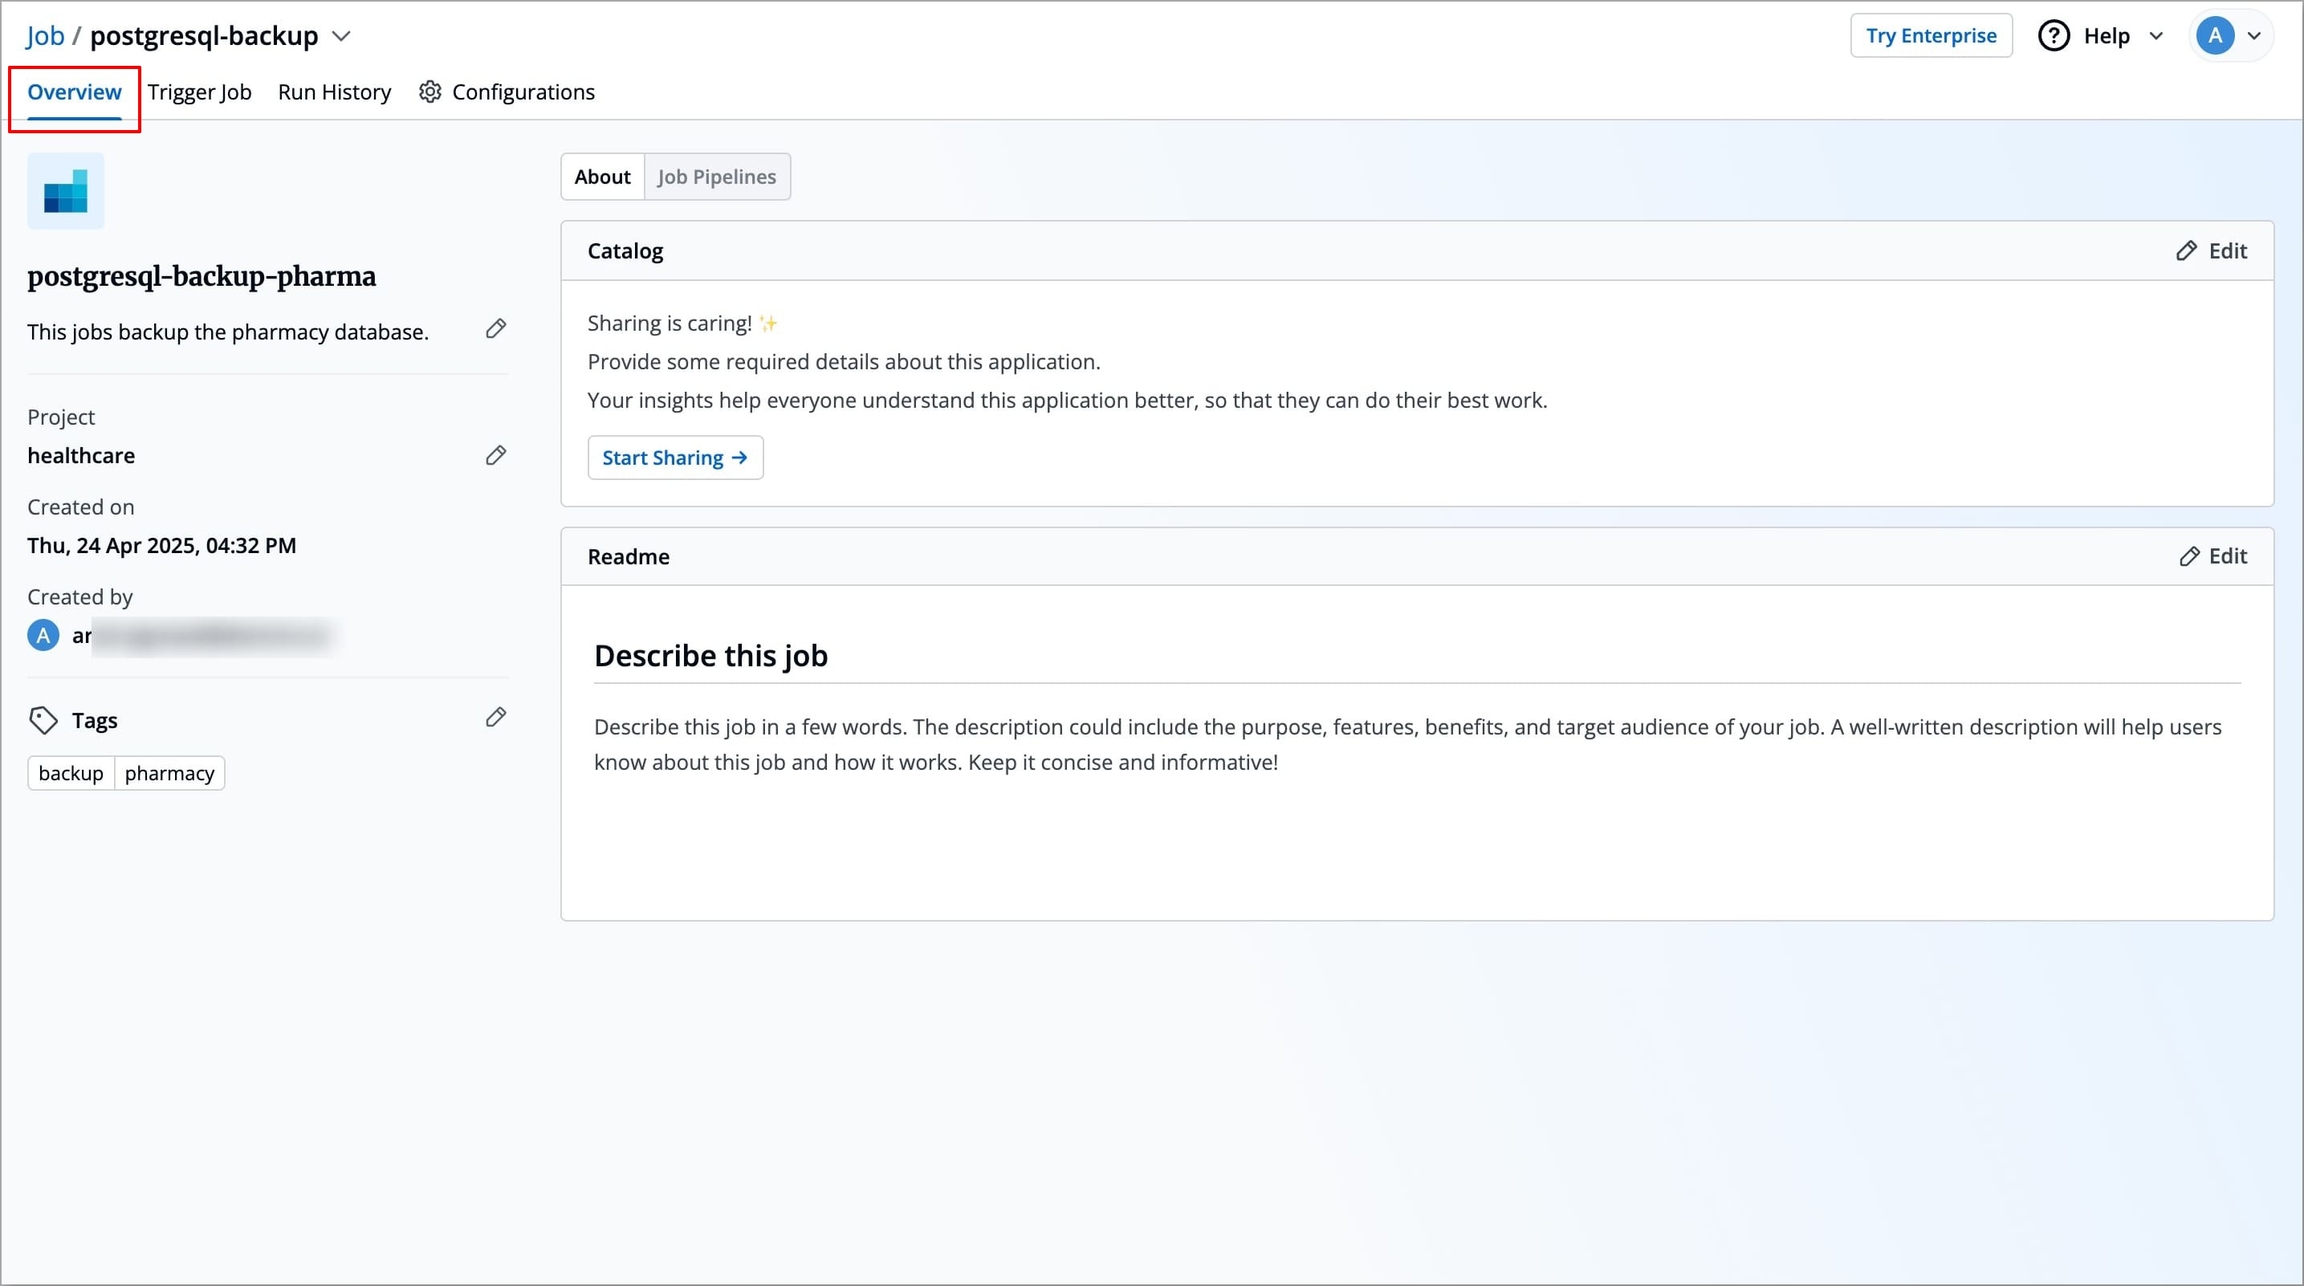
The Overview section contains the brief information of the job, any added tags, and deployment details of the particular job. In this section, you can also change project of your job and manage tags if you added them while creating job.
The following details are provided on the Overview page:
| Fields | Description |
|---|---|
You can change the project of your job by clicking Project on the Overview section.
Click Project.
On the Change project dialog box, select the different project you want to change from the drop-down list.
Click Save. The job will be moved to the selected project.
Tags are key-value pairs. You can add one or multiple tags in your application. When tags are propagated, they are considered as labels to Kubernetes resources. Kubernetes offers integrated support for using these labels to query objects and perform bulk operations e.g., consolidated billing using labels. You can use these tags to filter/identify resources via CLI or in other Kubernetes tools.
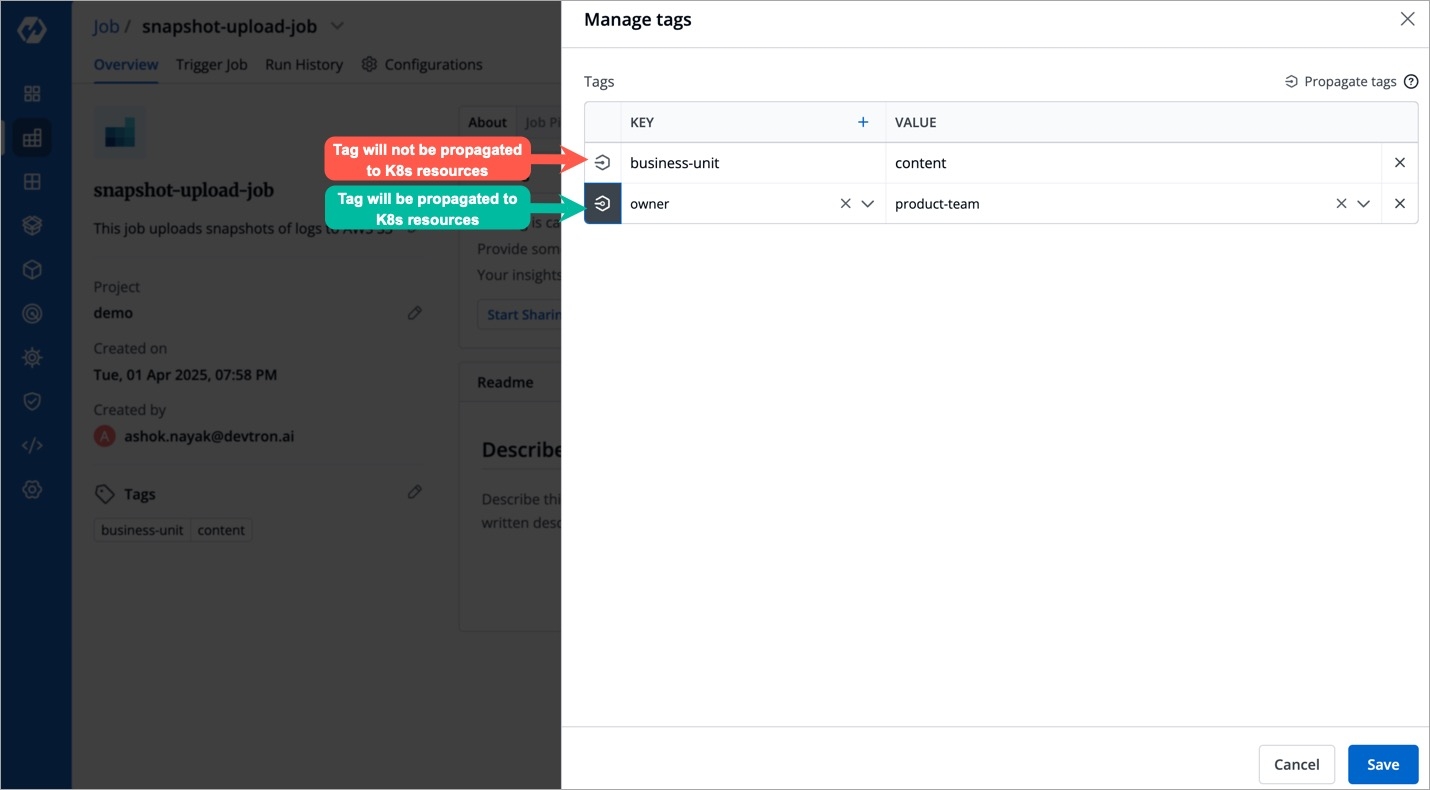
Manage tags is the central place where you can create, edit, and delete tags. You can also propagate tags as labels to Kubernetes resources for the application.
Click Edit tags.
On the Manage tags page, click + Add tag to add a new tag.
Click X to delete a tag.
Click Save.
The changes in the tags will be reflected in the Tags on the Overview section.
Click the symbol on the left side of your tag to propagate a tag.
Note: Dark grey colour in symbol specifies that the tags are propagated.
To remove the tags from propagation, click the symbol again.
Job Name
Displays the name of the job.
Created on
Displays the day, date and time the job was created.
Created by
Displays the email address of a user who created the job.
Project
Displays the current project of the job. You can change the project by selecting a different project from the drop-down list.

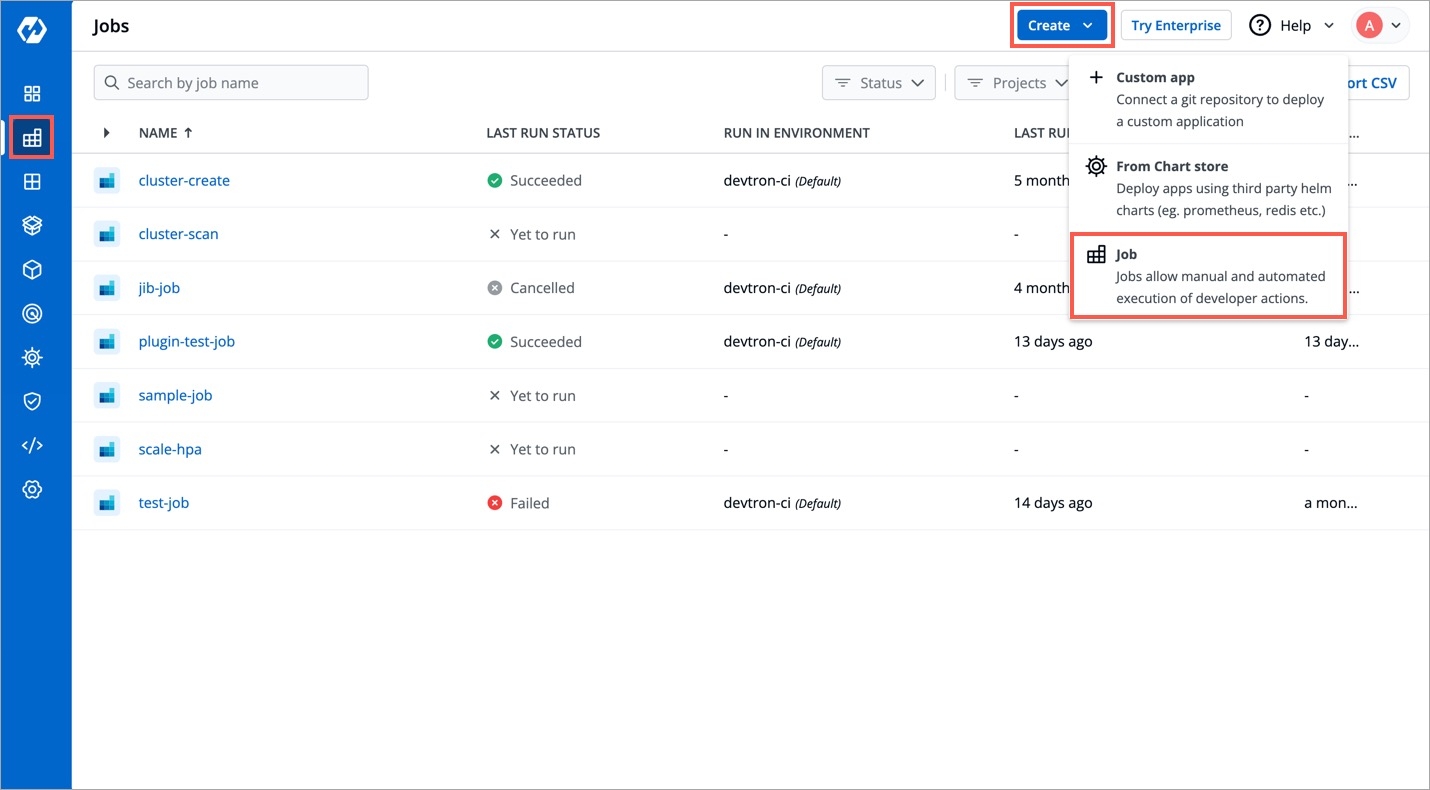
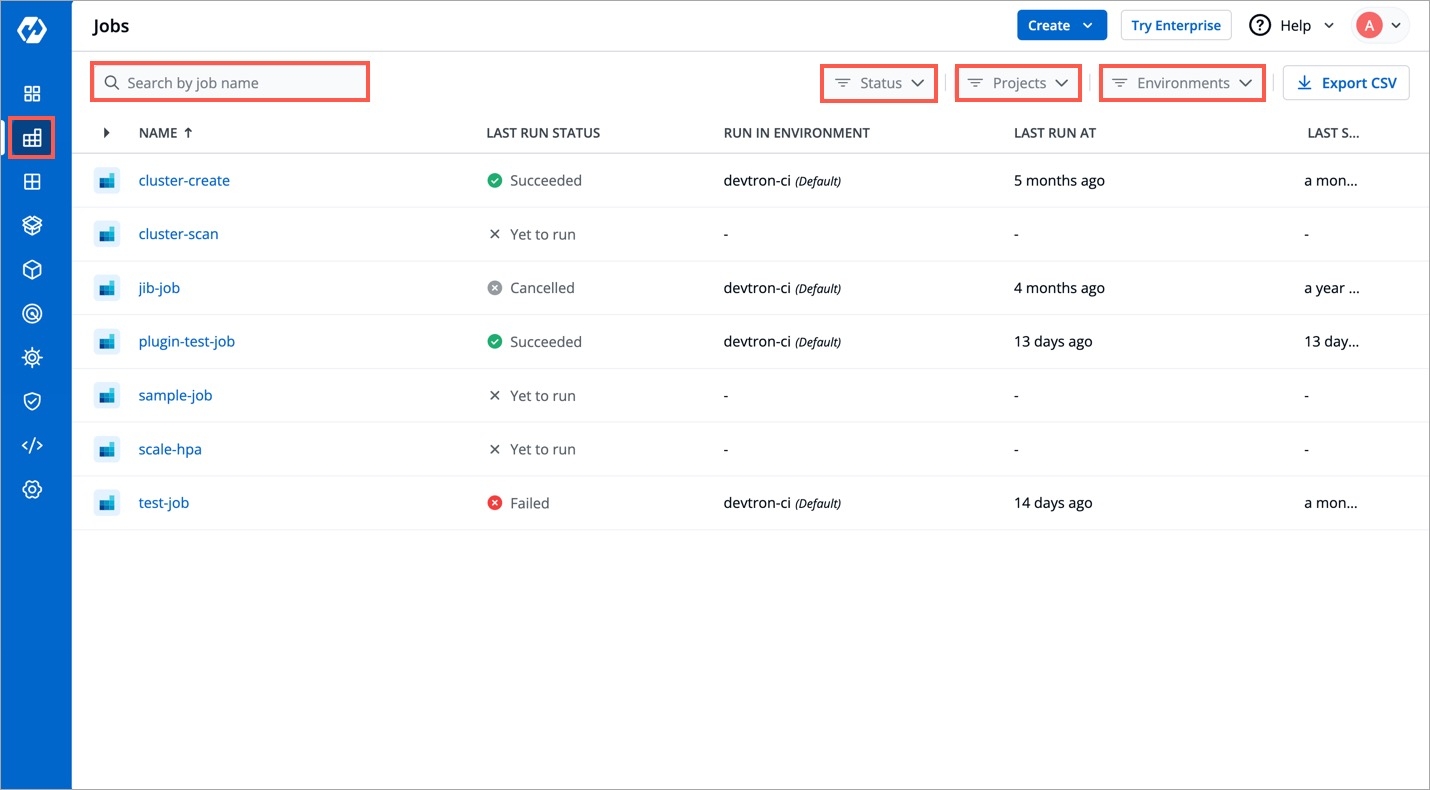
On the Devtron dashboard, select Jobs.
On the upper-right corner of the screen, click Create.
Select Job from the drop-down list.
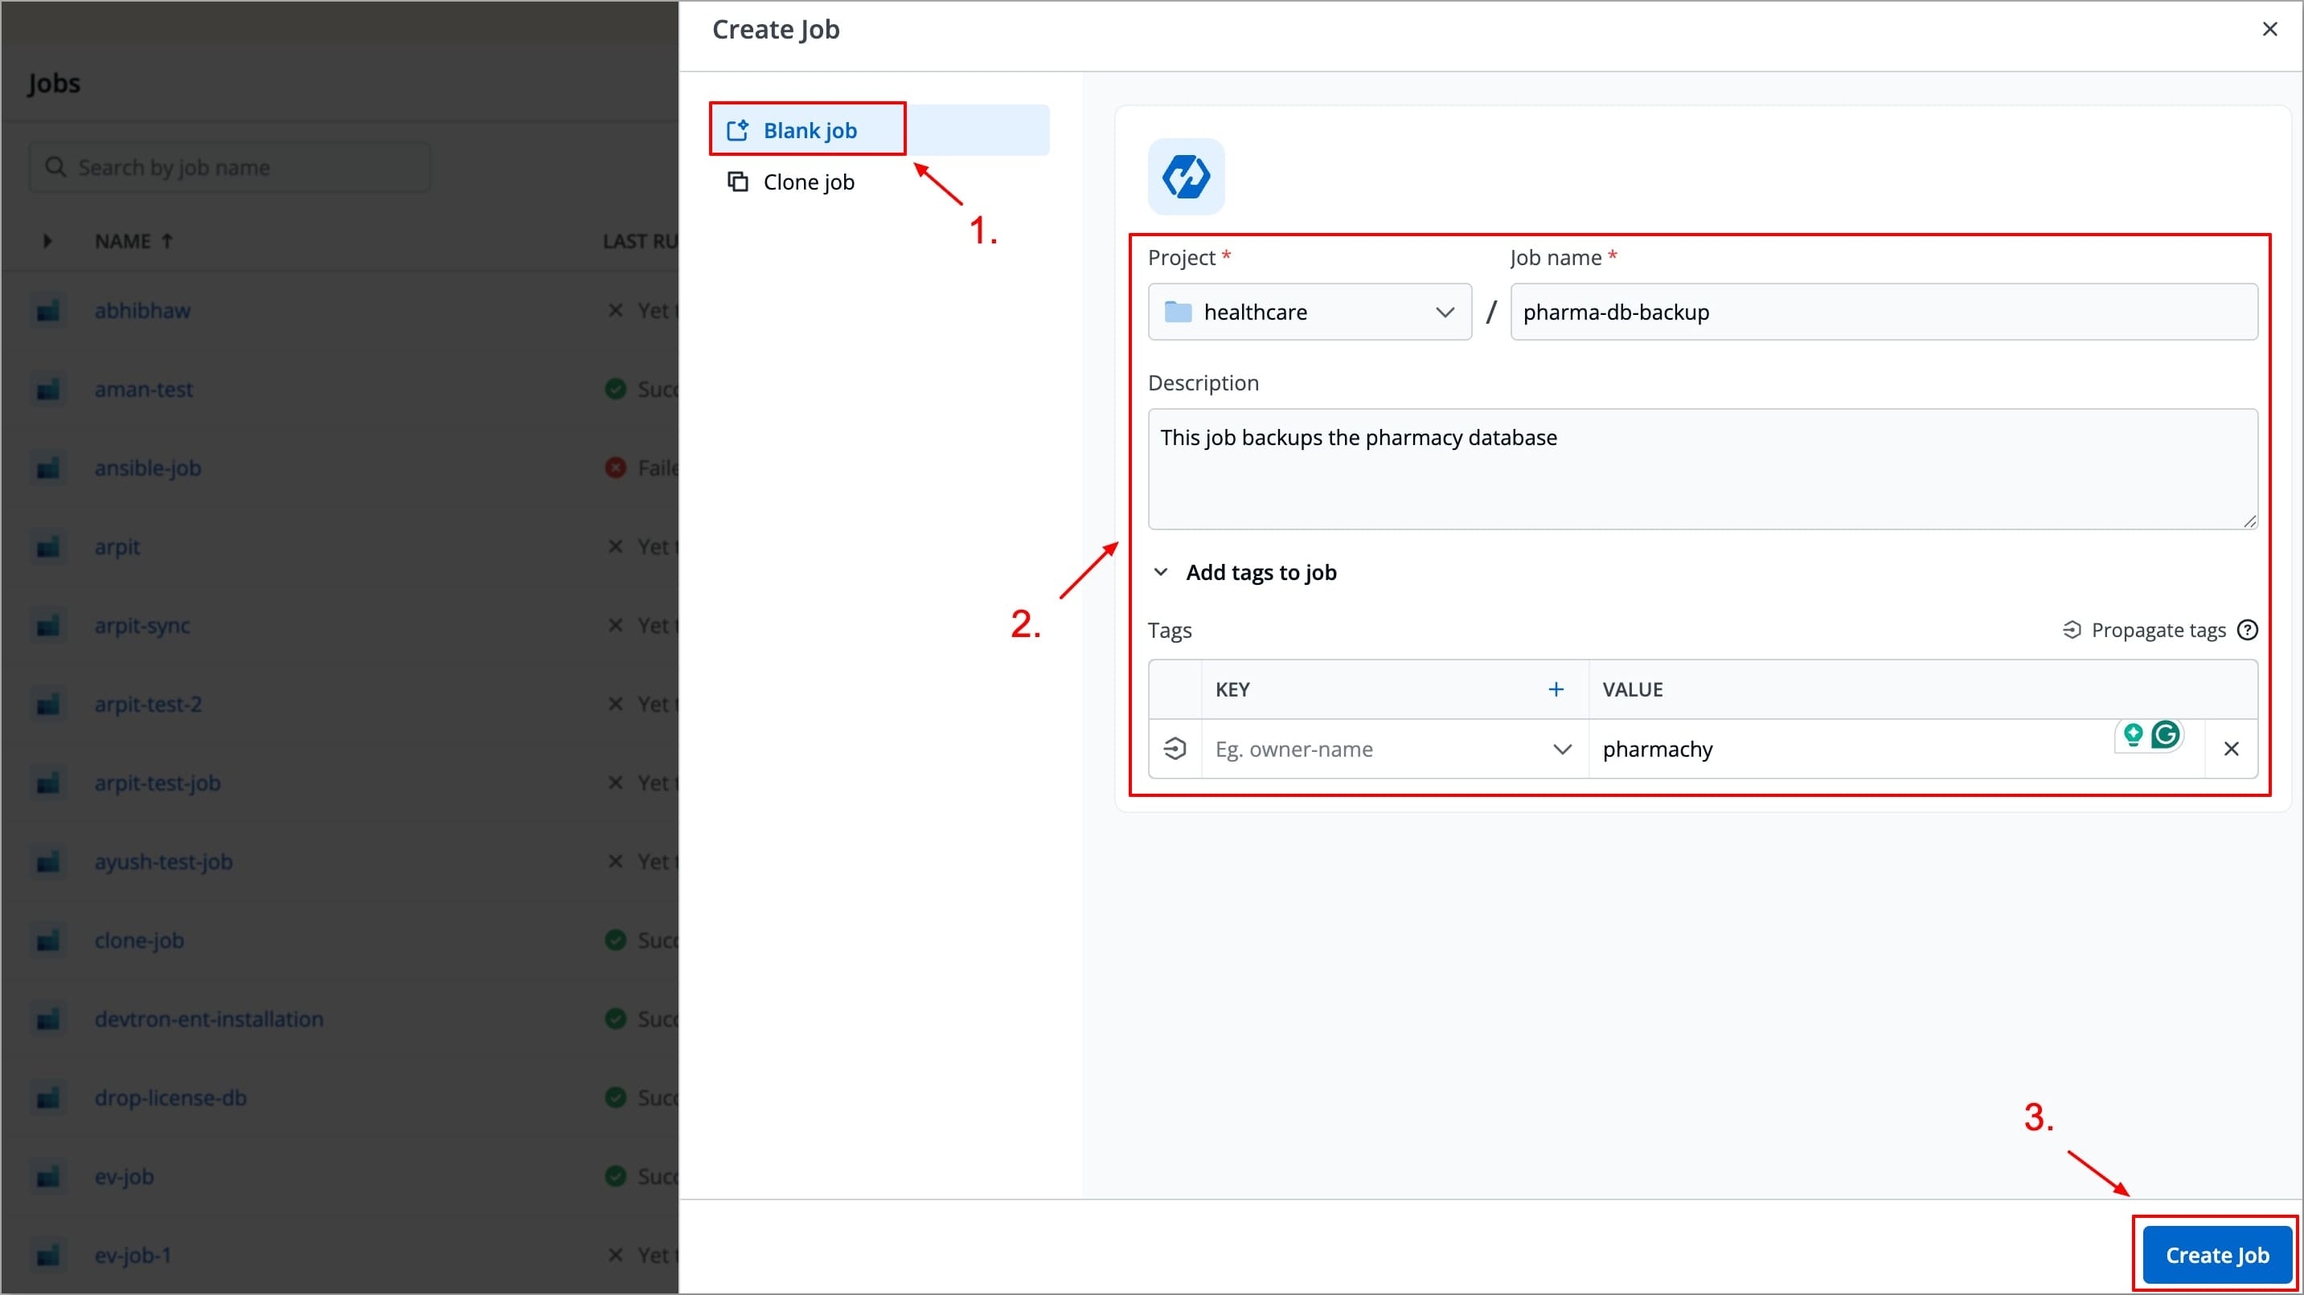
Create job page opens.
Provide below information on the Create job page:
Note: Do not forget to modify git repositories and corresponding branches to be used for each Job Pipeline if required.
Tags are key-value pairs. You can add one or multiple tags in your application.
Propagate Tags When tags are propagated, they are considered as labels to Kubernetes resources. Kubernetes offers integrated support for using these labels to query objects and perform bulk operations e.g., consolidated billing using labels. You can use these tags to filter/identify resources via CLI or in other Kubernetes tools.
Click + Add tag to add a new tag.
Click Save.
| Fields | Description |
|---|---|
Click the symbol on the left side of your tag to propagate a tag.
Note: Dark grey colour in symbol specifies that the tags are propagated.
To remove the tags from propagation, click the symbol again.
Job Name
User-defined name for the job in Devtron.
Description
Enter the description of a job.
Registry URL
This is the URL of your private registry in Quay. E.g. quay.io
Select one of them
Create from scratch :Select the project from the drop-down list.
Note: You have to add project under Global Configurations. Only then, it will appear in the drop-down list here.
Clone existing application: Select an app you want to clone from and the project from the drop-down list.
Note: You have to add project under Global Configurations. Only then, it will appear in the drop-down list here.
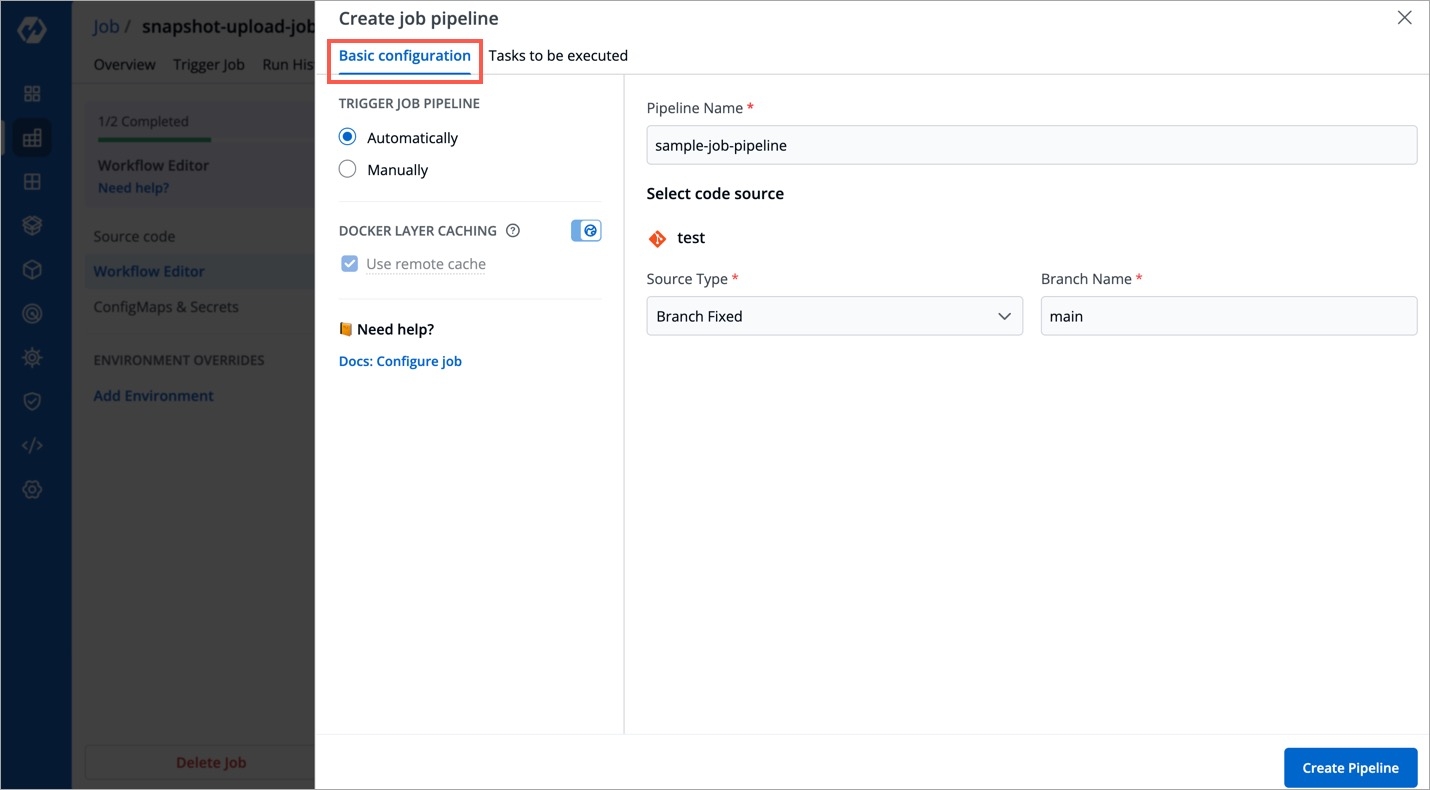
In the Workflow Editor section, you can configure a job pipeline to be executed. Pipelines can be configured to be triggered automatically or manually based on code change or time.
After adding Git repo in the Source Code section, go to the Workflow Editor.
Click Job Pipeline.
Provide the information in the following fields on the Create job pipeline page:
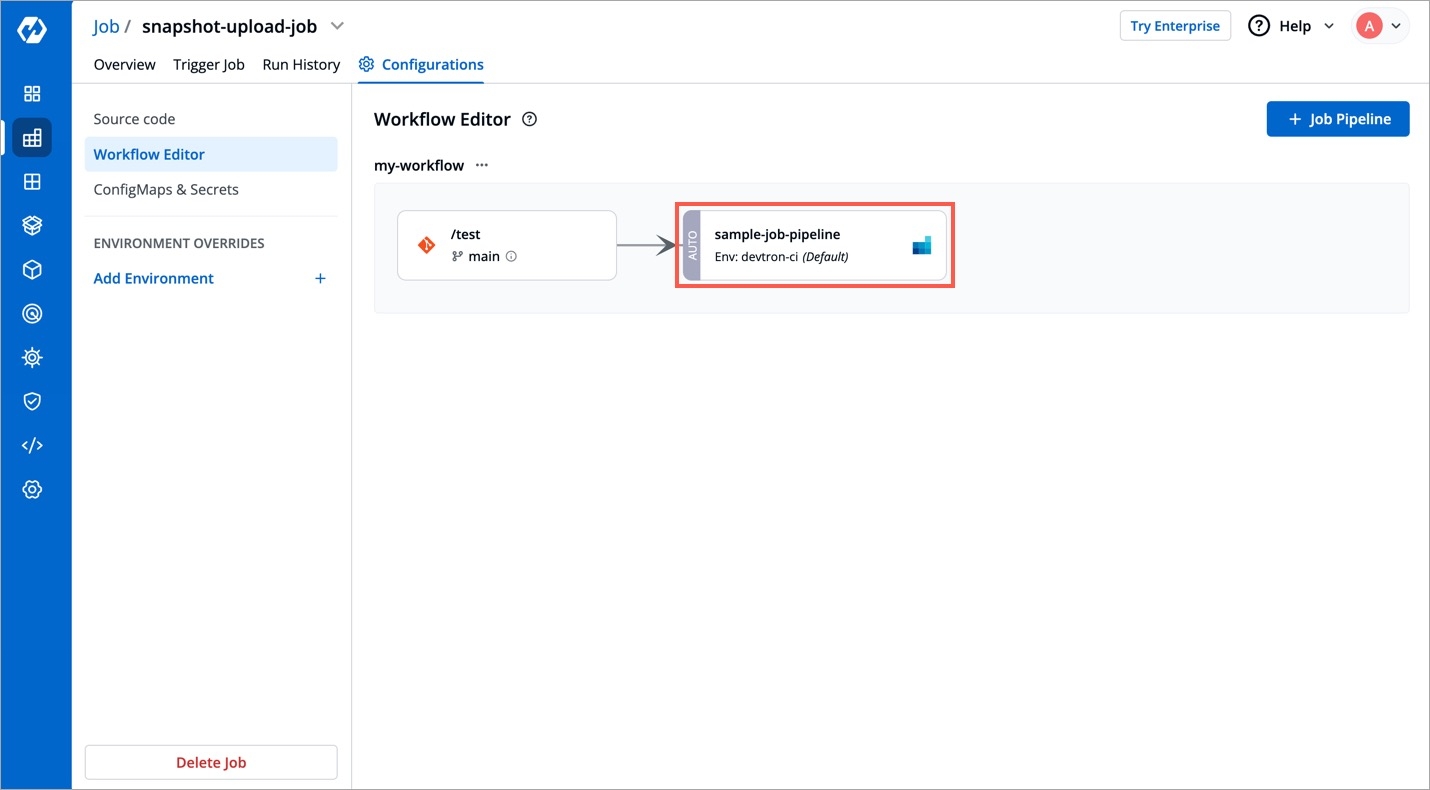
Click Create Pipeline.
The job pipeline is created.
To trigger job pipeline, go to the Trigger Job section.
Note: You can create more than one job pipeline by clicking + Job Pipeline.
The Source type - "Branch Fixed" allows you to trigger a CI build whenever there is a code change on the specified branch.
Select the Source type as "Branch Fixed" and enter the Branch Name.
Branch Regex allows users to easily switch between branches matching the configured Regex before triggering the build pipeline. In case of Branch Fixed, users cannot change the branch name in ci-pipeline unless they have admin access for the app. So, if users with Build and Deploy access should be allowed to switch branch name before triggering ci-pipeline, Branch Regex should be selected as source type by a user with Admin access.
For example if the user sets the Branch Regex as feature-*, then users can trigger from branches such as feature-1450, feature-hot-fix etc.
The Source type - "Pull Request" allows you to configure the CI Pipeline using the PR raised in your repository.
Before you begin, configure the webhook for either GitHub or Bitbucket.
The "Pull Request" source type feature only works for the host GitHub or Bitbucket cloud for now. To request support for a different Git host, please create a GitHub issue here.
To trigger the build from specific PRs, you can filter the PRs based on the following keys:
Select the appropriate filter and pass the matching condition as a regular expression (regex).
Devtron uses regexp library, view regexp cheatsheet. You can test your custom regex from here.
The Source type - "Tag Creation" allows you to build the CI pipeline from a tag.
Before you begin, configure the webhook for either GitHub or Bitbucket.
To trigger the build from specific tags, you can filter the tags based on the author and/or the tag name.
Select the appropriate filter and pass the matching condition as a regular expression (regex).
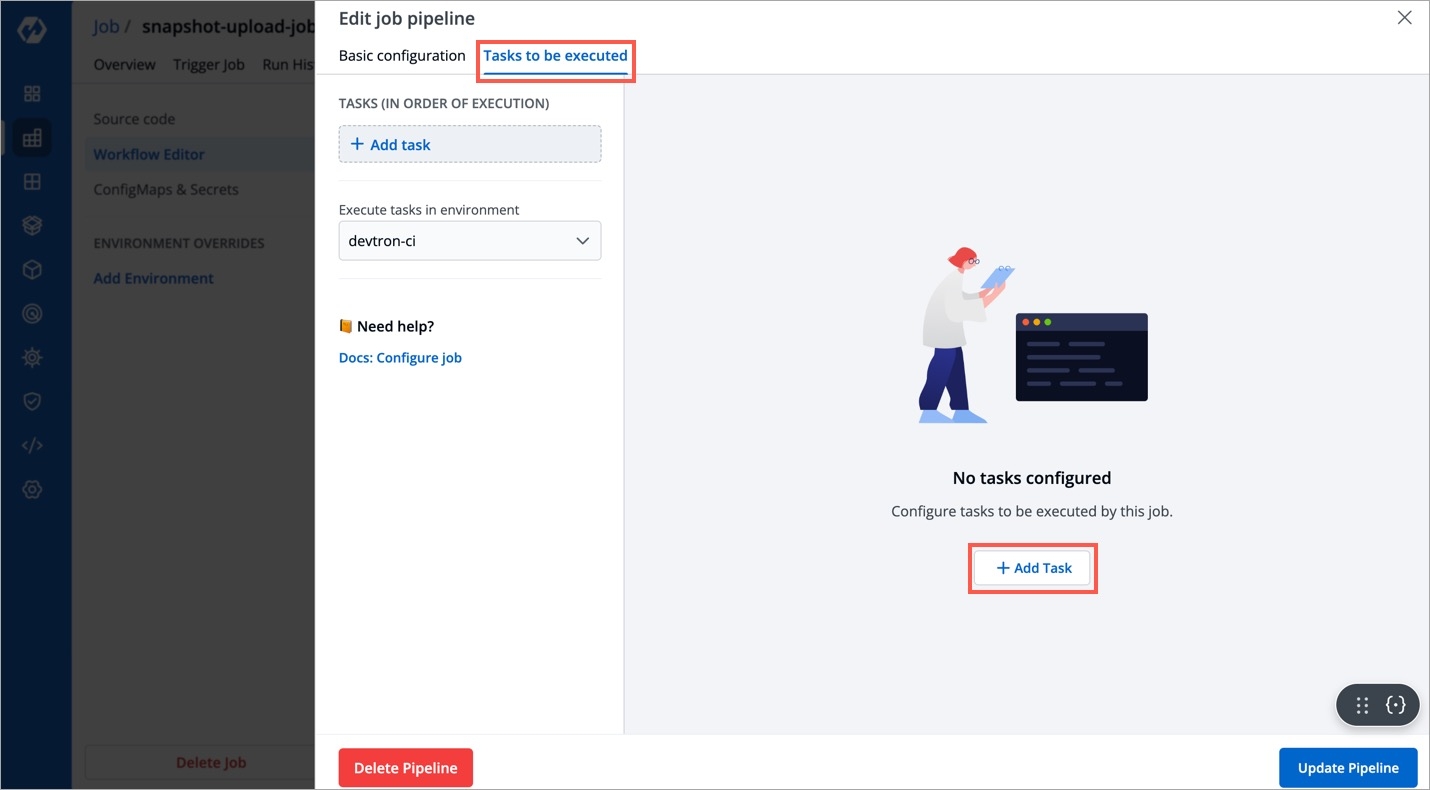
You can also add preset plugins in your job pipeline to execute some standard tasks, such as Code analysis, Load testing, Security scanning etc. Click Add Task to add preset plugins.
You can update the configurations of an existing Job Pipeline except for the pipeline's name. To update a pipeline, select your job pipeline. In the Edit job pipeline window, edit the required fields and select Update Pipeline.
You can only delete a job pipeline in your workflow.
To delete a job pipeline, go to Configurations > Workflow Editor and select Delete Pipeline.
| Field Name | Required/Optional | Description |
|---|---|---|
| Filter key | Description |
|---|---|
| Filter key | Description |
|---|---|
Pipeline Name
Required
A name for the pipeline
Source type
Required
Source type to trigger the job pipeline. Available options: Branch Fixed | Branch Regex |Pull Request | Tag Creation
Branch Name
Required
Branch that triggers the job pipeline.
Author
Author of the PR
Source branch name
Branch from which the Pull Request is generated
Target branch name
Branch to which the Pull request will be merged
Title
Title of the Pull Request
State
State of the PR. Default is "open" and cannot be changed
Author
The one who created the tag
Tag name
Name of the tag for which the webhook will be triggered
