This document will help you to deploy a sample Spring Boot Application, using mysql Helm Chart
To deploy mysql Helm Chart, you can refer to our documentation on Deploy mysql Helm Chart
For this example, we are using the following GitHub Repo, you can clone this repository and make following changes in the files.
Set the database configuration in this file.
To learn how to create an application on Devtron, refer to our documentation on Creating Application
In this example, we are using the url of the forked Git repository.
Give, the path of the Dockerfile.
Enable Ingress, and give the path on which you want to host the application.
Set up the CI/CD pipelines. You can set them to trigger automatically or manually.
Trigger the CI Pipeline, build should be Successful. Then trigger the CD Pipeline, deployment pipeline will be initiated, after some time the status should be Healthy.
It exposes 3 REST endpoints for it's users to create, to view specific student record and view all student records.
To test Rest API, you can use curl command line tool
Create a new Student Record
Create a new POST request to create a new Transaction. Once the transaction is successfully created, you will get the student id as a response.
Curl Request is as follows:
View All Student's Data
To view all student records, GET Request is:
path will be the one that you have given in Step 3 while configuring the Deployment Template.
http://<hostname>/<path>/viewAll
View student's data By student ID
To view student data by student id, GET Request is:
http://<hostname>/<path>/view/<id>
path will be the one that you have given in Step 3 while configuring the Deployment Template.
Welcome, this document consists of Devtron Use Cases
In this comprehensive guide, you will find a wide range of use cases, illustrating how Devtron can help optimize and streamline various aspects of your development and deployment processes. Explore the possibilities and discover how Devtron can enhance your workflows and empower your teams. Explore the following use cases to gain insights into the potential of Devtron:


In this application, you will learn about how to create a Expressjs Application that connects to mongoDb.
Follow the below-mentioned steps, to deploy the application on Devtron using mongoDb Helm Chart.
To deploy mongoDb Helm Chart, you can refer to our documentation on Deploy mongoDb Helm Chart
For this example, we are using the following GitHub Repo, you can clone this repository and make following changes in the files.
This is the Dockerfile. This exposes our expressjs application to port number 8080
This file will be used to connect to our database. This will include the service-name of the mongoDb Helm Chart, that you have deployed in Step1.
The syntax is as follows:
<service-name>:27017/<database-name>
This maps our service name to mongoDb's port number 27017.
To learn how to create an application on Devtron, refer to our documentation on Creating Application
In this example, we are using the url of the forked Git Repository.
Give, the path of the Dockerfile.
Enable Ingress, and give the path on which you want to host the application.
Set up the CI/CD pipelines. You can set them to trigger automatically or manually.
Trigger the CI Pipeline, build should be Successful, then trigger the CD Pipeline, deployment pipeline will be initiated, after some time the status should be Healthy
Check the Expressjs app connected to mongodb database, running successfully by hitting your application url.
The syntax is: http://<hostname>/<path>/
path will be the one that you have given in Step 3 while configuring the Deployment Template.
The output of our application would be as follows:
You can see that we are getting the JSON response. We have successfully connected our expressjs application to the mongoDb database.
Devtron supports the installation of Helm charts from both: Helm repos and Container/OCI registries. Unlike Helm repos, OCI registries do not have an index file to discover all the charts. However, Devtron makes it easier for you to populate your charts from multiple sources to the chart store.
Prerequisites
Helm Chart(s)
OCI-compliant Registry (e.g. Docker Hub and many more)
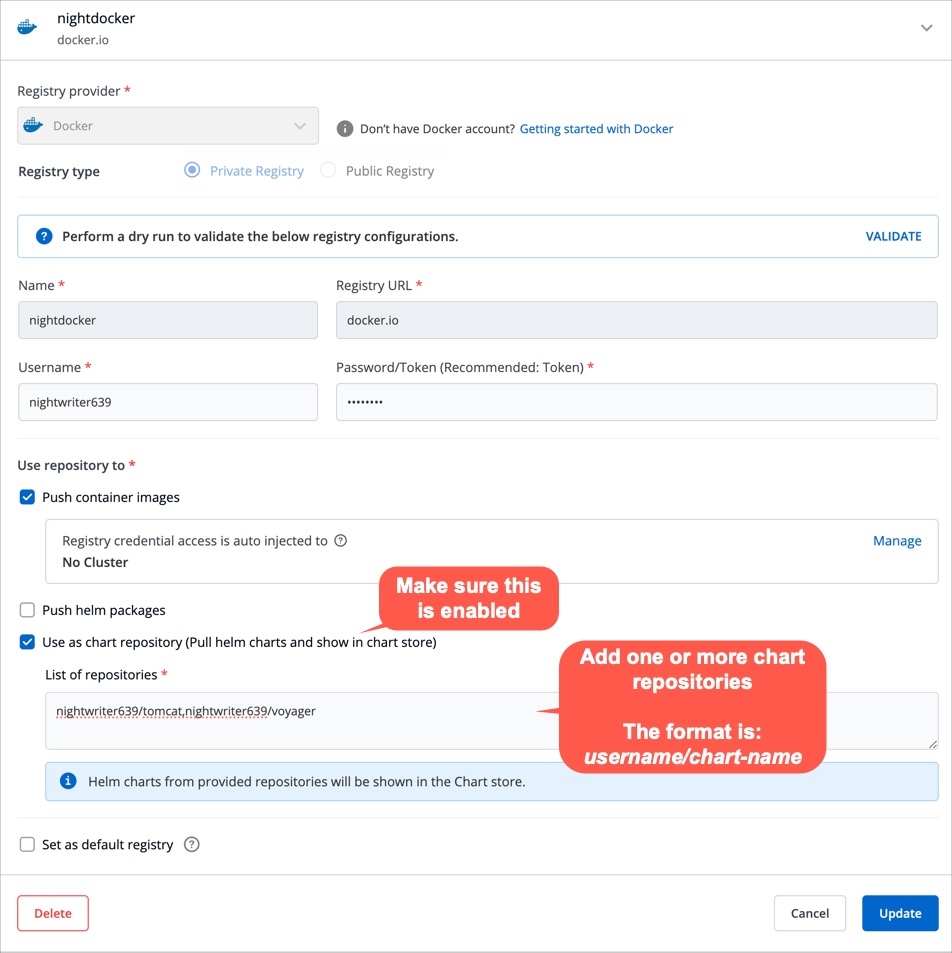
You must add your OCI registry to Devtron with the Use as chart repository option enabled.
Go to Global Configurations → Container/OCI Registry.
Search your OCI registry in the list, and click it.
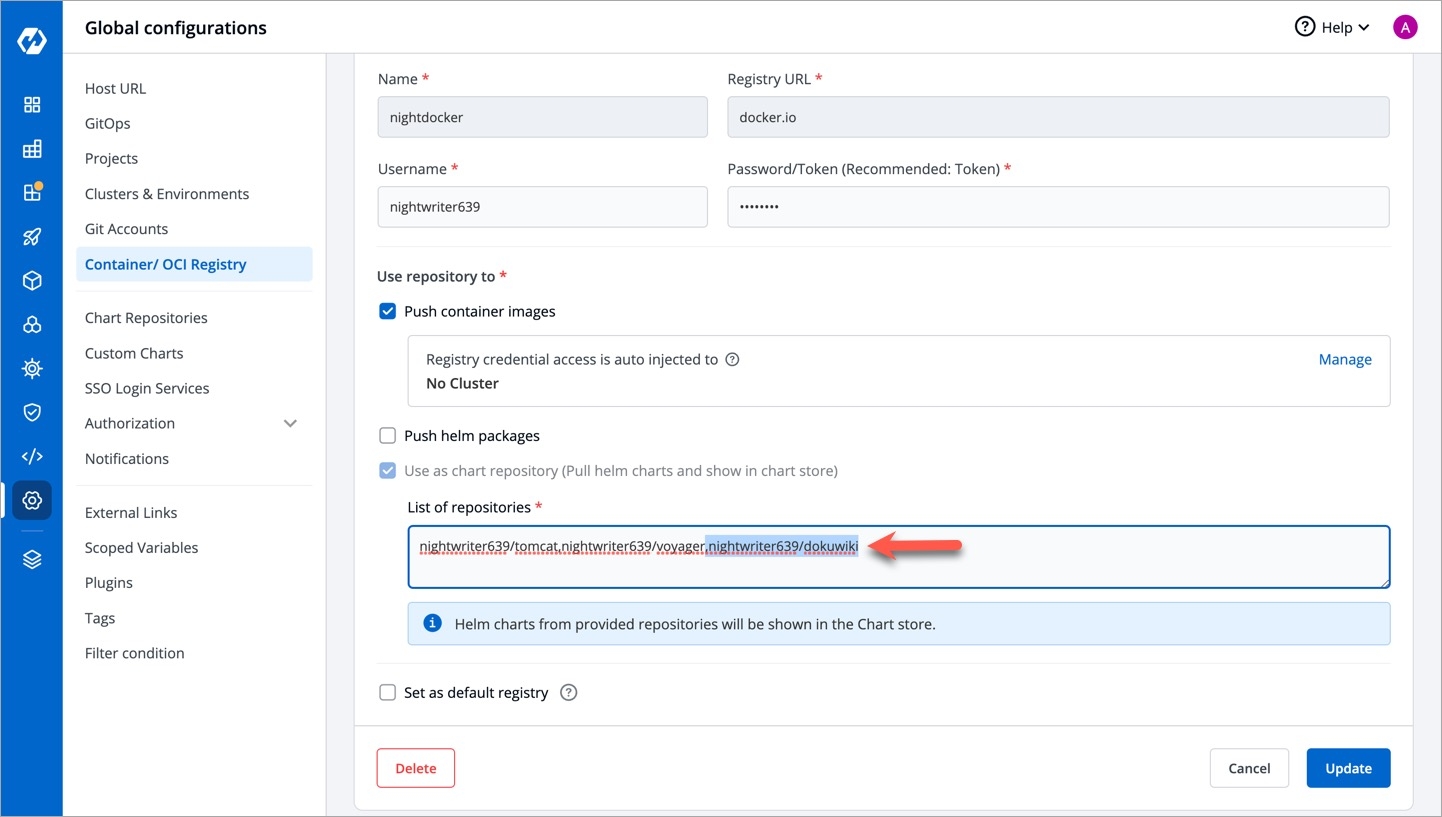
In the List of repositories, add the chart repo(s). The format should be username/chartname. You can find the username from your registry provider account.
Click Save or Update.
From the left sidebar, go to Chart Store.
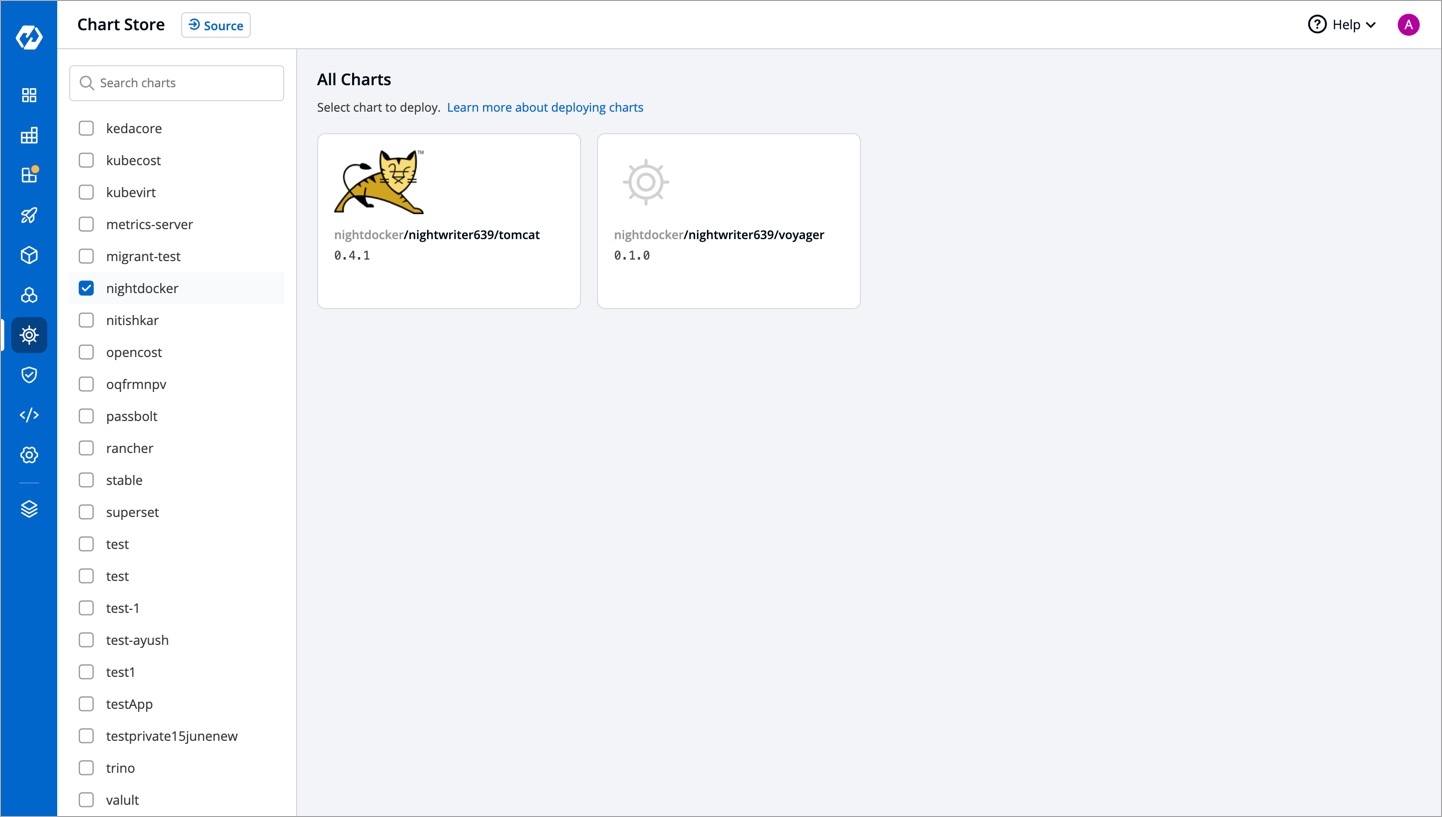
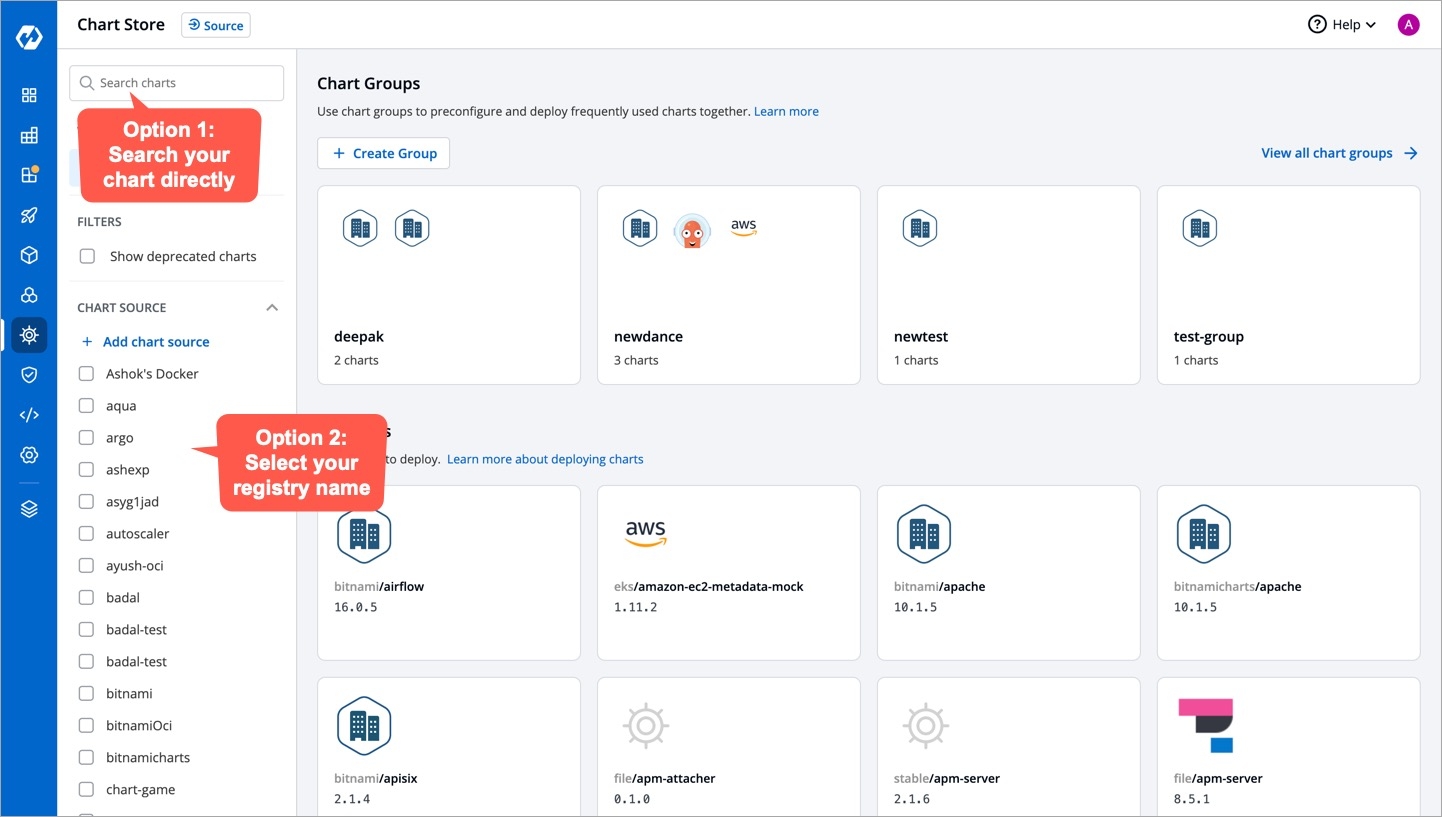
You can find your chart(s) either by using the search bar or by selecting your chart source.
You have successfully pulled your charts to the chart store.
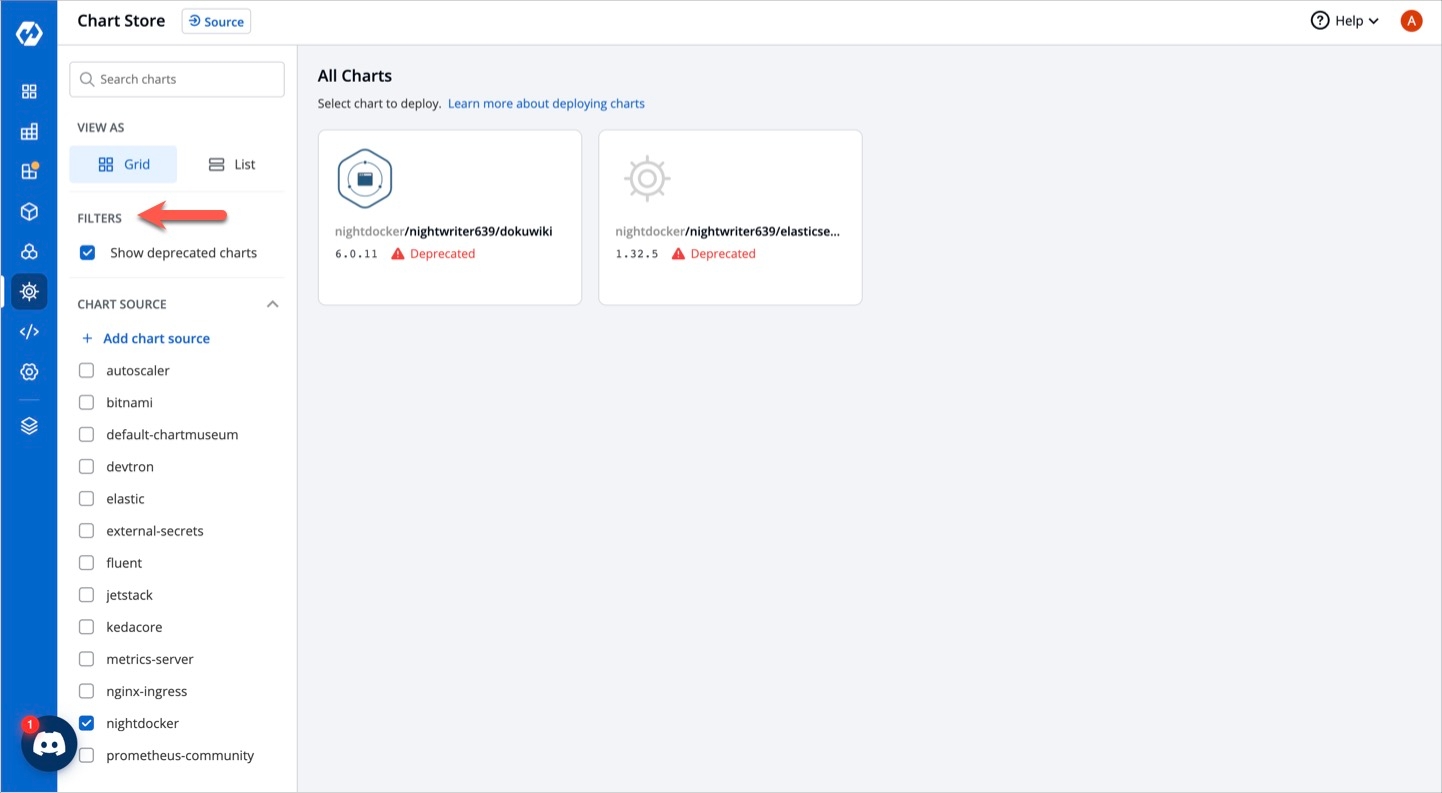
Deprecated charts won't show up in the Chart Store unless you enable the Show deprecated charts filter as shown below
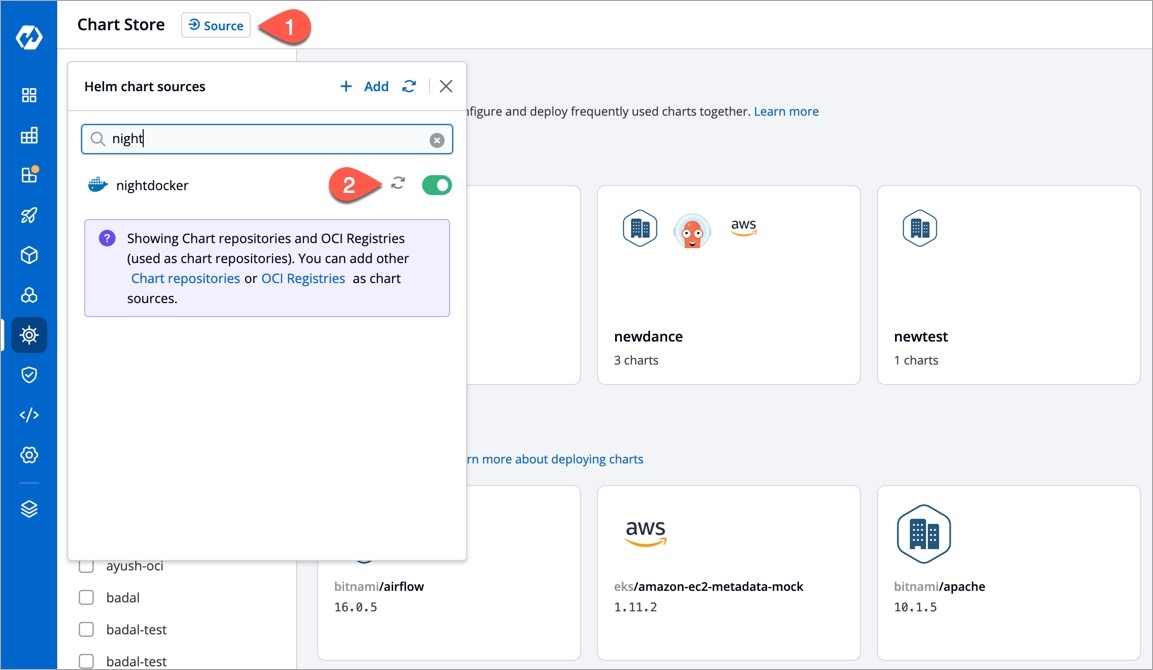
Or, you may try performing a resync as shown below
Go to your OCI registry settings in Devtron.
In the List of repositories field, remove the unwanted chart repo.
Click Update.
The removed chart would no longer appear in the Chart Store.
Deleting a chart repo from your OCI registry will not lead to the removal of chart from the Chart Store
Devtron also supports Job and Cronjob pipelines. If you need to regularly update the image and configurations of your cronjob/job, you should prefer to create a pipeline,To know more about this you can refer the link .
You can discover over 200 Charts from the Devtron Chart store to perform different tasks such as to deploy a YAML file.
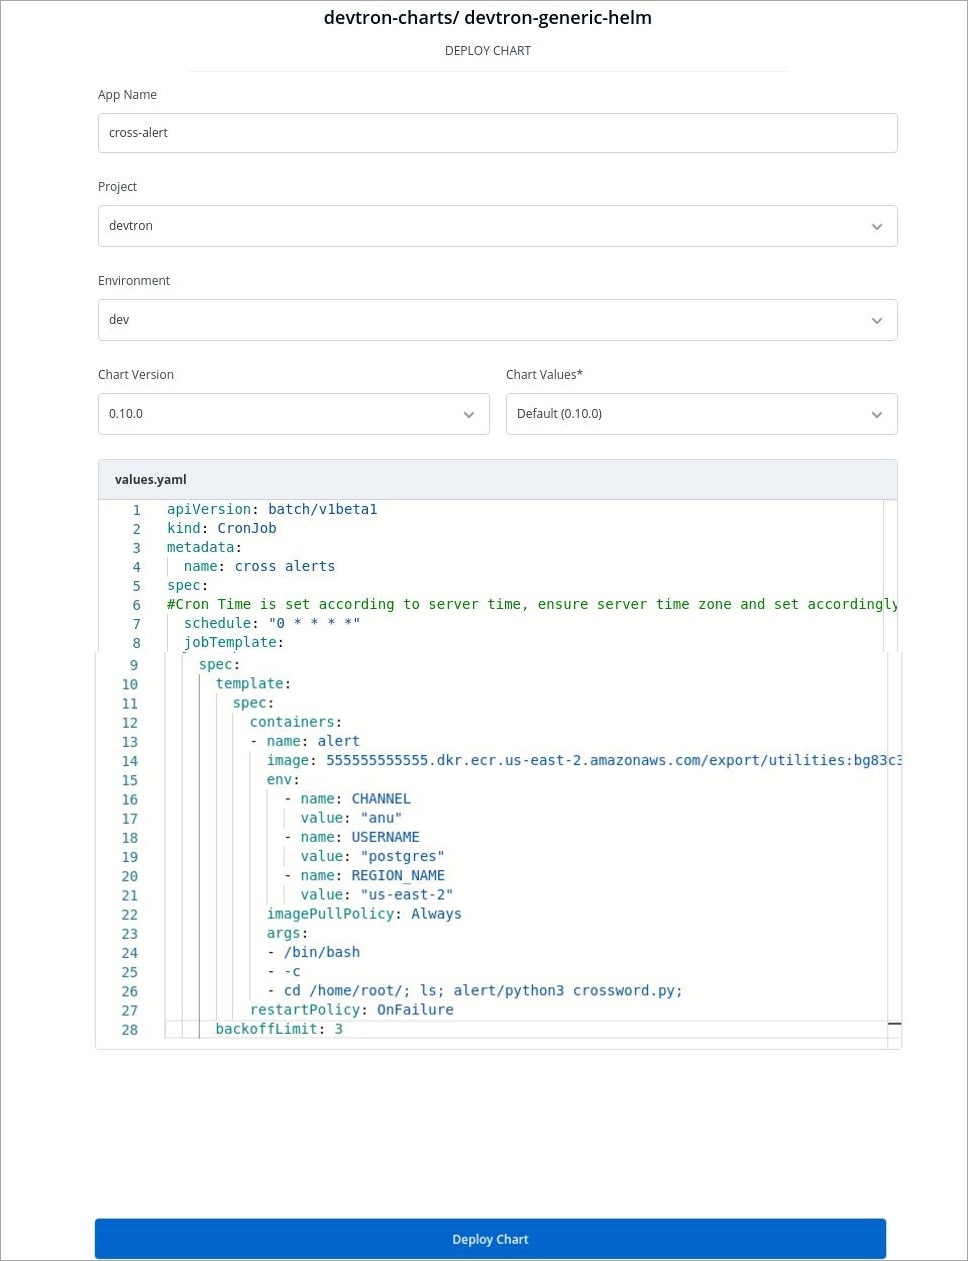
You can use Devtron's generic helm chart to run the CronJobs or one time Job.
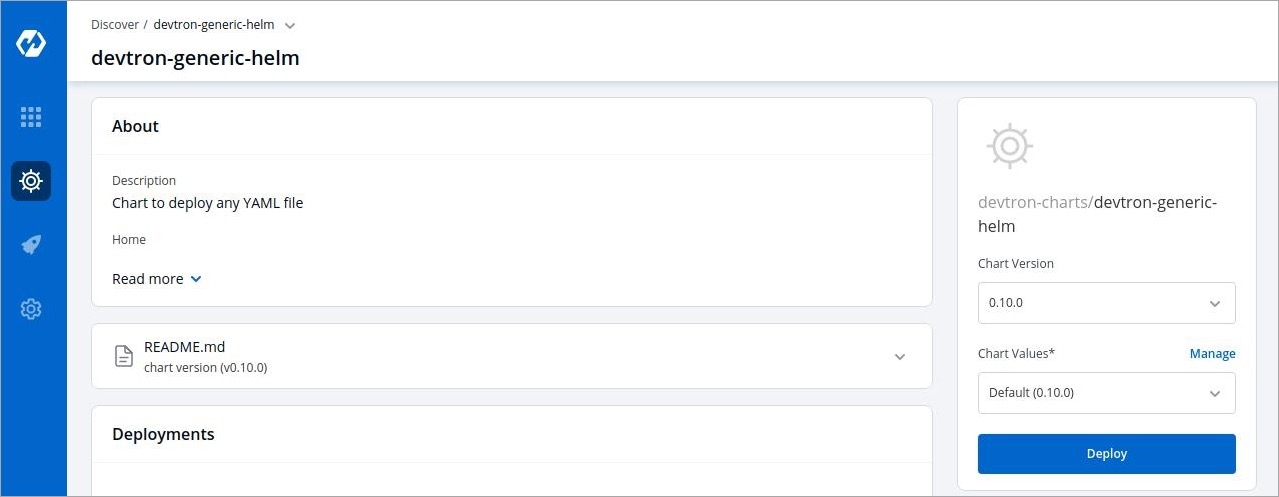
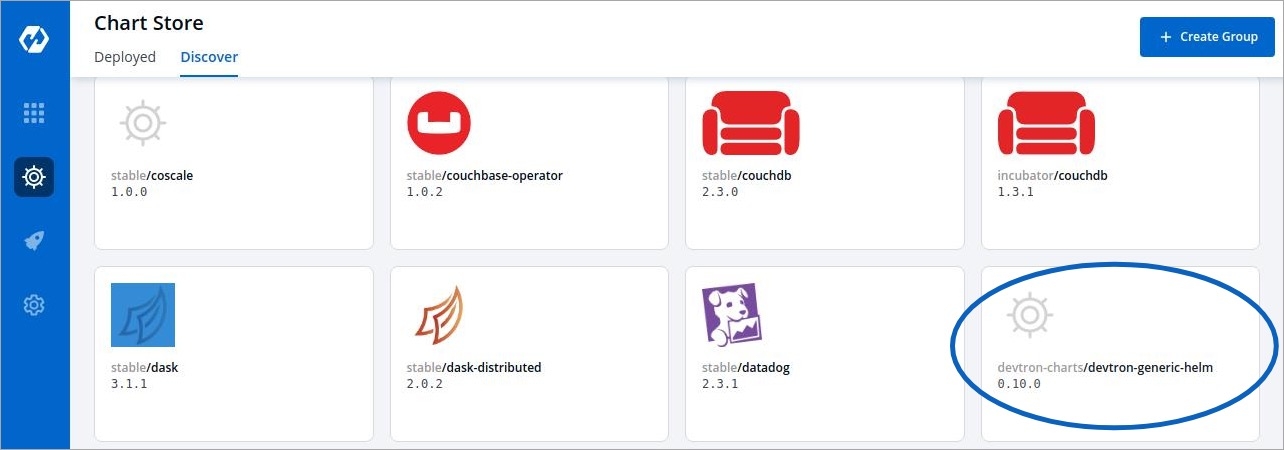
Select the devtron-charts/devtron-generic-helm chart from the Devtron Chart Store.
Select the Chart Version and the Chart Value of the Chart.
And, then click on Deploy
Configure devtron-generic-helm chart
Click on Deploy Chart
In values.yaml, you can specify the YAML file that schedules the CronJob for your application.
Django is a free, open-source web framework written in Python programming language. It allows for scalability, re-usability, and rapid development. Django can be connected to different databases like MySQL, PostgreSQL, etc.
To deploy mysql Helm Chart, you can refer to our documentation on
For this example, we are using the following , you can clone this repository and make following changes in the files.
Go to mysite/settings.py.
The settings.py contains the configuration for your SQL database. Make sure the configurations in settings.py matches the configurations of the mysql Helm Chart, that you have deployed in Step 1.
In this example, we are using the url of the forked Git Repository.
Give, the path of the Dockerfile.
Enable Ingress, and give the path on which you want to host the application.
Set up the CI/CD pipelines. You can set them to trigger automatically or manually.
Trigger the CI Pipeline, build should be Successful, then trigger the CD Pipeline, deployment pipeline will be initiated, after some time the status should be Healthy.
Check the Django app connected to mysql database, running successfully by hitting your application url.
The syntax is: http://<hostname>/<path>/
path will be the one that you have given in Step 3 while configuring the Deployment Template.
To learn how to create an application on Devtron, refer to our documentation on
App Name
Name of the app
Project
Name of the Project
Environment
Select the Environment in which you want to deploy app
Chart Version
Select the Version of the chart
Chart Values
Select the Chart Value or Create a Custom Value

